WEEK01 - Project Management and Final Project Sketch
Week 1 was all about project management, setting up a site for myself and starting out the page for tracking and outlining my ideas for my final project.
The key focus of these weeks were:
→ work through a git tutorial
→ build a personal site in the class archive describing you and your final project
The achieved outcomes were:
→ git tutorial for ssh
→ mkdocs-site for documentation
→ documentation of setting up git-repo
→ checking push/pull link
→ final project: sketch, brief mindmap outline page on website
→ “about me” page on website
→ signed and uploaded studentagreement
Setting up a documentation website and working through a git-tutorial
As I wasn’t previously familiar with git, I followed tutorials on git-hub on setting up ssh-keys, installing mkdocs, deploying my site and integrating mkdocs into my fabcloud environment. In many of these I ran into issues. some of these I’ll outline in the end. I knew I wanted to go with mkdocs as it was recommended to me, since I was already familiar with markdown more than with anything else. So for the sake of ease and speed since the documentation of my fabacademy journey should be organic and take up as little additional effort as possible: and since I have always used notion for all my documentation → staying with a markdown based site seemed like the best choice. MKdocs Material theme was recommended to me, as it has alot of already established navigation infrastructure with many easy to follow tutorials. Again in this instance the key was to set up something that would operate easiest with my daily life to become as un-bothersome as possible.
_ 01 _ downloading MKdocs
Step 1: I followed the MKdocs tutorial on their website to download MKdocs using Terminal.
First Issues
I ran into some first issues because neither pip nor python commands were working, and had to first understand that my computer had pip3 installed, and so I had to adjust any code I found online or in tutorials to this.
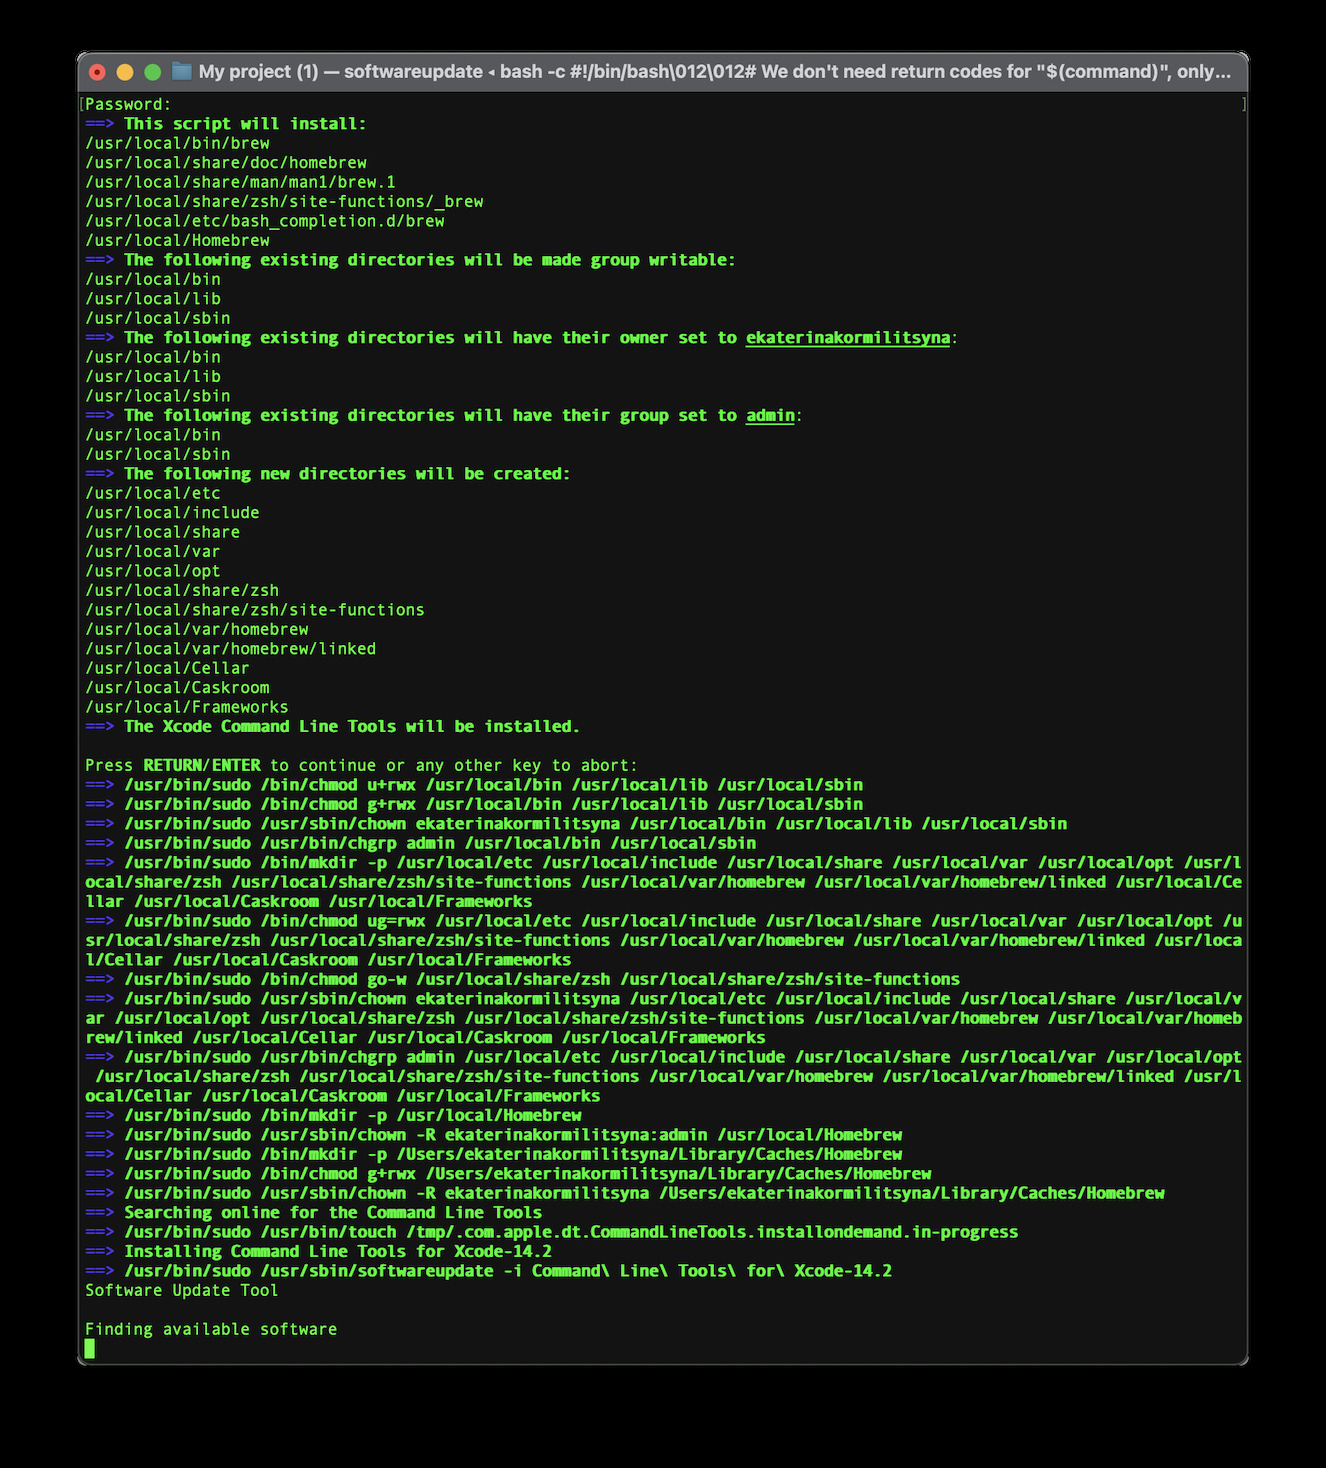
I also installed brew ! [ this turned out to be the cause of different problems down the line]
After realising this I simply followed the mkdocs tutorial found on their website
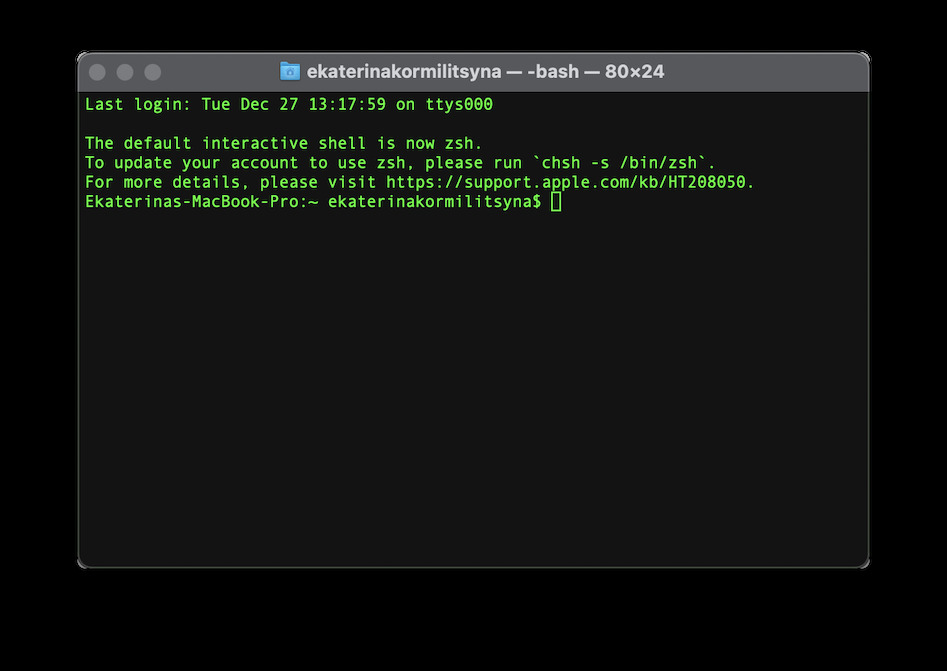
I also changed the default shell to zsh
$ pip3 install mkdocs
Step 2 install material:
$ pip3 install mkdocs-material
_ 02 _ Setting up directory and enabling connection between local and gitlab directory
Once I thought Mkdocs was working i went to attempt the steps to deploy the mkdocs documentation page to gitlab. For this i had to establish a stable connection between my computer and gitlab. This required setting up an SSH key. There was a gitlab tutorial for this, but I actually found it quite confusing and choice the gitHub one instead, and simply adapted some things.
Step 1: Creating a new SSH Key
I went to follow the github tutorial. To be found here.
-
Open Terminal. Go to the
.sshdirectory.$ cd ~/.ssh -
Paste the text below, substituting in your GitLab email address.
$ ssh-keygen -t ed25519 -C "your_email@example.com"
I also added a password.
And a name for the sshkey, which in my case was ‘gitlab’.
-
At the prompt, type a secure passphrase. For more information, see "Working with SSH key passphrases."
> Enter passphrase (empty for no passphrase): [Type a passphrase]
> Enter same passphrase again: [Type passphrase again]
Step 2: Adding SSH Key to ssh-agent.
$ eval "$(ssh-agent -s)"
Step 3: Adding Key Info to config
First, check to see if your ~/.ssh/config file exists in the default location.
$ open ~/.ssh/config
> The file /Users/----/.ssh/config does not exist.
Since the file doesn’t exist, I had to make a new one.
$ touch ~/.ssh/config
Open .ssh/config
$ open config
Add the following:
Host gitlab.fabcloud.org
  UseKeychain yes
  AddKeysToAgent yes
  IdentityFile ~/.ssh/gitlab
Step 4: Adding the Key to ssh-agent
Adding private key to ssh-agent
$ ssh-add --apple-use-keychain ~/.ssh/gitlab
This add the new key to the Apple Keychain.
Step 5: Adding Public Key to your gitlab directory
- Log into Gitlab
- Profile > Preferences > SSH Keys
- Click 'New SSH Key'
When copying your key, don't add any newlines or whitespace.
$ pbcopy < ~/.ssh/gitlab.pub
  # Copies the contents of the gitlab.pub file to your clipboard
paste the key into the required field on gitlab.
Step 6: Testing the connection
$ ssh -T git@gitlab.fabcloud.org
Welcome to GitLab, @ekaterina.kormilitsyna!
_ 03 _ MKdocs and gitlab directories
YAY Things seem to be working lets try to start, first things first, to implement mkdocs into my gitlab page I first cloned the fabcloud repo to my own computer, using the ssh connection. On the gitlab repo go to ‘clone’ and select the ‘clone with ssh’ → copy the url.
Clone to desired place on your computer.
$ git clone <repo url>
Once the directory is cloned to your computer, set up and buid the mkdocs page with the material.
OH NO
make sure you install mkdocs and mkdocs material using the same installers. if you accidentally use brew for one and pip for the other it will save them in seperate directories and nothing will work once you will try to push online. In such a case try uninstalling and reinstalling.
$ pip3 uninstall mkdocs

$ pip3 uninstall mkdocs-material

$ brew uninstall mkdcos-material

$ brew uninstall mkdocs
Once this was successfully achieved. I could go back and install MKdocs and material again using only pip3
$ pip3 install mkdocs

$ pip3 install mkdocs-material
Getting Mkdocs working on gitlab
To enable mkdocs I followed this template directory and made sure my directory also had all the core files:
Key adjustments:
adjust
.gitlab-ci.yml
image: python:3.8-buster

before_script:
  - pip install -r requirements.txt

pages:
  script:
  - mkdocs build
  - mv _site public
  artifacts:
    paths:
    - public
  only:
  - main
add a
requirements.txt
 # Documentation static site generator & deployment tool
mkdocs>=1.1.2

 # Add your custom theme if not inside a theme_dir
 # (https://github.com/mkdocs/mkdocs/wiki/MkDocs-Themes)
mkdocs-material>=5.4.0
add a .gitignore
To do this I had to go to another tutorial.
$ touch .gitignore
public
Troubleshooting
After this I pushed my local directory onto my gitlab one. Unfortunately this brought up pipeline errors.
- The first was due to the material template not working correctly:
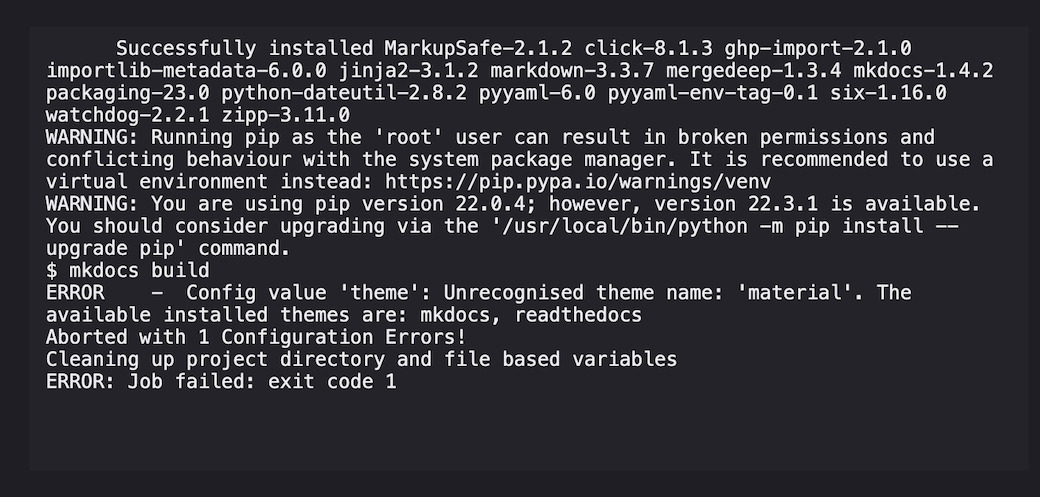
The reason here was that in my requirements file I had made a mistake in the line relating to the theme. Make sure it is written correctly:
requirements.txt
 # Documentation static site generator & deployment tool
mkdocs>=1.1.2

 # Add your custom theme if not inside a theme_dir
 # (https://github.com/mkdocs/mkdocs/wiki/MkDocs-Themes)
mkdocs-material>=5.4.0
- The second was because I forgot to define a site directory in my mk-docs.yml file:
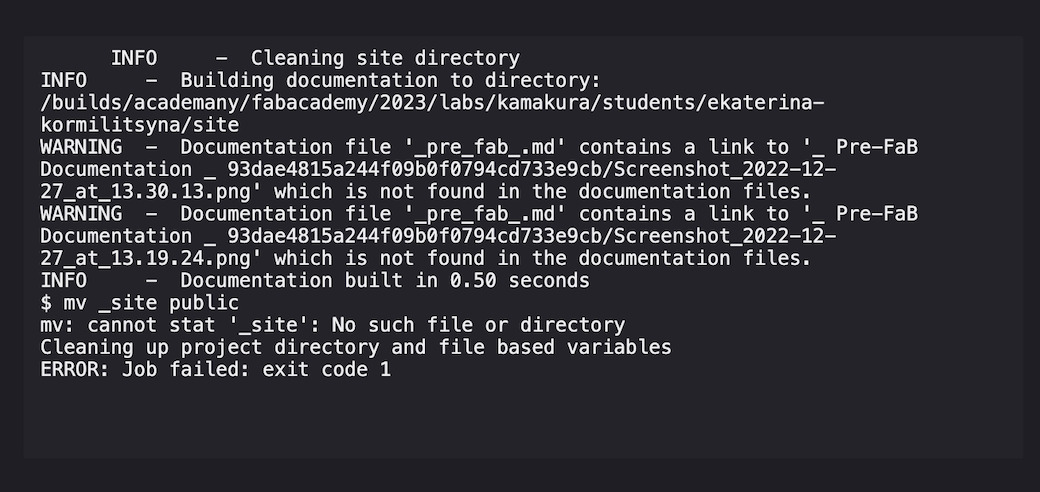
So to fix this make sure the following is inside your mk-docs.yml file:
site_dir: _site
Now everything worked as expected!
_ 04 _ Customizing the Mkdocs template
As already mentioned, the template that I am using for this website is called Material and can be found here.
I customized it to fit my desired look. My inspiration for this page is ascii - text art. So I wanted to change the background colours and the font to resemble terminal font, so that the ascii inserts look authentic.
One of the reasons for using ascii-text as illustrations is because it'll allow me to add aesthetic illustrations to my documentation, without having to deal with added weight.
To change the backdrop to dark and the highlight links to green and to change the font to Roboto mono -> I added the following lines to my mkdocs.yml file
theme:
  name: material
  palette:
    primary: black
    scheme: slate
    accent: light green
  font:
    text: Roboto Mono
    code: Roboto Mono
Also
I also added this code which I found on the mkdocs website in oder to enable custom adomnation icons for when I want to highlight text and make it stick out
icon:
    admonition:
      note: octicons/tag-16
      abstract: octicons/checklist-16
      info: octicons/info-16
      tip: octicons/squirrel-16
      success: octicons/check-16
      question: octicons/question-16
      warning: octicons/alert-16
      failure: octicons/x-circle-16
      danger: octicons/zap-16
      bug: octicons/bug-16
      example: octicons/beaker-16
      quote: octicons/quote-16
_ 05 _ working through a Git-Tutorial
To familiarize myself with git - also quickly worked through some git basics to push and pull data from my computer to my fabcloud repo and learn some short cuts for command line.
The tutorials I found here
After reading the tutorial I decided to implement some shortcuts to make sure I could work from the commandline for added speed.
things I found out: you do not need to seperate 'git add' and 'git commit', you can commit and then push everything in one short command sequence.
( exept for at the end of the day, you should atleast once run
$ git add -A
So:
first I tested the cloning of the directory again, the way I had described above ^ in Step 03.
$ git clone <repo url>
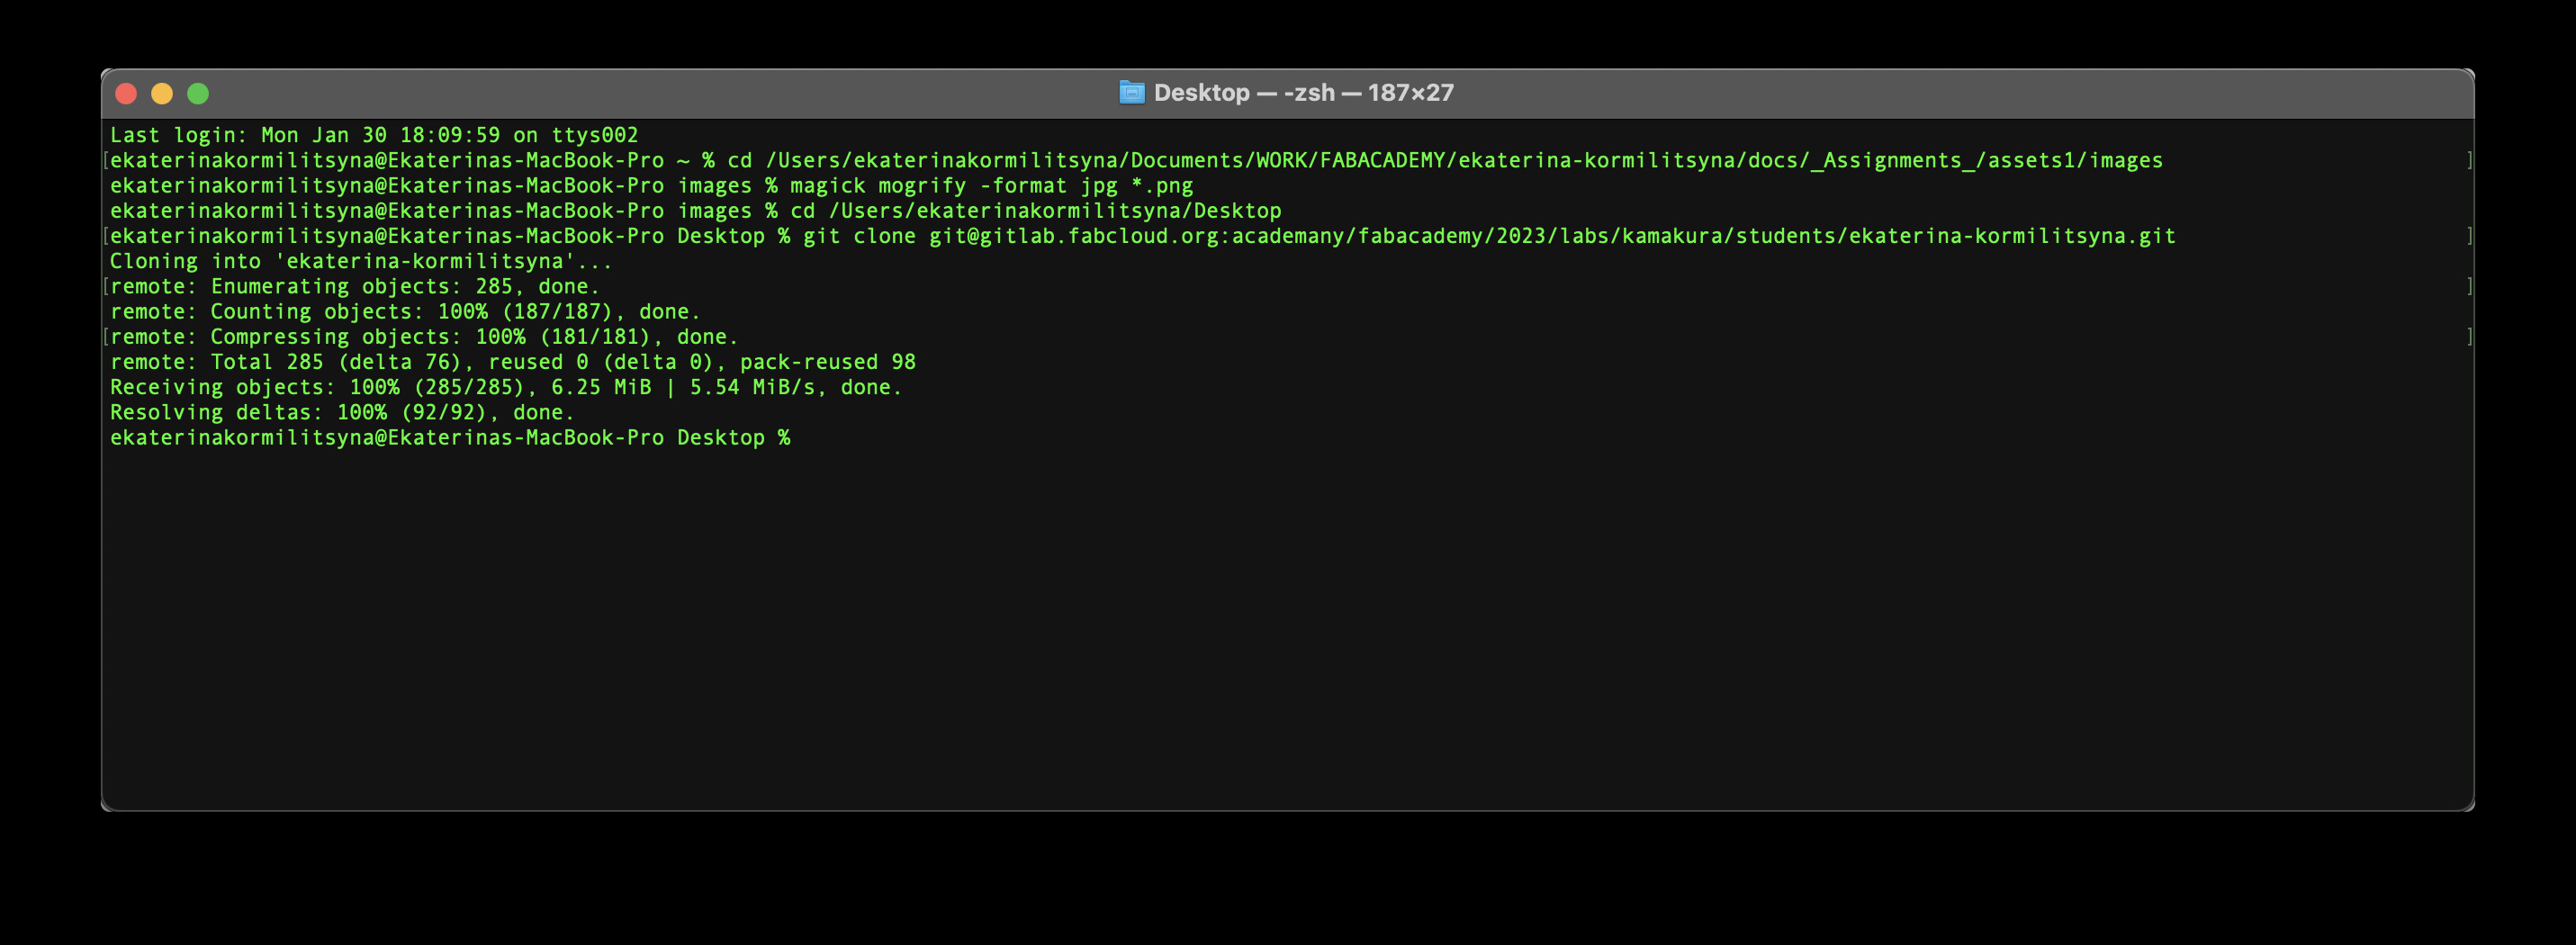
$ git status

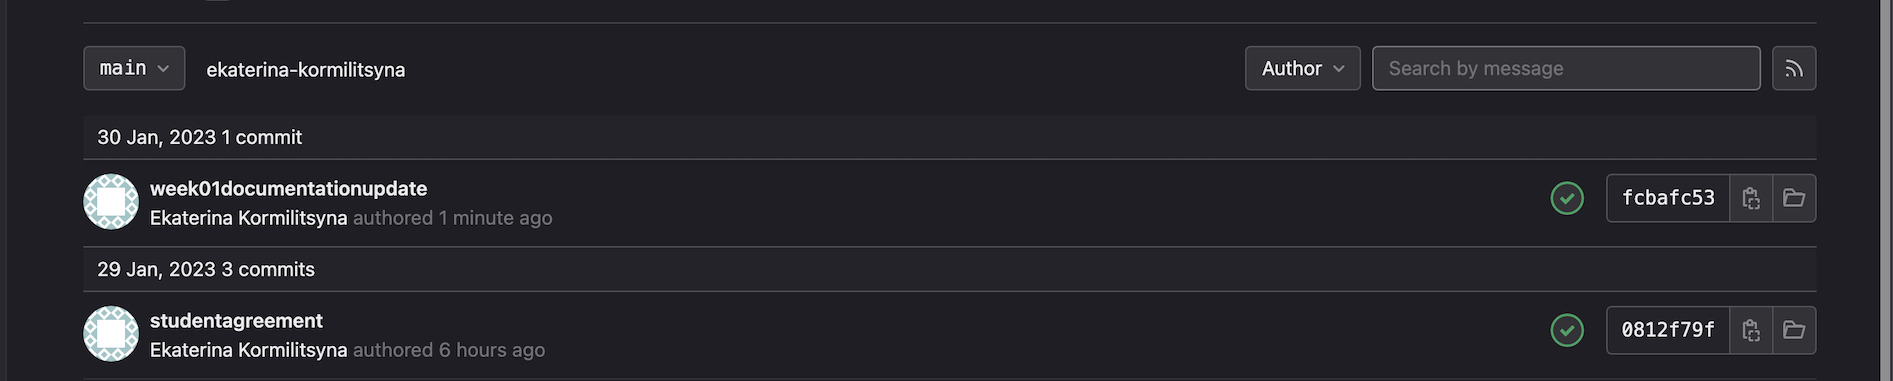
$ git commit -a -m "week01documentationupdate"

$ git push

$ git pull
and voila- the updates successfully pushed to gitlab in a more streamlined way! Everything is visible in the repo.
_ 06 _ Image compression and batch format changing
for now I will try Imagemagick
$ brew install [imagemagick](https://imagemagick.org/)
I used it to batch transform screenshots from .png to .jpg
$ magick mogrify -format jpg *.png

Final Thoughts
I just wanted to summarize some final thoughts on how I feel about Git.
I understand why it's necessary for this project. If I had been keeping this notebook for myself I would have probably kept it in Notion or something, however I understand and appreciate Gits purpose as a timed archive, and the fact that you can go back in time. Its a version control process after all.
Knowing my personal lack of organization skills, I do know that my git-notes ( not my documentation but my lables for my pushes will most likely be a mess) So based on this I do think that after academy I will try to spring-clean and try to implement a 'cleaner' git referencing process for myself.
Week 15 Update:
Ok. its week 15. I keep going back to previous weeks cos I keep forgetting things. and you know what. It's nice that it's not all just on my computer. Also. I am still keen on learning on more git methods..and just nicer webdesign. I'd love to learn to be able to update git from my phone so I could write documentation on the go - i have been told there are ways.. but .. I am BUSY ahahah my brain is fried lol... i was thinking george was joking when he said I wouldn't have time for life during fab academy.