13. Embedded Networking and Communication
This week’s assignment is to design, build and connect wire or wireless nodes with network or bus addresses.
Individual Assignment
- I decided to use a Raspberry Pi Pico and XIAO RP 2040 for this assignment.
- For background I watched this video that was suggested in the Global Open time. link
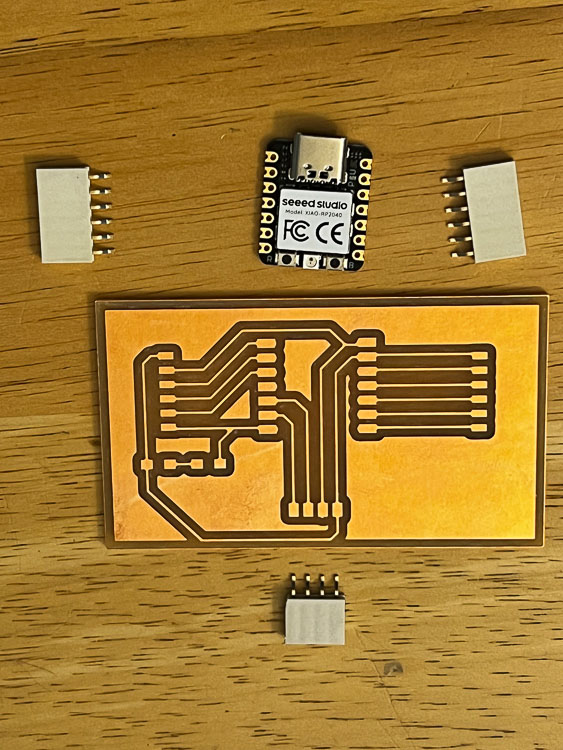
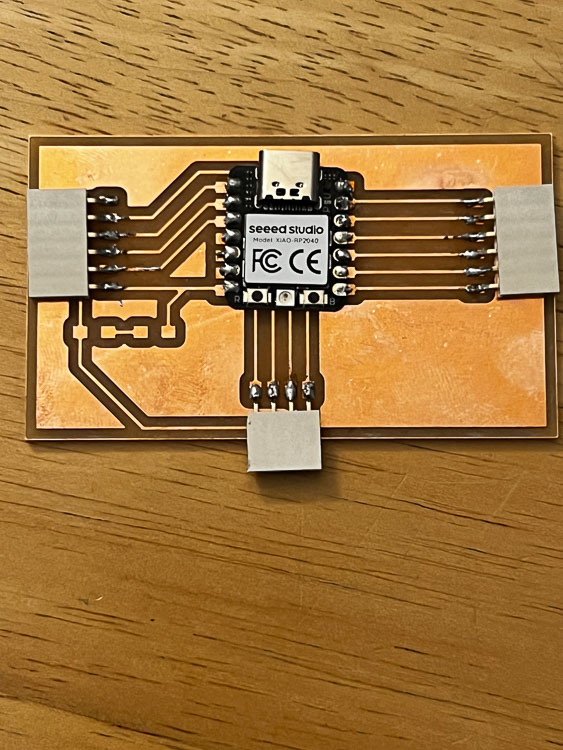
- The next task was to design a board for the XIAO to assist with this project.
- Here is the schematic and PCB design for my board in KiCad.
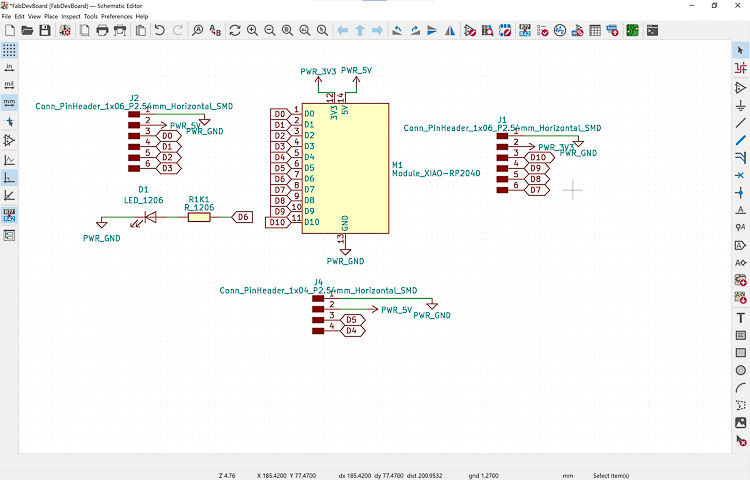
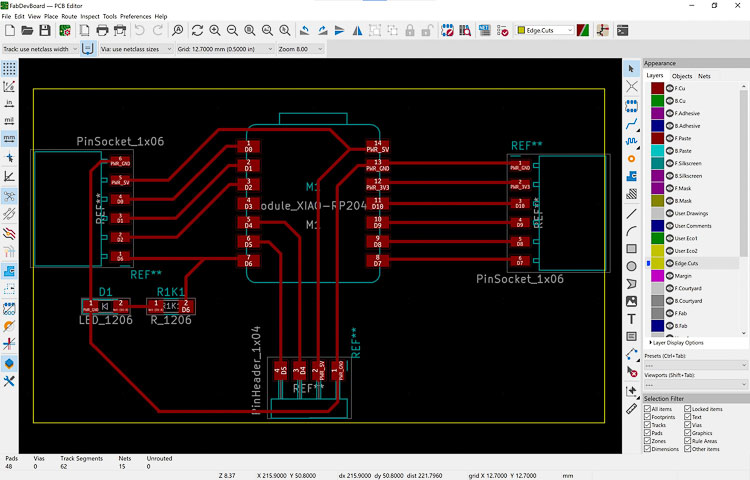
- The theory was to pinout the entire XIAO RP2040 to maximize flexibility. I had to run the DRC a few times to get the board design clean enough to mill, but it wasn’t too difficult.
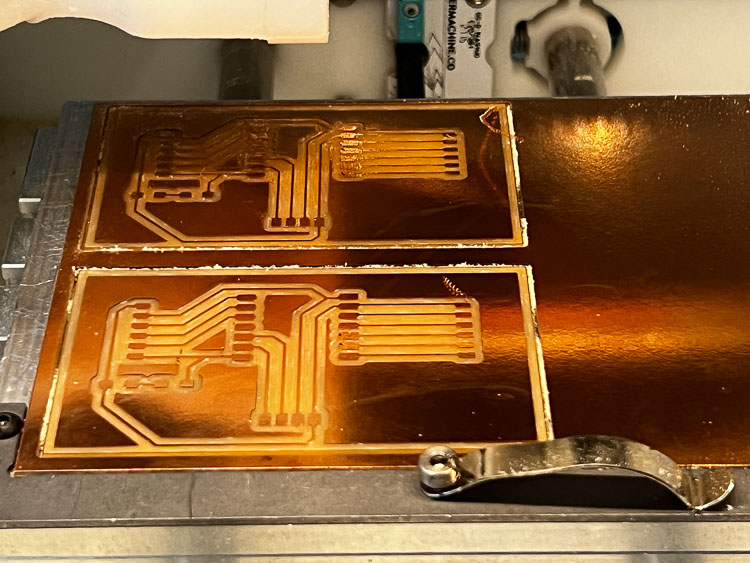
- After I was happy with the design, I exported the gerber files and milled the board on one of the lab’s OtherMill Pro machines using a 1/32” flat end mill with .15 mm trace depth and 1.5 mm trace clearance.
- Here is a picture of the milled board.
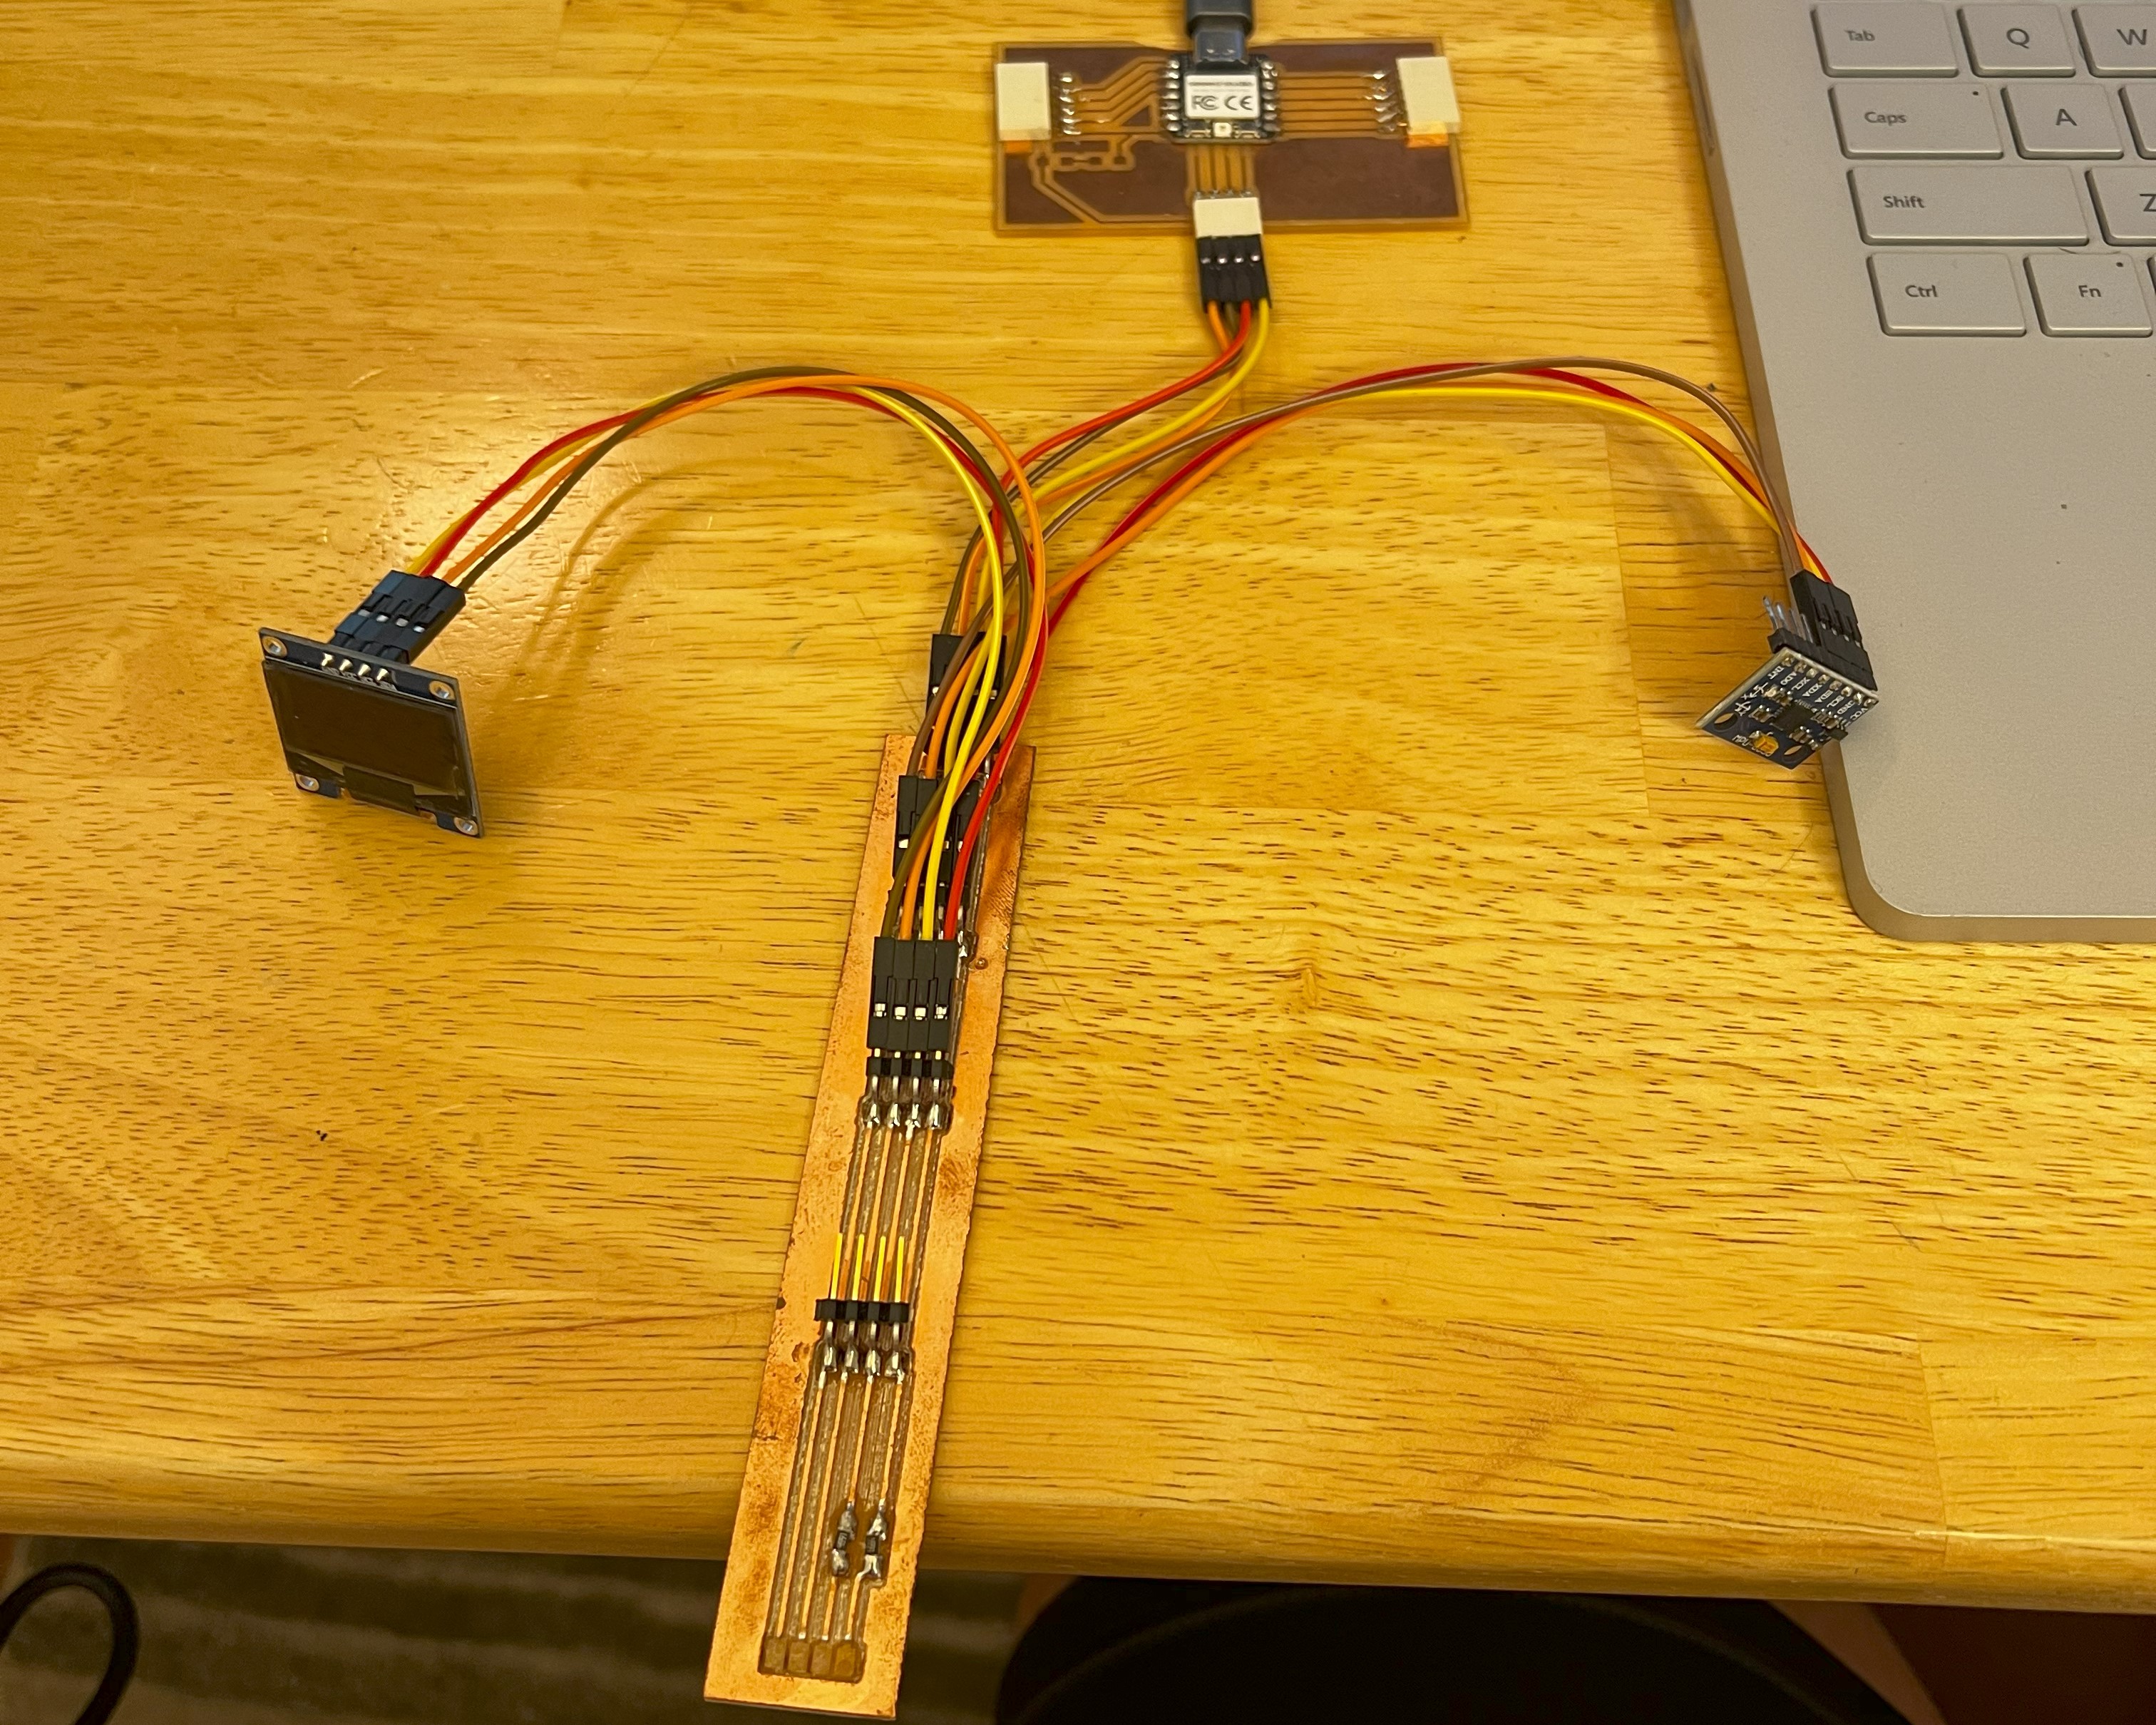
- At that point I stuffed the board by soldering on the XIAO and the headers. I’ve learned from past mistakes and used a multimeter to continuity test my board before connecting it to the computer. I found and corrected a few mistakes before I declared the board ready for testing.
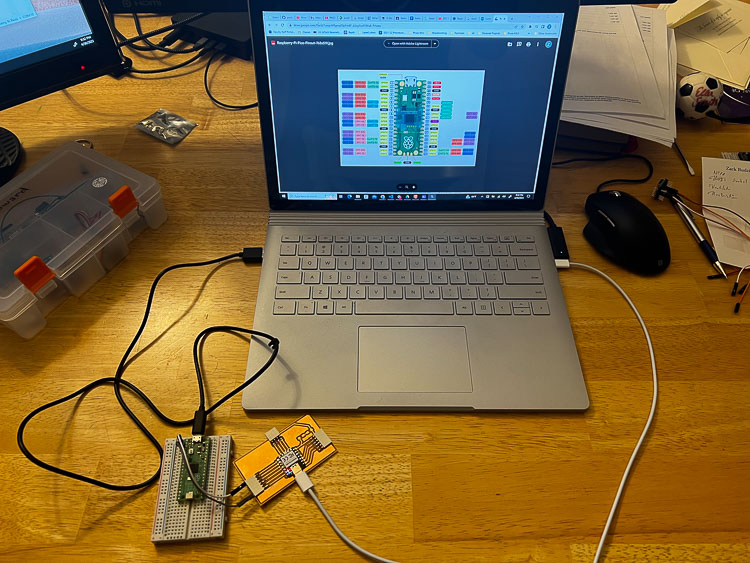
- Once I completed the board, I used this tutorial to get wired networking going between the Pico and the XIAO RP2040 on my development board using Thonny.
- Here was my setup.
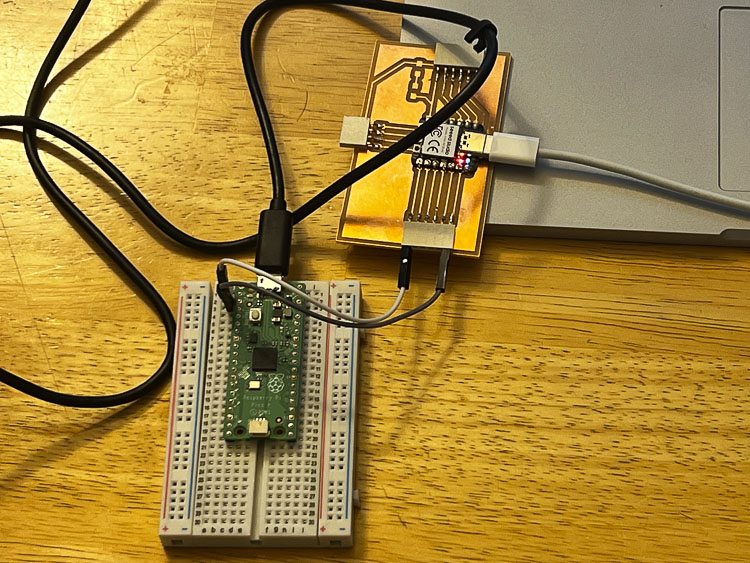
- View with both controllers hooked up to my computer.
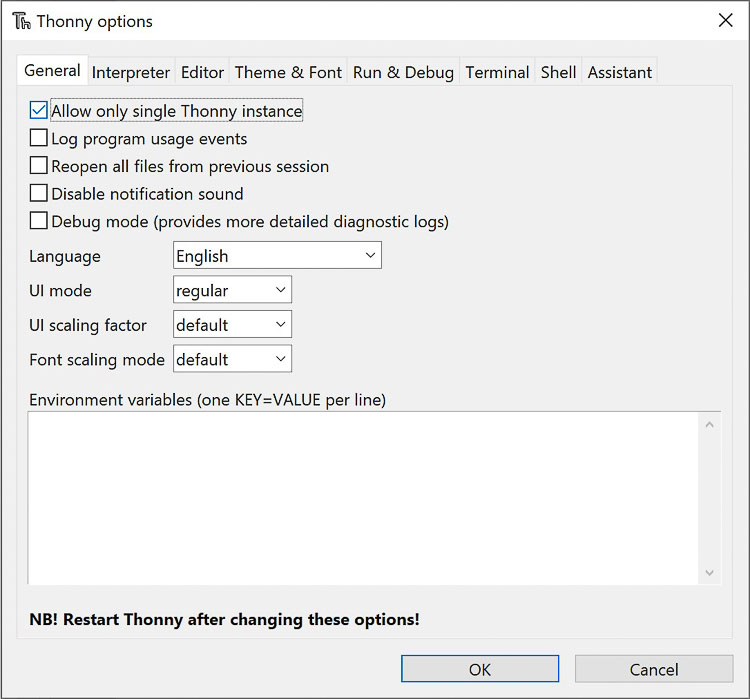
- One issue that I encountered was that initially I could only open one instance of Thonny. Some internet research pointed to and easily changeable setting in Thonny as the culprit. I just needed to go to Tools–>Options–>General and uncheck the box for “Allow only single Thonny instance” select OK and restart the program. It worked.
- Once that issue was resolved, I was able to connect both microcontrollers to my computer and get to work. I used the code provided in the tutorial with the Pico and microcontroller A and the XIAO as microcontroller B.
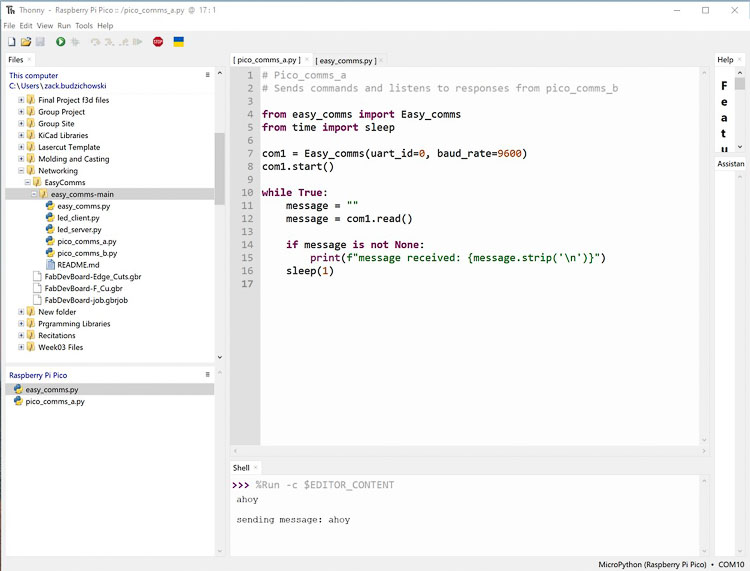
- Pico message sent
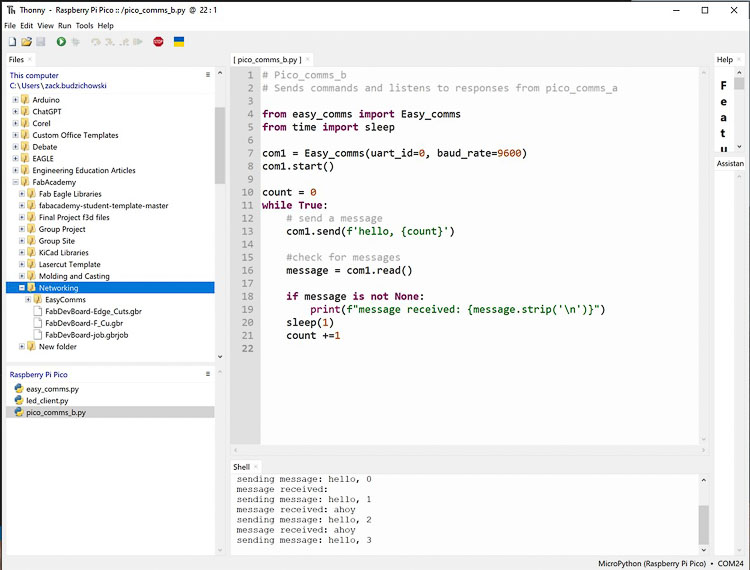
- XIAO message received
- Each time I pressed the run button on the Pico the XIAO showed message received.
I2C
2024 Update
-
I used the following items for this assignment:
-
Development Board from above:
 - SSD1306 I2C OLED Display
- MPU6050 Gyroscope
- Borrowed Barbara Morrow’s week 14 milled ‘Bus’ minus the headers on one end that had accidentally come off. Ideally they were to allow for the pull up resistors, but after some research I found the sensors I was using already had resistors in the boards, so bypassing the pull up resistors wasn’t a problem.
- SSD1306 I2C OLED Display
- MPU6050 Gyroscope
- Borrowed Barbara Morrow’s week 14 milled ‘Bus’ minus the headers on one end that had accidentally come off. Ideally they were to allow for the pull up resistors, but after some research I found the sensors I was using already had resistors in the boards, so bypassing the pull up resistors wasn’t a problem.
-
-
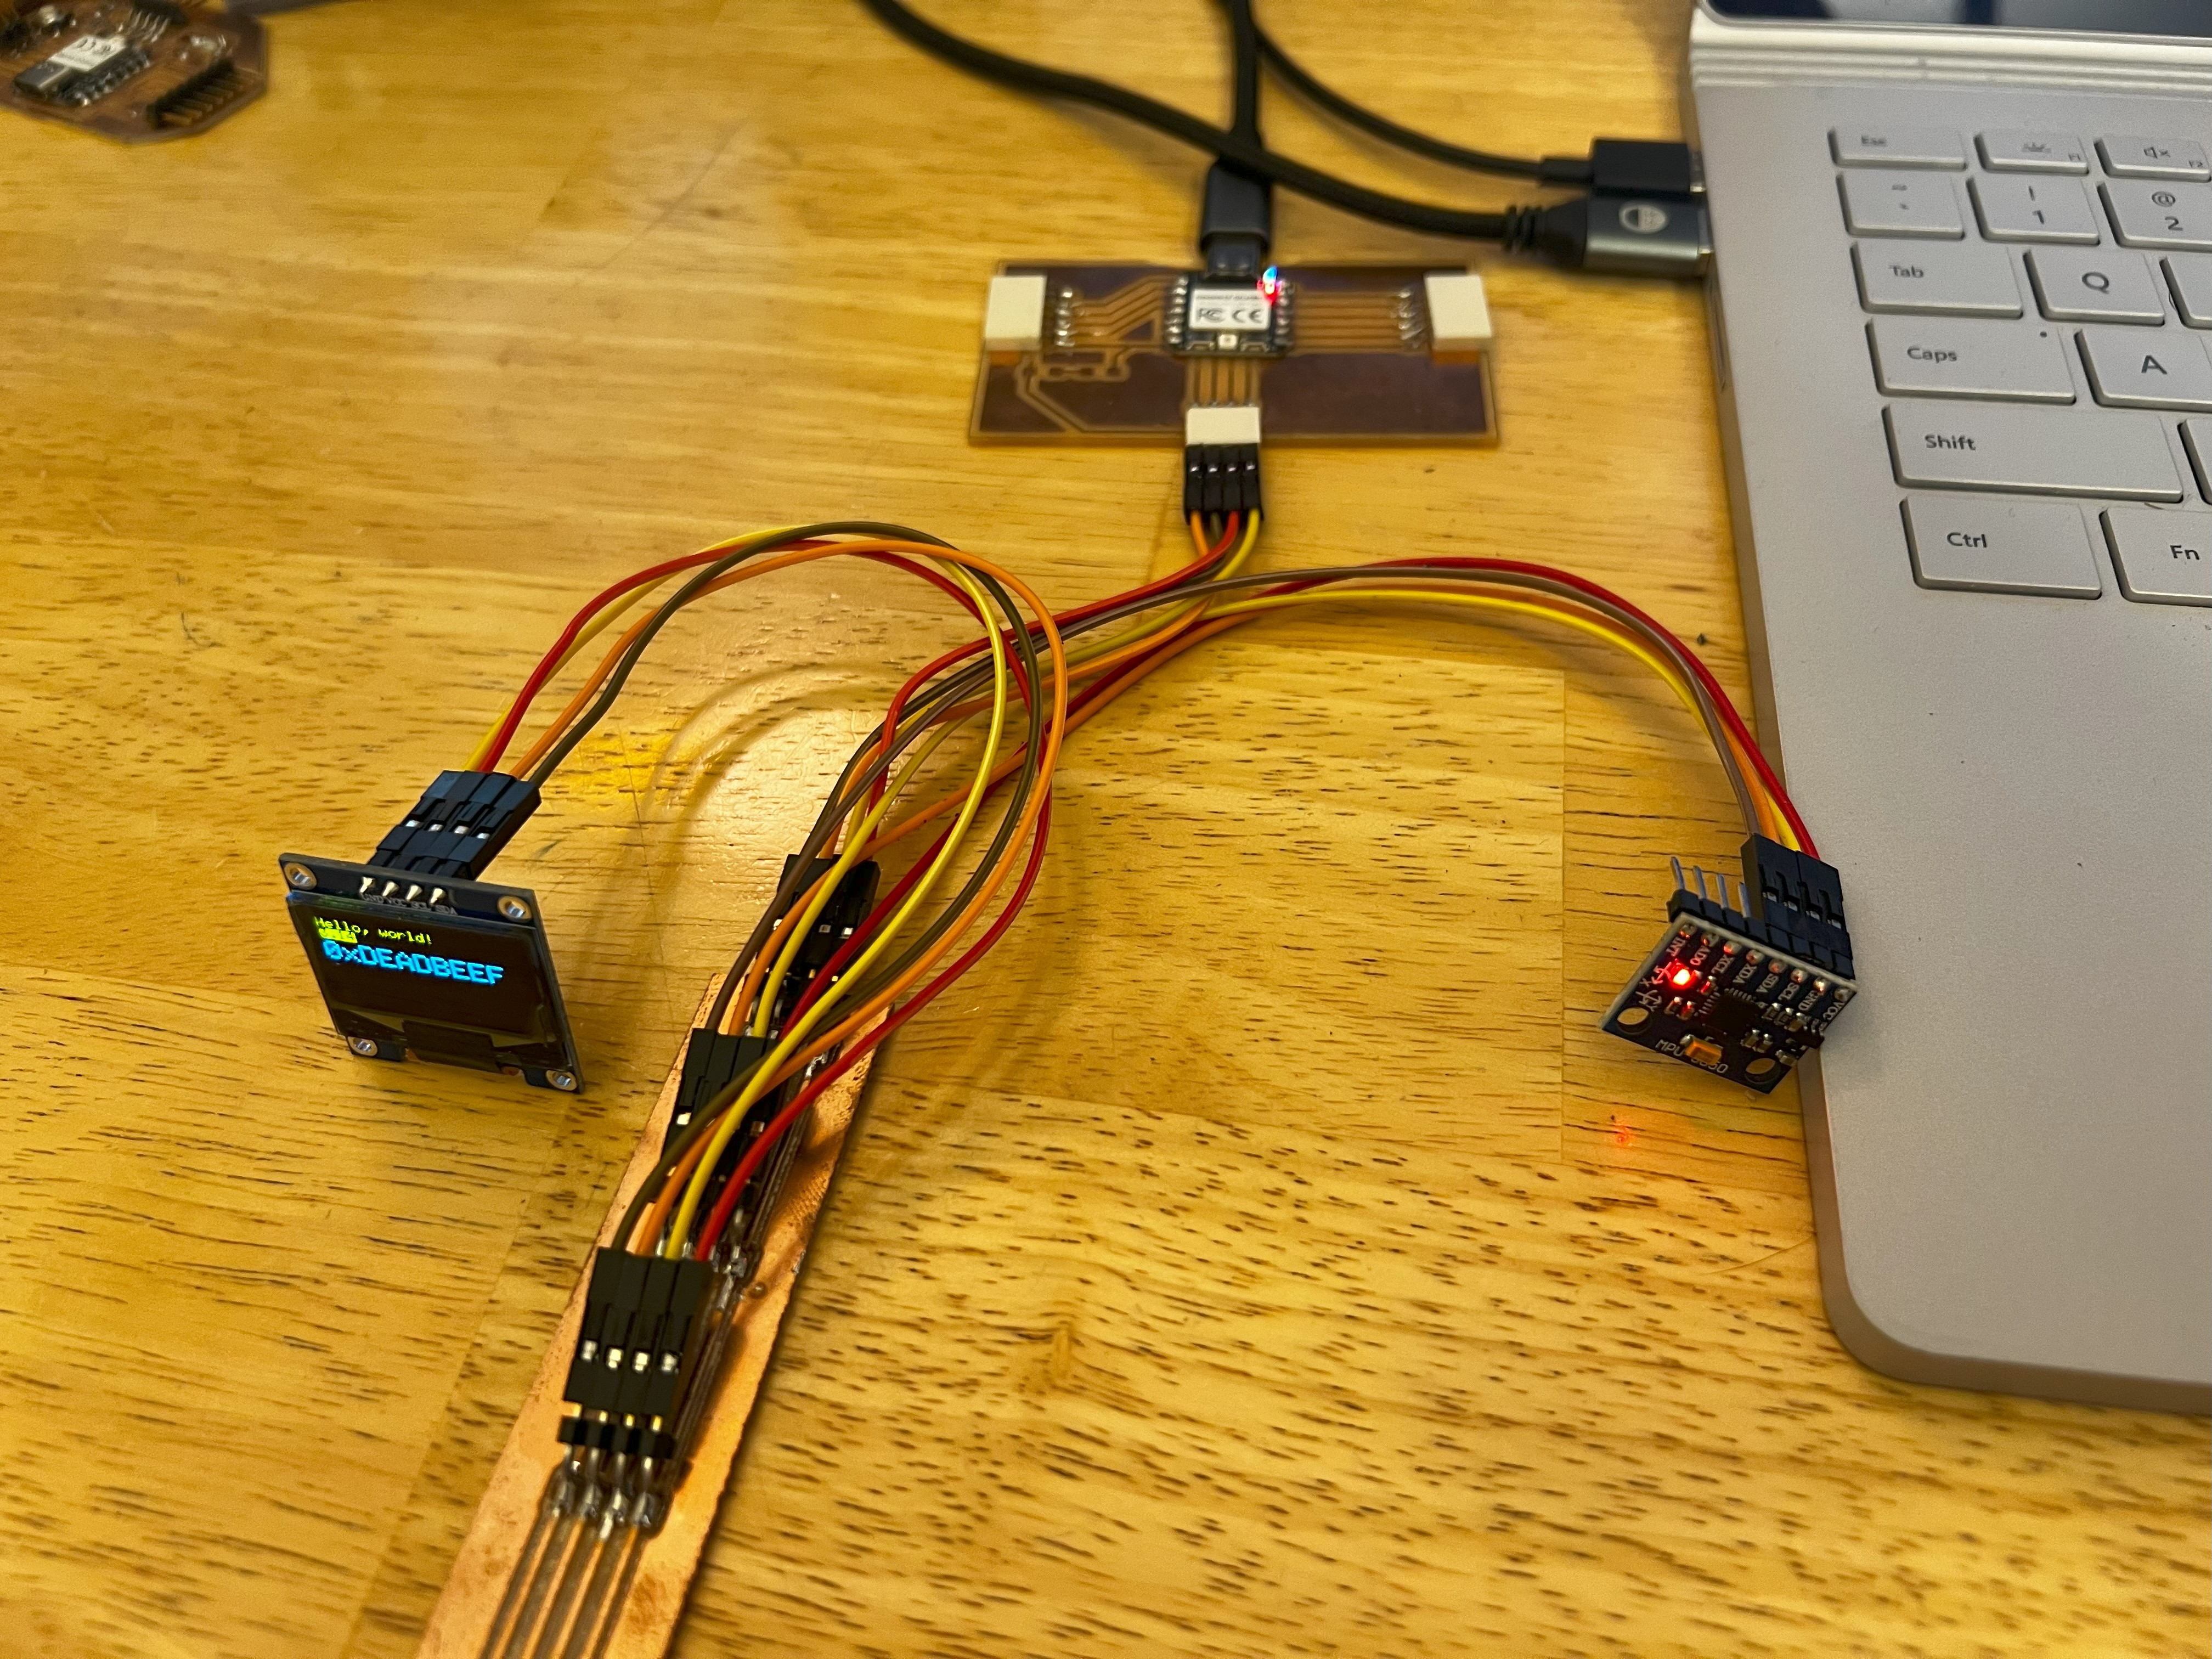
My I2C setup
- VCC-Red
- GND-Yellow
- SCL-Orange
- SDA-Brown
-
First Test-OLED
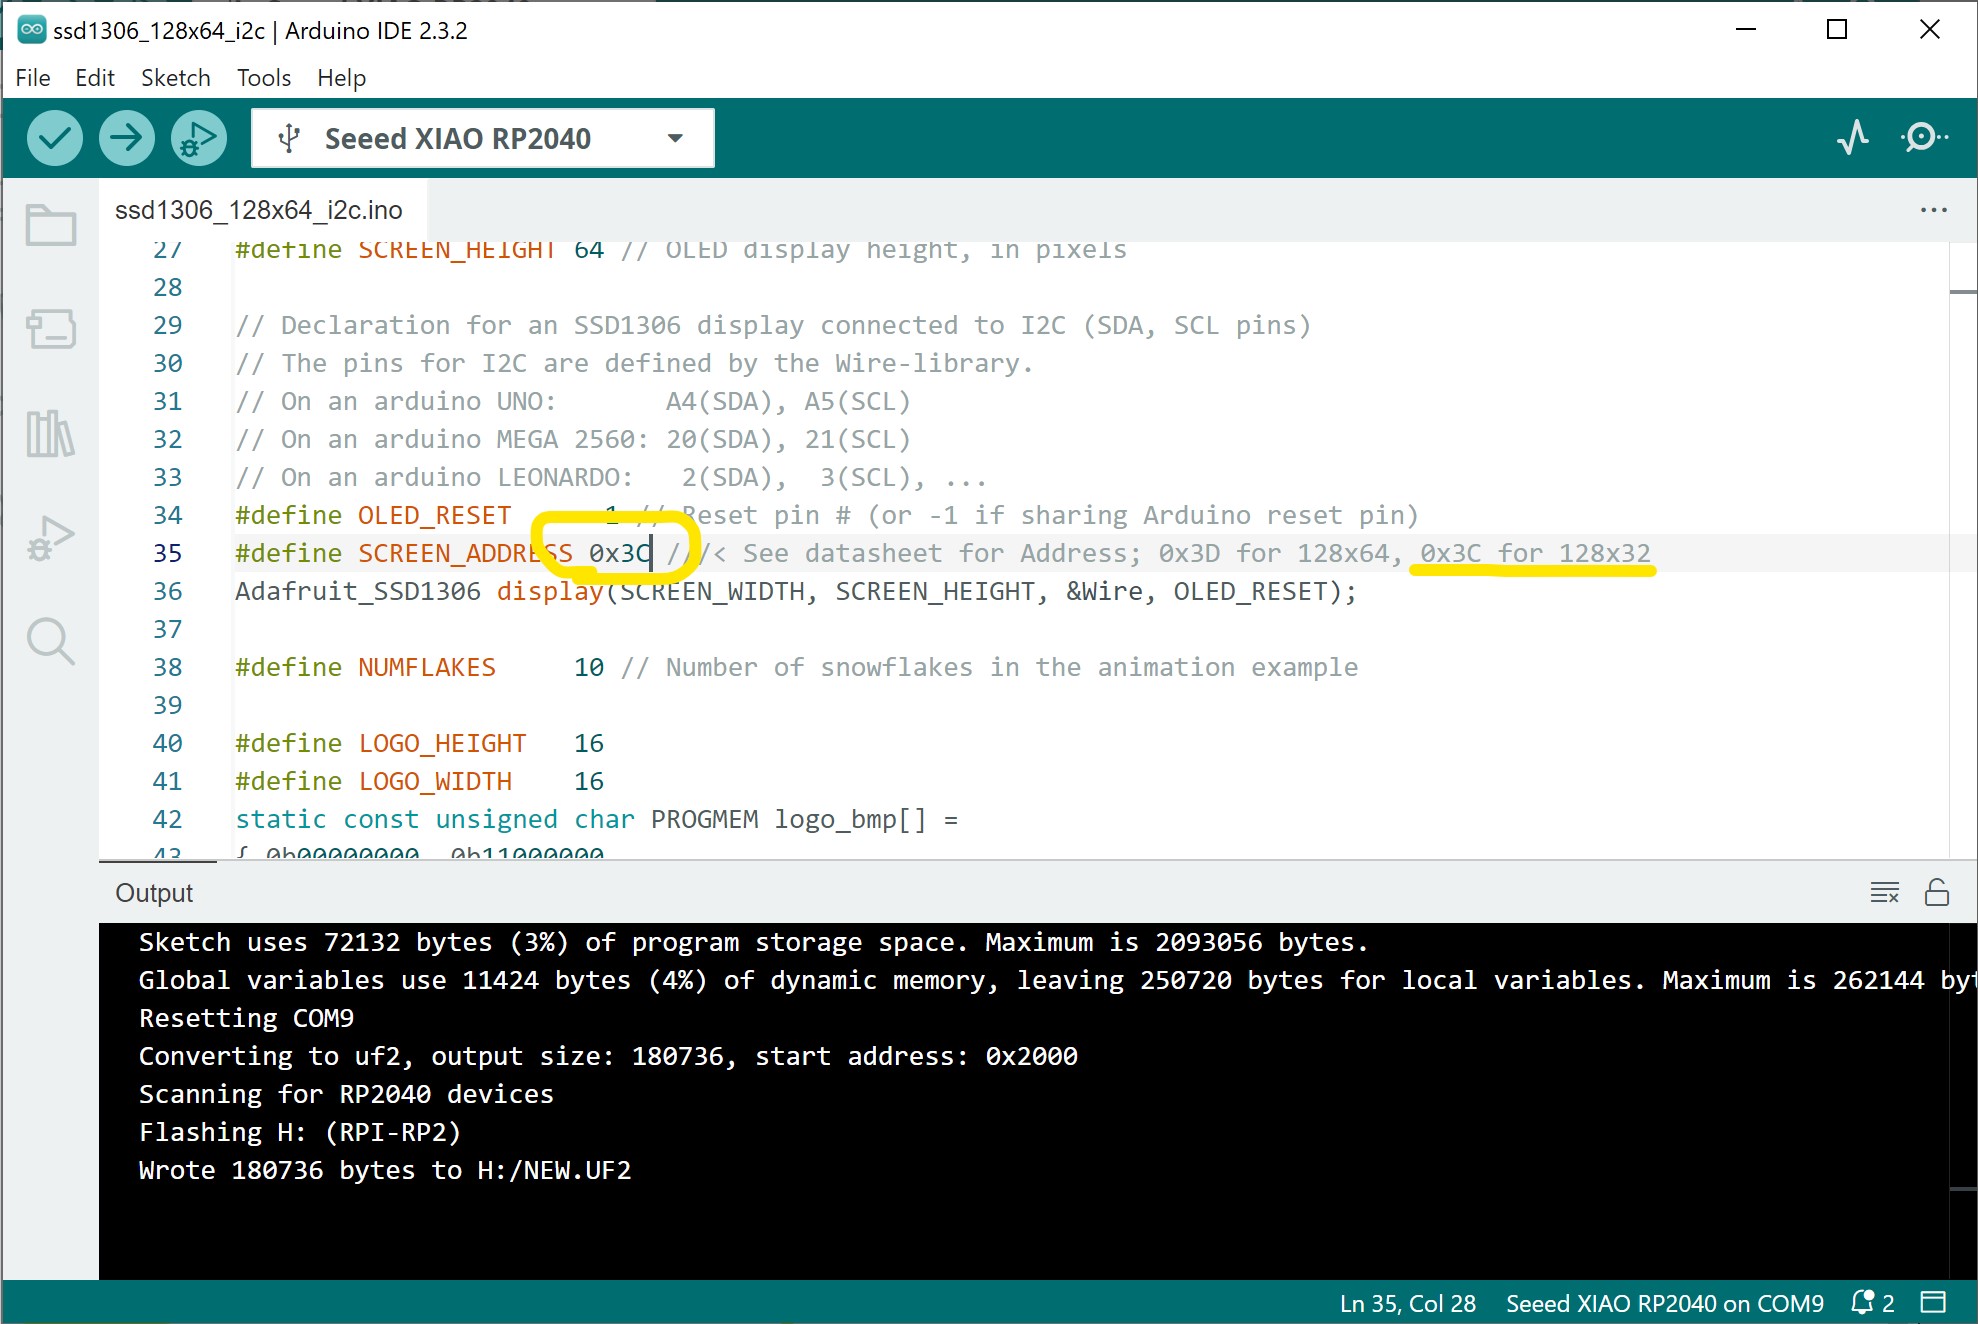
- The first thing I did was test the OLED screen because it appeared as if it might be damaged, so I loaded the Adafruit SSD1306_128x64_i2c.ino code to see if it still worked.
-
I found the XIAO on COM9 and uploaded code and nothing happened.

-
I reviewed the code and the back of the board and found the resistor indicated that the address for the board was incorrectly set to 0x3C even though it was a 128x64 display, so I made the switch and tried again.
-
It worked!
-
Big Test-MPU6050 and SSD1306 together
-
I knew from my Inputs Devices Week that I was able to get I2C readings from the MPU6050 sensor and my development board, so now I’m going to see if I can have both the MPU6050 and SSD1306-OLED on the same I2C bus and have the readings for the gyroscope display on the OLED. I did some research, and it seems like there is an Adafruit example that may work. It’s the Adafruit MPU6050_oled.ino example that I will try.
-
The code works and the OLED display the reading from the gyroscope. See video. I do note a couple of things that I will investigate.
- The display seems stretched vertically
-
Temperature is not being displayed
-
When I reviewed the code, I realize that the resolution was based off the incorrect I2C address and the code thought it was a 32 line display not a 64 line display so I adjust the line 6 of code
Adafruit_SSD1306 display = Adafruit_SSD1306(128, 32, &Wire);to
Adafruit_SSD1306 display = Adafruit_SSD1306(128, 64, &Wire); -
To add the temperature readings to the output I insert the following lines at line 77
display.println(""); display.print("Temp: "); display.print(temp.temperature); display.println(" degC"); -
I made those changed and uploaded the code with the following results
-
The display was the correct size and the temperature reading now fit on the display.
-
-
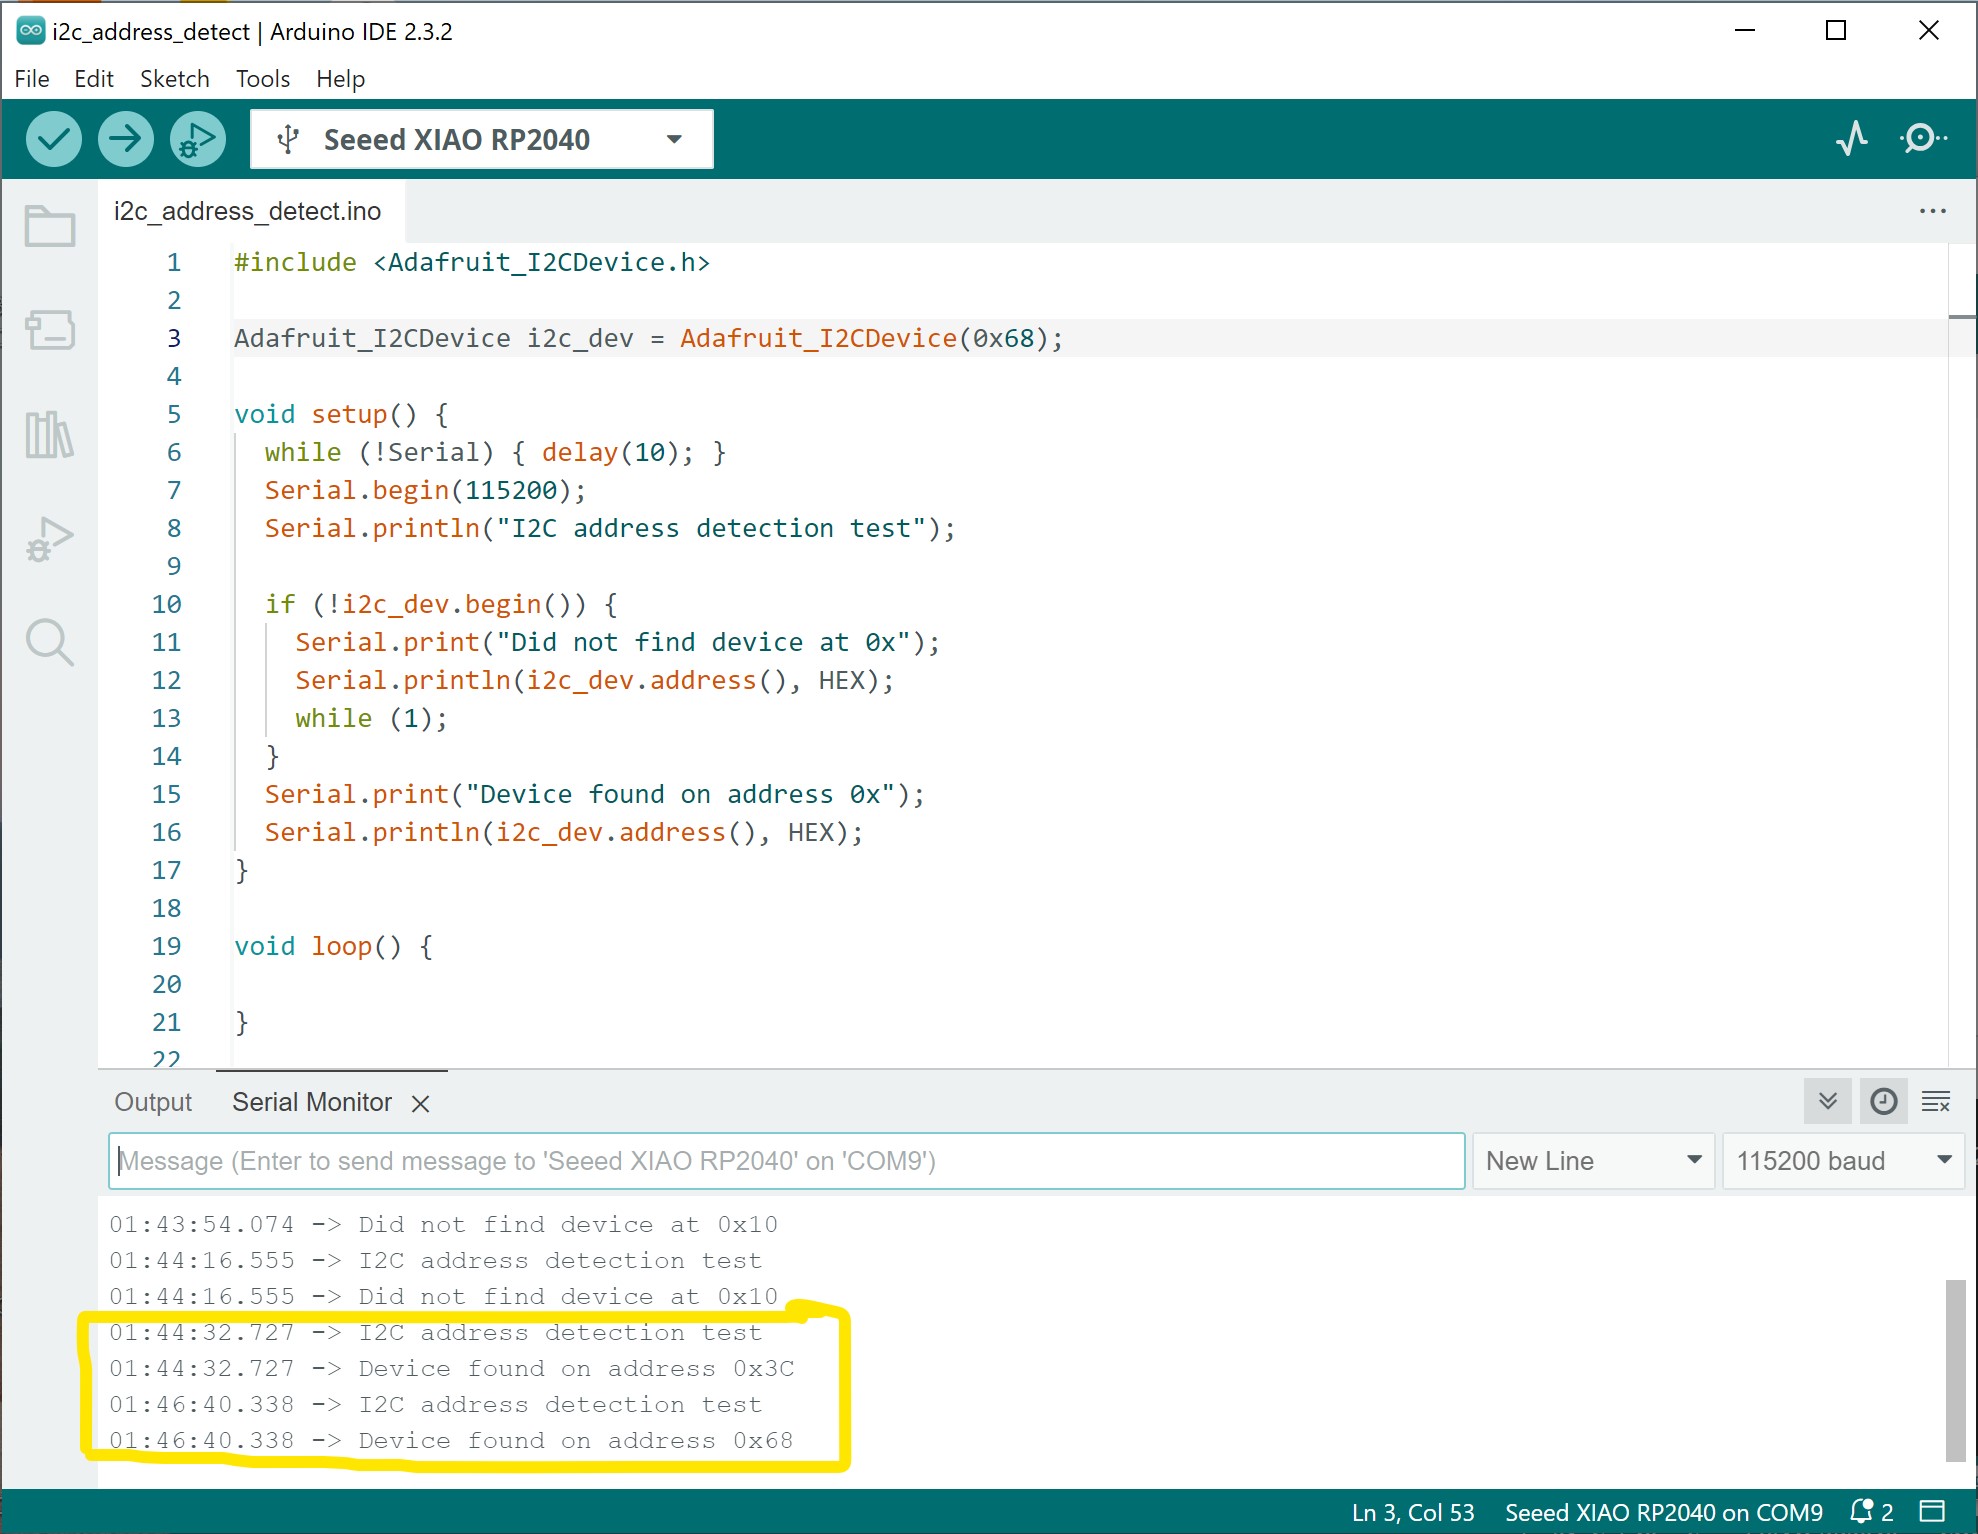
After the fact, I2C address detection
-
I did some research to determine the I2C addresses and found the SSD1306 was (0x3C) and MPU6050 was (0x68). I then used the Adafruit I2C address detection Arduino code to confirm. Results below.
-
Learning
This week I learned how to design, build and connect a development board to a Raspberry Pi Pico with a wired connection. I believe that I saved myself a lot of time by checking for continuity on my development board and correcting any errors before moving forward with testing and coding for the week.
Here is a link to my files for the week.
Group Assignment
Here is a link to our group assignment