11. Input Devices
This week’s assignment is to measure something: add a sensor to a microcontroller board that you have designed and read it
I’m trying to use a MPU6050 gyroscope with the XIAO and read something.
Individual Assignment
Here’s what I’ve done for this assignment.
-
Obtained a MPU6050 3-axis gyroscope link
-
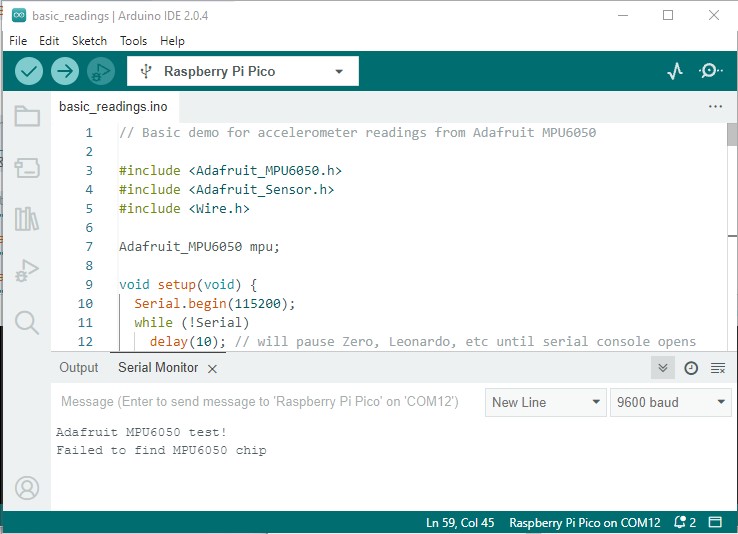
I installed the MPU6050 adafruit library in the Arduino IDE and attempted to get the sensor to work. It was unsuccessful.
-
I used a multimeter to verify the connections and realized that the SDA and SCL pins were mislabeled (backwards) on the FabXIAO diagram when comparing the pinout and schematics, so I switched the SDA and SCL wires and tried again. No luck.
-
Mr. Dubick informed us that there appears to be an issue with the SeeedXIAO RP2040 and the I2C protocol, so I decided to test the sensor by connecting it to an Arduino UNO and running the same code. It worked, so the sensor is operational and the issue is with the communication between the XIAO and the sensor. When I uploaded and ran the code it returned an error that the MPU6050 chip initialization failed.
-
I consulted about the issue with ChatGPT and made mild progress. It generated the following code.
#include <Wire.h>
const int MPU_addr=0x68;  // I2C address of the MPU6050

void setup() {
  Wire.begin();  // initialize the Wire library for I2C communication
  Serial.begin(9600);  // initialize the Serial communication for debugging purposes
  Wire.beginTransmission(MPU_addr);  // start communication with the MPU6050
  Wire.write(0x6B);  // select the PWR_MGMT_1 register
  Wire.write(0);     // write a zero to the PWR_MGMT_1 register to wake up the MPU6050
  Wire.endTransmission(true);  // end the communication with the MPU6050
}

void loop() {
  Wire.beginTransmission(MPU_addr);  // start communication with the MPU6050
  Wire.write(0x3B);  // select the starting register for the 14 registers we want to read
  Wire.endTransmission(false);  // end the transmission with the MPU6050, but don't release the I2C bus
  Wire.requestFrom(MPU_addr,14,true);  // request 14 bytes of data from the MPU6050, and release the I2C bus when done

  int16_t AcX=Wire.read()<<8|Wire.read();  // read the accelerometer X value
  int16_t AcY=Wire.read()<<8|Wire.read();  // read the accelerometer Y value
  int16_t AcZ=Wire.read()<<8|Wire.read();  // read the accelerometer Z value
  int16_t Tmp=Wire.read()<<8|Wire.read();  // read the temperature value
  int16_t GyX=Wire.read()<<8|Wire.read();  // read the gyroscope X value
  int16_t GyY=Wire.read()<<8|Wire.read();  // read the gyroscope Y value
  int16_t GyZ=Wire.read()<<8|Wire.read();  // read the gyroscope Z value

  Serial.print("AcX = "); Serial.print(AcX);  // print the accelerometer X value
  Serial.print(" | AcY = "); Serial.print(AcY);  // print the accelerometer Y value
  Serial.print(" | AcZ = "); Serial.print(AcZ);  // print the accelerometer Z value
  Serial.print(" | Tmp = "); Serial.print(Tmp/340.00+36.53);  // print the temperature value in degrees Celsius
  Serial.print(" | GyX = "); Serial.print(GyX);  // print the gyroscope X value
  Serial.print(" | GyY = "); Serial.print(GyY);  // print the gyroscope Y value
  Serial.print(" | GyZ = "); Serial.println(GyZ);  // print the gyroscope Z value
  delay(1000);  // wait for 1 second before reading the next set of values
}
-
Using the above code, produced output from the sensor, and I was initially excited, but then quickly realized that it was bad data. Back to work.
-
I had concerns that that sensor was defective, so I tested the sensor with an Arduino Uno. I used the tutorial at this link from LastMinuteEngineers. It worked, so I’m left with trying to decide what to do next. The sensor is good, so wondering if it’s a problem with the XIAO.
-
To test this theory, I’m going to see if I can get the sensor to so work with Python in Thonny. I used the following tutorials to test out the sensor.
- Seeed Studio XIAO RP2040 with MicroPython to connect and load MicroPython on the Seeed Xiao.
- How to Connect the MPU6050 to the XIAO RP2040
I first followed the above tutorials with a SeeedXIAO with headers and the MPU6050 sensor connected with jumper wires. It worked with no issues, so I moved on to the development board I had milled earlier. I followed the same protocol, and it too worked, so the problem must be with the SeeedXIAO RP2040 and Arduino protocols.
-
2024 Update-I went back and tried this again with the example code from Arduino at this link with my Embedded Networking Board and it worked.
-
Here is the setup
-
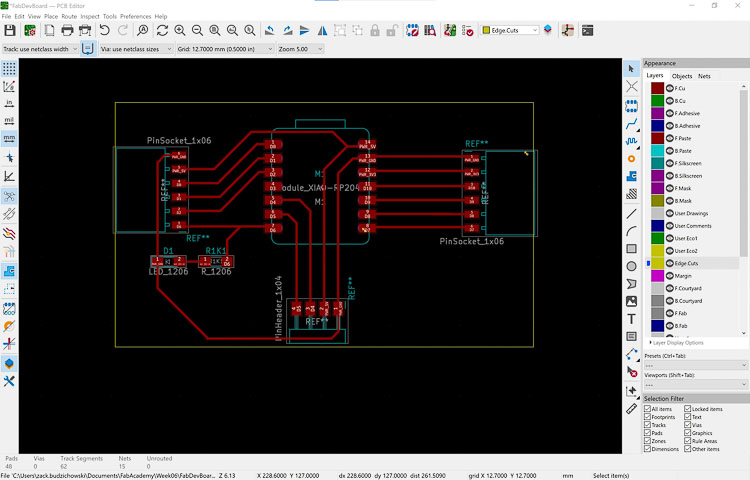
Board Design
 2. Stuffed Board
 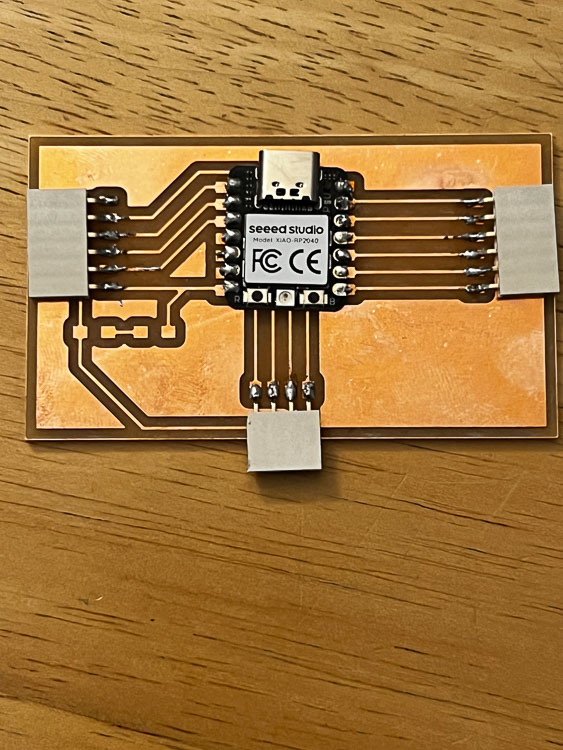 3. Connection setup
 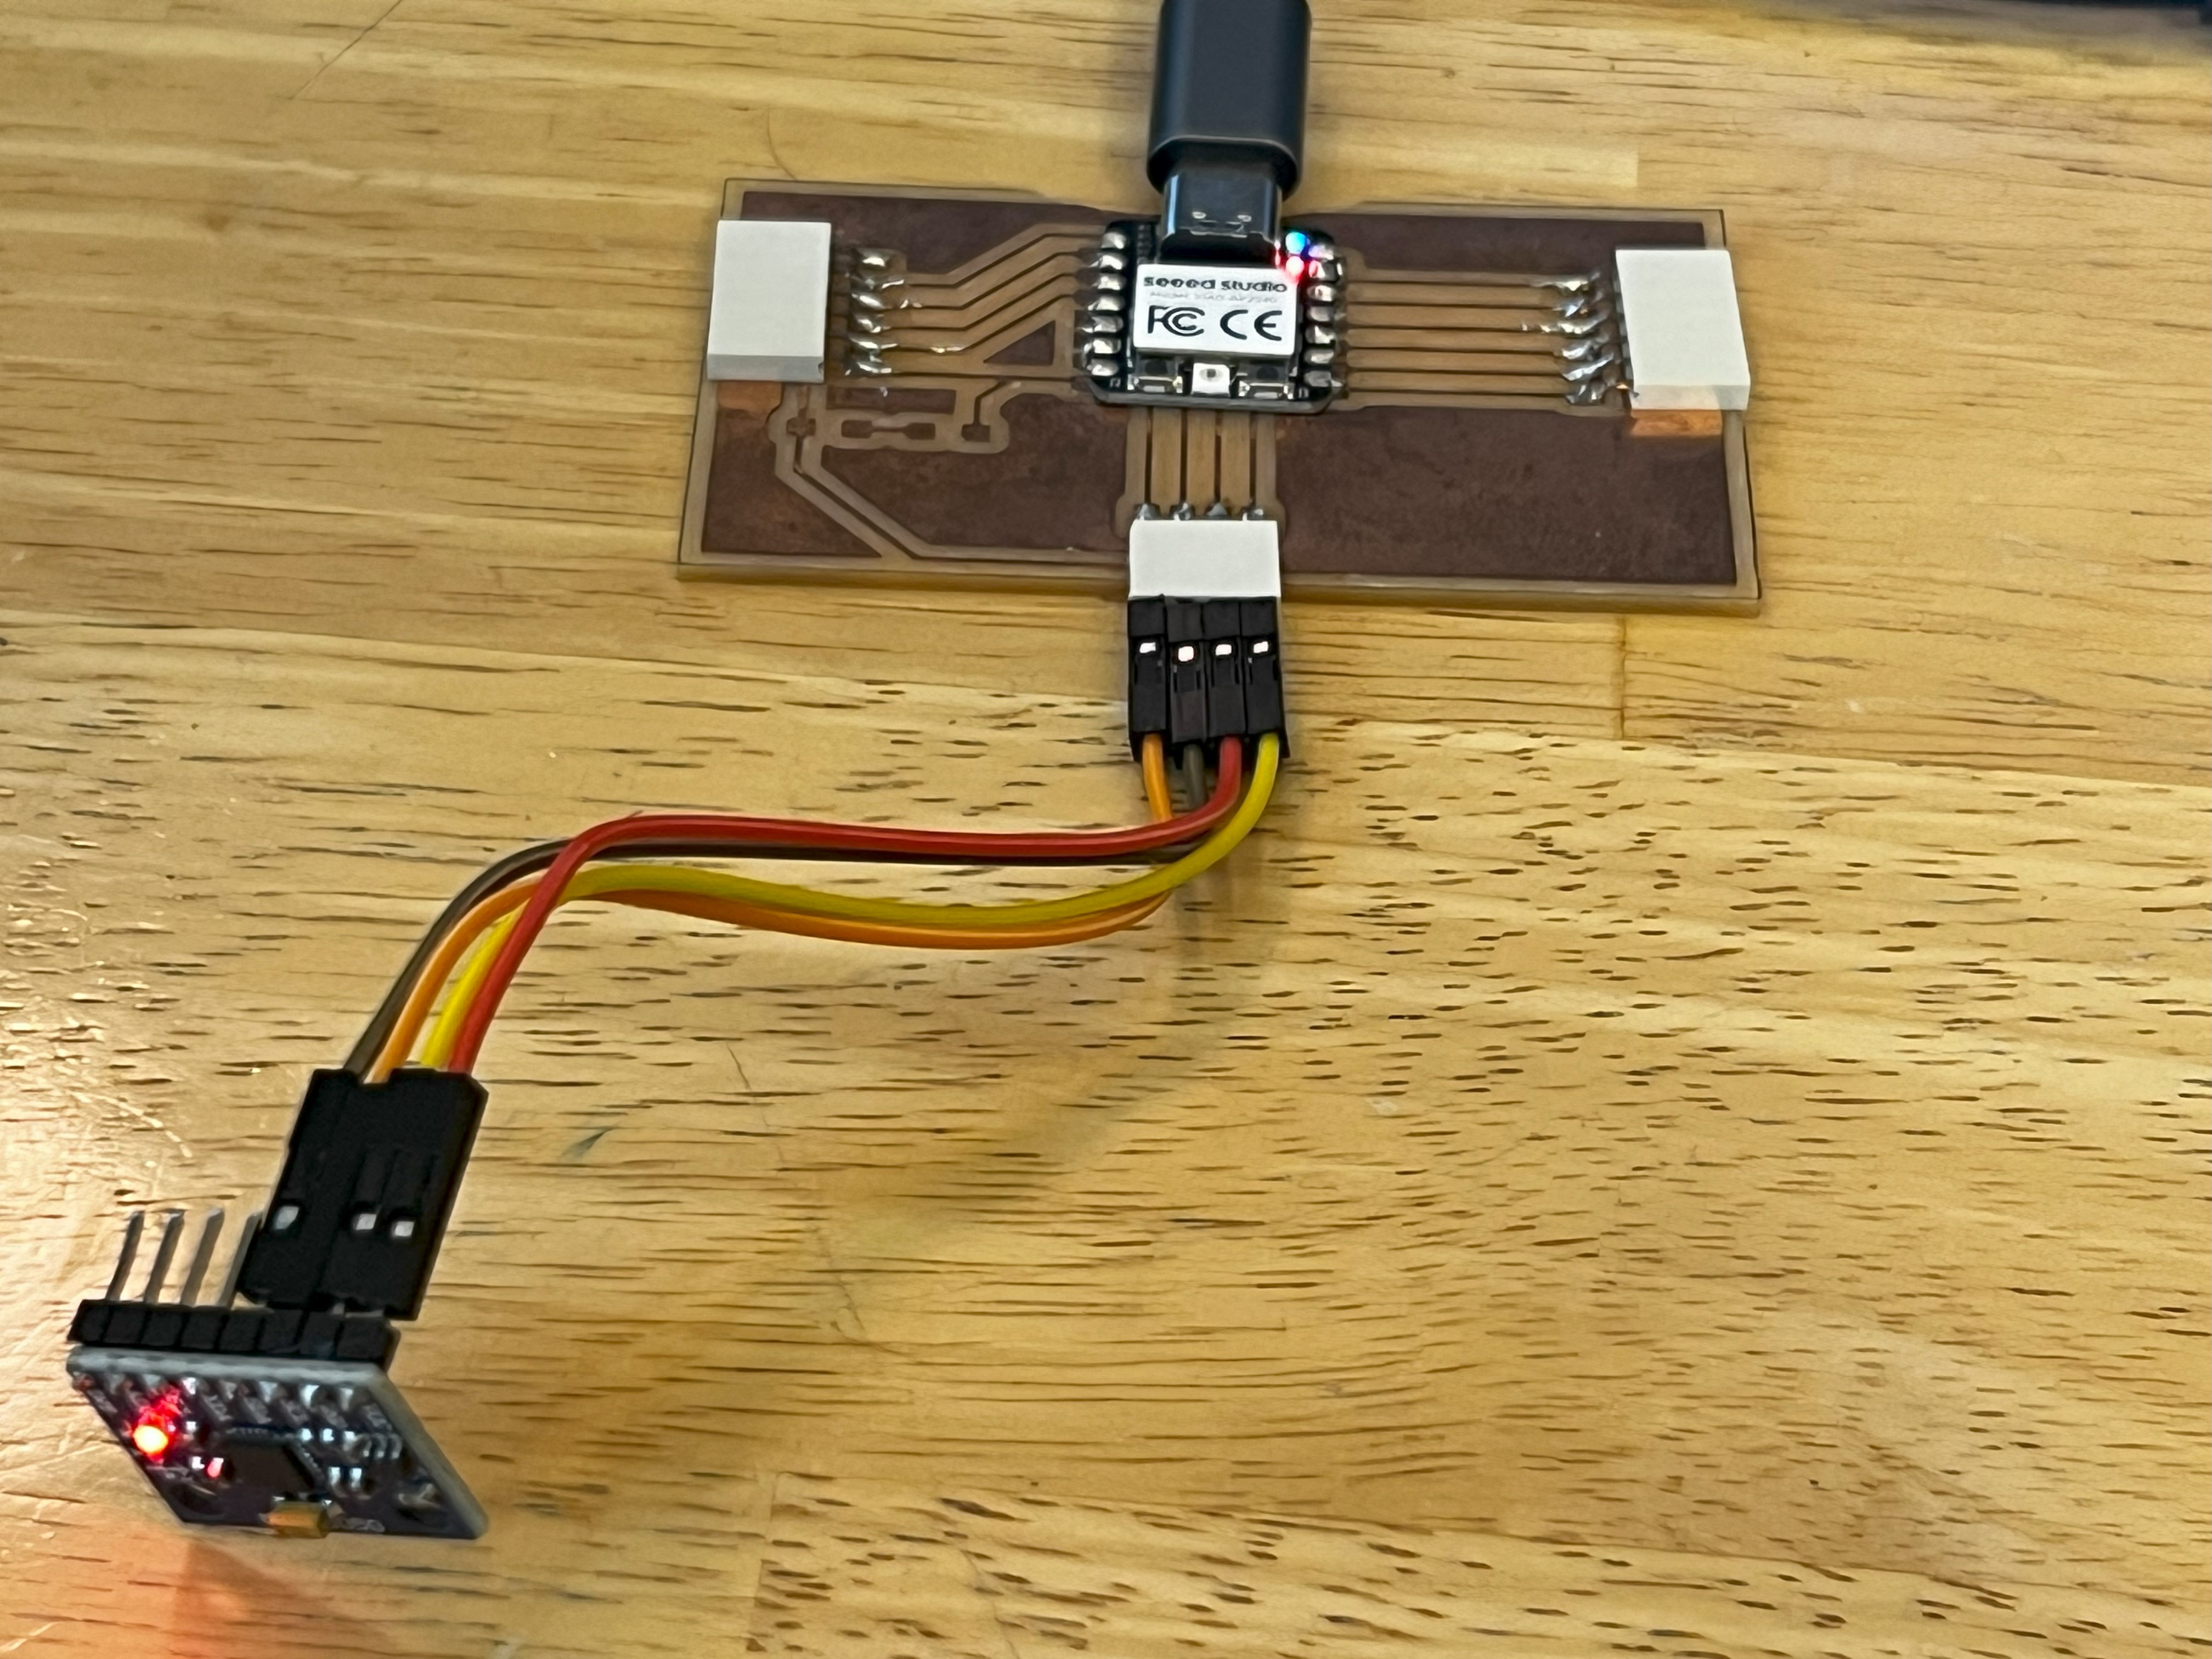 4. MPU 6050 Sensor
 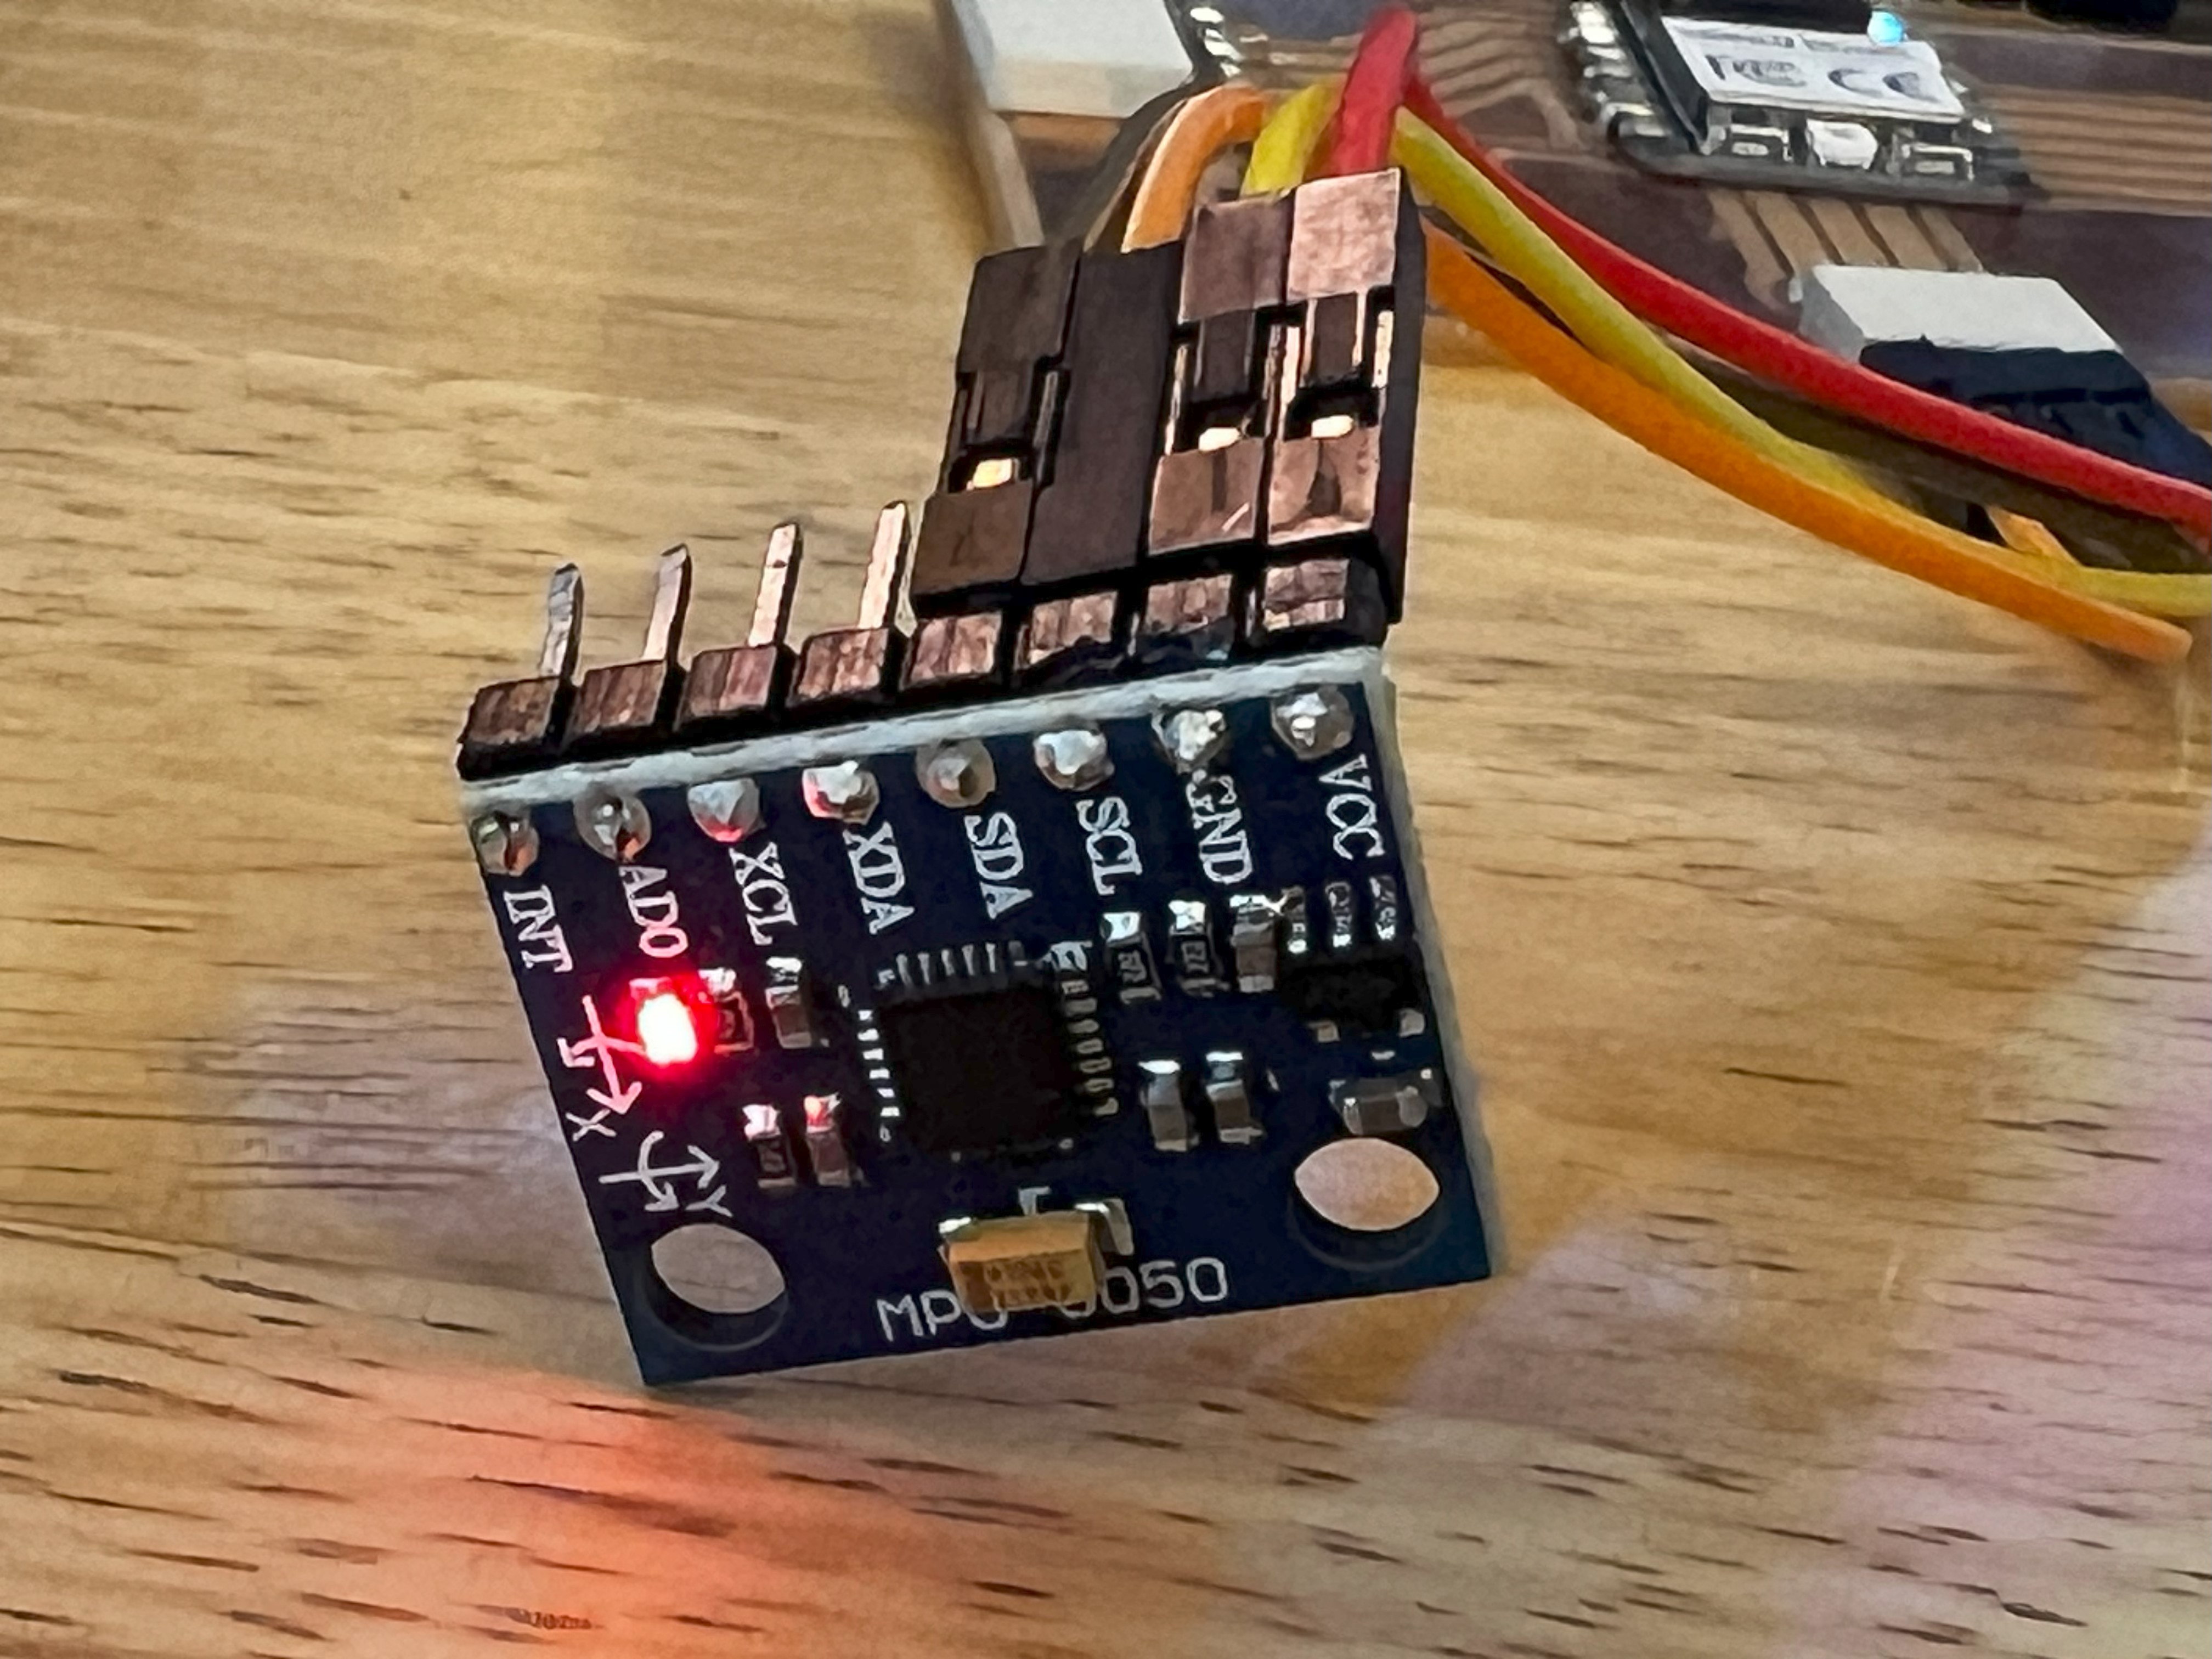 5. Video of readings-you can see the acceleration and temperature readings change as I put my thumb on the sensor and move it around.
// Basic demo for accelerometer readings from Adafruit MPU6050

#include <Adafruit_MPU6050.h>
#include <Adafruit_Sensor.h>
#include <Wire.h>

Adafruit_MPU6050 mpu;

void setup(void) {
  Serial.begin(115200);
  while (!Serial)
    delay(10); // will pause Zero, Leonardo, etc until serial console opens

  Serial.println("Adafruit MPU6050 test!");

  // Try to initialize!
  if (!mpu.begin()) {
    Serial.println("Failed to find MPU6050 chip");
    while (1) {
      delay(10);
    }
  }
  Serial.println("MPU6050 Found!");

  mpu.setAccelerometerRange(MPU6050_RANGE_8_G);
  Serial.print("Accelerometer range set to: ");
  switch (mpu.getAccelerometerRange()) {
  case MPU6050_RANGE_2_G:
    Serial.println("+-2G");
    break;
  case MPU6050_RANGE_4_G:
    Serial.println("+-4G");
    break;
  case MPU6050_RANGE_8_G:
    Serial.println("+-8G");
    break;
  case MPU6050_RANGE_16_G:
    Serial.println("+-16G");
    break;
  }
  mpu.setGyroRange(MPU6050_RANGE_500_DEG);
  Serial.print("Gyro range set to: ");
  switch (mpu.getGyroRange()) {
  case MPU6050_RANGE_250_DEG:
    Serial.println("+- 250 deg/s");
    break;
  case MPU6050_RANGE_500_DEG:
    Serial.println("+- 500 deg/s");
    break;
  case MPU6050_RANGE_1000_DEG:
    Serial.println("+- 1000 deg/s");
    break;
  case MPU6050_RANGE_2000_DEG:
    Serial.println("+- 2000 deg/s");
    break;
  }

  mpu.setFilterBandwidth(MPU6050_BAND_21_HZ);
  Serial.print("Filter bandwidth set to: ");
  switch (mpu.getFilterBandwidth()) {
  case MPU6050_BAND_260_HZ:
    Serial.println("260 Hz");
    break;
  case MPU6050_BAND_184_HZ:
    Serial.println("184 Hz");
    break;
  case MPU6050_BAND_94_HZ:
    Serial.println("94 Hz");
    break;
  case MPU6050_BAND_44_HZ:
    Serial.println("44 Hz");
    break;
  case MPU6050_BAND_21_HZ:
    Serial.println("21 Hz");
    break;
  case MPU6050_BAND_10_HZ:
    Serial.println("10 Hz");
    break;
  case MPU6050_BAND_5_HZ:
    Serial.println("5 Hz");
    break;
  }

  Serial.println("");
  delay(100);
}

void loop() {

  /* Get new sensor events with the readings */
  sensors_event_t a, g, temp;
  mpu.getEvent(&a, &g, &temp);

  /* Print out the values */
  Serial.print("Acceleration X: ");
  Serial.print(a.acceleration.x);
  Serial.print(", Y: ");
  Serial.print(a.acceleration.y);
  Serial.print(", Z: ");
  Serial.print(a.acceleration.z);
  Serial.println(" m/s^2");

  Serial.print("Rotation X: ");
  Serial.print(g.gyro.x);
  Serial.print(", Y: ");
  Serial.print(g.gyro.y);
  Serial.print(", Z: ");
  Serial.print(g.gyro.z);
  Serial.println(" rad/s");

  Serial.print("Temperature: ");
  Serial.print(temp.temperature);
  Serial.println(" degC");

  Serial.println("");
  delay(500);
}
Group Assignment
Here is a link to our group assignment