5. 3D Scanning and Printing
3D Scanning
This week’s individual assignment was to 3D scan and print an object. I did some research by reading the “Start Scanning” article in the Spring 2023 issue of Make: magazine. Their top recommendation for mobile 3D scanning was an app called Polycam. I downloaded the app for my for iPhone and got started.
-
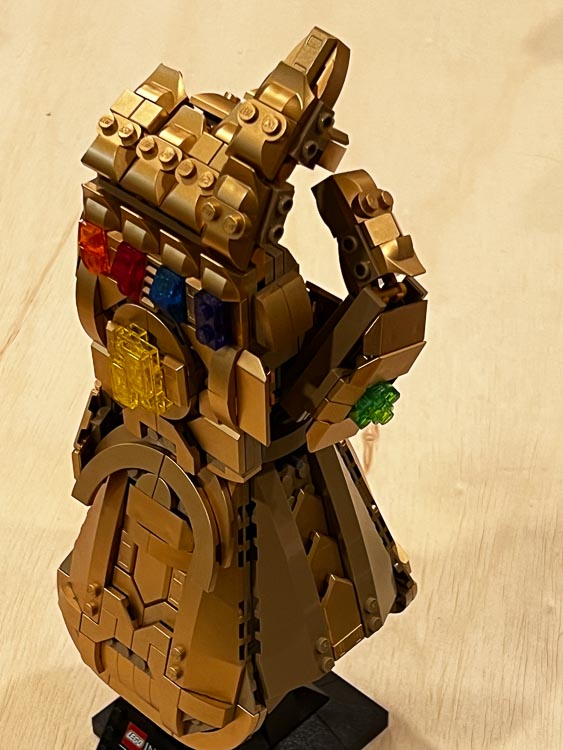
As a fan of the MCU, I decided to scan and attempt to print a scaled down copy of my son’s Lego Infinity Gauntlet.
-
I opened up the Polycam app and got started. With minimal directions I was able to get a scan within about 15 minutes of starting the experiment. There were multiple options to choose from in the app about how to scan and process the object. I chose the LiDar option and began recording the object. It was relatively straightforward process of moving the camera around the object to capture all the features.
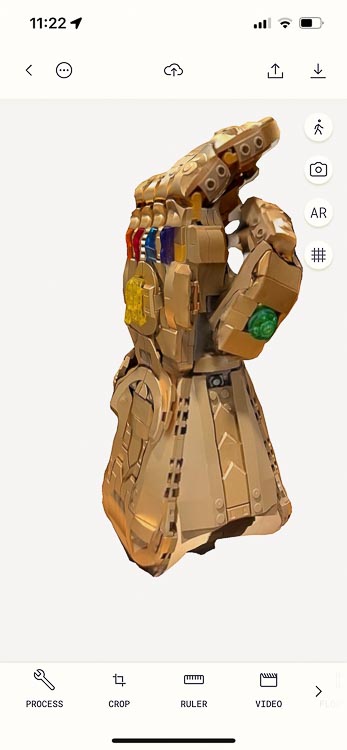
One issue that came up was that the scan had lots of background data in it that need to be cropped out. I didn’t know that Polycam had a crop feature at first, but after the first export to Fusion360 I decided to look into the option.
-
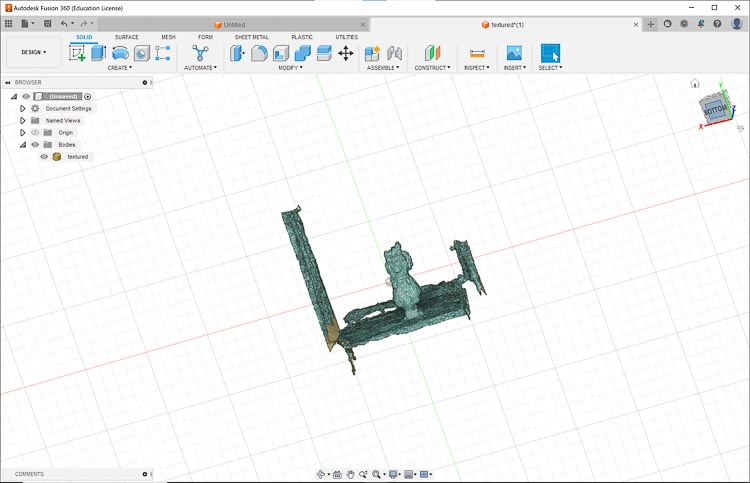
I was able to find the crop feature on the app and got rid of the extraneous parts of the scan. Then I exported the object again as an STL file for Fusion360.
-
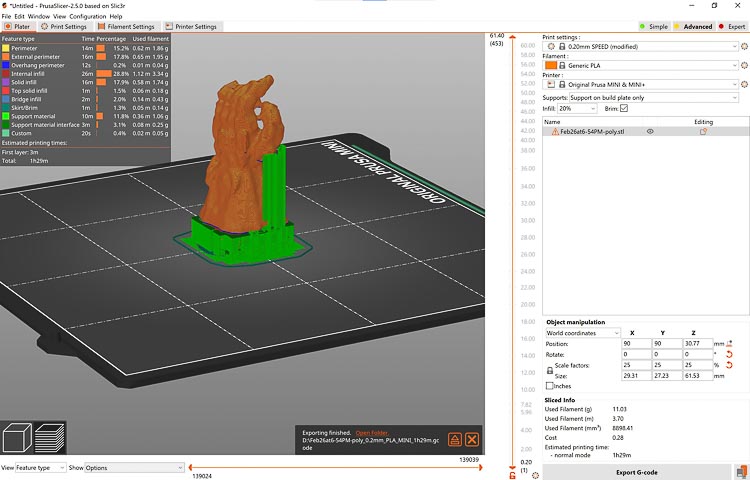
I exported the object to Prusa Slicer to see what type of supports it would need to print.
-
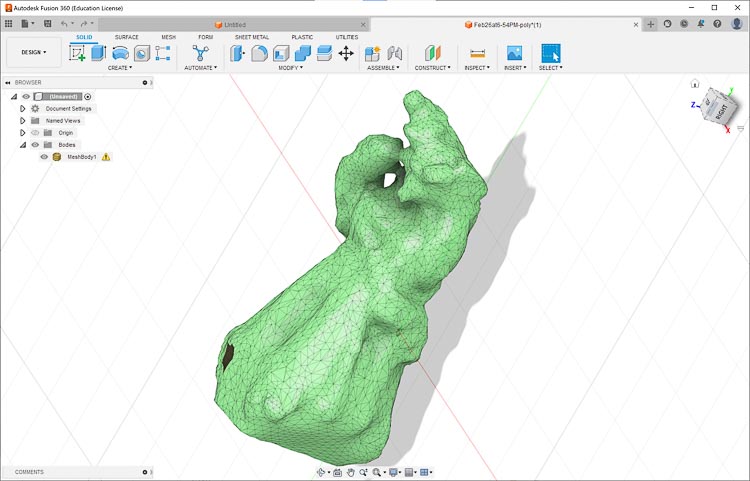
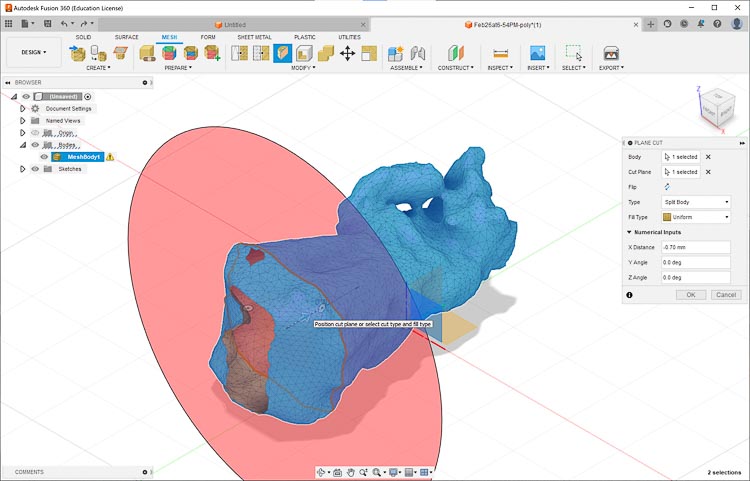
After looking at the sliced print in Prusa Slicer for a while I decided to challenge myself to print it without supports, but knew that I would have to tidy up the base of the object a bit first. I learned how to use cut planes in Fusion 360 to split the object as a challenge.
-
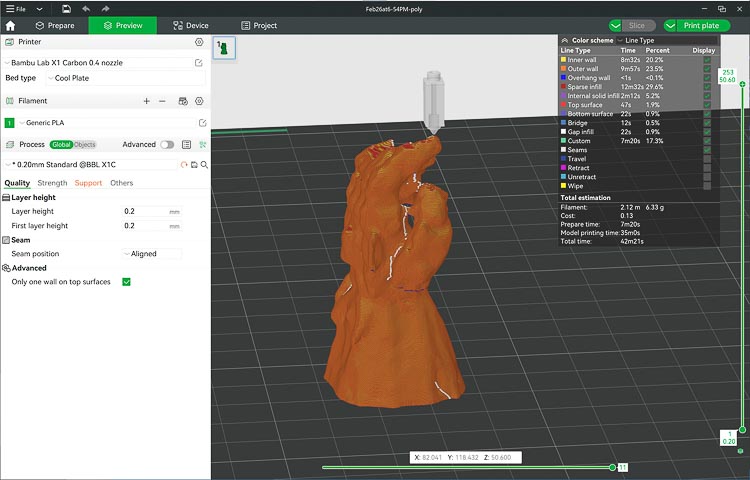
As I was working with the object to get it ready for printing, I had a realization that I may have been making the task harder than it needed to be, so I went back to the slicer. This time I went to the Bambu Studio for the machine we have on loan since it would be able to print the gauntlet in half the time as the Prusa. Plus it had a shiny filament loaded and I thought that would be a nice effect for the finished product. Since I was manipulating an STL file in Fusion, I decided to try to cut out the middle man and just use the cut plane tool in the slicer program and save some steps. It worked.
-
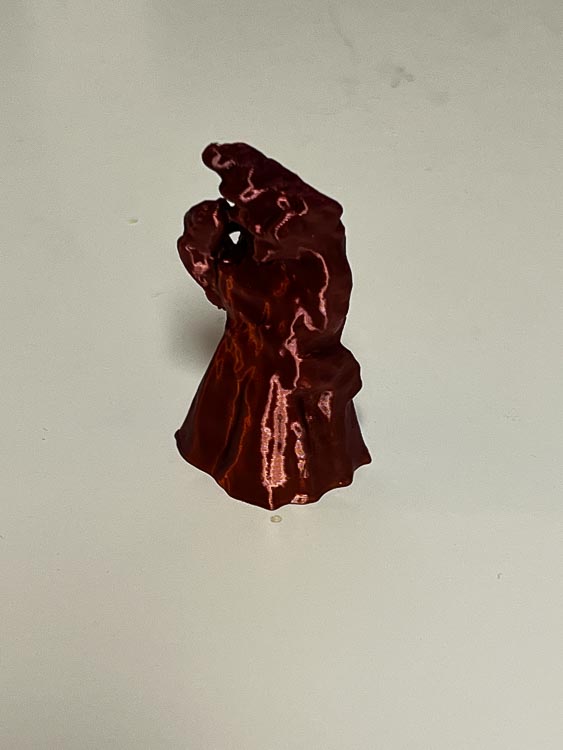
The print went well on the Bambu X1 Carbon and here’s the final product.

Learning-While the process of scanning and printing a 3D object is relatively straightforward in the age of LIDAR and smartphones, there are lots of options and settings that can be studied to learn ways to optimize the output of the scanning software. There is also a lot to learn about the process of how the meshes are made along with the ways they can be manipulated in various CAD software programs.
3D Printing
This week’s assignment was to design and print an object that could not be made subtractively. I chose to make an open wheel with 5 hex nuts printed inside. I chose this design to improve me skills using the parametric and pattern tools in Fusion 360.
-
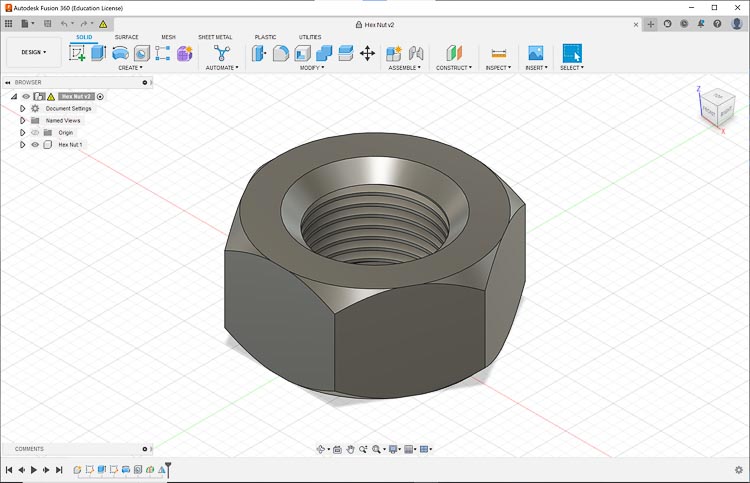
Started with the Hex Nut design I made using this Kevin Kennedy tutorial earlier this year.
-
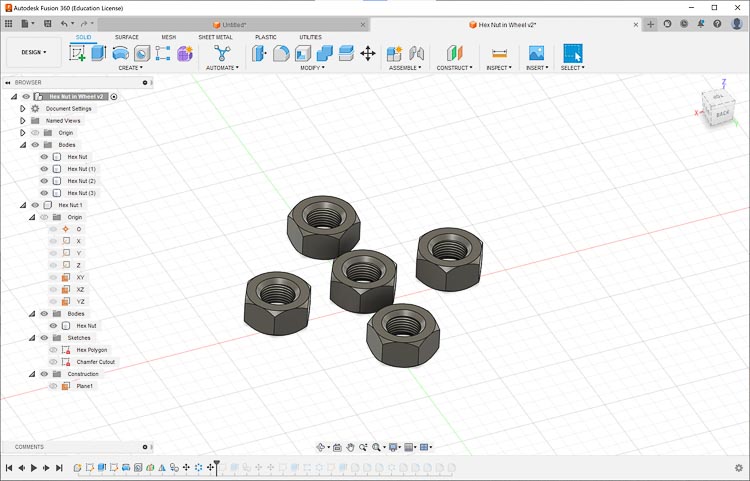
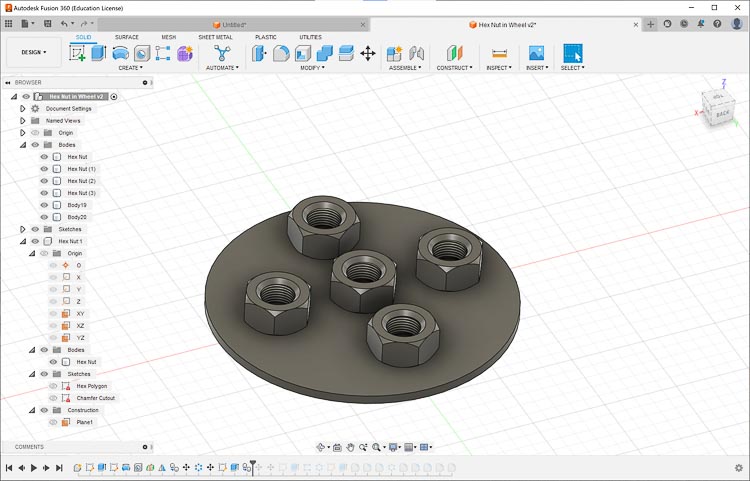
Made a circular pattern of hex nuts with an additional one in the middle that will be trapped in middle of the wheel.
-
Bottom plate under the hex nuts.
-
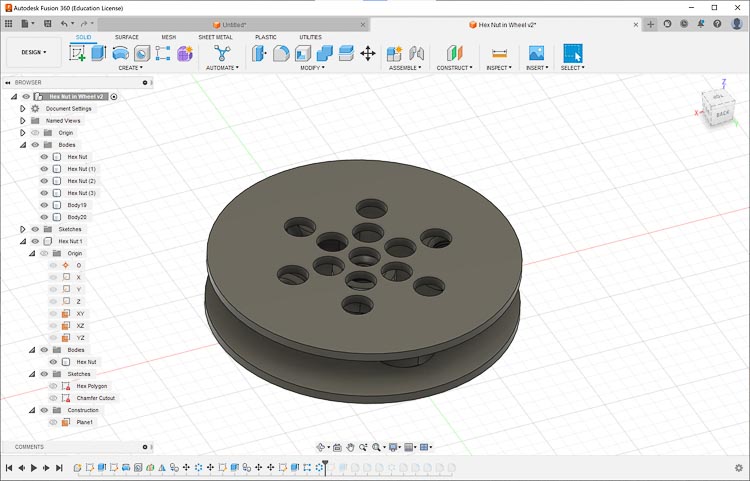
Top platter added over the hex nuts with access holes for taking out support material.
-
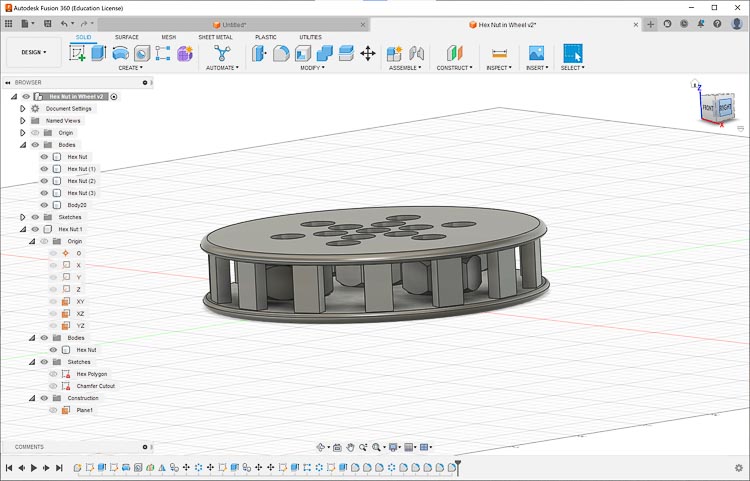
Finally, I added some vertical bars to keep the hex nuts in the wheel and made sure to leave enough room between them to allow for pliers to access and remove the support material necessary for the print.
-
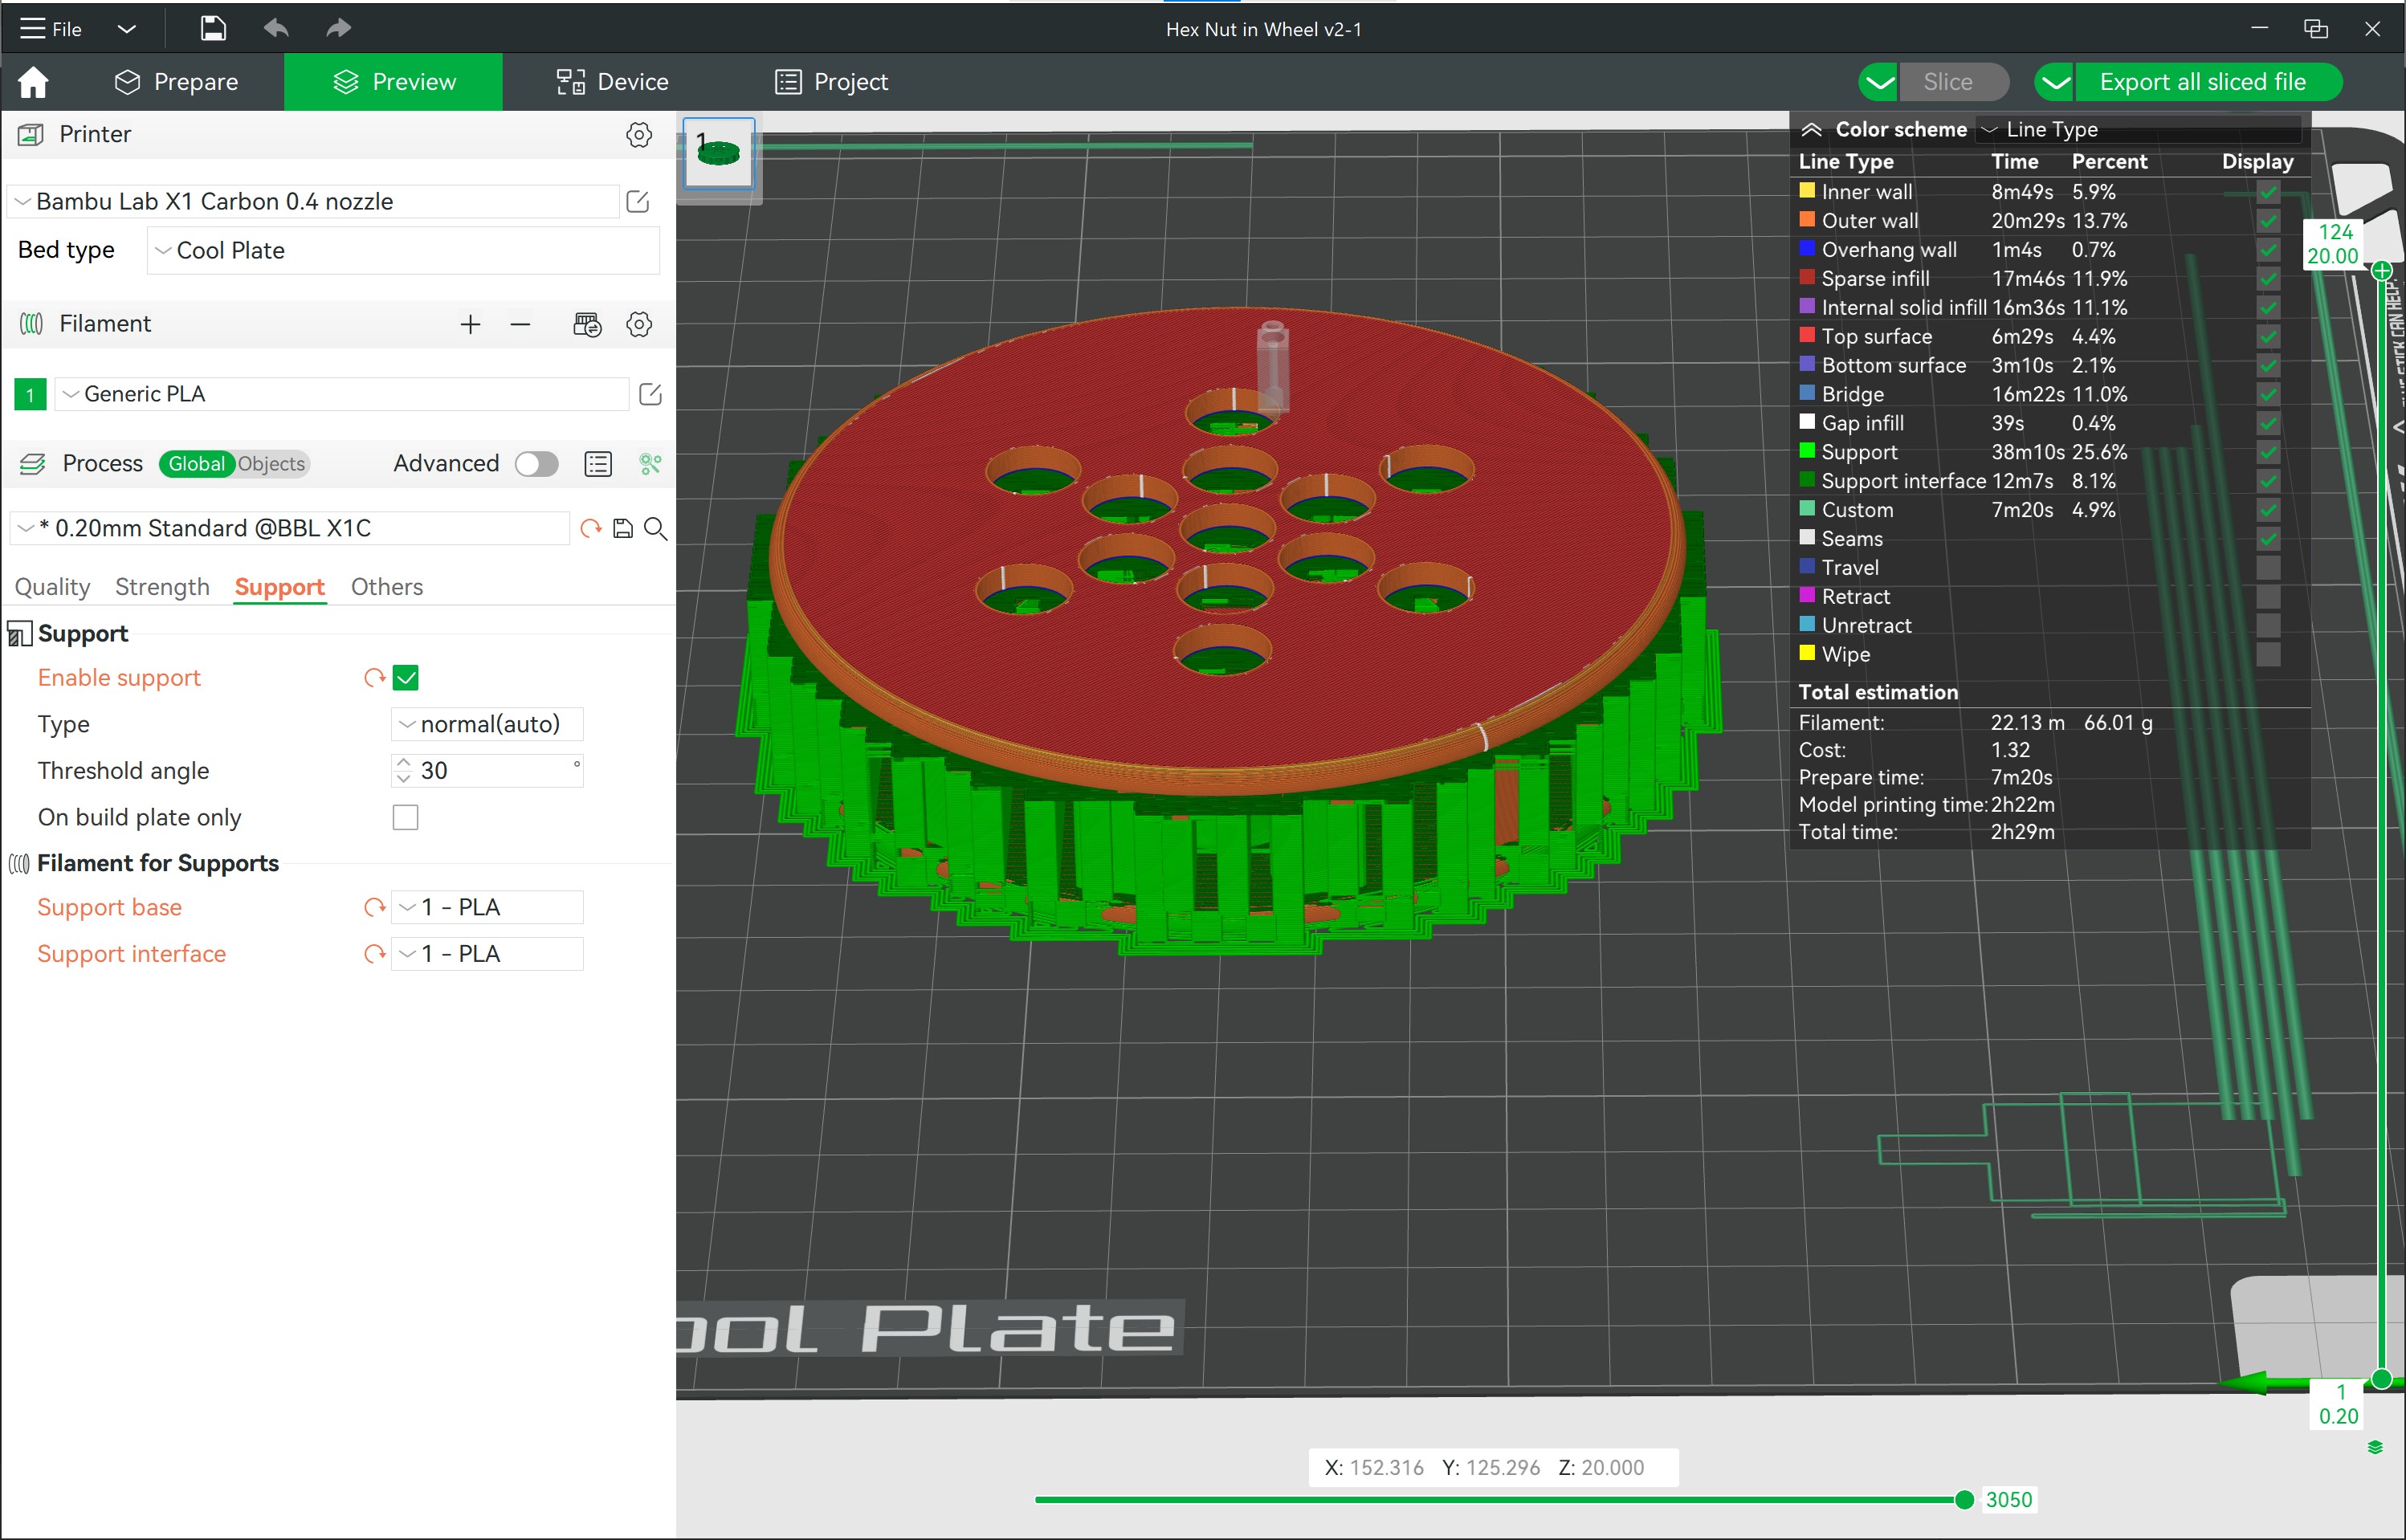
Like before I used the Bambu Studio software to slice the file for printing on the Bambu X1 3D printer. Here are my slice and support settings on the Bambu Studio Software.
- Slice Settings
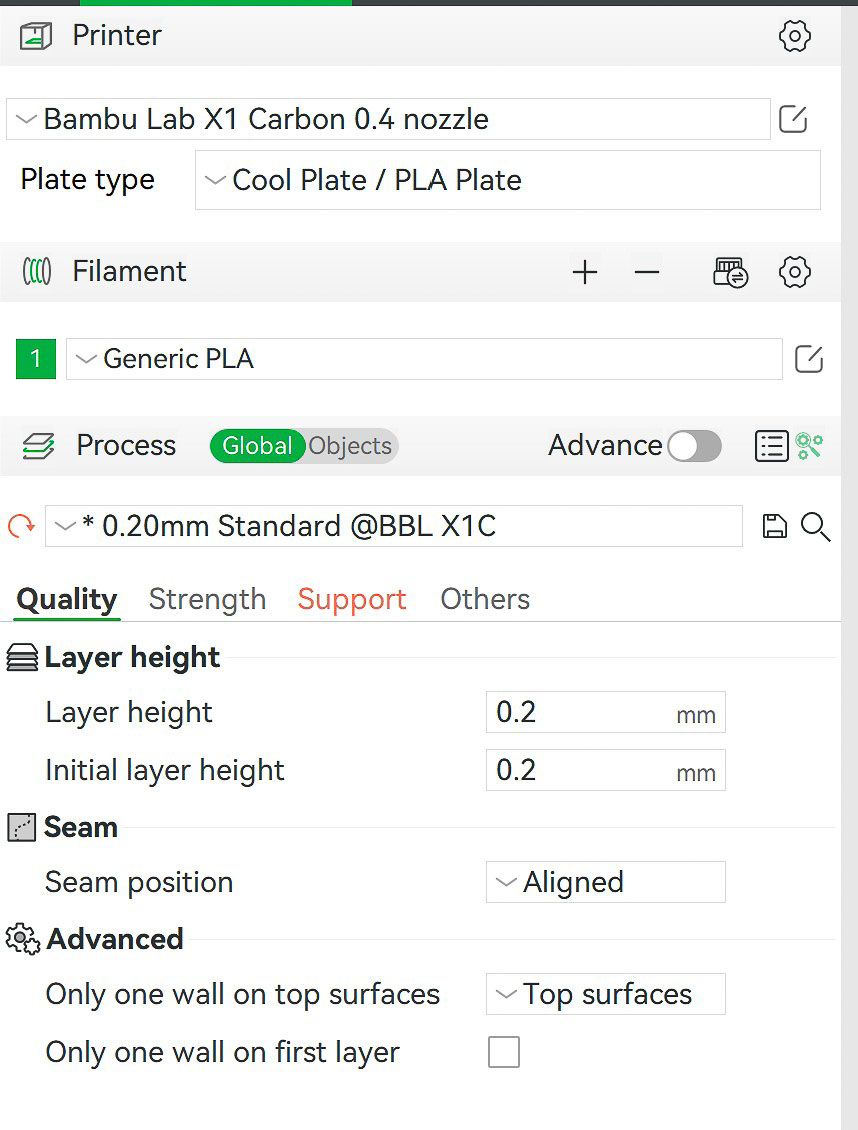
-
Support Settings
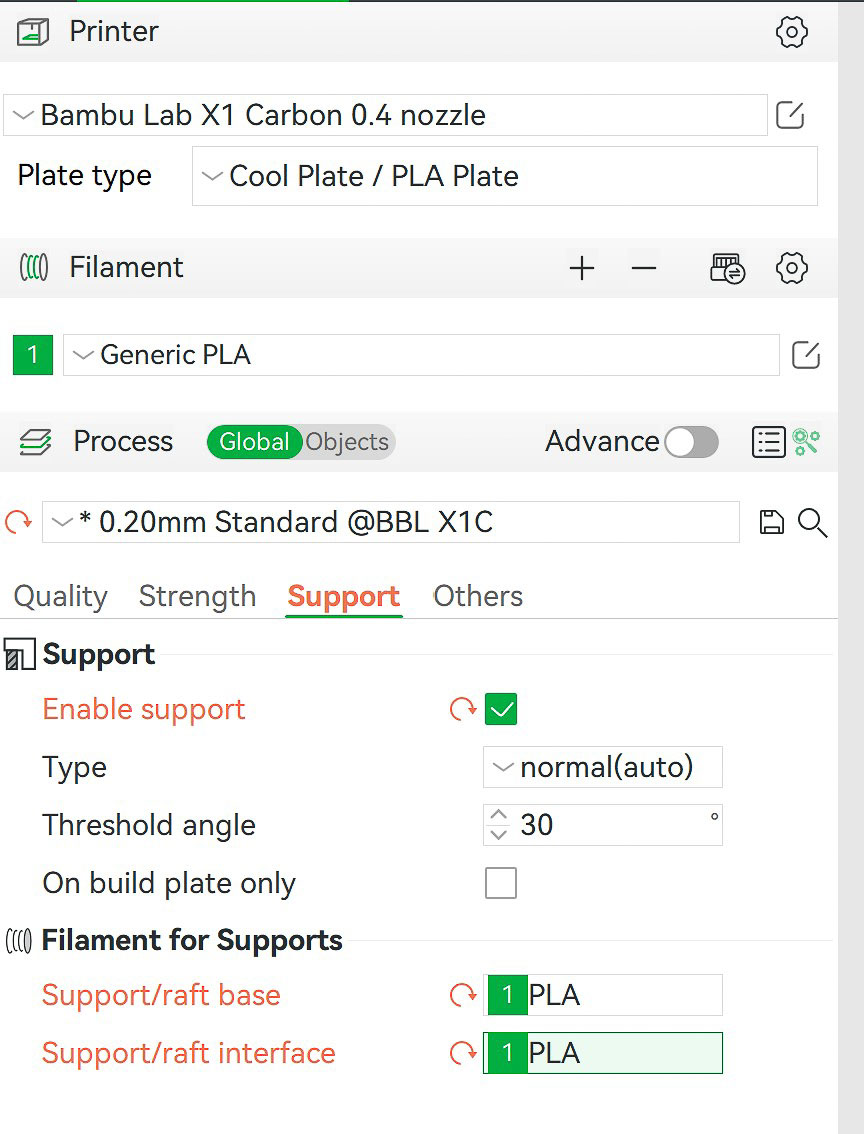
- Slice Settings
-
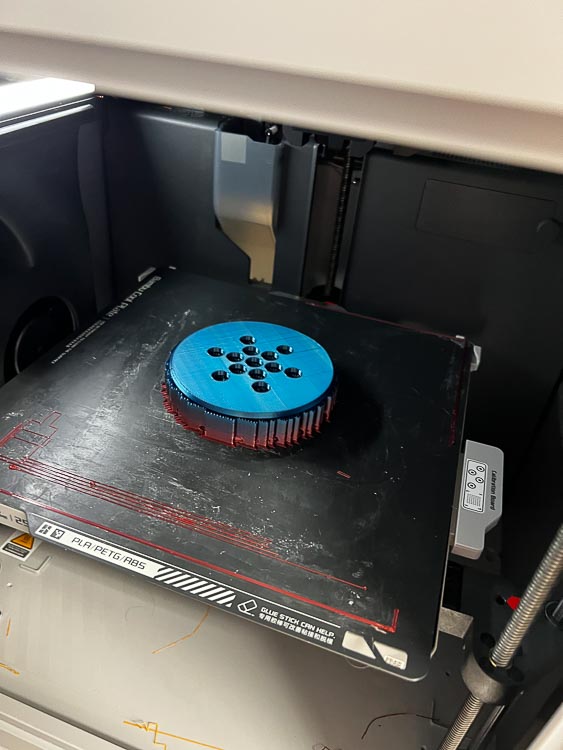
Here is the sliced file ready for printing. There will be a lot of work to get the supports out.
-
Here is the print as it came off the Bambu X1 with supports. Time to start taking off the supports.
-
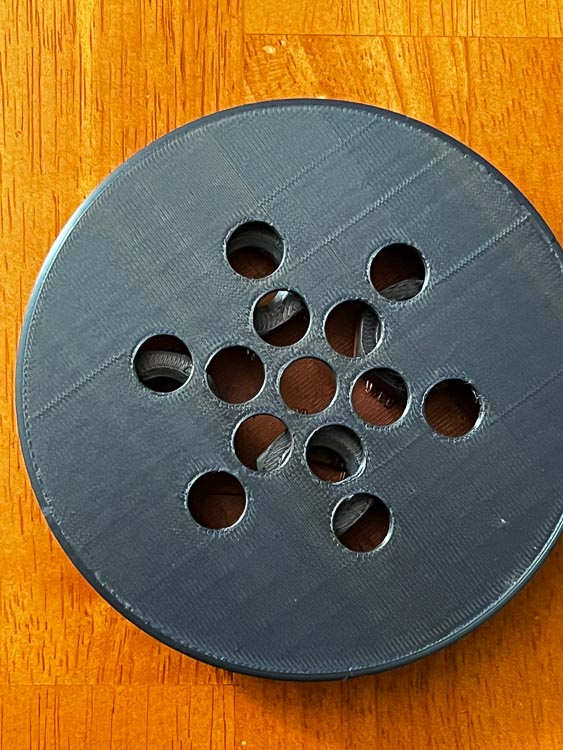
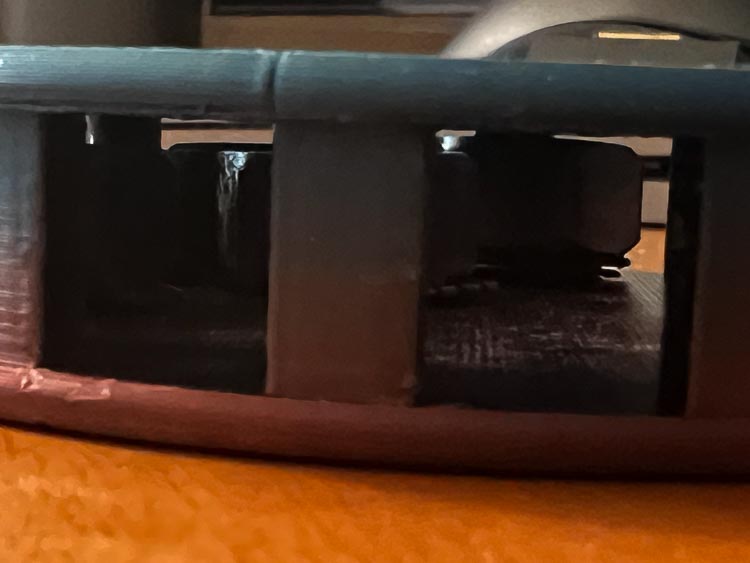
As you can see from the following two photos, the five hex nuts are captured in the wheel and could not have been manufactured with a subtractive process.
Learning-Overall I had a positive experience with this assignment. It gave me a chance to improve my CAD skills with copying objects into arrays parametrically to make the vertical pieces that held the wheel together along with manipulating bodies in the file also. Next time I print an object like this, I will put more effort into figuring out a way to use fewer supports because the process of removing the supports was quite time-consuming.
Link to my files for the week.
Group Assignment
Link to our group assignment.