5. 3D Scanning and printing
This week I learned how to scan an object and print it. I also worked on creating a print that could not be made subtractively. For my group work, we were given a 3D printer to work with and to compare the same print file with the other groups and the 3D printers they are using. My group used the Formlabs: Form 3B SLA printer. In my group I helped out with the cleaning and washing, and I did a lot of the documentation.
3D Printing
For my print I used Fusion 360 to create a sphere that was surrounded by the outline of a box.
Prusa Mini
In the Charlotte Latin FabLab we have a wall of Prusa Mini’s, 3 regular Prusas, 2 Form 3B SLA printers, and one Bambu X1-Carbon. I used the Prusa Mini.
Fusion 360
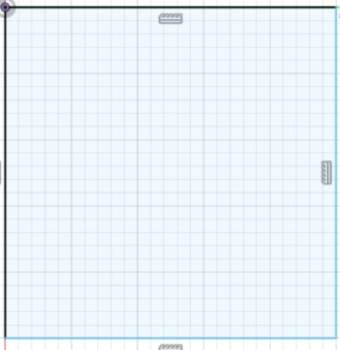
As I said before I am going to stick with using Fusion 360 for any 3d printing because I am comfortable with the software. The first thing I did to create my piece was I created a sketch using the Sketch Command, then using the Rectangle Tool I created a square:
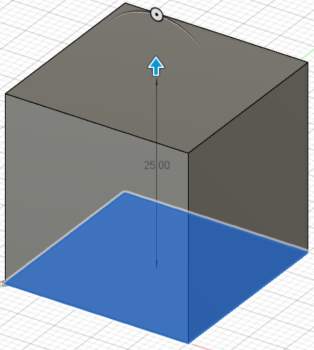
I then extruded the square using the the Extrude Tool to turn the square into a box.
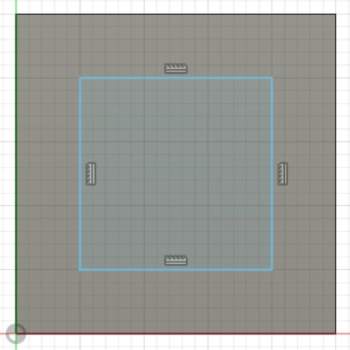
I then created a smaller square on each face of the box using the Rectangle Tool:
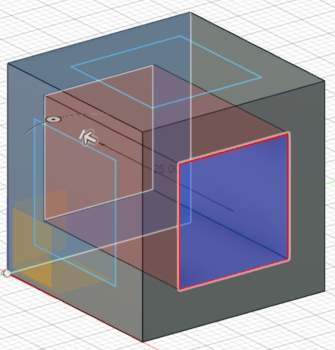
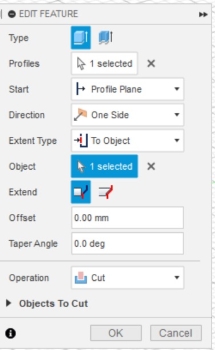
I then cut the squares from one side of the box to the other using the Extrude Tool and making it cut:
These are the settings I used for the cut:
I then created a sphere using the Sphere tool:
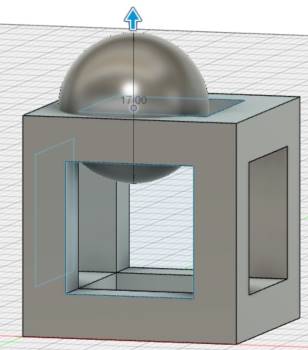
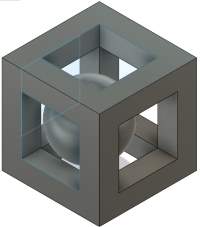
I played around with ball size and used the Move tool just trying to eyeball a ball big enough to not fall through the holes but small enough to where it can move around. This is what I ended with.
Prusa Slicer
For slicing I used the Prusa Slicer since that is what I am familiar with. All I did was I uploaded the file from Fusion 360. Then click slice.
Printing
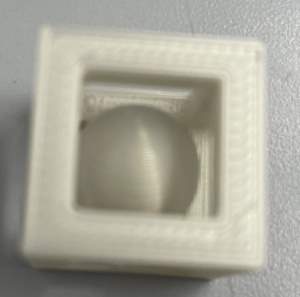
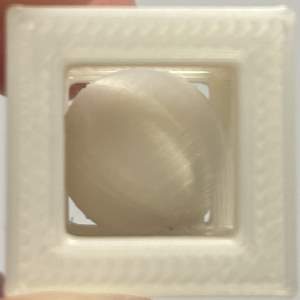
To accese the printer used ‘’‘pm8.local’‘’. I then cleaned off the print bed using a paper towel and a few drops of rubbing alcohol. I then clikced print on the website. Everything worked perfectly and this is what I finished with:
3D Scanning
Kiri
For Scanning I used the Kiri Engine app. To create a scan using the app you can either take tons of photos of the object or take a video where Kiri will take images for you. To get a good scan you what to have good lighting and have the object you want to scan on a contrasting background and you dont want the object to be reflecting any light because that messes up the can. While your takeing the photos or video you either want to slowly move around the object while the object stays in place or move the object slowly while the phone stays in place, I think the first option is easier. For best results I’d recommend maxing out the amount of photos you use. Once you done with that hit the arrow in the bottom left and a page with settings should show up. These are the settings I choose:
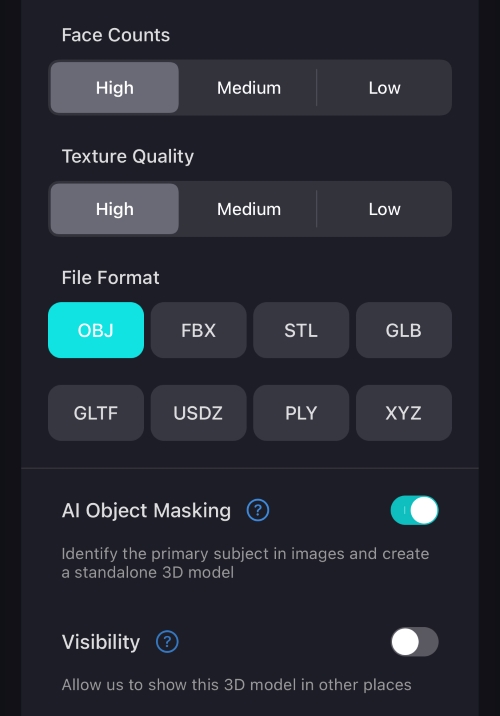
I selected AI Object Masking because I found it made the best render and it elemintated all of the background. After it loaded the object, to get it on your computor you can either export it from your phone or open Kiri in google on your computor and download your modle there.
Prusa Slicer
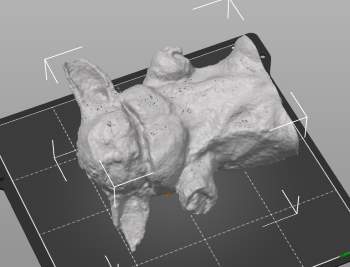
When I imported the OBJ into the Pursia Slicer it was sideways:
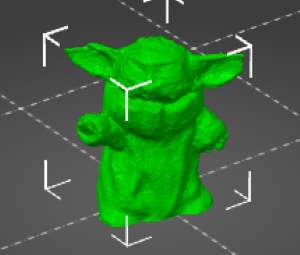
I had to rotate the y under object manipulation to stand it u straight. I also thought it was to big, and I could tell that it would of been a very long print so I sized it down 30 percent and this is what I got:
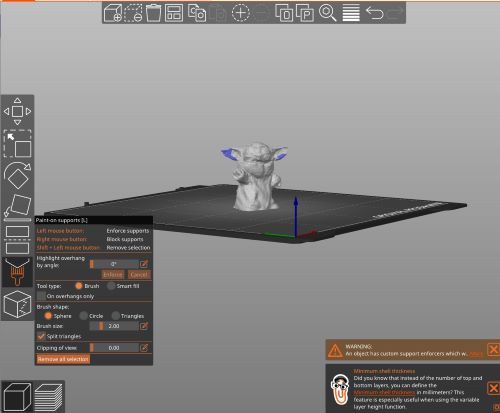
I then painted on supports, changed perimeters to 4, and changed the layer density of the layers around the head and neck just in case. I also decided to add a raft to the print just in case. Chaning the number of perimeters from 2 to 4 makes the walls of the print thicker which adds time to the print but make it more stable:

Here you can see the paint on supports, they are the blue on the baby yoda. I did this so that I could add supports only to the ears and not worry about the slicer adding supports everywhere:
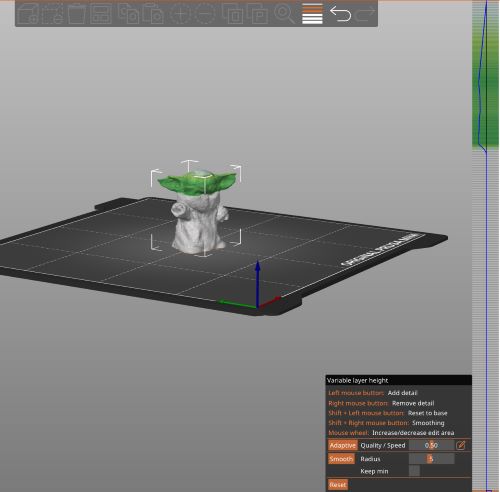
Finally I noticed the the scan didn’t do a great job on the head and ears and left almost holes there so I made the head layers extra thick to make sure they would print well:
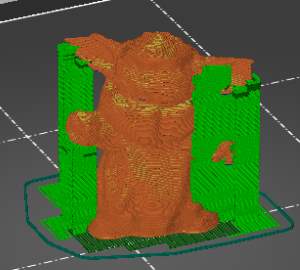
Heres what the g-code looks like:
The I exported the g-code and opened it in pm4.local.
Printing the Scan
After opening the file in pm4.local, I wiped rubbing alchol on the heat bed off to make sure it was clean and clicked print. Heres what the print looked like on the print bed:
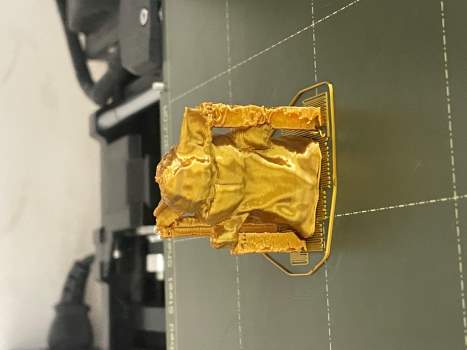
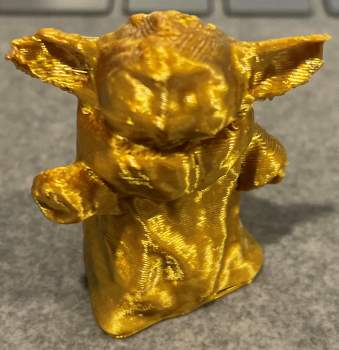
Here is what it looked like after post processing:
What I Learned
This week I learned how to scan a 3d object and how to export the model as an OBJ. I also learned some of the features of the Prusa Slicer like paint on supports. I will definitely use 3d printing in my final project as well as what I learned in the Prusa Slicer.