2. Computer Aided Design
This week I worked on using multiple different types of CAD softwares. Two of them being 2d, one vector and one raster, and two 3d.
Files for the Weak
Cuttle. GIMP FreeCad Fusion360
Cuttle
For my vector software I choose to work with Cuttle because I have already worked with Corel Draw. I used the web editor for Cuttle because I didn’t want to pay for a subscription incase I didn’t like Cuttle. I followed these two tutorials one and two. I got both of these off of the Cuttle website. I created a single cell of a dodecahedron candle holder.
What I Did
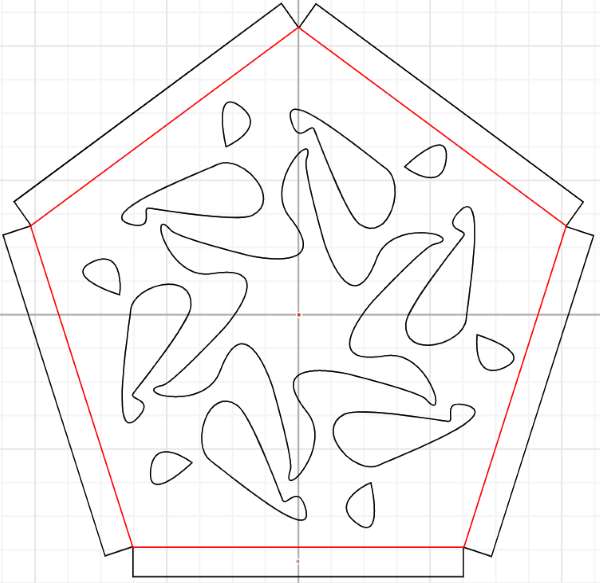
I first dragged over a a polygon and kept it as pentagon and changed the size. Then I dragged over a rectangle and I used the Geometry Snapping tool to snap it to a side of the pentagon and then resized it. I then clicked the rectangle and went Modify>Rotaiotnal Repeat and copied it on ever side of the pentagon. After using the Rotational Repeat I grouped everything or as Cuttles calls it Boolean Union. I then I then copied the pentagon layer and moved it out from underneath the group and changed it to red to be score lines. You can see the different groups here:

I then unselected the Geometry Snapping tool and used the Pen tool to create a random curved shape by clicking and dragging with the Pen tool. I used the Rotational Repeat to repeat it around the center of the polygon and for some reason the lines stuck together and created a connected shape:

I then created two more unique shapes using the Pen and Rotational Repeat method made this:
Things I Liked About Cuttle
I liked that I could drag and drop shapes. I liked how features snapped together using the Geometry Snapping tool. I liked the Rotational Repeat tool.
Things I Didn’t Like About Cuttle
I don’t like the controls too much. It was a little confusing on how to acces sertain commands because you have to select the object and then see if the command works.
Overall Thoughts On Cuttle
I think its a good software for something quick and simple but I think i’ll stick with Corel Draw for a more compelex vector experiance.
GIMP
For my raster based software I choose to use GIMP. I downloaded the GIMP version 2.10.32 directly onto windows. I followed these two tutorials, one and two.
What I did
GIMP Tutorial 1
The first tutorial was all about image manipulation. The tutorial taught me how to scale an image, which allowed me to change the size, resolution and quality. The scale image tool also used a chain feature that made it so if you changed the diamention of the width the height would update so that the image didn’t distort. It also taught me how to change the file size of my image, when you go to export the file there is a slider that changes the quality of the image and it shows you how big the file is when you change the quality before you save it. It also showed me how to crop an image and it showed me some of the features of the transform menu.
GIMP Tutorial 2
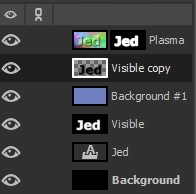
In this tutorial I created a name plate that lookes elivated. I created the image using different layers and and many tools in GIMP. The first thing I did was I created a blank black image. Then I created a visual layer and then uesed the text tool to create my name. I used the Gaussian Blur to add blur, Filers>Blur>Gaussian Blur. Then I created a new layer that I add a PLasma Filter too by going Filters>Render>Noise>Plasma. I then used the Bump Map tool to add my name to the Plasma layer by combining the layer with my name to the Plasma layer. I then added a Layer Mask that shared the same layer with the Plasma layer. I then copied and pasted the layer with my name and pasted it onto the Mask Layer. I then added a layer under the Plasma layer and colored it. I then Adjusted Color Levels to clean up the edges. In the Adjust Color Levels menue I moved the White point slider to the left. To add a shadow I duplicated the first layer I added my name to and moved it right under the Plasma layer. This is what my layer menu looked like.
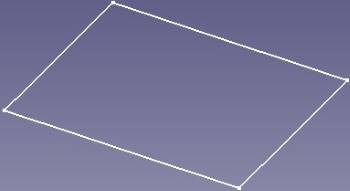
 I then inverted the new layers colors, then to give it a tranparent background I did Layer>Trasparency>Color to Alpha. I then used Tools>Trasnform Tools> Move to move the trasparent layer over to create a shadow. This is what it looked like at the end:

Things I Liked About GIMP
One thing I liked was how many features and tools there were on GIMP. I also liked how easy it was to manipulate an image.
Things I Didn’t Like About GIMP
There was a lot that I didn’t like. Some of the menus were confusing. Created an image on GIMP was challenging and a struggle. Even when you found what tool and you wanted to use a tool there was a high chance the menu for that tool was very confusing like the Bump Map menu:
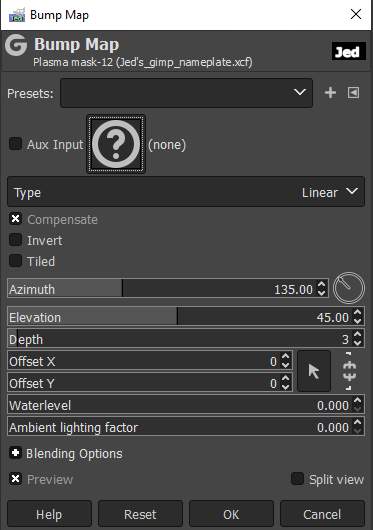
It doesn’t exactly tell you what everything does and you have to figure a lot of it out on your own. Like the Aux Input is the layer you want to Bump and even when I seleted it sometimes the preview didn’t always work so I din’t know if I was doing it right.
Overall Thoughts On GIMP
I don’t like it for creating an image but I do like it for editing an image.
Free CAD
Since I already knew Fusion 360 I desided to try out Free CAD. I followed this tutorial to learn the basics of FreeCAD.
What I Did
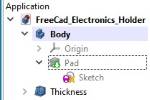
In FreeCAD I created an Electronics Holder for my final project.
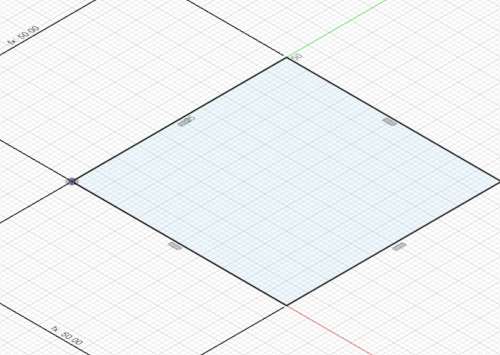
The first thing I did was I created a rectangular sketch using the Sketcher app.
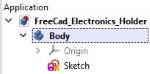
I then tried to use the Pad tool in the Part Design app but it told me I needed to create a body first so I did that.

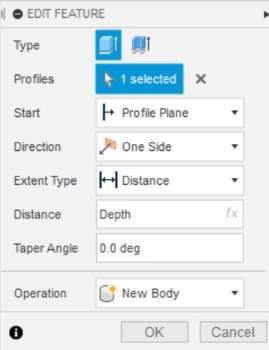
I tried again to use the Pad tool but it said the same thing so then I moved the sketch under the body and it worked.
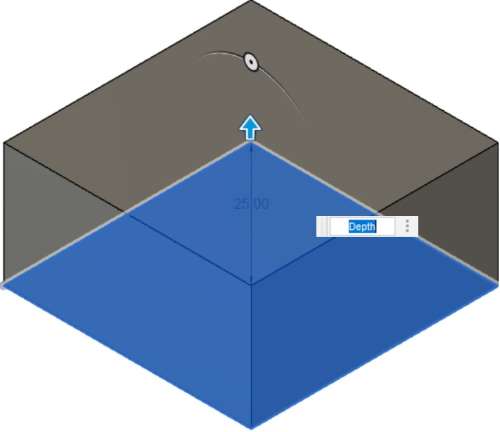
That fixed the problem and then it opened the Pad menu:
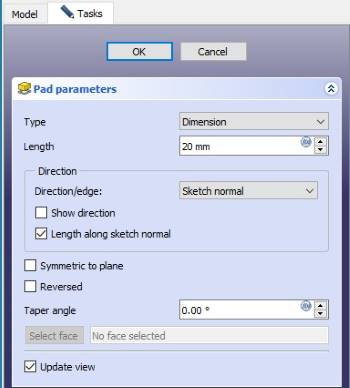
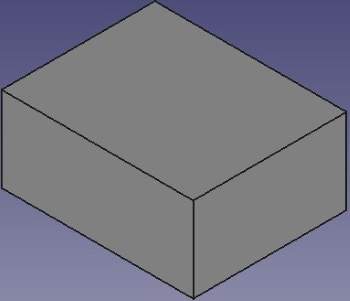
The Pad command acts like an extrude so this is what my file looked like after the Pad tool:
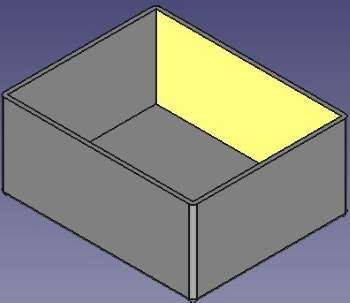
I then used the thickness tool in the Part Design app to shell the rectangle. This is what my file and the menu looked like after that.
What I Though About Free CAD
What I Liked
I liked that almost everyone can contribute to Free CAD and can give it extra features.
What I Didn’t Like
I don’t like how everything is split up between dropdown menu for the apps. It was hard trying to find exactly what I needed because I had to check each app and then see if it was a function there.
Overall Thoughts on Free CAD
It’s good for a Free CAD software, but I will be sticking with Fusion 360.
Fusion 360
Leading up to Fab Academy and just at Latin I have been working with Fusion 360 a lot so it’s a software I’m comfertable with. I didn’t use any tutorial with Fusion.
What I did
I created a basic electronics holder for my Final Project. The first thing I did was I created a sketch and using the Rectangle tool I added a rectangle onto the sketch.
I then used the Extrude tool the rectangle to give it a 3d shape. These were the settings I used:
And this is what the extrude looked like.
I then used the Shell tool to hollow the box out.
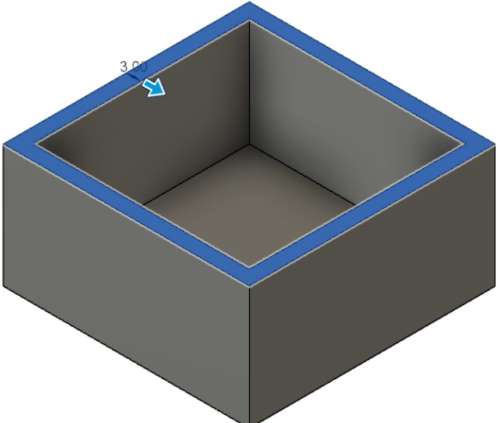
I then created a sketch on the side of the box. I then used the Rectangle tool to add a rectangle on the side of the box.
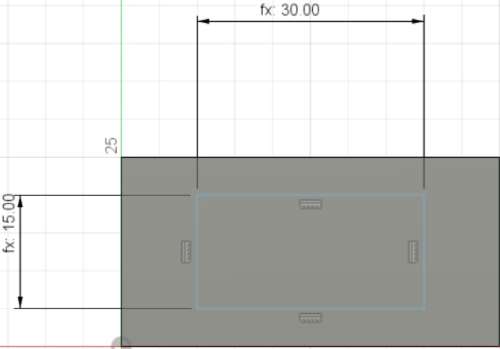
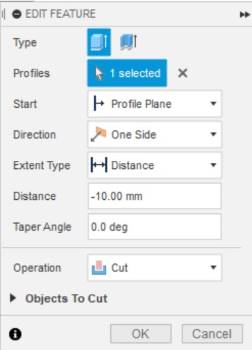
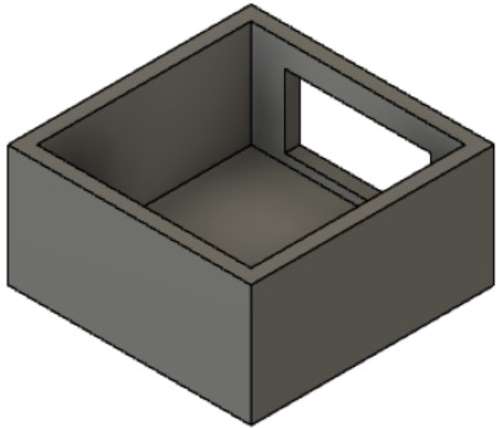
I then used the Extrude tool to cut a hole into the box. These are teh settings I used and the out come.

I then went back in the timeline and constried as much as I could. Then using the Search tool I found the Parameters tool and created custom user Parameters so that I could adjust the size of any part of the file. Here are my Parameters:

Here is the Final Product:
Issues Week 2
File Upload
One thing I had an issue with was uploading my file to my site. I added it to my “week02.md” the same way I add images by dragging it over to my code. The problem was I assumed it was the same as images where I technically don’t need to lable images, so I removed the red lable from the code and left the brackets and it didn’t work. I asked Dr. Taylor and he showed me Aaron Logan’s site code. Where I leared files act similar to hyperlinks.
What I Learned
This week I learned how to use multiple different software that have different uses and that are different from what i’m used to. Each software I used has uses that are easier to use in its own software so I think I might use 1 or 2 of these for my final project.