3D SCANNING AND PRINTING
Individual Assignment:
1- Design and 3D print an object (small, few cm3, limited by printer time) that could not be made subtractively
2- 3D scan an object (and optionally print it)
Group assignment:
3- Test the design rules for your 3D printer(s)
Link
1- Design and 3D print an object (small, few cm3, limited by printer time) that could not be made subtractively
For this week i already knew what 3D Printers were capable of, but this assignment have been a little bit on eye opener since i never made an model that cannot be made with 7-axis or 5-axis cnc machine. I had many iterations for the design and to be frank not all i didn't completely understand how to do it but it turned out fine in the end.
- Initial design
First i had an idea of tree (i Know it's ugly) and i thought 2-axis cnc machines(i thought task was only about 2-axis machines) wouldn't be able to make this shape i was right until Eng. Hashim Pointed out that i have to design something that could not be made substractively with any machine
Then i tried to modify the design by changing the sizes of elements and angles and it still wouldn't be able to satisfy the requirment, then i knew there was this ball inside a box that could only be made using 3d Printers.
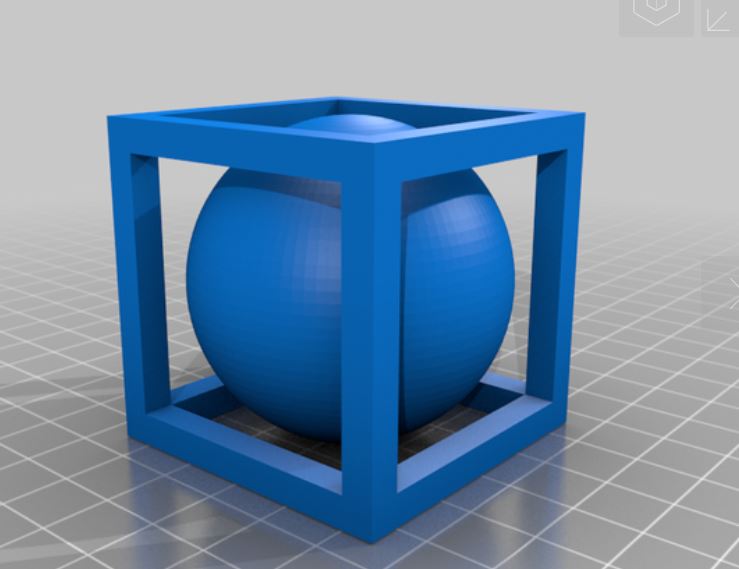
Eng. Waleed inspired me by giving me an idea on trying to make something similar to the ball, he pointed out try to make the tree for example inside a box then you can see through it. I have to say that i have spent some time in this model to make it support free for 3d Printing, since i removed the tree "stalks" which would have made a lot of support material wasting time and material.
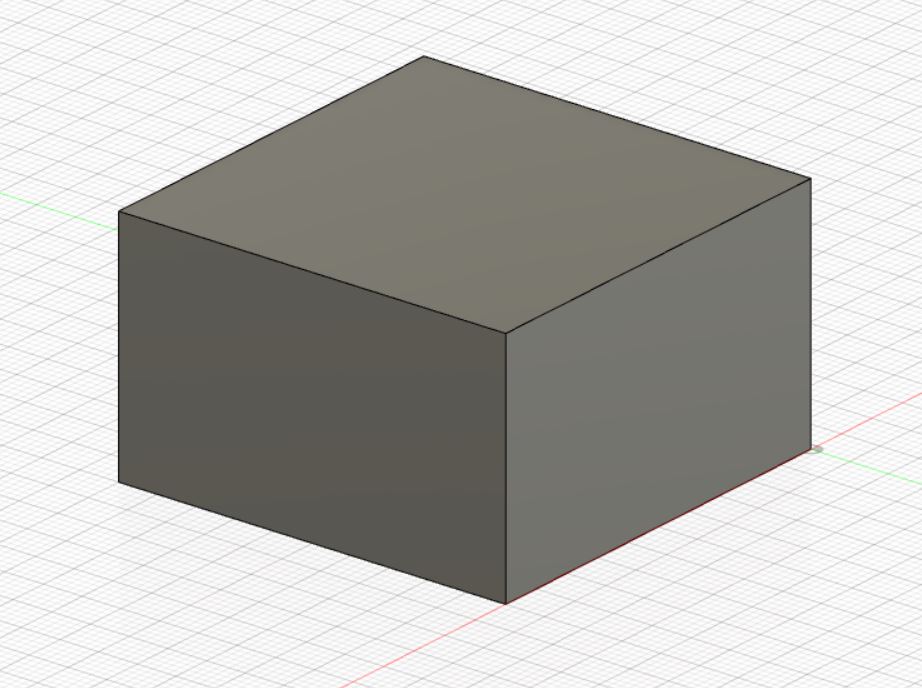
Design Steps in Fusion360
First on fusion360 I inserted a cube
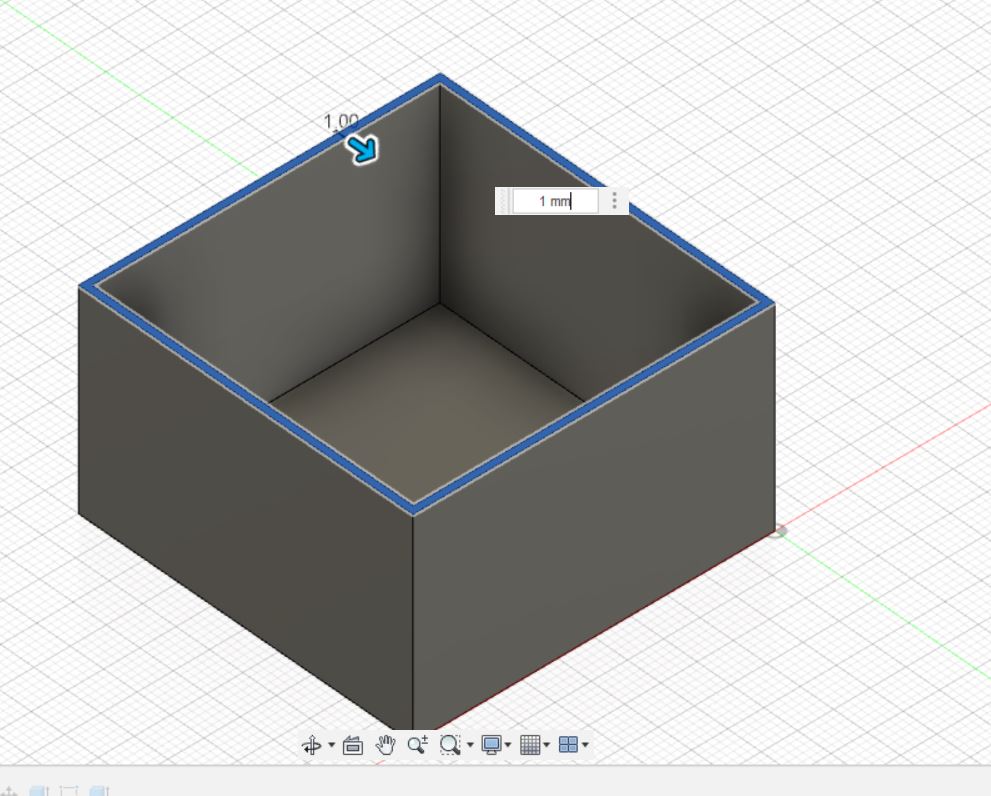
Then I used the shell command on the top surface with thickness of 1mm to give it the shape of a box.
After that i went to the front side of the cube and created a sketch with circle on top corner.
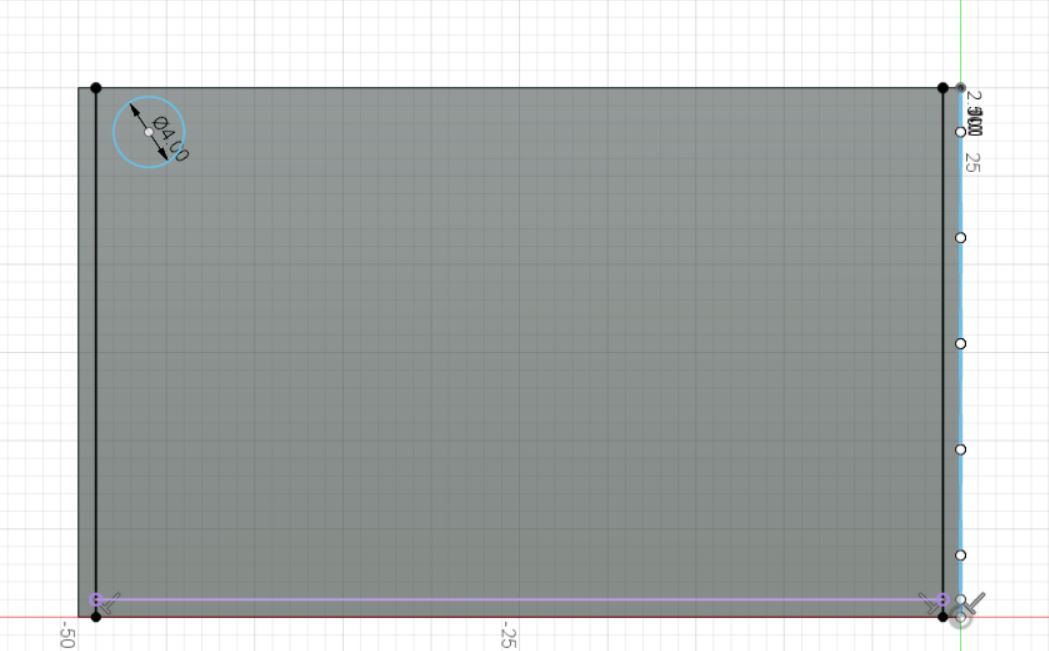
Then i used the recatangular array tool to create an array of circles which i will be using to make web like structure.
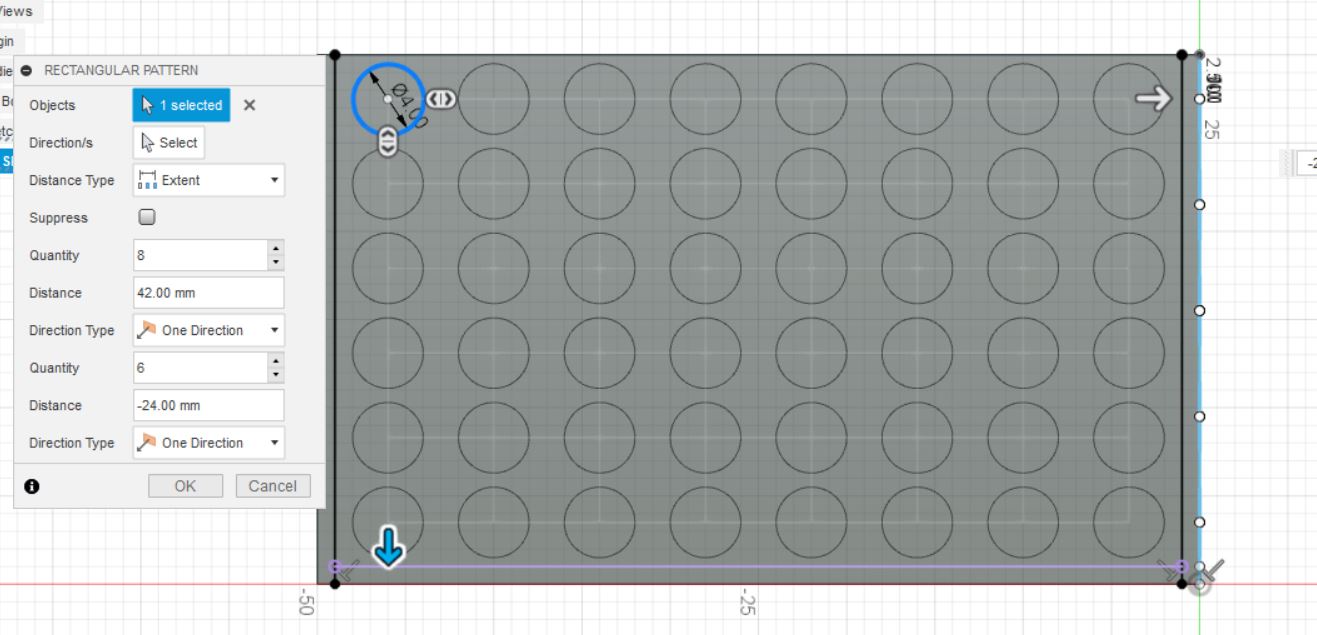
I selected the circles and extruded(set operation to cut) them to the end until i cut the cube from both sides
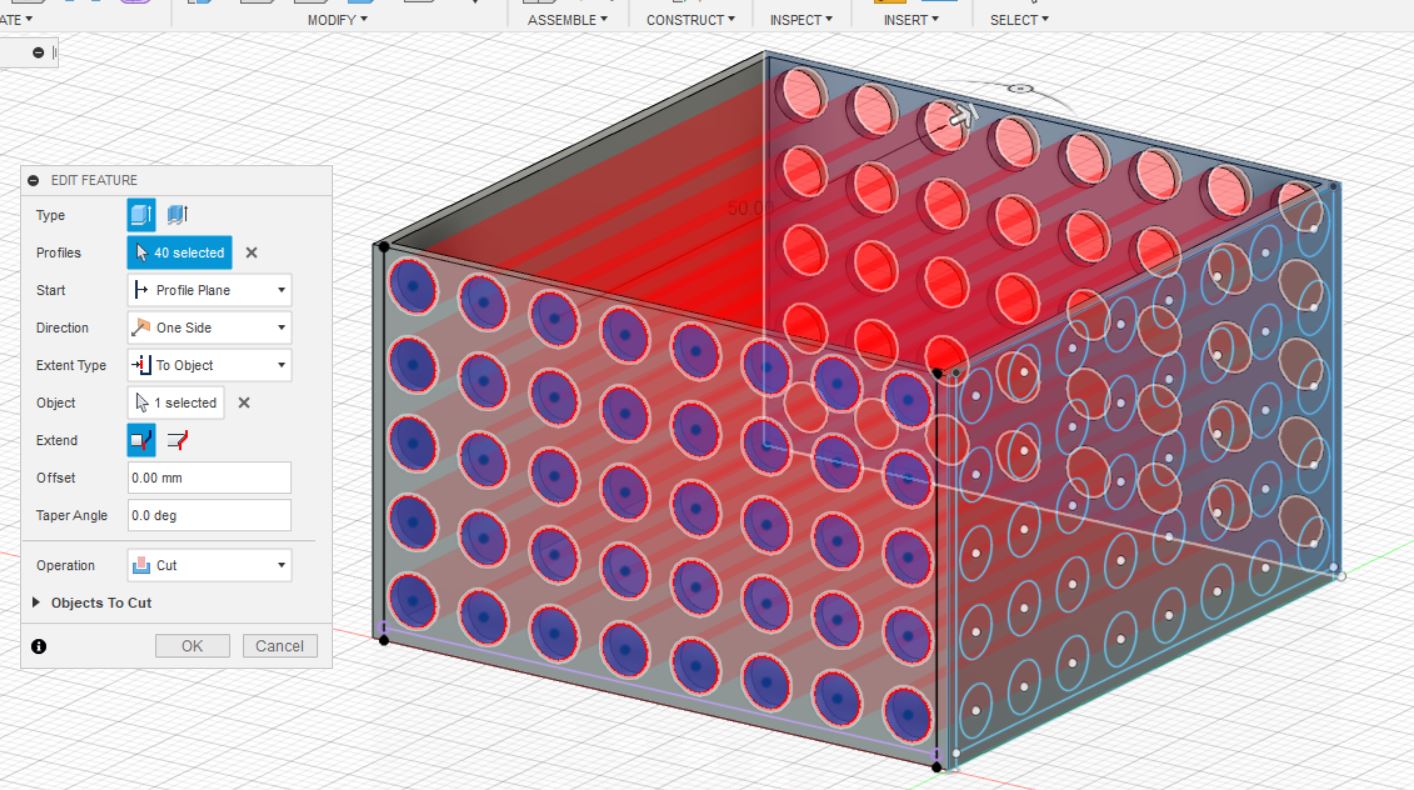
Here you can see the result of the extrusion
Then i repeated the same step for the other face and this is how it turned out.
I created a square at the bottom of the box
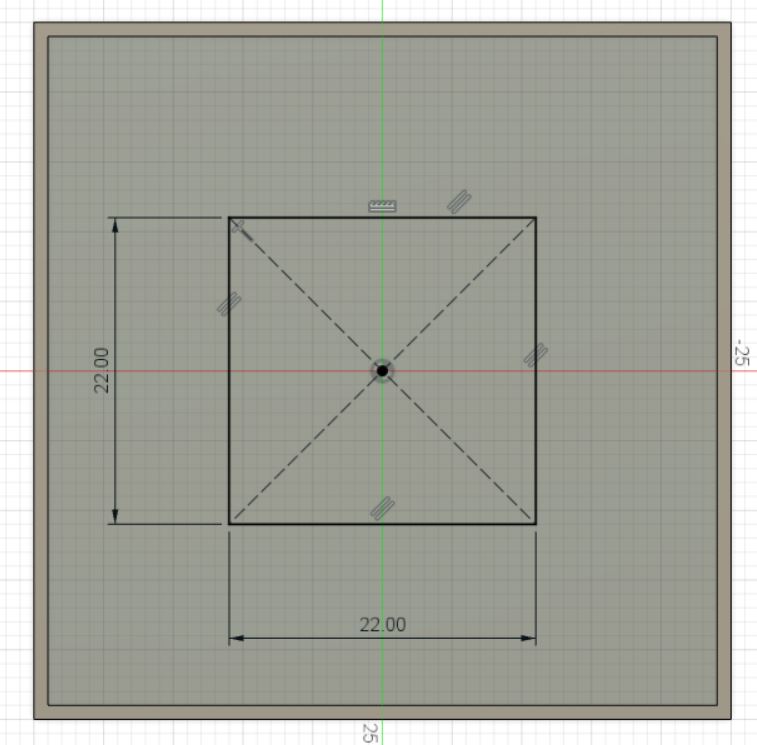
then i extruded it
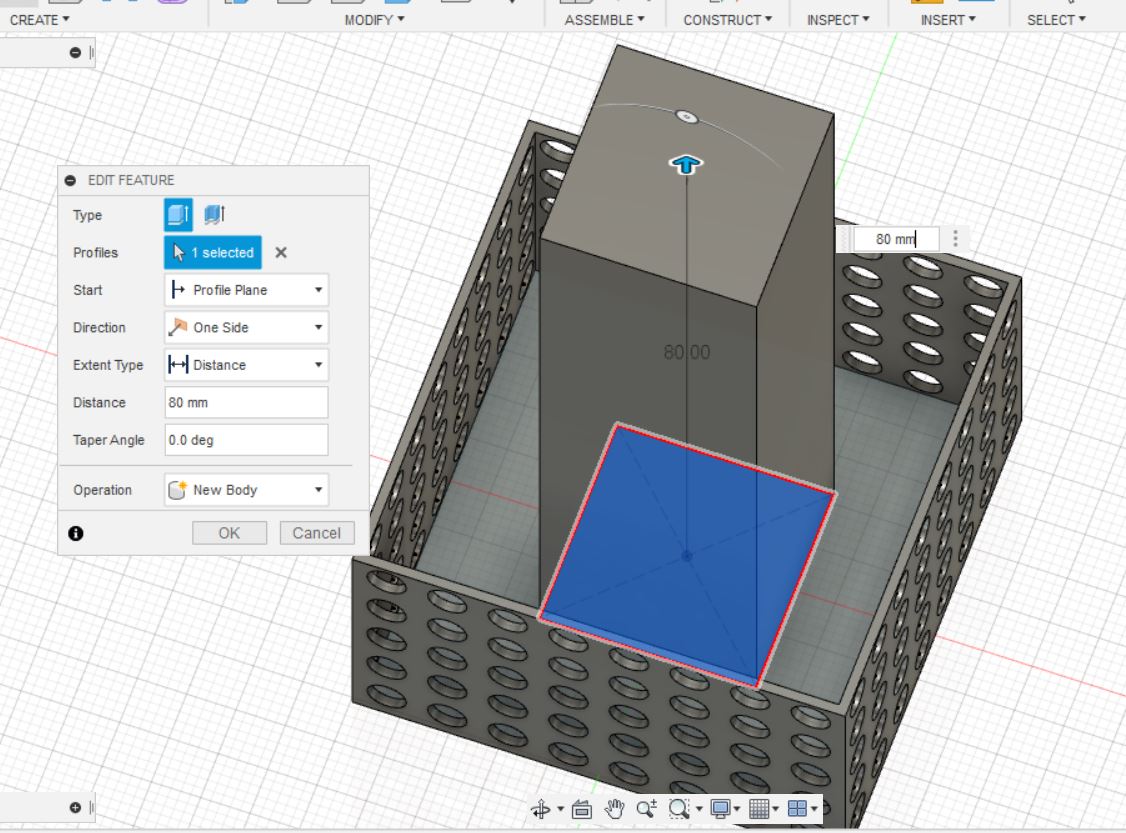
After that i went on the top face of the box and created a sketch there.
I drew a rectangle on the top face

Extruded the rectangle on the top face
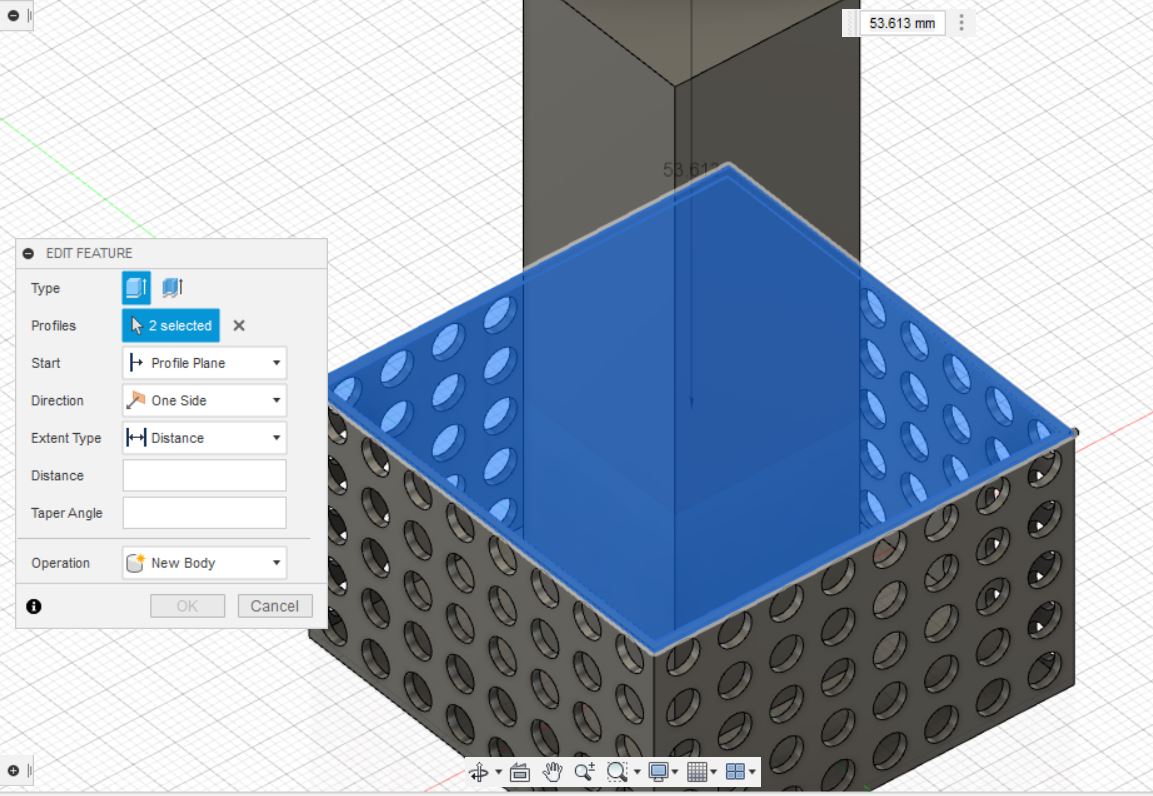
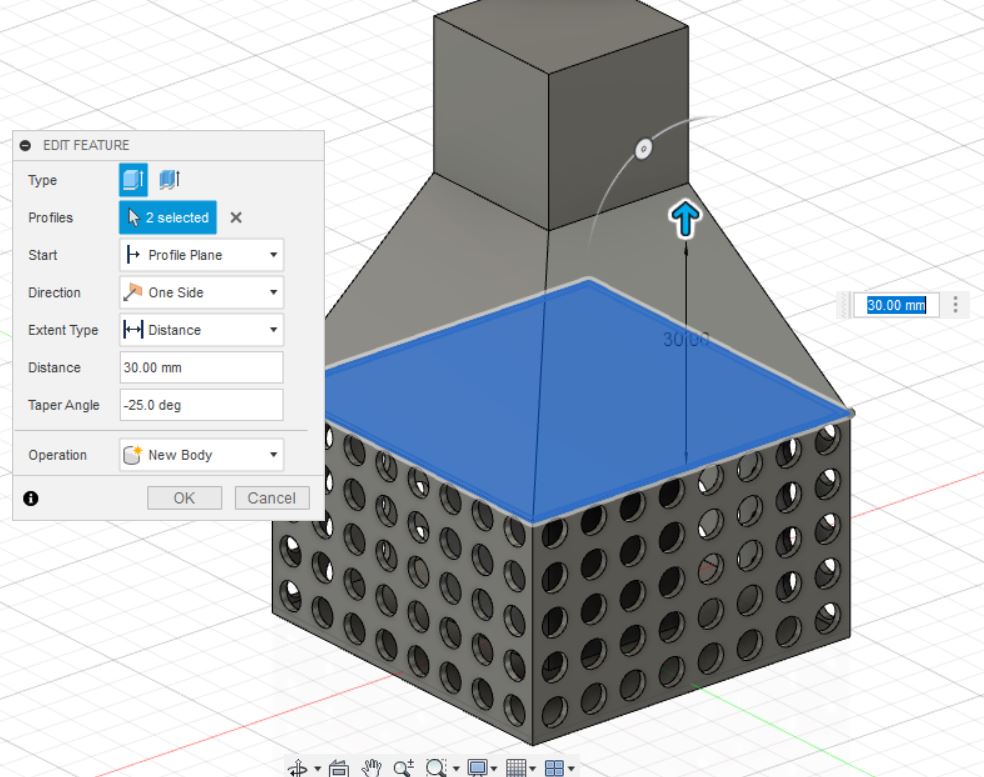
Set the the extrusion to angle until it touches the tall sqaure
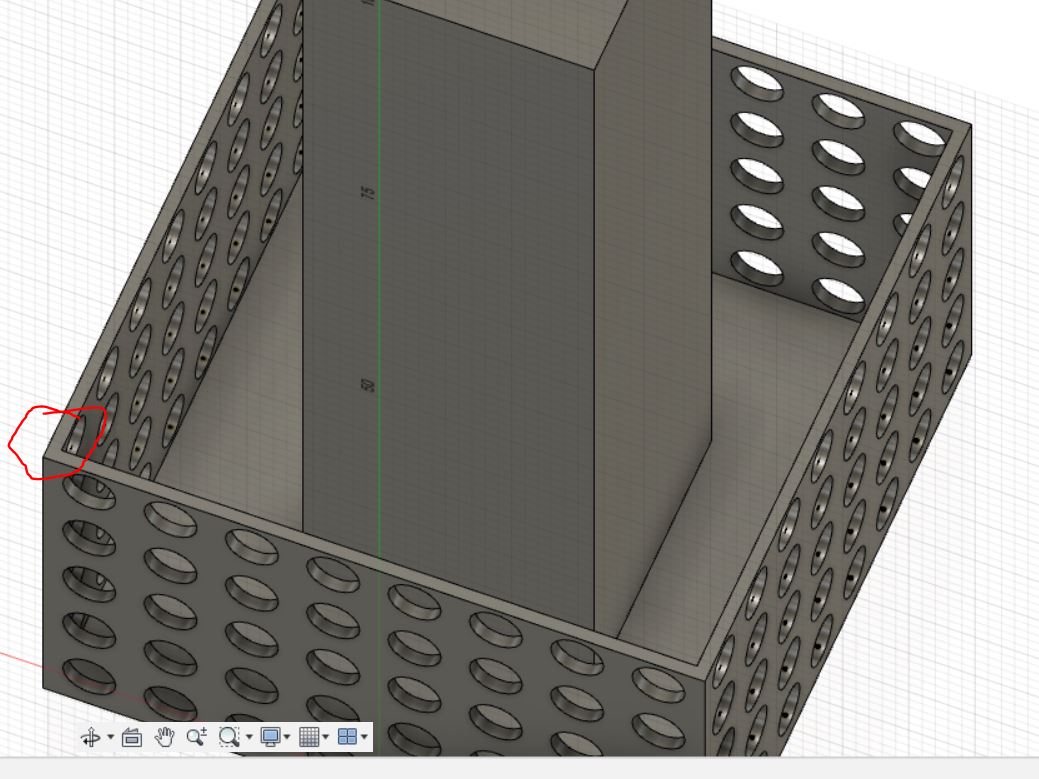
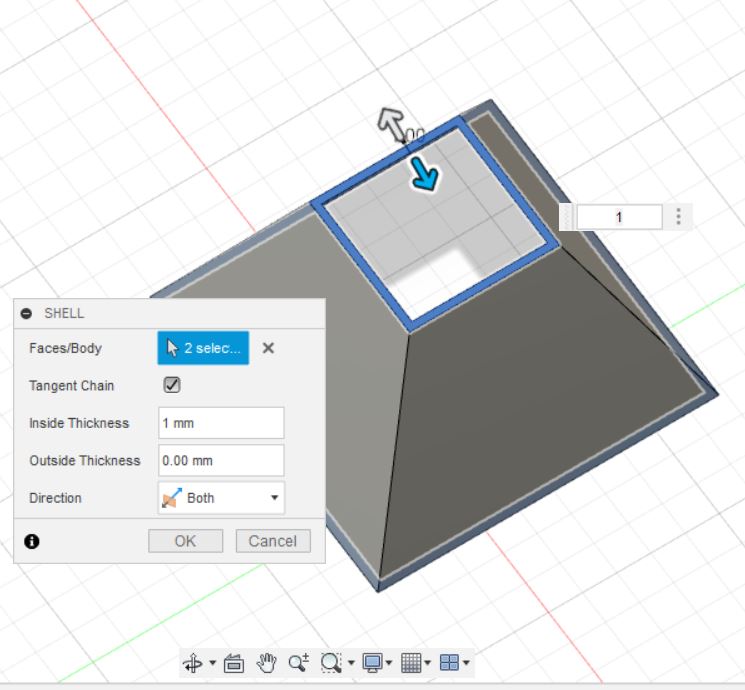
Last i used the shell command with 1mm on the new created pyramid like body and make sure on that the direction is set to both.
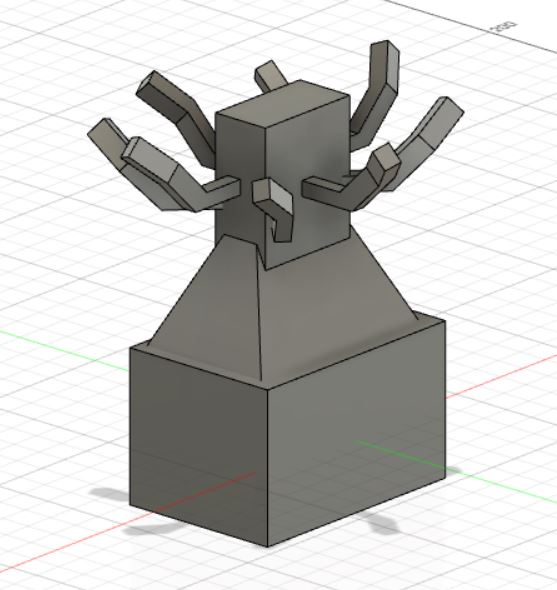
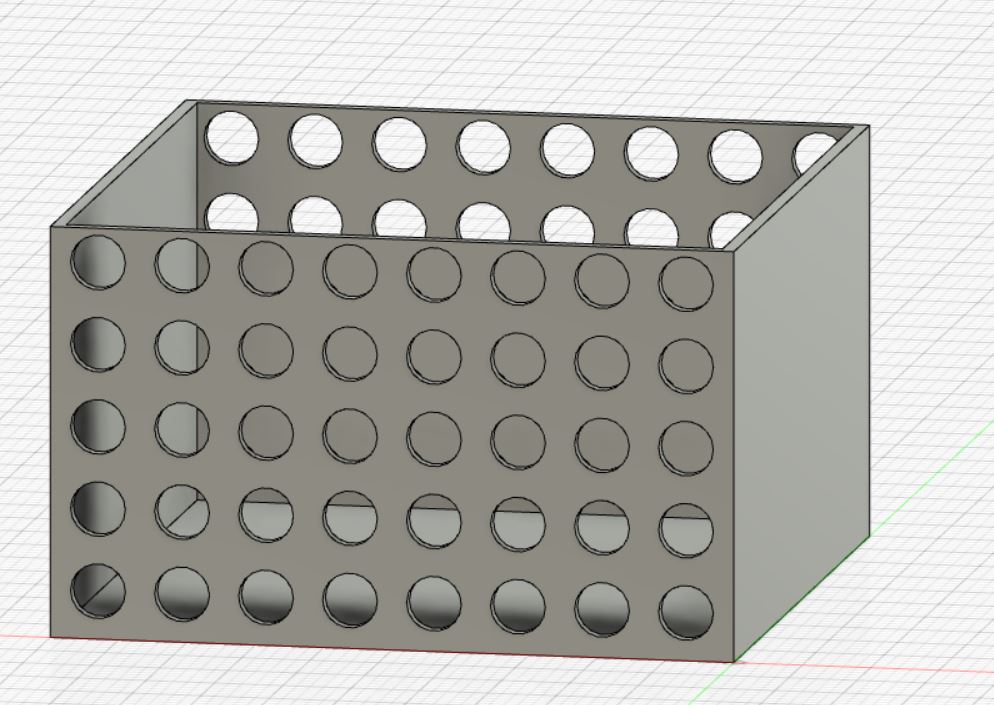
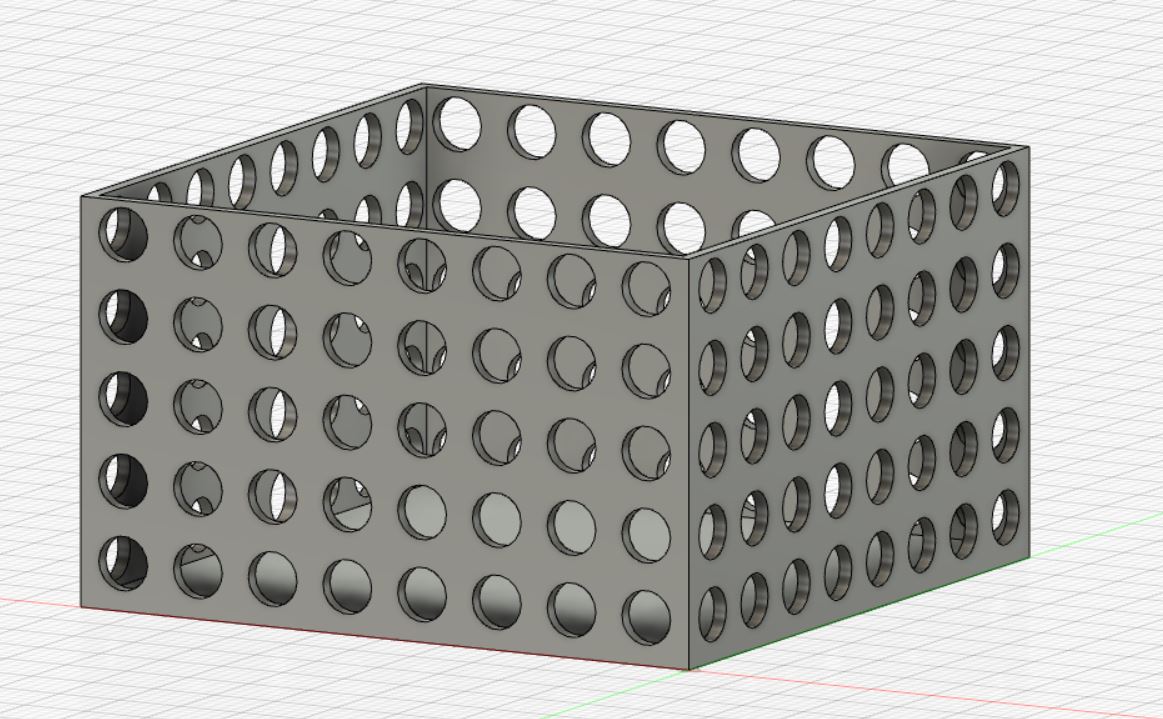
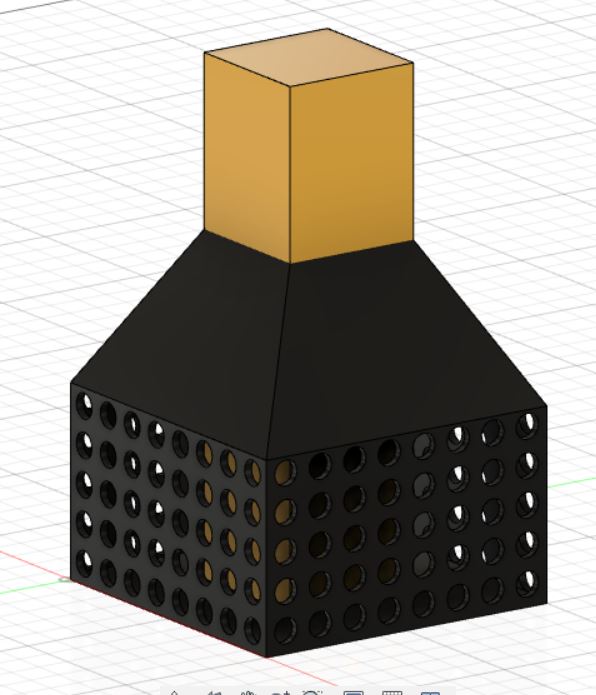
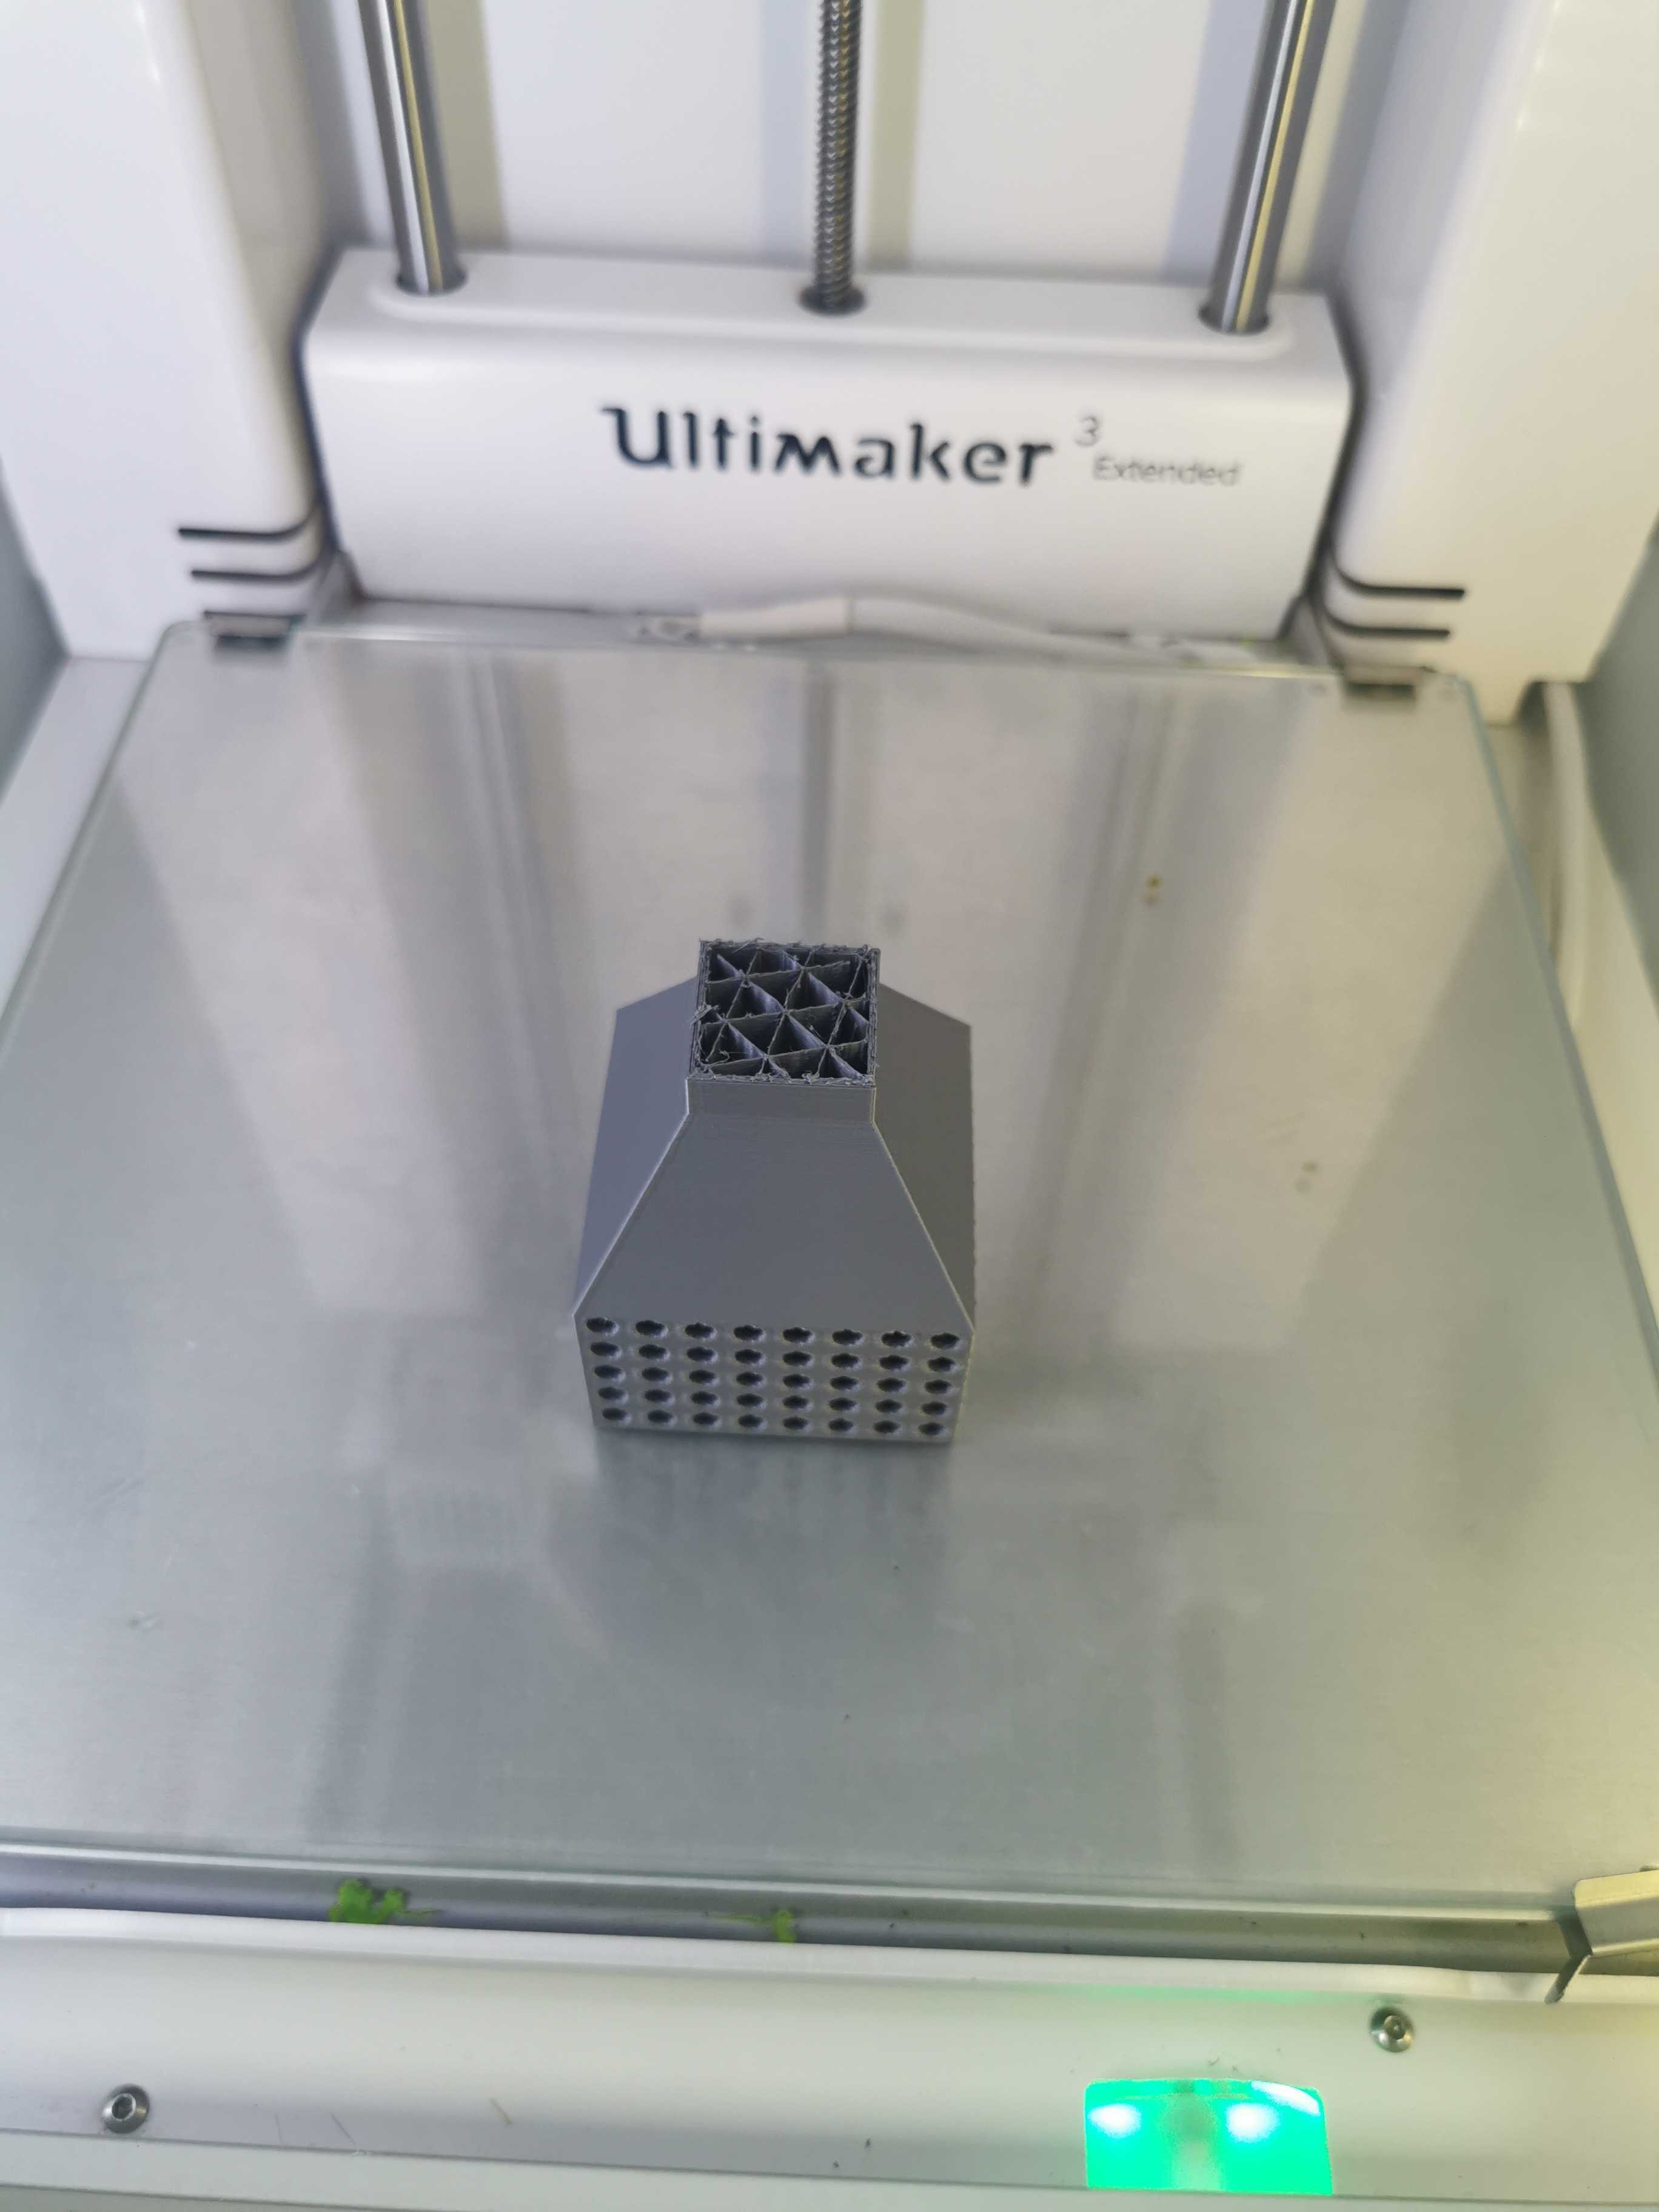
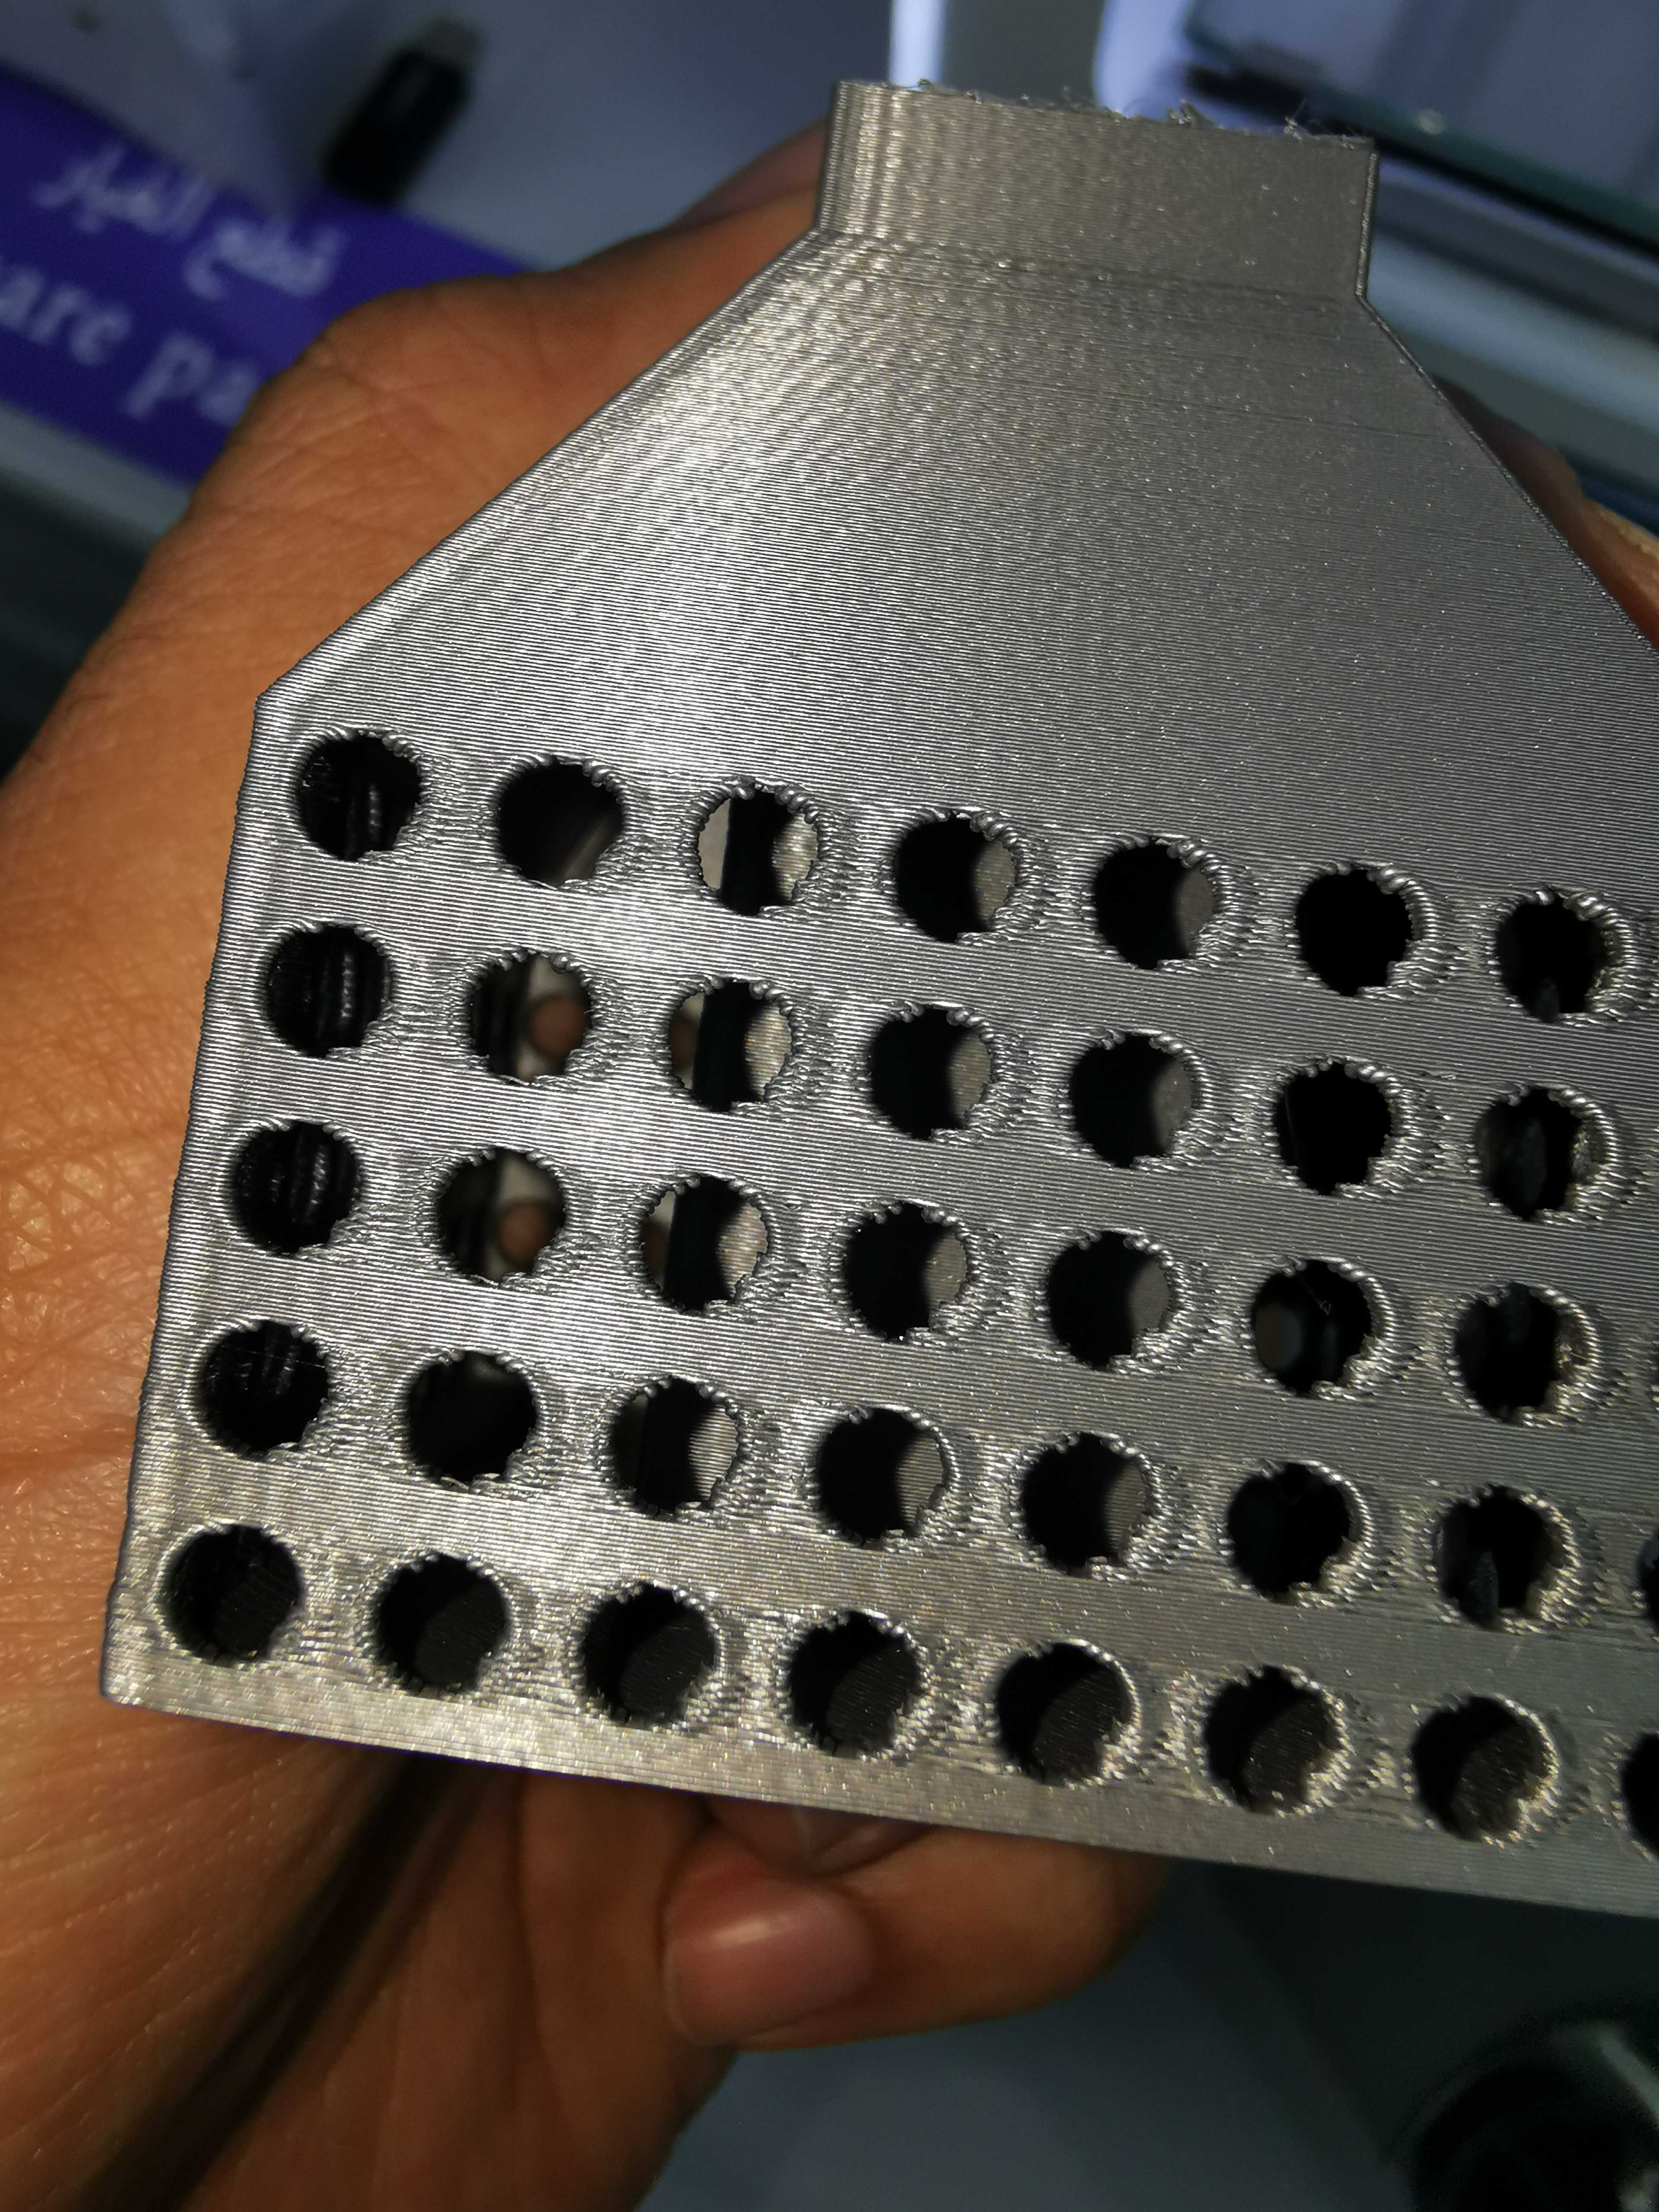
- The Final Design
Here are the Printing Results
2- 3D scan an object (and optionally print it)
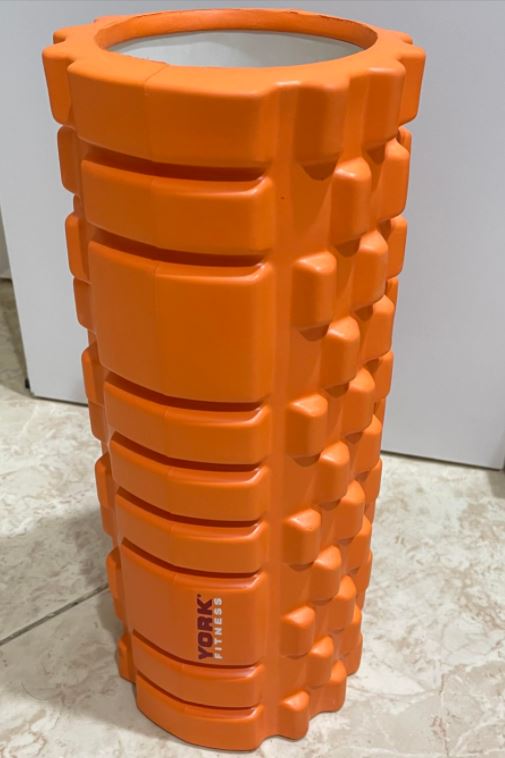
For the Scanning I used a software called polycam on my Iphone 12 Pro, I mentioning my phone model is because Apple included the Lidar in this model and Lidars help in calculating distances to get good results, The great thing about Polycam that it support both Lidar scanning and Photogrammetry. I tried to scan a Foam Roller which is an object used to massage muscles.
The Software was relatively easy to use just hit record and start. For the Lidar scanning here are the Results
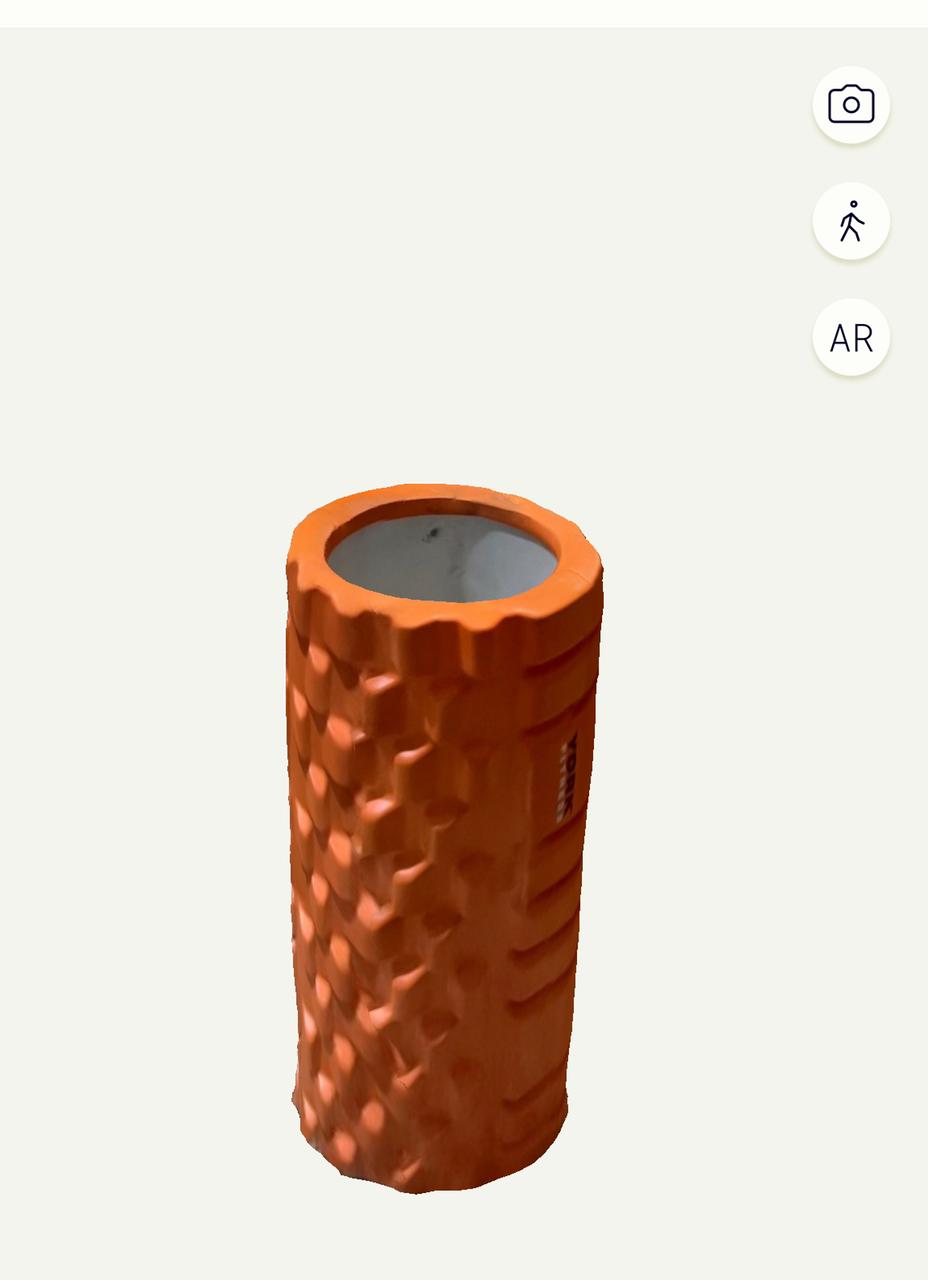
For the Photogrammetry Scan using the software, it took around 60 pictures then processed it to final result
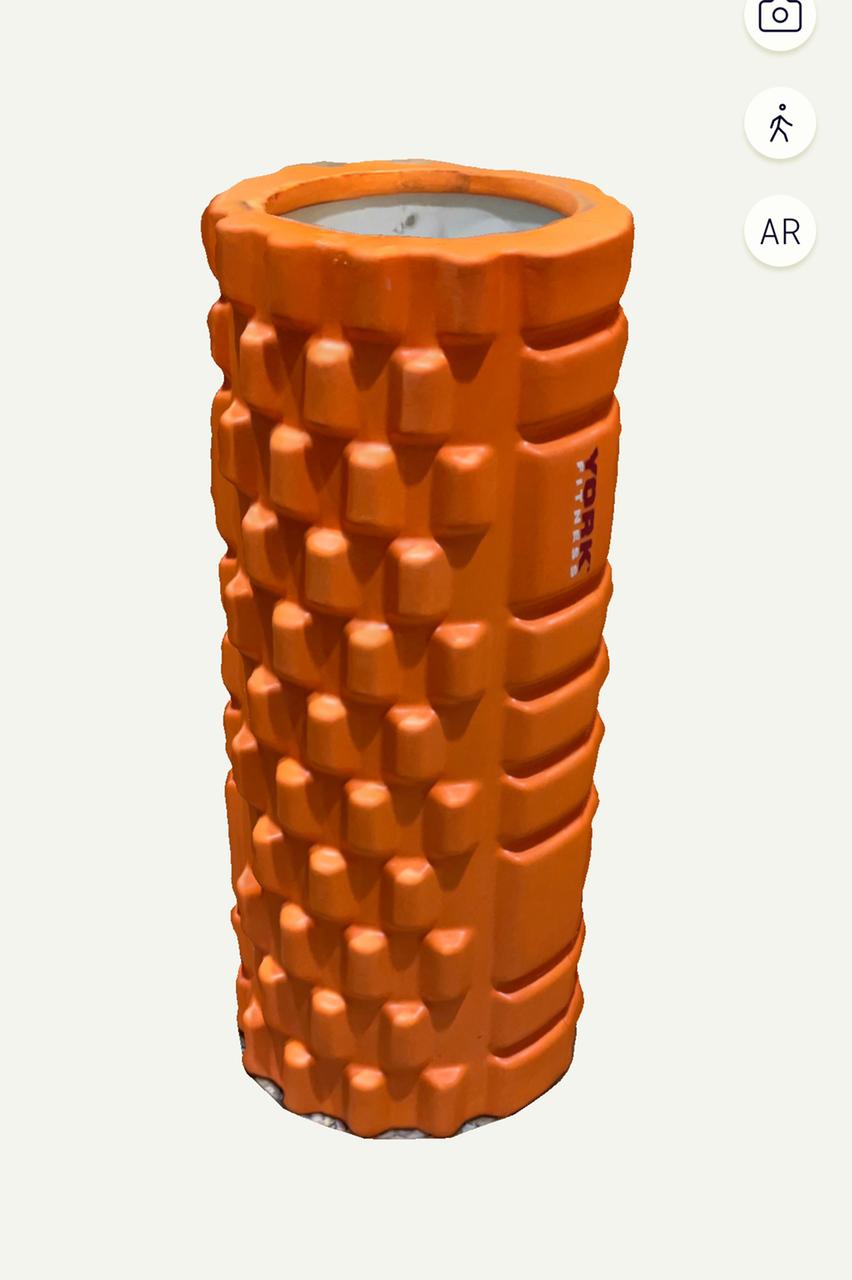
For the Results, I thought that the Lidar will have better results but i was wrong or maybe i needed more trials to get better results, i am sure that i could get better results if were using an automatic turntable or if i was keeping my distance constant through out the scan . Unfortunately the App dosen't allow to export files in the Free version.
3- Test the design rules for your 3D printer(s)
For this assignment, i think the goal is to find the optimum settings for what your printer can print through angles, overhangs, Bridges, Spaces, etc. For the assignment i have chosen to print the Angles and the Dimensions models.
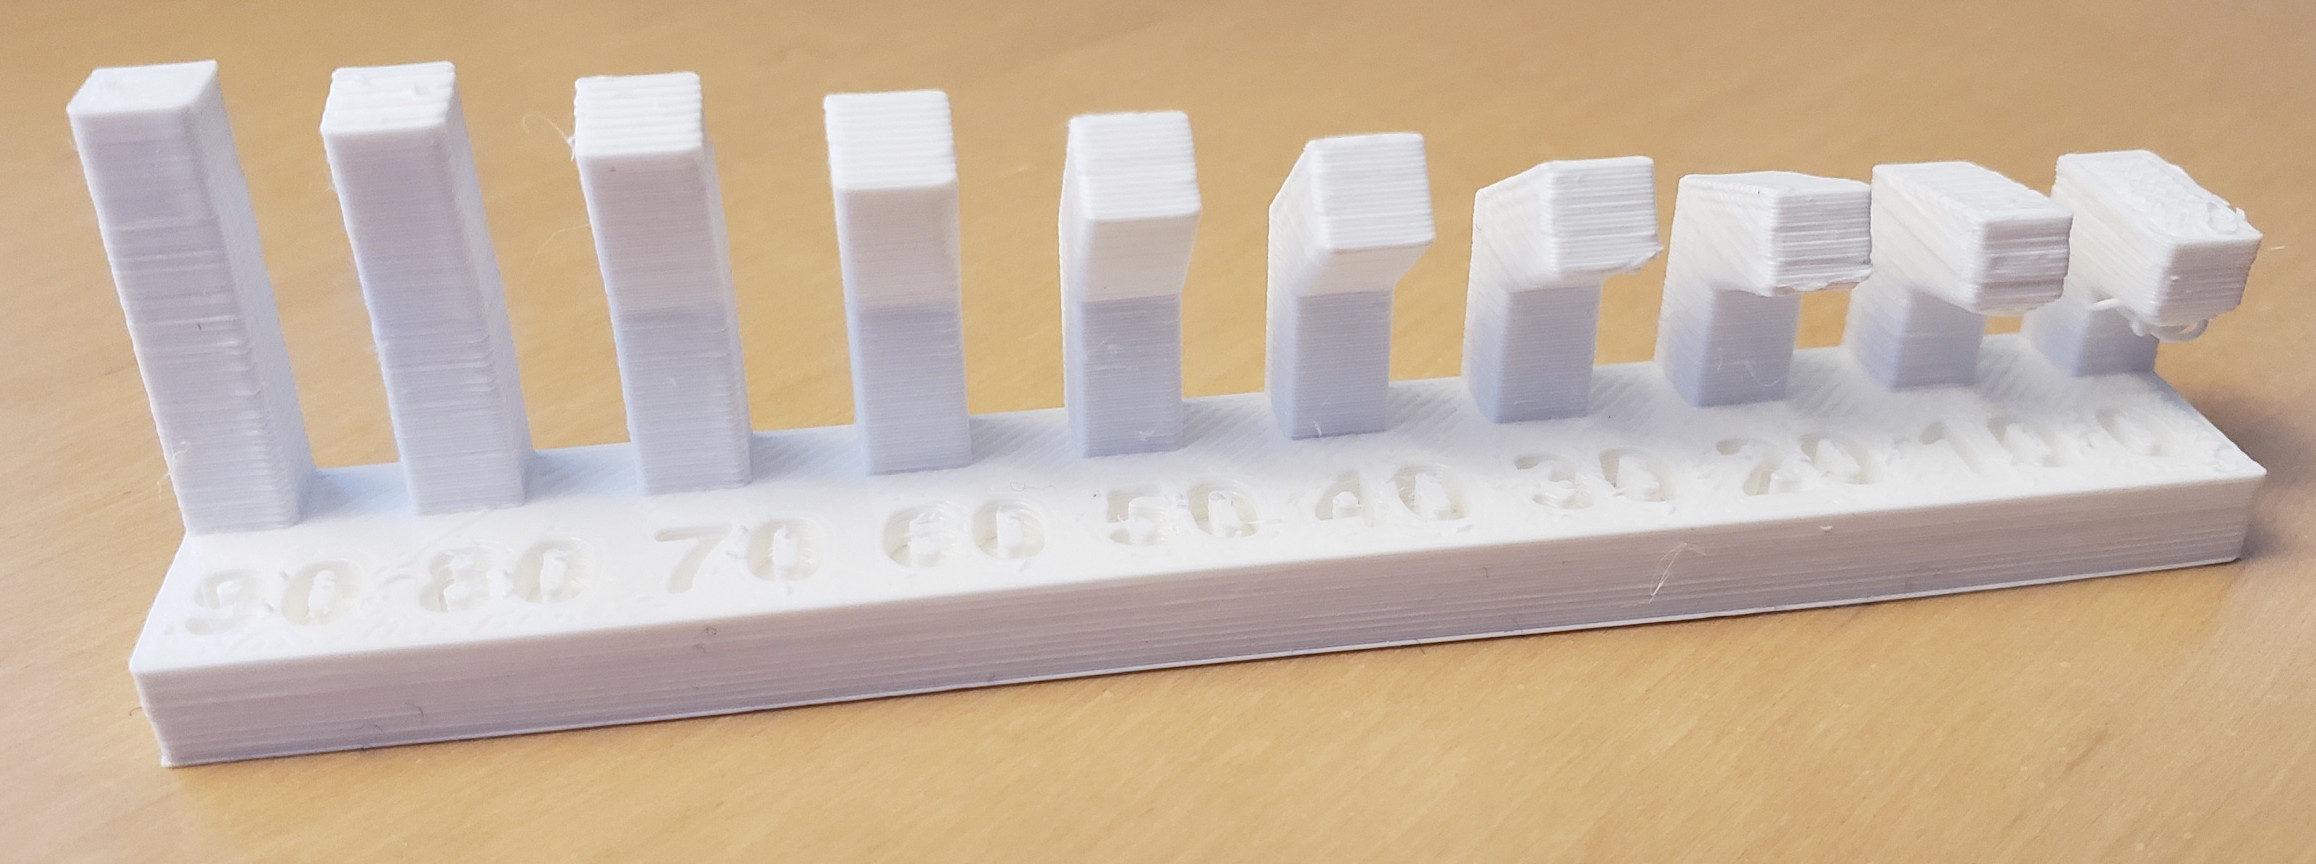
I know for a fact that ultimaker printers are very good compared to their chine se Competitors from my experience, also depending on the printer the more you fine tune the settings the better the results you will get, Knowing how ultimaker is a good printer, i only did two trials for each materials one try with 0.1mm layer height and the other is 0.2mm layer height.
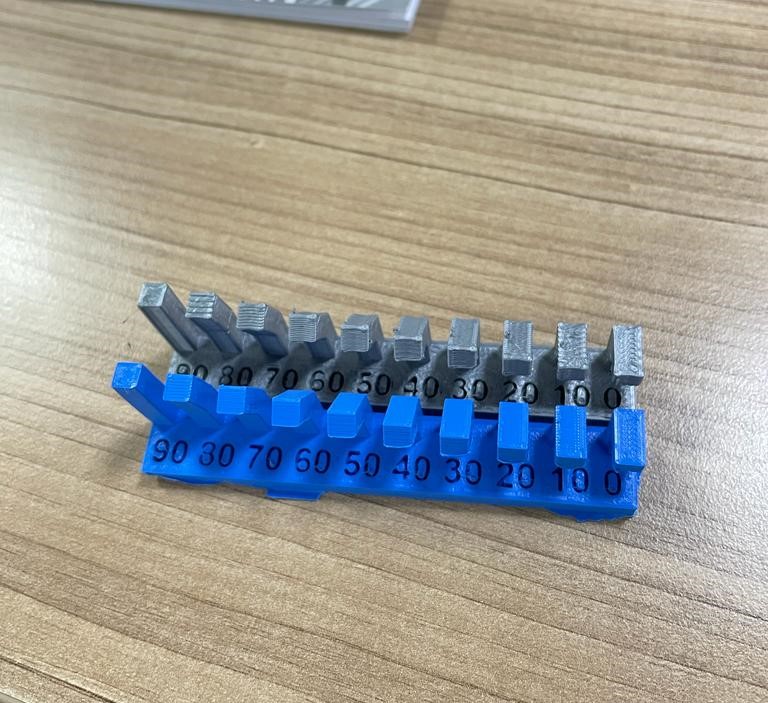
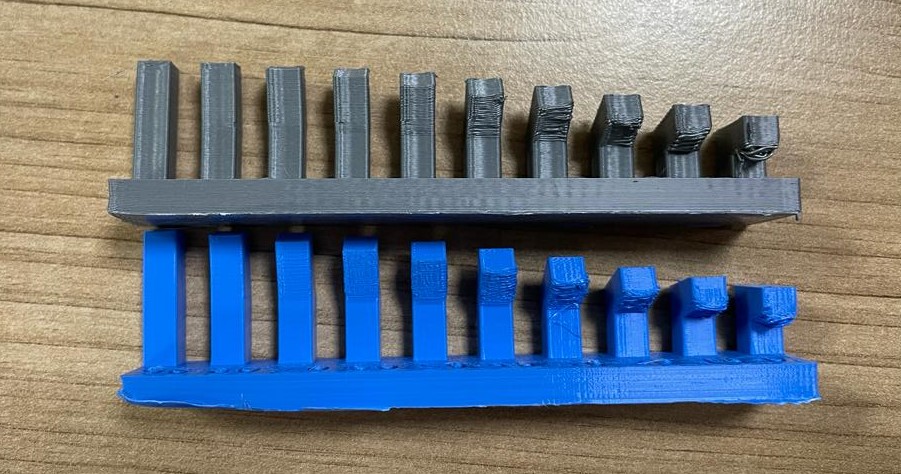
Angle Model
The Gray one is 0.2mm and the Blue one is 0.1mm in layer height respectively, if you focus on the blue one can see that there aren't 3d printed lines showing clearly as the gray one this because of the layer height.
Here we can see the effects of the layer height in detail as the angle increases more artifacts start to appear and the print begins to lose quality, from the picture i can say that if i had a model with that has angles from more than 50 degrees it's better to go with 0.1mm layer height to decrease the chance of print fail
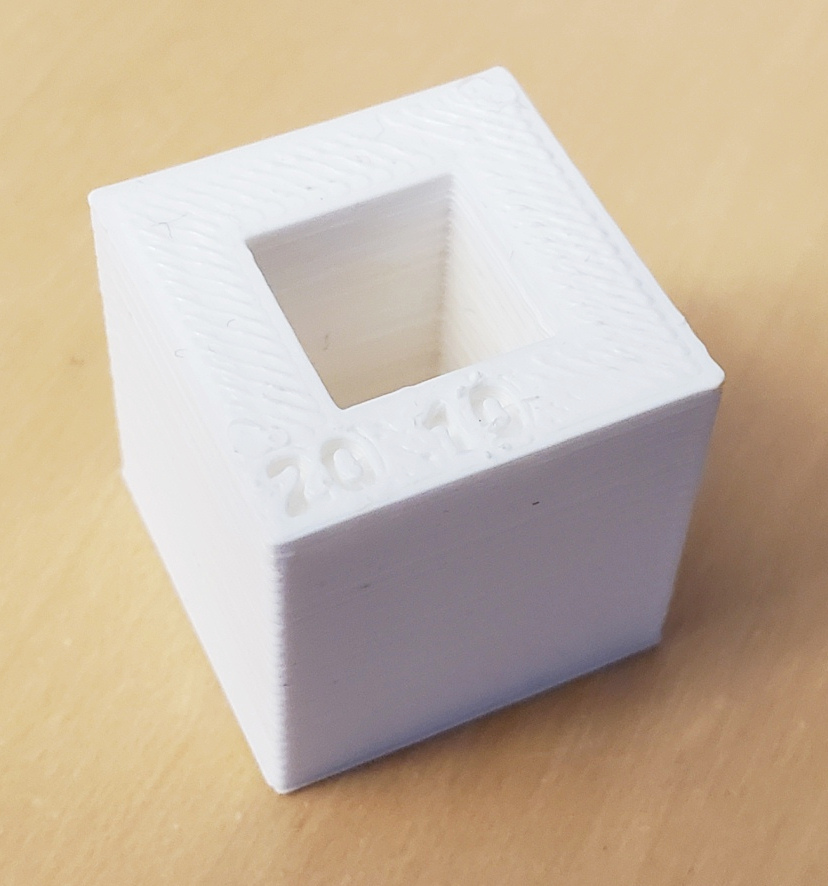
Dimension Model
Here it's obvious that the left one is 0.2mm and the right 0.1mm due to simply that the numbers on 0.1mm is much clearer than 0.2mm

Files
TREE.f3dTREE.stl
