16. Wildcard week
Assignment
Design and produce something with a digital fabrication process (incorporating computer-aided design and manufacturing) not covered in another assignment, documenting the requirements that your assignment meets, and including everything necessary to reproduce it. Possibilities include but are not limited to wildcard week examples.
My plans
- Design Origami in computer
- Create crease pattern in Zund.
Origami
It is the art of folding objects out of paper to create both two-dimensional and three-dimensional subjects.
What is Crease pattern?
A crease pattern is an origami diagram that consists of all or most of the creases in the final model, rendered into one image.
Valley and mountain fold
These are the basic foldings in origami.
A Valley fold is in its essence a paper fold that forms a trench. A Mountain fold is, on the other hand, a paper fold that forms a ridge.
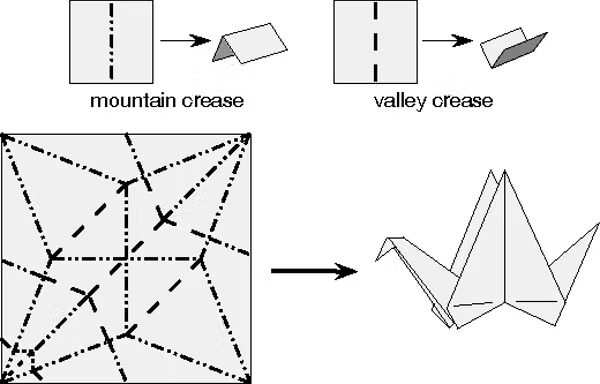
img src: theconversation.com
Some mathematics behind Origami Folding.
*Axioms of Origami*
There are different types of folding in origami. some of them are given in the following image.
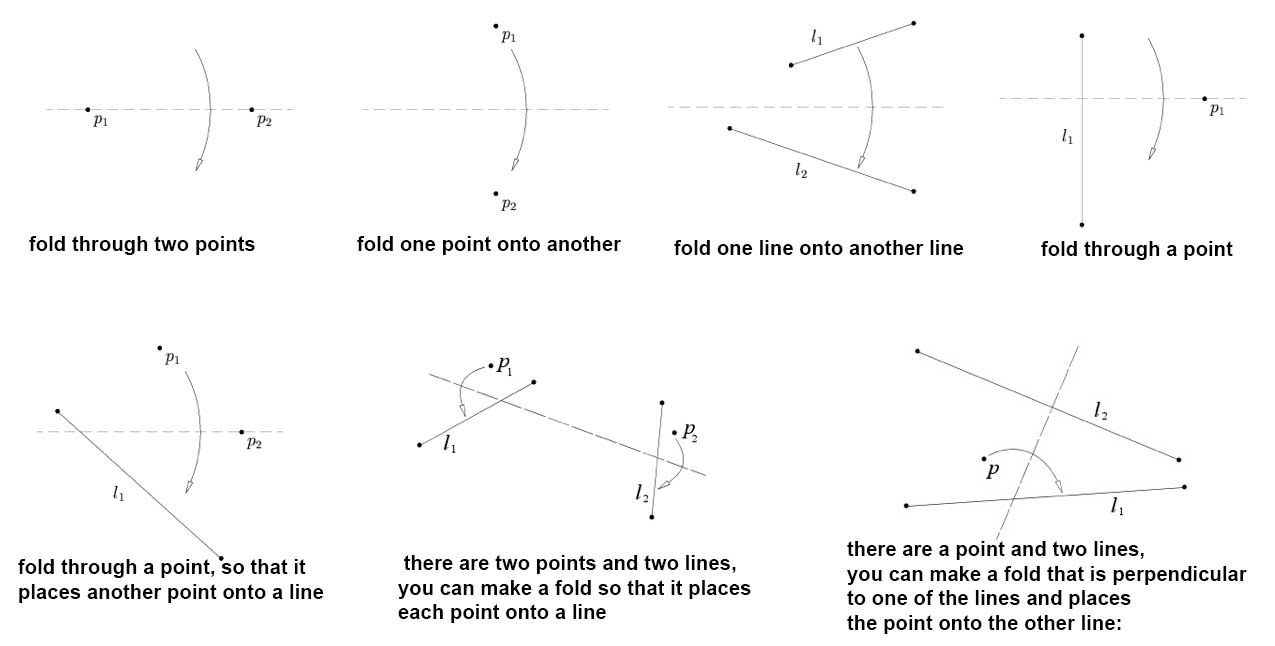
ref: wild.maths.org
Create a new Origami
I tried to learn how to design origami. I searched on the internet to find origami tools.
Some of them I found are given below.
We can design new origami structure using some softwares and web tools.
d-origami.com
It is an online platform for folding paper to create simple origami designs.
We can download the crease pattern of our design.
I tried to designed a paper airplane in that.
After the 5th or 6th folding, the web tool doesn’t respond properly.
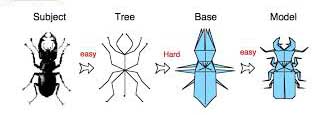
Tree maker
TreeMaker is a program for the design of origami bases. You draw a stick figure of the base on the screen; each stick in the stick figure will be represented by a flap on the base.
To design an origami, there is some steps.
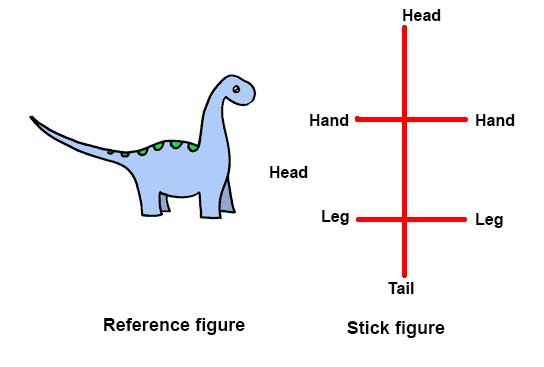
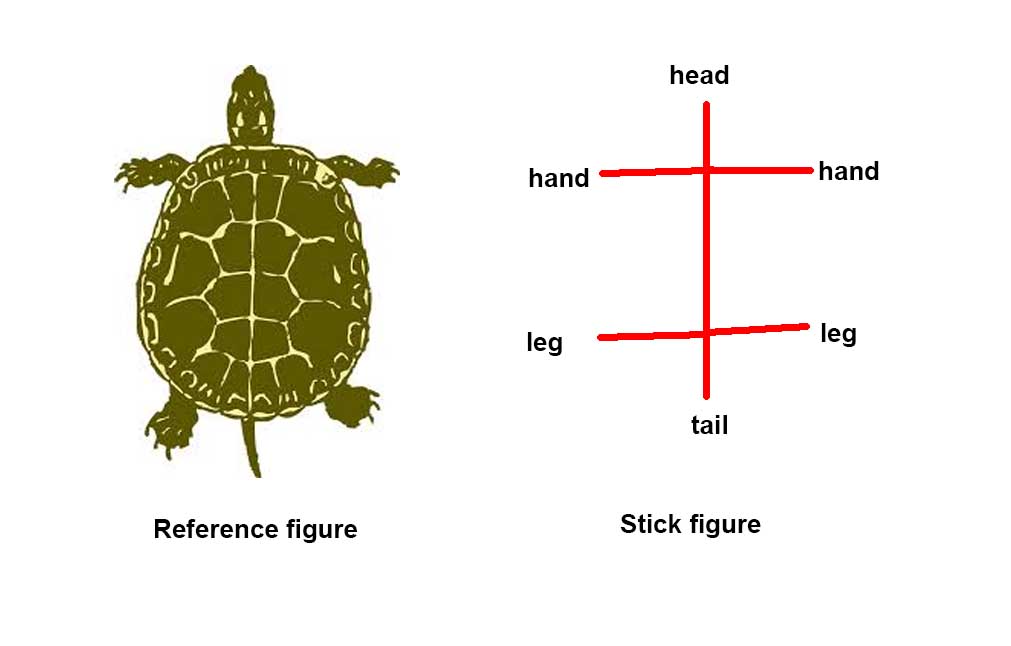
I decided to create a model of a Dinosaur in Tree maker. I will also make a tortoise using same Base.
-
Make a Stick figure A stick figure is a very simplified representation of a base of an origami model. A stick figure shows all flaps and rivers, also it shows relations between them. Also, a stick figure shows lengths of all flaps as well as widths of all rivers. ****I take a reference image and drew a stick figure.
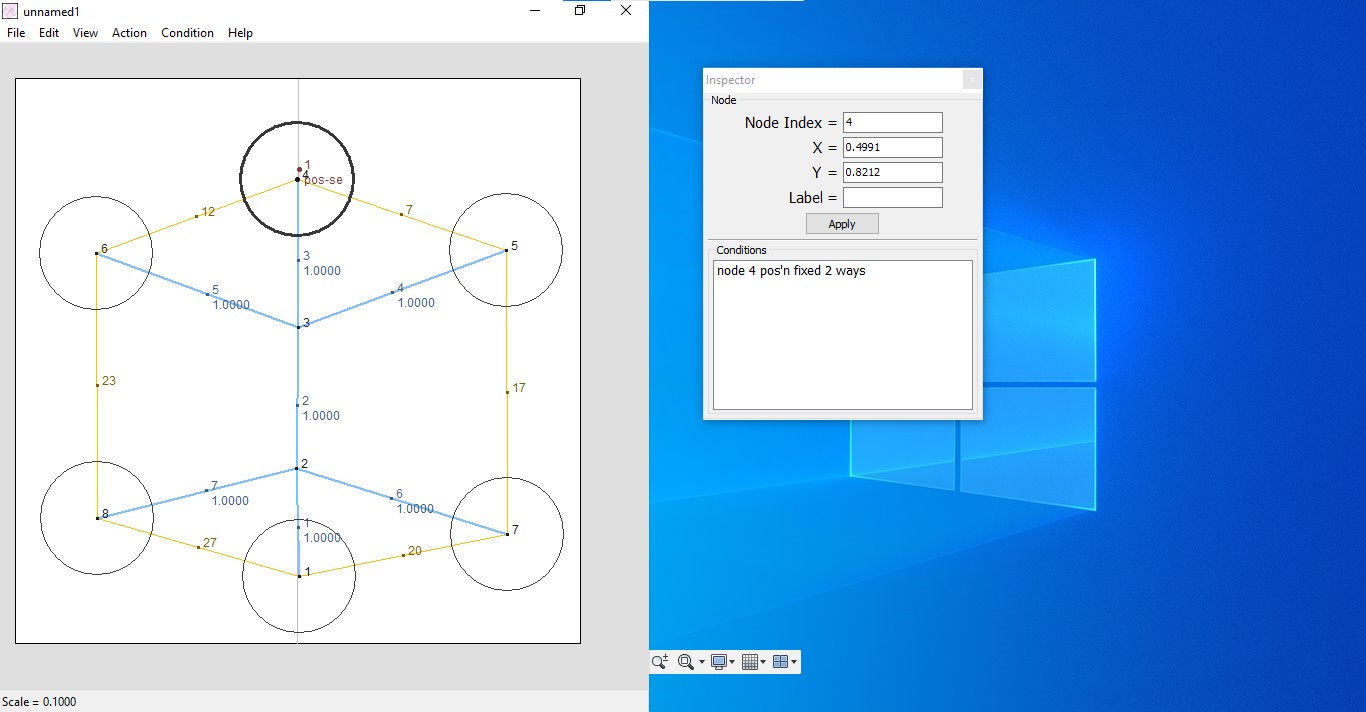
2 types of nodes in Treemaker.
- Leaf nodes These are edge nodes. These represented by circle.
- Branch nodes These nodes will have 2 or more edges. These represented by dots.
Design an origami in Treemaker.
Steps I followed are given below.
- Download Treemaker(Link here) and install it
-
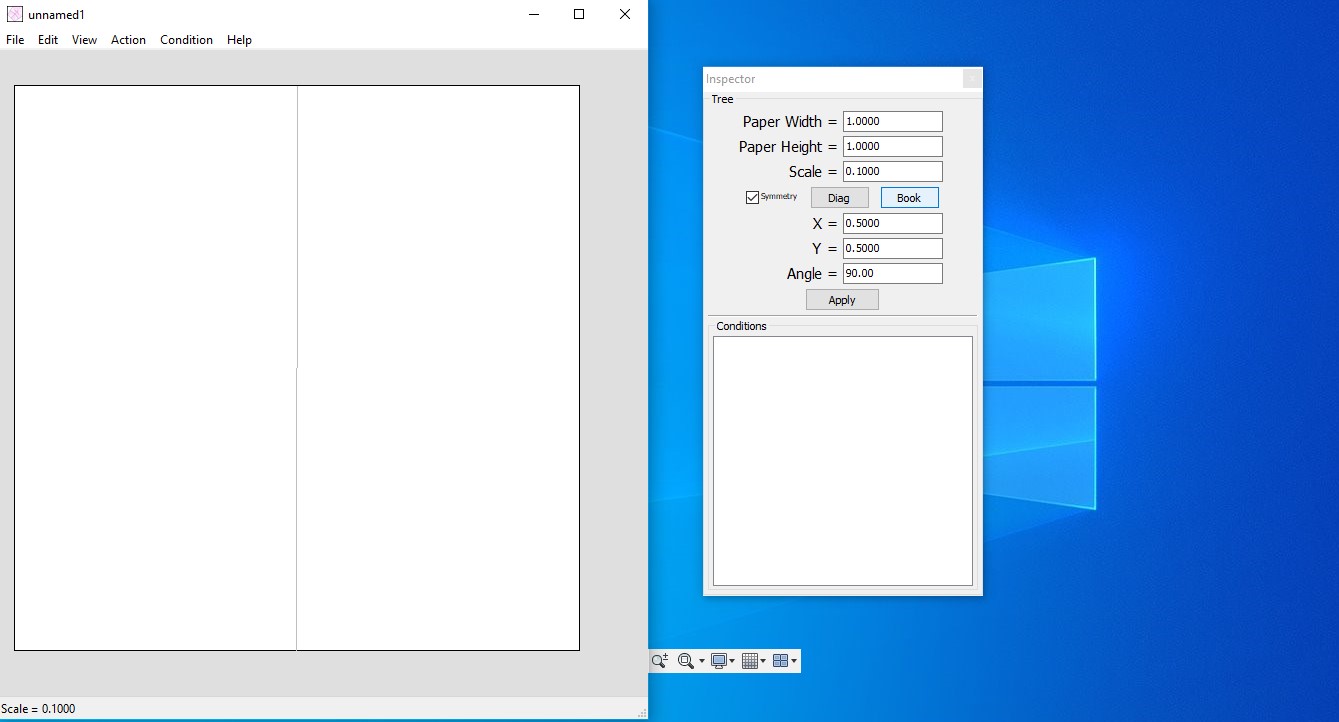
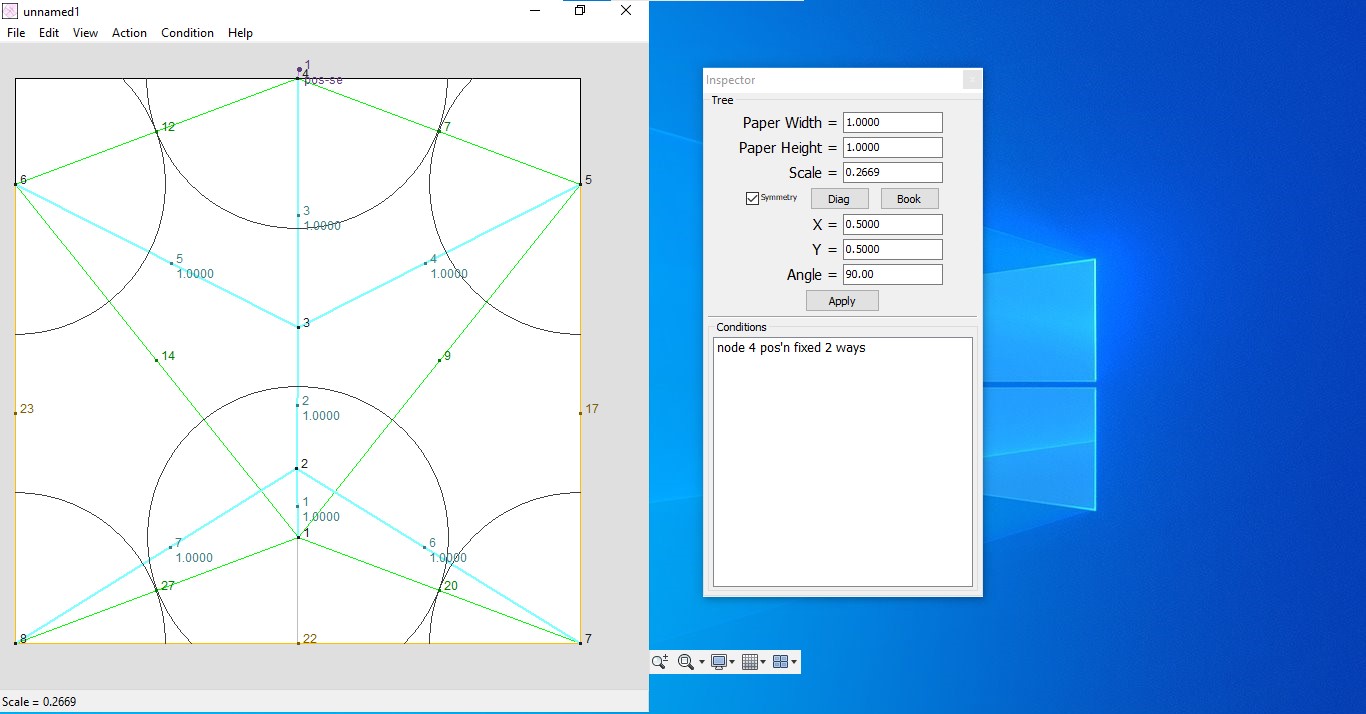
UI of Treemaker is very simple. The white color portion is a paper and we can change its size using Inspector. Click on the Book button for draw a symmetry line.
-
By just left click on a point, we can draw a node.
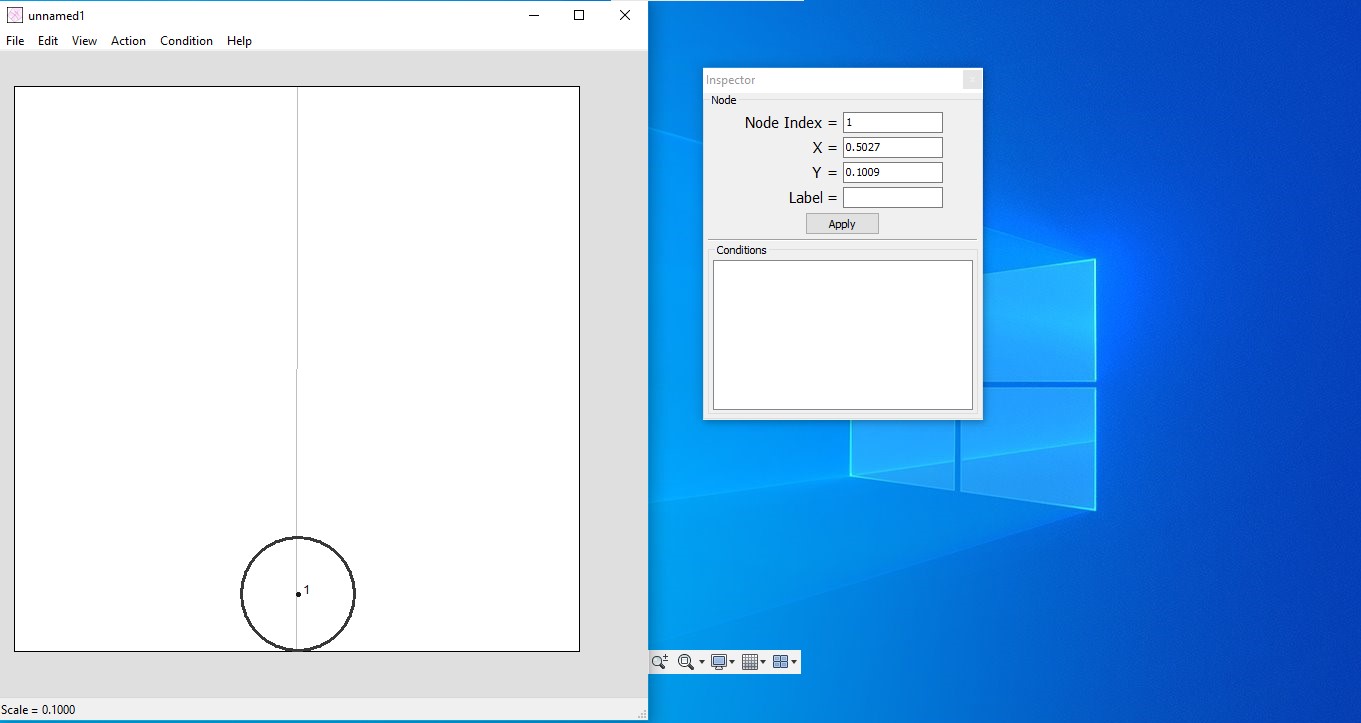
-
After selecting the circle, click on another point to create another node. The line between the nodes are called Edge
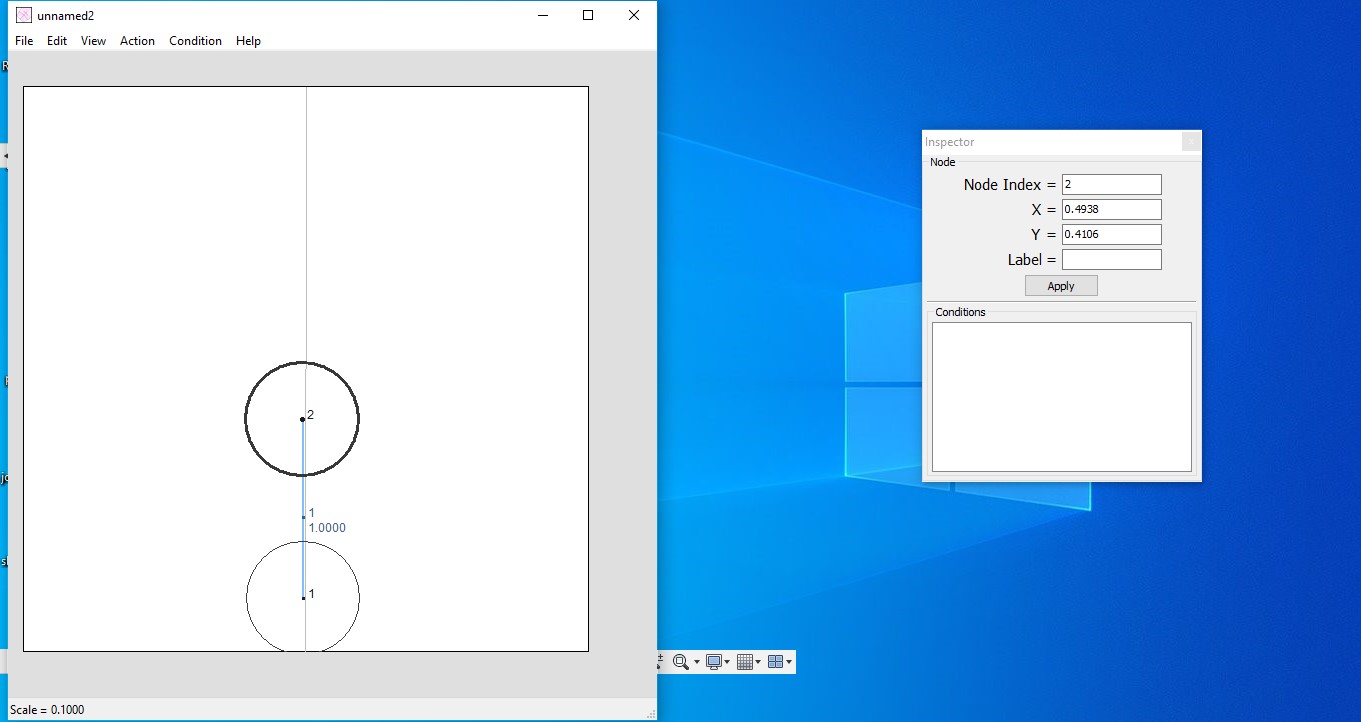
-
When we click on another point, the center circle will replace by a point(node-2) These nodes are called branch nodes. We can repeat same steps accordingly.
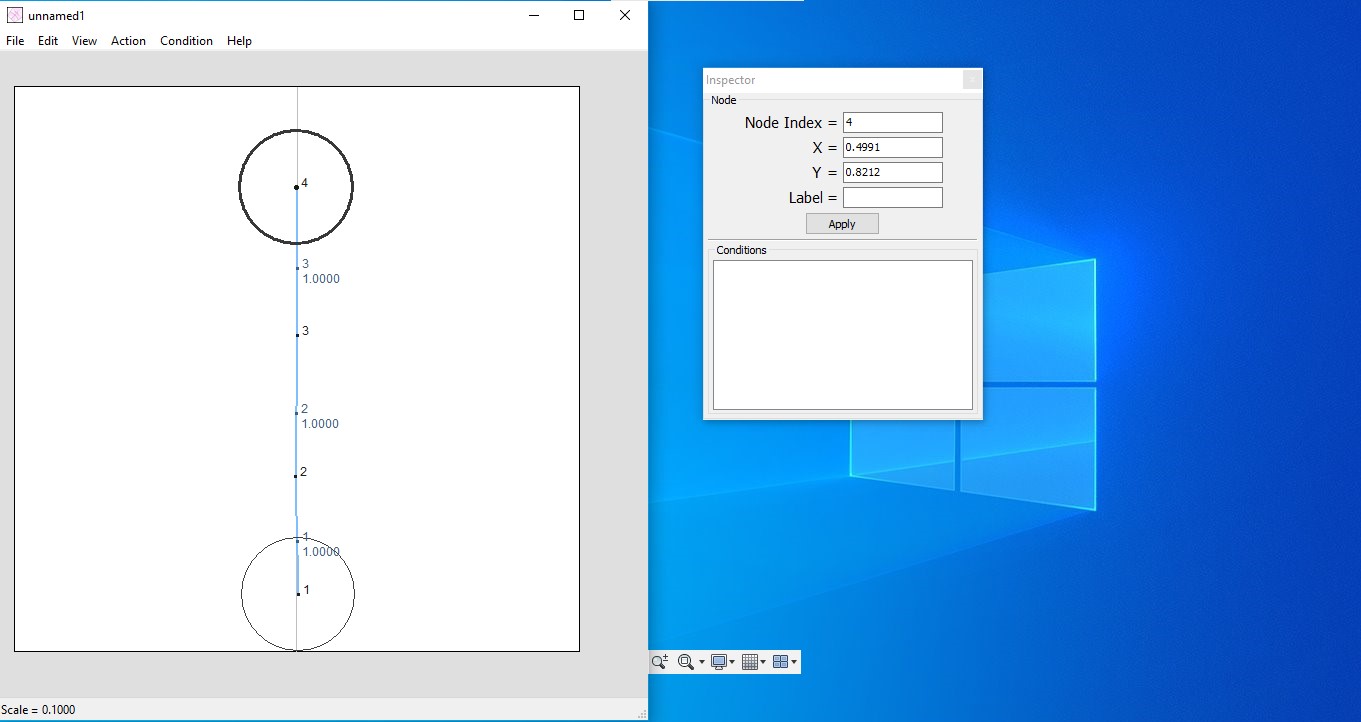
-
After clicking on branch nodes we can create leaf nodes, through that we can create all nodes.
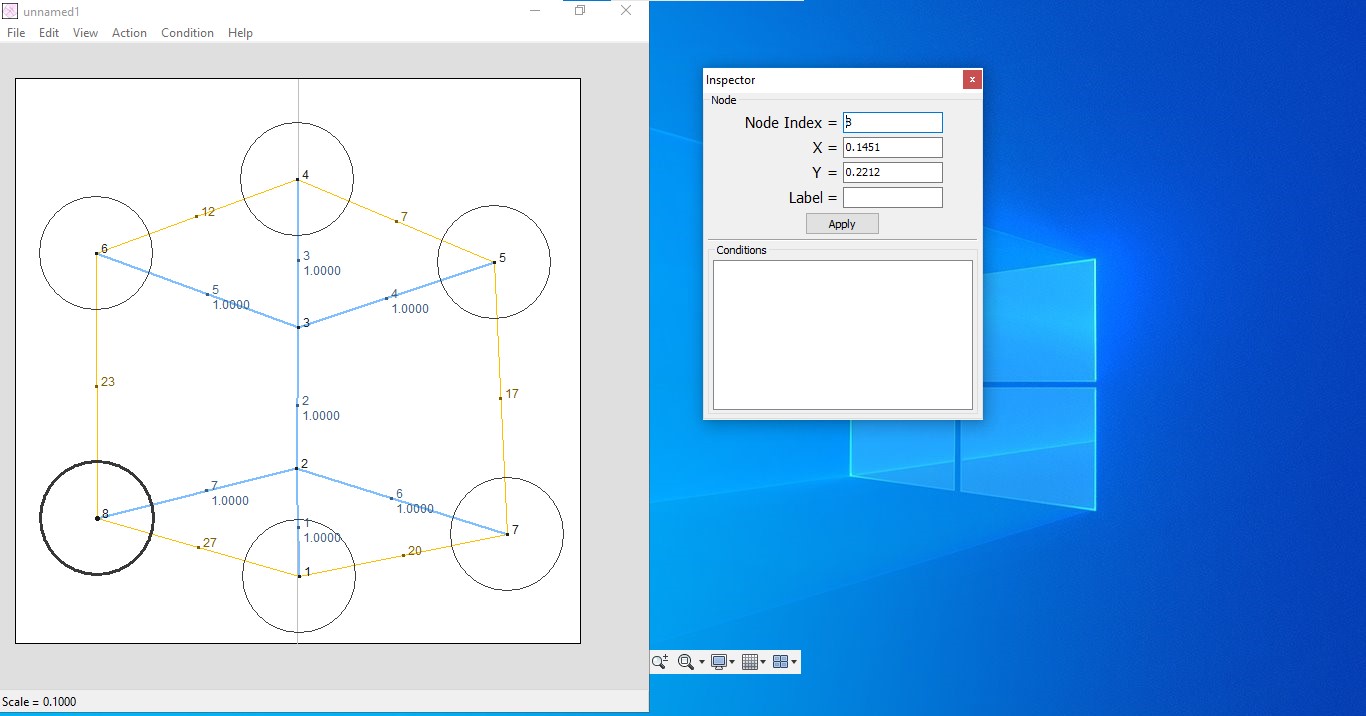
-
Then select node 4(top circle) and go to Condition→ Node(s) fixed to symmetry line and again go to Condition → Node(s) fixed to paper edge.
-
Go to Action→ Scale Everything
-
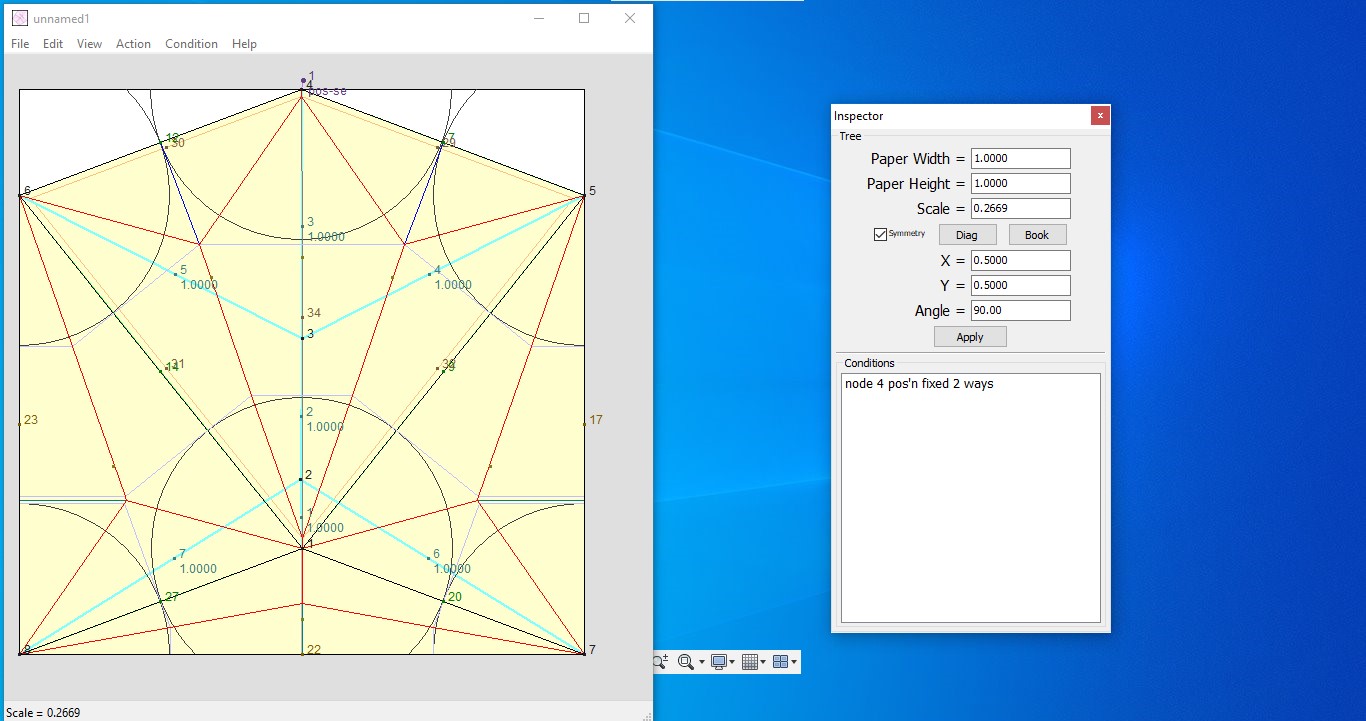
Go to Action→ Build crease pattern, then Treemaker will create a crease pattern.
-
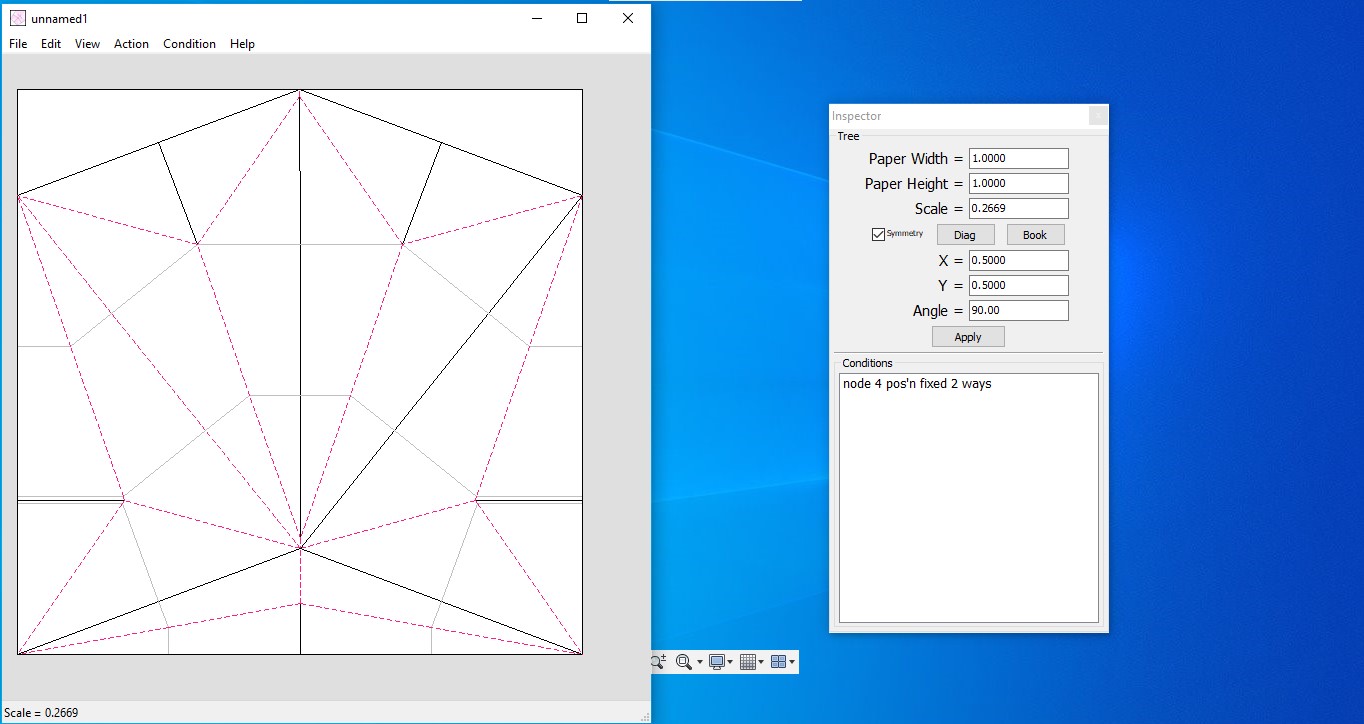
Go to View→ Creases view to get the crease pattern only.
-
We can change the view settings by going to View→ Show view settings. I changed the crease pattern from dots to lines.
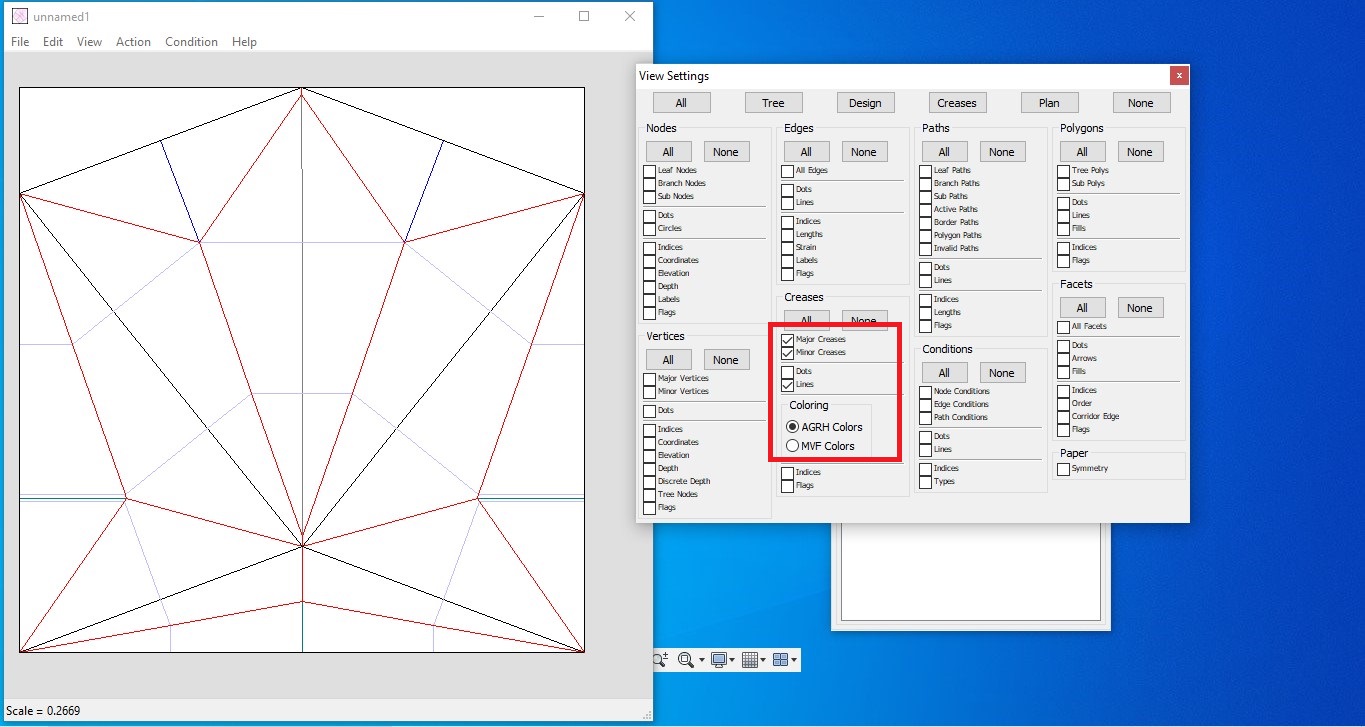
-
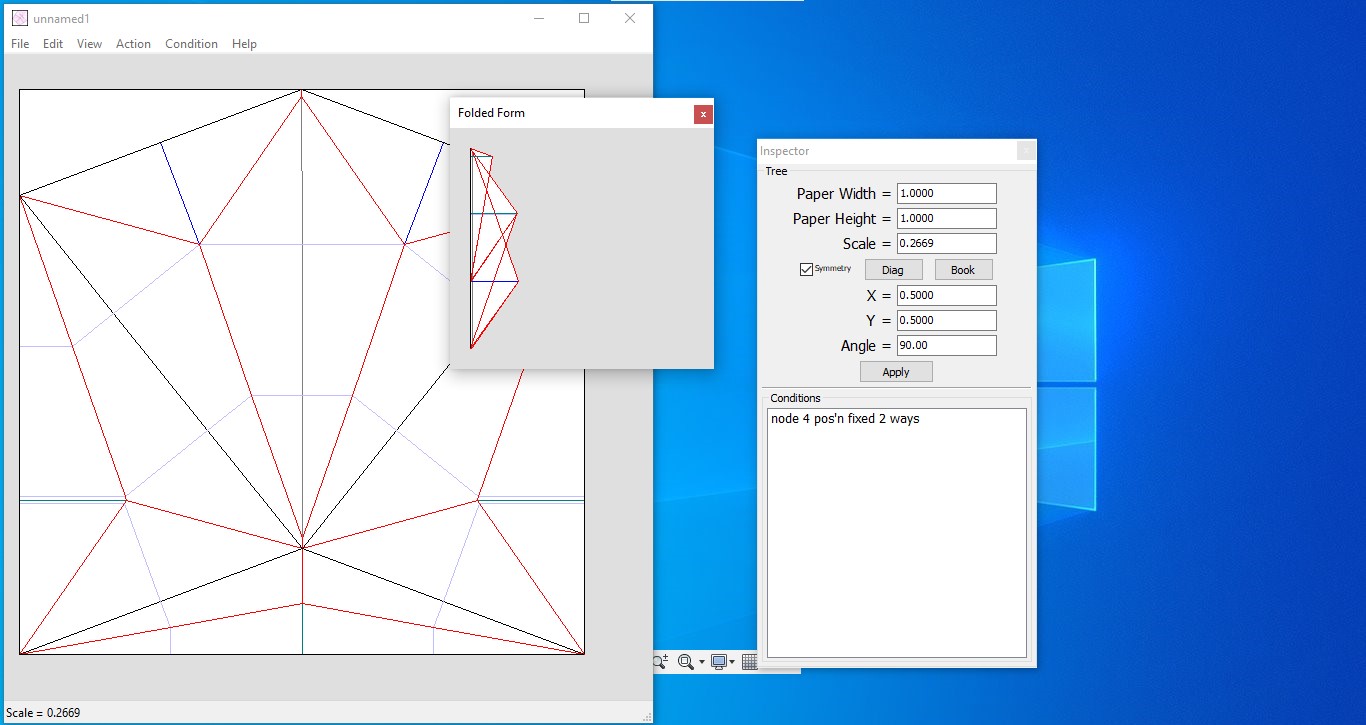
We can see the folded view by going to View → Show Folded Form
-
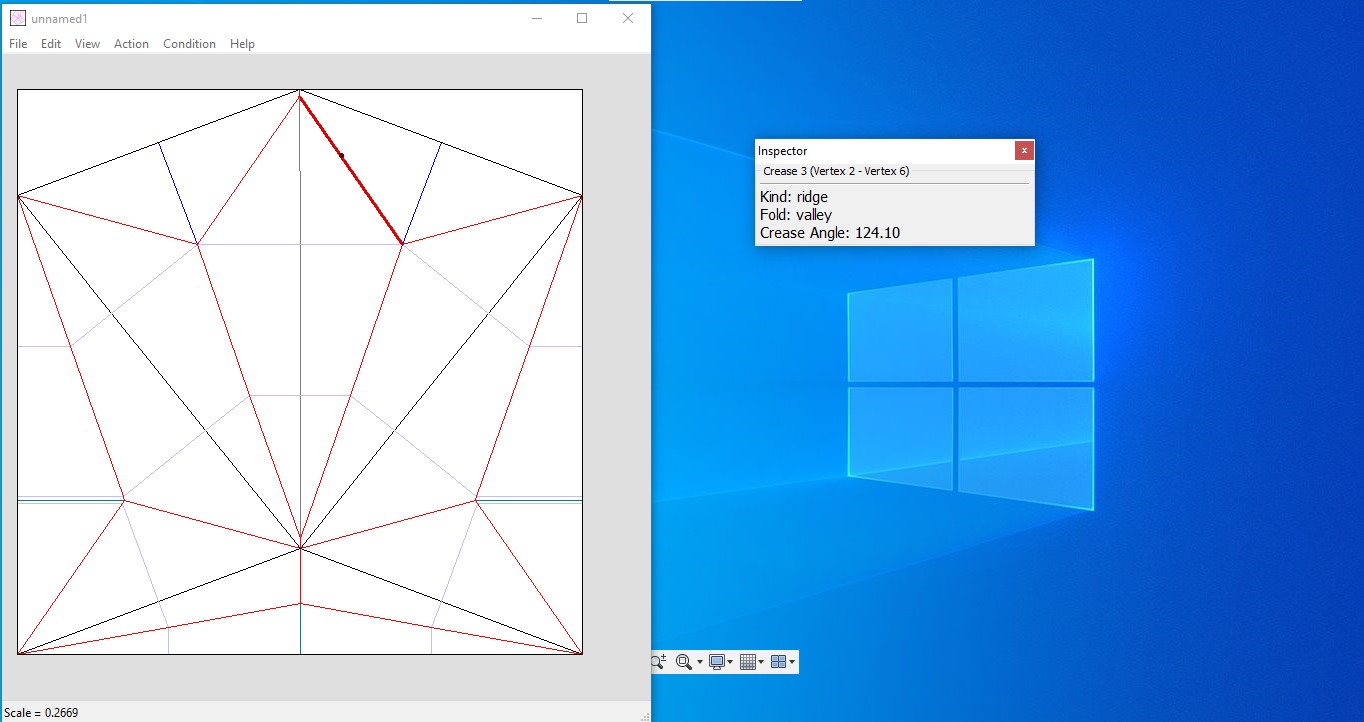
By clicking on different edges, we can see the properties of them. (Kind, Fold type and Crease angle)
-
Then go to File→ Print and save the file.
Creasing on ZUND
I creased the patterns on ZUND.
ZUND has edge-detecting feature.
I used
I used an A4 sheet for folding.
Creasing tool and Knife tool are used
Tool module changing in ZUND.
Defining machine steps
In Zund, we can assign different tools for a different sets of lines. I opened
After importing the crease pattern on ZUND’s software. I defined 5 machine steps.
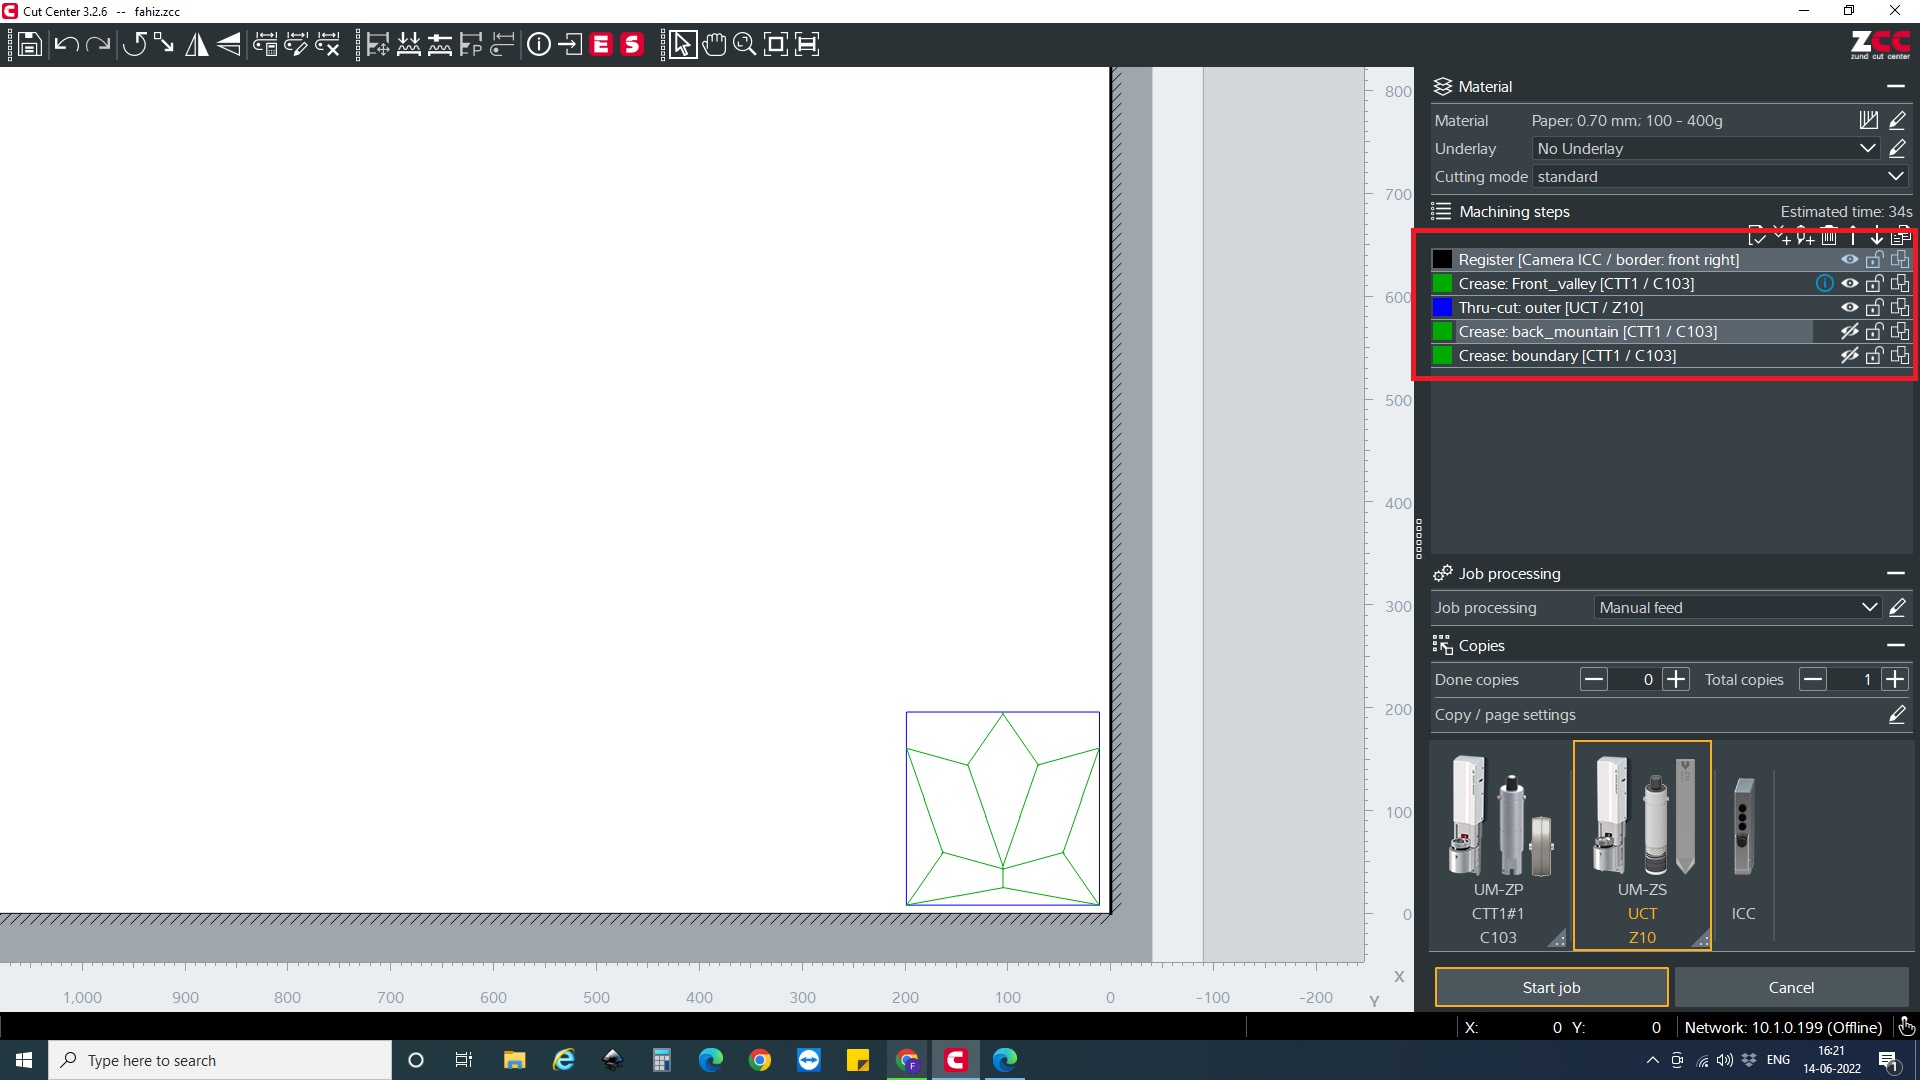
- Creasing Valley
- Creasing Mountain.
- Creasing other folds.
- Outer cut.
I could select valley folds and mountain folds very simply with help of the tree maker file.
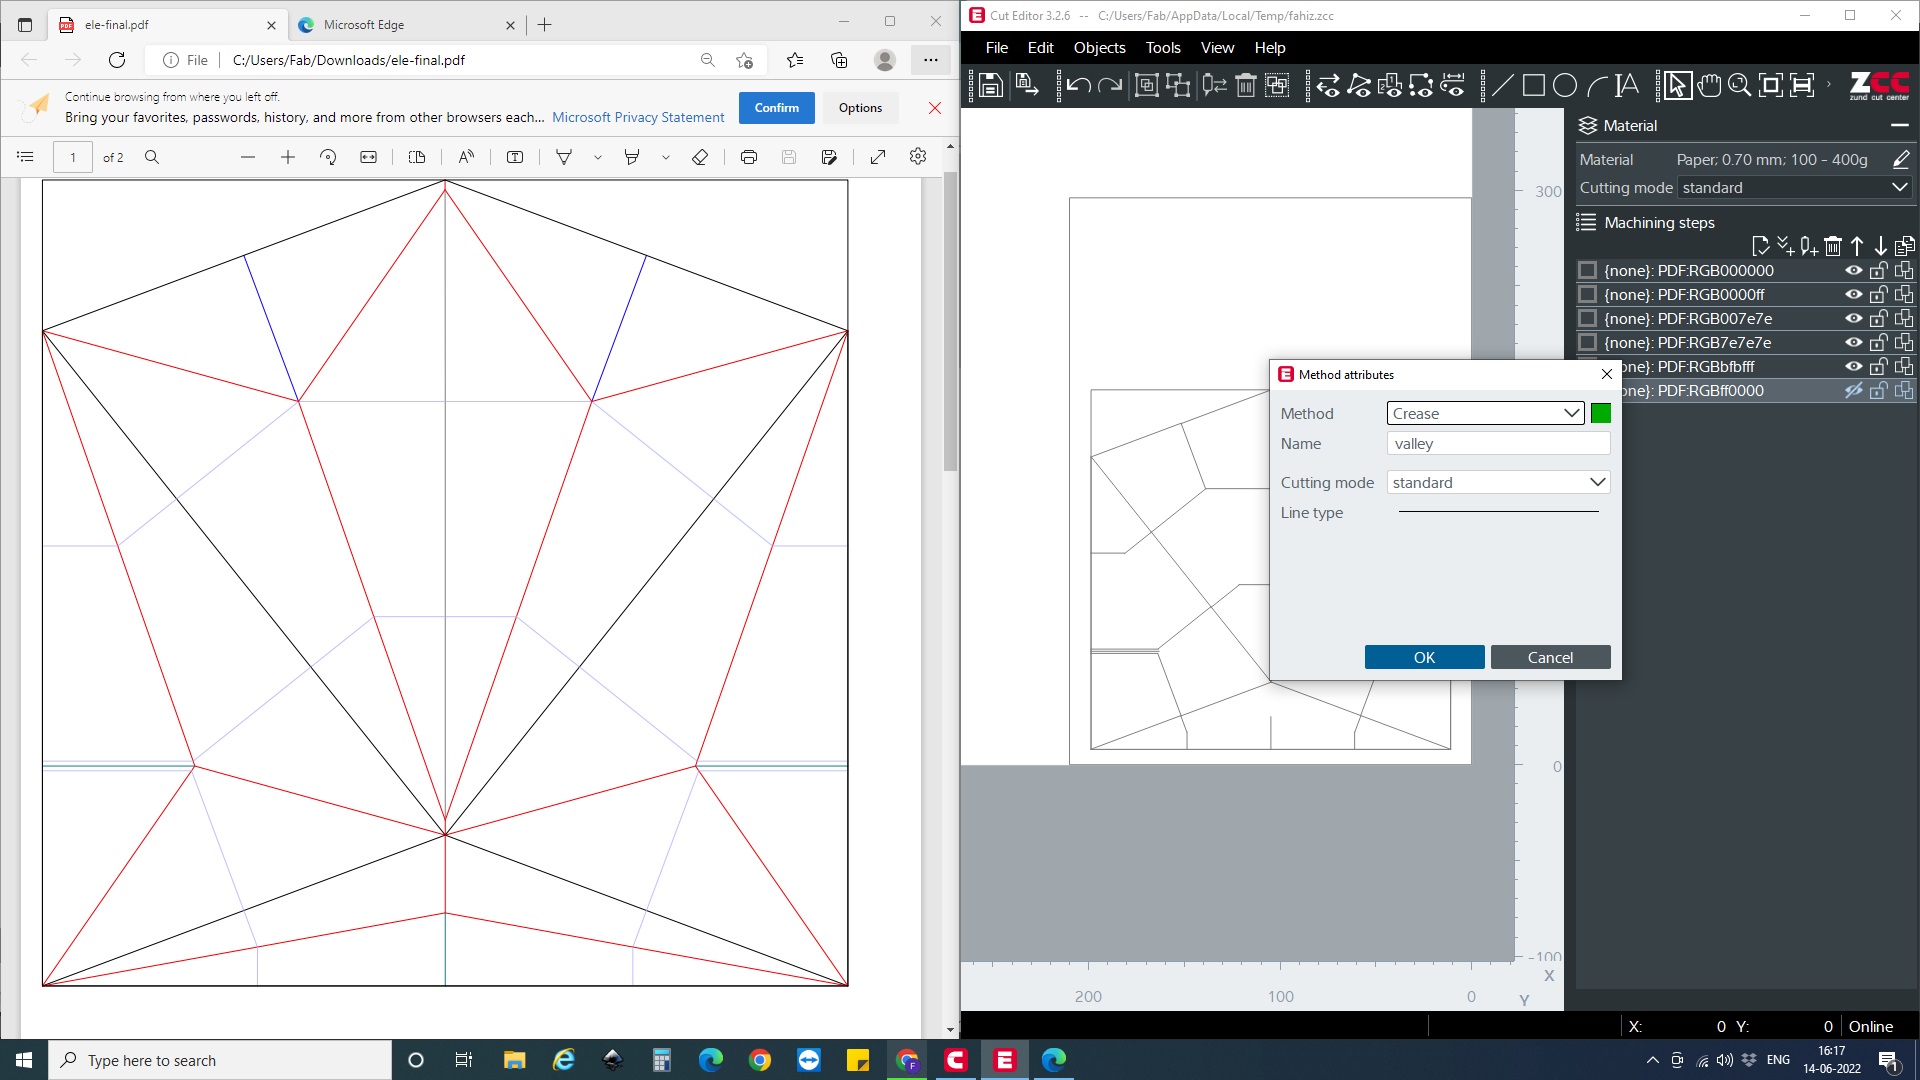
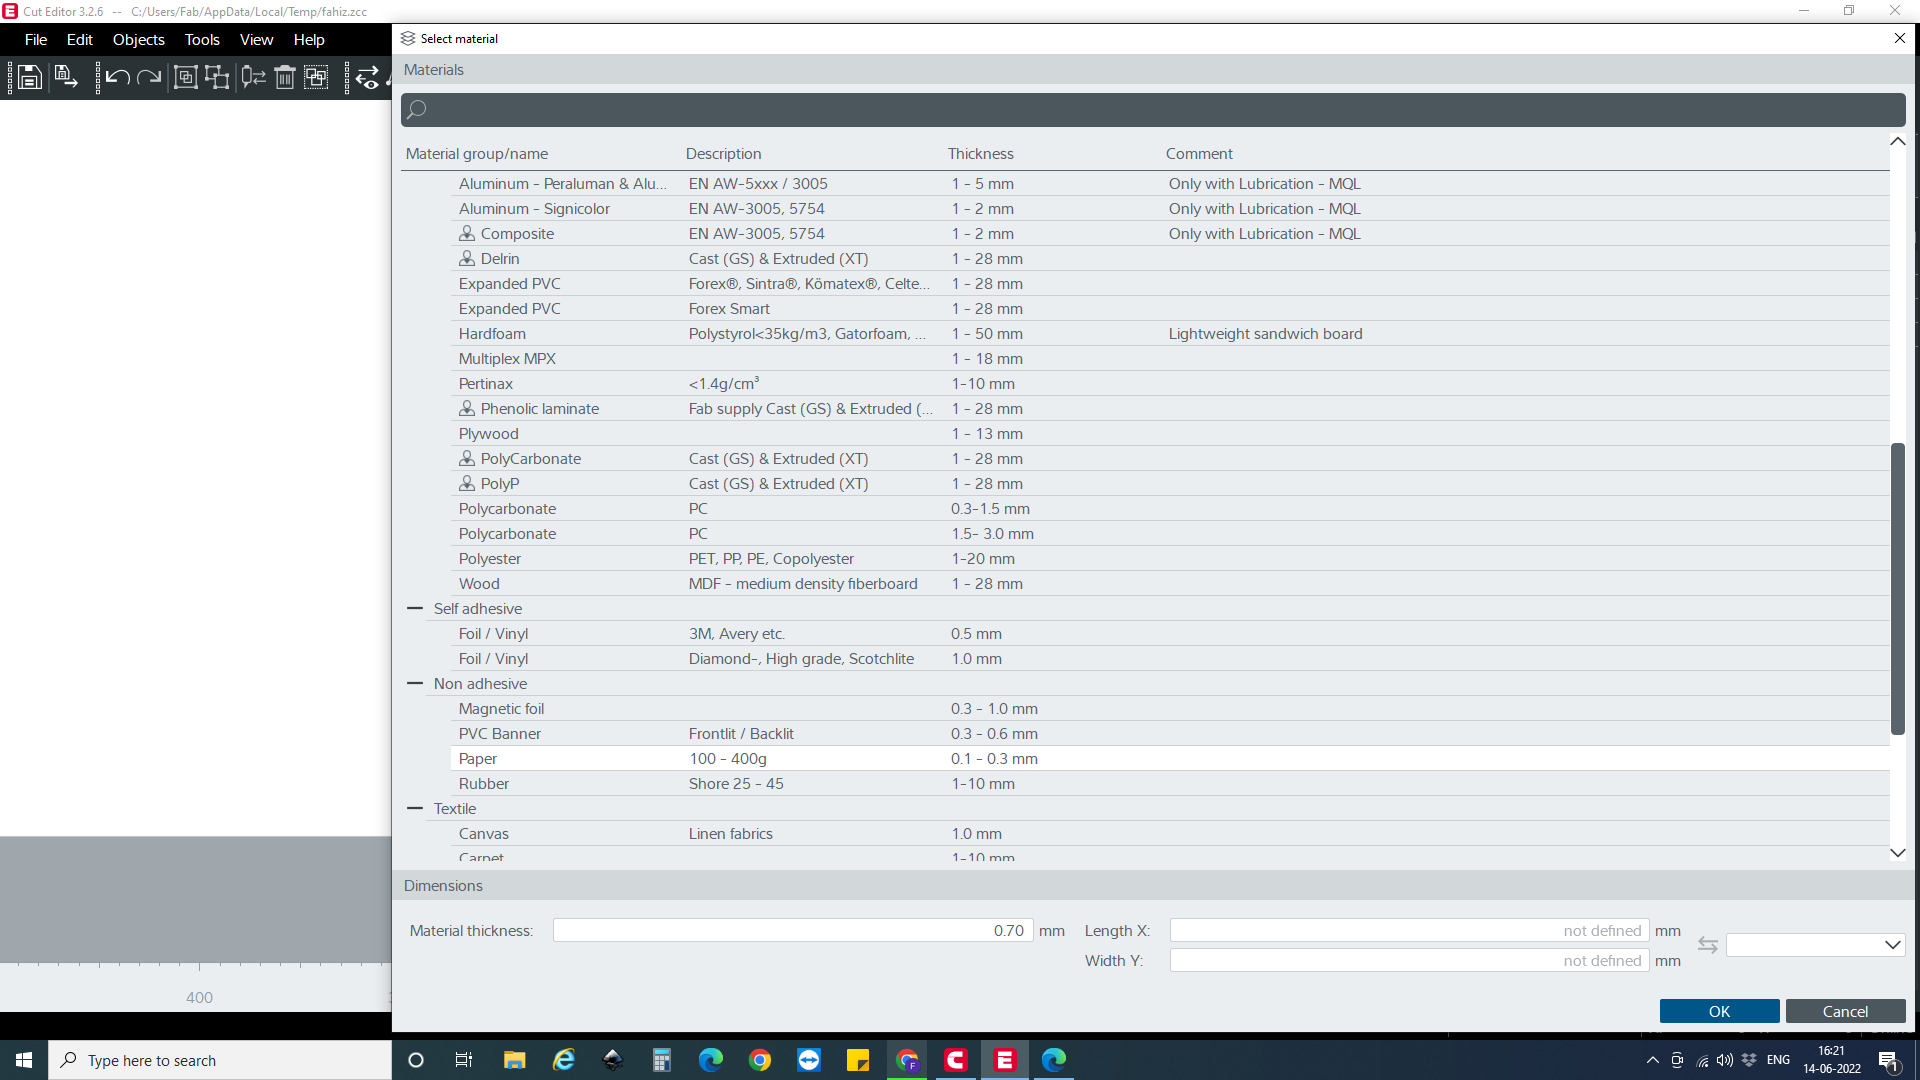
I selected material as paper.
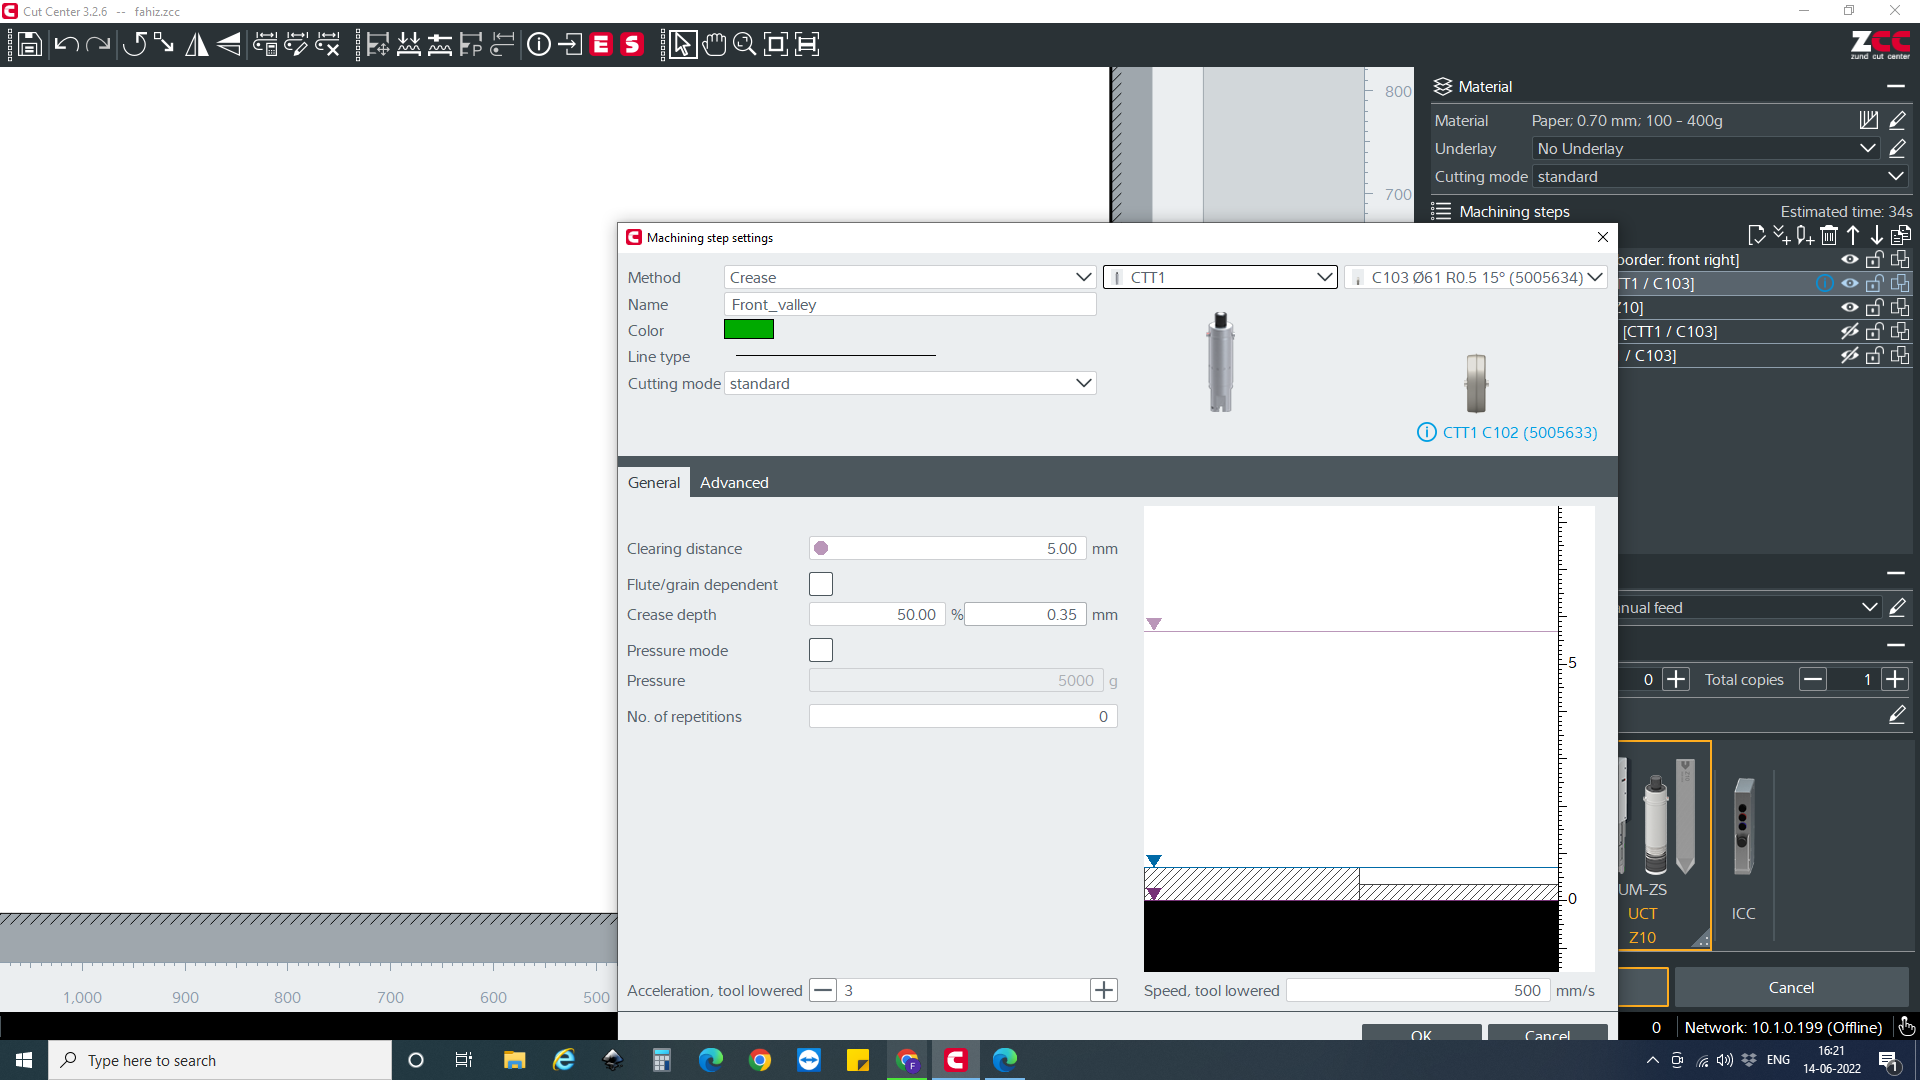
Then I set machining step settings.
- Method
- Tool
- Clearing distance
- Crease depth
- Speed tool lowered
Then select different machining steps and click on Start job
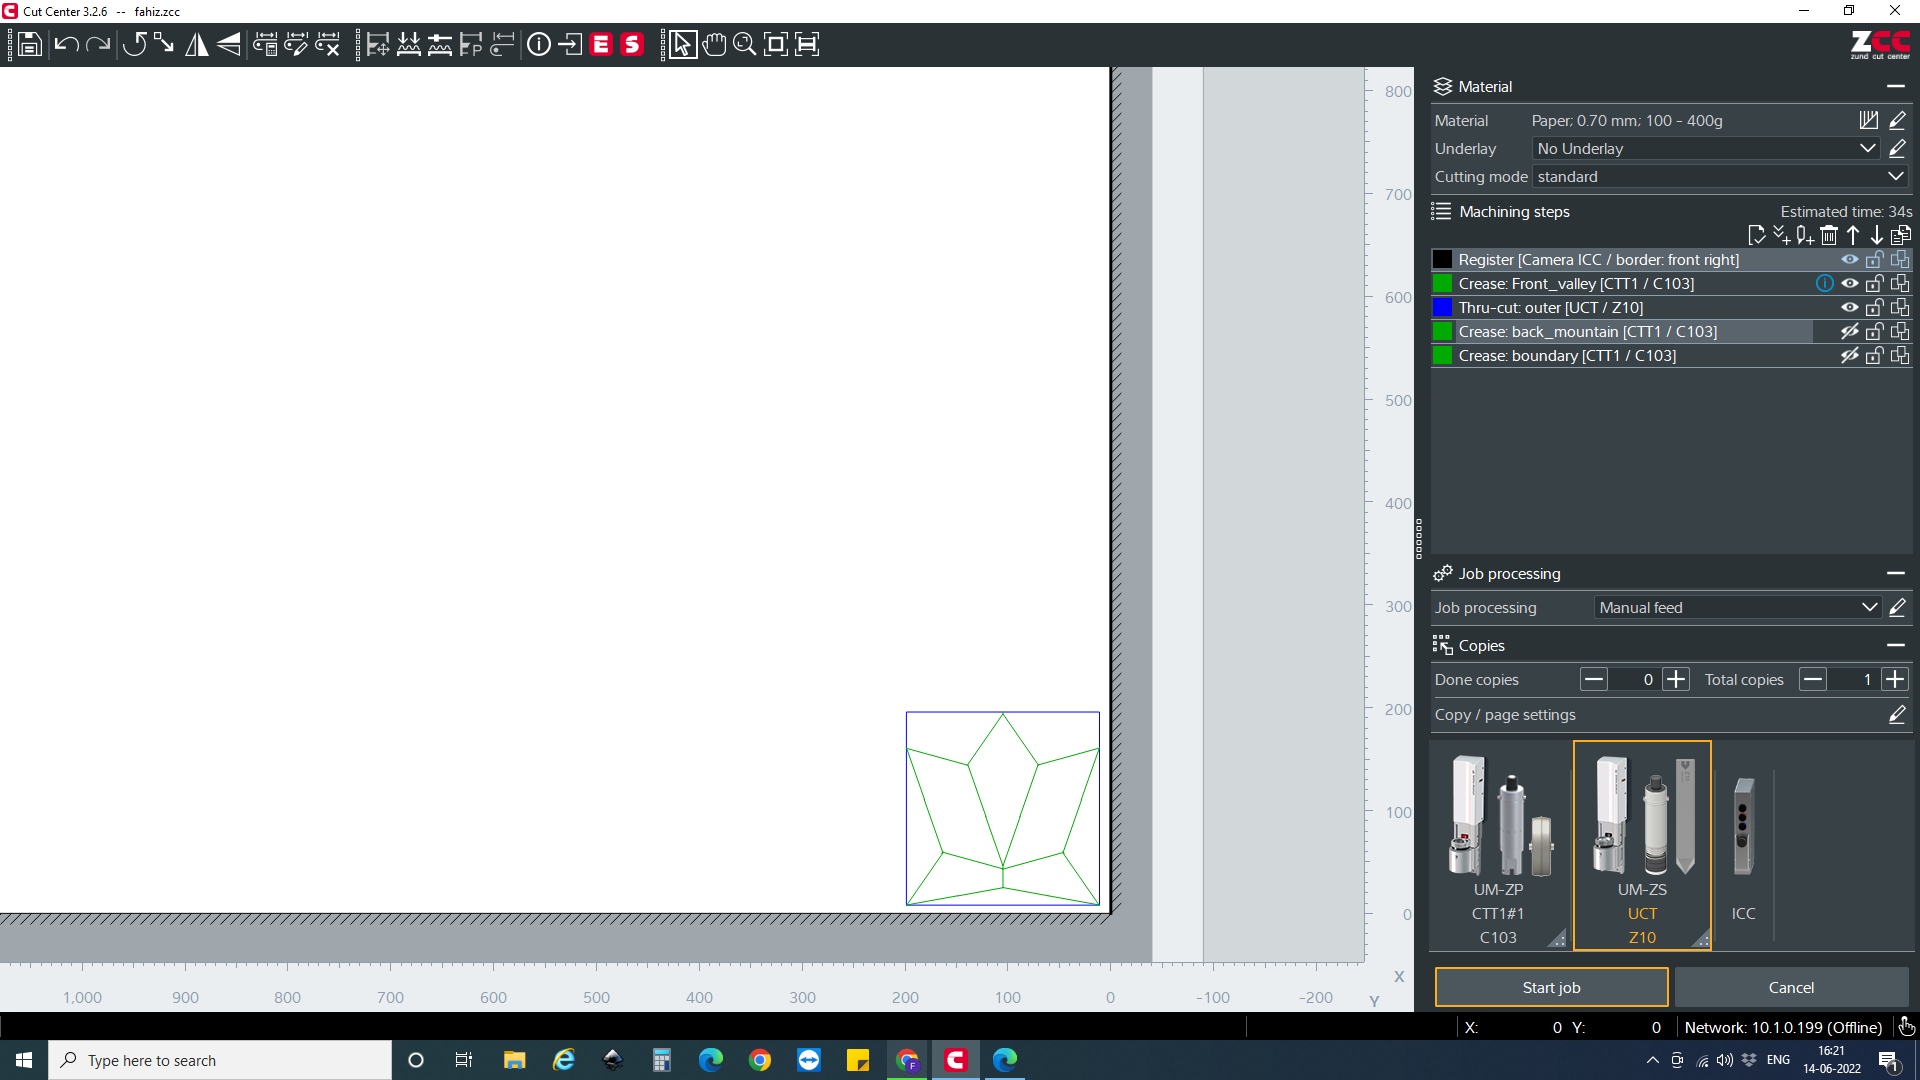
In the first operation I selected Valley creasing and Edge cutting.
In the second, I selected Mountain and other creases.
In my first attempt, The creases was very high.
So for next operation I used small crease tool. And I decreased Crease depth and Tool speed. Then I got a good result.
About creasing on ZUND.
- I used A4 paper for creasing. So vacuum cannot pull the paper correctly.
- Creases were very accurate.
Folding Creases.
I folded the paper according to the creases with reference of folded model view in the Treemaker.
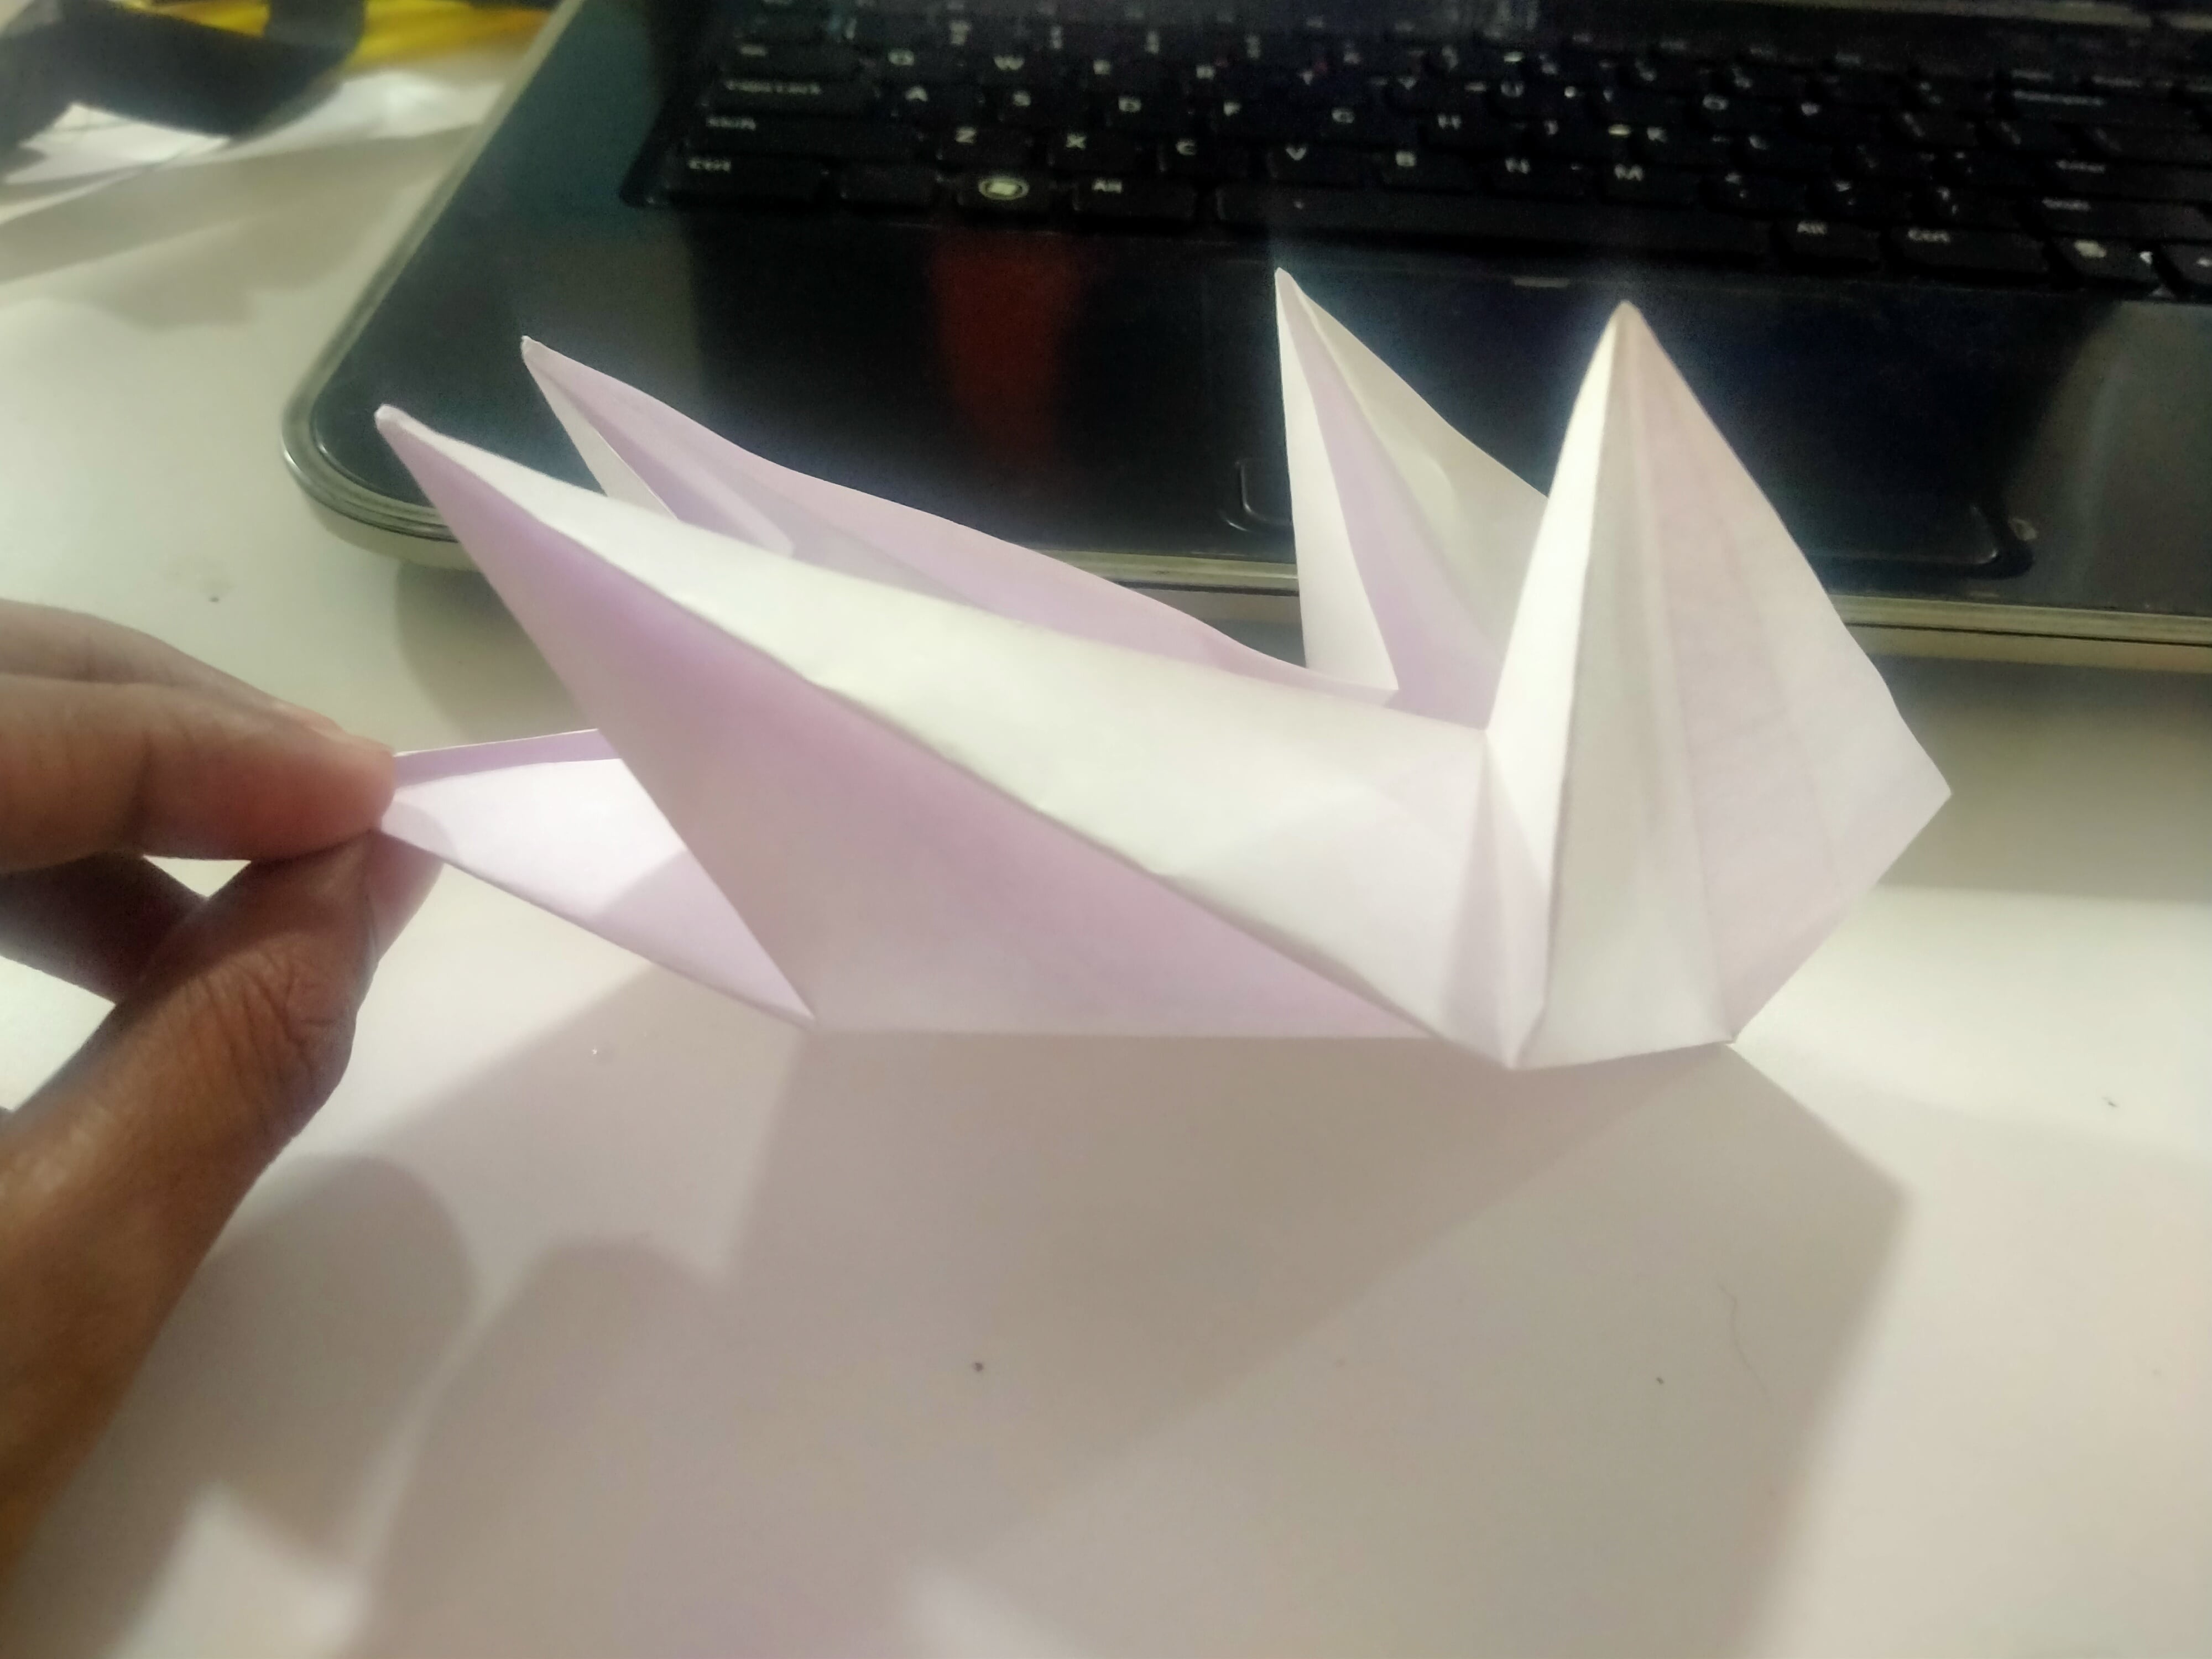
After making the base model, I folded it into Dinosaur.
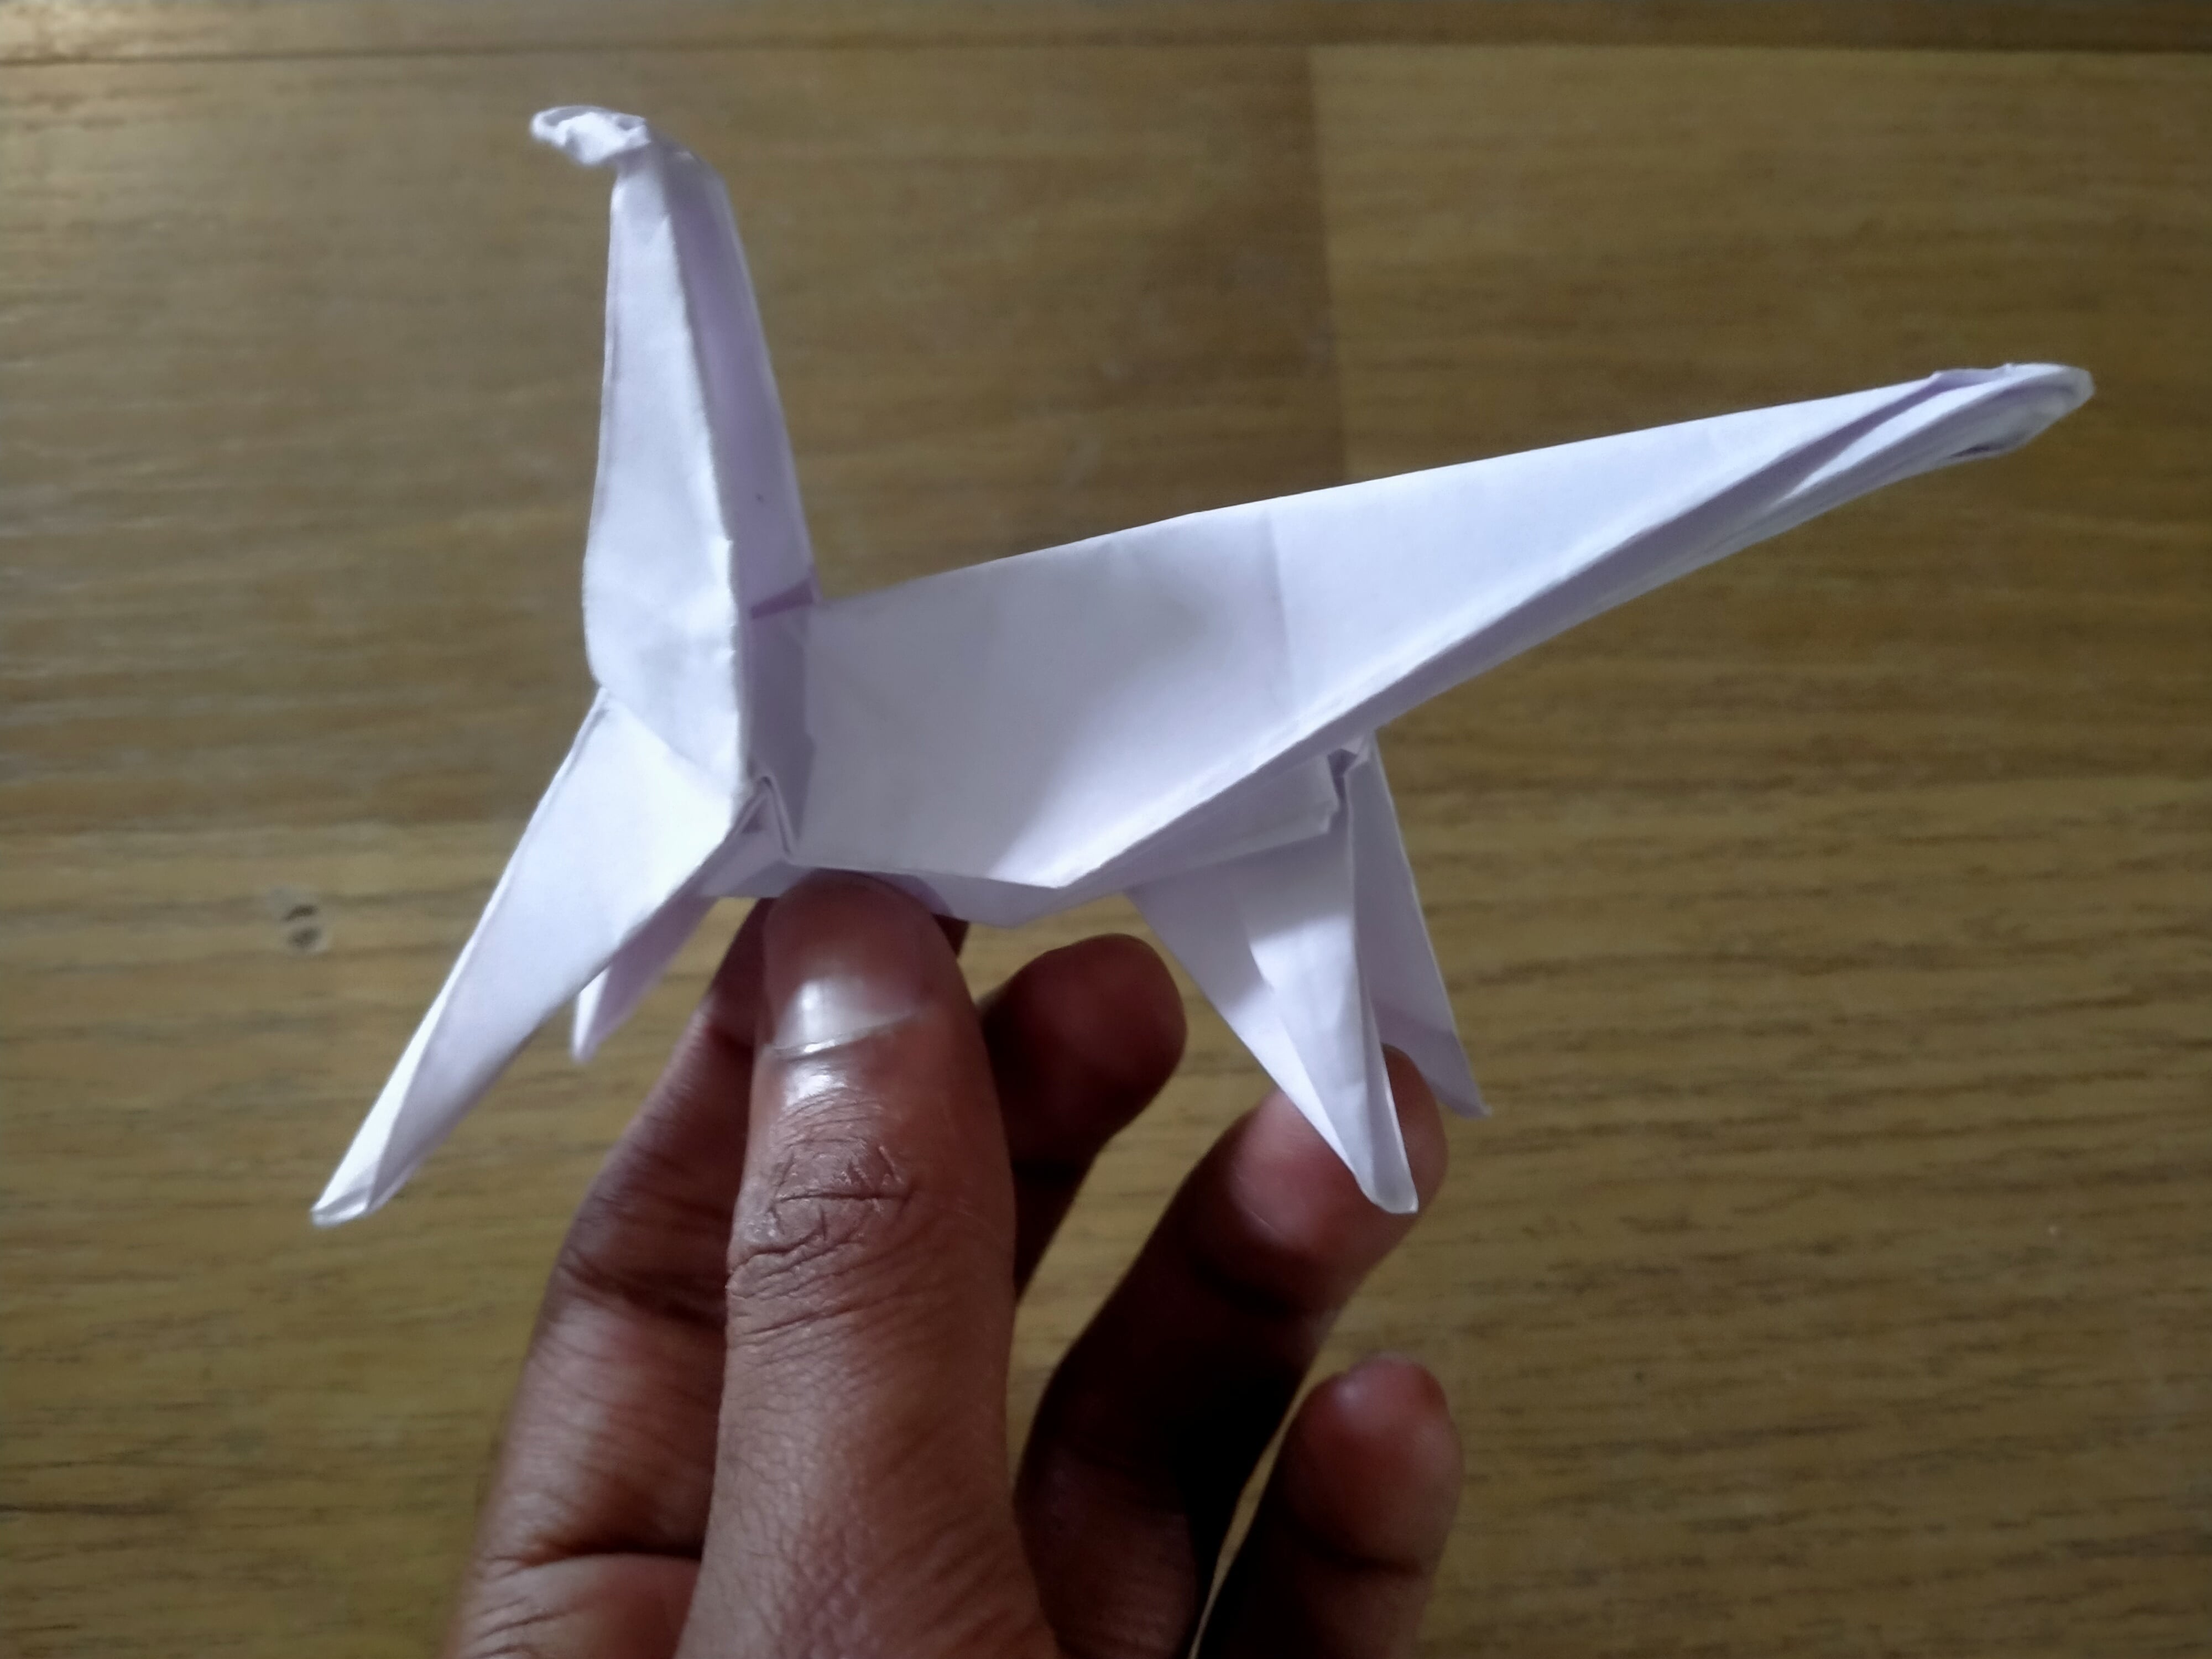
With the same base fold, I made an elephant and a tortoise.

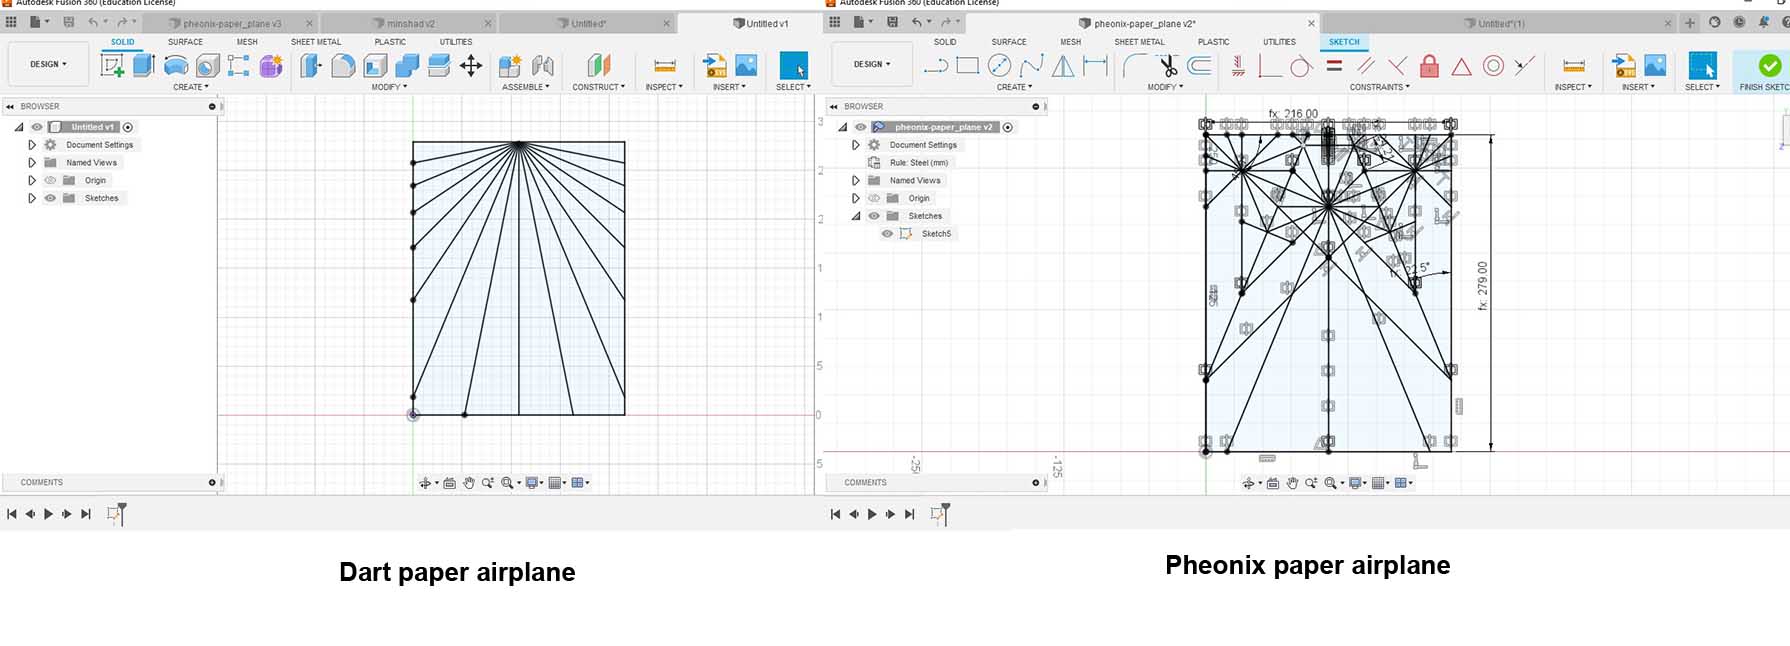
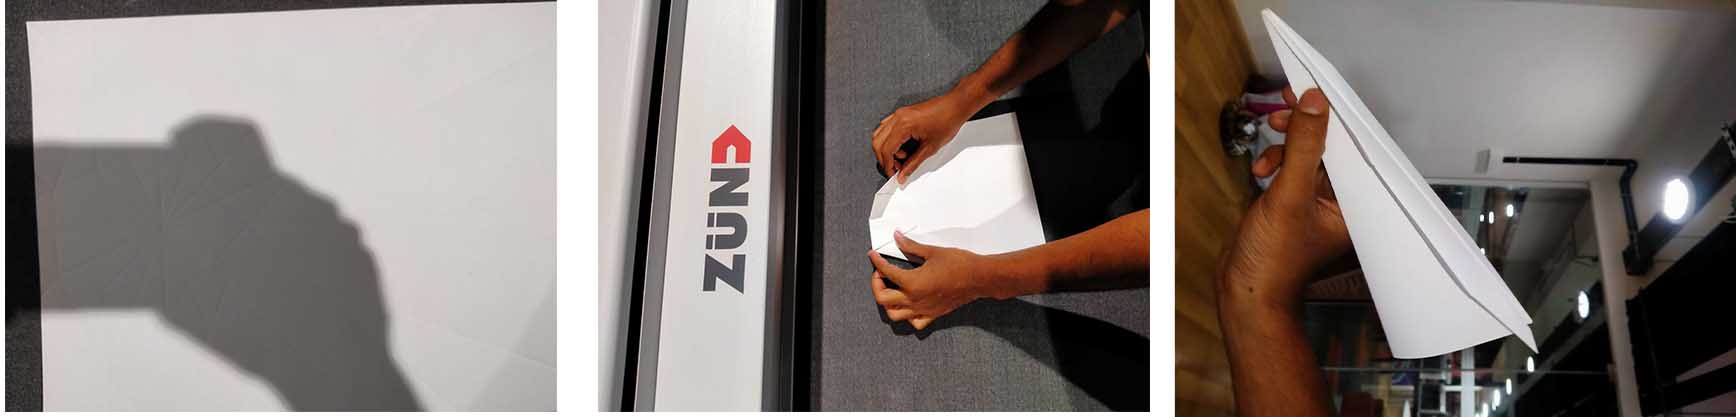
I also tried to make some paper flight models in Fusion 360 and creased it on ZUND.
Steps
- I made an airplane using paper by hand and unfold it and studied about the corner and foldings.
- I created that in fusion 360. I noticed that the Creasing patterns meet a lot of symmetries,