Another project
About old idea.
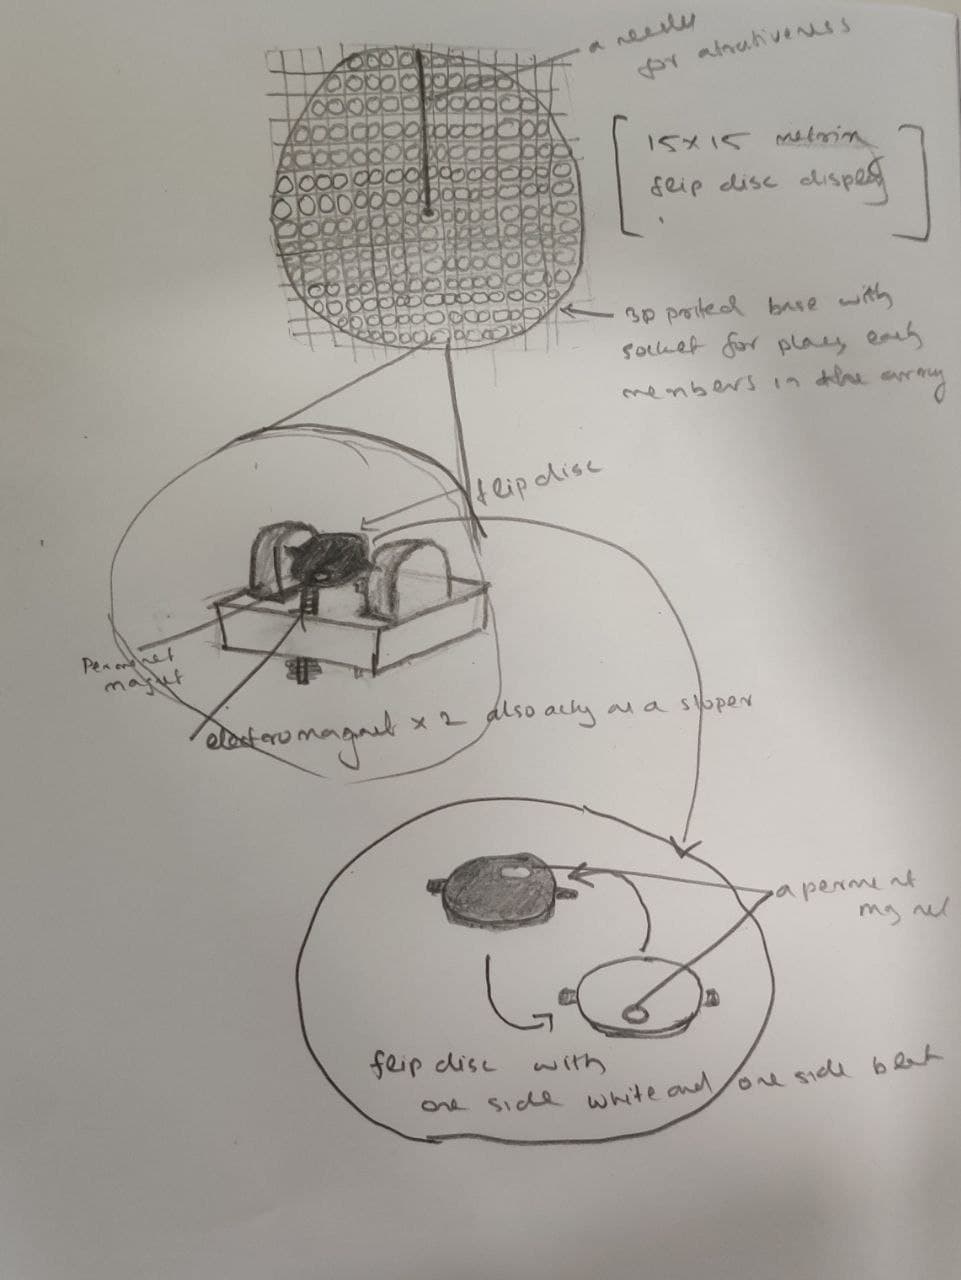
Initial idea and sketching of the project
My plan is to create a dynamic sculpture with a 15x15 matrix disc flap display. One side of the rotating/flipping disc is painted black, while the other side is painted white or any other color. When the permanent magnet on the disc is attracted by the excited electromagnet which is installed in the disc holder, the colored side of the disc flips up. Each holder represents one of the matrix’s elements. As part of the beginning phase of my final project, I created a hand sketch.
2D and 3D Modeling
Priliminary designe of the Final Project
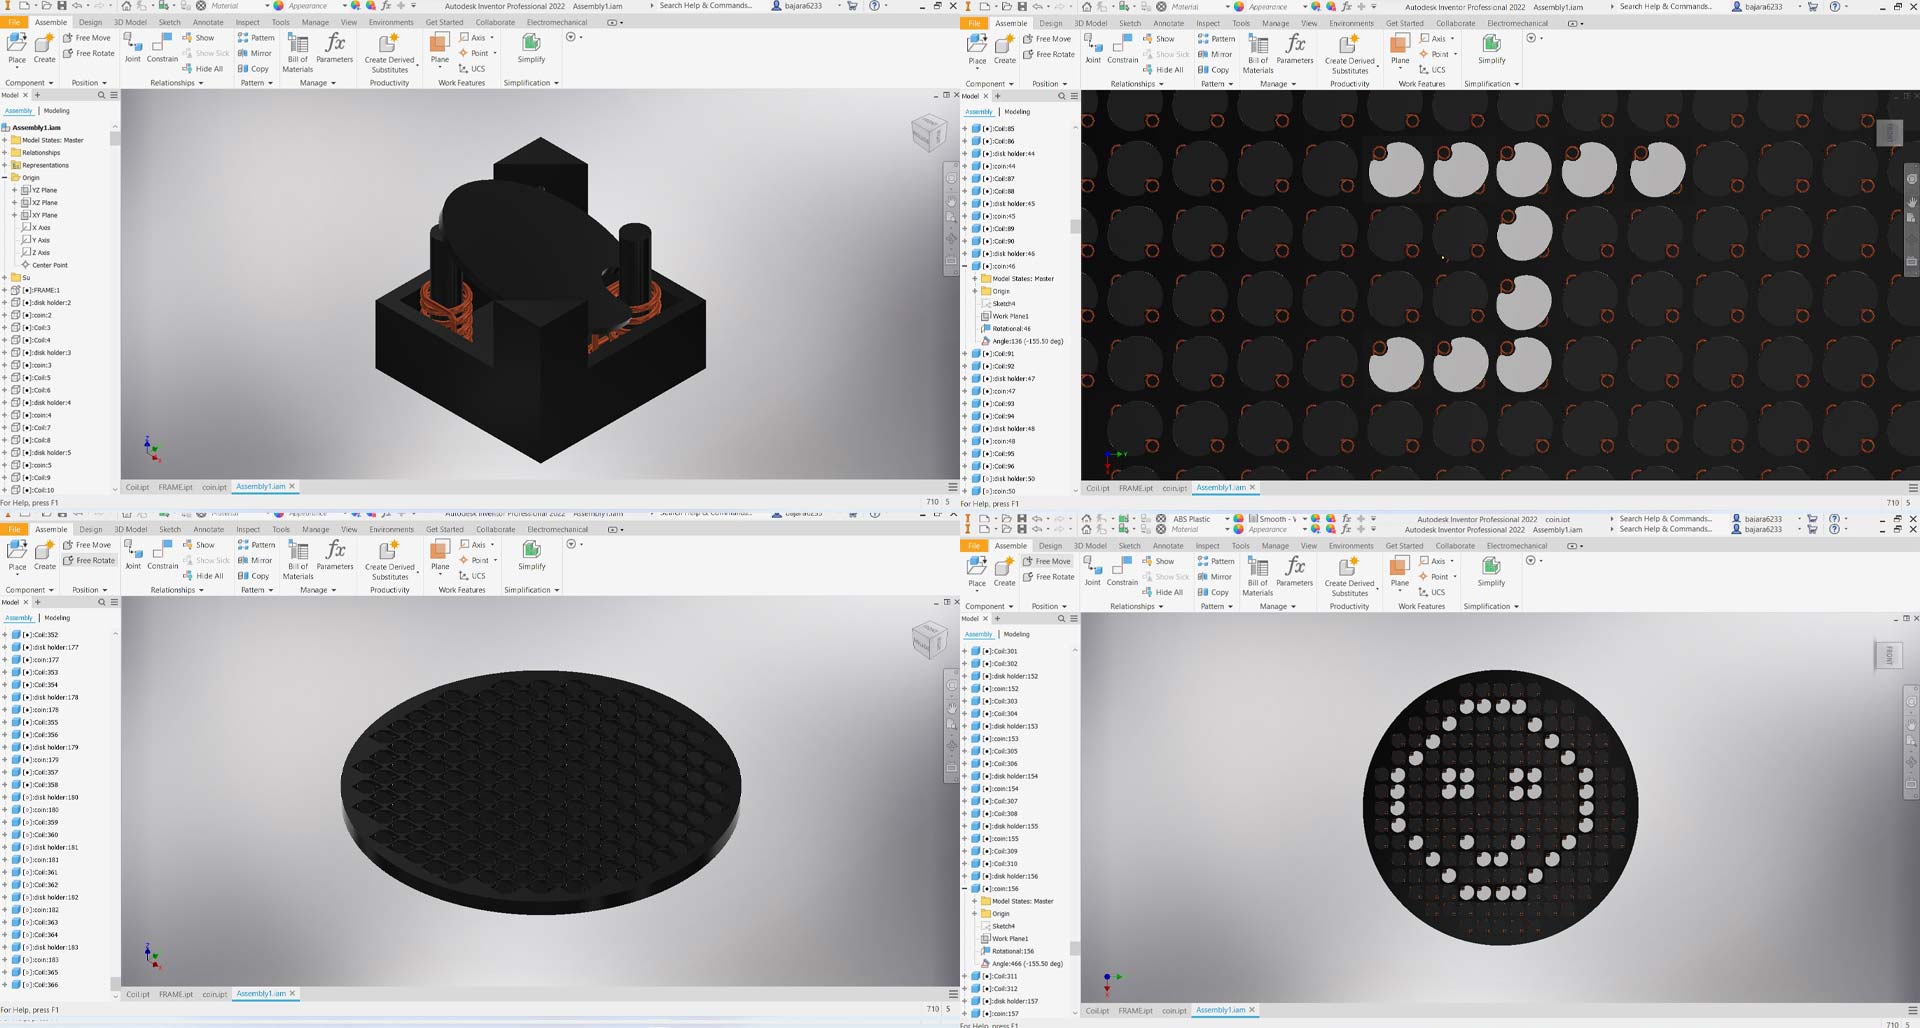
In Inventor 3D, I considered making a little animated representation of my project. I chose this software for modeling because this model has a lot of components and subassemblies, thus I thought of utilizing Autodesk inventor.
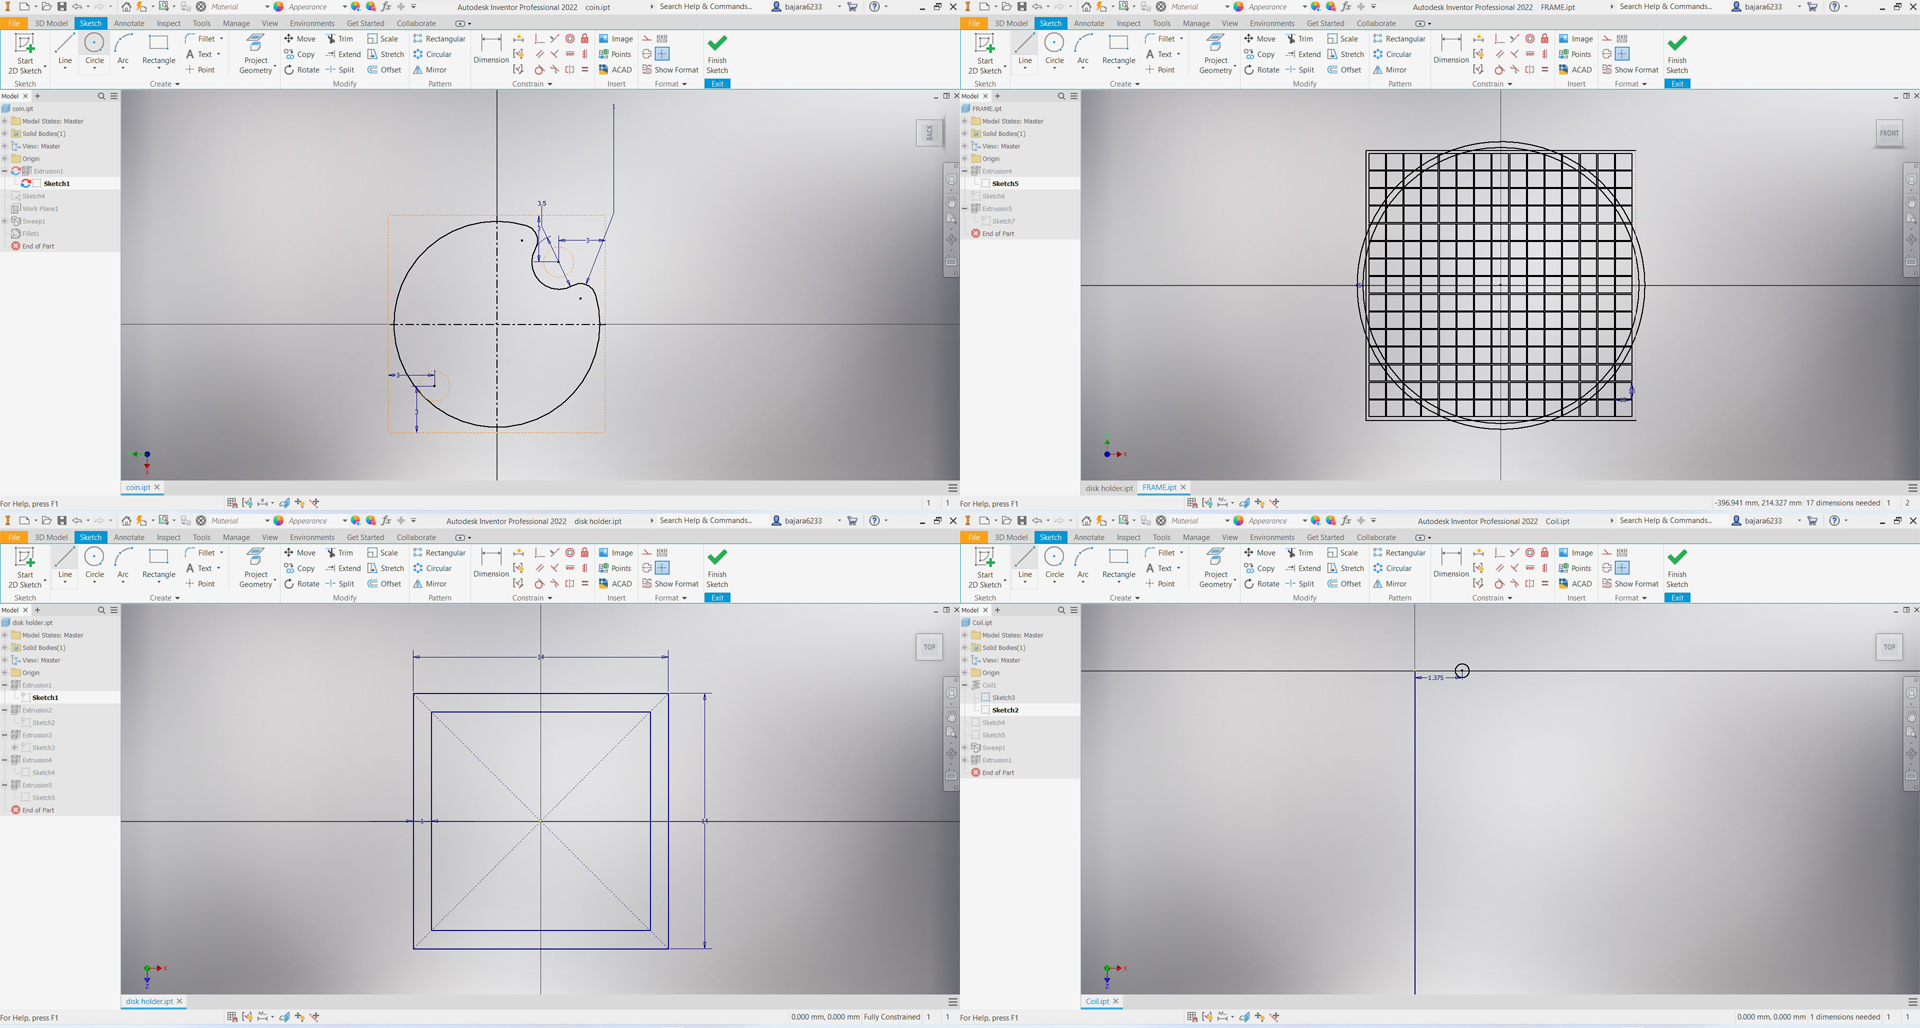
Sketching 2D
The first stage in any design is to sketch the 2D drawings, therefore I began sketching the 2D designs for individual parts.
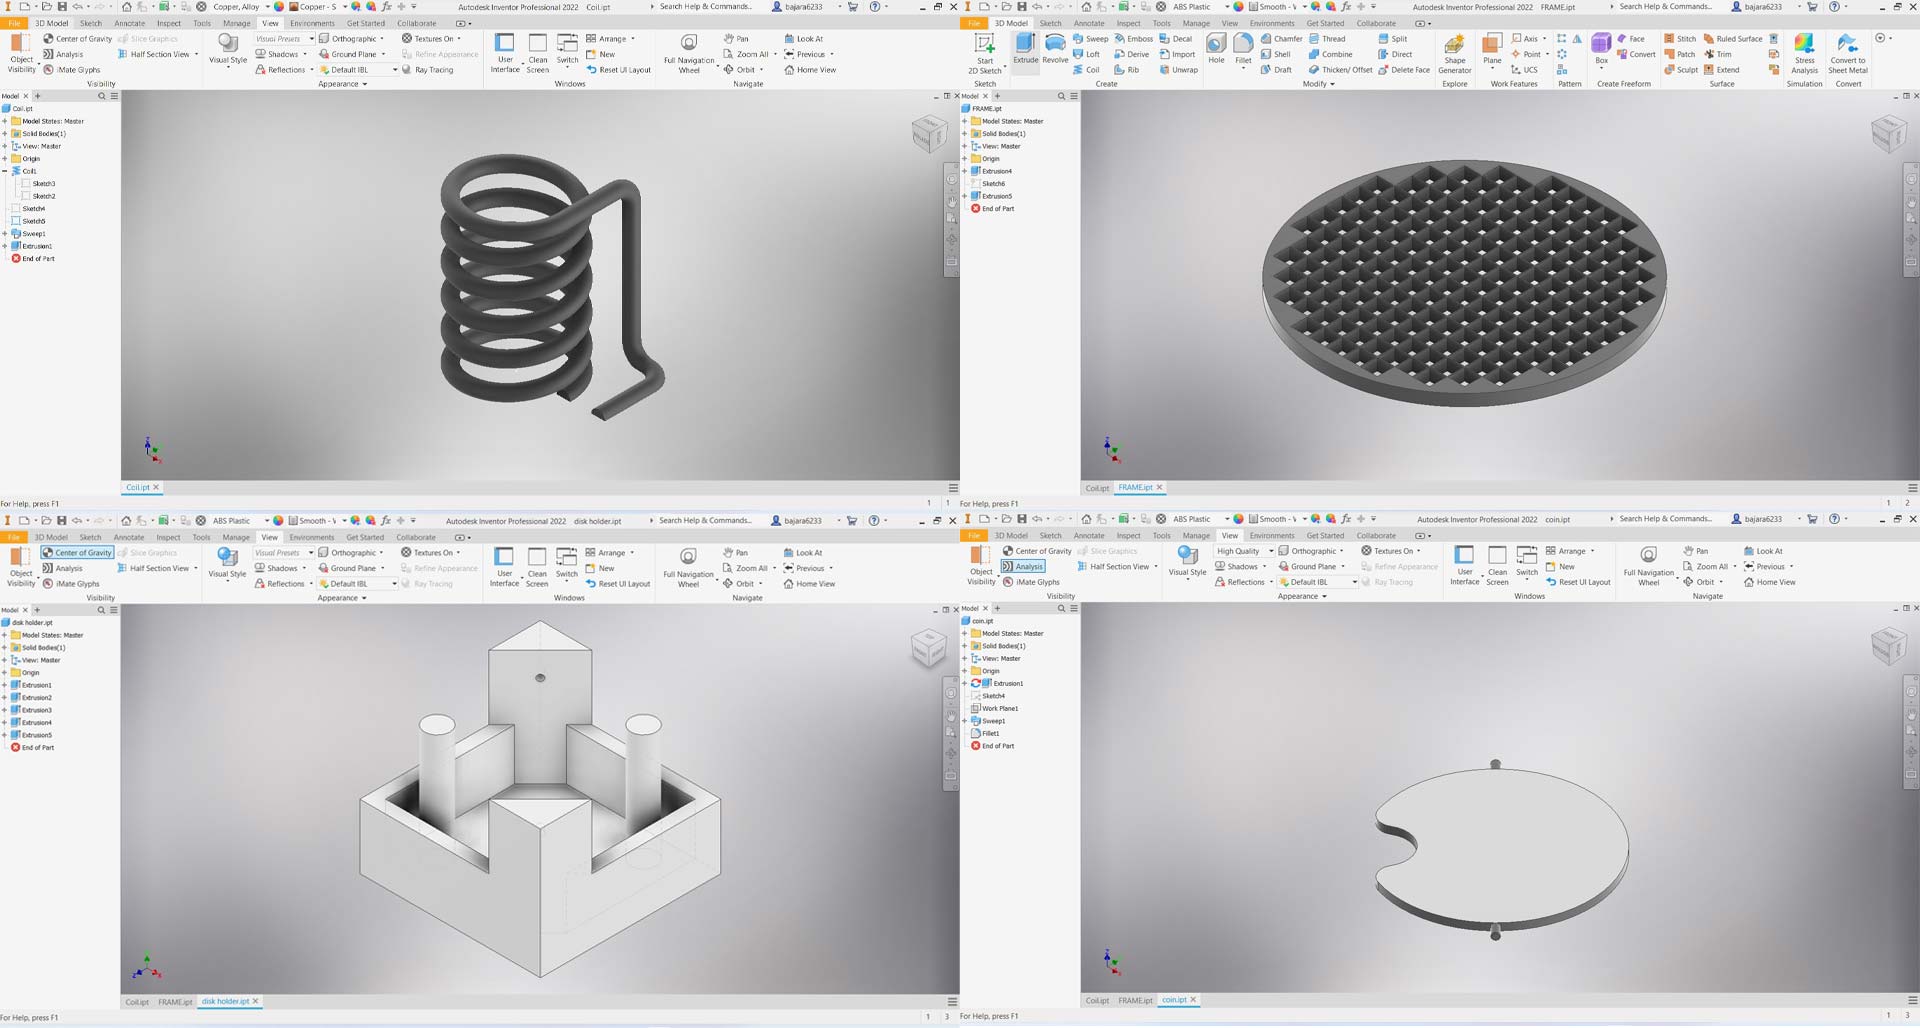
3D Modeling
I created a 3D model of each component of my final project using basic 3D modeling tools such as extrude, sweep, coil, pattern, and others.
Assembling the model
The magnetizing coil, flip disc, and base were first assembled as a sub-assembly for the flipping mechanism. After that, the subassemblies were assembled inside the frame.
Animation/Motion Study
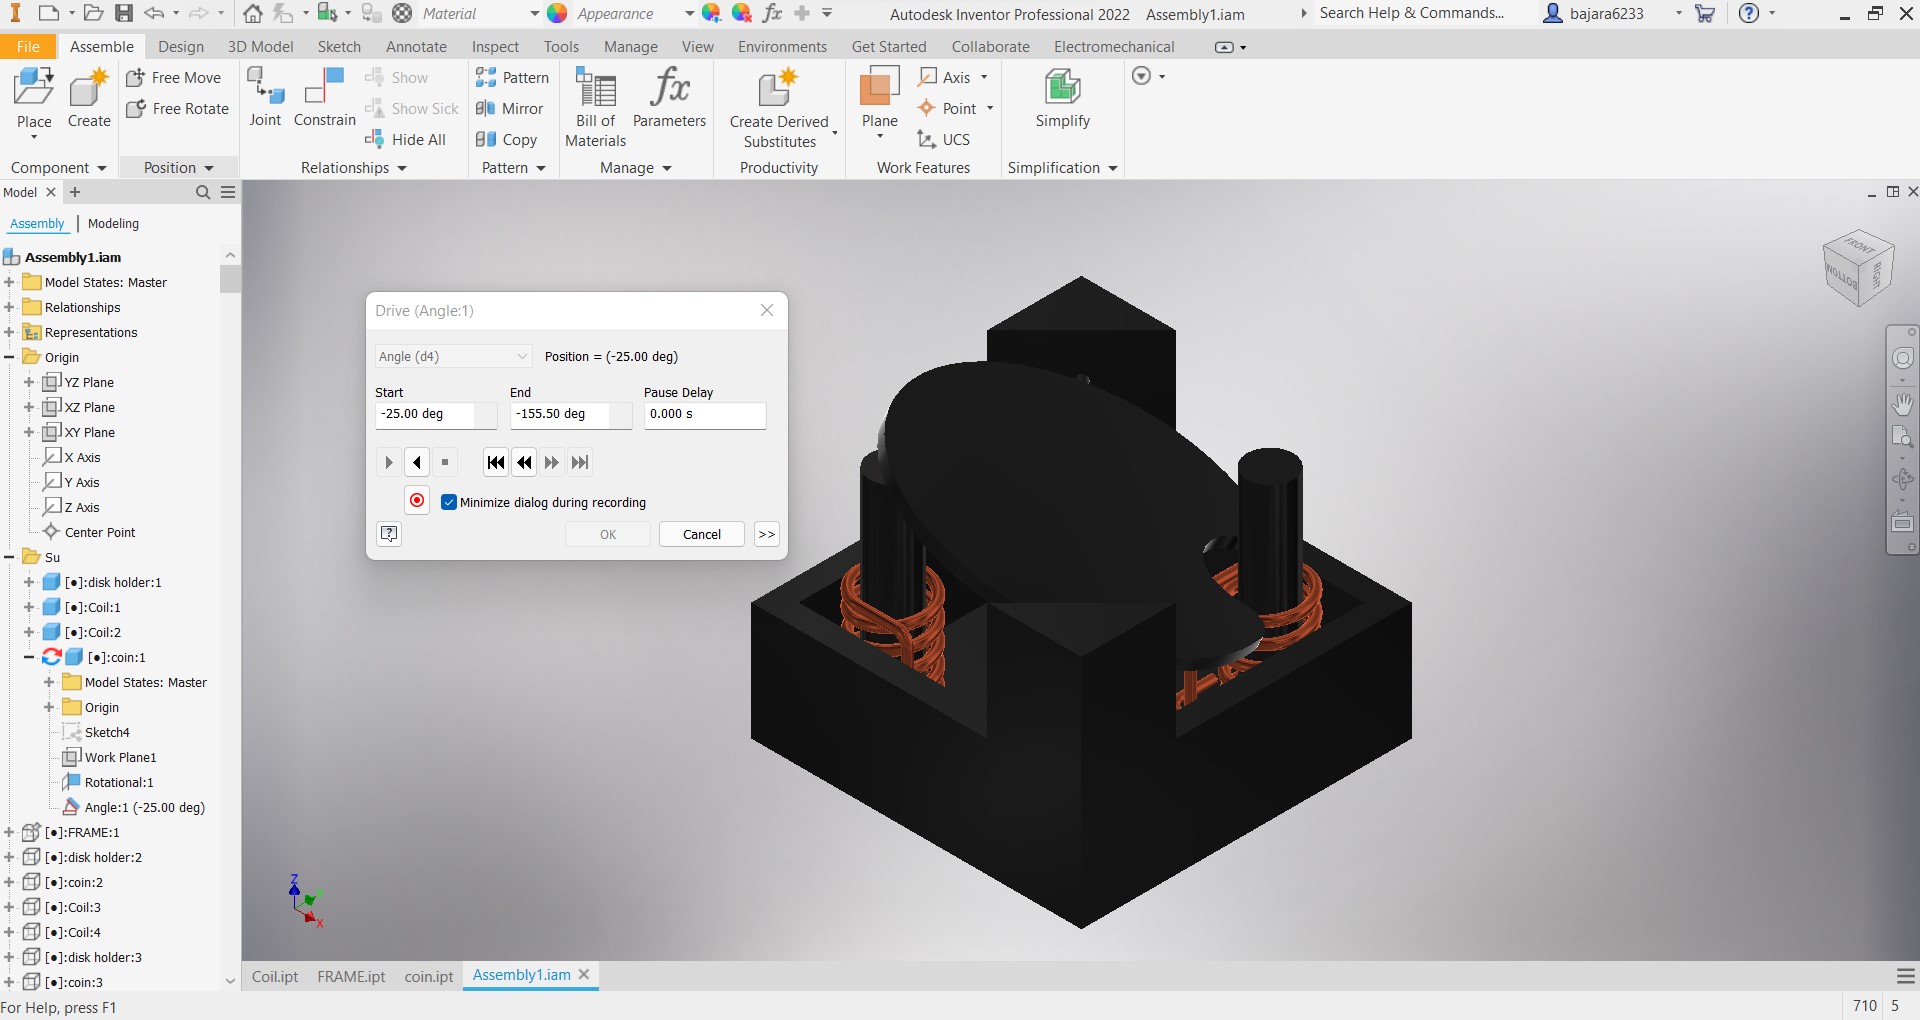
To animate, we must design drives for the constraint in order to control the mobility of the pieces within the assembly. As shown in the figure, click the constraint to be animated and then click on the drive to establish the drive.
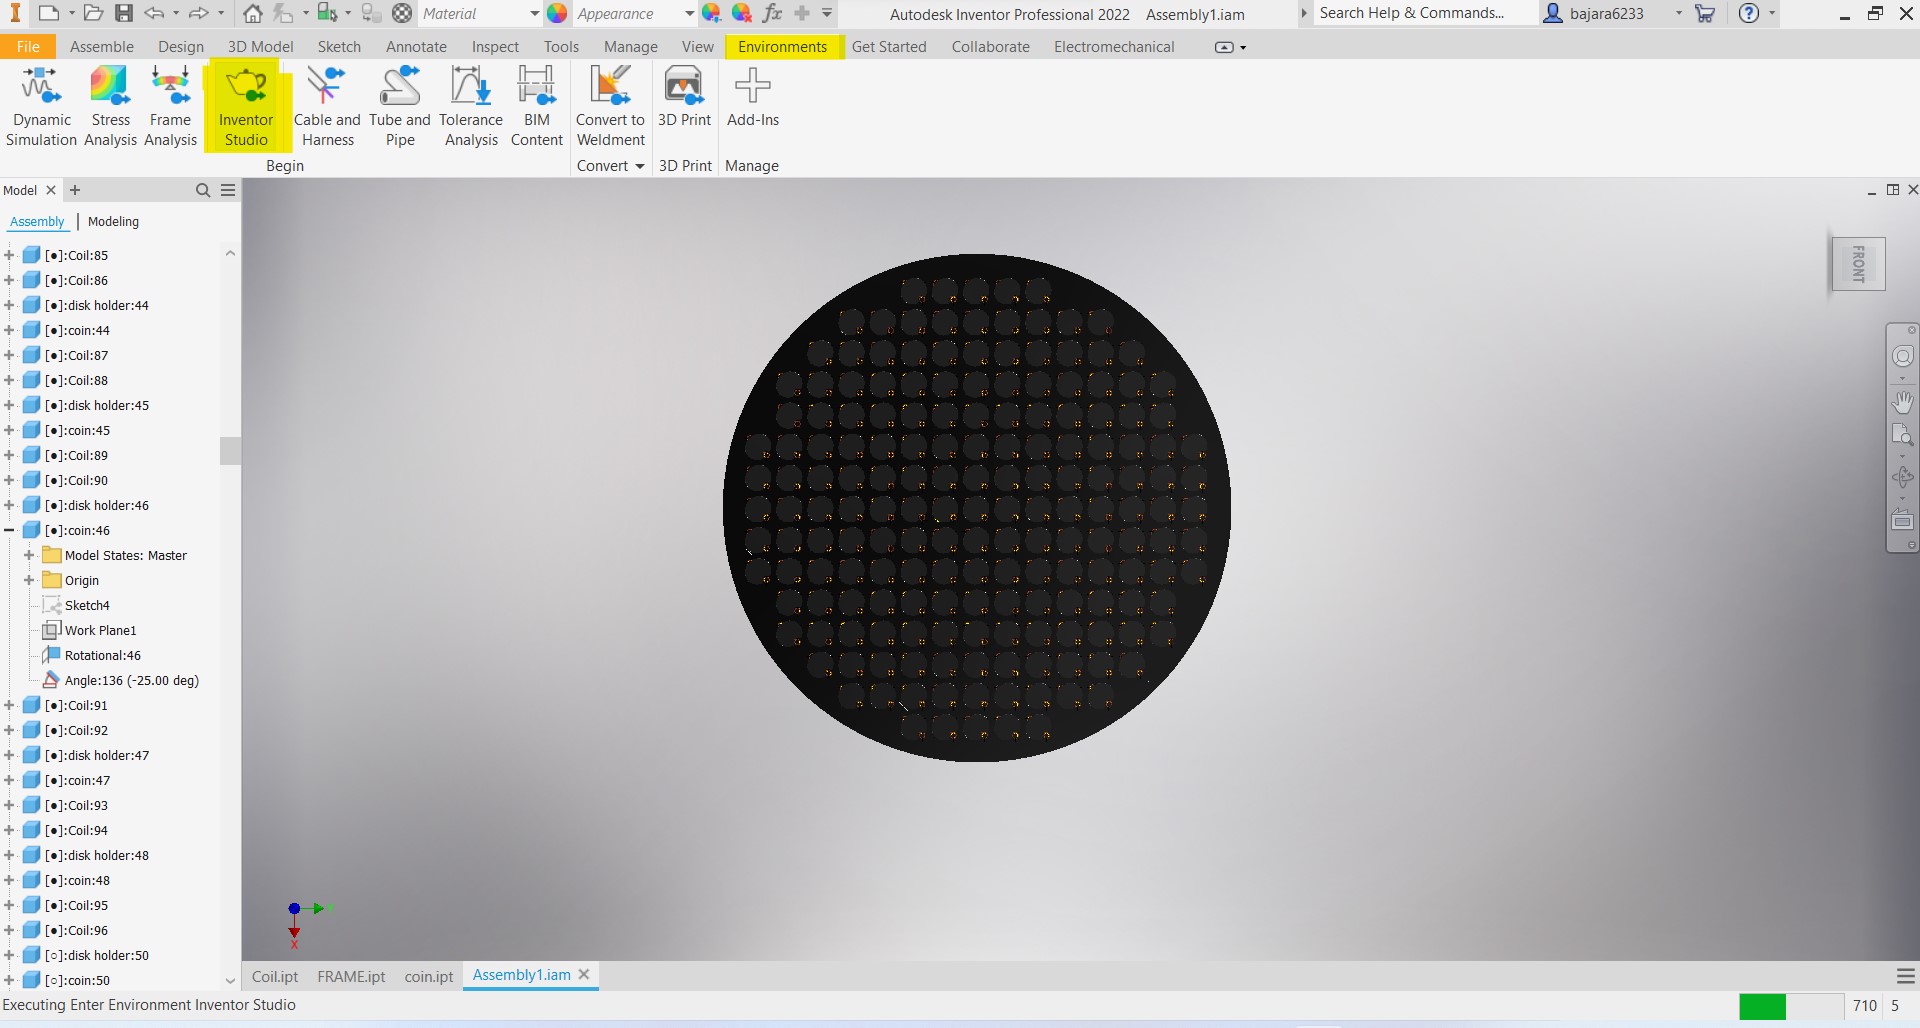
Now go to environment on the top ribbon and select inventor studio
Animate the drives to achieve the desired effect.
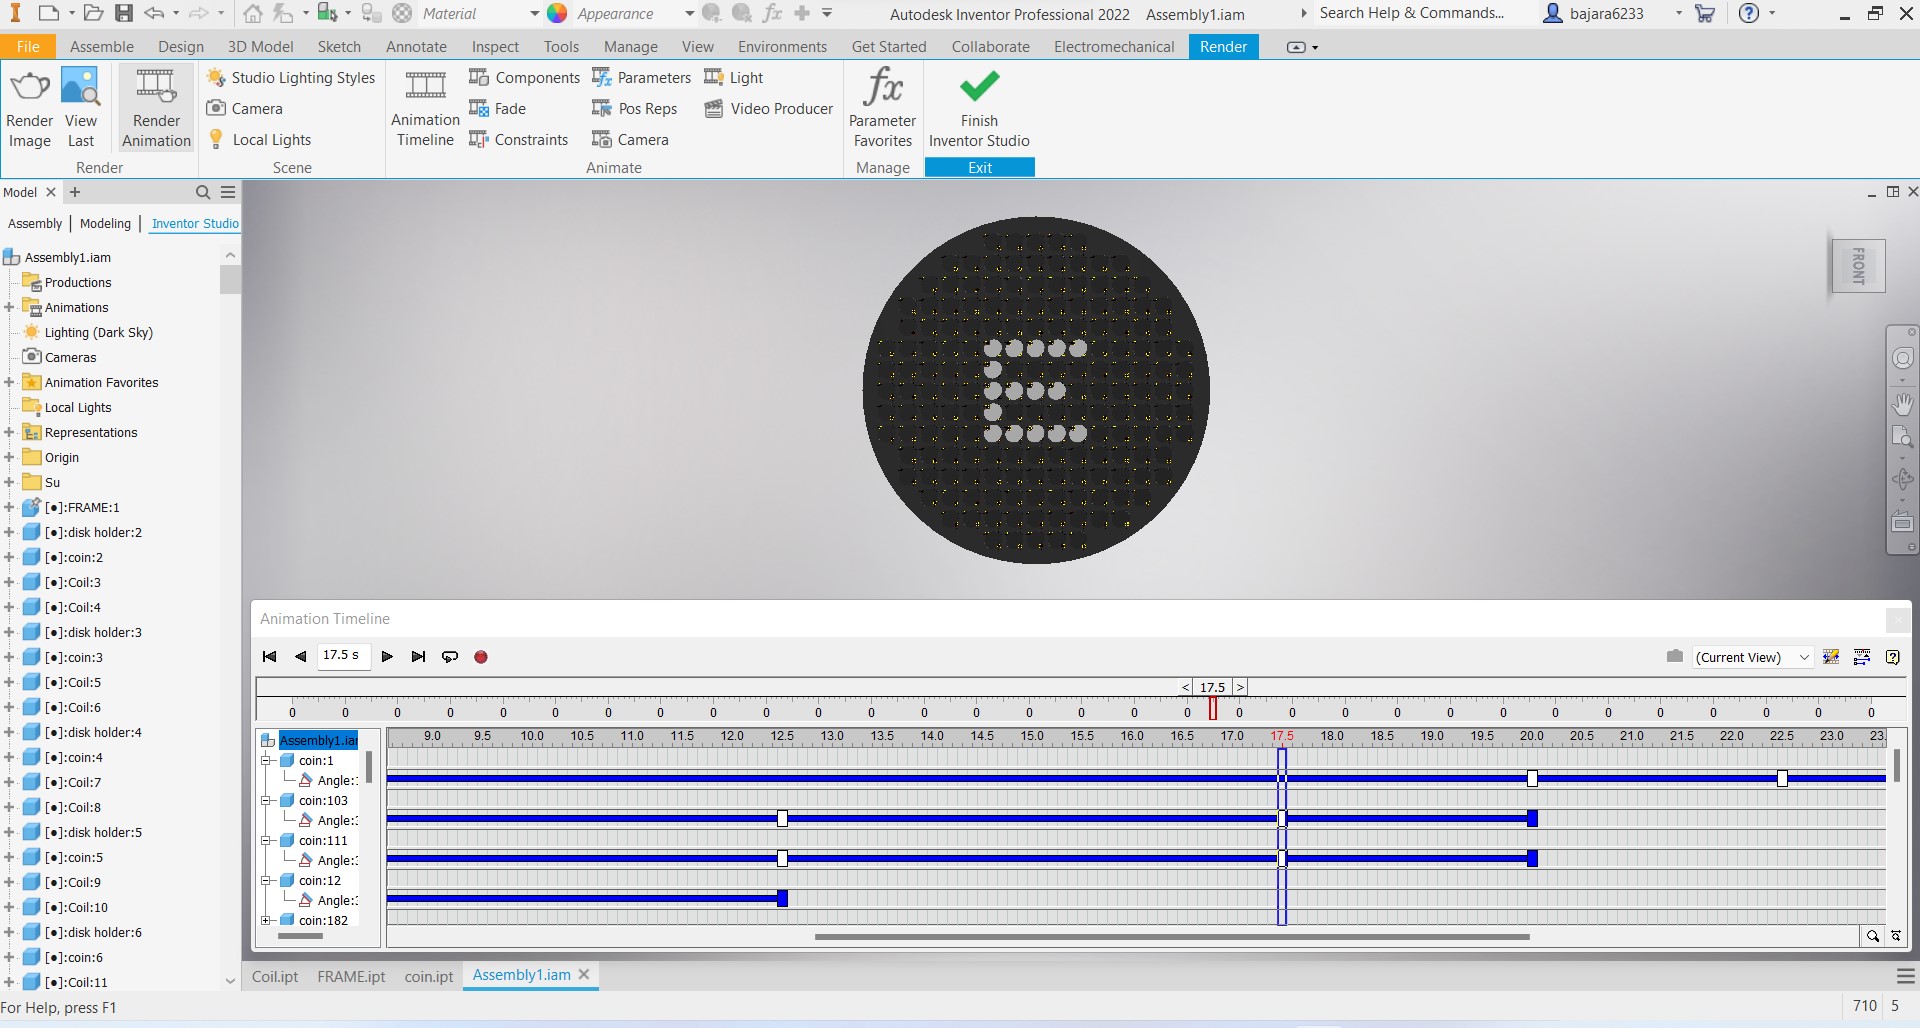
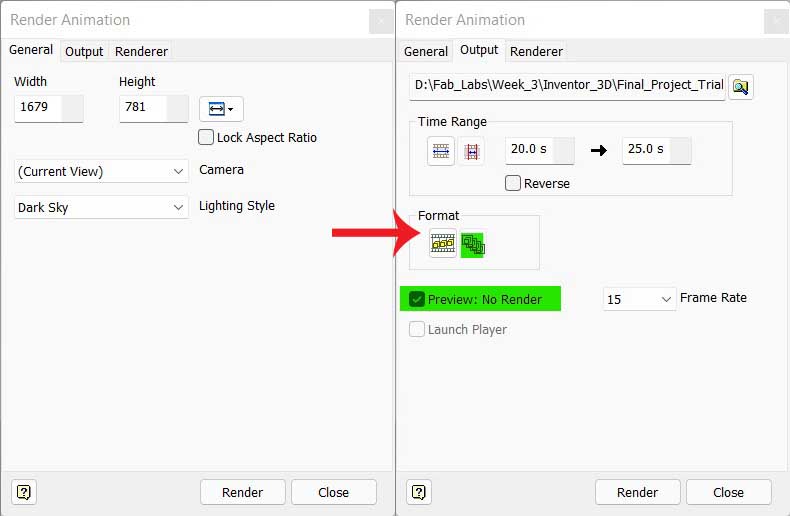
Rendering
For rendering click on the render animation on the ribbon then select the following setup to get a fast rendered output.