5. 3D Scanning and printing (Indonesia)
This is group assignment page of 3D Scanning and printing (Indonesia Student) :
Group assignment:
test the design rules for your 3D printer(s)
Design rules of our 3D printers machine
In this task we will do: Test design rules on our 3D Printer machine: Prusa i3 MK3S Kit, and compare it with another machine.
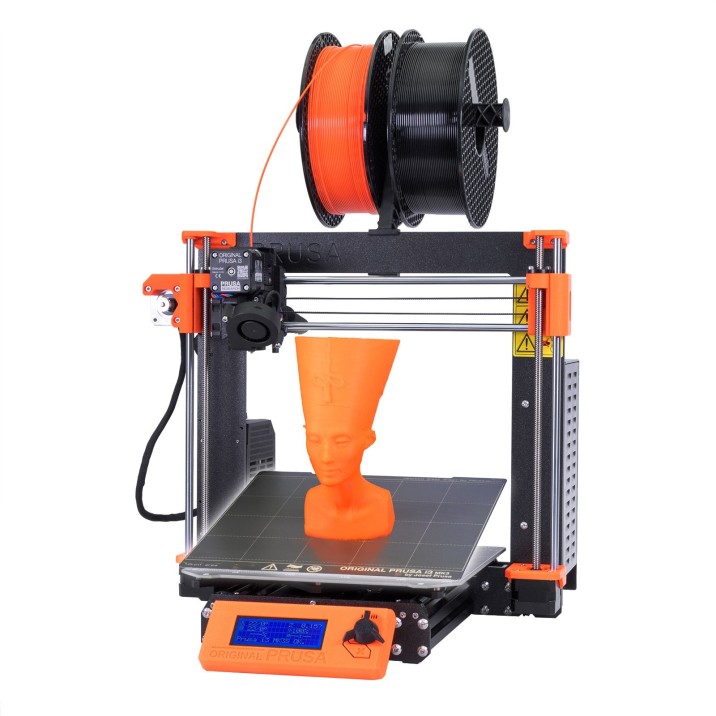
Printer Specification
Technical Parameters :
- Build Volume : 25×21×21 cm (9.84”×8.3”×8.3”)
- Layer height : 0.05 - 0.35 mm
- Nozzle : 0.4mm default, wide range of other diameters/nozzles supported
- Filament diameter : 1.75 mm
- Supported materials : Wide range of thermoplastics, including PLA, PETG, ASA, ABS, PC (Polycarbonate), CPE, PVA/BVOH, PVB, HIPS, PP (Polypropylene), Flex, nGen, Nylon, Carbon filled, Woodfill and other filled materials.
- Max travel speed : 200+ mm/s
- Max nozzle temperature : 300 °C / 572 °F
- Max heatbed temperature : 120 °C / 248 °F
- Extruder : Direct Drive, Bondtech gears, E3D V6 hotend
- Print surface : Removable magnetic steel sheets(*) with different surface finishes, heatbed with cold corners compensation
- Printer dimensions : (without spool) 7 kg, 50×55×40 cm; 19.6×21.6×15.7 in (X×Y×Z)
- Power consumption : PLA settings: 80W / ABS settings: 120W
Full Features List (October 2021 Edition)
Controller: EINSY RAMBo 8-bit board with Trinamic 2130 drivers (256 microstepping), co-developed with Ultimachine, sensorless homing for X and Y axes Mesh Bed Leveling: Advanced high-quality SuperPINDA sensor (Super Prusa INDuction Autoleveling sensor) Print sheet profiles: Firmware supports print sheet profiles to store Live Z calibration data to enable quick switching between different print sheets. Filament sensor: IR sensor built-in, supports filament auto-loading. Print pauses when filament runs out. Power Panic: Hardware-based, single G-code line accuracy Ethernet connection: via Raspberry Pi (optional) Wi-Fi connection: via Raspberry Pi (optional) Advanced sensors: 3 thermistors, fans RPM monitoring, SuperPINDA Calibration: Automatic, Mesh Bed Leveling, SelfTest Print medium: SD card (16 GB card included) Firmware update: via PC (USB cable) PSU: Custom-made Delta PSU with hardware-based power panic Advanced features: Automatic filament loading, steel sheet profiles, Octoprint compatibility and more New features introduced through firmware upgrades
Procedure
When we are going to do 3D printing, there are several procedure steps that we have to do.
- turn on the power supply
- loading filament
- setting bed level
- prepare the file to be printed
- printing process
Printer Test
In this group assignment, we will try to print a test for FDM Assessment Protocol using Autodesk x Kickstarter FDM 3D Printer Assessment. we can download the source of the model to be printed here.
Geometry developed by Autodesk and Kickstarter tests how well 3D printer hardware and software are calibrated to specific materials by stressing the system to the point of failure. Failure led to the creation of witness features that can be used to assess the performance of cutters, extruders, and drive systems. While these geometries and protocols can reveal many types of problems in a system, fixing open problems is beyond the scope of this basic assessment protocol.
- After we download the model file (.stl), then we open the PrusaSlicer software, open the model file (drag or import) to PrusaSlicer.
- Setting the parameters of printer, includes:
- material used: PLA 1.75 mm
- infill : 15%
- layer height : 0.15 mm
- Nozzle temperature: 210 degrees Celsius
- bed temperature: 60 degree Celsius
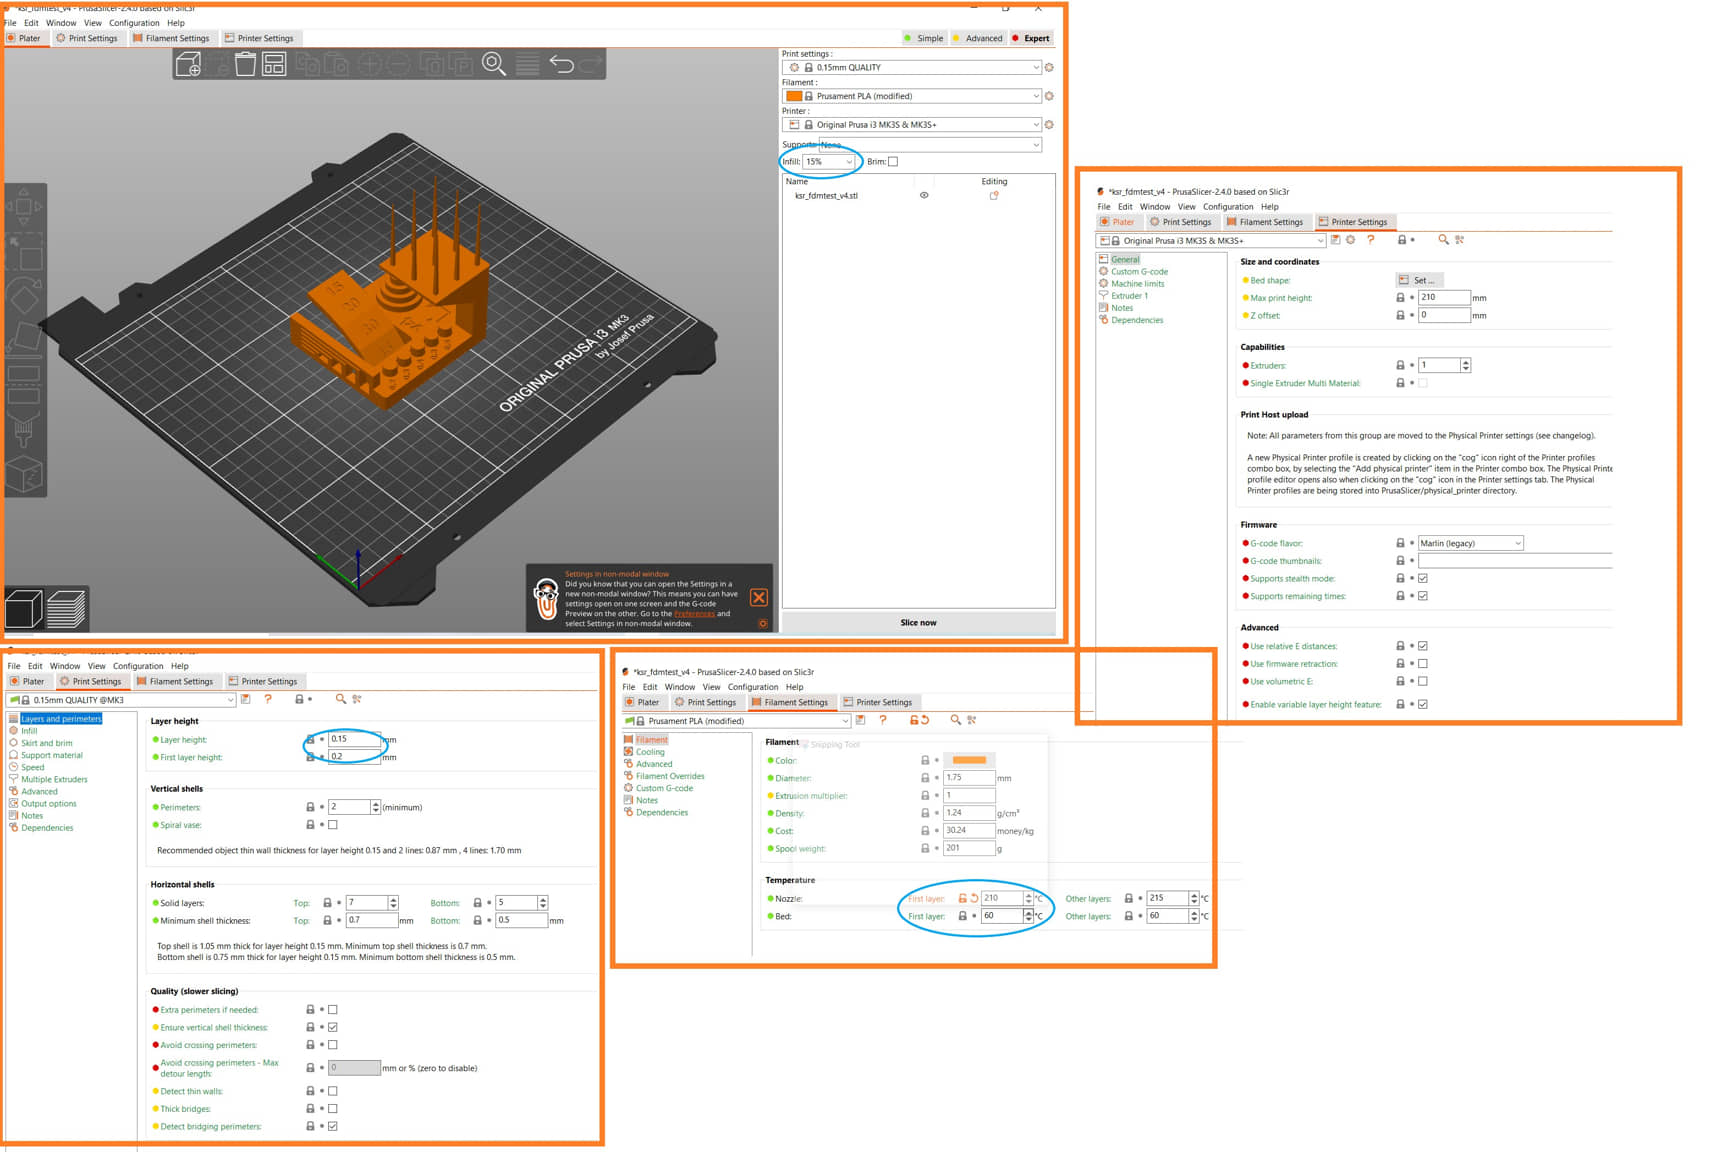
- then Slice now
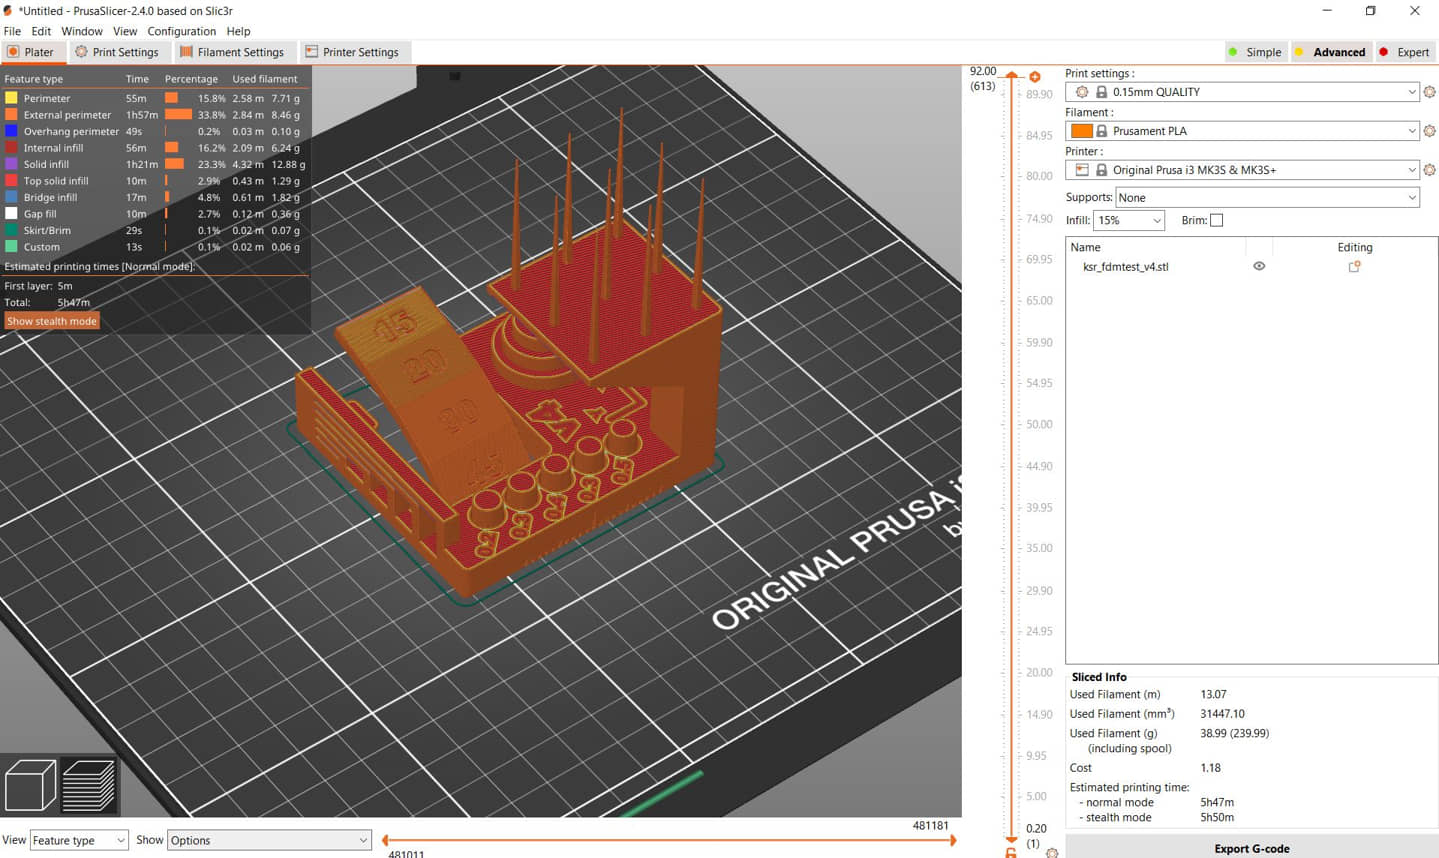
we get an estimate of the processing time of about 5 hours 50 minutes.
- Export G-Code, save/copy the G-code file to SD-card, after copying bring the SD card to the 3d printer machine,
- printing process
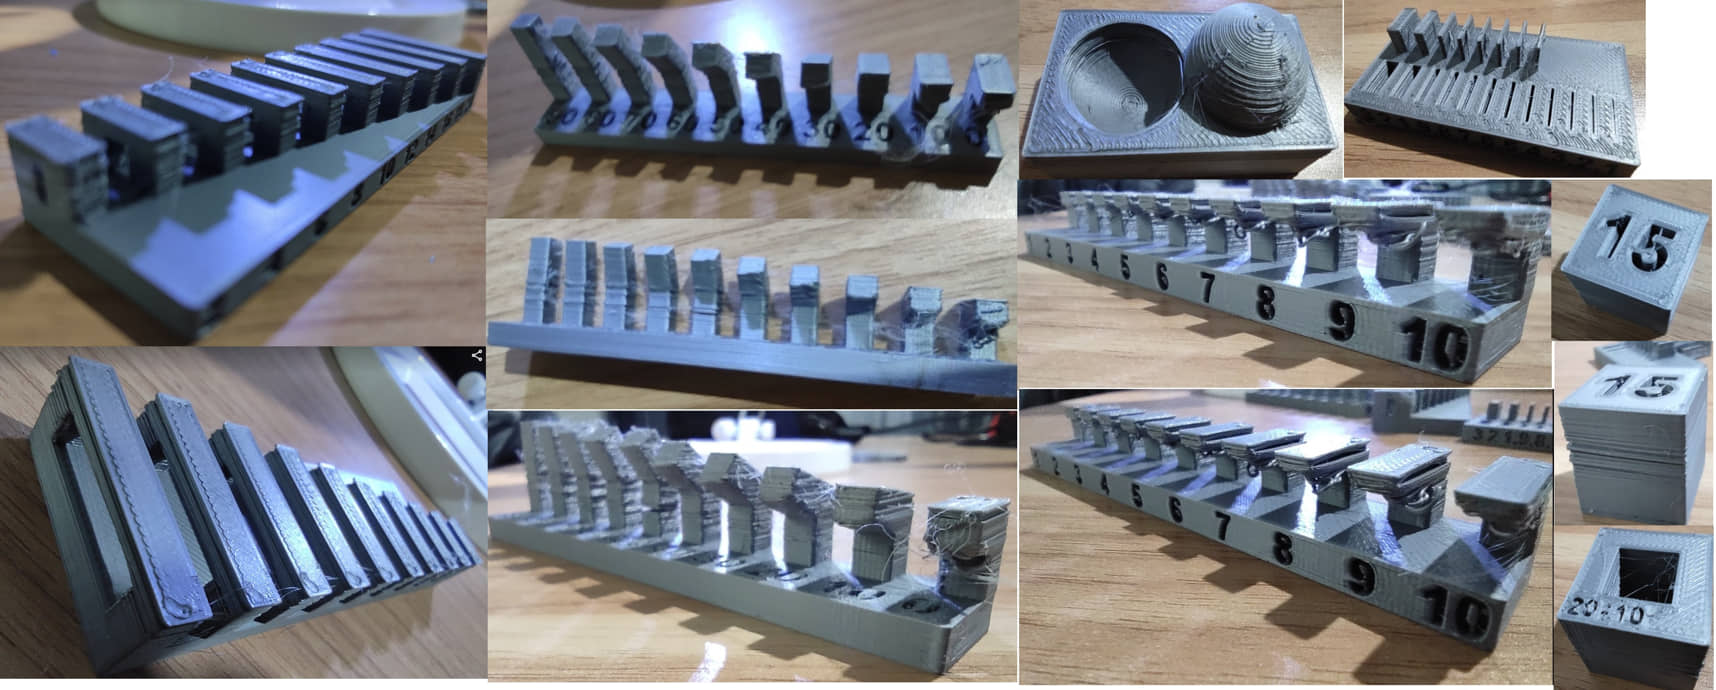
Results and Analysis
In the print results that have been obtained, several things were checked, including:
- Dimensional accuracy
- Negative feature resolution
- Positive feature resolution/fine flow control
- Basic overhang capabilities
- Basic bridging capabilities
- XY ringing
- Z-axis alignment
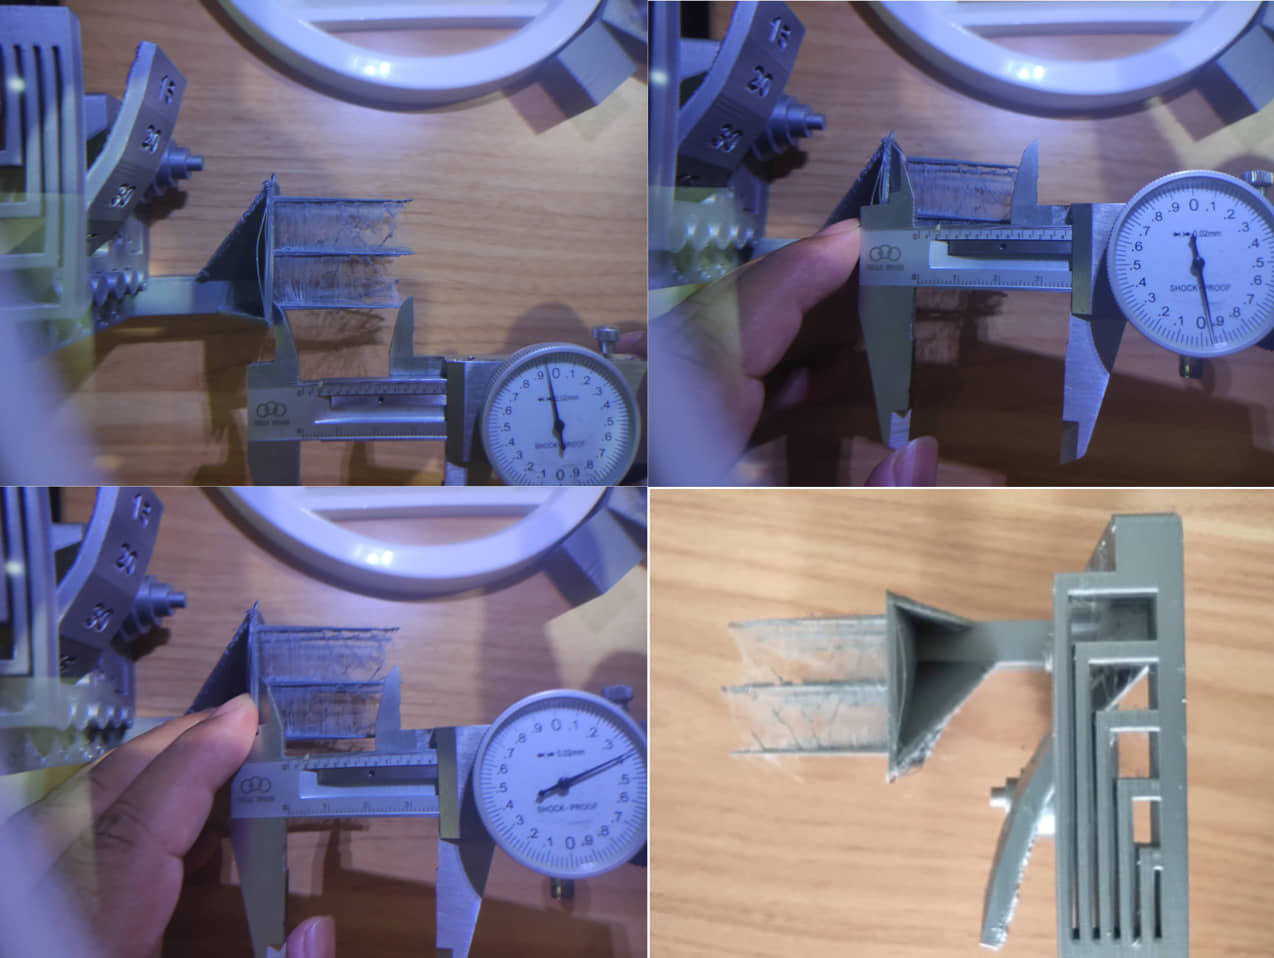
Dimensional accuracy
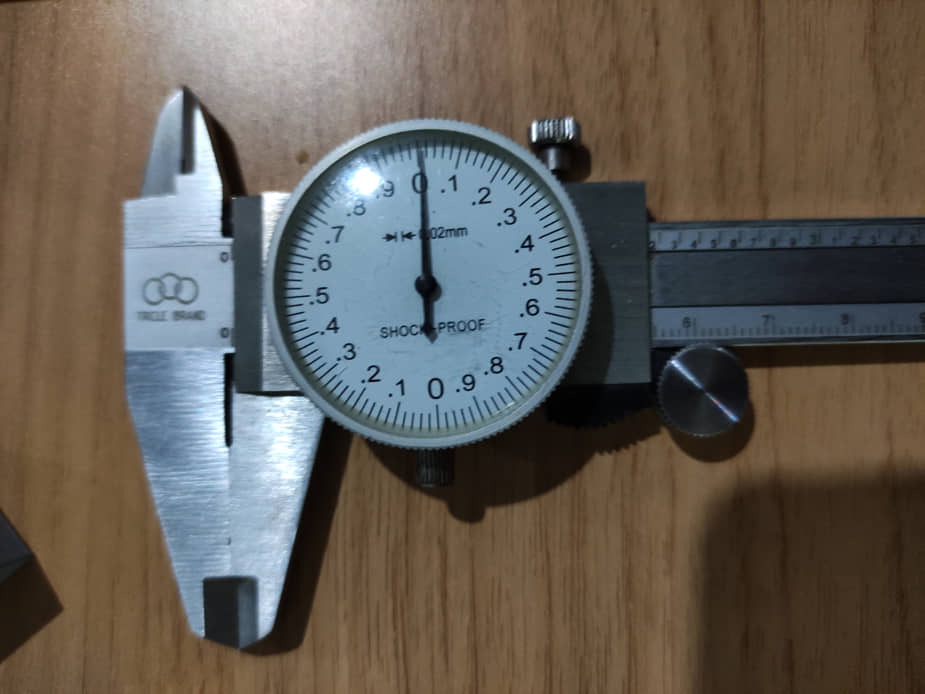
Note
our first step is to calibrate (setting zero) on the caliper
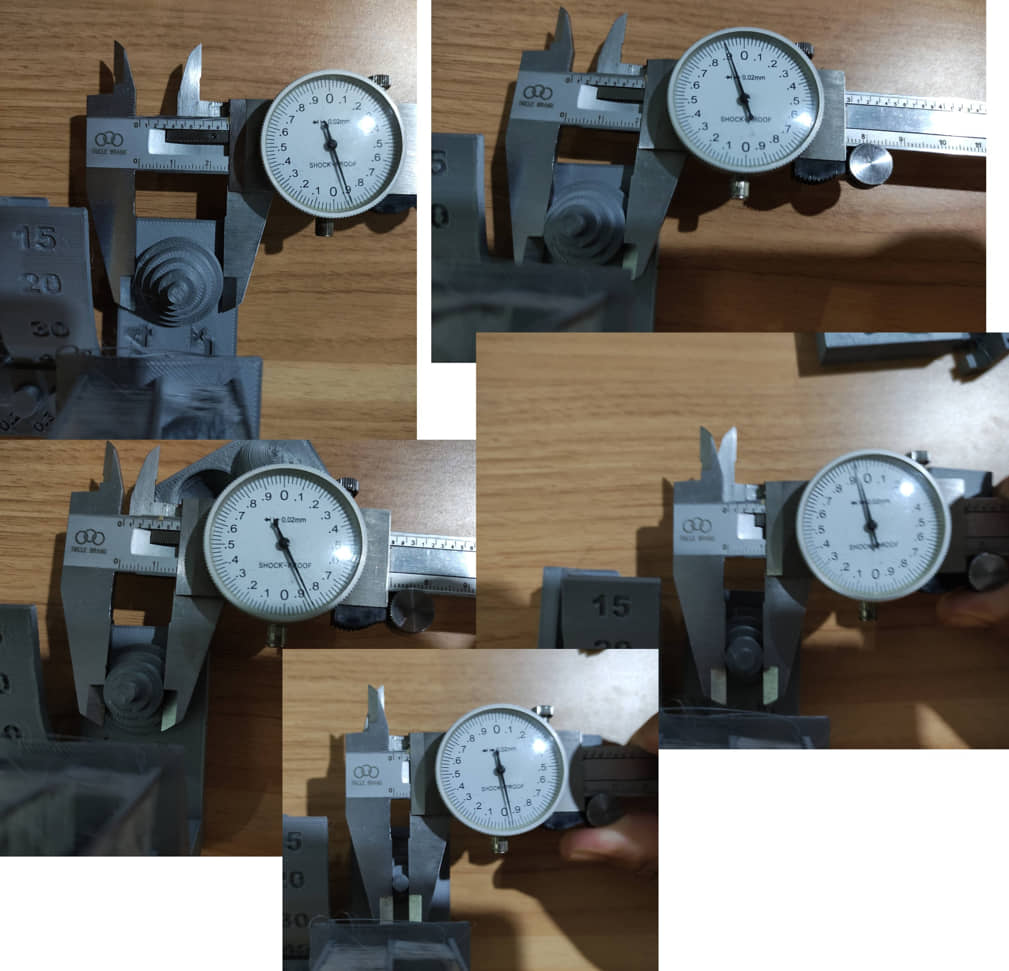
direction measurement of dimensional accuracy
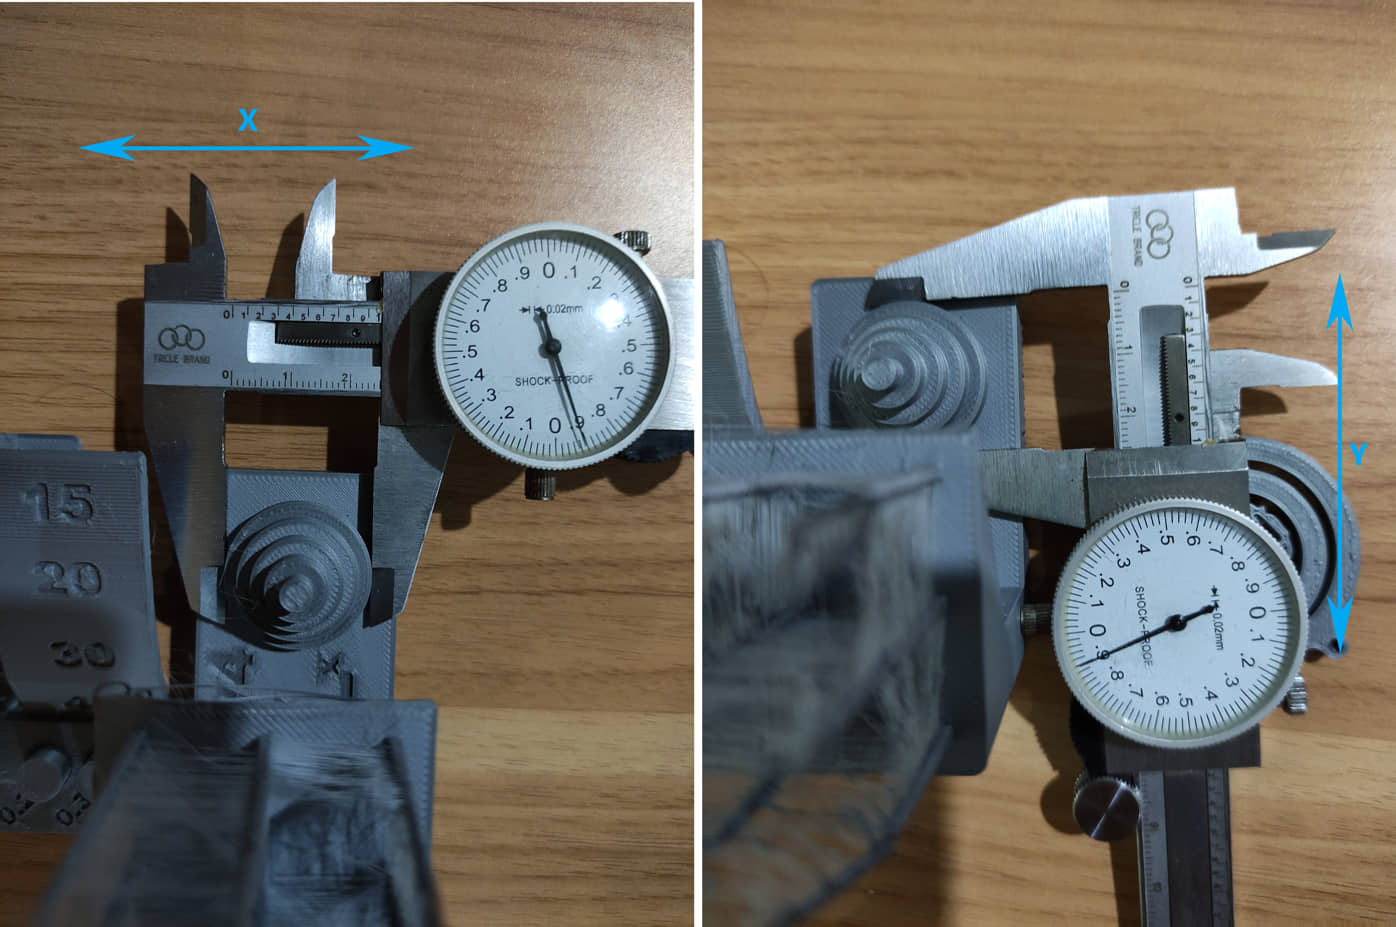
To assess dimensional accuracy, we measured each level of the circle stack for dimensional accuracy and recorded the absolute difference between the target and the measured dimensions in the following table:

Score
- Record a “1” if the magnitude of the overall average error is greater than 0.40mm.
- Record a “2” if the magnitude of the overall average error is between 0.31 and 0.40mm.
- Record a “3” if the magnitude of the overall average error is between 0.21 and 0.30mm.
- Record a “4” if the magnitude of the overall average error is 0.11 and 0.20mm.
- Record a “5” if the magnitude of the overall average error is between 0.0 and 0.10mm.
Score : 5
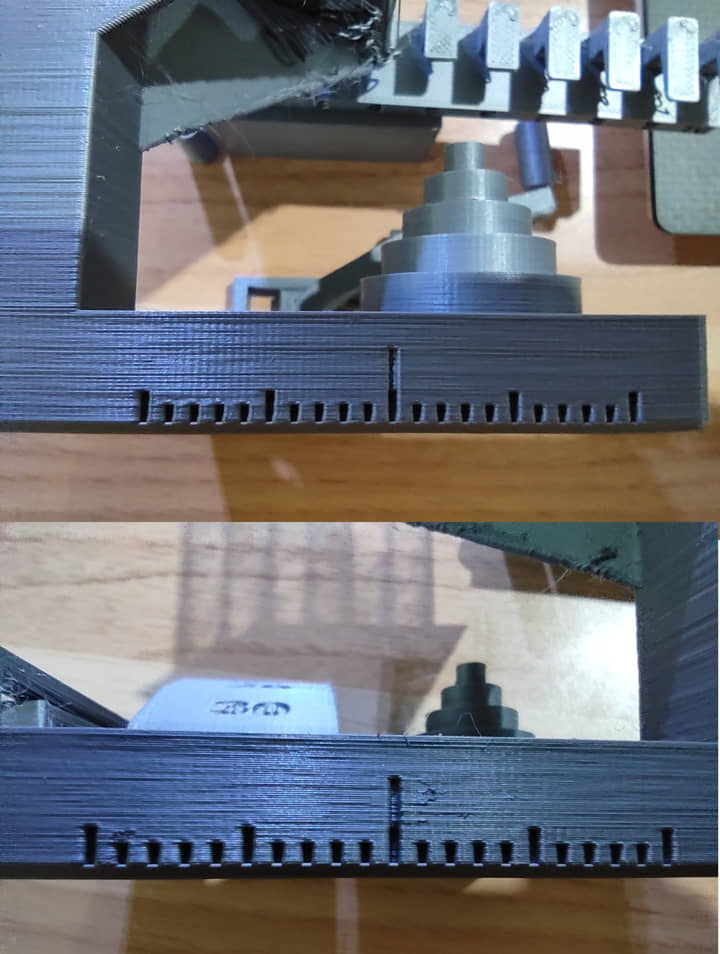
Fine Flow Control
This test looks at how well the printer can make small spires. measured the height of the tower that can be made (height score for > 30mm) and whether when making it clean or not leaving stringing between towers.
The result is a spire height of more than 30 (the shortest is 36.4 mm) but still leaves some stringing between the spires.
Score : 2.5
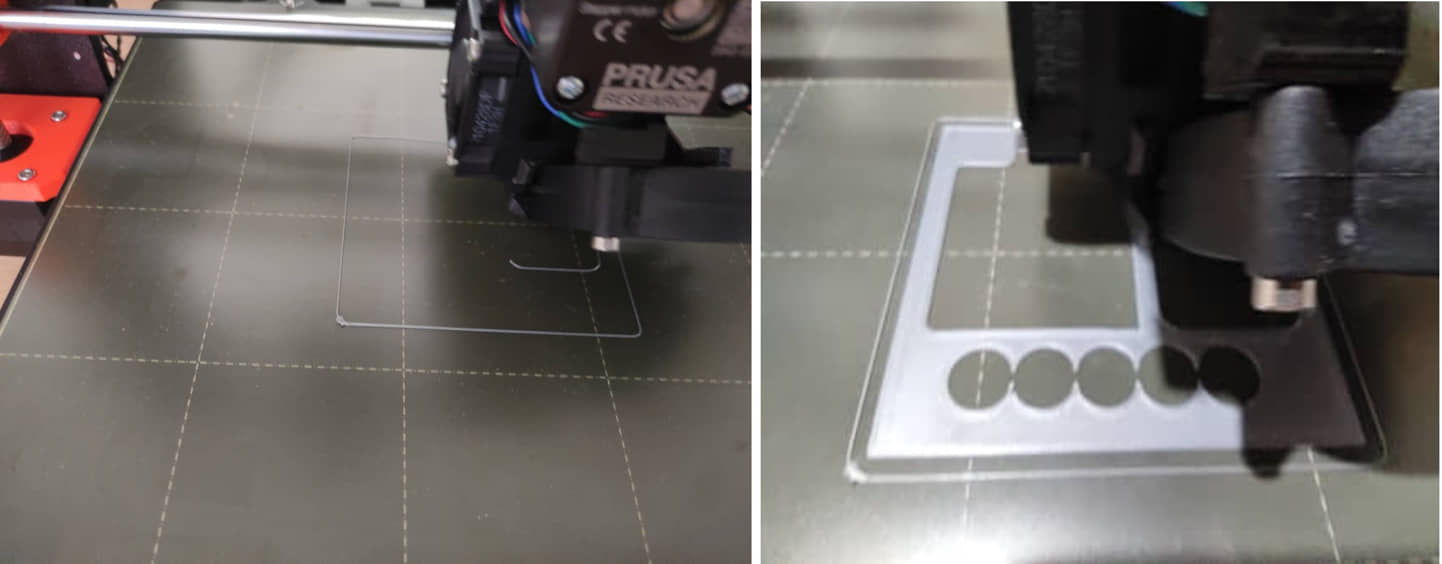
Fine Negative Features
This test is to see the 3d printer’s ability to make pins and holes and the ease of releasing (making clearance). There are 5 pairs of pin-holes, when printed they all become one but after printing how easily the pins are released using your fingers (not with tools). Attempt to remove all the pins from their holes using fingers
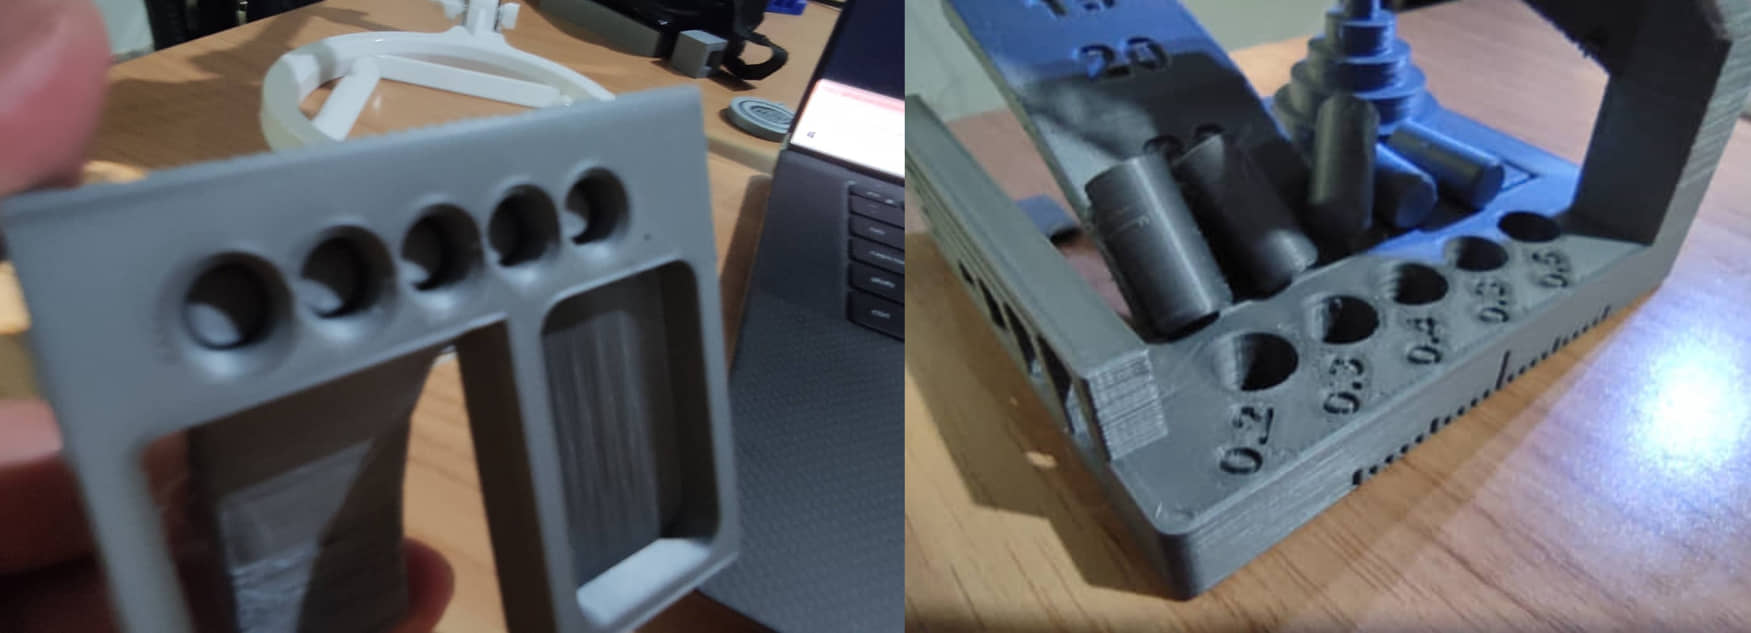
As a result, all pins can be removed easily with a finger.
Score : 5
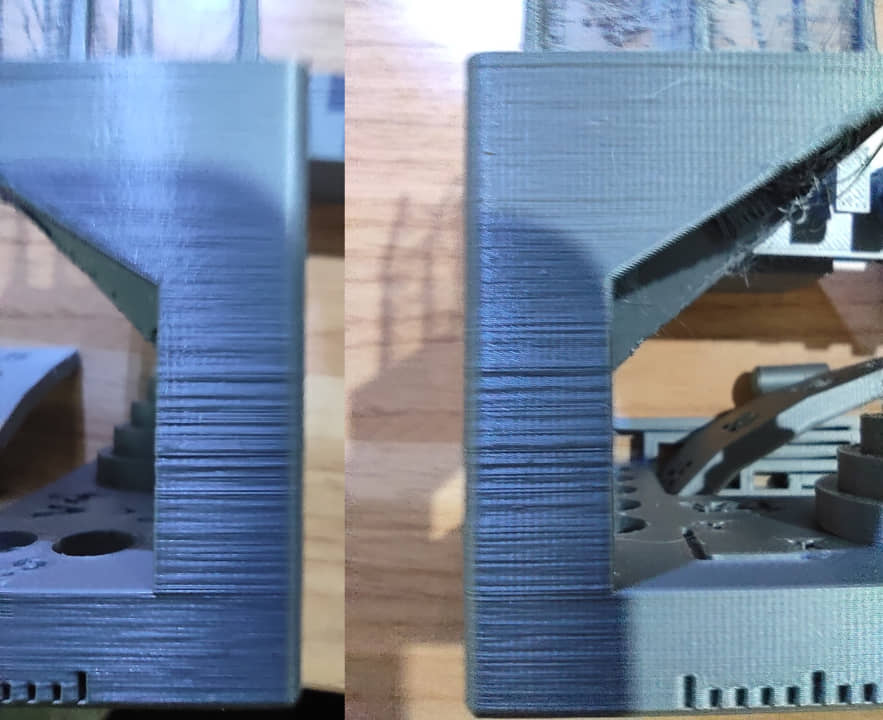
Overhangs
This test is to determine the printer’s ability to make objects overgang at a certain angle to the flat direction. the smaller the angle and still form a flat / stable surface, the better the results. There are overhang testing of 45, 30, 20 and 15 degrees.
 the result only the 15 and 20 degree surfaces differ from the 45 degree overhang.
Score : 3
Bridging
This test is to find out Inspect for contact between bridges and the surface beneath each. five measures are made to determine the level of ability in making bridging.
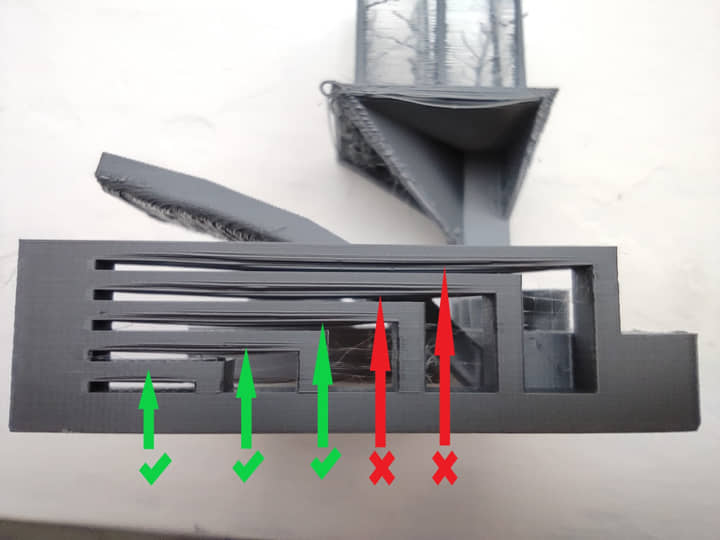
the result is only three that can make bridging without touching the surface underneath.
Score : 3
XY Resonance
Score : 2.5
Z-axis alignment
This test is to see how the printer makes prints in the Z (layer) direction. If a layer registration effect with a period equal to that of the leadscrew is visible on the pillar supporting the fine positive features test, record “0,” otherwise, record “2.5.”
Score : 0
Total Score : 5 + 2.5 + 5 + 3 + 3 + 2.5 + 0 = 21 (Prusa i3 MK3S Kit)
Another test 1
We also made “Design rules of our 3D printers machine” for other printers
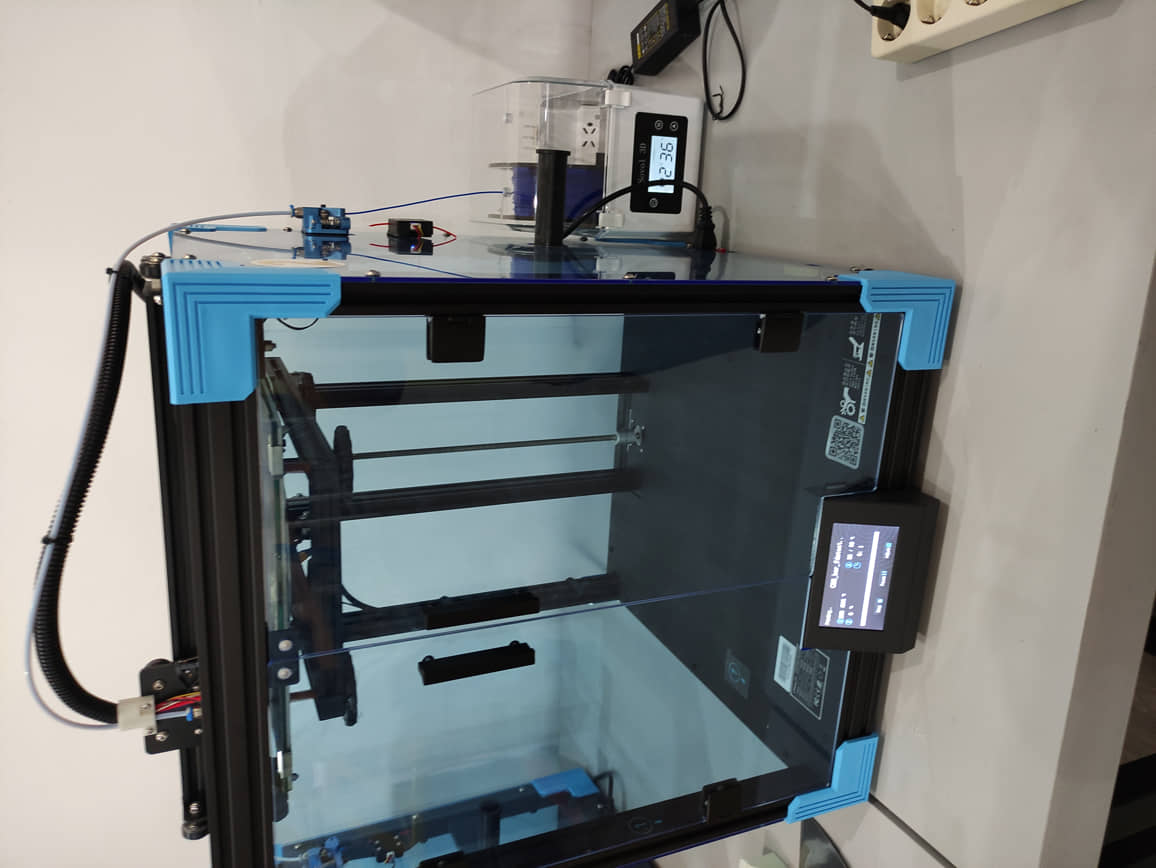
- Printer type: FDM
- Brand : Ender-6 3D Printer
- Filament : PLA (We use eBox Lite Storage with heater for PLA filament, because the nature of the PLA used in this printer is brittle, this is to keep the filament from breaking during the printing process).
-
result :

-
Assessments result:
-
Dimensional accuracy (Score : 5)

-
Negative feature resolution (Score : 3 )
- Positive feature resolution/fine flow control (Score : 5)
- Basic overhang capabilities (Score : 3 )
- Basic bridging capabilities (Score : 1 )
- XY ringing (Score : 0 )
- Z-axis alignment (Score : 2.5 )
-
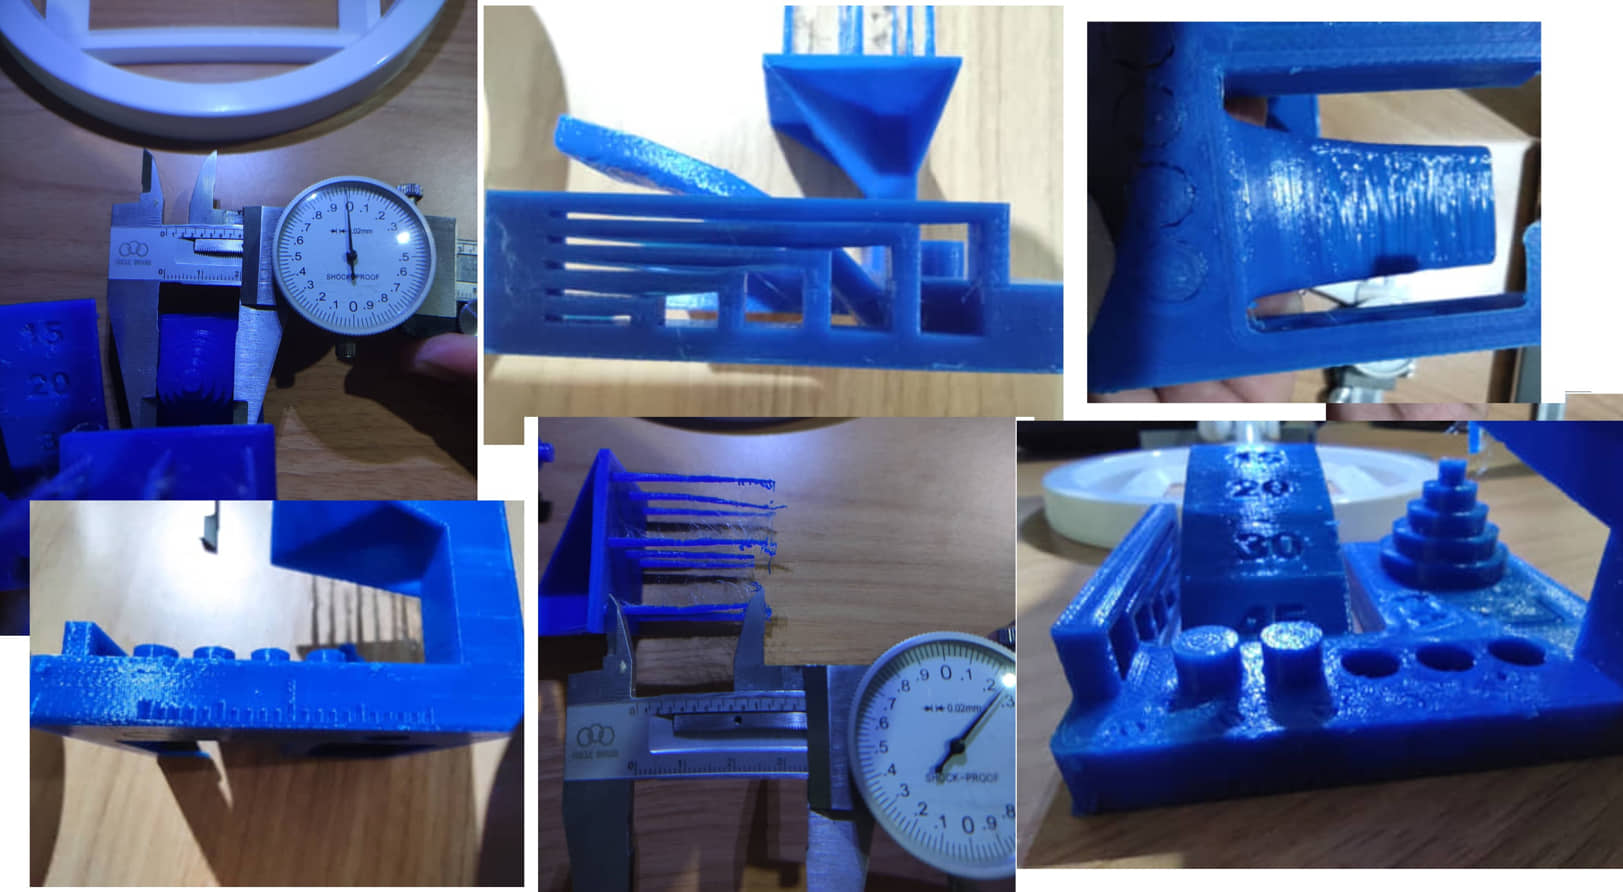
Total Score : 5 + 3 + 5 + 3 + 1 + 0 + 2.5 = 19.5 (Ender-6 3D Printer)
Another test 2
We also perform tests on several forms that do not require support, such as the following: