6. 3D Scanning and printing
This week task as below:
- Individual assignments
Design and 3D print an object (small, few cm3, limited by printer time) that could not be easily made subtractively
3D scan an object, try to prepare it for printing (and optionally print it)
3D print
This is my first time to use 3D printing to print the object.
The 3D printing I used is called 86 Duino Enjoy Auto Exchange.
Below is the offical web site for the for the 3D printing.
Step 1
Firstly, I need to create sketch.
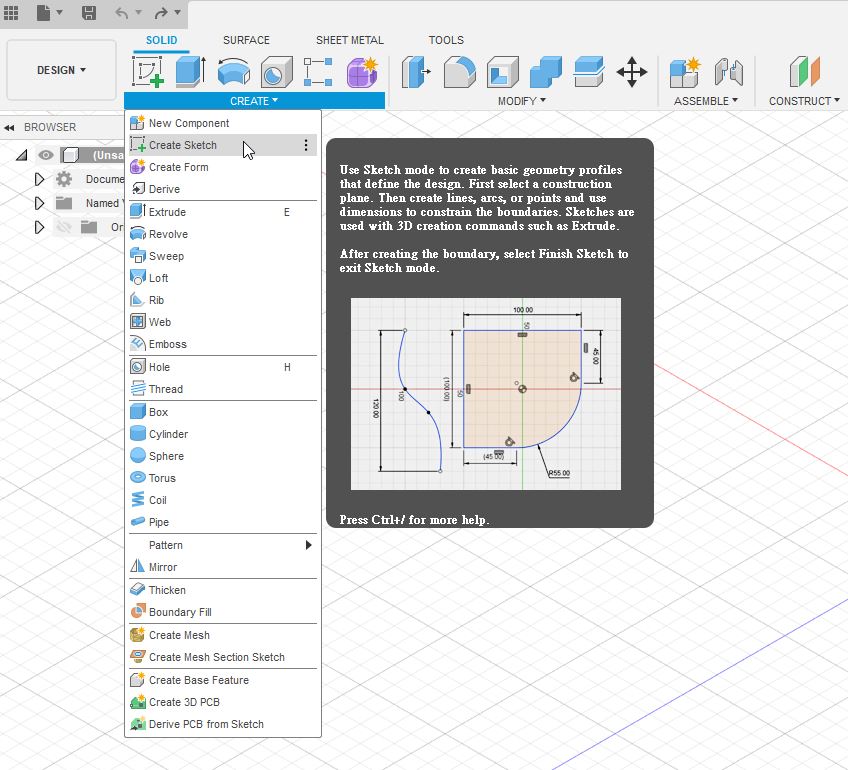
Step 2
I need to create a center rectangle.
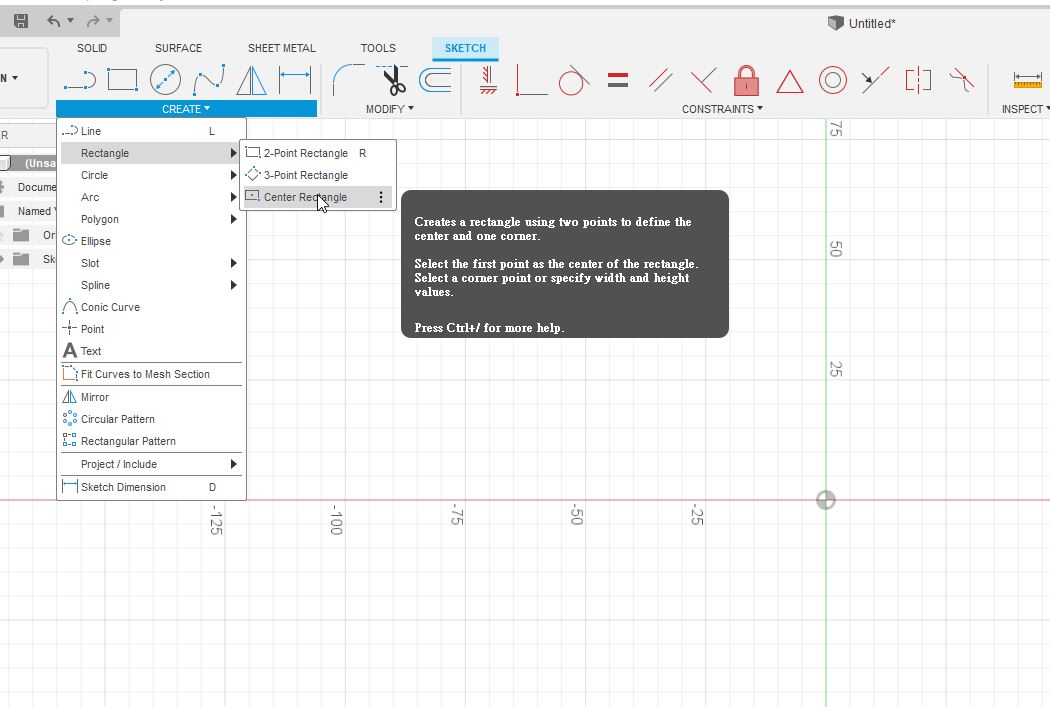
Step 3
I draw a center rectangle with dimension is 50mm X 50mm

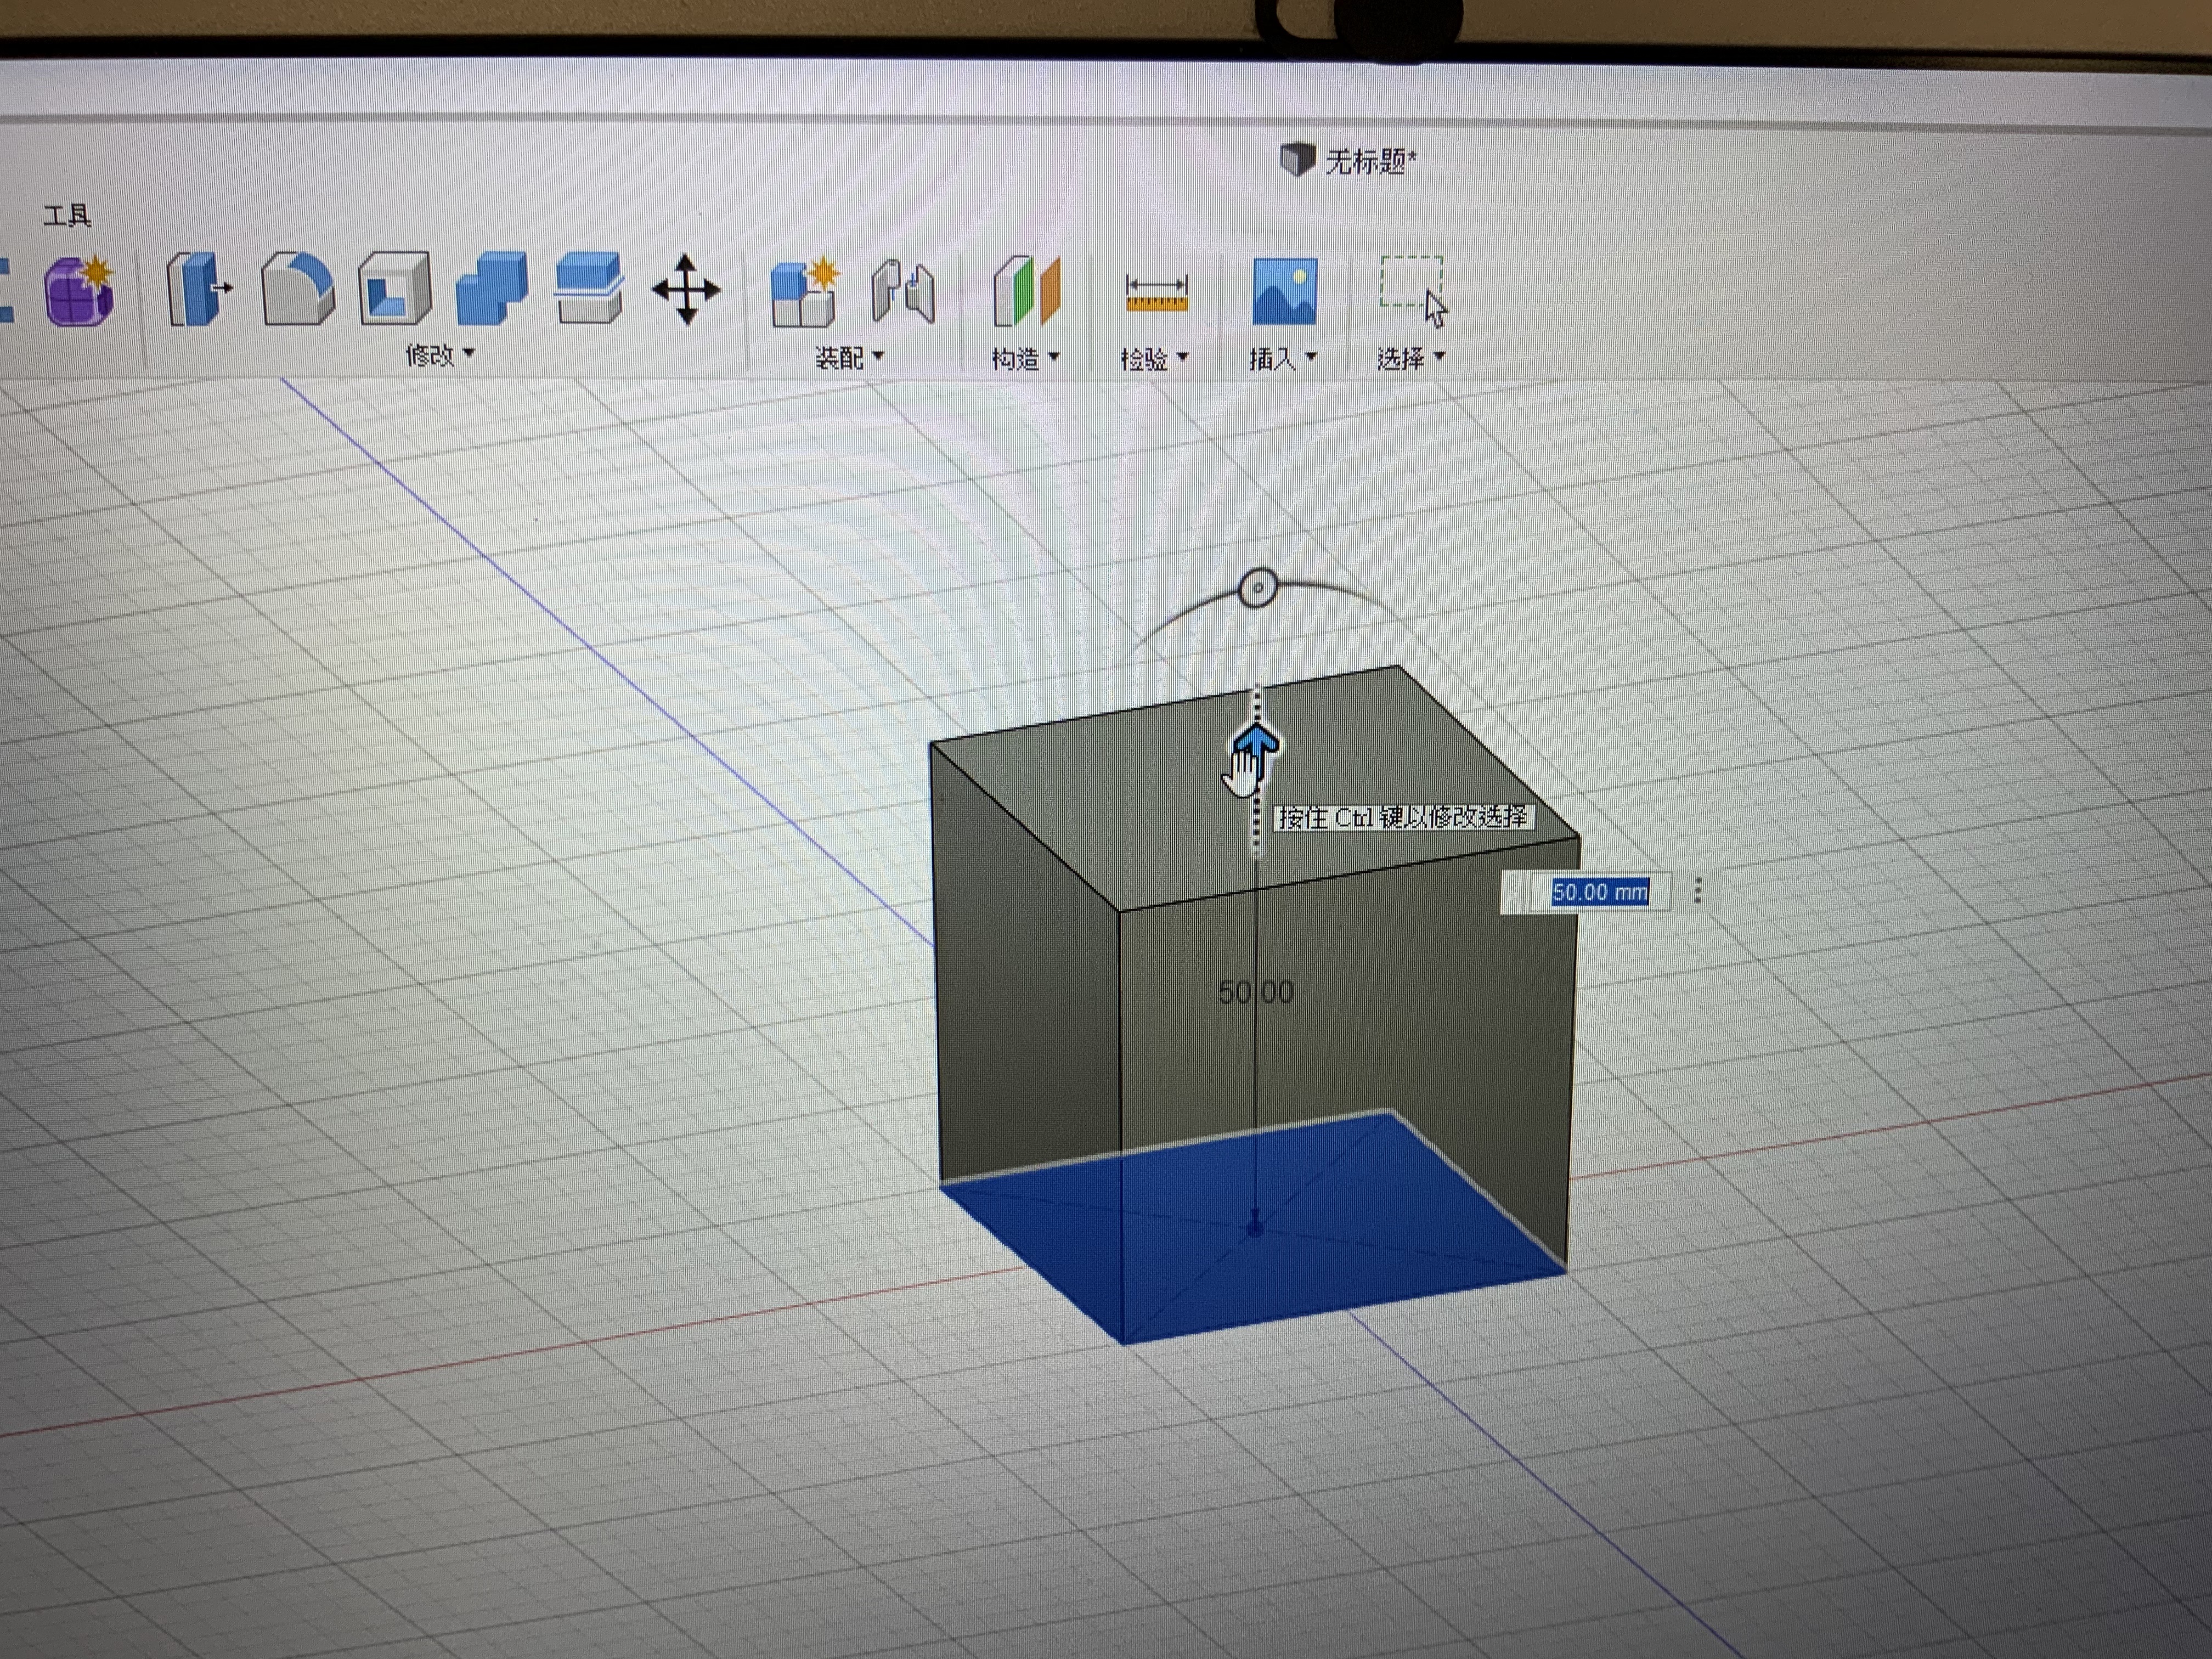
Step 4
I have to use solid \ extrude feature in order to extent it.
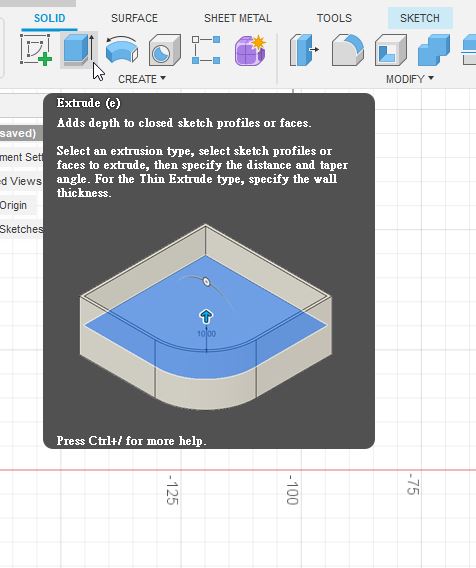
Step 5
I will extrude the solid into 50 mm height.
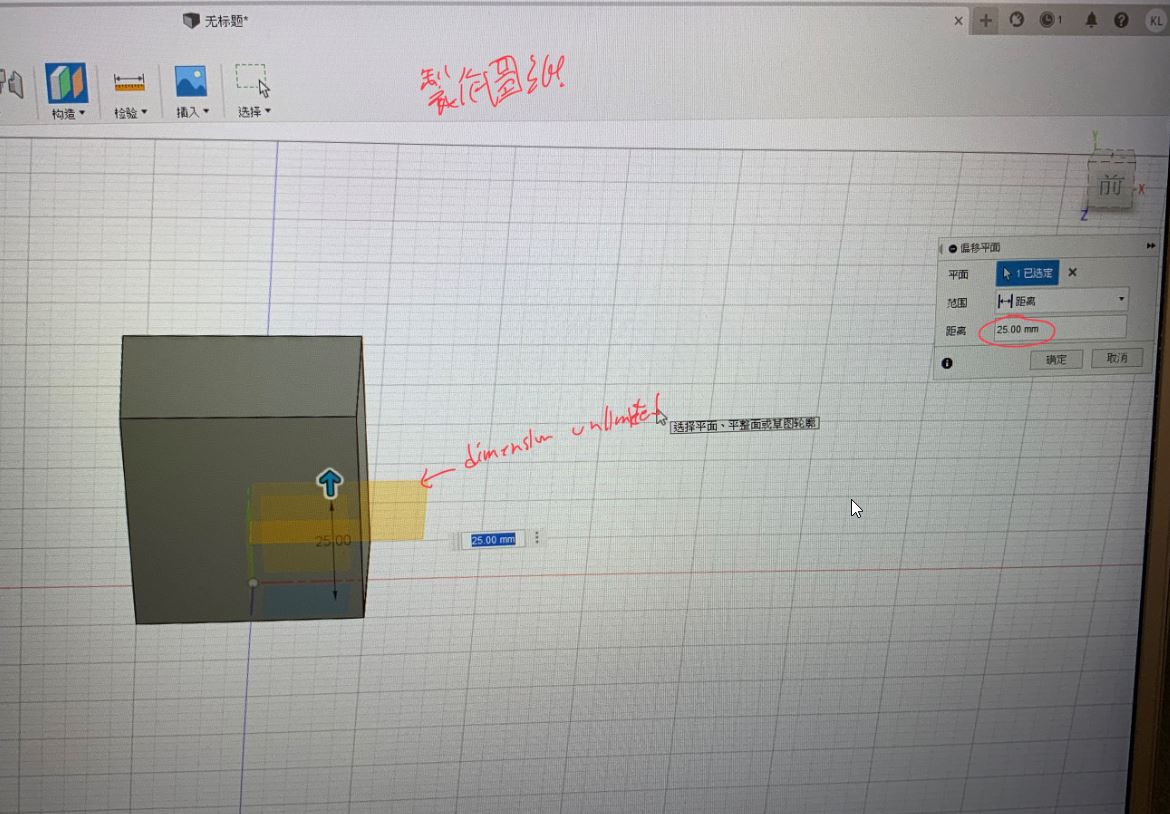
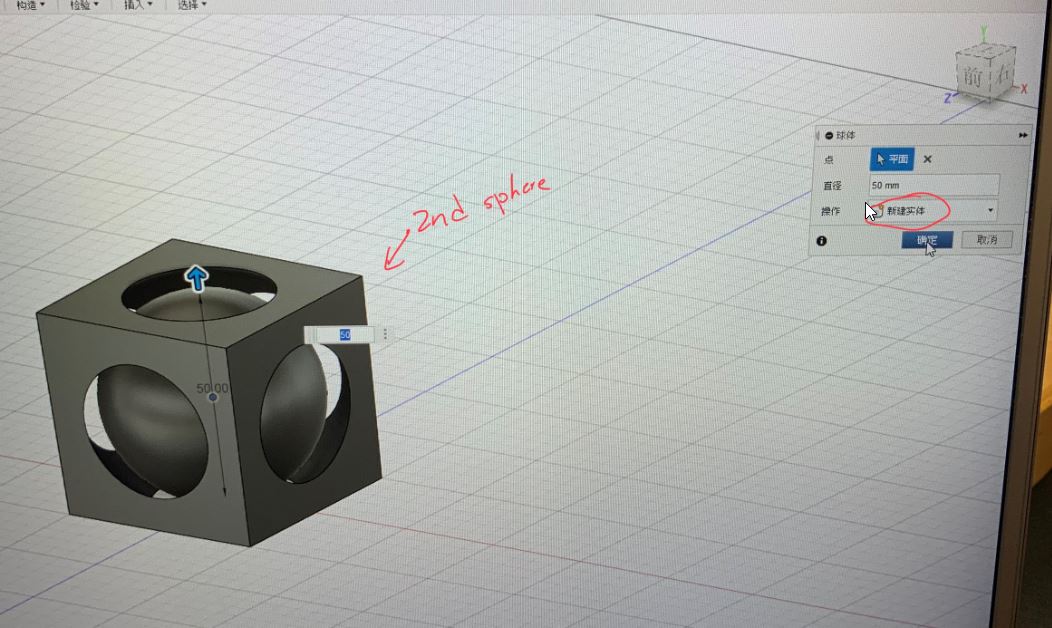
Step 6
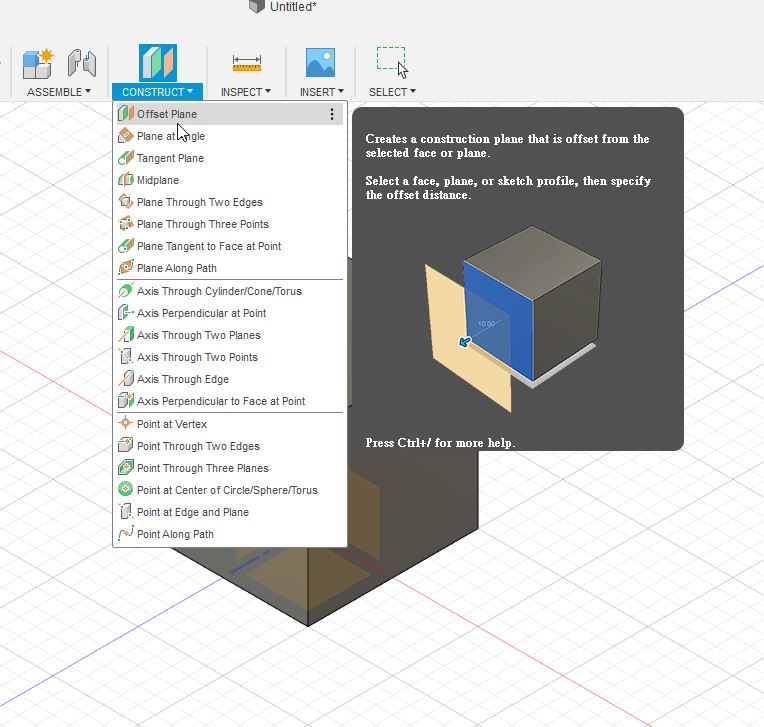
By using offset plane, to create sphere.
Step 7
Setting 25mm as the distance.
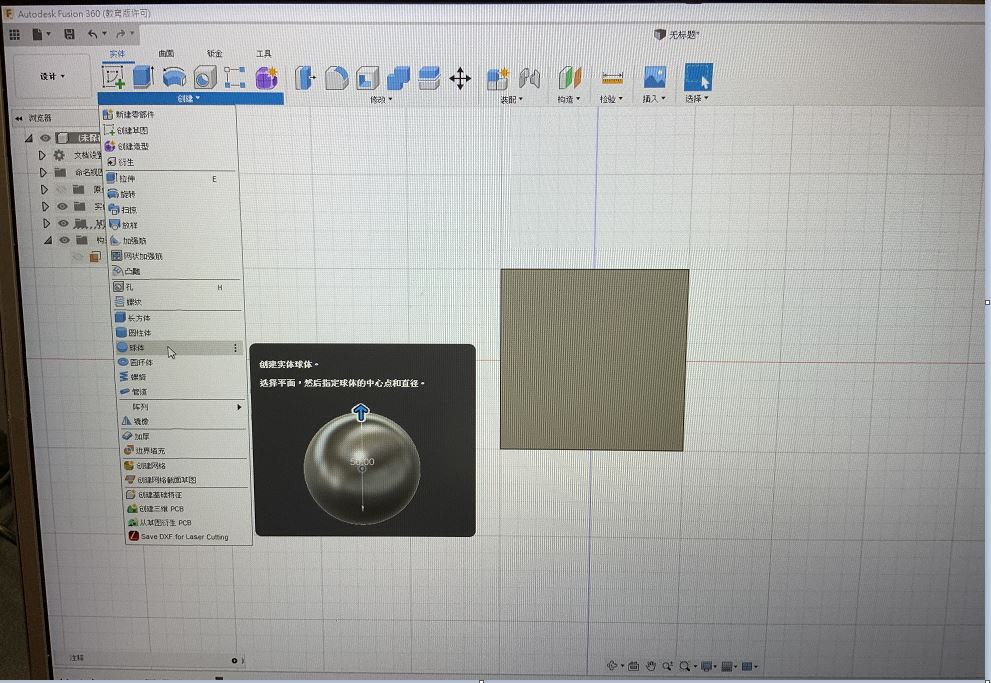
Step 8
Create sphere
Step 9
Create sphere with 60mm which is a little bit larger than the rectangle solid.
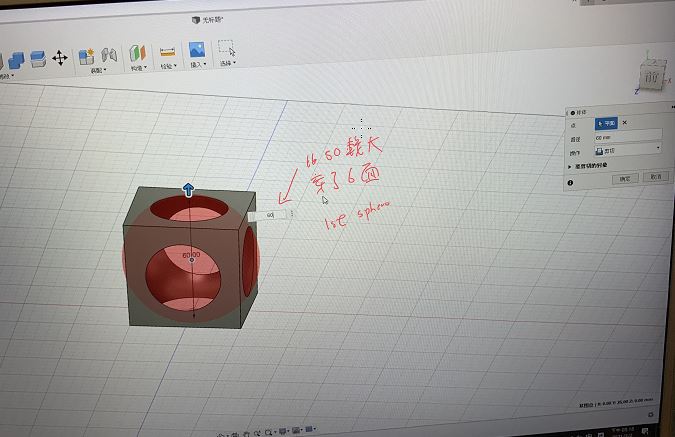
Step 10
Then, I will create another sphere with radius 50mm. This is the sphere inside of the solid.
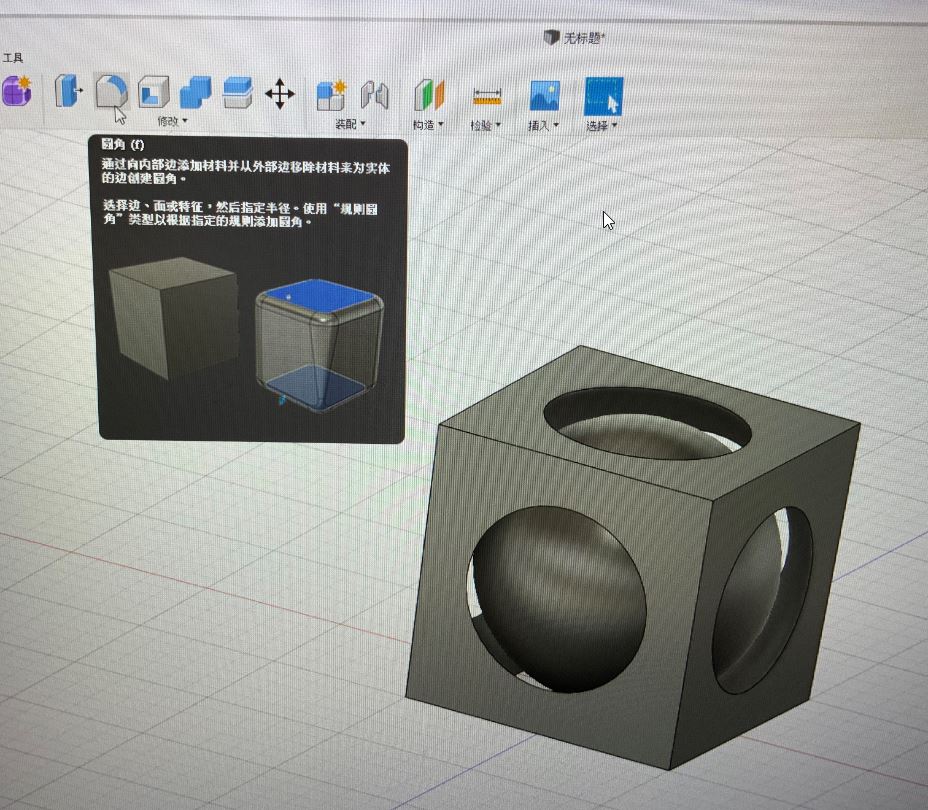
Step 11
By using fillet, I will round every edges in the solid.
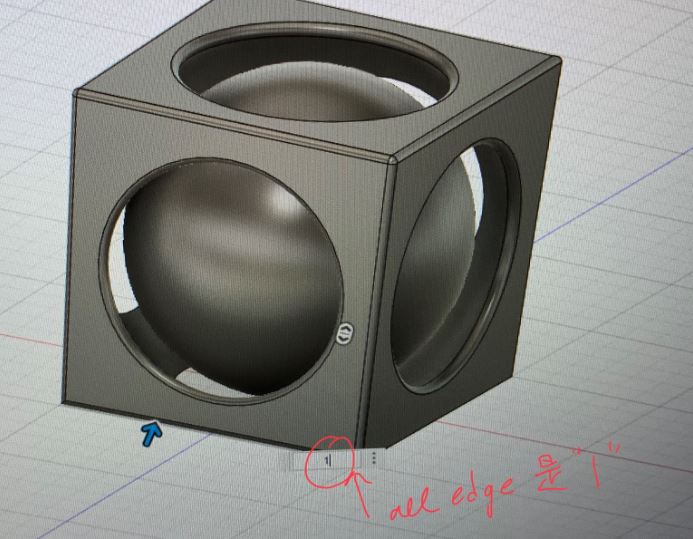
Step 12
By using fillet, all edge is set to 1. The 3D model is created.
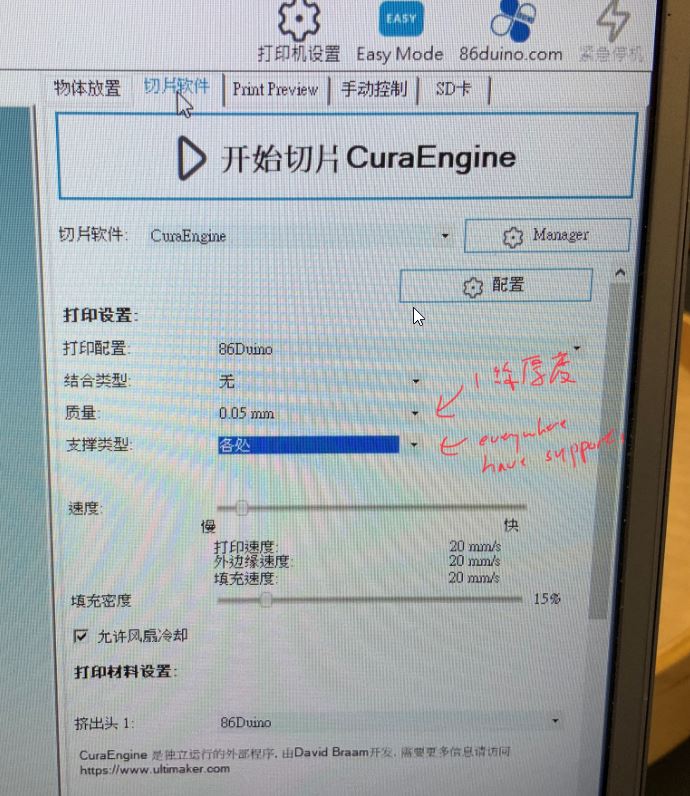
Step 13
I am going to use 86 Dunio Repetier in order to cut the 3D model into layers.
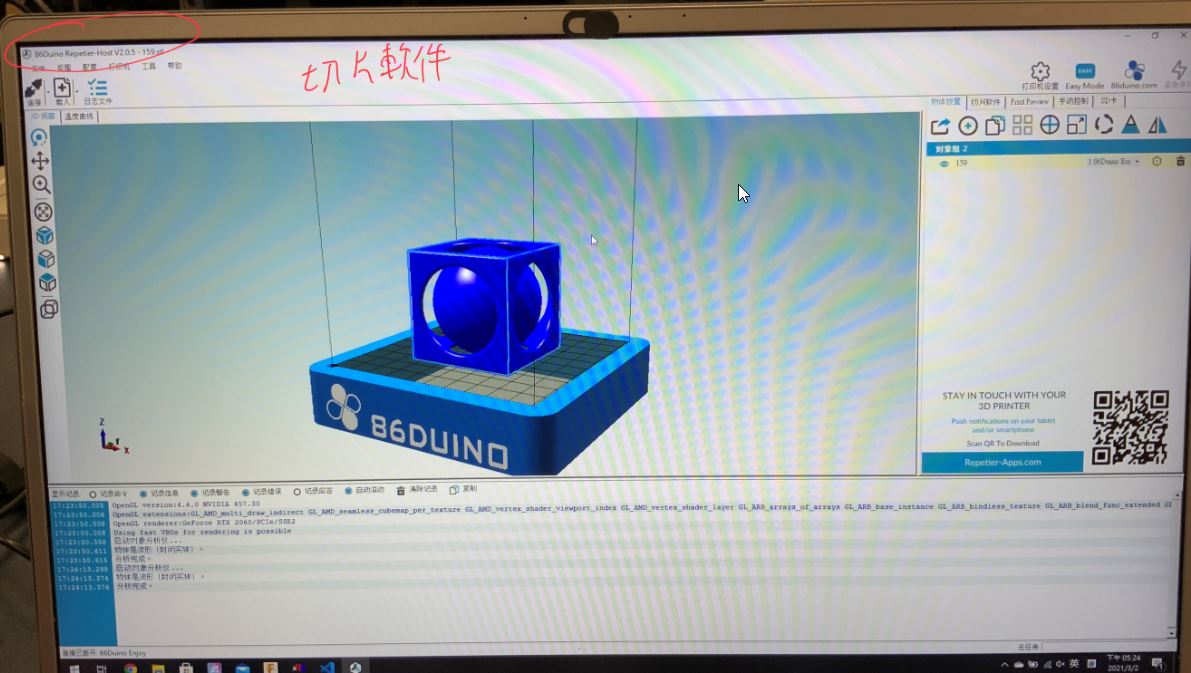
Step 14
I have to set the quality as 0.05mm. that mean each layer thickness is 0.05mm
Also, setting the “support” is necessary.
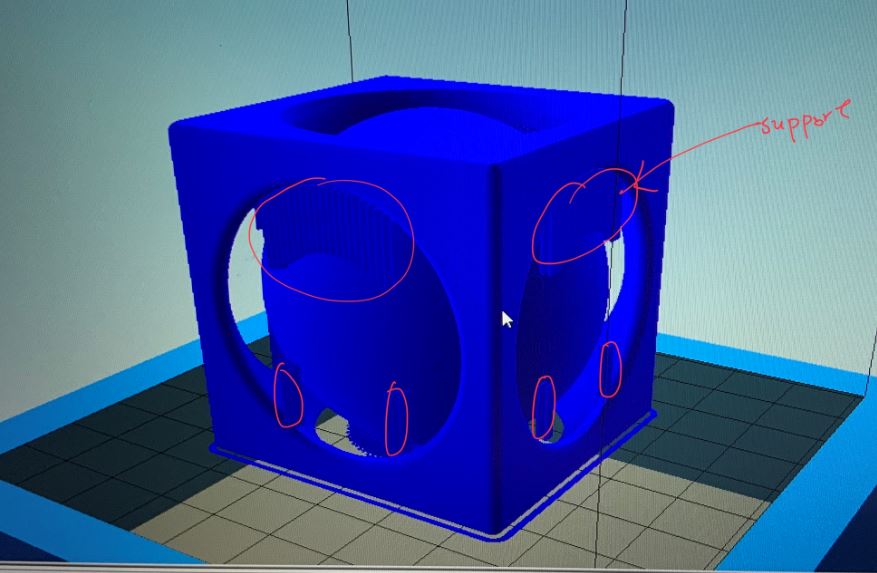
Step 15
After it is completed, you see that there are some support around the 3D model. I will save the file as G code for the machine to use.
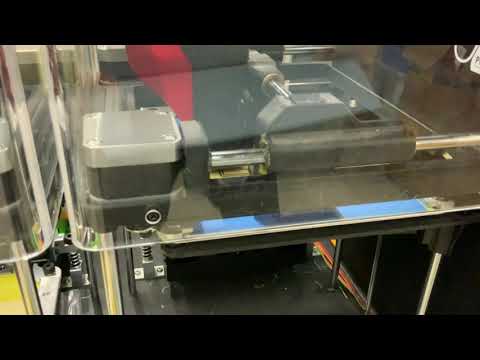
Step 16
please click below link to watch the process of 3D printing. It takes about 10 hours to print the model.
Step 17
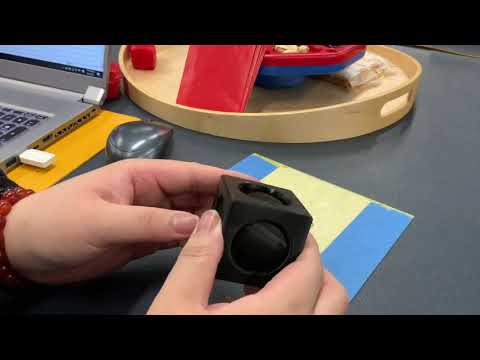
This is the final product.
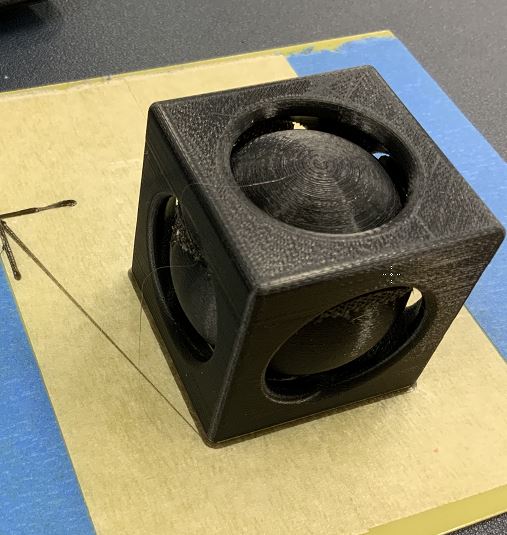
Step 18
please click below link to watch the final product. I need to remove the “support” from the 3D model.
Please click here to download source file
3D scan
This is my first time to use 3D scanning technology for scanning an object.
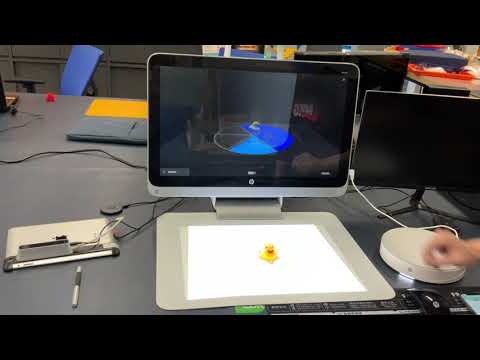
The computer I used for scanning is called HP Sprout.
Below is the offical web site for the computer for 3D scanning.
Step 1
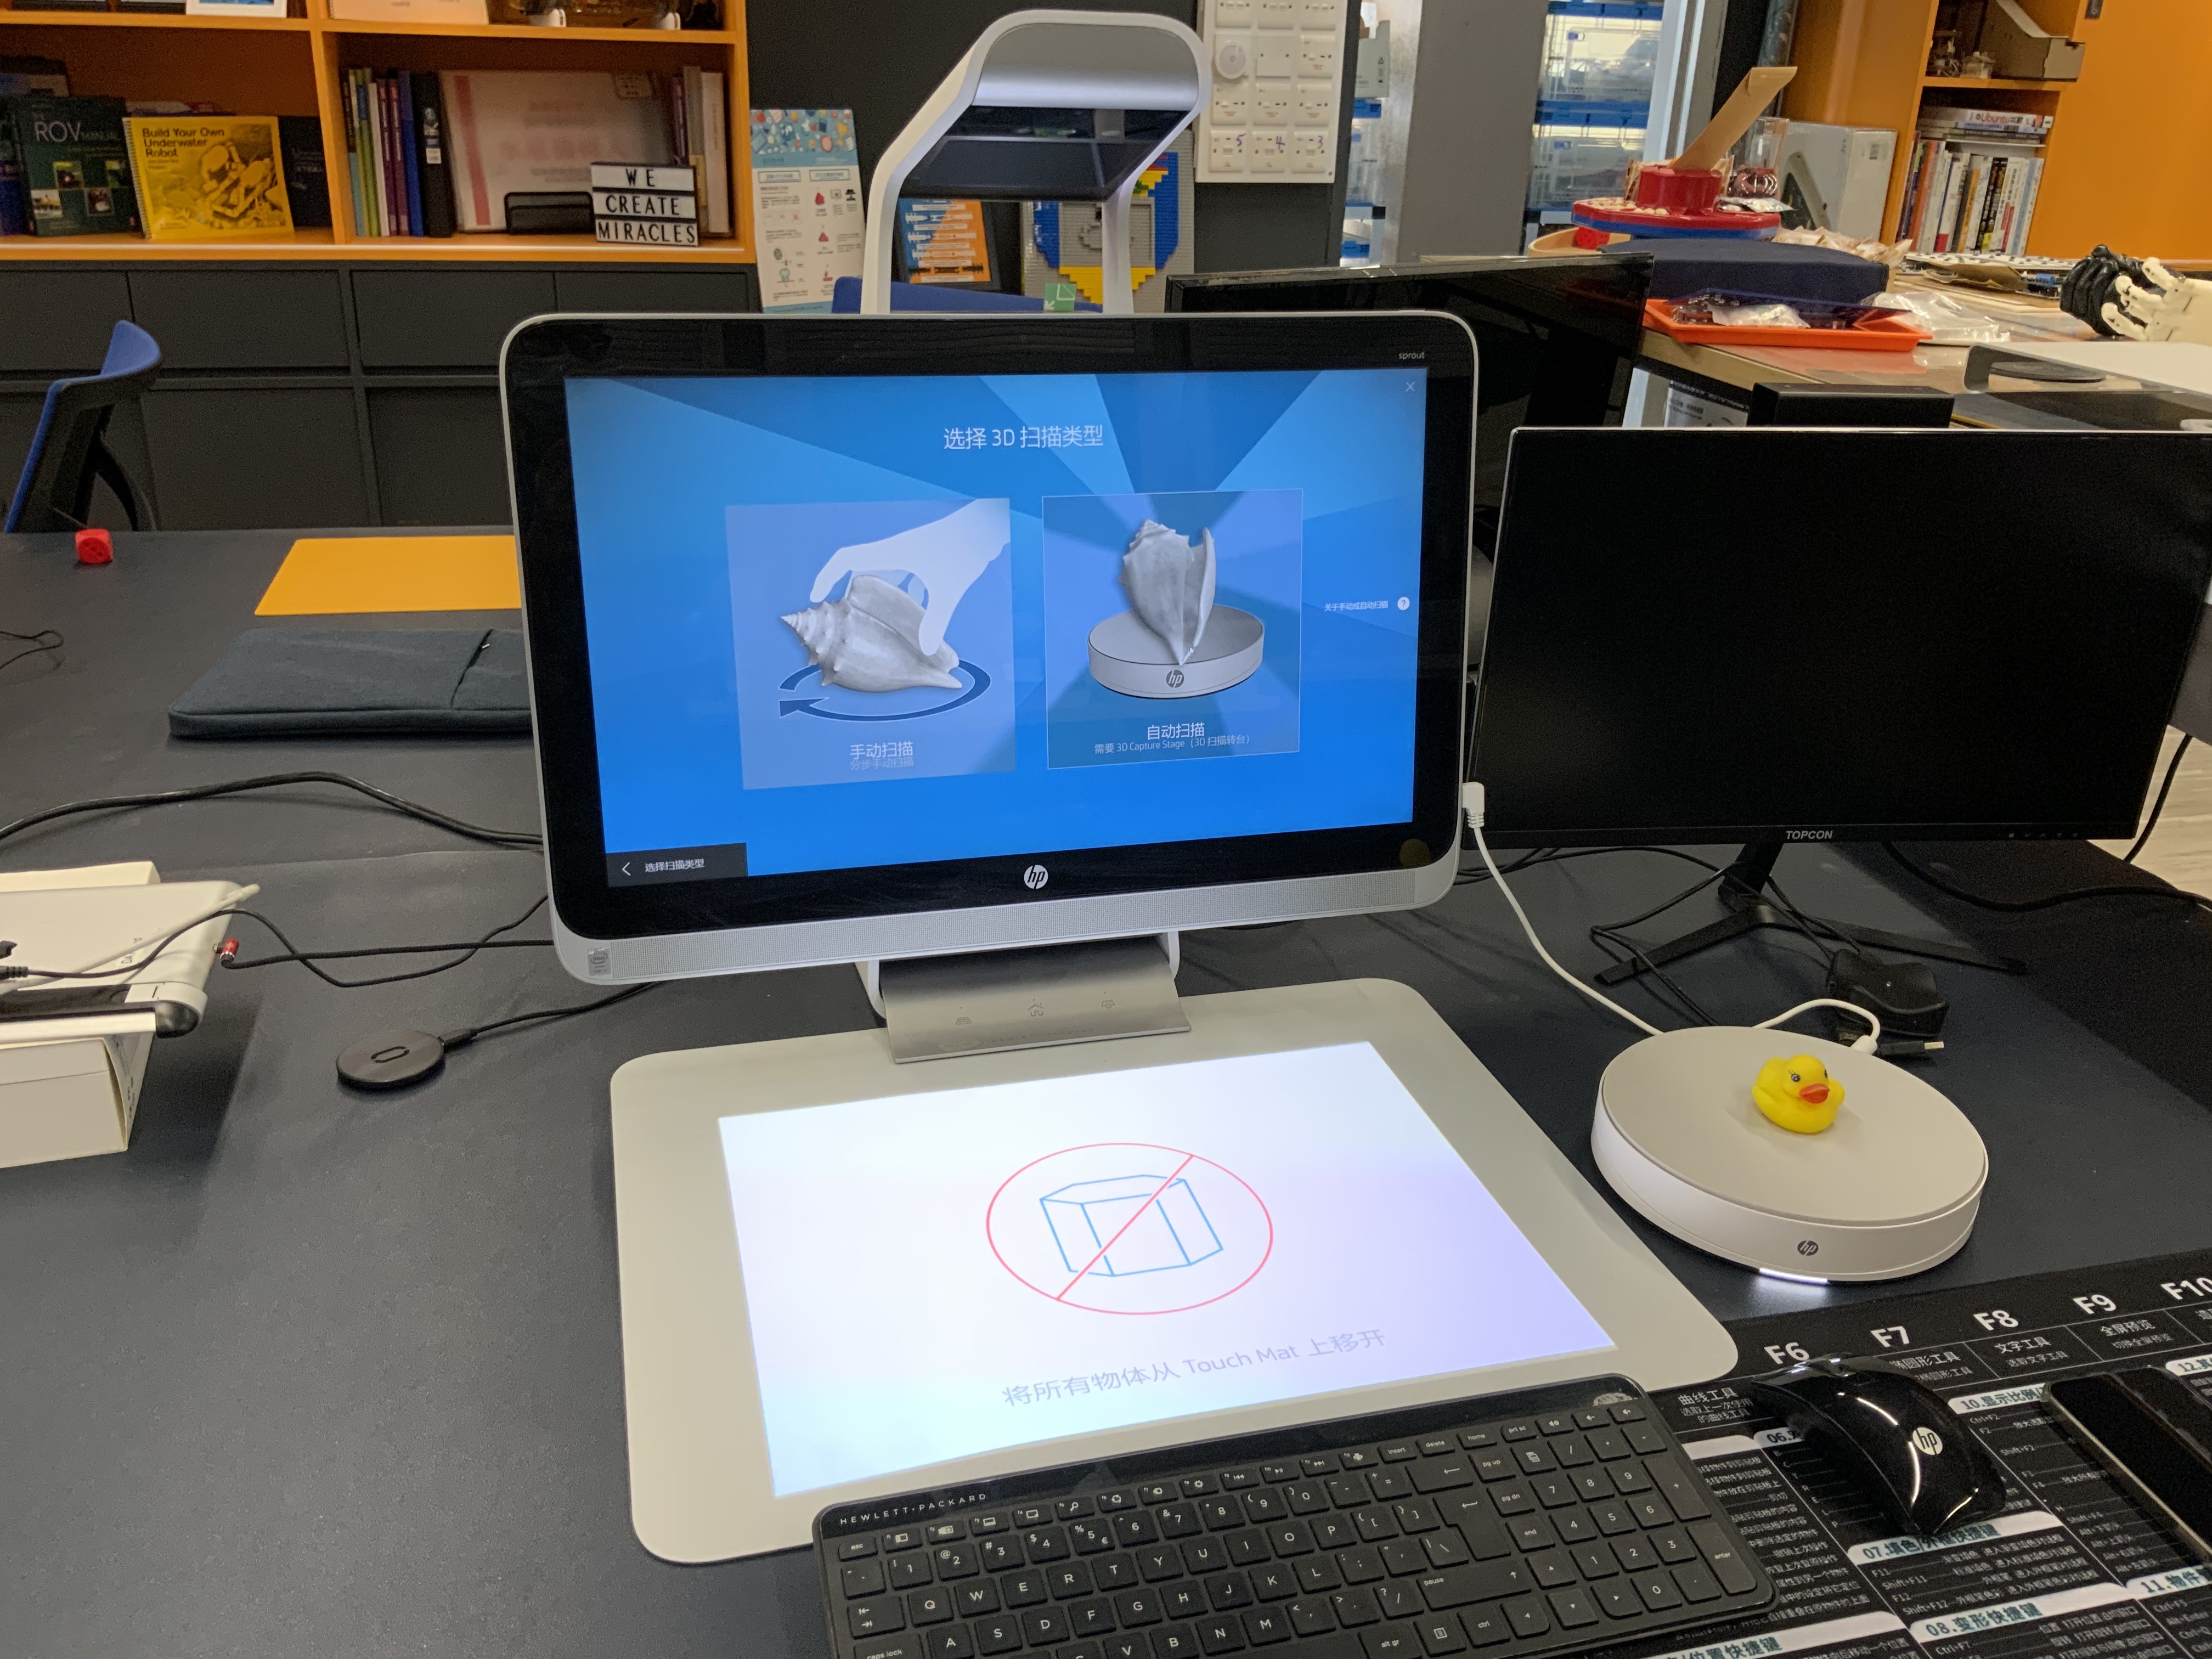
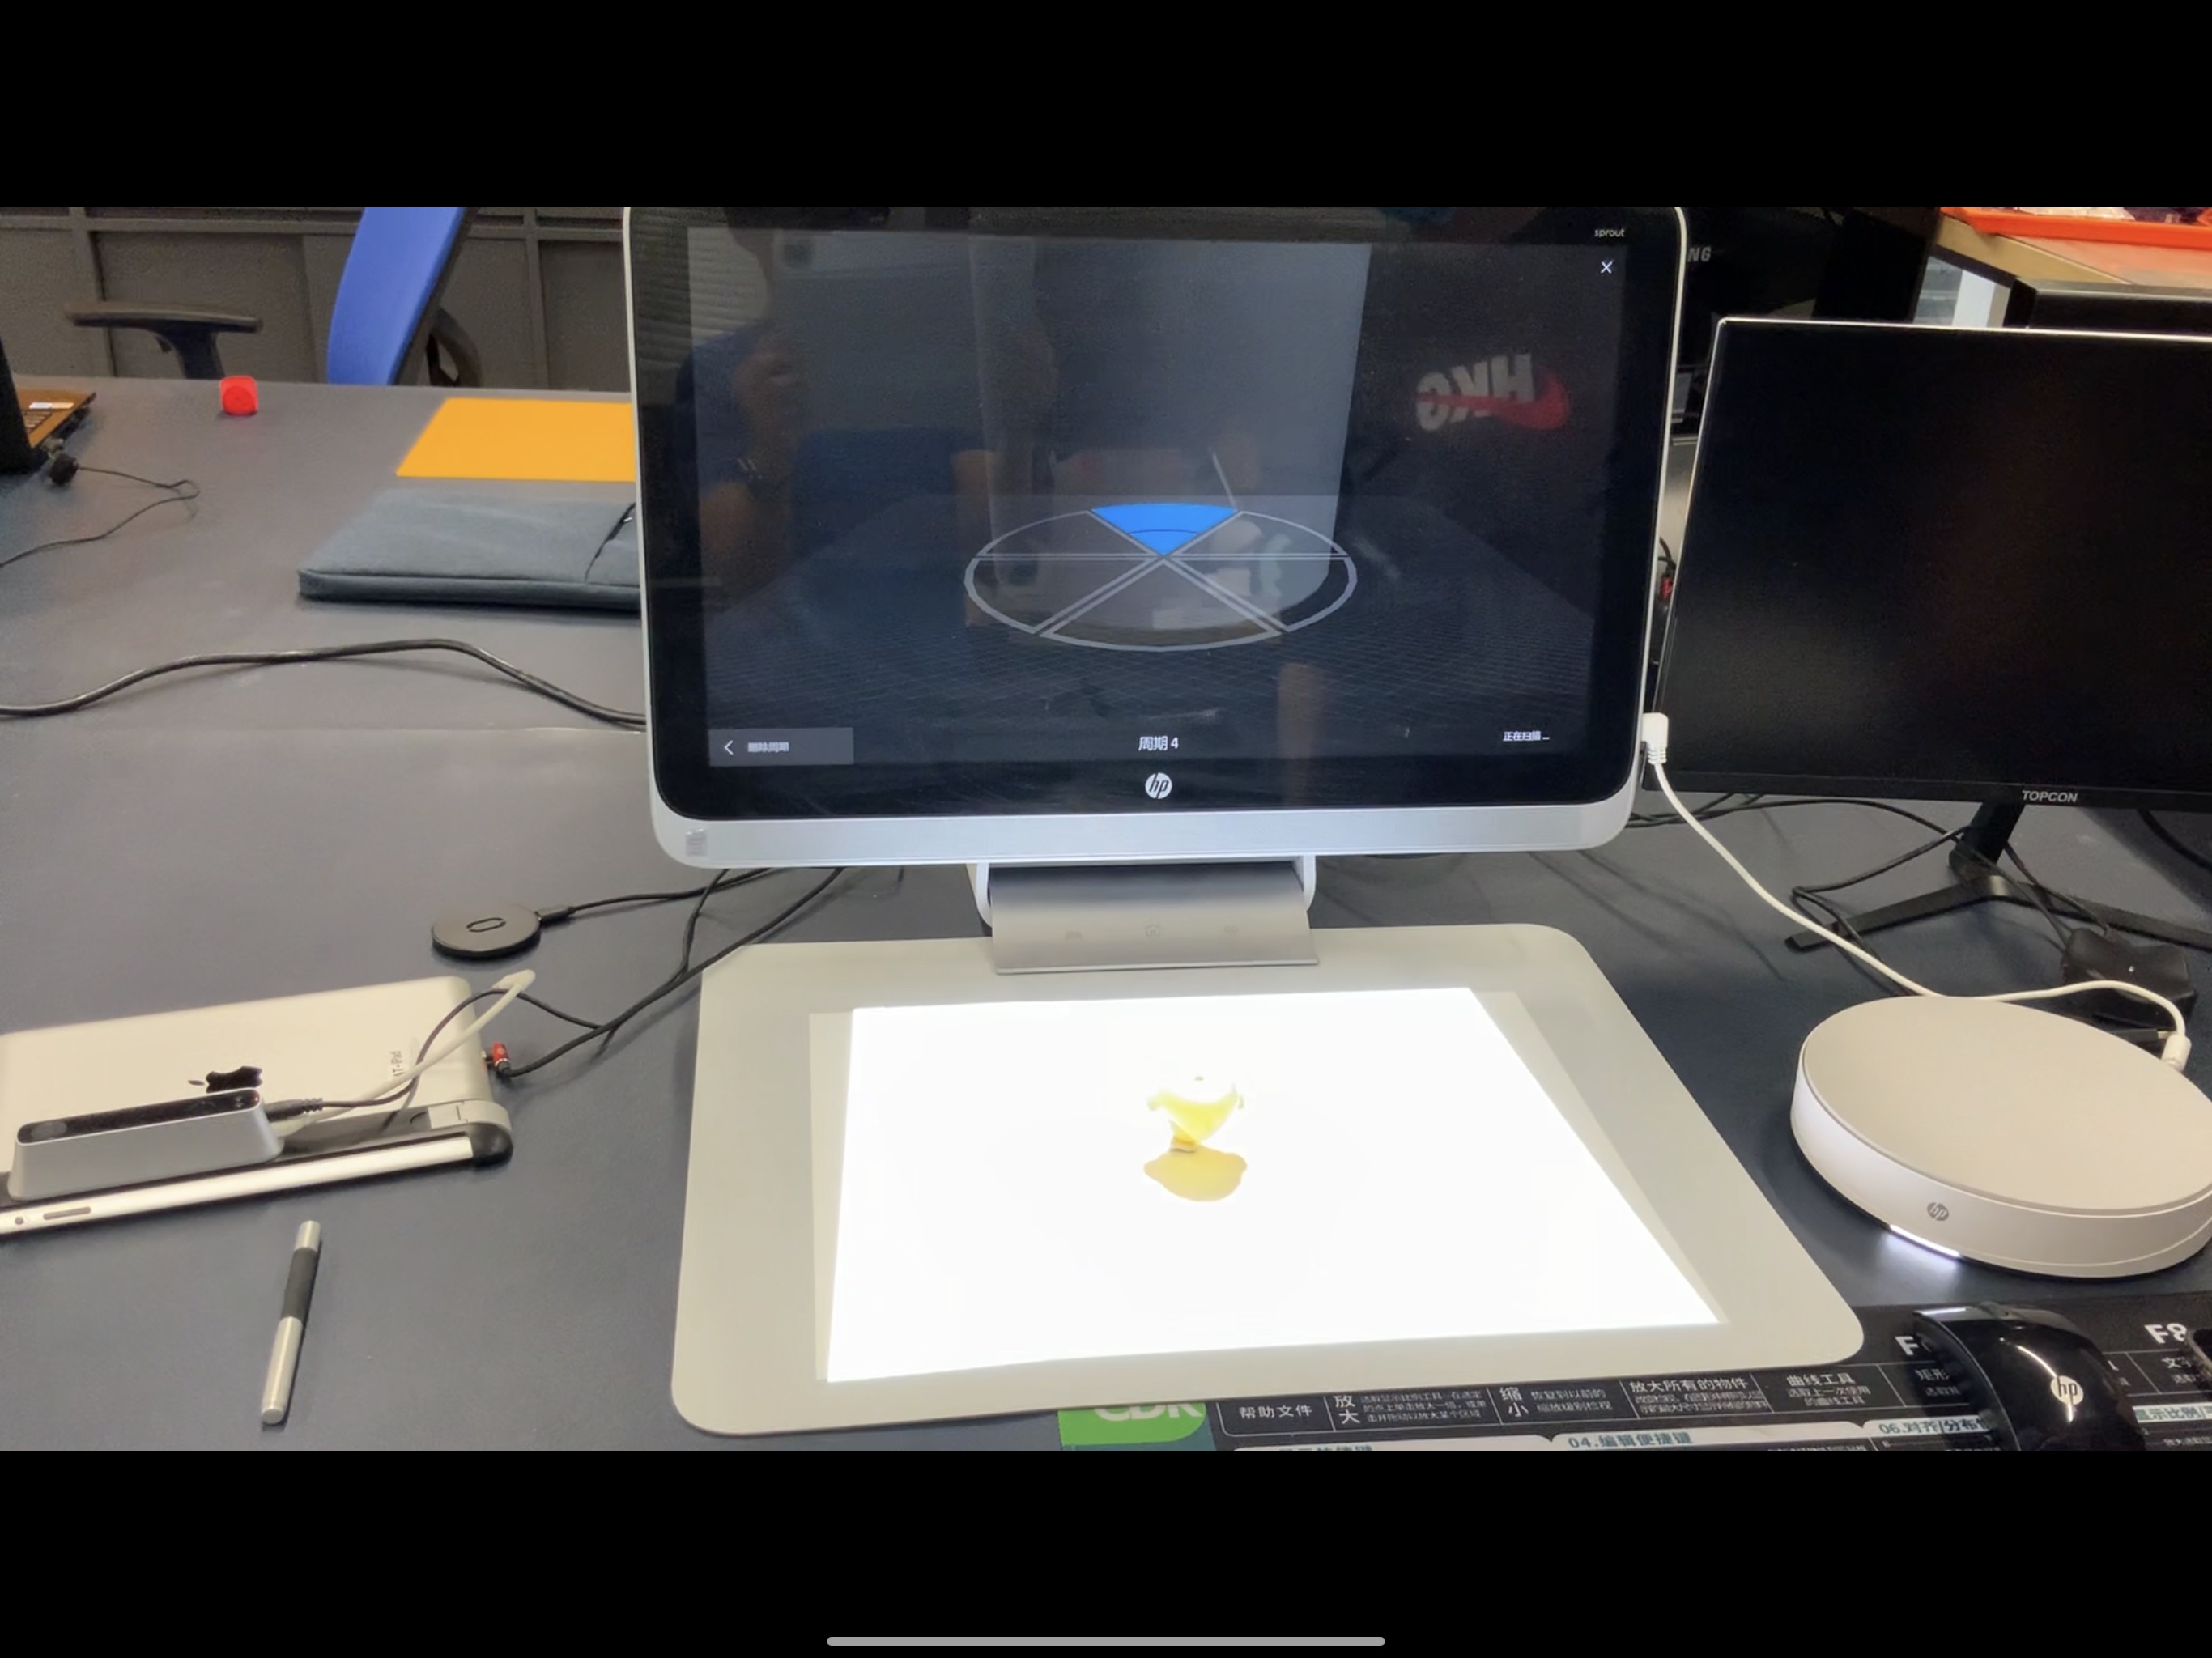
You can view from the below diagram. At the top of the computer, there are a scanning used camera.
Also, at the bottom of the computer, there is a stage for putting the object on it.
On the screen, it shows that there are two methods for scanning object
a. Scanning by manual rotation the object.
b. Scanning by auto rotation the object.
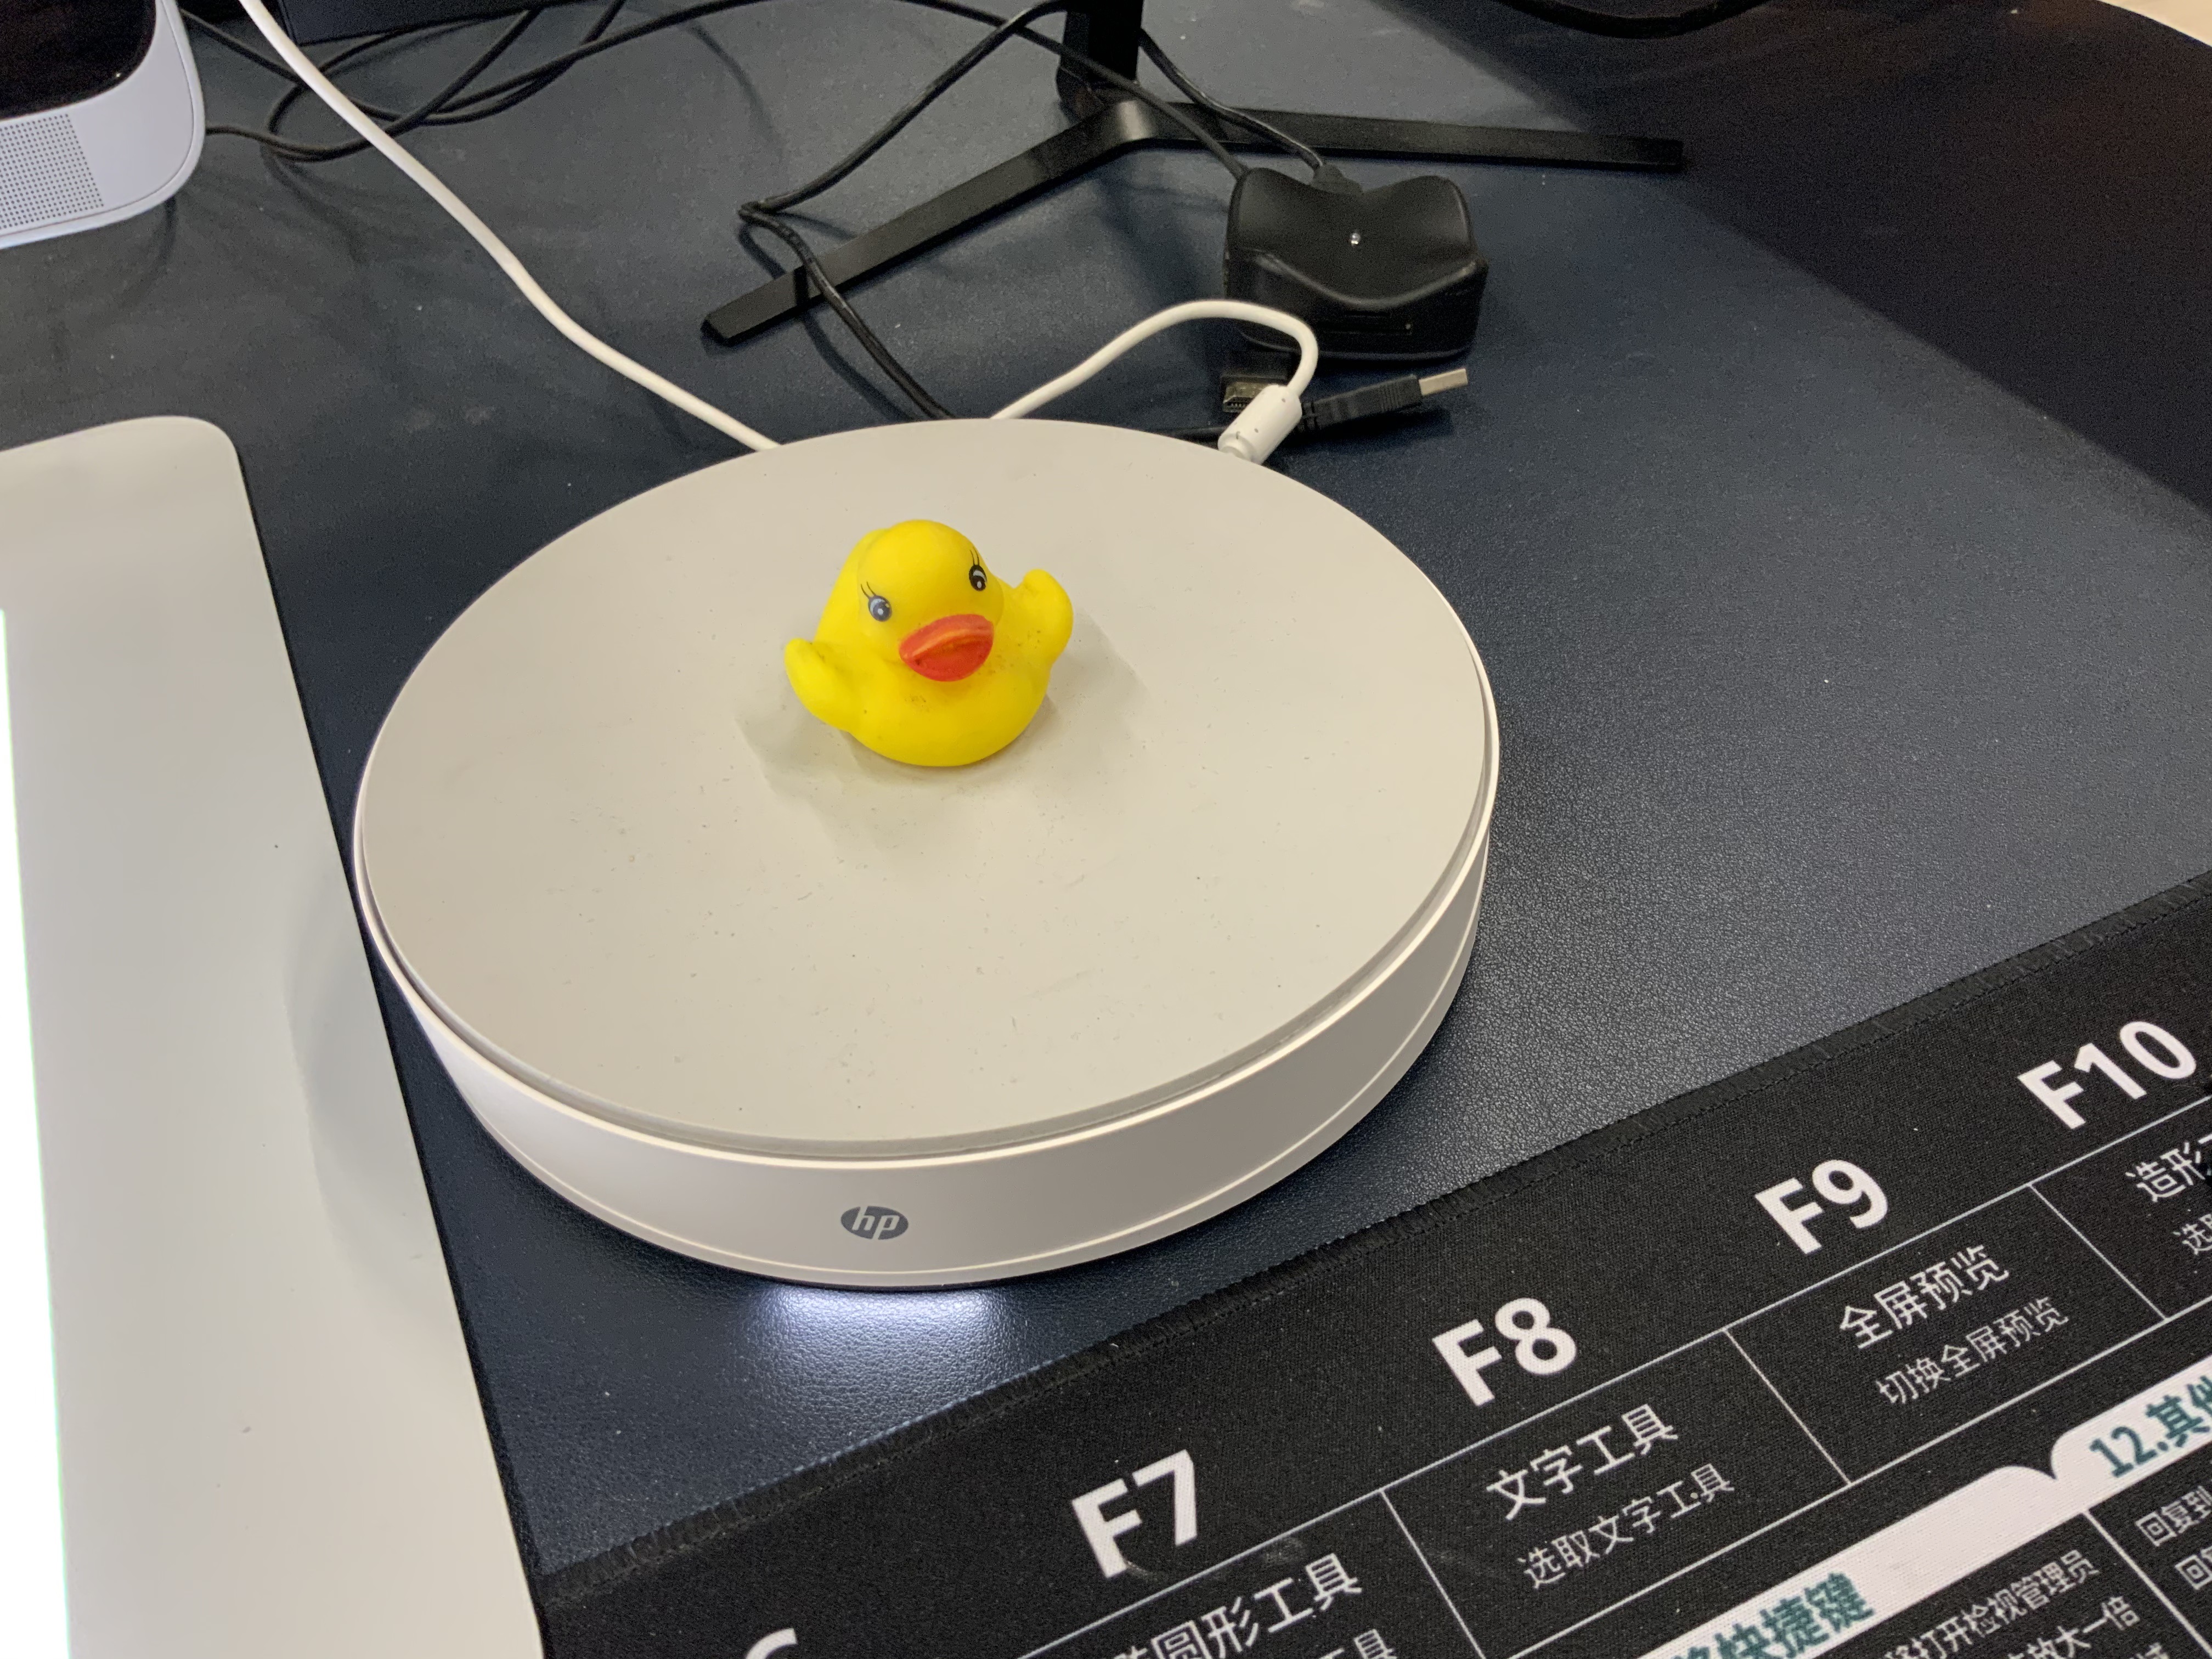
Step 2 The other method is putting on the auto rotation stage. However, I did not use auto rotation.
The method I use is maunal rotation.
Step 3 However, this time the method I used is manual rotation.
3D scanning need to scan the background first as below.
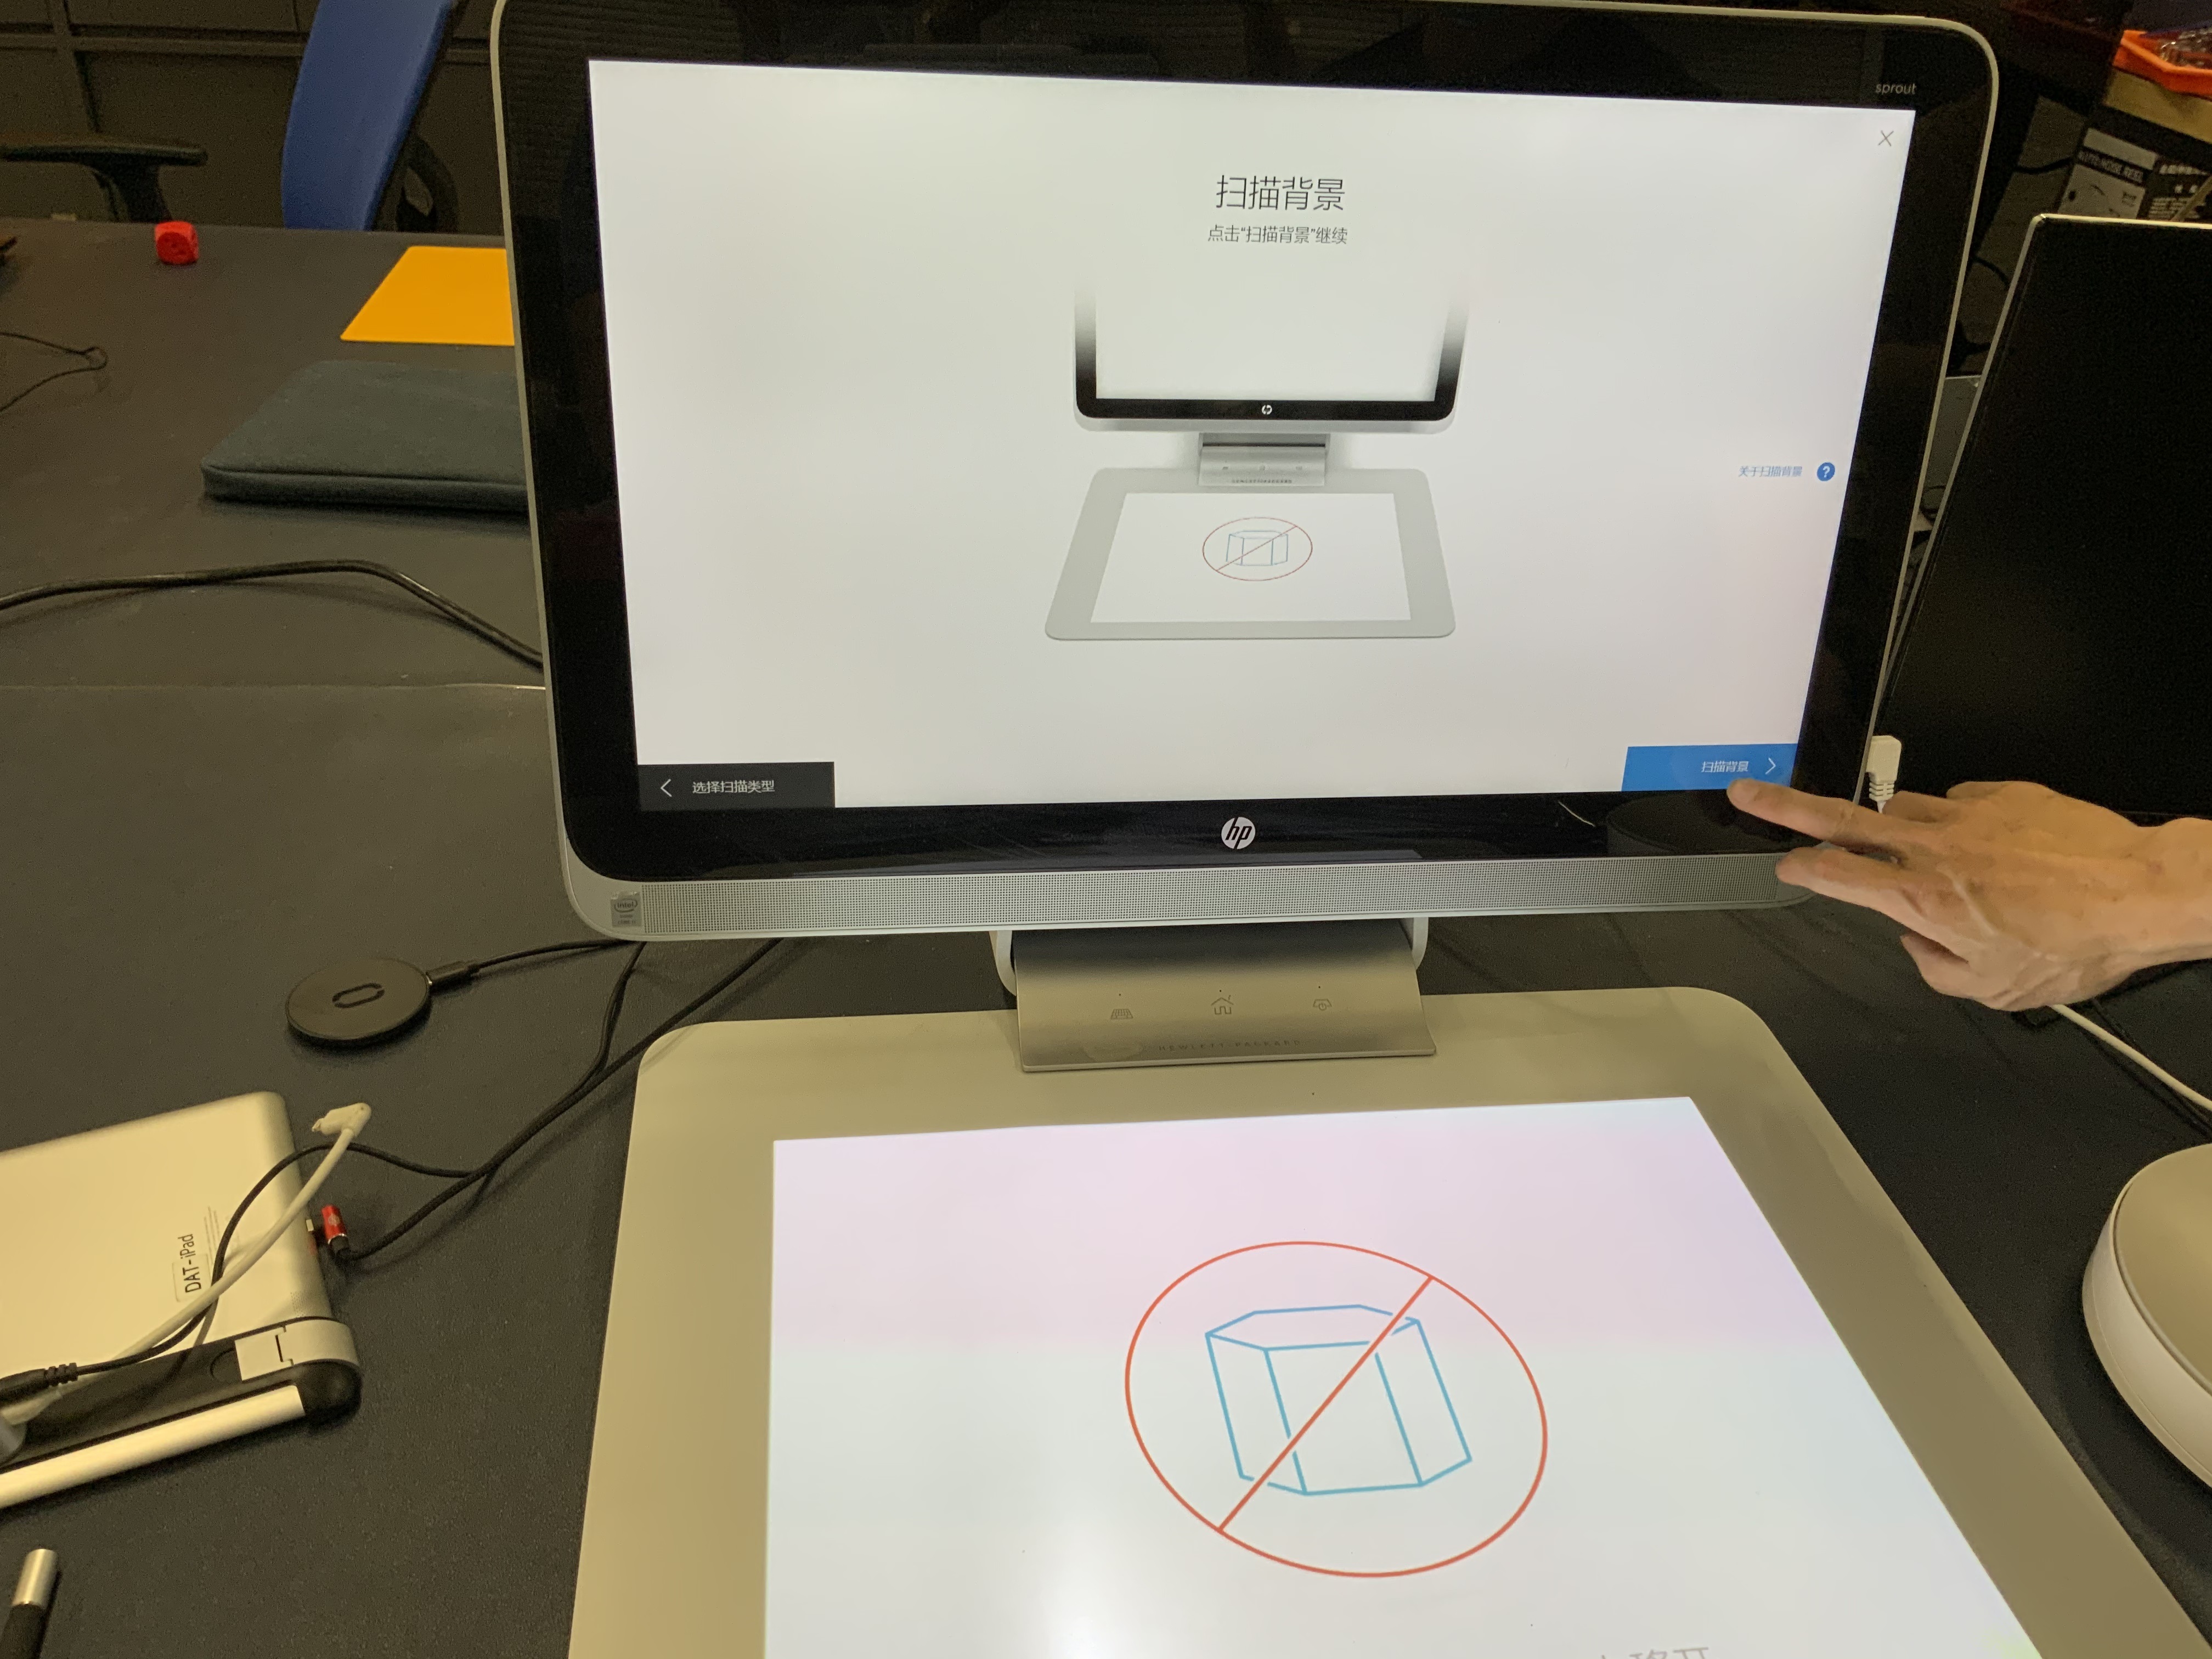
Step 4 It is going to remove the background.
Step 5
Now I am going to 3D scan the object ‘Duck Toy’ Please click the below youtube video to watch the 3d scanning process
In the video, you see that I need to retate the toy duck to different angle.
There are six angles for the toy duck, therefore I need to keep manually rotate the toy duck.
Step 6
I also need to move the ‘toy duck’ upside down. In order to fully capture the 3D duck.
Step 7
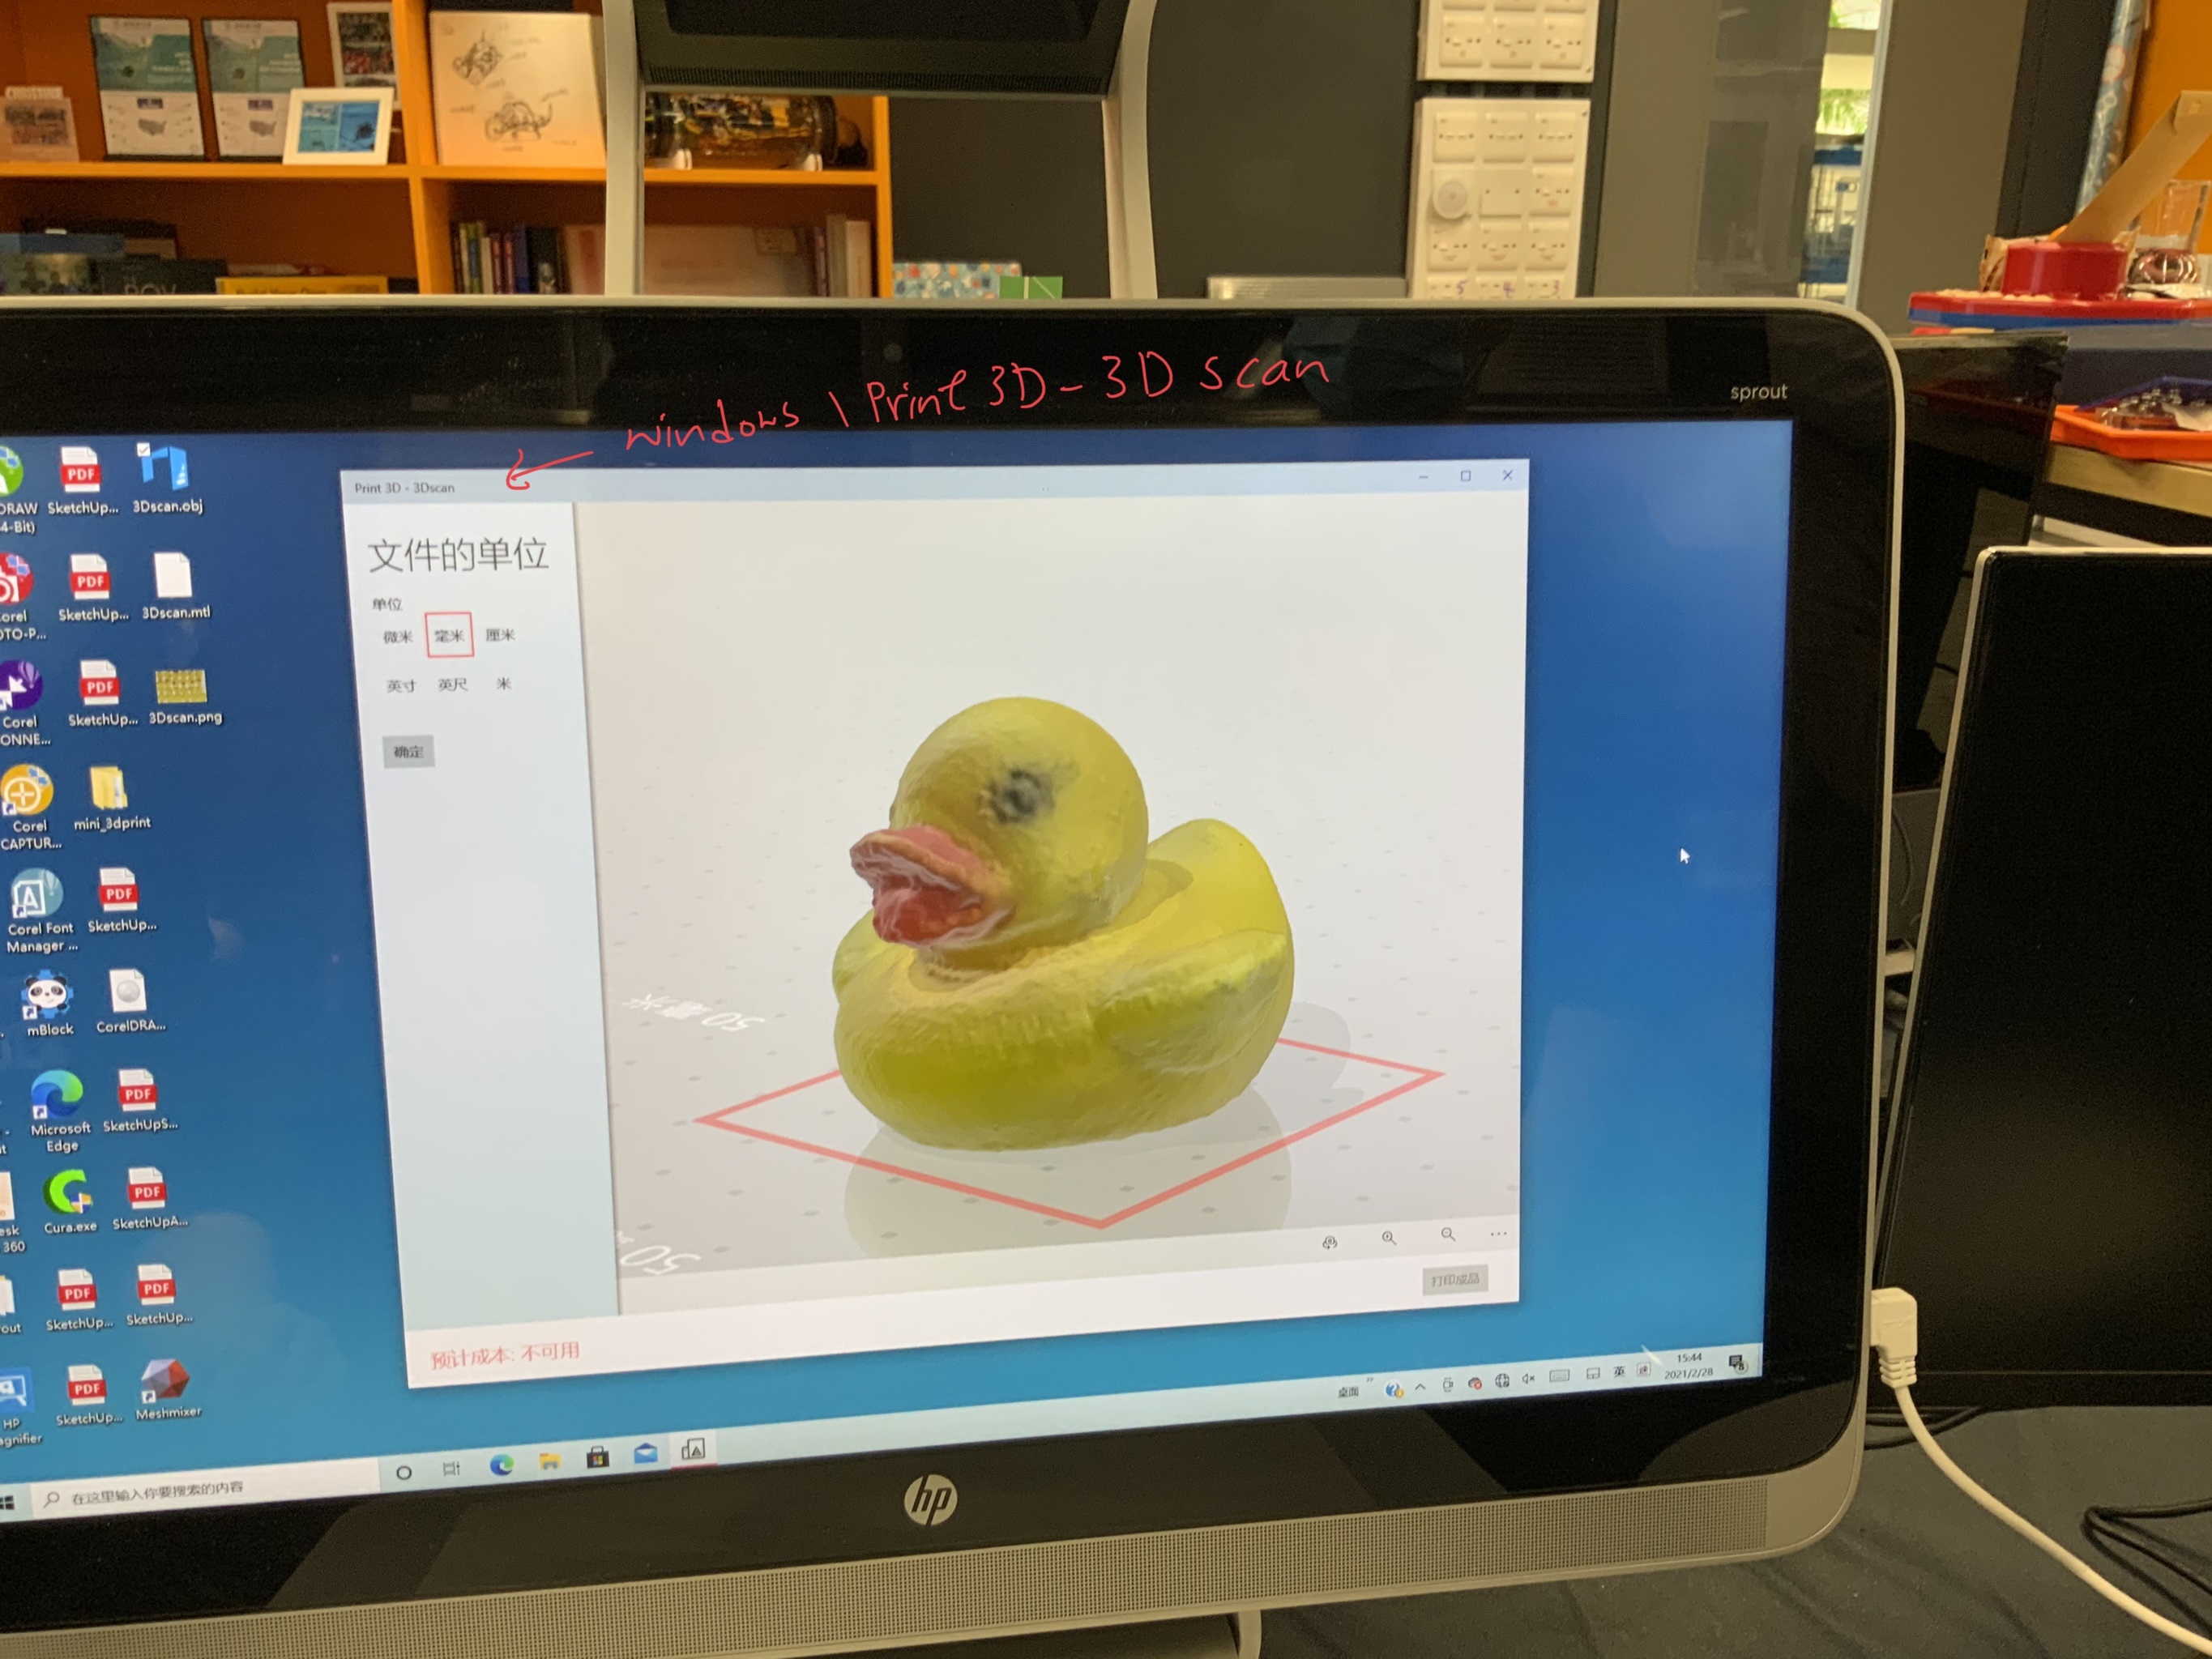
After I have taking many photos of this ‘toy duck’, the final 3D image of the ‘toy duck ‘ is created.
It looks like not bad as below image.
Step 8
Besides of the manual rotation, I tried the auto rotation. I need to put the toy duck on the rotational stage.
However, the result of auto rotation is worser than manual rotation.
The computer did not sucessfully create the 3D duck.

Please click here to download source file
Group assignments
Here is the link of the group assignment .