14. Networking and communications
This week task as below:
- Group assignment:
Send a message between two projects
- Individual assignment:
design, build, and connect wired or wireless node(s) with network or bus addresses
Individual assignment
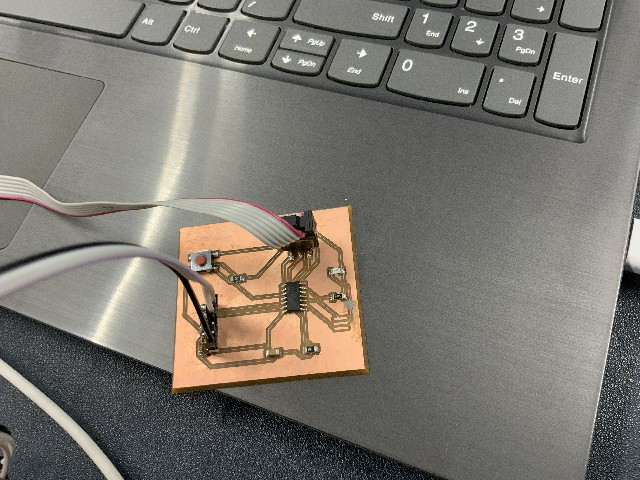
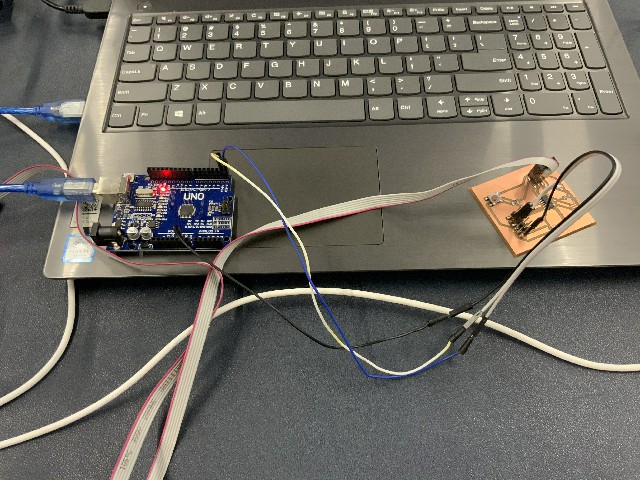
I am going to connect my board together with a Arduino UNO by using a serial bus.
Step 1:
Firstly, you find that this is my board. I am going to connect myboard by using a serial bus.
Step 2:
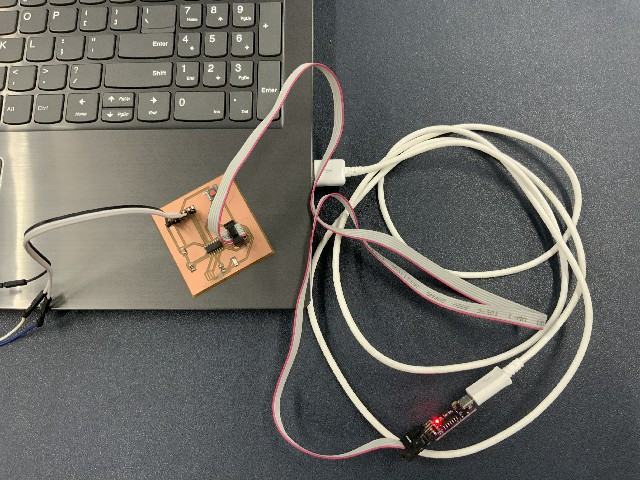
I am going to control my board. Therefore I also connect my board to my notebook computer.
Step 3:
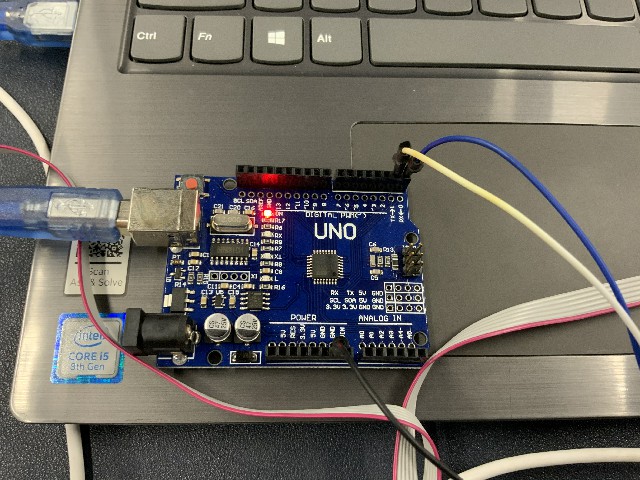
On the other side, I have to use a client arduino UNO.
Step 4:
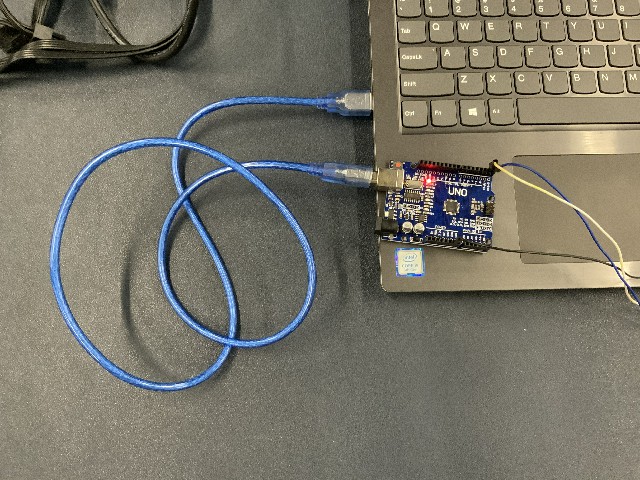
The audunio UNO is connected to my notebook computer.
Step 5:
In this diagram, you find that both my board and arduino UNO are well conncted by using a serial bus.
Step 6:
Also, my board and arduino UNO are connected to my notebook computer.
Therefore I could control both chips and let them to communicate to the other.

Step 7:
In the following video, you would view that my board and ardunio UNO are well conncted.
Group assignment
I am going to send messages between two chips (projects).
Step 1:
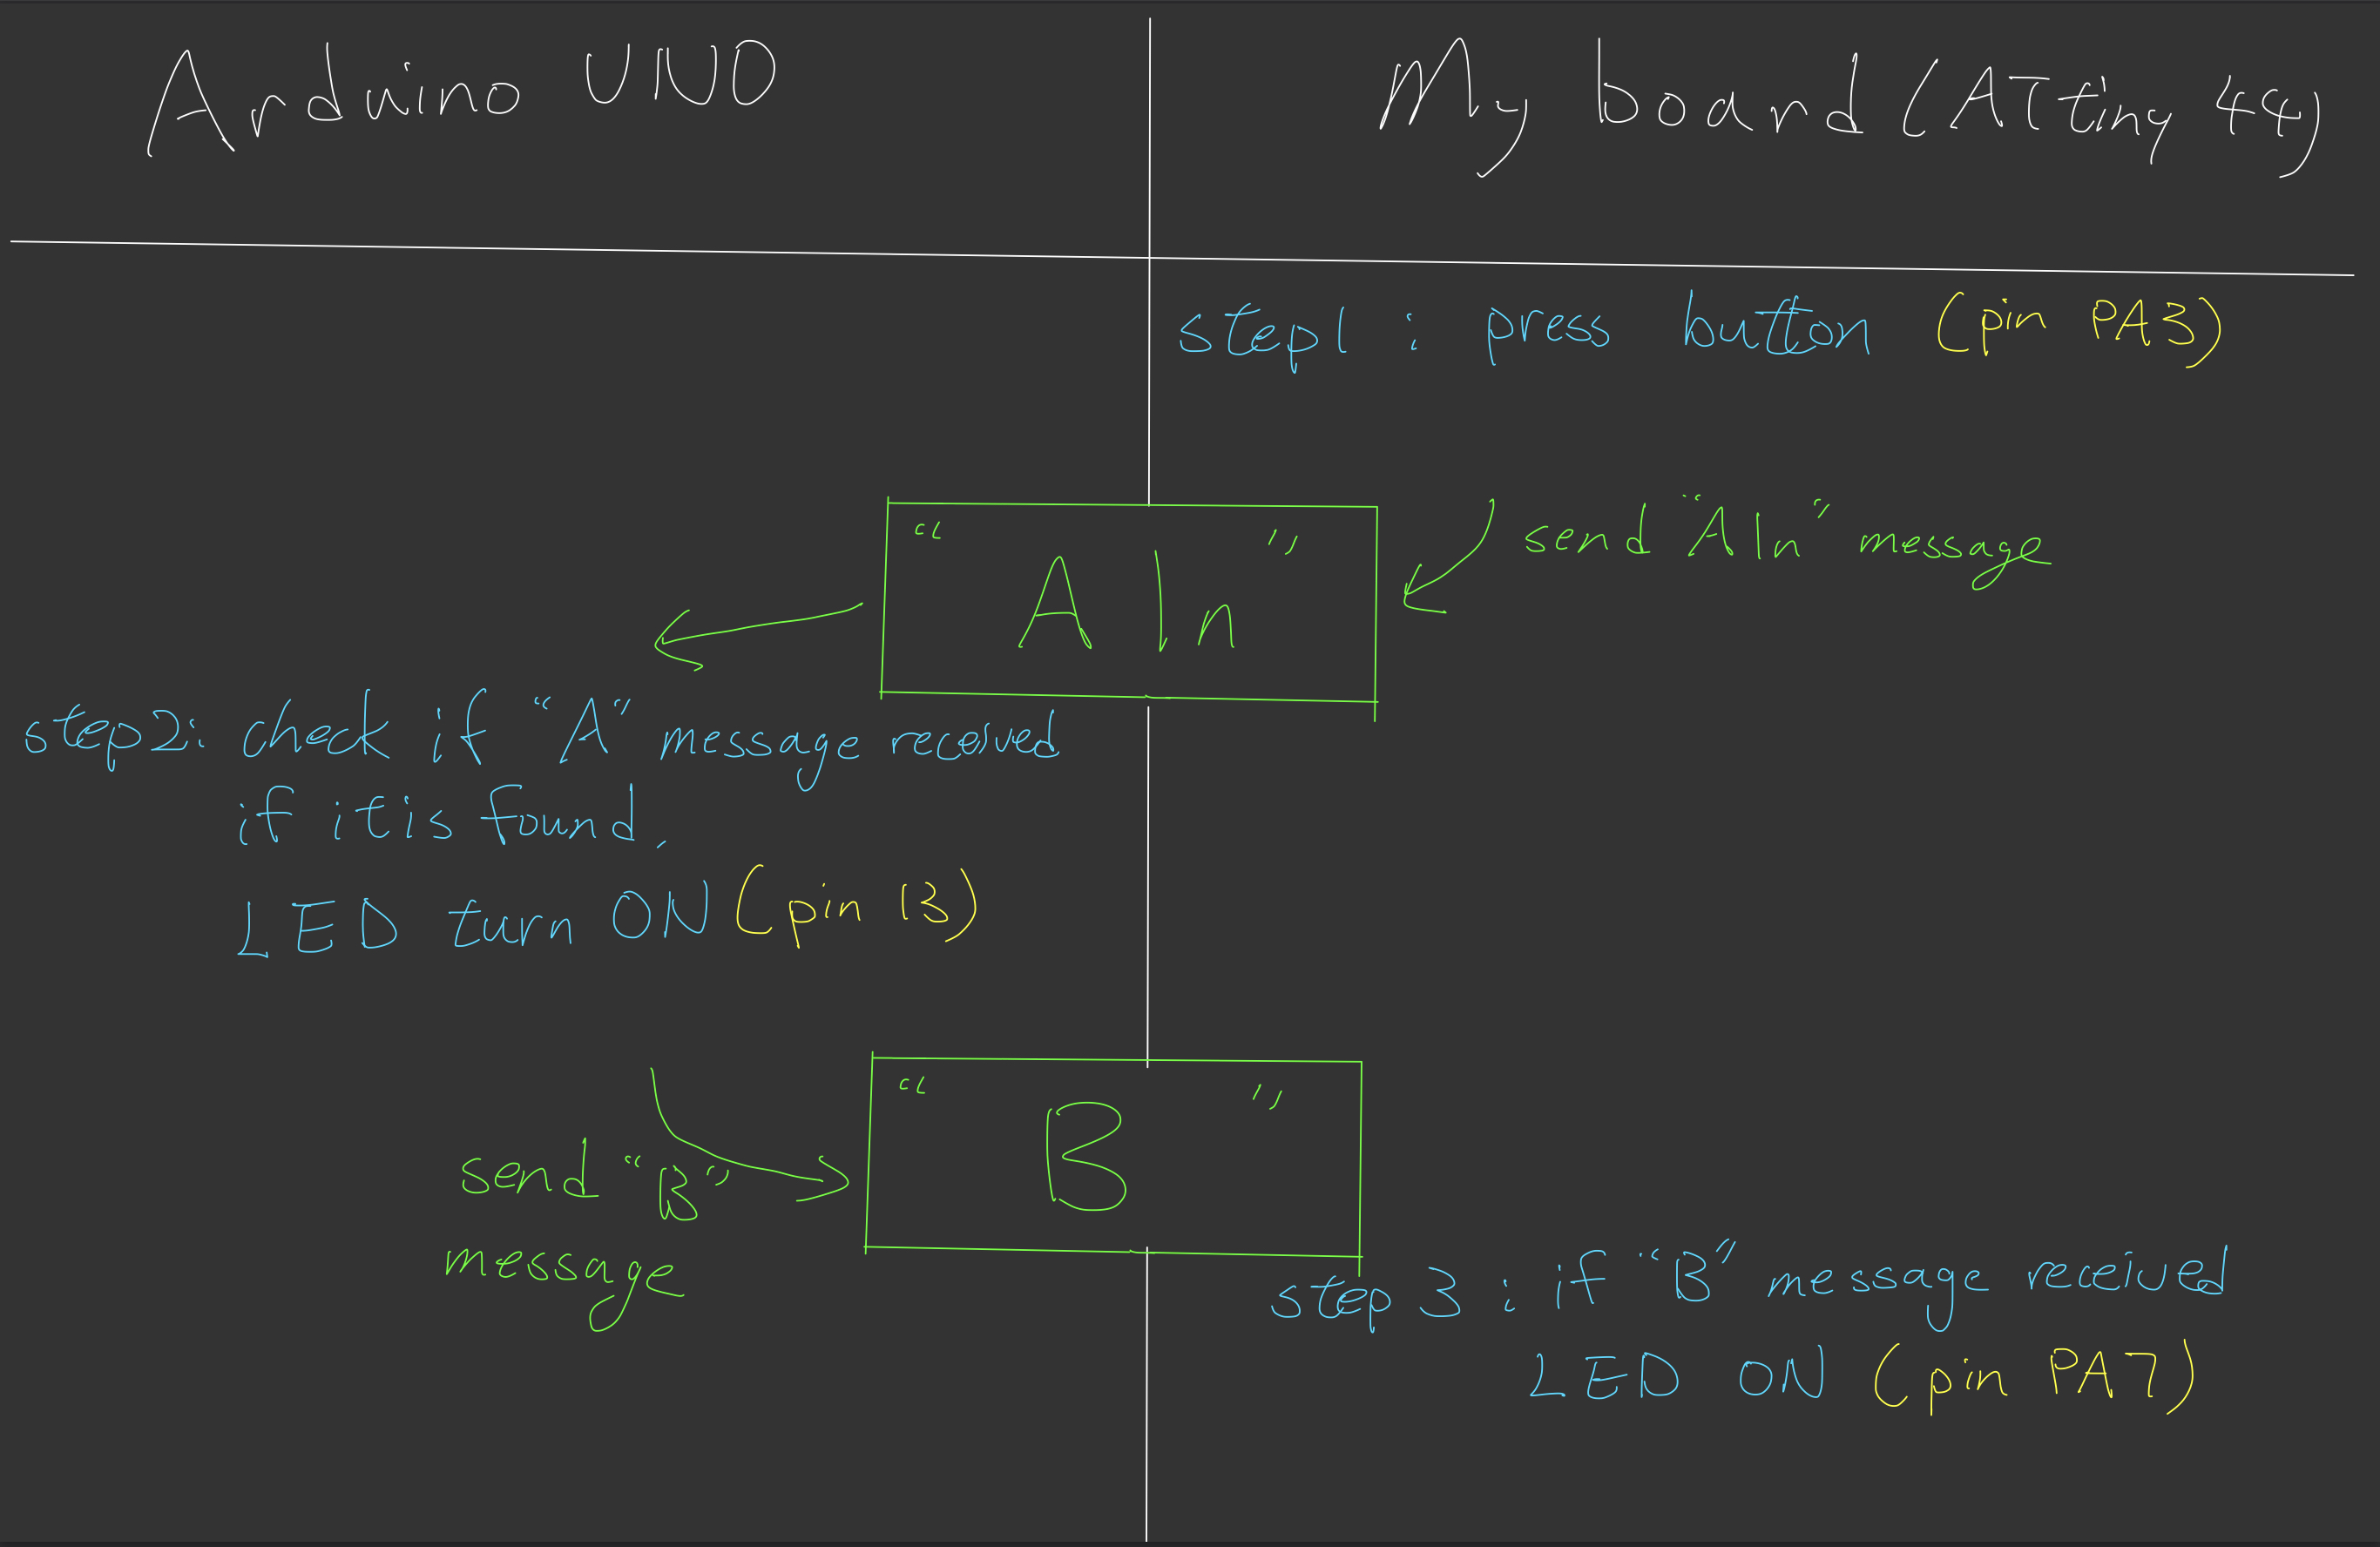
You could read that here is the message prototype and communcation between two clips.
Step 2:
Now I am going to view the code of my board first.
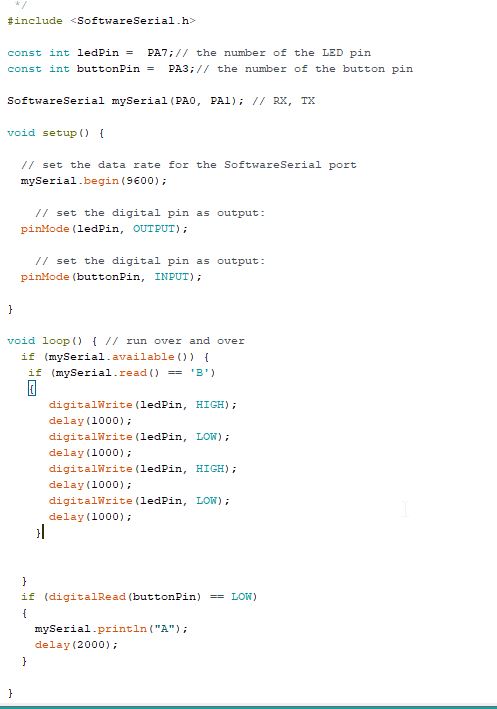
My chip only do two jobs.
Job 1 : When the button (pin PA3) is pressed, message “A” will be sent to arduino UNO.
Job 2 : Keep checking if message “B” sent from ardunio UNO. If it is found, LED will turn on and flashing for two times.
You may also download the arduino program ino file here.
Please click here to download the outline nc file
Step 3:
Also, we are going to view the program from arduino UNO.
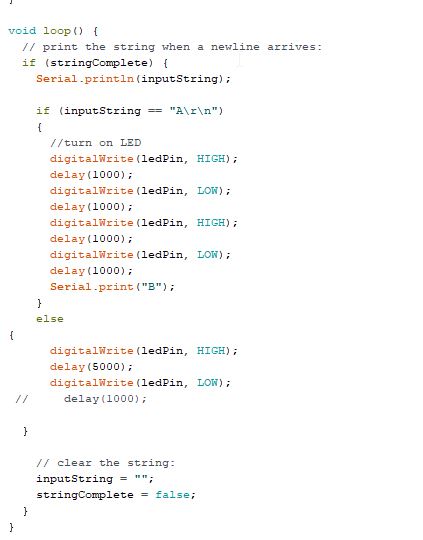
The program keep checking message “A” is sent from my board. If it is found, the LED will turn on and flashing for two times.
Also, a message “B” will send to my board.
You may also download the arduino program ino file here.
Please click here to download the outline nc file
Step 4:
In the following video, you would view the testing.
It behave like as expected.
Group assignment
Here is the link of the group assignment .
Send a message between two projects
I am going to send message between two projects.
Besides of my first PCB, I have to make the other PCB.
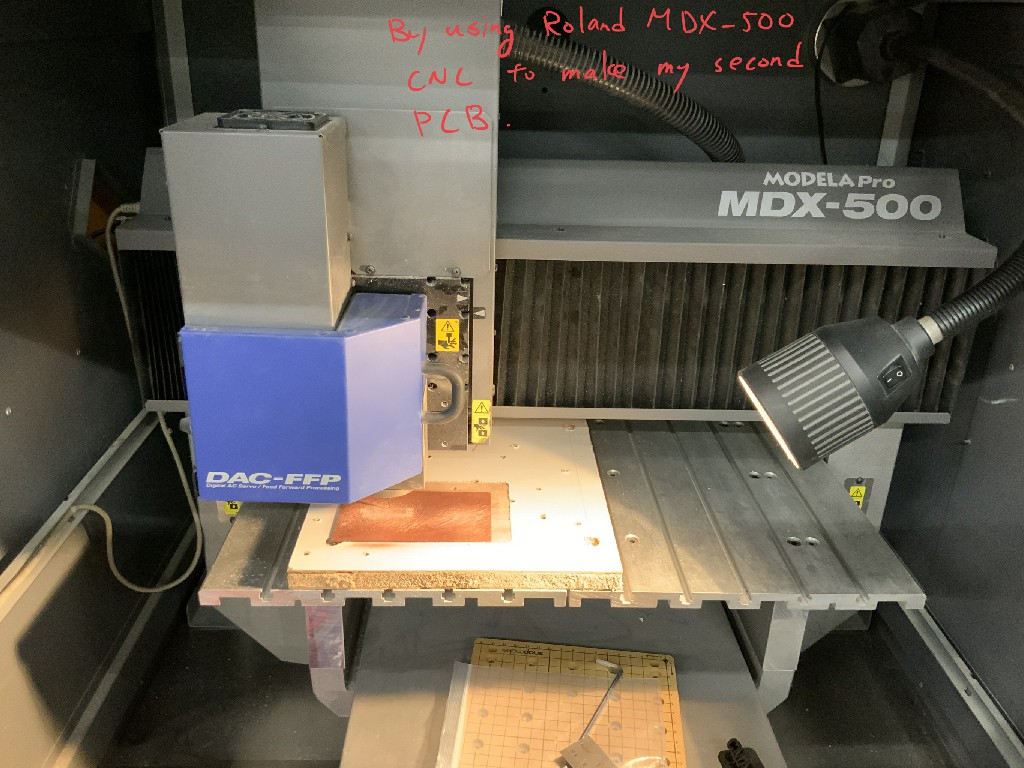
By using Roland MDX-500 CNC to make my second PCB.
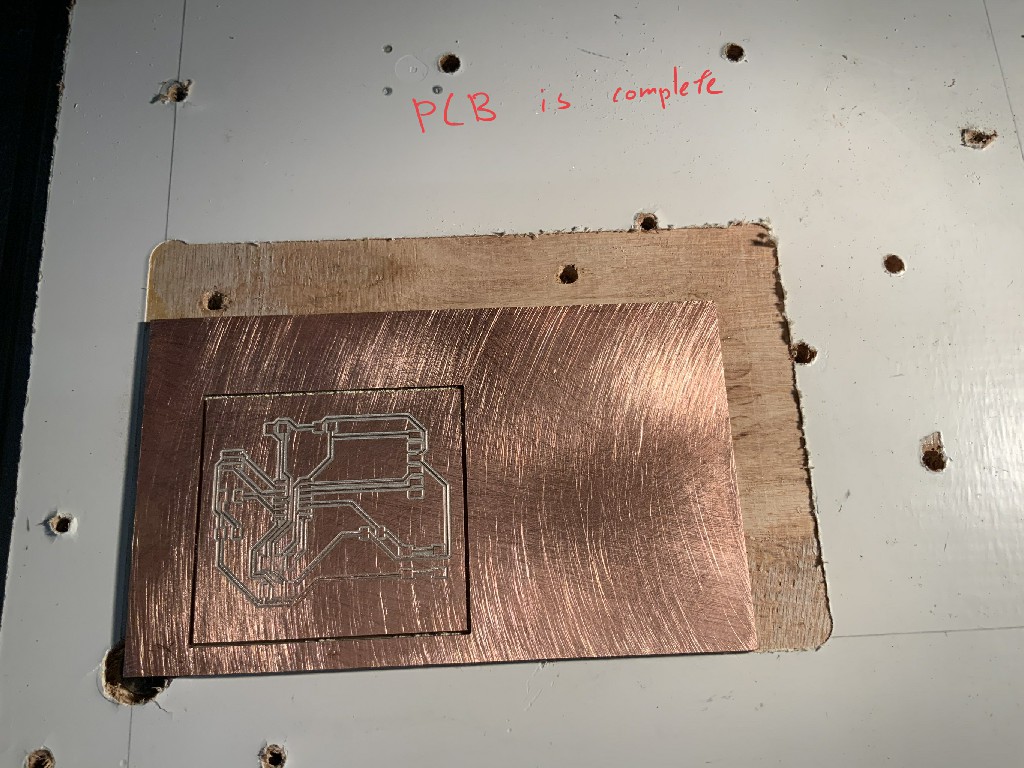
The milling of PCB is finished.
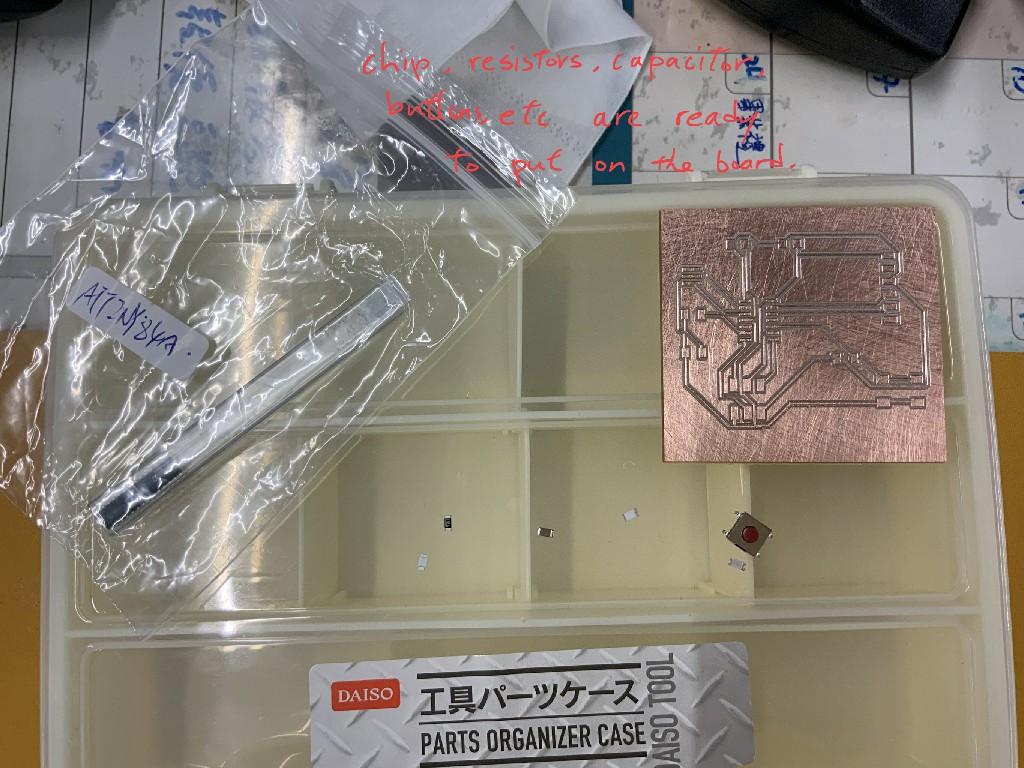
Chips, resistors, capacitor, buttons etc are ready to put on the board.
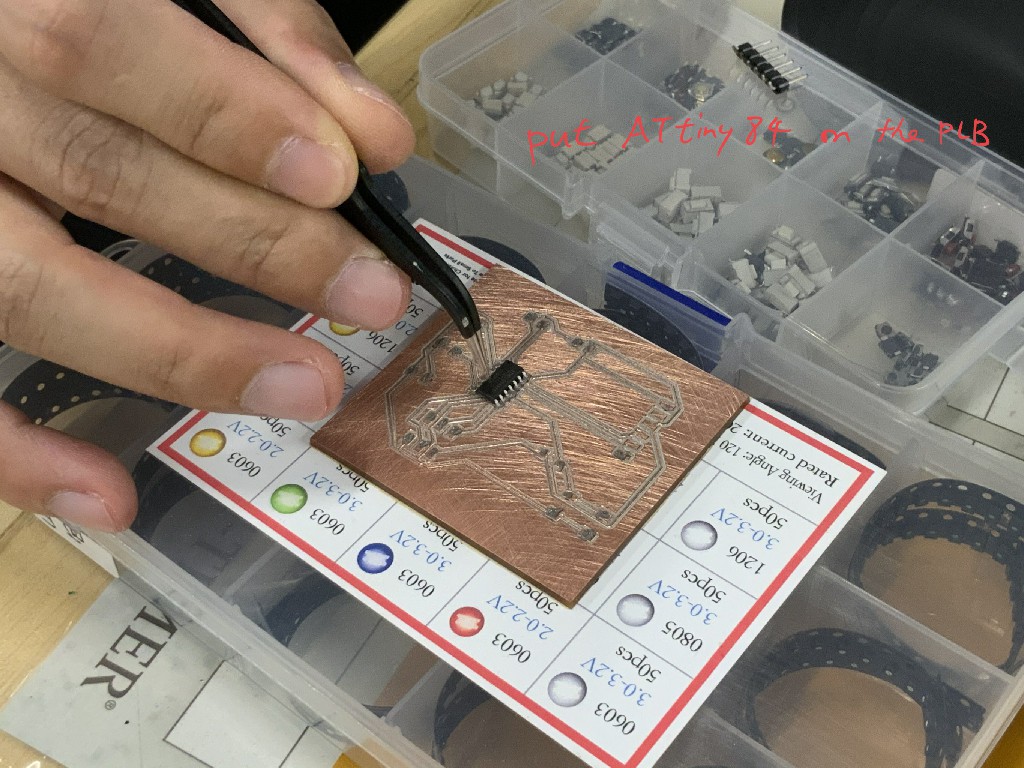
Put Attiny84 on the PCB.
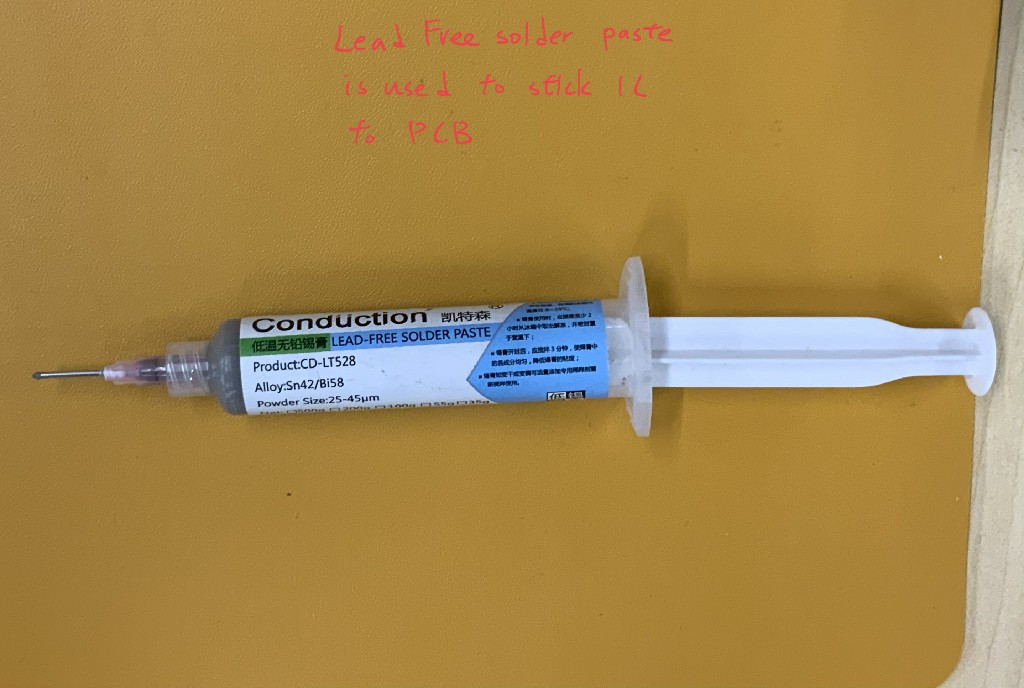
Using the lead free solder paste to stick IC to PCB.
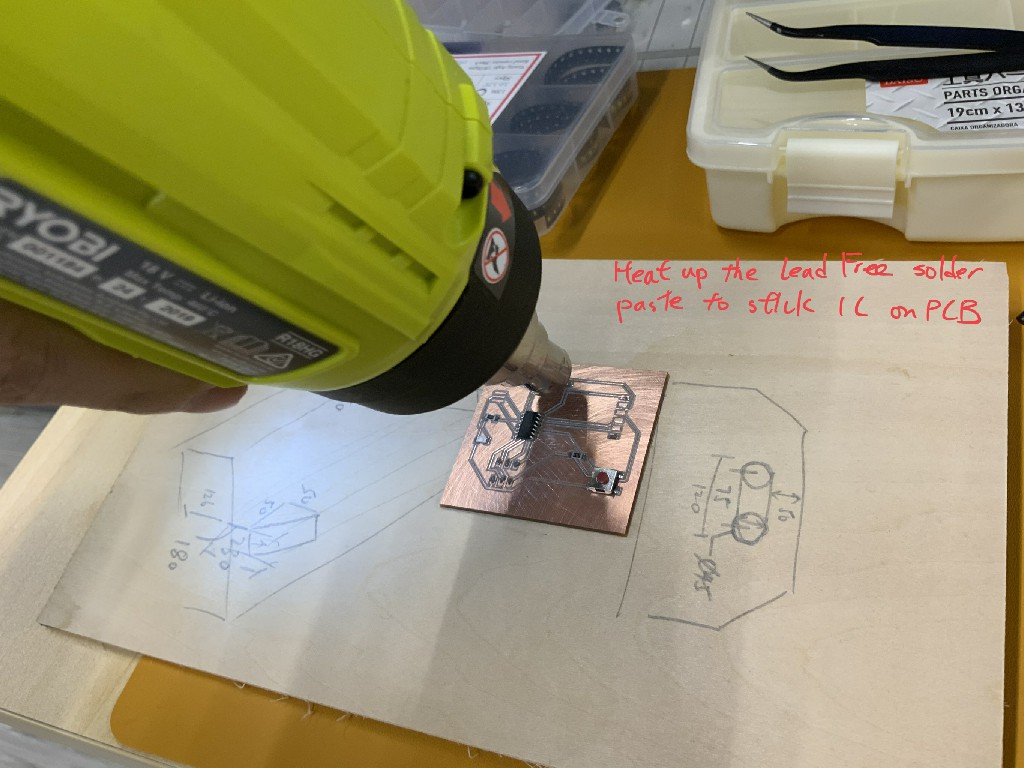
Heat up the lead free solder paste to stick IC on PCB.
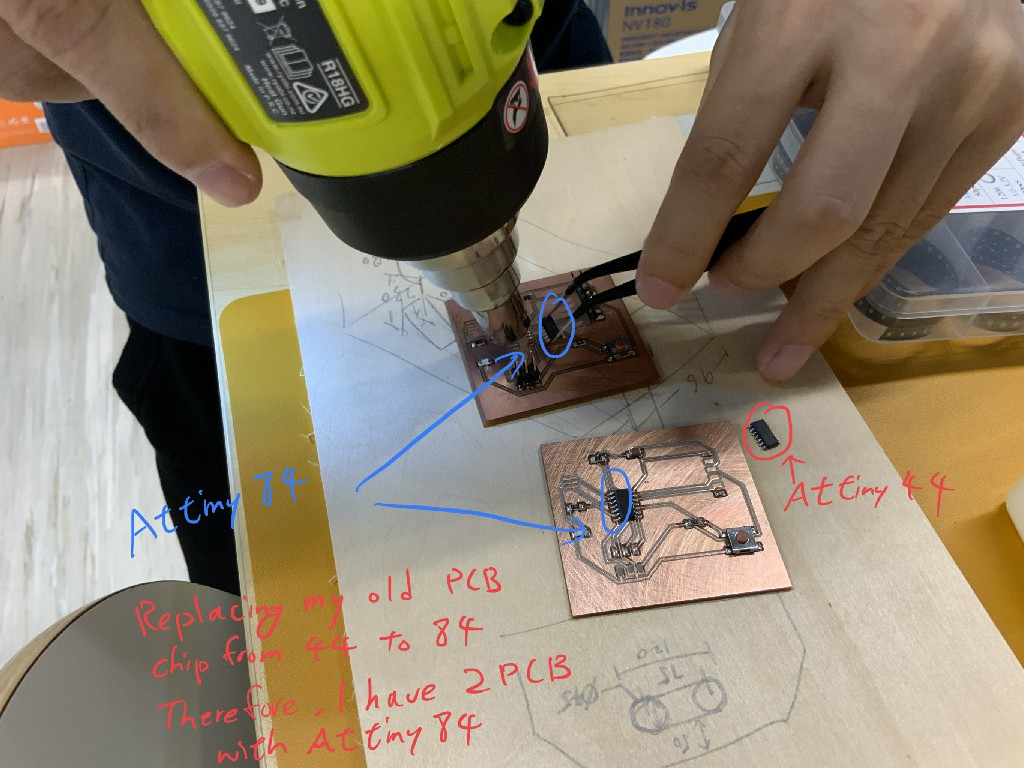
Replacing my old PCB chip from Attiny 44 to Attiny84.Therefore I have 2 PCB with Attiny84.
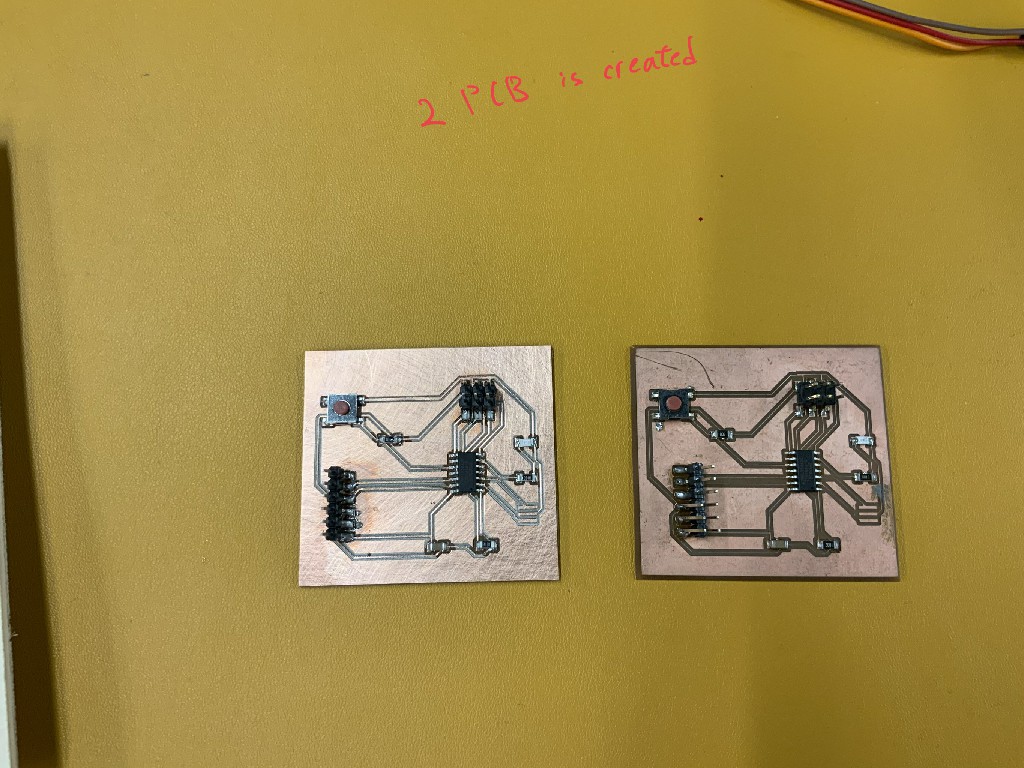
Two PCB are created.
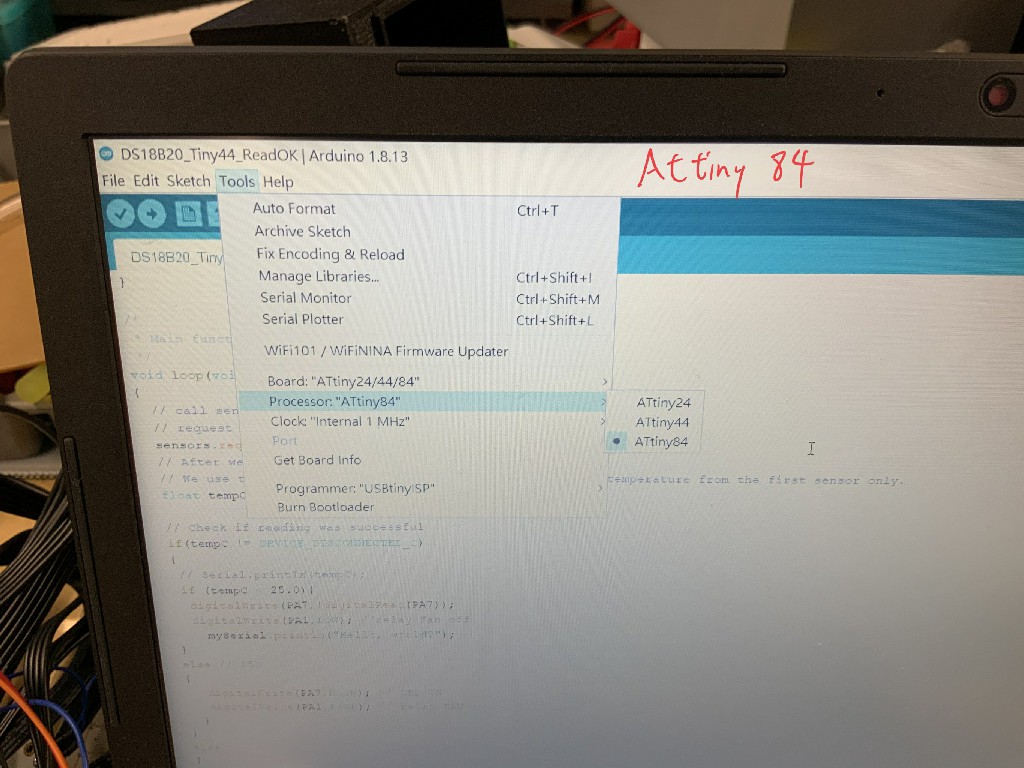
In arduino, I need to chhose processor Attiny84.
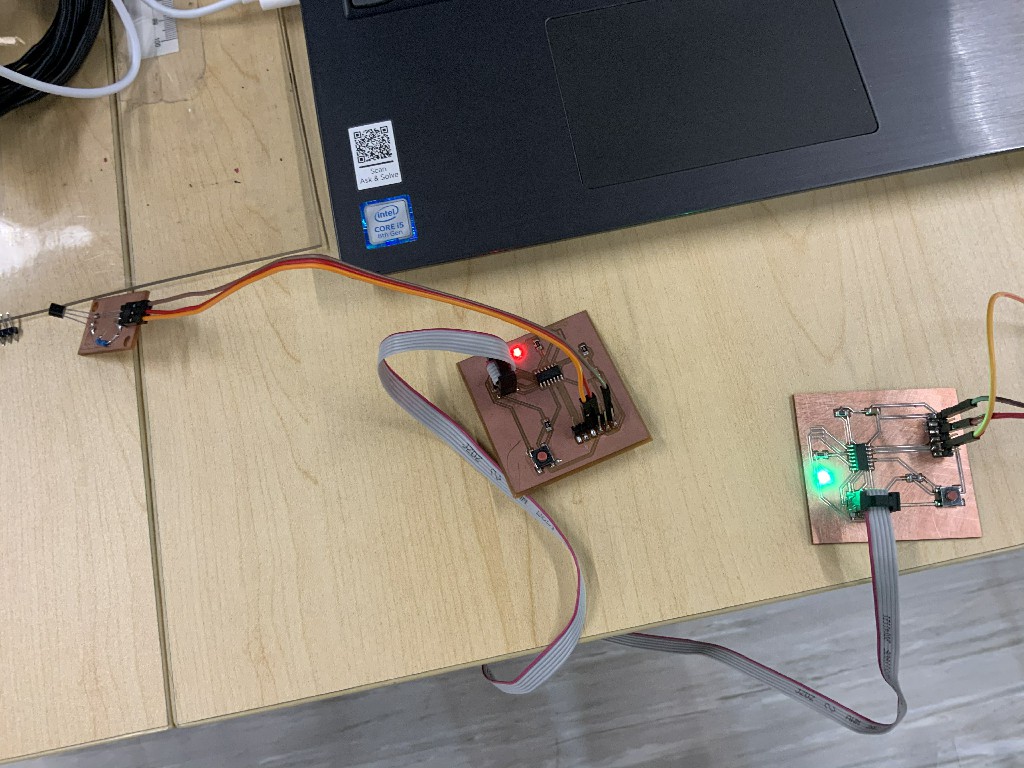
There are two PCB. The first PCB A (with red LED) receive input signal from input sensors.
Then, the serial signal is transferred to my second PCB B (with green LED).
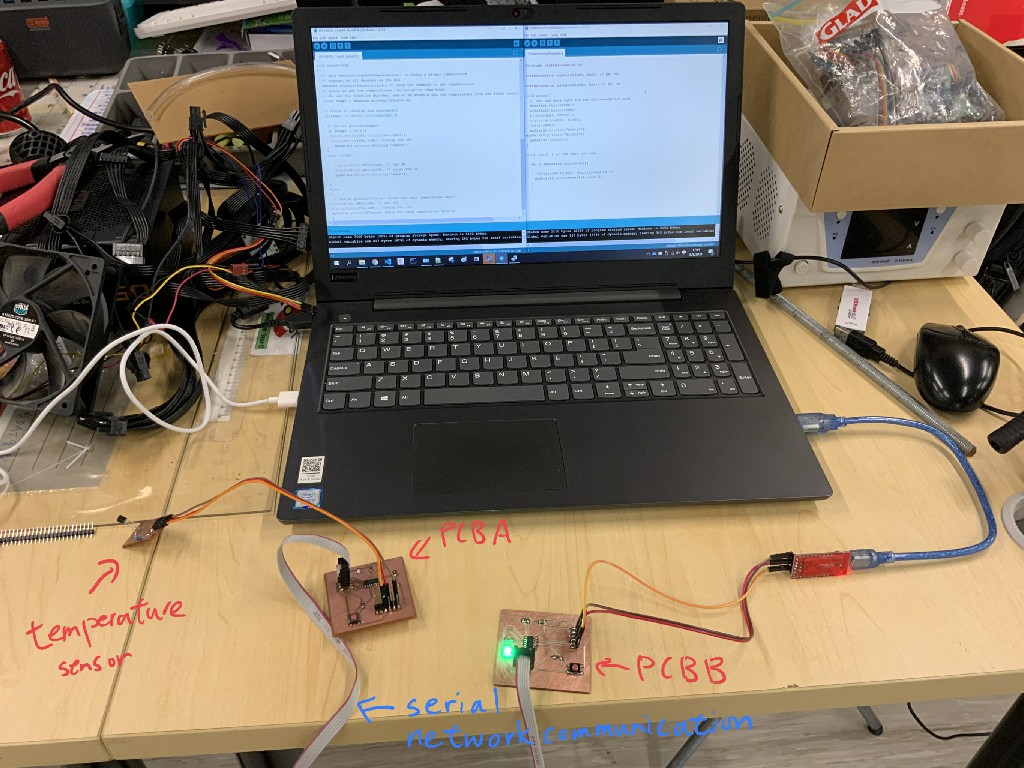
The whole picture of every part of my final project.
Temperature senors on the left hand side.
A serial network communication is used as a transmission channel.
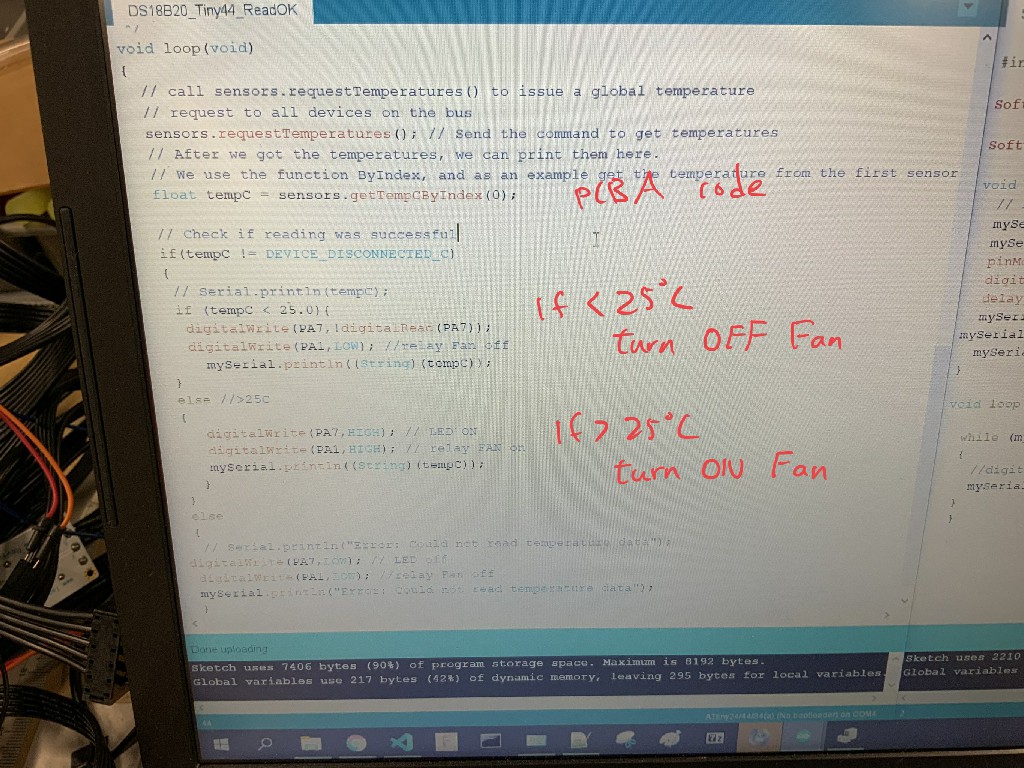
code of PCB A.
If temperature is lower than 25C, turn off Fan.
If temperature is higher than 25C, turn on Fan.
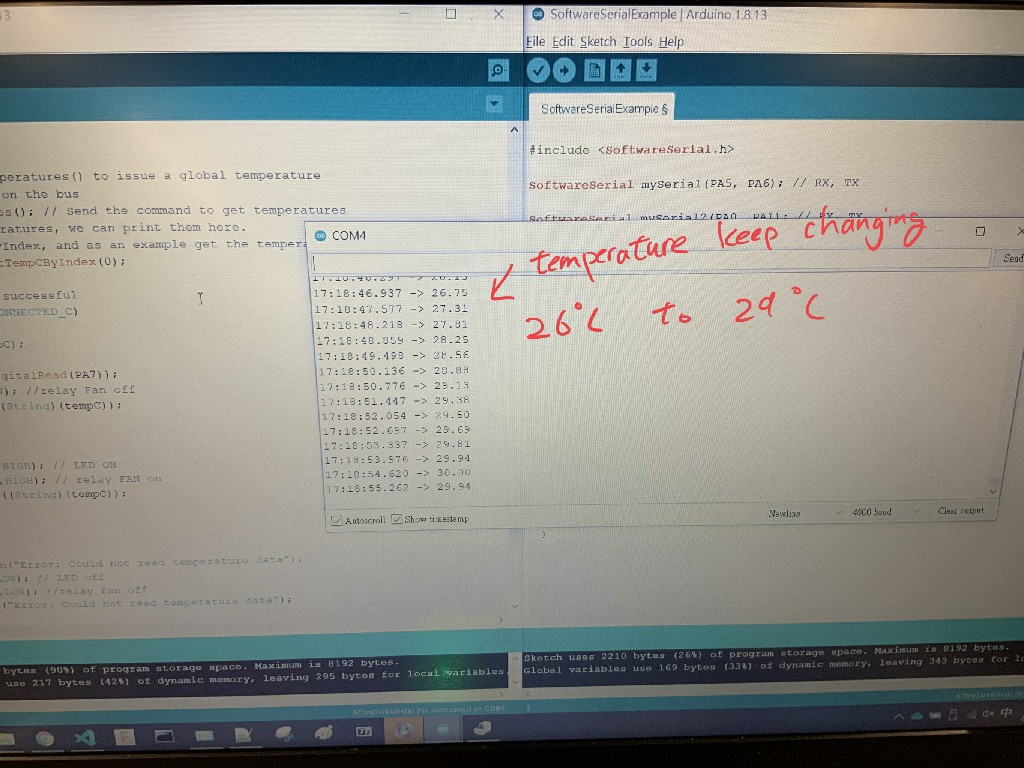
In serial monitor, temperature keep changing from 26 C to 29C.
Here is my used files
Please click here to download the ino file
Please click here to download the ino file
Please click here to download the python file
Please click here to download the schematic file
Please click here to download the broad file