2. Project Management
This week in ‘22
- Got ssh to work this time
- Updated documenting workflow to use Visual Studio Code IDE
- Worked out how to Imagemagick my screenshots
This week in ‘21
- Made a website and described how you did it
- Introduced yourself
- Documented steps for uploading files to archive
- Pushed to the class archive
- Signed and uploaded Student Agreement
Resources
mkdocs markdown fundamentals Homebrew
New stuff in ‘22
Installing packages on a Mac
I have a new Mac, I need to re-establish my working environment.
Unlike a Linux machine, OSX does not come with a package manager by default. When you start to get to grips with the command line, installing ready made packages in convenient.
Most applications can be added to your system using Homebrew installed thus:
/bin/bash -c "$(curl -fsSL https://raw.githubusercontent.com/Homebrew/install/HEAD/install.sh)"
Once we have that we can install things like mkdocs:
brew install mkdocs
Mac OSX uses python 2 by default, I prefer to use the more up to date python3. You can have both on your system, the simplest way to do that is to use Homebrew to install:
brew install python3
To make use of python 3 on the command line append the 3 anytime you call python
> python3 script.py
Some tools, or parts of tools, are not available with Homebrew. Typically python tools will have dependencies on external python modules, those are installed with pip. In our case pip3, where there is legacy python 2 on the system and we want to use python 3.
python3 get-pip.py
python3 -m pip install --upgrade pip
Mkdocs
Mkdocs is a static site generator. You can use it to compile ‘static’ of fixed websites. Distinct from dynamic websites where pages can change dynamically. We use a site generator as they hide a lot of the details away from us allowing us to write in simple markup that gets interpreted and translated into a more complex finished product.
The markup language that we use to describe our site with mkdocs is markdown. A broadly recognised language for marking up basic text documents. Many systems use markdown as a foundation, producing formatted text output from plain text files.
The vanilla markdown install has a few things missing when compared to the default Fab Academy template. I’ve also added the ability to use includes, a macro that lets me experiment with writing partial fragments of pages one time, and ‘including’ them in several locations within my site.
Adding the bits that were missing from my mkdocs install:
pip3 install mkdocs-material
pip3 install mkdocs-git-revision-date-localized-plugin
pip3 install mkdocs-macros-plugin
Material is a theme, the first plugin enables an interaction between mkdocs and git allowing last revised time to be displayed, the second plugin allows me to play with partial fragment of pages.
There are a few things that need to be changed in the template configuration to make the site what it is. This configuration is in the root of our gitlab repository called: mkdocs.yml
In this file I’ve updated the Author details, site description, added a new favicon, enabled the include macro.
Your mkdocs install allows you to preview your site on your own machine before you push to the fabcloud. To trial my site I run a local server:
mkdocs serve
and head over to 127.0.0.1:8000 to look at the compiled site. Whilst the server is running it will track changes to the documents you write and keep the browser’s view of your site up to date.
Little note on Markdown Bulleted Lists and Mkdocs gotchas
I’ve so far found to specific ways that I can foul up the markdown that I write so that mkdocs fails to interpret is correctly. One introduces a fault in bullet lists, the other makes the per page Table of Contents vanish to solve the first:
Leave a blank line before the list.
Or you get: * item 1 * item 2
Where you want:
- item 1
- item 2
To solve the second:
turns out that mkdocs only likes a strict hierarchy of headers, single H1 followed by H2 etc.
SSH
Some of the steps below were a result of debugging a not quite set up yet ssh/git configuration in Visual Studio Code.
SSH allows us to make a secure connection between our machine and the fabcloud server. It’s a process that you can set up a single time, making a secure ‘pipe’ between the systems.
On a system terminal first generate the keys, entering a passphrase when prompted:
ssh-keygen -t ed25519 -C "john.story@bangor.ac.uk"
The keys that are generated are part of the cryptographic system that secures your communication with a remote system. A private key is used by you to unscramble messages sent to you that have been hidden using your public key. If you want to send a private message to another system you use it’s public key to scramble the message, only the other systems hidden private key will reveal the information you send. In particular we’ll be using the keys generated in this step to secure the communications between our systems and the fabcloud gitlab instance. Once set up it allows for secure upload of our files to the fabcloud, without repeated entry of passwords.
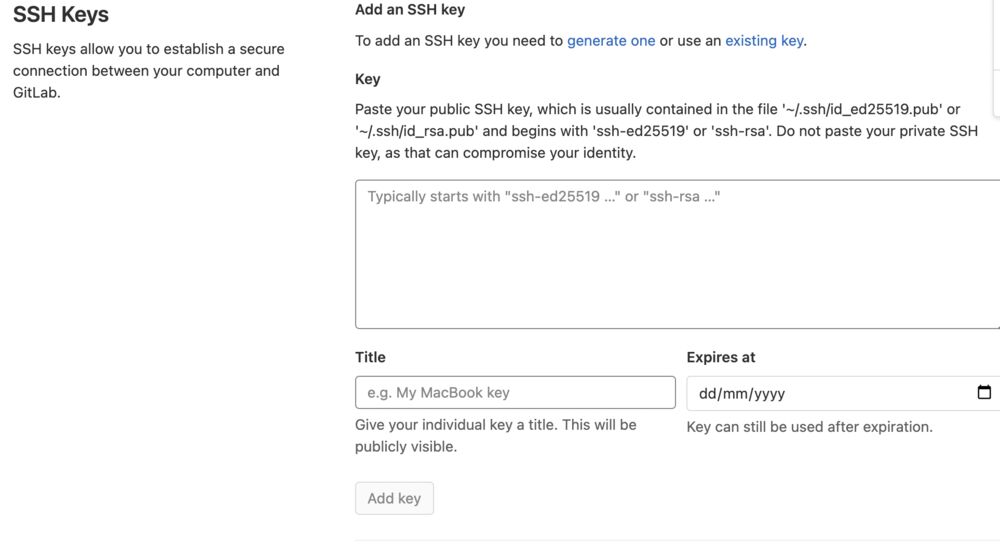
On Mac copy your public key into the clipboard
tr -d '\n' < ~/.ssh/id_ed25519.pub | pbcopy
Paste into the usual box on the gitlab site under SSH Keys in your Preferences:
Making your ssh-agent aware of the keys that you have locally, you can first list them with:
ssh-add -l
More than I want to write here to add your keys to the ssh-agent see tutorial This is required to ensure that the ssh connection is automated.
Getting your system to pick up the public key from a remote system that you want to connect to, you give ssh-keyscan the name of the host and it will see if there are any public keys available, helping you compile you known_hosts file:
ssh-keyscan gitlab.fabcloud.org >> ~/.ssh/known_hosts
Test the connection:
ssh -T git@gitlab.fabcloud.org
Enter passphrase for key '/Users/xxxxxx/.ssh/id_ed25519':
Welcome to GitLab, @john.story!
Git workflow in Visual Studio Code
I’ve started to make more use of an Integrated Development Environment (IDE) a tool specifically designed to aid in the development of code. Specifically Visual Studio Code from Microsoft. Part of the integration is direct access to version control from the GUI. Making it easy to manage staging and commit actions.
Outside of the IDE we can tidy up out git a bit with:
git config --global user.email "john.story@bangor.ac.uk"
git config --global user.name "John Story"
Git config is a command line tool that helps manage configuration files that are a store of settings used by git when it marks up and communicates about your repositories.
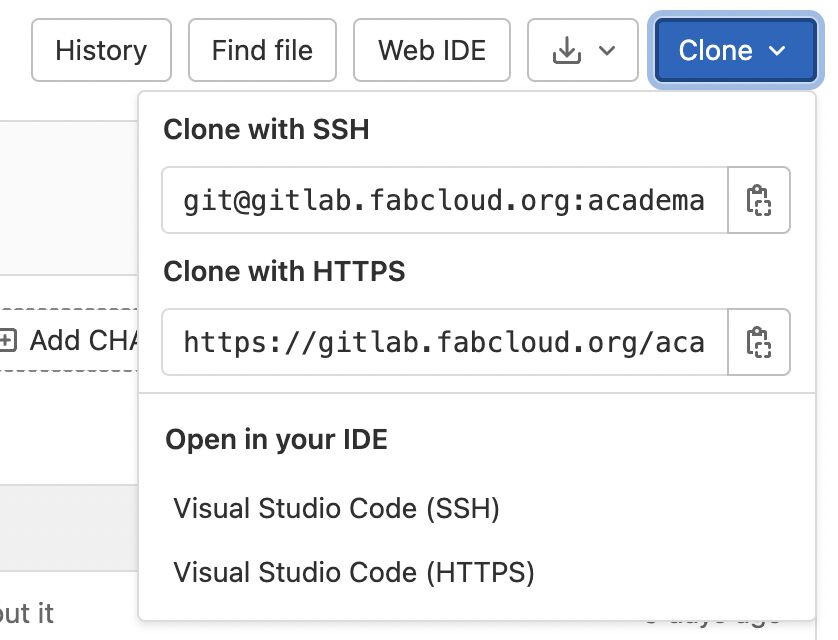
Cloning your repository
Making a local copy of your repository is easy for Visual Studio users. Gitlab has an ‘Open in your IDE’ option that will fire up Visual Studio Code and automatically download a copy of your site for you, this is a good way to find all the missing bits from your ssh installation.
Integrated version control
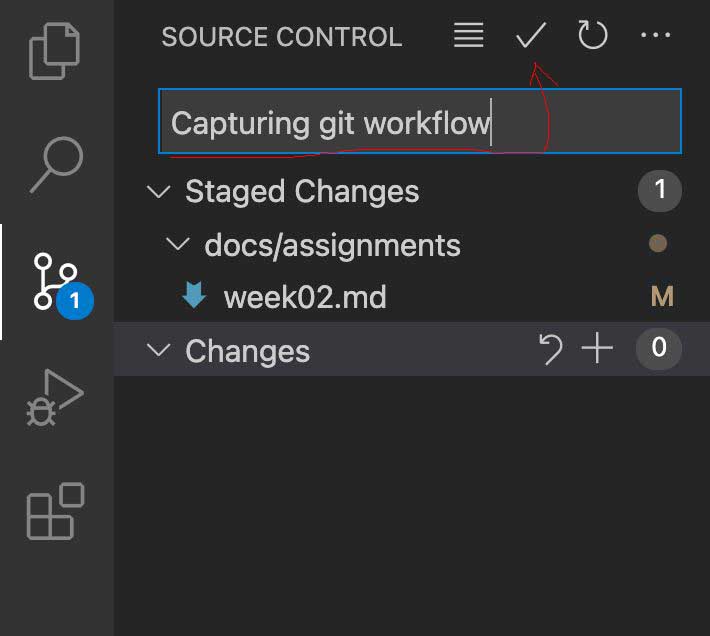
The version control panel in Visual Studio Code will keep track on changed documents for you (like a continuous git status being run):
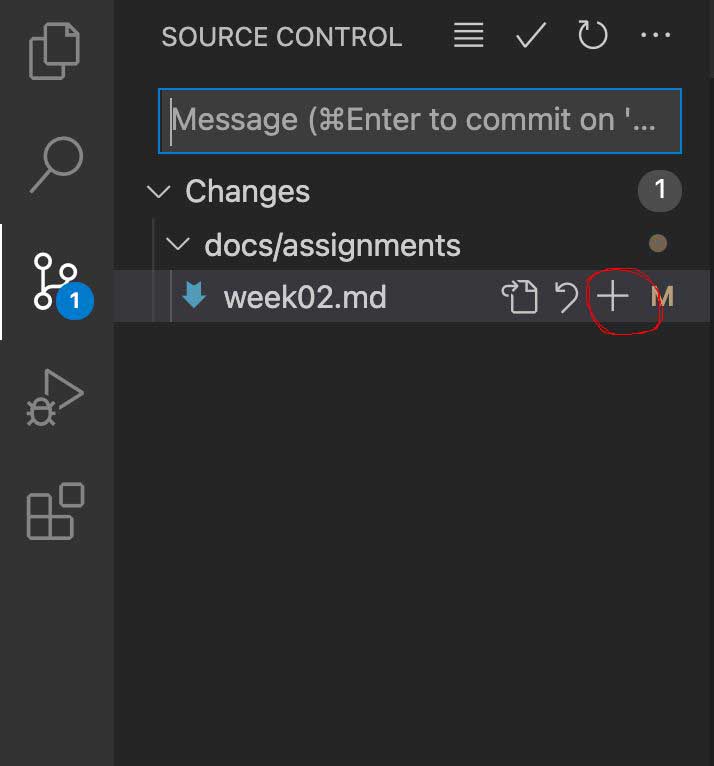
Hitting the plus next to the filename will stage the changed file, (this is the same as doing git add):
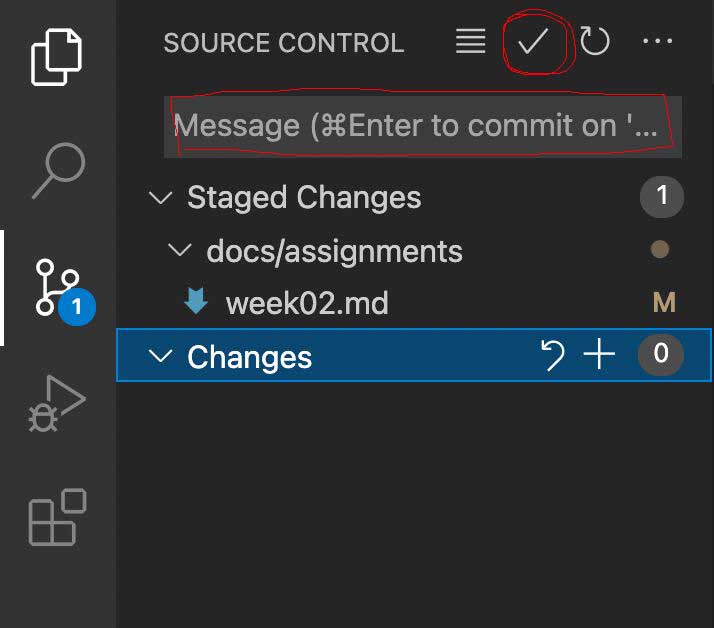
Adding a message and hitting the tick at the top of the pane will commit to you local repository (git commit -m ‘message’):
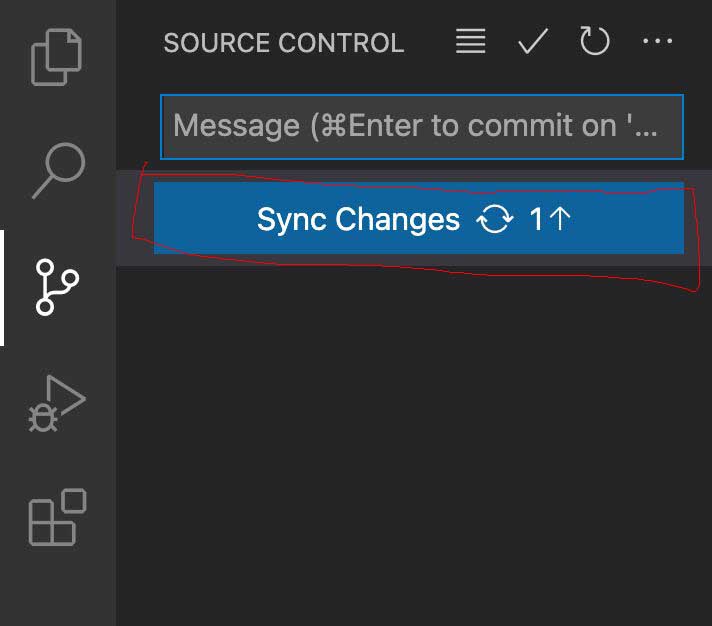
Once you’re happy, you can sync up your remote repository, VSCode will do a pull then push by default.
Continuous Integration (CI/CD)
Once we push a new version of our website to the fabcloud server, a process of ‘Continuous Integration’ is triggered. There’s a script that watches out for updates, and on receipt of a push, triggers the servers instance of mkdocs to recompile your static site. The CI process is used to build and test code. The process is managed by a scripts that are triggered by activity in the repository, in our case the script is stored in the root and called .gitlab-ci.yml containing the instructions for installing, testing and updating our web pages.
Imagemagick
Last year I found shrinking my pictures in Photoshop effective but laborious. It gives you a chance to crop and tweak, but it’s a lot of clicks. It’s something that I aimed to get sorted out this time around.
Enter Imagemagick.
To get going, our friend Homebrew
brew install imagemagick
It’s a surprisingly big download.
Then after quite a bit of googling I came up with the following command. To be run in the folder with a set of .png Screenshots as captured by my Mac:
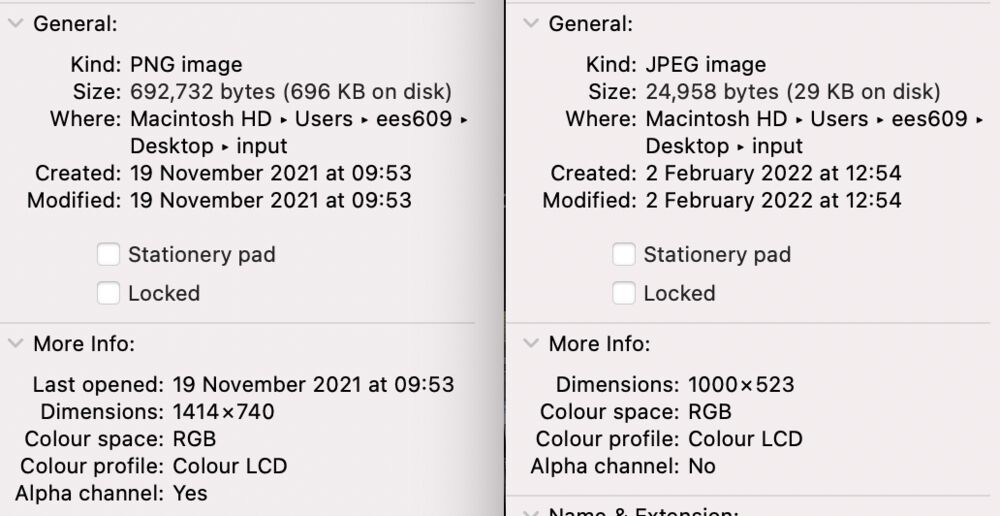
convert '*.png' -set filename:fn '%[basename]-small' -resize 1000x1000\> -quality 80 '%[filename:fn].jpg'
This command grabs all the .png files in the folder grabs the input name and appends “-small” for the output, scales the image (whilst preserving the aspect ratio) to 1000px on the longest side, reduces the quality to 80% and saves out as a .jpg.
Here’s an example before and after:
Stuff below from ‘21 (some edits made, in ‘22)
The website
Used the default option, mkdocs. See notes above on installing mkdocs.
Staying in Sync
Making use of the standard mkdocs install to deliver the website. I use git to sync a local copy of the files on my laptop. Process of keeping that in sync depends on git commands. I learned Version Control a long time ago, starting with Subversion (SVN) in commercial settings, before picking up some Git. I don’t remember what tutorial I learned it from.
Git is a Version control system that allows you to track changes made in files. It allows you to keep a version history of tracked files, you can go back to old versions, see what someone commented when they marked a particular version of the file. It also lets you manage simultaneous changes to tracked files with the ability to manage the merger of different versions of a file. Git is a sophisticated system, one of it’s defining features was the removal of the requirement to have a central server, every copy of a repository is a whole system ready to manage the code base. Each repository can however be synchronised with others. In our case we synchronise our local repositories with one held by the gitlab.fabcloud instance. gitlab is an open host for git repositories, making it possible for an organisation to manage a centralised base for storing code. It also has a number of very useful tools that help you manage the development of code. See CI/CD above.
The following is a sequence of commands to make an update to our repository having changed some files:
git pull
Just in case I’ve done some work on another system or made a quick edit online, it’s a fundamental habit to make sure your clone is up to date.
git status
Get an idea of what’s changed since you last made a commit.
git add <filename>
Add those files that you want to stage for this commit.
git commit -m
Commit the staged files, opening up a local editor to add a commit message.
git push
Push your local changes to the online repository.
From ‘21…
Develop locally
Following the getting started guide for mkdocs leaves you with a local installation of the tools. Using:
mkdocs serve
fires up a server that you can access with your browser on the local host address:
127.0.0.1:8000
This allows you to check how things are looking, and if they’re working before you push.
Editor
Editor of choice: Sublime
Techniques for file prep.
This week I worked on illustrating some basic 2D techniques. Learning my first lessons in FreeCAD. Started constraining my final project idea in the context of Fab Academy.
See next week for some details on Adobe tools and Inkscape
Video
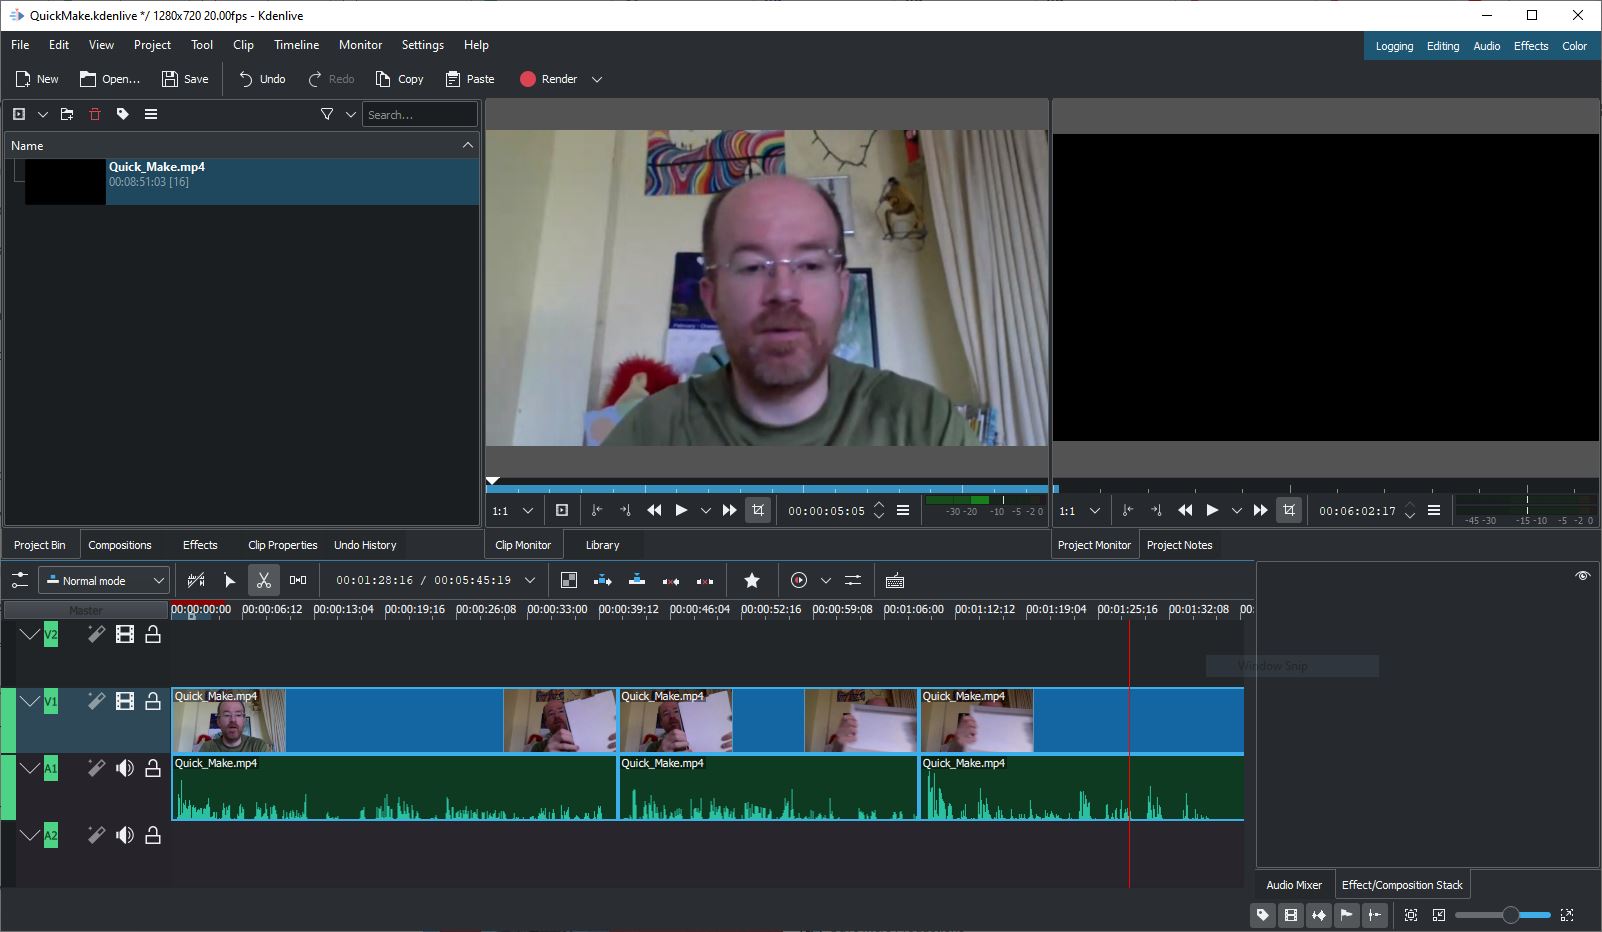
Did some video editing to trim some silent gaps out of a recent lecture
The other tasks:
Introduction can be found here. If you are reading this, we managed to push to the archive… Signed and uploaded the Student agreement