To achieve my idea I needed to analyze the whole process that Quentino will carry out, the basis of the project is to generate benefits to the children for their personal development but also to improve the bonding with the parents. This is why my proposal is versatile for two different cases, one when the child can handle it alone and the other in the company of his parents. All the information received by Quentino will serve to provide better proposals for each child.
Second week
Secondclass
This February 3th was the Computer-Aided Design class and it was very particular because we started review the storage at the git lab, I was on the top and Neil showed us how to improve the photos's weight because we only have to occupate 10 MB per week. I was working on my website to improve the organization and learned that It was the photos which weigh more, my new design is better and it permit me put many other things without charger too much.
At the class we learned about what CAD it means and know many alternatives to use differents 3d design software, I know some programs but I want to explore others to modeling my first prototype, maybe it will be interesnting to manage different workspaces and see the differences.
Second class - My first excess
General concepts
- Vector graphics: Are computer graphics images that are defined in terms of points on a Cartesian plane, which are connected by lines and curves to form polygons and other shapes.
- Píxel: Is the smallest homogeneous color unit that is part of a digital image.
- CAD: Computer-Aided Design - CAD tools allow us to create digital geometric shapes in 2 and 3 dimensions, as well as realistic animations and images.
- 3D Design: Is the set of techniques used to project in three dimensions. It would be the first step to design objects, constructions and three-dimensional pieces before modeling or building them.
- A point cloud: Is a set of vertices in a vertices in a three-dimensional coordinate system coordinate system. These vertices are usually identified usually identified as X, Y, and Z coordinates, and are representations of the external surface external surface of an object. Point clouds are usually created with a laser
three-dimensional scanner.
- Polygons: Surface generated by systems of vertexes vertex systems positioned in a virtual space with its own coordinate data. There are various systems and algorithms of creation. A mesh is constructed from a minimum of 3 vertices called a minimum of 3 vertices called a face, which is the basic basic unit of any three-dimensional polygon.
- B-splines: Scaling or translating the node vector does not alter the basis functions. In other words, if we manipulate a control point we change only the local behavior of the curve and not the global behavior as with Bézier curves. The basis function can be obtained from the Bernstein polynomial.
- NURBS: Non-uniform rational B-splines or NURBS (non-uniform rational B-spline) is a mathematical model widely used in computer graphics to generate and represent curves and surfaces.
(Source: Wikipedia.com)
My final project
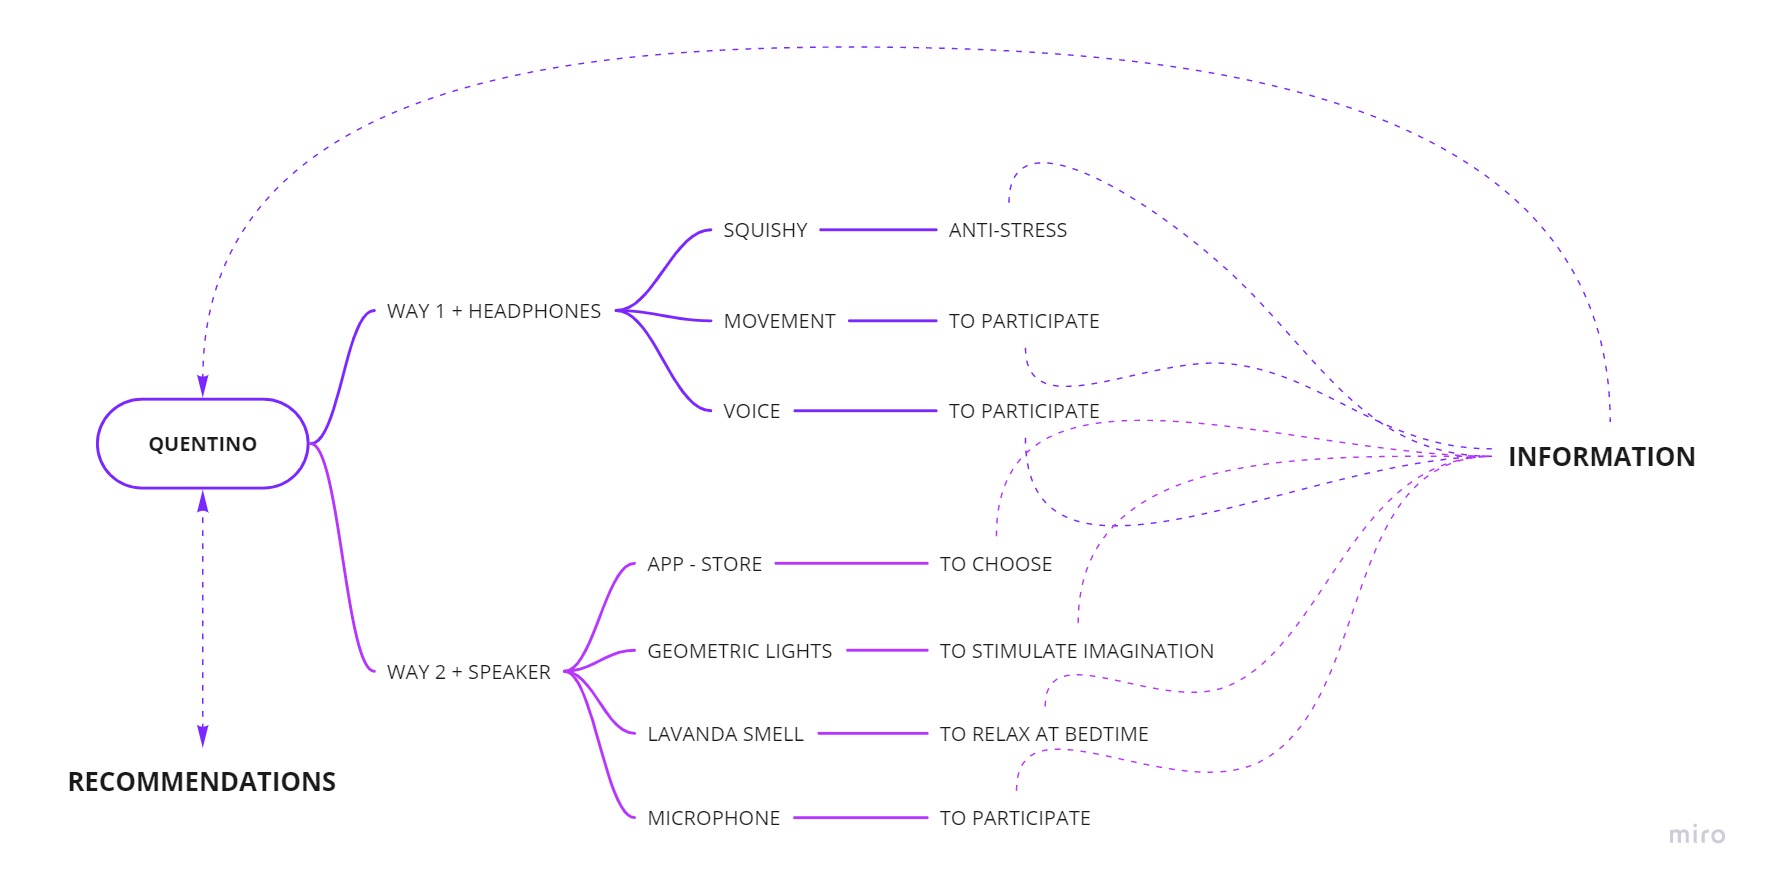
To start my design I needed to diagram my system, this is the best way to organize my ideas so I use one virtual platform calls Miro to do it, it help me to understand step by step my system and my project. Well, it is two alternatives to use it, one is with their parents and the second when their are alone. The first posibbilitie is when child go to sleep at night and their parents can interactive with they, this is important to connect between both because Quentino can program one story and put one topic about soft skills to develop on the child. The second one is when the child is making other activities during the day, this posibilitie works giving a chance to move and talk to Quentino to participate on the story.
Possibilities
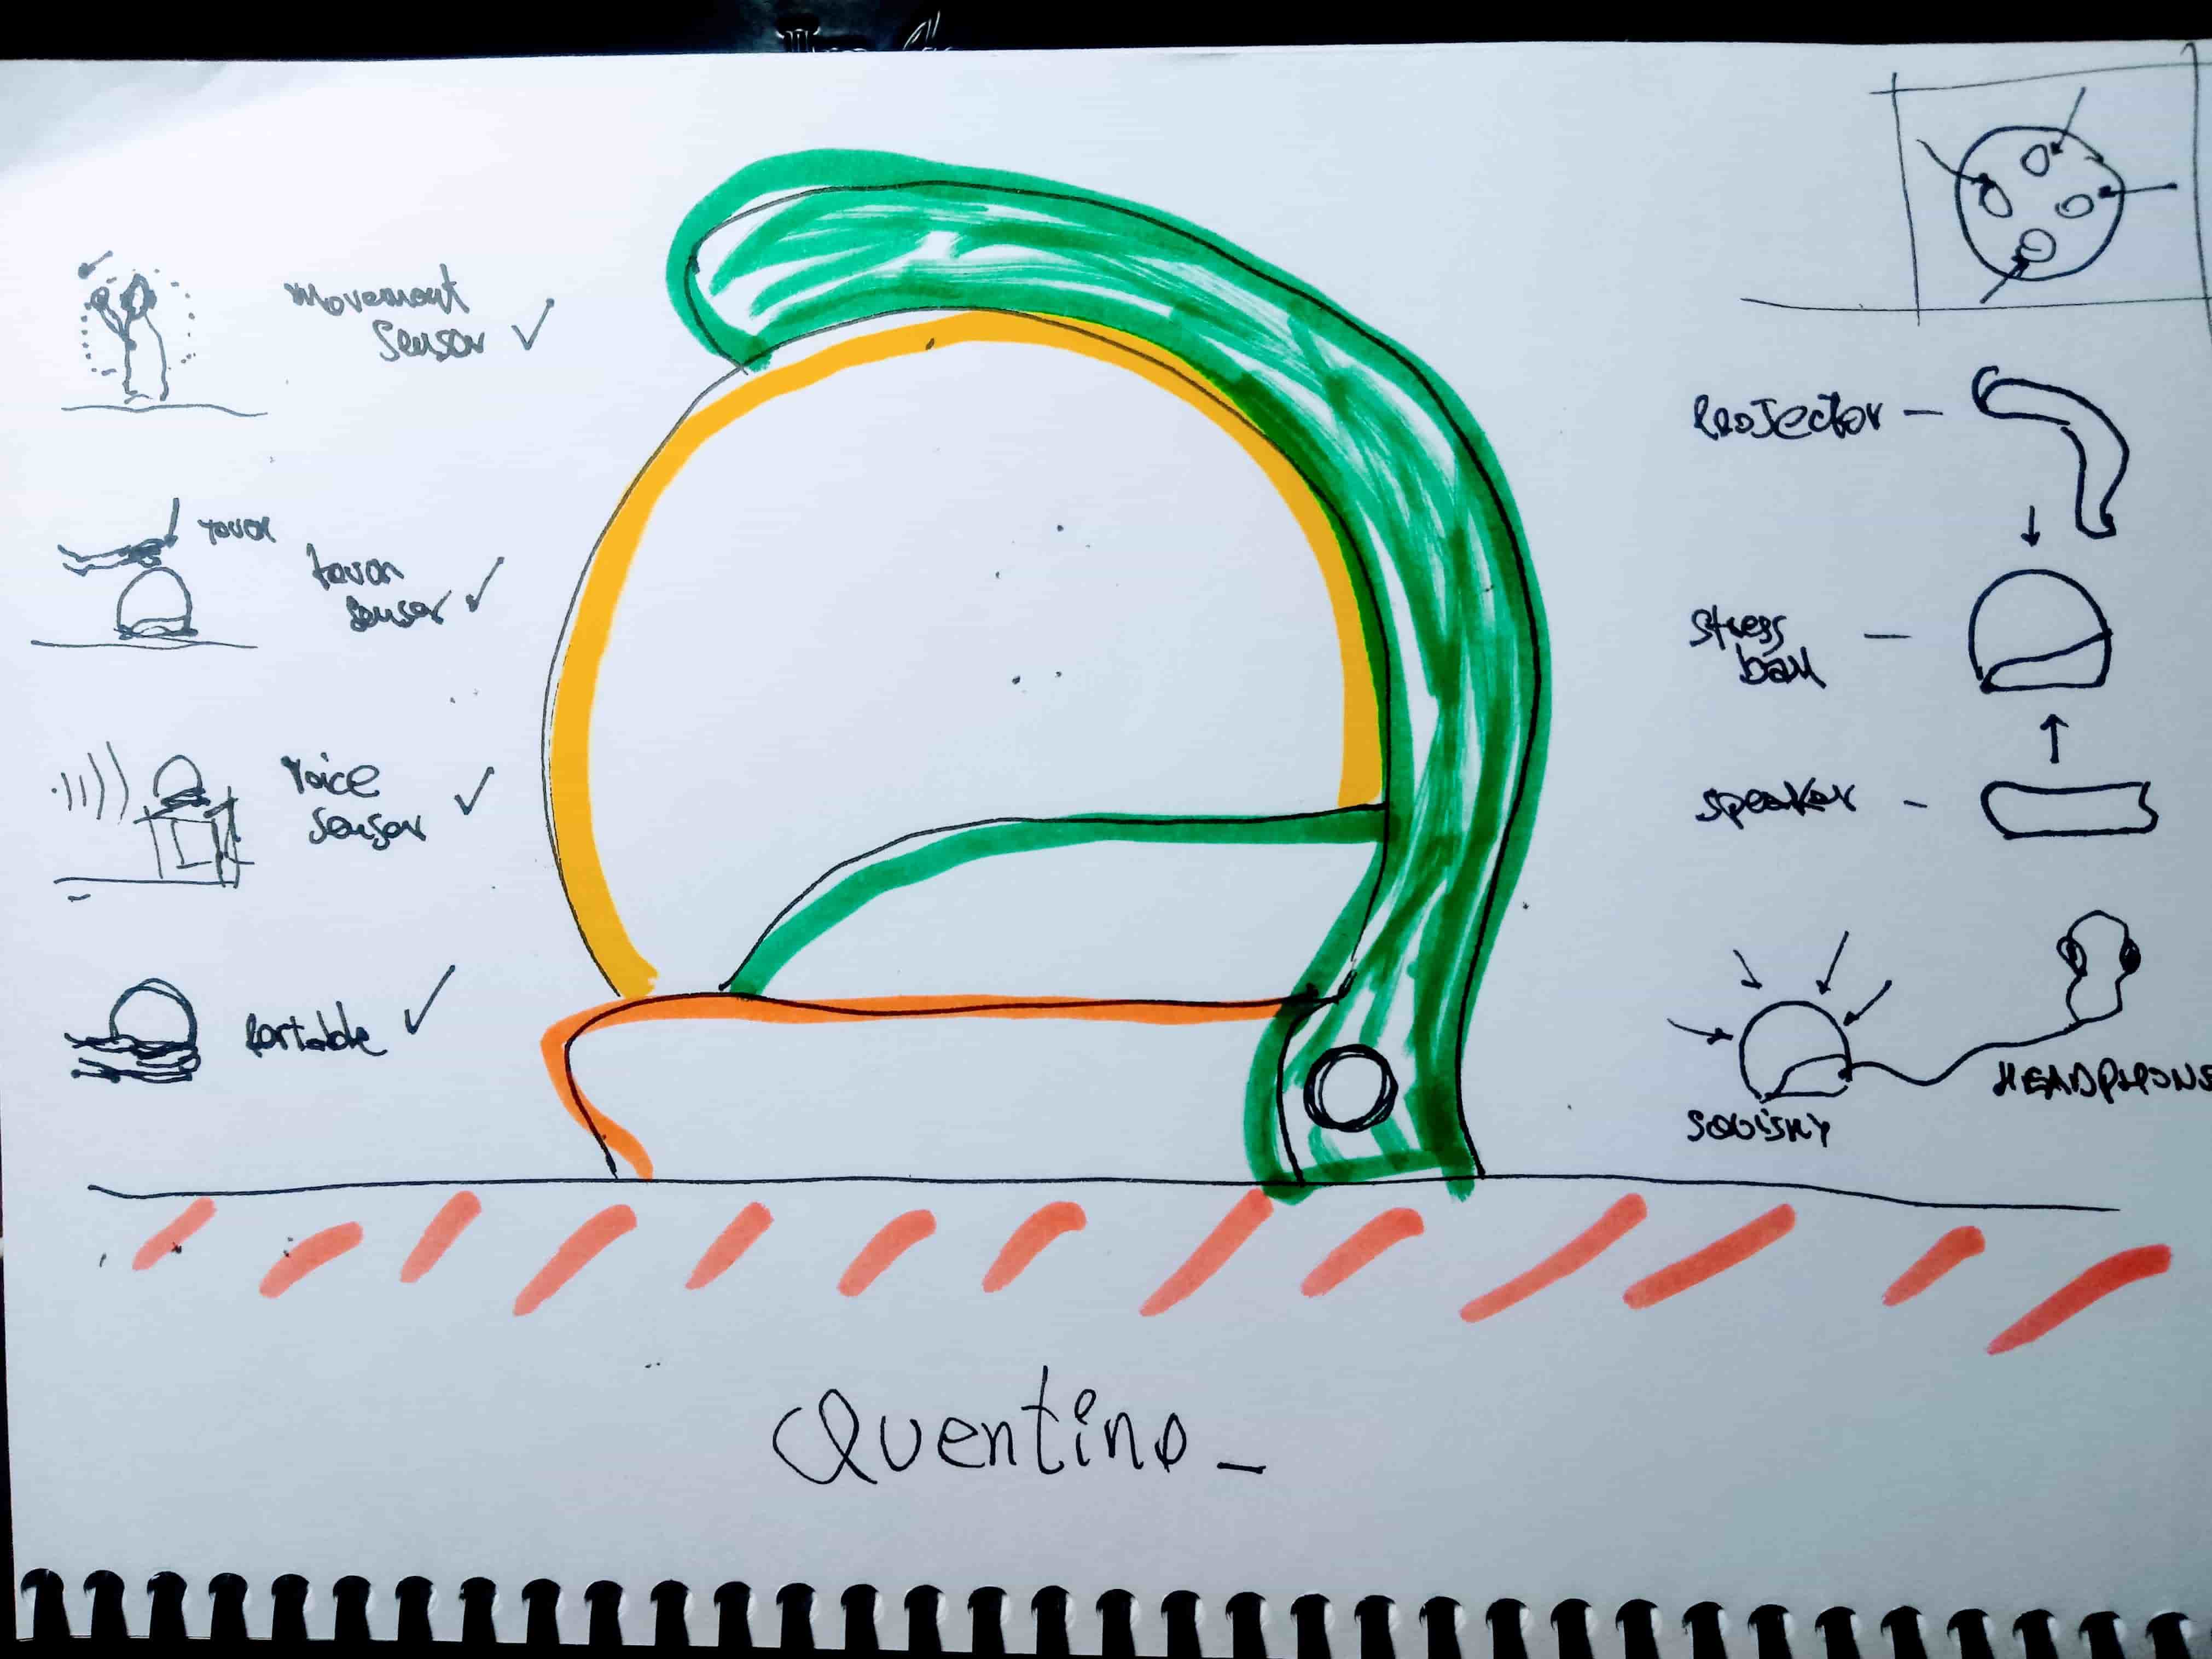
How can I start to design?
I always have the need to draw my ideas, in this case I started to draw some possibilities about "Quentino" but I researched about the different shape alternatives for children because they are the ones who are going to use this device. One of the most important things is the shape, my proposal is to start with a sphere because I was inspired by soft toys. (See the image). When I was a kid I loved these toys, they were so much fun and I could shape them as I wanted, I remember that these toys were very easy to create and one day I built one for myself. Today I am so happy to remember my childhood and build one for my first exploration of my project.
A toy from my childhood
Explorations
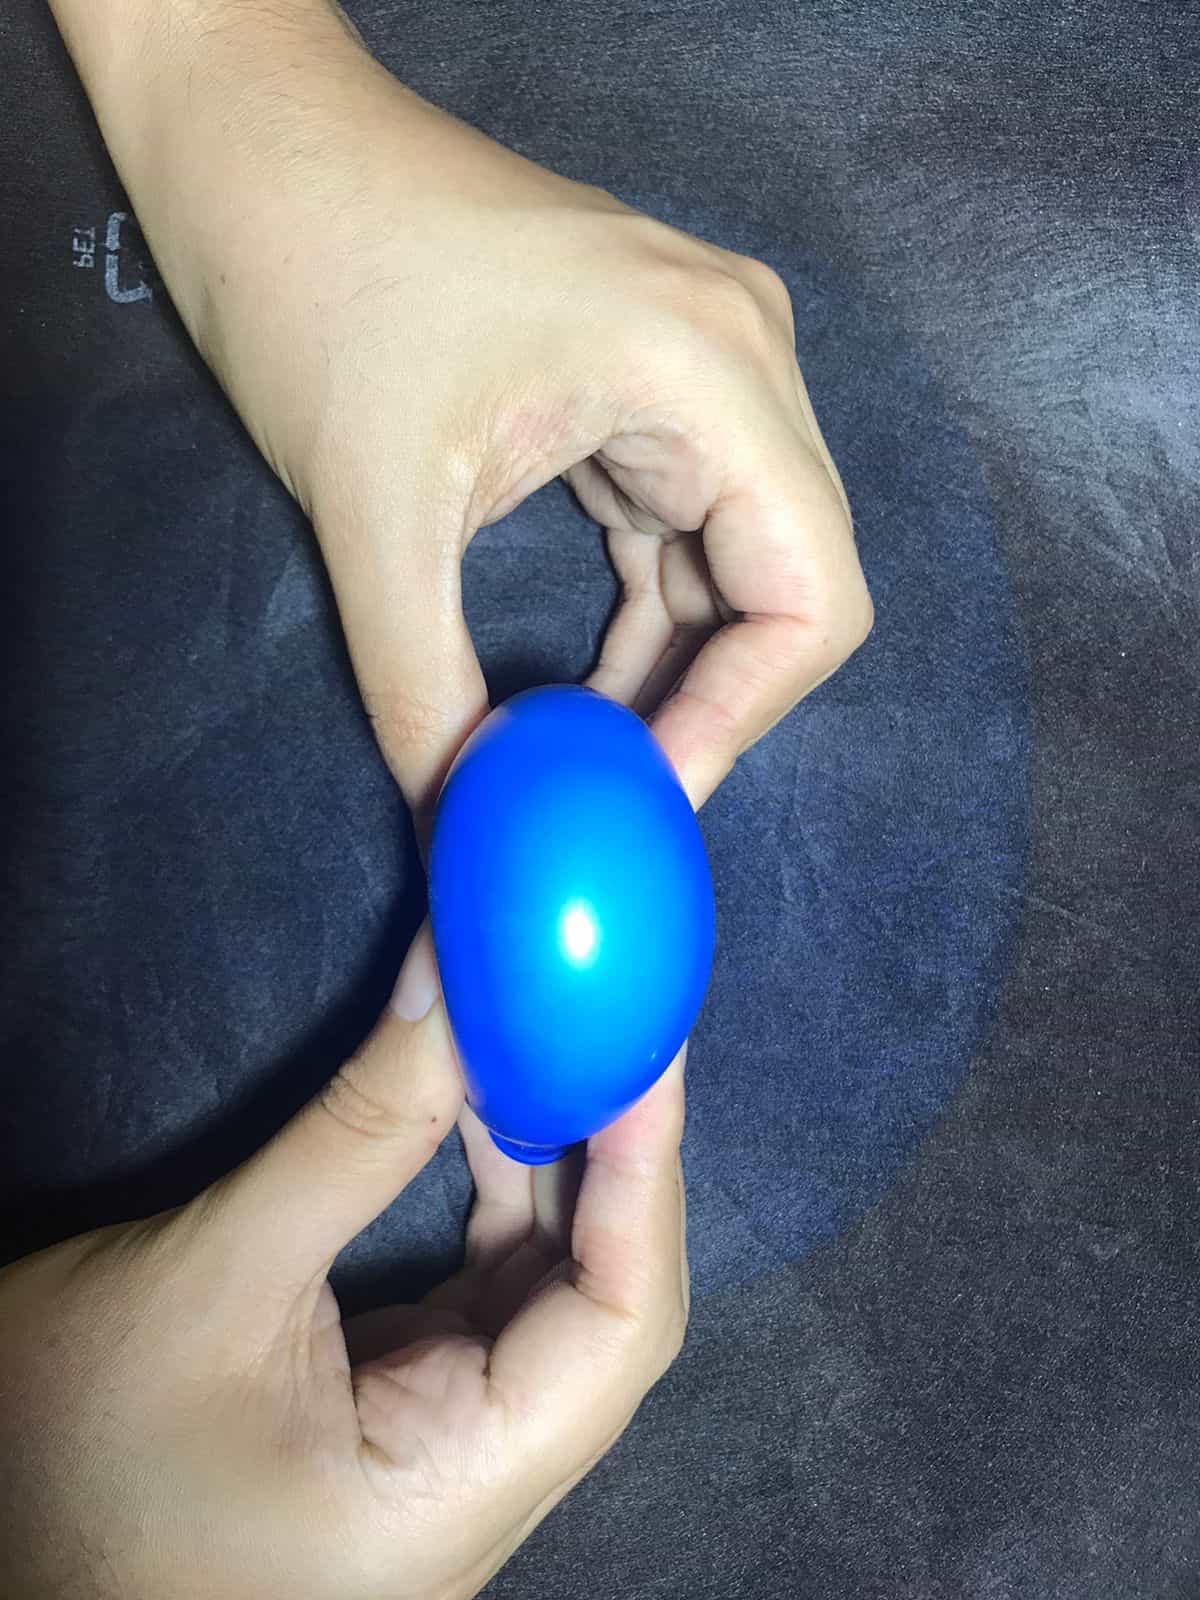
Physical exploration
I've only need one ballon and toothpaste, with this those things I start to imagine the best shape for my project, this is the first step to think how children will use it because my idea is that they will can manipulate this very easy. If children can have this objet they can practice the movements of their fingers while they hear the tayle from Quentino. According to specialists, it is beneficial to have something in their hands if the imagination is to be stimulated with an audio story, this complement the experience.
Second week
Exploringsoftware
Most of the programs I have used are free, I have no preferences because I believe that each of them has a particular purpose, I recommend choosing them according to our objectives, each one has a good level of potential so it is a great resource to find them on the internet.
In this part I will explain my experience in Gimp, Inkscape, Zbrush Core mini, FreeCAD, Fusion 360 and Blender. I recommend explore any program without a tutorials, I know it is hard at the start but if you take some minutes to find the solutions you will learn more and then when you can't find a solution you can looking for many tutorials on youtube. One of the things that I learned on Fab Lab Perú is try to be proactive and find something exploring and breaking, this is very important when you want to learn to do everything yourself, so if you want to learn and take the challenge don't ask your instructors, take your own decisions and first just try on.
My first idea on ZBrush
Some Software
- Inkscape: Computer-Aided Design - CAD tools allow us to create digital geometric shapes in 2 and 3 dimensions, as well as realistic animations and images.
- Sketch UP: Is the set of techniques used to project in three dimensions. It would be the first step to design objects, constructions and three-dimensional pieces before modeling or building them.
- ZBrush Core mini: Is a set of vertices in a vertices in a three-dimensional coordinate system coordinate system. These vertices are usually identified usually identified as X, Y, and Z coordinates, and are representations of the external surface external surface of an object. Point clouds are usually created with a laser
three-dimensional scanner.
- FreeCAD: Surface generated by systems of vertexes vertex systems positioned in a virtual space with its own coordinate data. There are various systems and algorithms of creation. A mesh is constructed from a minimum of 3 vertices called a
minimum of 3 vertices called a face, which is the basic basic unit of any three-dimensional polygon.
- Fusion 360: Escalar o trasladar el vector de nodo no altera las funciones de base. En otras palabras si manipulamos un punto de control cambiamos sólo el comportamiento local de la curva y no el comportamiento global como con las curvas de Bézier. La función base se pueda obtener del polinomio de Bernstein.
- Blender: B-splines racionales no uniformes o NURBS (acrónimo inglés de non-uniform rational B-spline) es un modelo matemático muy utilizado en la computación gráfica para generar y representar curvas y superficies.
(Source: Wikipedia.com)
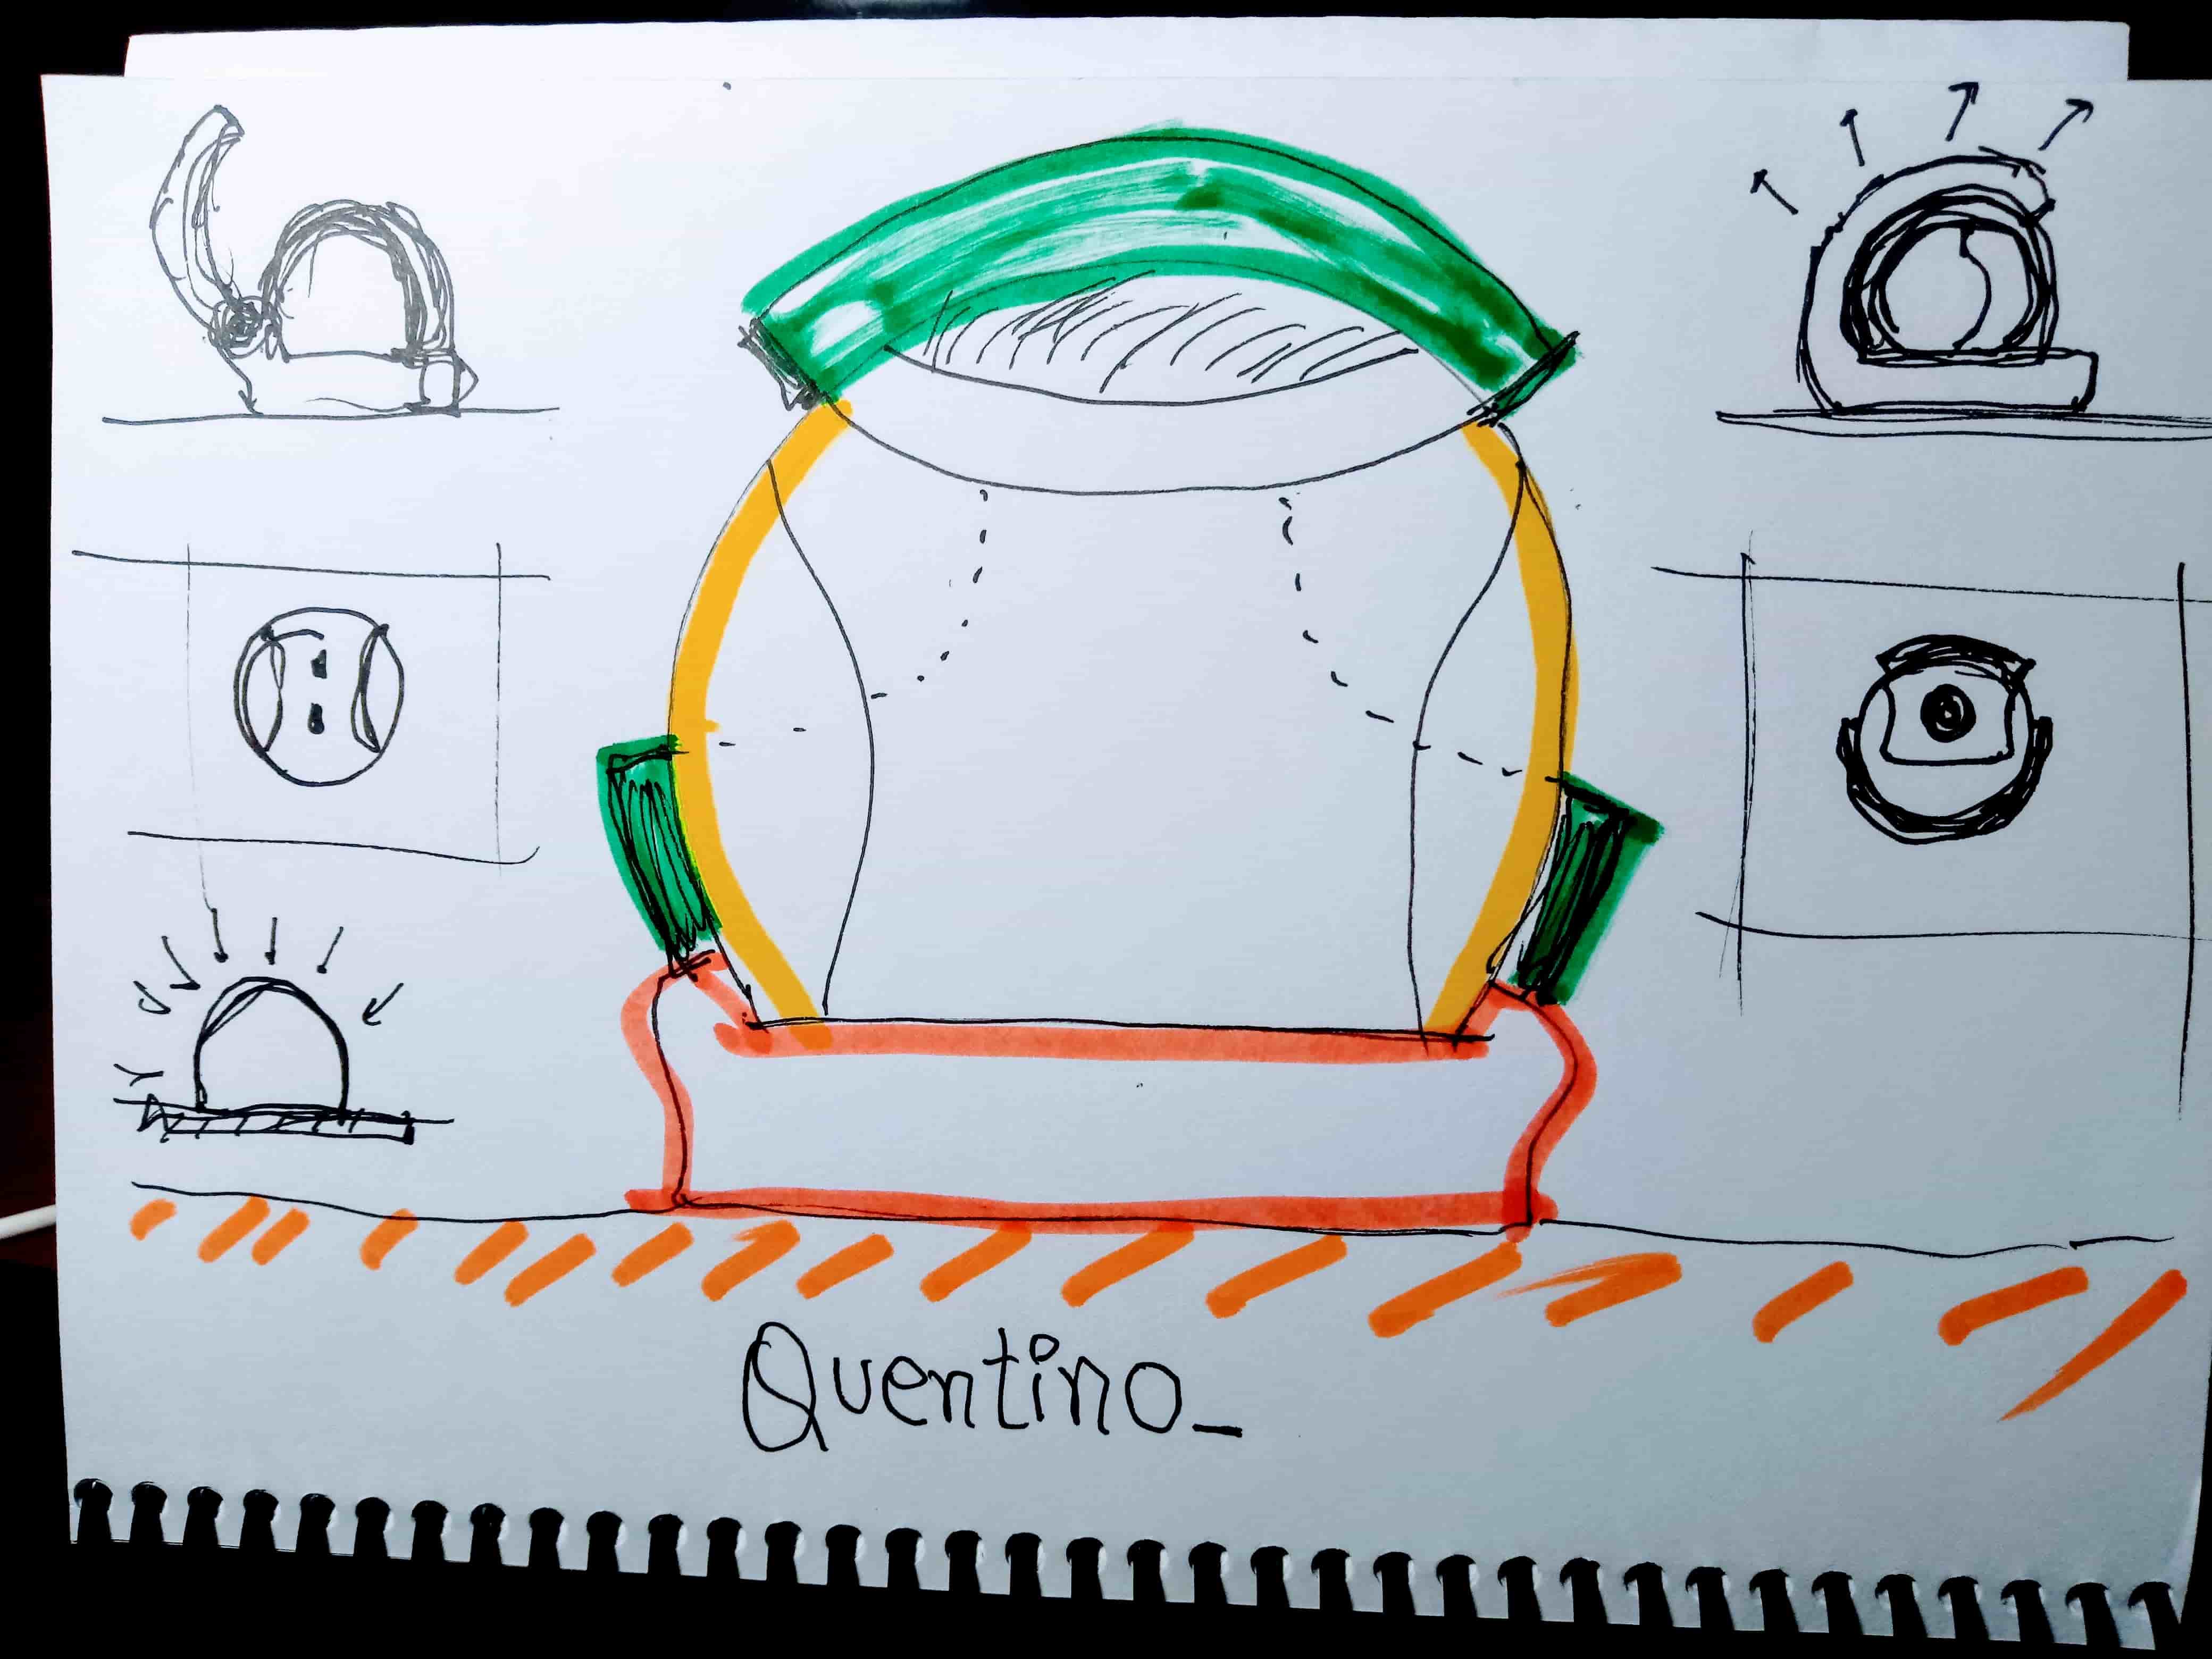
Hand drawing
The best tecnology to create anything is a pencil, well, I love to use some markers so I want to show you some of my proposals. 🥰
Views
Views
Gimp
It is the first time I use the GIMP program, I find it much more friendly than Photoshop, it is a free program like many of those I am using in this course and that is super good, thanks to this program you can retouch, compose and edit images, but the use that I am giving it is to compress my images, I convert them all to JPG format and lower the quality so it can be lighter, the good thing is that almost no resolution is lost.
Compressing
Compressing
Inkscape
Inkscape is a powerful free vector drawing software for Windows and Mac that allows you to create graphics in a similar way to Adobe Illustrator. It has a very complete interface and at first glance I liked it a lot, I had used it a few times but this is the first time I explore it in more detail. In order to generate a first vectorization I used a Cuentology photograph, I made the following steps:
1. I imported the image.
2. I placed "vectorize bitmap" at the top.
3. I configured the window and placed preview.
4. Finally I deleted the imported image to keep the vectorized image.
5. I saved the new image in svg format.
Vectorized image
Vectorized image
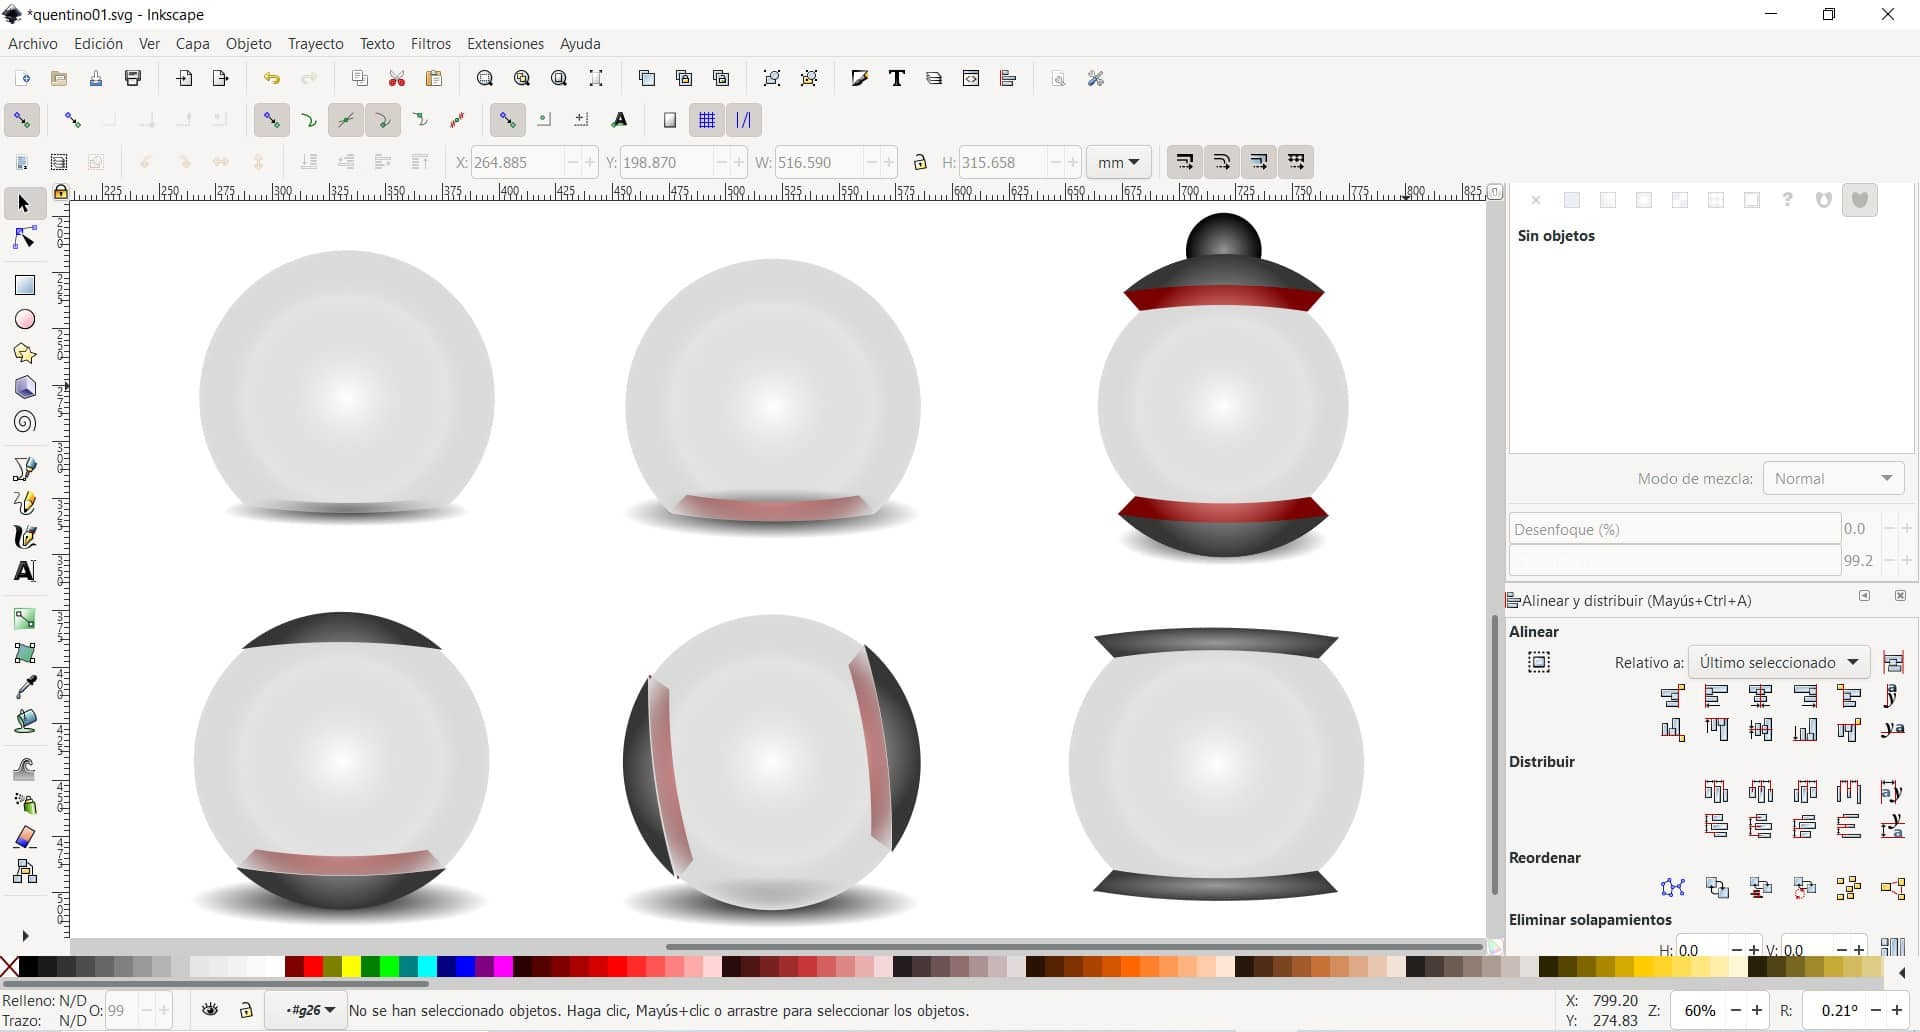
This program is very interesting, I had not explored the 3d version from a vectorization program like this one so this time I ventured. Thanks to the fact that there is a free version and it doesn't take much time to download I was able to get Inskape from the official website here. I recommend it to pass your base ideas and develop the possible details with 3D effects. On this occasion I tried some alternatives for Quentino's shape. The best tutorial I found taught me to understand the logic of shadows and volumetrics in 3d. here 😄
Exploring shapes
Proposals for quentino
FreeCAD
My experience with FreeCAD has been hard, I knew how to handle 2d and 3D drawing but I had not designed mechanisms before. The logic I followed was to first draw the design by hand, otherwise it would be complicated to start designing in the software, then I separated the pieces to build them in parts and then I worked on the joints. It is not so complicated when you find the good handling of the constraints, FreeCAD has the possibility to make it easy to create 3d from 2d. The official site has many other instructions to try to understand this program. Official website
First draw
First modeling
View
View
Blender
With blender I have been able to make some tests of movement in mechanisms, I find it very good but it is not very easy to use. Here I have solved some possibilities and thanks to some tutorials I was able to test some simulations for a part of my project.
Possibilities
To begin to understand the logic of Blender I needed to take a look at many videos but there was one that taught me step by step how the joints work.here
Here are some tricks I learned by exploring:
1. Shift + A = Add
2. Z = Display type of the object
3. Shift + D = duplicate
4. S = Scale
5. G + Z = Move up and down
6. S + Z = Vertical scale
7. Alt + R = Clear
8. M: Properties
Construction
Construction
Construction
Construction
Construction
Construction
Thanks to these configurations I was able to complete the simulation of some of the arms of my project, in the video you can see how with one piece I can generate the movement and rotation of the others, additionally it is interesting to see when adding volumes and connecting them, these also respond to the movement.
Additionally, using this same logic, I used the mechanism for a rotation in XY to simulate the flexible material, the idea is that the manipulation of Quentino is smooth and invites you to deform it, in blender I put how to make a movement similar to squeezing the object. I still don't know what material I will make this part of the project but with these programs I can realize that it's all about exploring and trying different materials, it will be a challenge.
Other explorations (Sketch UP & Sketch Fab)
I used Sketch Up to try to model online some ideas of the Quentino pieces, thanks to this program I could have a way to represent my ideas at the beginning since it is a bit difficult to start drawing in an interface that you don't know so Sketch Up helped me a lot to clarify my ideas after working them by hand. The difference of this type of drawing is that it is not parametric, it is composed by meshes, now that I am practicing parameterization I understand that it is much more efficient to work with relationships between components.
Modeling
Modeling
After the modeling I downloaded the STL file and explored Sketch Fab, this platform is very good to see a simulation of your proposal, it helped me to see it in space and use the VR. You only need to have an account with an email and you will be enabled to use it. I highly recommend it.
Parametric design gives you many more possibilities, it is important and useful to know the various tools easily accessible because there are multiple alternatives that these give you to build almost anything. Probably there are programs that are more complex than others or do not have a very friendly interface but it is up to each of us to explore and choose which one we feel more comfortable with. Any questions or doubts you may have can be solved by watching tutorials, it is a matter of taking your time and exploring with patience.