6. 3D Scanning and printing
Group assignment
For the group assigment we made a couple of tests. On Thursday I worked with Tue and Antoine and we printed this test:
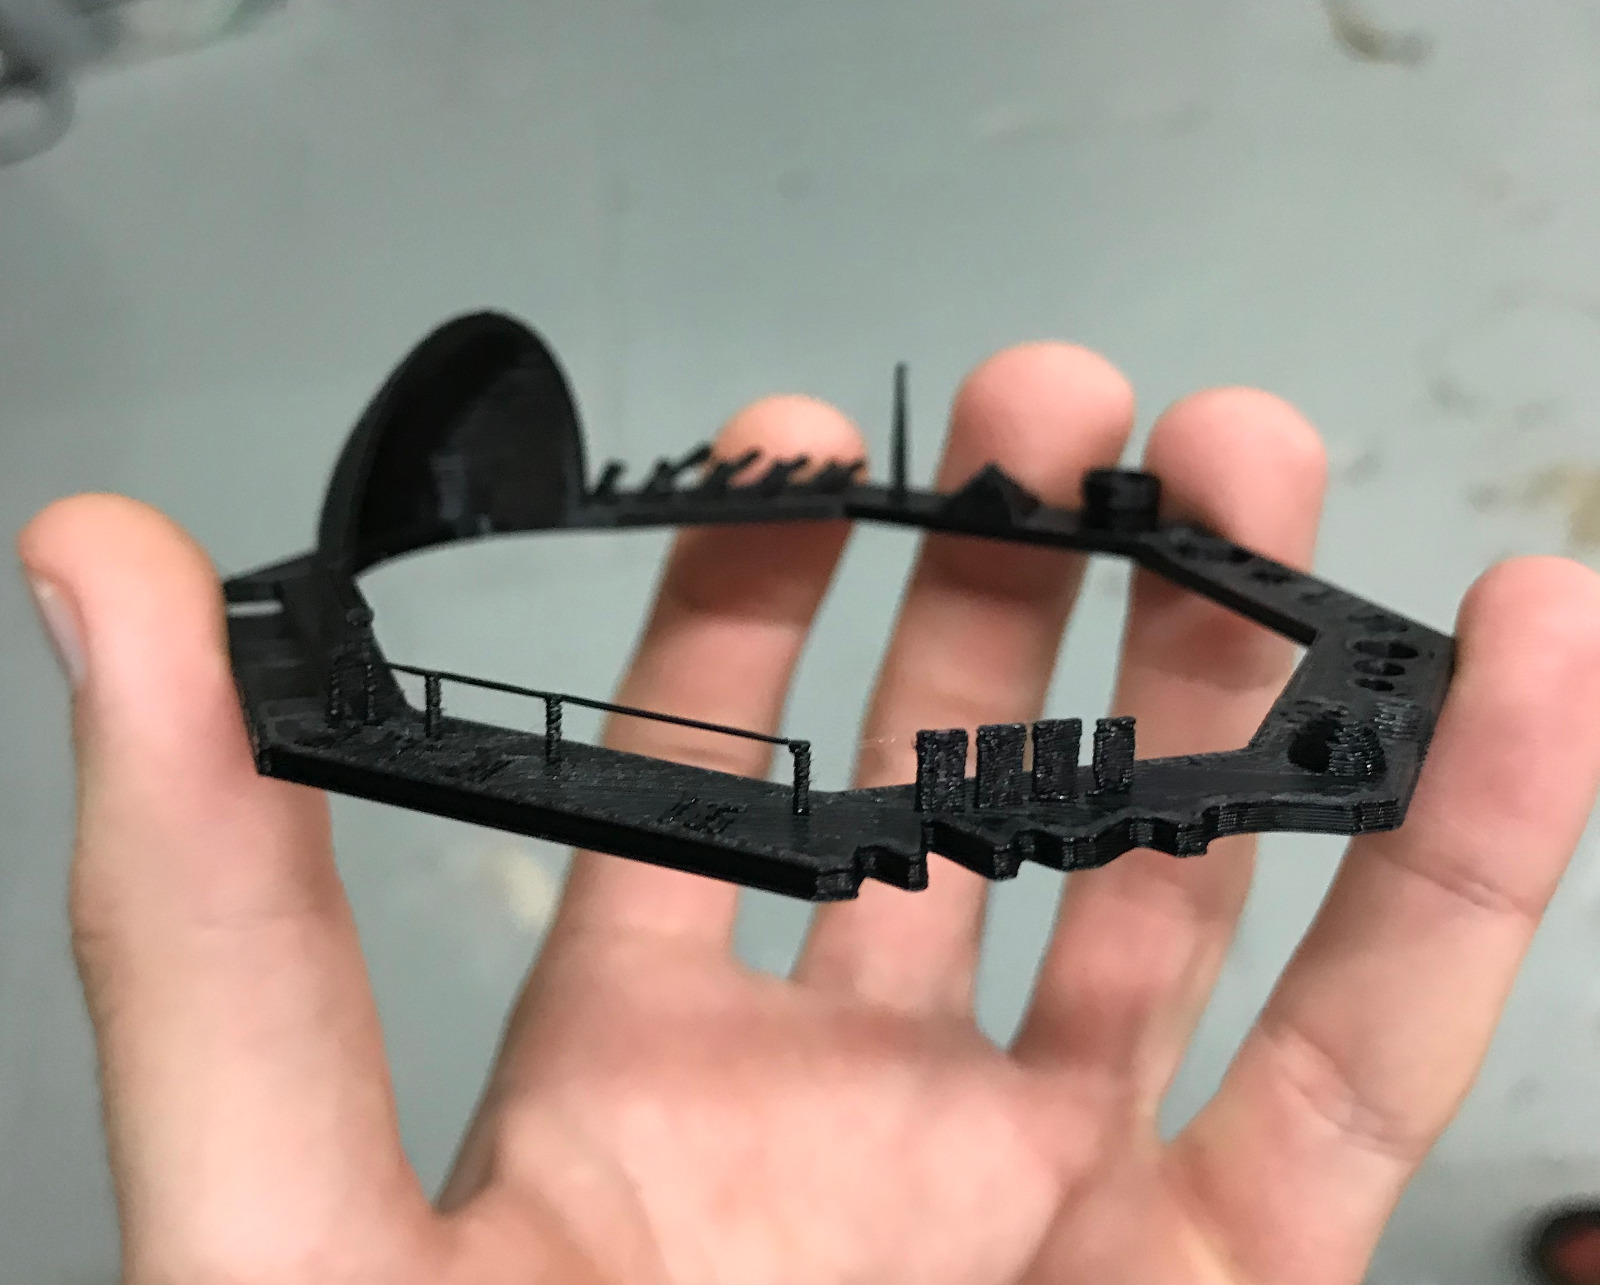
Taste the fresh testing test file!
You can see it in detail in the Antoine page
What I’ve learnt
-
It’s important to use proper files and investigate them.
-
The size matters a lot in how much time it’s going to take.
-
The file 01 that we have was very well documented so it was more useful to know about bridges and different interations. The file 02 was not so useful.
3D Scanning
For 3D scanning I’ve done 2 things. First I scanned a doll with the MDX-20 and look for the limitations.
In the other hand I was scanned with the photometry of Scanect with the help of CUCA, a robot we have in IAAC
Doll Scanning using milling machine
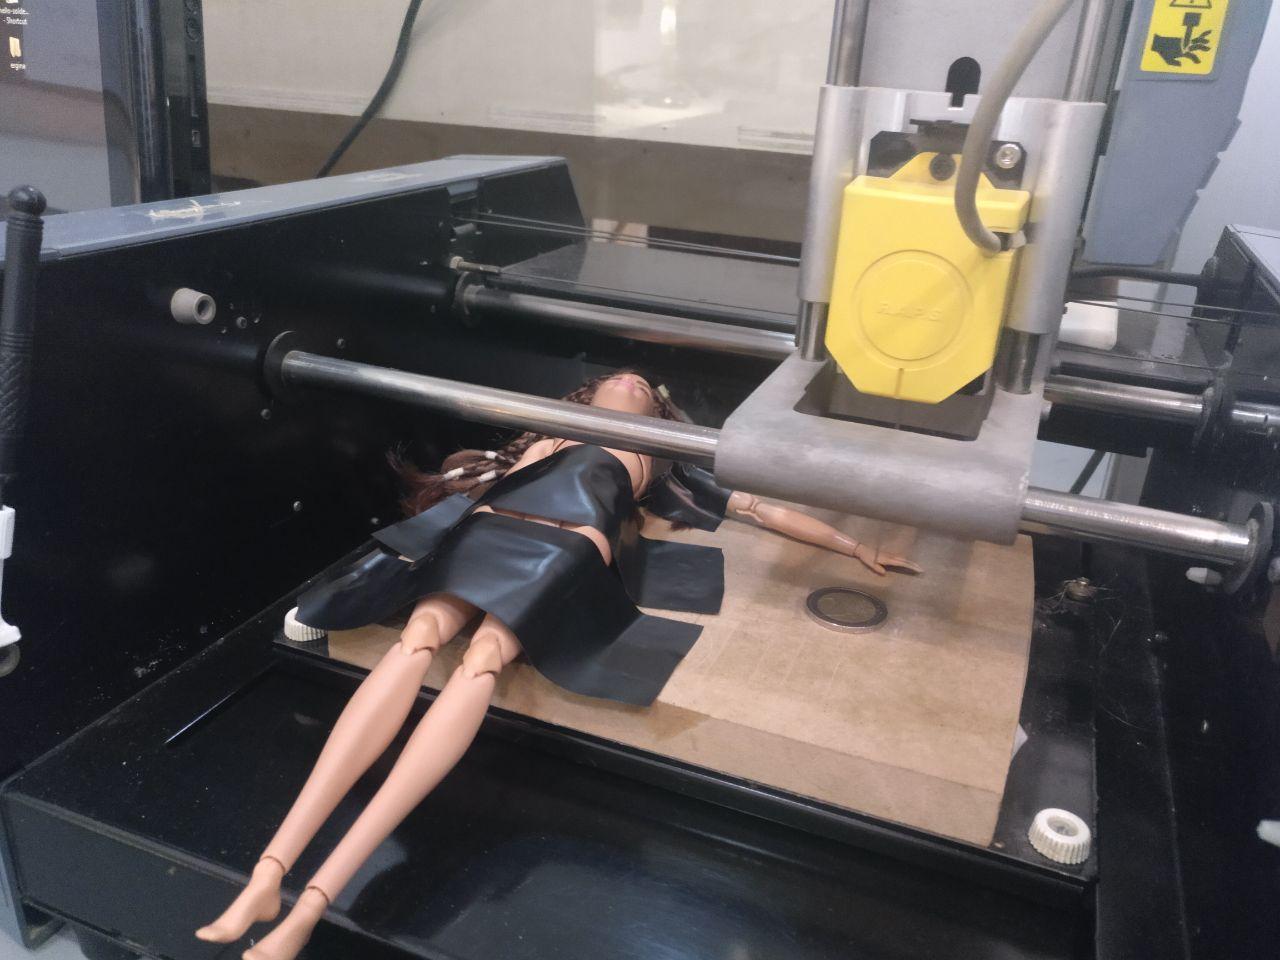 I feel like a James Bond mega-villain
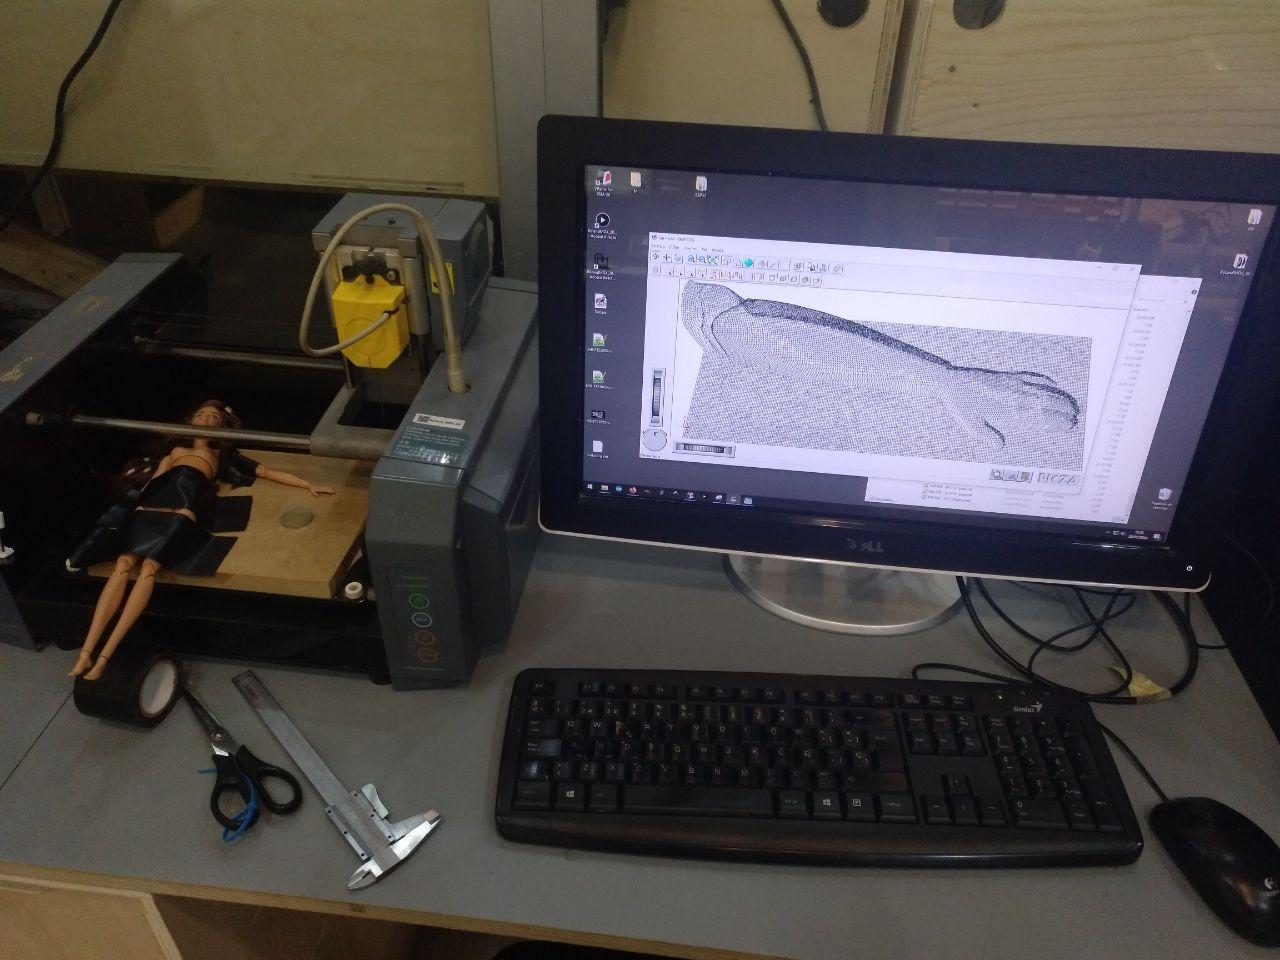
I chose to expirement with an articulated doll for this assigment to see if I can reconstruct it and since photometry can’t be this accurate for little pieces I chose this option of using a Z-scan sensor unit of the MDX-20.
We saw it last week but we didn’t give it much use since we have other 2 SRM-20.
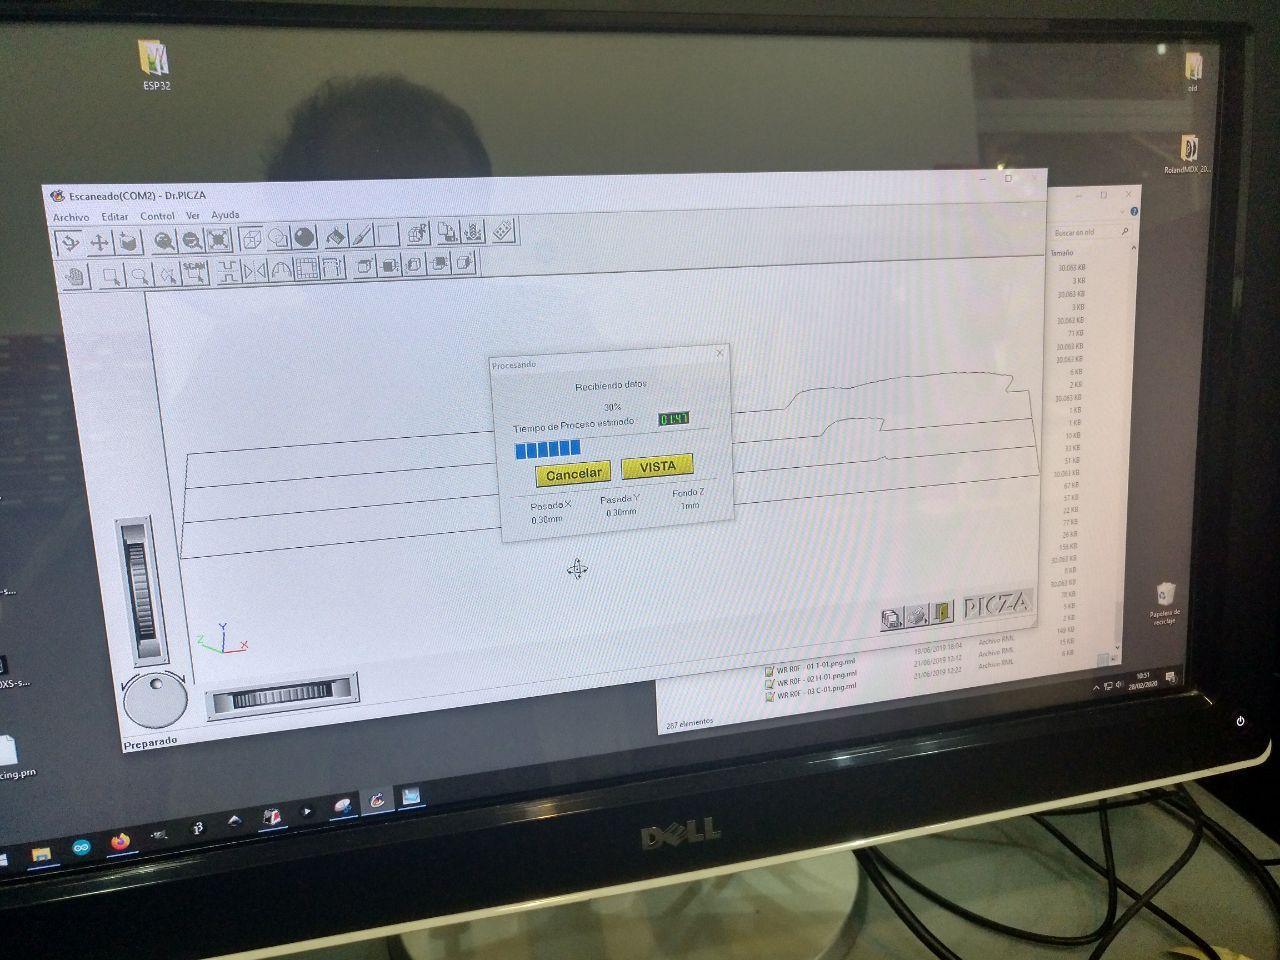
To use this program we had some instructions made by Santi and it was esentially to use the Software that comes with the Roland: PICZA. Here you can see the instructions from the manufactor step by step.
This program it’s good to scan engravings but the mechanism has limitations with the “hidden parts”. It produces STL files (in mm) in the native format of the program.
The 3D scanning is slow. Is as slow as the 3D printing or even more. Beware of that. And if you don’t set it up properly it can take lots more of time.
What it’s critical to do this is to set properly the limits of the scanning in x, y and z axis and set up a proper density of points (the more, the more time that’s going to take the scan)
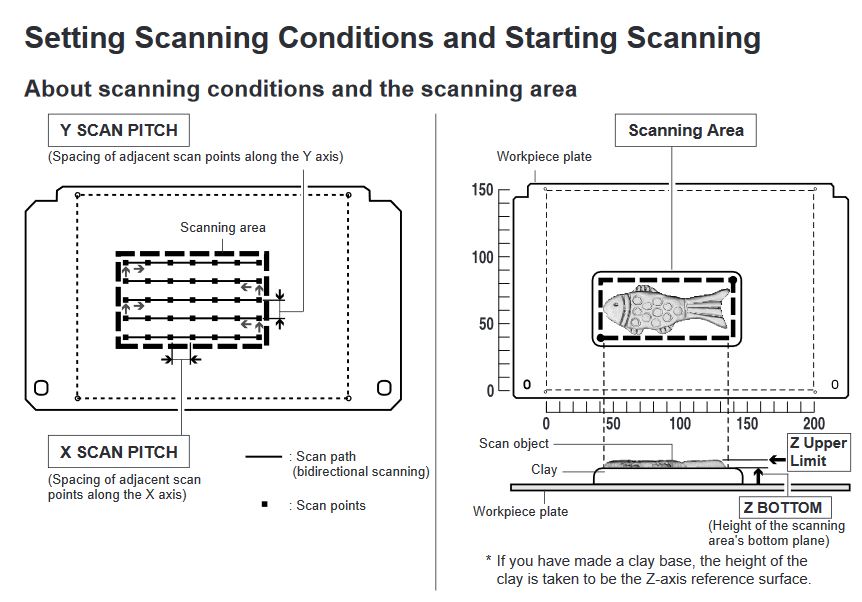 Explanation of the density and the areas in a documentation that talks you about WindowsNT
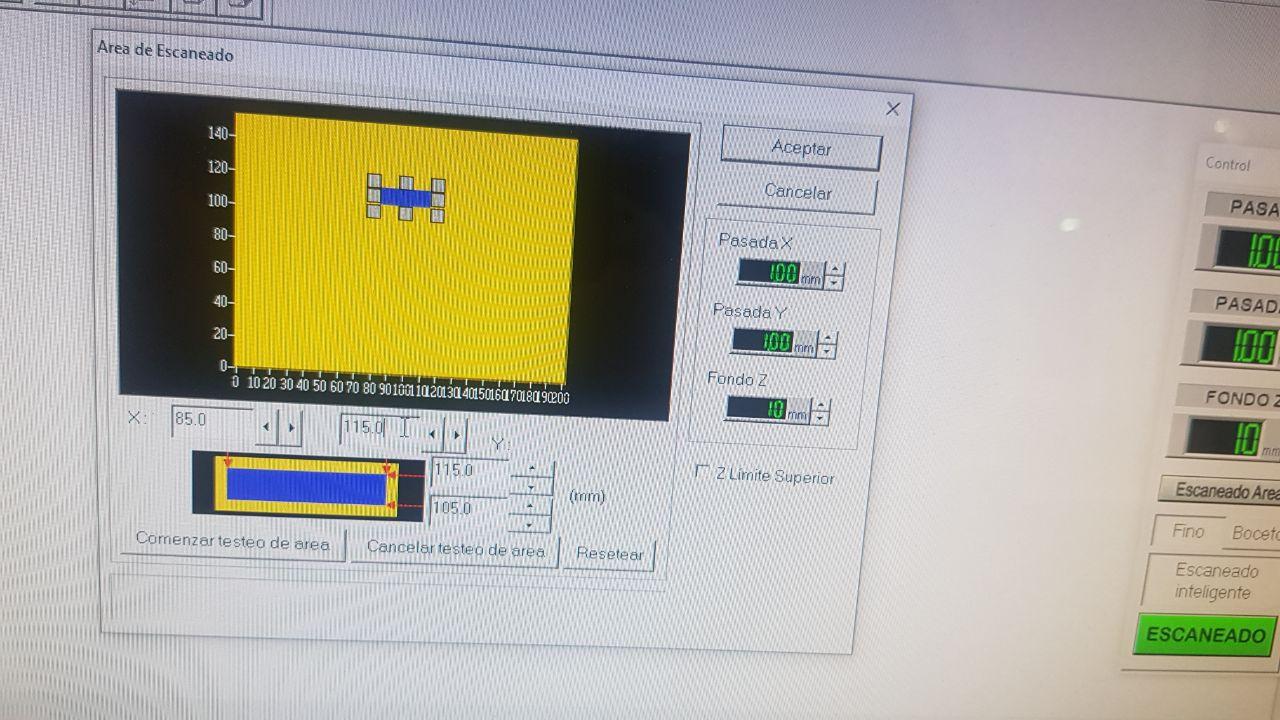 actual interface of Doctor PICZA program
For this doll I scanned the arm and it took with 0.3 mm each axis and it took 2 hours and a half.
 taking looong time
In the meantime the program shows you a couple of lines but there just a summary of what the machine is scanning so it skips lots of points (and it’s normal to say “oh, it took 30 minutes to do a couple of lines” but don’t worry, it’s fine)
This was the result:
 Barbie in the Matrix
If you see it in rhynocerox (After exporting to * .stl) yo can see this mesh.
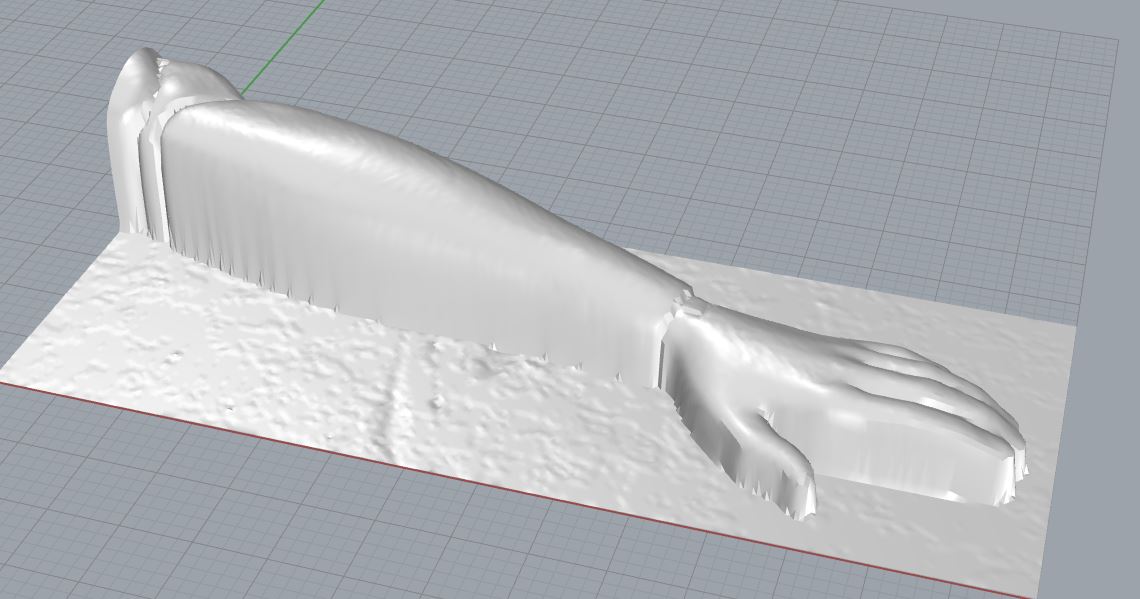 way better than the image in the Software “DOCTOR PICZA”
As expected, it has good detail (it’s a doll detail), but it has problem with the back part. I’m not used to fix 3dmeshes but I guess that there should be a solution to match several of these scans and put them together.
But remember. This kind of 3D scan is slow.
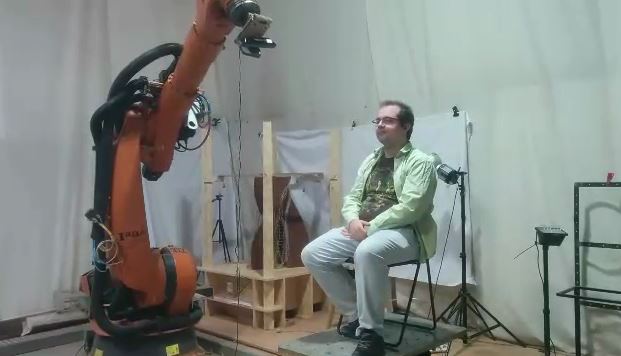
Self Scanning using Scanect.
 CUCA looking good with the kinect
On Friday we had a class about photometry (using drones for scanning buildings). In this class they connected to another class about using CUCA, the big robot arm to make a circuit with the Kinect and scan people with the software Skanect.
Me and my classmate Roger were scanned by Cuca using that software and now we have each of us a Mesh to work and try to print ourselves!
 I felt observed.
We had a class on Monday of just adjusting meshes with blender to 3Dprint but I’m not used to so that part will occurr in other time. This is the mesh in skannect.
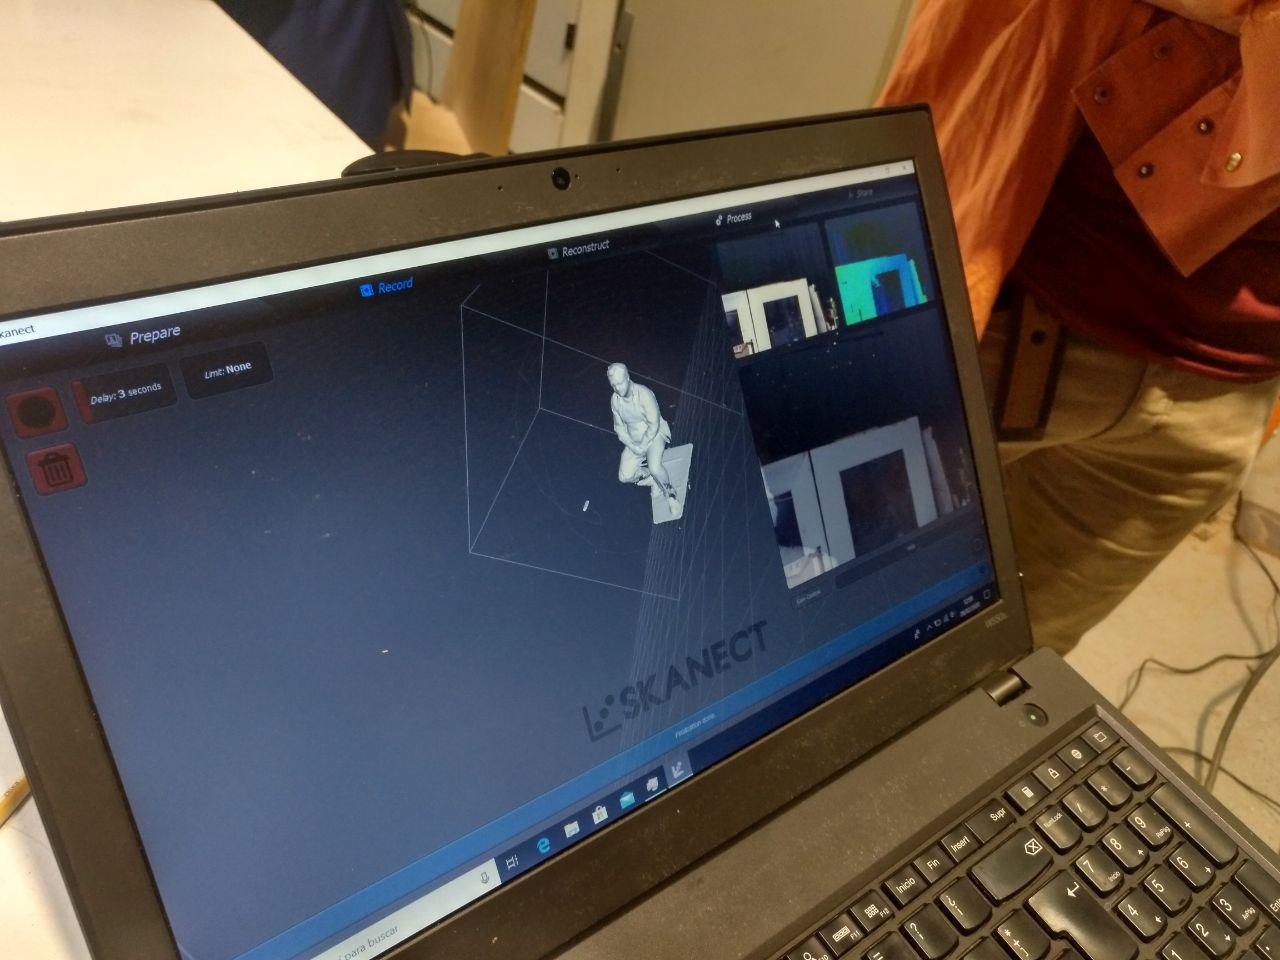 I can see me
Problems Faced
-
Even if the robot was well calibrated it takes time to do it properly and we coudldn’t scan me standing up so I had to be scanned sitted on a chair.
-
It took a long time to the program to process the image without any feedback. This meant 6 long minutes thinking there was something wrong.
-
There was some spots that had to be worked on in the 3D programs
-
Glasses were not a good idea. They are difficult to scan.
Results
This is the result after I exported to stl.
3D printing
Result!
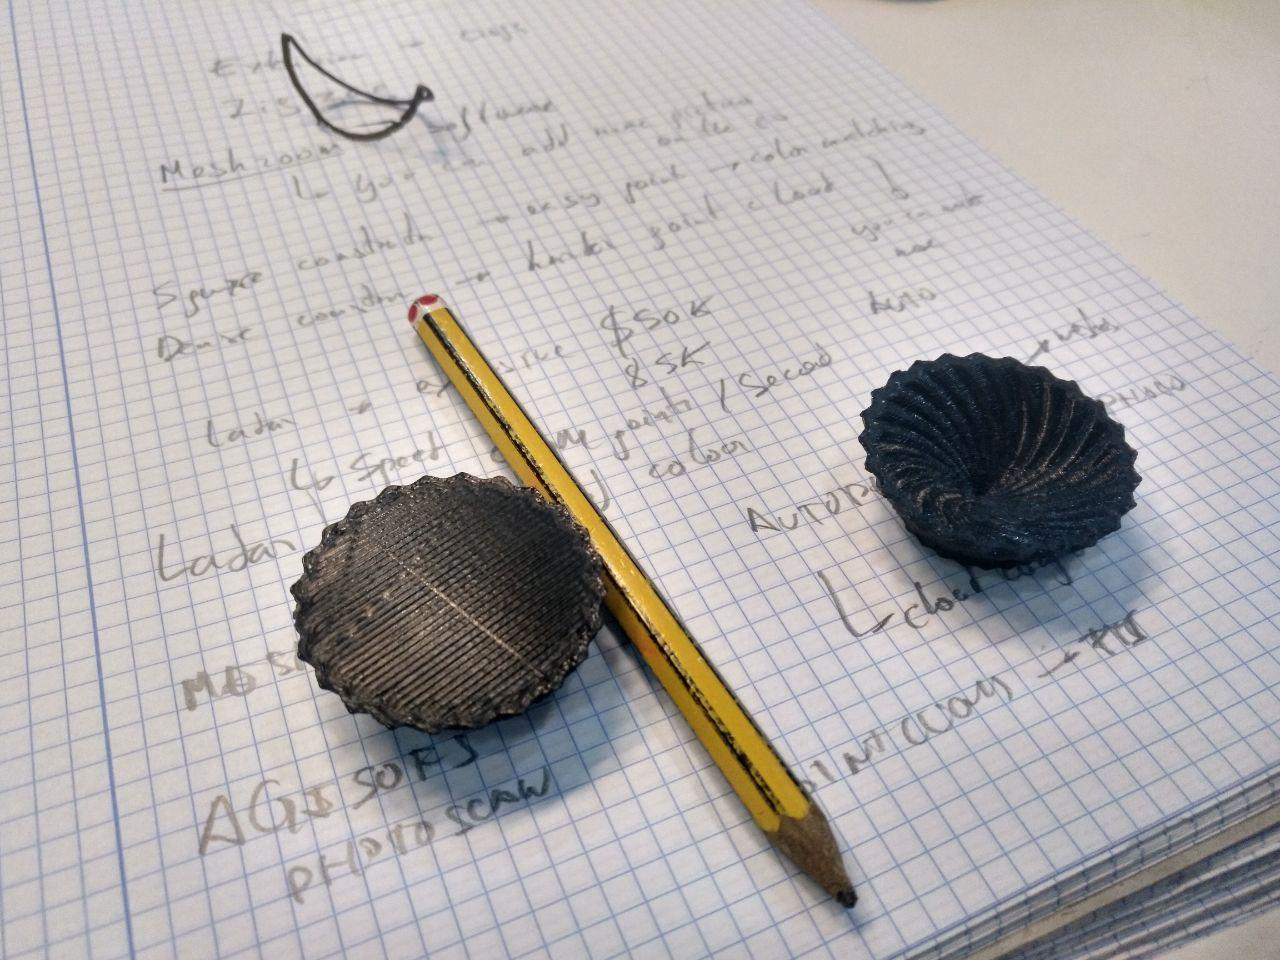 a couple of little bowls!
Process
In this case I tried to do a case for my cards of netrunner. But when I sliced the solution it took the least 3 hours to print, so since there are lots of people printing this week and many things could go wrong, I change my design since I want to experiment and face all the problems but not occupy the machines taking time of my classmates.

Fly away, sweet box that can’t be escalated to be printed in less than 3 hours
Modelling
So I switched for a little grasshopper program. Since I didn’t want to do something too complicated, I made a shape with Illustrator (less headaches than doing it in grasshopper) that was an hexagon rotated 4 times 45 degrees to make a star like shape by joining al 5 shapes.
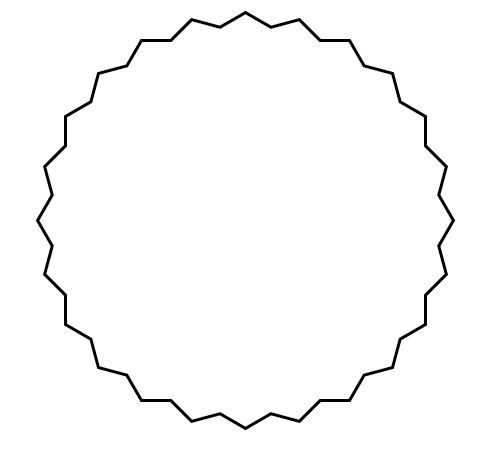
the shape that could be done probably in grasshopper but I did it faster in illustrator
Then, I imported the .ai file into rhinno and save it so Grasshopper can find it and I move it, rotate a bit and escalate it so it could make the vase shape. The good thing of this design is that since it’s not constraint by the size of anything I could make small enough to make it in 30 minutes.

elevation, plan and 3d view of the vase
How this cannot be done with substractive methods
The idea of a vase that has some texture design in the inside and the outside makes that it cannot be done by substractive methods unless you have a 5-6 axis robot (that it’s quite more complex to handle than a 3D printer). With a normal CNC (2,5 axis) you could make a shape like this one if you carve the interior, flip it and then, after setting up the axis perfectly, carved the exterior.
Printing
I used the machine Anycubic at our disposal and I learnt how to calibrate it (we have to adjust properly the z axis) with Mikel.
To prepare the CAM file (the GCODE) I used Cura since it’s the program that Mikel show us and it was the most user friendly. I downloaded it but I didn’t have the specifics of the machines so I only used it to have a preview of what I was going to do.
To make the CAM file for the 3d printer, we used the computer from the lab that has the printers profiles. I set the filing and the detail of the z layers.
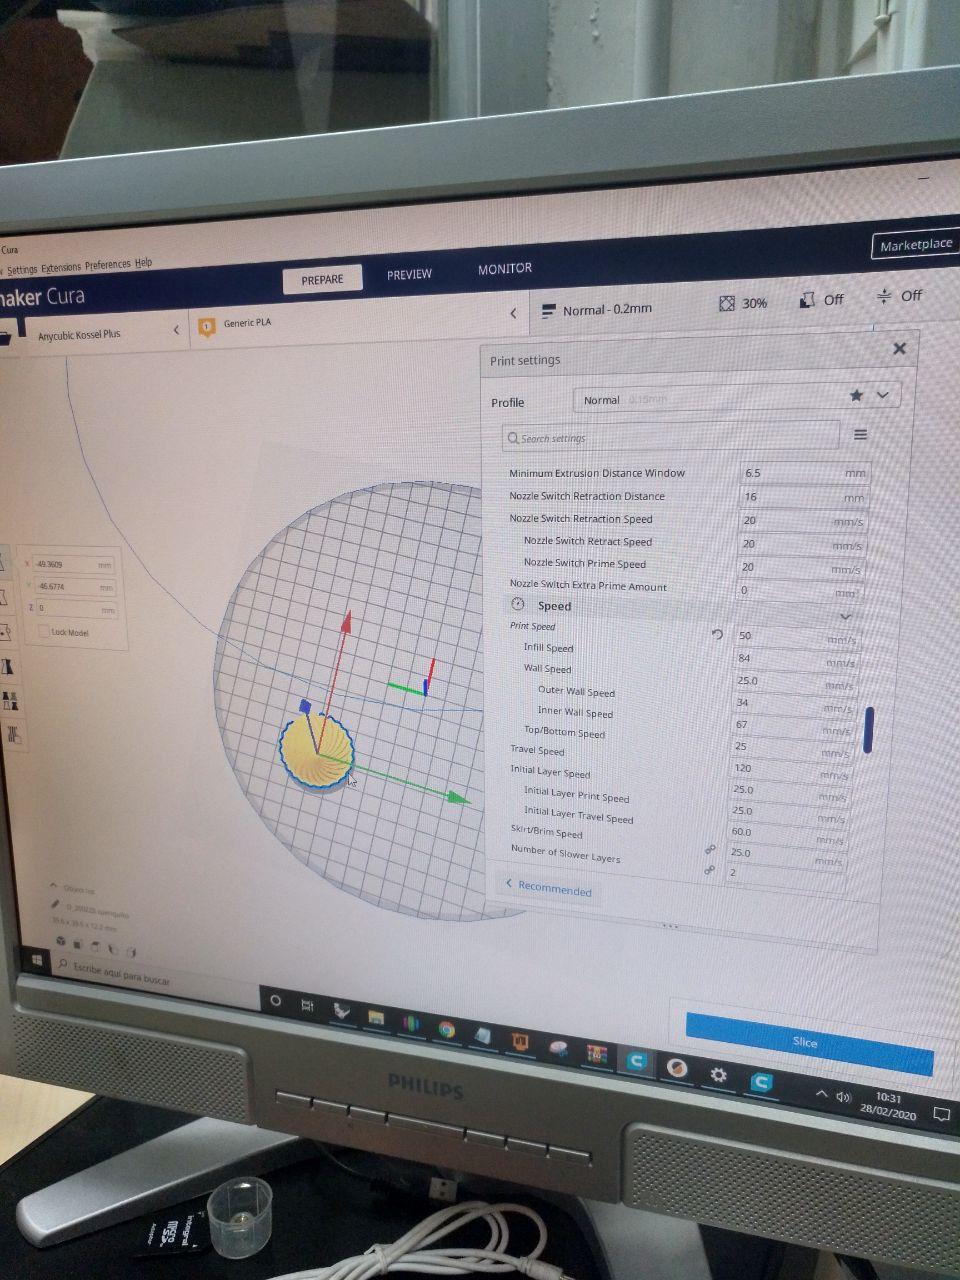
Cura interface
Problems Faced
-
As I mentioned the scale was the key part of making an object doable. For prototiping if possible it’s better to make a very small object. But sometimes we can’t afford the scaling so we need to know that the piece it’s going to take a long time.
-
I had some issues with the mesh to make it properly from grasshopper to rhino and to .obj . Luckily with a fresh mind I could do it. Now it’s in the file

Put your all your surfaces in a brep was the answer
-
Even with that I had a problem that the .obj had a problem of not being well done and it didn’t “empty” the vase. I had to export the obj again and then it worked.
-
There are some imperfections in one of the size of the vase that I couldn’t trace. It was weird because if was the hangover, the hangover was the same in all the parts of the vase but the imperfections were only in a section of it. Maybe it was some little unleveling but since it didn’t happen from the bottom part I can’t trace it.
Useful links
3D scanning
Design files
Remember to use download link as.. to download the files.
-
Robot Scanning (downloadable at Sketchfab)
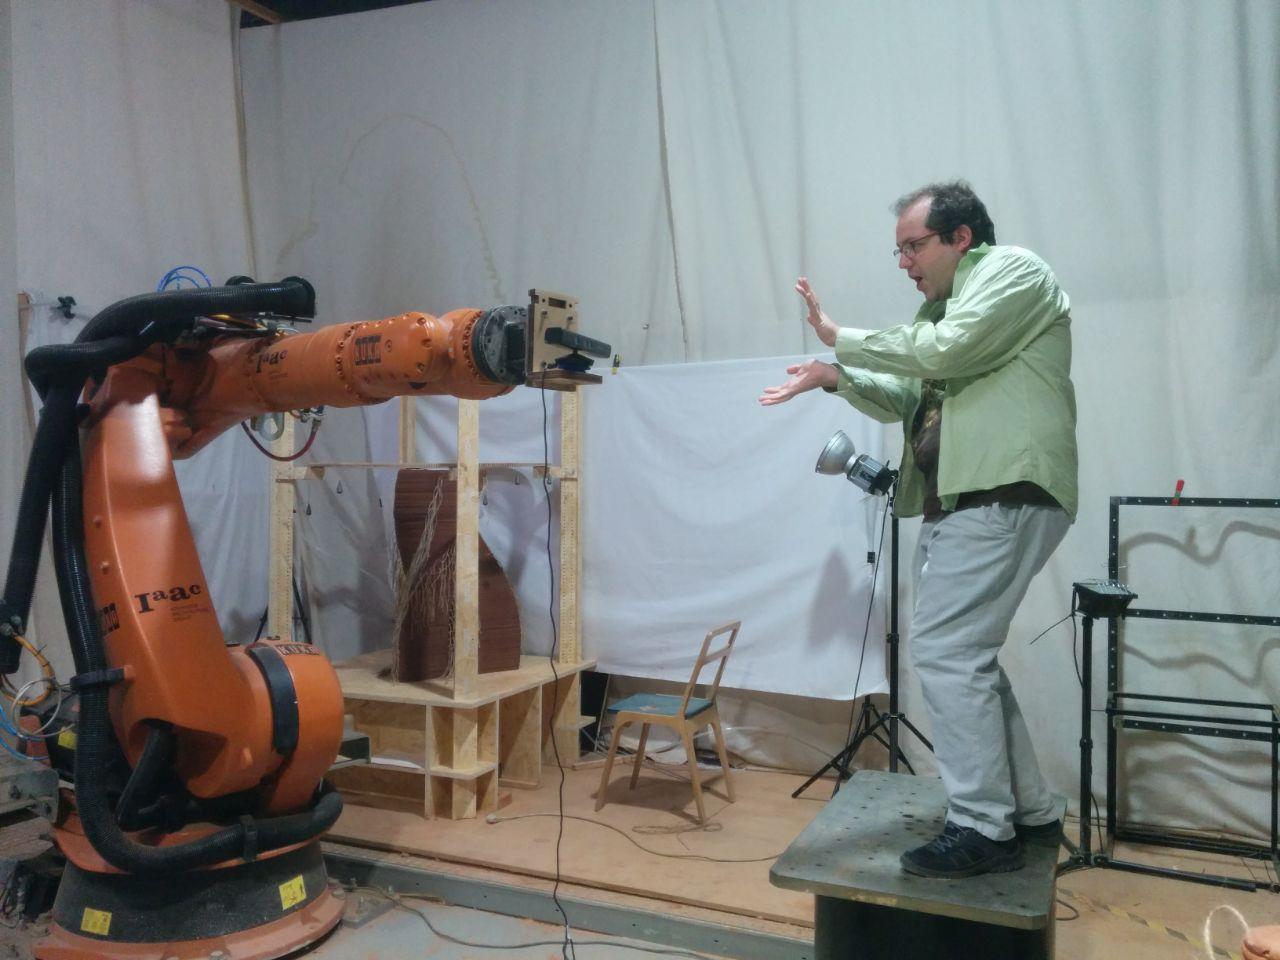 Man vs Machine