Final Project Electronics and programming
The documentation about the Monolith is divided between the hardware and the software because even if they are interconected I separate the files because they are too long
Electronics and programming
Here I’m going to post the documentation about the progress of the project regarding electronics. Expect lots of code.
Create a wifi hotspot and redirect the traffic there
Now I’m going to try to have a hotspot on my ESP8266 and try to redirect a webpage to any device that connects to it. It doesn’t seem a lot but for my final project is very important because it’s easier if the Monolith has a wifi hotspot to connect and it controls everything from there.
I think that’s several steps easier than having a app, since every device can work with webpages. (I found this tutorial but it’s focused on windows pcs)
I tried this ESP sketch and it works but I still have to remember which IP do I have to connect.
So I need to look if there is any further implementation. Arman has made something similar but you still need to remember your IP. Maybe if I configure the gateway as the same chip maybe the phone recognizes it.
I have to add this
IPAddress local_IP(192,168,4,1);
IPAddress gateway(192,168,4,1);
IPAddress subnet(255,255,255,0);
And then the method WiFi.softAPConfig that you can see detailed here
Serial.println(WiFi.softAPConfig(local_IP, gateway, subnet) ? "Listo" : "Falló!");
And… it doesn’t work. = (
But I found the name of what I’m trying to do: A CAPTIVE PORTAL. Now I have something better to google it. I found this link with an example that I’ll try as it is.
Damn. It’s using other libraries. But it seems that makes something it creates something with the “client” object.
I’ll try to make something out of it with more care since it’s using wifiNiNa.
After posting an issue Arman (a fellow student from here, the fablabbcn) answered and sent me to this githup.
And it works! = D
So now I have to tweak a little the code to serve as template of the next steps.
#ifdef ESP8266
#include <ESP8266WiFi.h>
#include <DNSServer.h>
#include <ESP8266WebServer.h>
ESP8266WebServer webServer(80);
#else
#include <WiFi.h>
#include <DNSServer.h>
#include <WebServer.h>
WebServer webServer(80);
#endif

const byte DNS_PORT = 53;
IPAddress apIP(192, 168, 1, 1);
DNSServer dnsServer;

String responseHTML = ""
  "<!DOCTYPE html><html><head><title>Monolith</title></head><body>"
  "<h1>Hi, human!</h1><p>You're now connected to the Monolith</p></body></html>";

void setup() {
  WiFi.mode(WIFI_AP);
  WiFi.softAPConfig(apIP, apIP, IPAddress(255, 255, 255, 0));
  WiFi.softAP("Monolith");

  // if DNSServer is started with "*" for domain name, it will reply with
  // provided IP to all DNS request
  dnsServer.start(DNS_PORT, "*", apIP);

  // reply to all requests with same HTML
  webServer.onNotFound([]() {
    webServer.send(200, "text/html", responseHTML);
  });
  webServer.begin();
}

void loop() {
  dnsServer.processNextRequest();
  webServer.handleClient();
}
This code has an if so it’s compatible with the nodeMCU and the ESP32 because they use different libraries.
Here some shots about it!
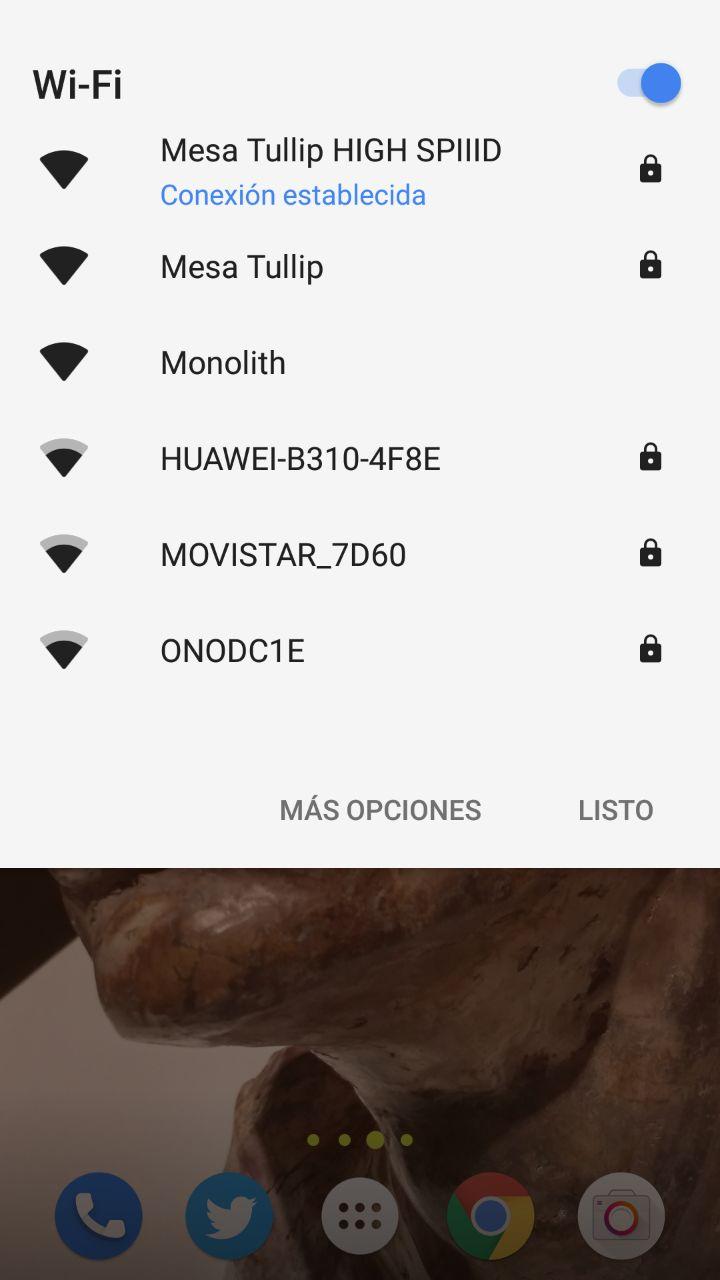
Here comes a new challenger!
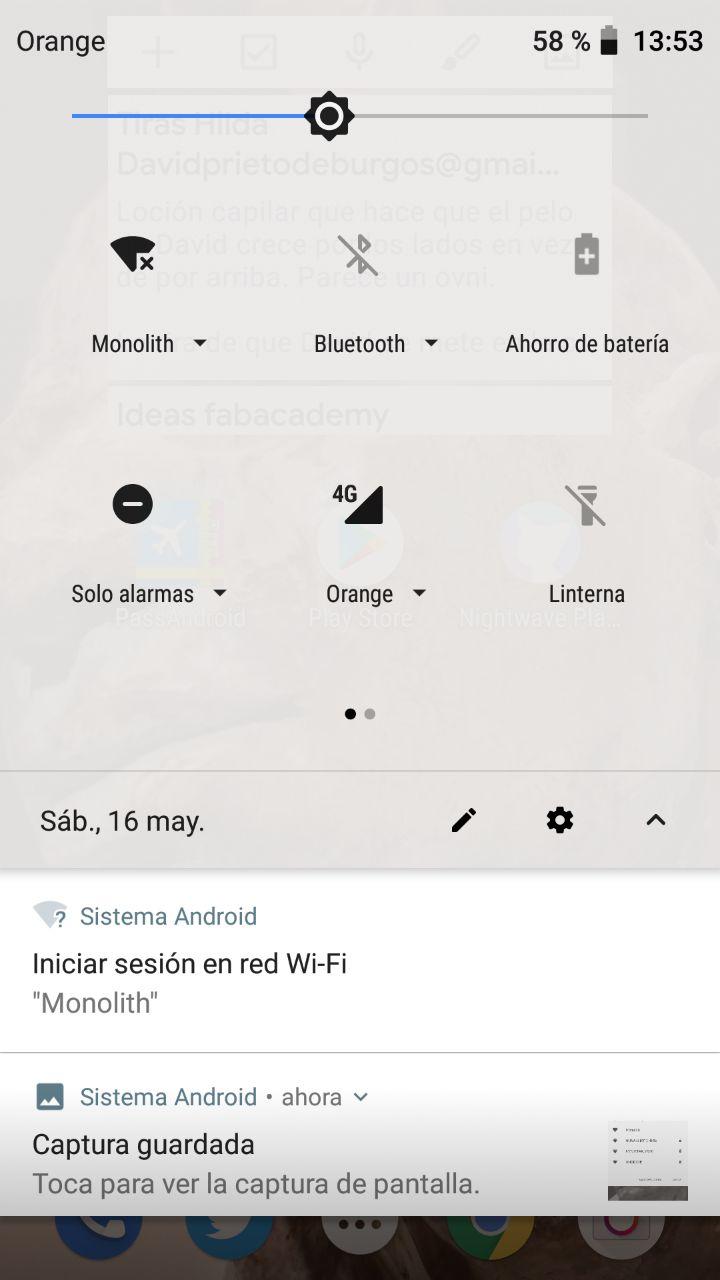
The DNS works, here it says to make me go to a specific webpage!

And here is the SUPER DUPPER MEGA WEBPAGE (under construction)
SPIFF memory. Storing a bigger html
The next step it’s to store data in the SPIFF memory rather so let the webserver send that. The idea it’s to in some point, store a twine project. So the idea for this is to store and deliver a twine file (around 332 kb)
That will be better for the following reasons:
-
It will allow me to distribute the work
-
I’ll have access to store other (small) data that could be usesful.
-
It will leave me space on my sketch to be more complex handling the I2C communication, and websocket server.
So, I’ll see if this reference works
This sketch is not as straight foward has the one of the Captive Portal so first I’ll try to modify what I have from the DNS.
What it adds it’s the SPIFF library. First, as I have experience, let’s just add the library and check if it compiles.
Yay, it compiles.
But when I add ” SPIFFS.begin(); ” in the setup it misses somehting.(SPIFFS not declared in scope) And aso it uses something like a local DNS. I tried to put it as in the example but it doesn’t work.
So let’s change the tutorial
Let’s try to use this one (in Spanish).
The base it’s the same.
And it gives the same error. So let’s try to just google the error… and the solution it’s to add after the include of the library FS.h a another include:
#include "SPIFFS.h"
it seems that this only happens if you use or define an ESP32 but you don’t need it in the ESP8266
Now let’s keep moving. We add the utils of handling files.
And we substitute the part of what do we serve as a page. This is the old code:
// replay to all requests with same HTML
webServer.onNotFound([]() {
  webServer.send(200, "text/html", responseHTML);
});
webServer.begin();
And now we can serve the webpage. index.html in my case (Since it’s the default file to send).
Also there were some problems of consistency since the first example uses the word “webServer” and this example just “server” (because there is no DNS server). Remember if you find this not to use find and automatically replace or use it carefully because you may break something.
And it compiles! Now will it work when I upload it? Let’s test it!
Well, the good news that it compiles, and the network works. But now the dns doesn’t work properly.
So let’s try to replace the code of the answer to this:
  // reply to all requests with same HTML
   server.onNotFound([]() {                  // If the client requests any URI
        ServeFile("index.html");
   });
  server.begin();
Nah, it doesn’t work either. I think I need to use the serve function with a 200 code to make it work. Let’s try this other code I found in some examples:
static const uint8_t gif[] PROGMEM = {
  0x47, 0x49, 0x46, 0x38, 0x37, 0x61, 0x10, 0x00, 0x10, 0x00, 0x80, 0x01,
  0x00, 0x00, 0x00, 0x00, 0xff, 0xff, 0xff, 0x2c, 0x00, 0x00, 0x00, 0x00,
  0x10, 0x00, 0x10, 0x00, 0x00, 0x02, 0x19, 0x8c, 0x8f, 0xa9, 0xcb, 0x9d,
  0x00, 0x5f, 0x74, 0xb4, 0x56, 0xb0, 0xb0, 0xd2, 0xf2, 0x35, 0x1e, 0x4c,
  0x0c, 0x24, 0x5a, 0xe6, 0x89, 0xa6, 0x4d, 0x01, 0x00, 0x3b
};
char gif_colored[sizeof(gif)];
memcpy_P(gif_colored, gif, sizeof(gif));
// Set the background to a random set of colors
gif_colored[16] = millis() % 256;
gif_colored[17] = millis() % 256;
gif_colored[18] = millis() % 256;
server.send(200, "image/gif", gif_colored, sizeof(gif_colored));
As I supsected, the key it’s to use the “serve” function because it gives the code 200. In this case the result was a gif of a static face.
Now let’s try this version:
// reply to all requests with same HTML
 server.onNotFound([]() {                  // If the client requests any URI
  File file = SPIFFS.open("index.html", "r");
  server.send(200, "text/html", file);
 });
Here I just open the file and send it. Will it work? Let’s compile and upload to see.
Nah, it doesn’t seem to work.
Now that I have everything set up, I can go back and try to decipher if I get a clue from this project my instructors made for fab2015
They don’t mess with the SPIFF, they just make a char string out of a include.
const char *webpage =
#include "index.h"
//this is the index.html
  ;

void handleRoot() {
  server.send(200, "text/html", webpage);
}
The bad part of this is that here I’m not using the auxiliary memory that I do have at my disposal. But let’s give it a try.
It doesn’t compile because using the char makes the compiler go through all the html, takes ages to compile and the twine file has symbols like @ or # that the compiler doesn’t like.
Let’s look for another example.
Digging more I find that I can convert something to a character using the macro “F()”. Well, to store it in the flash memory.
This is the example that I’ve found and here some instructions in Spanish.
If I do that I think that I can convert the file I’ve read into the flash memory.
So this would try
// reply to all requests with same HTML
 server.onNotFound([]() {                  // If the client requests any URI
  File file = SPIFFS.open("index.html", "r");
  server.send(200, "text/html", F(file));
 });
I begin to be a little tired of this
and it doesn’t work because file it’s not a string. Looking again for the File object it seems that we can use “read” and it gives some bytes so maybe that’s what I needs
// reply to all requests with same HTML
 server.onNotFound([]() {                  // If the client requests any URI
  File file = SPIFFS.open("index.html", "r");
  server.send(200, "text/html", file.read());
 });
And it doesn’t compile. It gives you an int. This is the error
exit status 1
invalid conversion from 'int' to 'const char*' [-fpermissive]
Let’s try the simple casting:
// reply to all requests with same HTML
 server.onNotFound([]() {                  // If the client requests any URI
  File file = SPIFFS.open("index.html", "r");
  server.send(200, "text/html", (const char*)file.read());
 });
  server.begin();
}
AND IT COMPILES. I CAN NOT BELIEVE IT.
Time to upload.
And back to the problem of not being recognized the DNS default thing.
Let’s do some serial debugging just in case. To make sure that we arrive to the server.onNotFound
We put a serial.begin(9600) and this code:
server.onNotFound([]() {                  // If the client requests any URI
 Serial.println("sending something");
 File file = SPIFFS.open("index.html", "r");
 server.send(200, "text/html", (const char*)file.read());
 Serial.println("something sent");
});
Now we know that if I connect they DO send stuff. But I guess that it’s not the right path maybe?
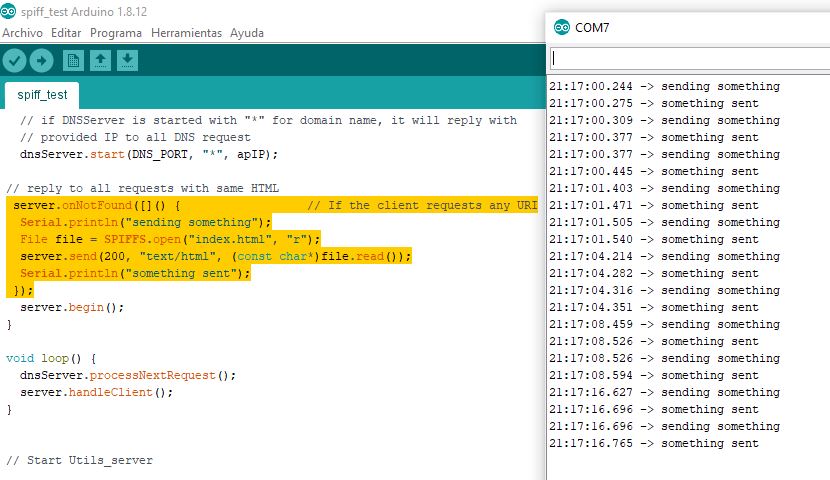
So you’re sending SOMETHING
So let’s try to add this little thing I found here
// reply to all requests with same HTML
 server.onNotFound([]() {                  // If the client requests any URI
  Serial.println("sending something");
  File file = SPIFFS.open("index.html", "r");
  if (!file) {
    Serial.println("file open failed");
}
  server.send(200, "text/html", (const char*)file.read());
  Serial.println("something sent");
 });
  server.begin();
}
Yeah, that’s the problem. The file has not been opened properly.
I tried to press again the “flash button” so if it’s not working. Now let’s check that it uploaded that index.html. Last try it uploaded this:
327808 bytes (236866 compressed)
If I upload the same sketch but I move to another folder out of the project this is what it says:
327808 bytes (236866 compressed)
SO YOU DIDN’T UPLOAD MY DAMMED INDEX.HTML YOU DAMMED.
He roars and destroys the city
Splitting the problem
Ok, after talking with Óscar, we decided that the best should be to split this into two things. First, check (by serial) if the Flash is storing properly the data. And once we have that, send it through the webserver. He also suggested to use another library that he used in smartcitizen. So let’s get to it.
Check Flash and SPIFF
First we should get the flash memory with this sketch
Check flash
https://github.com/esp8266/Arduino/blob/master/libraries/esp8266/examples/CheckFlashConfig/CheckFlashConfig.ino
The answer it’s 4mB
So now let’s try to follow this tutorial. The tutorial says some properties of the SPIFFS but also that I need an Arduino plugin. Agora sim entendo! The plugin you can find it here
And that needs you to have esptools installed. So go install it using pip (because it seems that it’s a python package). So many things to install. I had to use this command in the terminal:
``` python -m pip install esptool
```
(because if I just put pips instal esptool there was an error)
Um, same error. Will come later and keep on working. Man this is hard.
Nothing in the web that’s useful for now = /
The key for this is install the latest plugin. 0.5 was the chosen one. You can find it here
Once you have it installed (it’s a zip tha you have to extract into your /tools folder in the arduino installation path) you will see a ESP8266 sketch data upload.
Then it will take the files that you have in the folder “data” and it will flash them.
Remember that this is a independent process from uploading a sketch.
This is a sketch that tests this
// Steve Quinn 06/03/17
//
// Copyright 2017 Steve Quinn
//
// This program is free software: you can redistribute it and/or modify
// it under the terms of the GNU General Public License as published by
// the Free Software Foundation, either version 3 of the License, or
// (at your option) any later version.
//
//  This program is distributed in the hope that it will be useful,
//  but WITHOUT ANY WARRANTY; without even the implied warranty of
//  MERCHANTABILITY or FITNESS FOR A PARTICULAR PURPOSE.  See the
//  GNU General Public License for more details.
//
//  You should have received a copy of the GNU General Public License
//  along with this program.  If not, see <http://www.gnu.org/licenses/>.
//
// Written to accompany the following Instructable;
//
// 'Using ESP8266 SPIFFS'
//
// Compiled using Arduino 1.6.9
//
//


#include <string.h>
#include "FS.h"


bool    spiffsActive = false;
#define TESTFILE "/testfile.txt"


void setup()
{
  Serial.begin(115200);
  delay(1000);

  // Start filing subsystem
  if (SPIFFS.begin()) {
      Serial.println("SPIFFS Active");
      Serial.println();
      spiffsActive = true;
  } else {
      Serial.println("Unable to activate SPIFFS");
  }
  delay(2000);
}


void loop()
{
  if (spiffsActive) {
    if (SPIFFS.exists(TESTFILE)) {
      File f = SPIFFS.open(TESTFILE, "r");
      if (!f) {
        Serial.print("Unable To Open '");
        Serial.print(TESTFILE);
        Serial.println("' for Reading");
        Serial.println();
      } else {
        String s;
        Serial.print("Contents of file '");
        Serial.print(TESTFILE);
        Serial.println("'");
        Serial.println();
        while (f.position()<f.size())
        {
          s=f.readStringUntil('\n');
          s.trim();
          Serial.println(s);
        }
        f.close();
      }
      Serial.println();

      f = SPIFFS.open(TESTFILE, "a");
      if (!f) {
        Serial.print("Unable To Open '");
        Serial.print(TESTFILE);
        Serial.println("' for Appending");
        Serial.println();
      } else {
        Serial.print("Appending line to file '");
        Serial.print(TESTFILE);
        Serial.println("'");
        Serial.println();
        f.println("This line has been appended");
        f.close();
      }

      f = SPIFFS.open(TESTFILE, "r");
      if (!f) {
        Serial.print("Unable To Open '");
        Serial.print(TESTFILE);
        Serial.println("' for Reading");
        Serial.println();
      } else {
        String s;
        Serial.print("Contents of file '");
        Serial.print(TESTFILE);
        Serial.println("' after append");
        Serial.println();
        while (f.position()<f.size())
        {
          s=f.readStringUntil('\n');
          s.trim();
          Serial.println(s);
        }
        f.close();
      }

    } else {
      Serial.print("Unable To Find ");
      Serial.println(TESTFILE);
      Serial.println();
    }
  }

  while (true){
    yield();
  }
}
I had to comment untcomment the #include SPIFF.h if I use an ESP8266 because it doesn’t compile properly.
This is how it looks from the serial:
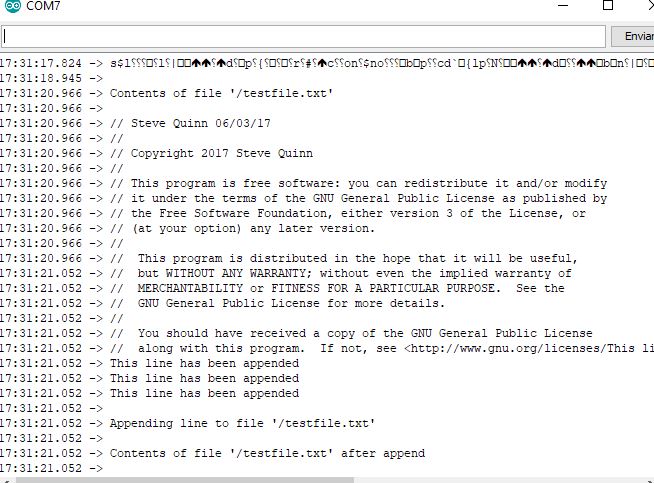
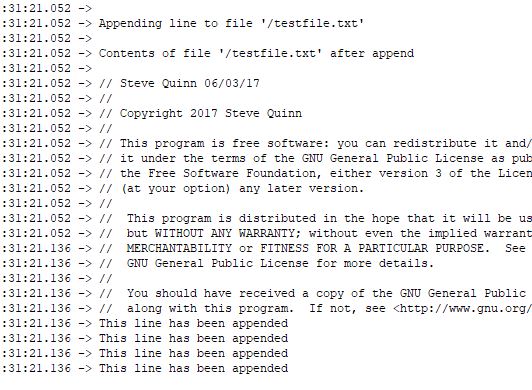
APPEND IT!
So now I can go back to try to send the captive portal from the html.
Finally.
Going back to the webpage
Óscar told me that maybe I have to switch to another library (That he uses in the smartcitizen). This one
Since it’s not on the library administrator I have to put it by hand in the arduino folder.
https://github.com/esp8266/arduino-esp8266fs-plugin/releases
https://www.instructables.com/id/Using-ESP8266-SPIFFS/
https://github.com/fablabbcn/smartcitizen-kit-21/blob/master/esp/src/SckESP.cpp#L709
https://github.com/me-no-dev/ESPAsyncWebServer
https://www.cplusplus.com/doc/tutorial/pointers/
Websockets and webpages and ESP8266
For my final project I need to have a webpage and that webpage needs direct information from and to the board. So I’m trying websockets technology.
I found a couple of tutorials that can be helpful (this with ESP32 and this one in Spanish with ESP8266)
Websocket it’s a technology that works usually with fast and bidirectional communication. It doesn’t need to reload the page, it just sends info. It’s used with chats for example.
Next. Try to publish html on my nodeMCU and see it from the outside!
The next idea it’s trying to host a html on my nodeMCU and try to interface with a led or something. If I can do that I may try to publish my twine skecth into the board and try to make things more visible!
First I tried the very example we have from the class. Using the code of the example of my first ESP server with platform io I didn’t have the libraries
But it didn’t matter which wifi for ESP8266 I installed. The header wasn’t recognized. And I tried A LOT.
Then I tried with the arduino IDE so if I was more lucky this time. Since I wasn’t using the same computer, I needed the basic libraries to install the boards. The libraries of NodeMCU and ESP32 were in other place in the local documentation, in this case in the very first electronics week. Here
So now it doesn’t find the webserver.h. So once I set everything on fire outraged, I calm down and I think of using another example.
Digging a little I found this page of introduction of the NodeMCU that has this example:
#include <ESP8266WiFi.h>
#include <WiFiClient.h>
#include <ESP8266WebServer.h>

/* Set these to your desired credentials. */
const char *ssid = "ssid""; //Enter your WIFI ssid
const char *password = "pswd"; //Enter your WIFI password

ESP8266WebServer server(80);

void handleRoot() {
  server.send(200, "text/html", "<form action=\"/LED_BUILTIN_on\" method=\"get\" id=\"form1\"></form><button type=\"submit\" form=\"form1\" value=\"On\">On</button><form action=\"/LED_BUILTIN_off\" method=\"get\" id=\"form2\"></form><button type=\"submit\" form=\"form2\" value=\"Off\">Off</button>");
}
void handleSave() {
  if (server.arg("pass") != "") {
    Serial.println(server.arg("pass"));
  }
}
void setup() {
  pinMode(LED_BUILTIN, OUTPUT);
  delay(3000);
  Serial.begin(115200);
  Serial.println();
  Serial.print("Configuring access point...");
  WiFi.begin(ssid, password);
  while (WiFi.status() != WL_CONNECTED) {
    delay(500);
    Serial.print(".");
  }
  Serial.println("");
  Serial.println("WiFi connected");
  Serial.println("IP address: ");
  Serial.println(WiFi.localIP());
  server.on ( "/", handleRoot );
  server.on ("/save", handleSave);
  server.begin();
  Serial.println ( "HTTP server started" );
  server.on("/LED_BUILTIN_on", []() {
    digitalWrite(LED_BUILTIN, 1);
    Serial.println("on");
    handleRoot();
  });
  server.on("/LED_BUILTIN_off", []() {
    digitalWrite(LED_BUILTIN, 0);
    Serial.println("off");
    handleRoot();
  });
}
void loop() {
  server.handleClient();
}
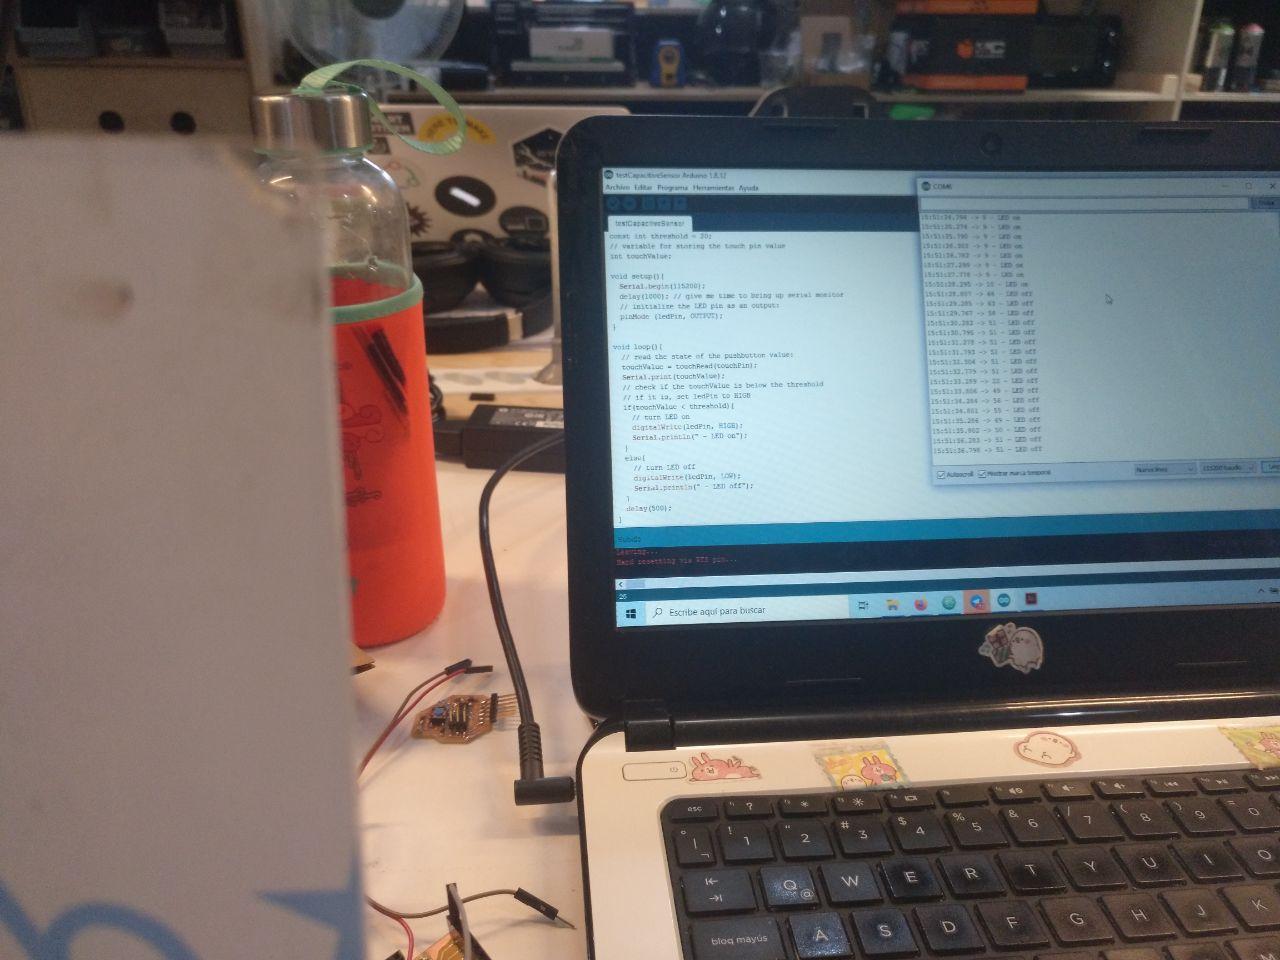
I use it and it works!
Now that will be time to improve it. But at least the wifi working.
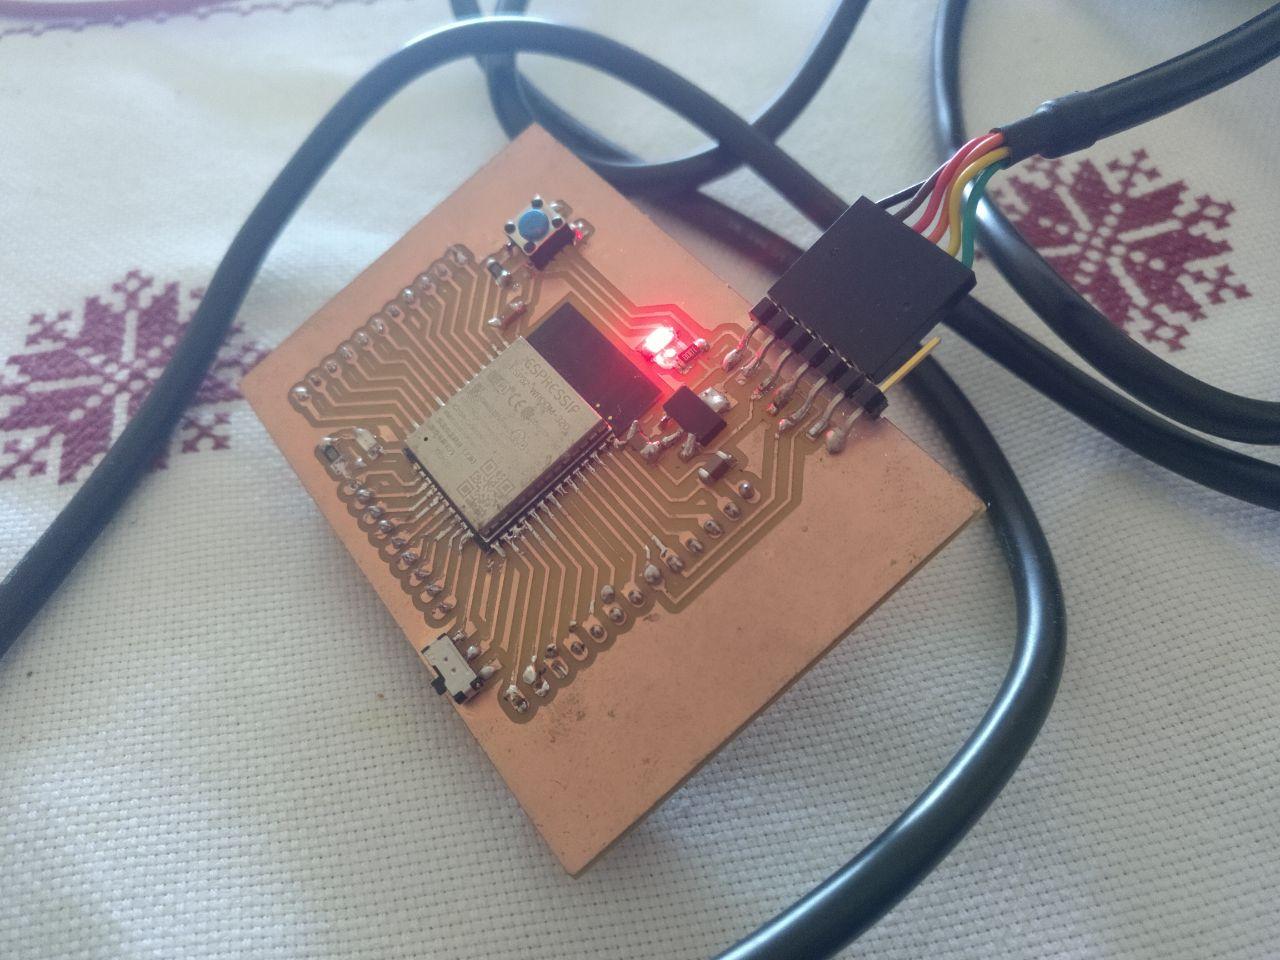
Hero wifi shot
it looks stupid but it took several days to make this work. Finally
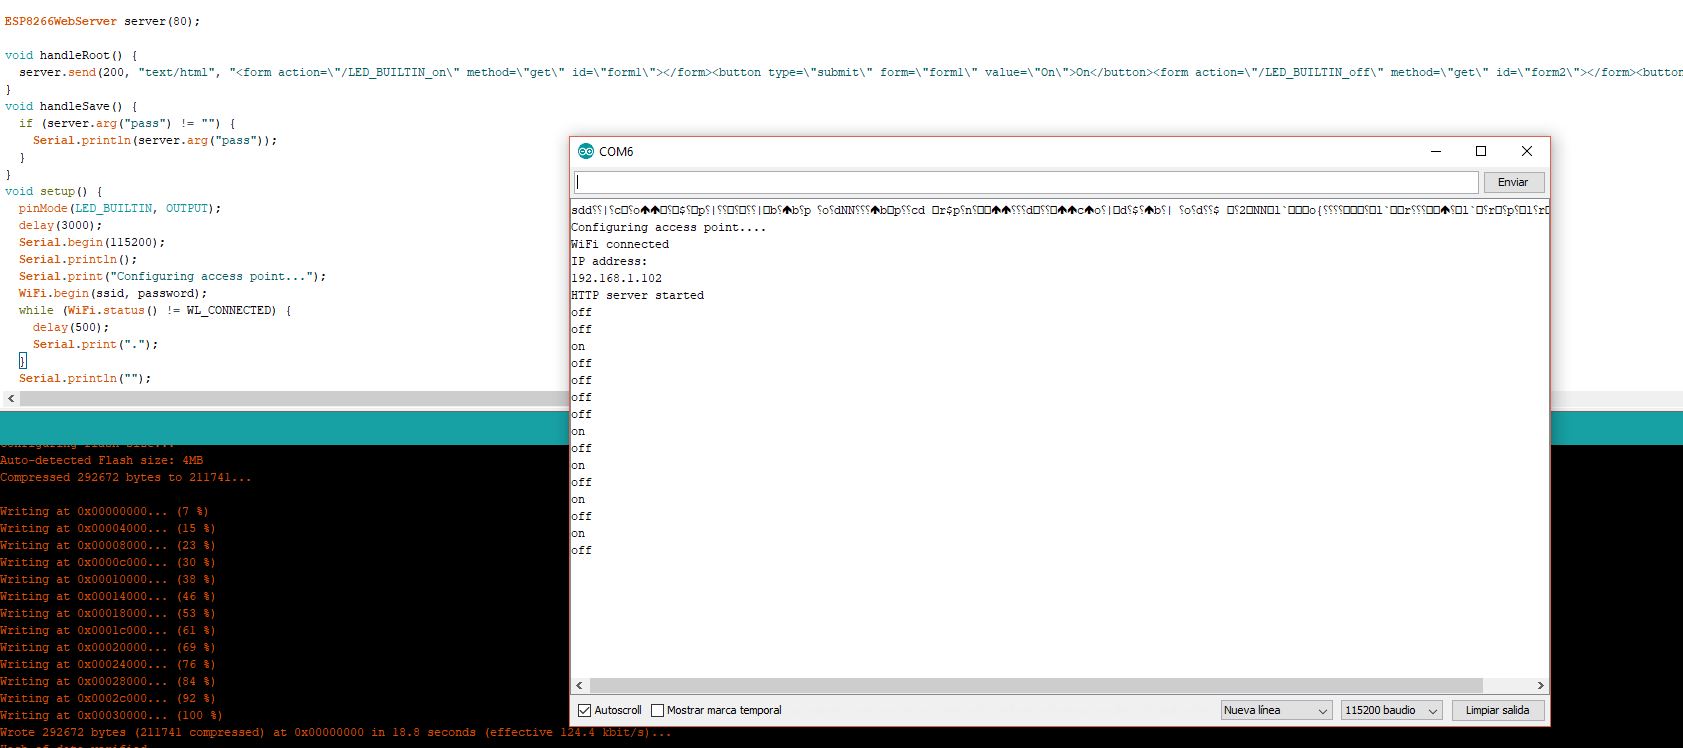
The serial also helps debugging saying when does it switch on and off and the ip adress
Things of this code
This code it’s a test but it has some failures that I’m fully aware of. The web it’s not responsive (because it’s embedded and not optimized) and the functionality it’s reversed. When you press on it switches of the led and vice versa.
What I’ve learnt
Libraries are tricky and messy.
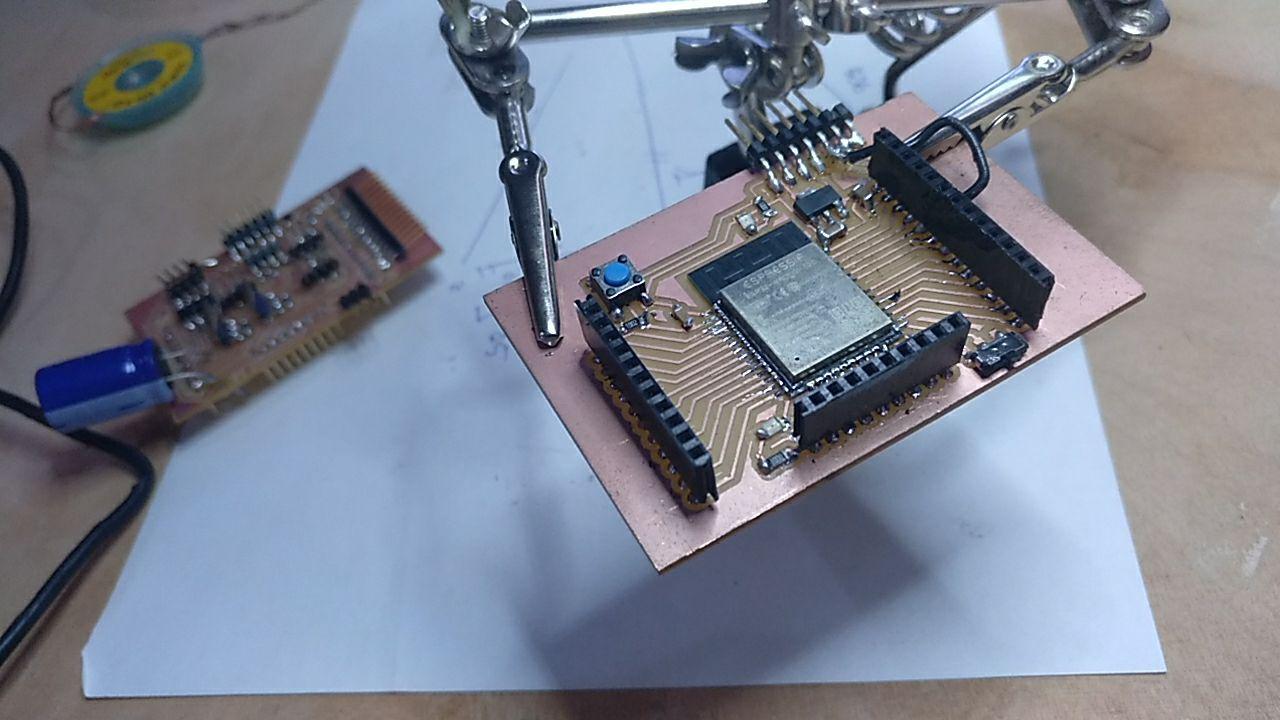
New chip. New horizons
Ok, I got some barduinos when we left the lab because of the Covid19. But I couldn’t make them work properly. Now I could go one day to the lab and now they work. It seems that I didn’t press properly the reset button (And it wasn’t well soldiered anyway). But they tested a blink and it worked. And I did a test and it worked.
So now let’s go
we’re going to have fun
Wifi AP hotspot with captive web 2: Now it’s personal
First thing is to try the previous example. Now withouth the ifdefs
The code it’s this ones
#include <WiFi.h>
#include <DNSServer.h>
#include <WebServer.h>
WebServer webServer(80);


const byte DNS_PORT = 53;
IPAddress apIP(192, 168, 1, 1);
DNSServer dnsServer;

String responseHTML = ""
  "<!DOCTYPE html><html><head><title>Monolith</title></head><body>"
  "<h1>Hi, human!</h1><p>You're now connected to the Monolith</p></body></html>";

void setup() {
  WiFi.mode(WIFI_AP);
  WiFi.softAPConfig(apIP, apIP, IPAddress(255, 255, 255, 0));
  WiFi.softAP("Monolith");

  // if DNSServer is started with "*" for domain name, it will reply with
  // provided IP to all DNS request
  dnsServer.start(DNS_PORT, "*", apIP);

  // reply to all requests with same HTML
  webServer.onNotFound([]() {
    webServer.send(200, "text/html", responseHTML);
  });
  webServer.begin();
}

void loop() {
  dnsServer.processNextRequest();
  webServer.handleClient();
}
And it works
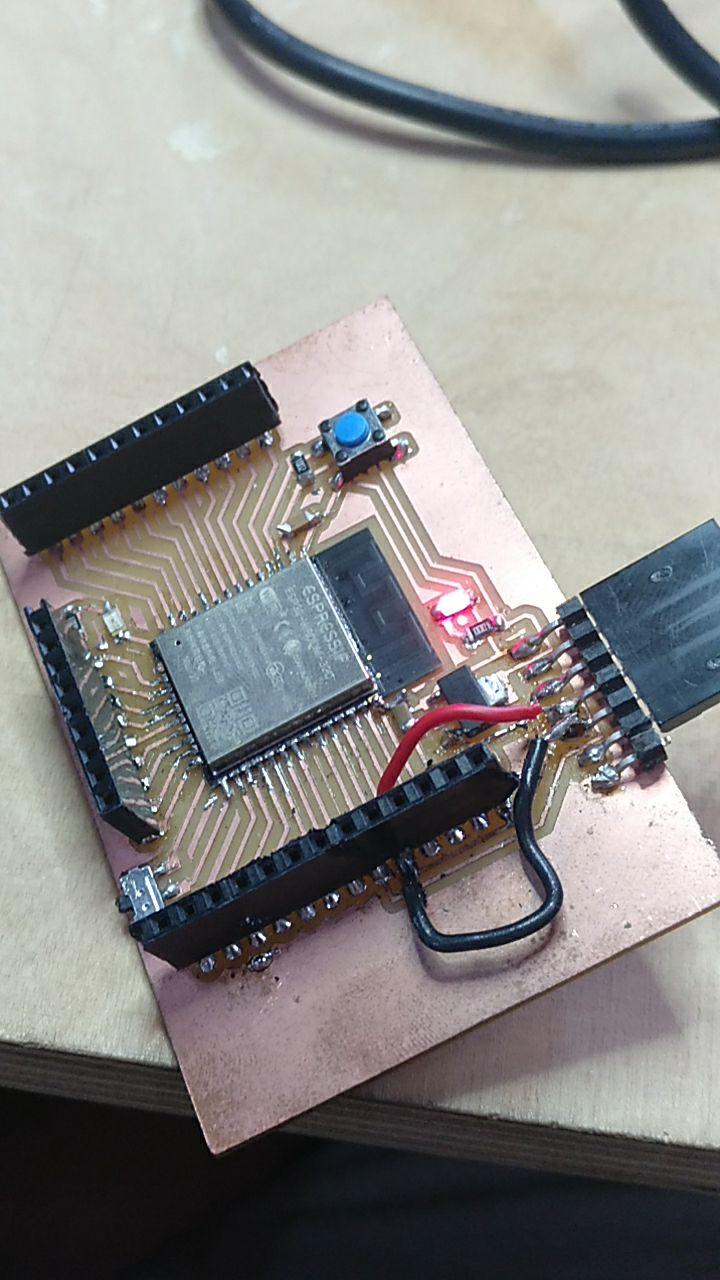
How to program the barduino.
I have some problems with the reset button but the steps are the following.
1) Set the switch in the interior (programming mode).
2) Press the reset button. If it doesn’t work connect and disconnect.
3) Upload the code. It should connect and work.
4) Set the switch to the exterior (execution mode)
5) Press the reset button. If it doesn’t work connect and disconnect.
This will be useful to me in the future. I’m certain
Change the library
Oscar sent me a library that is asyncronous so it doesn’t work on the loop function. I’m going to try the captive portal example. I also wrote about it in this verypage
Ok, I have to install also AsyncTCP.h. It’s not in the library searcher of arduinoIDE so I have to download it directly from here
To install it you have to download the library as a zip. Put in this equivalent folder and reset arduinoIDE and that should do it!
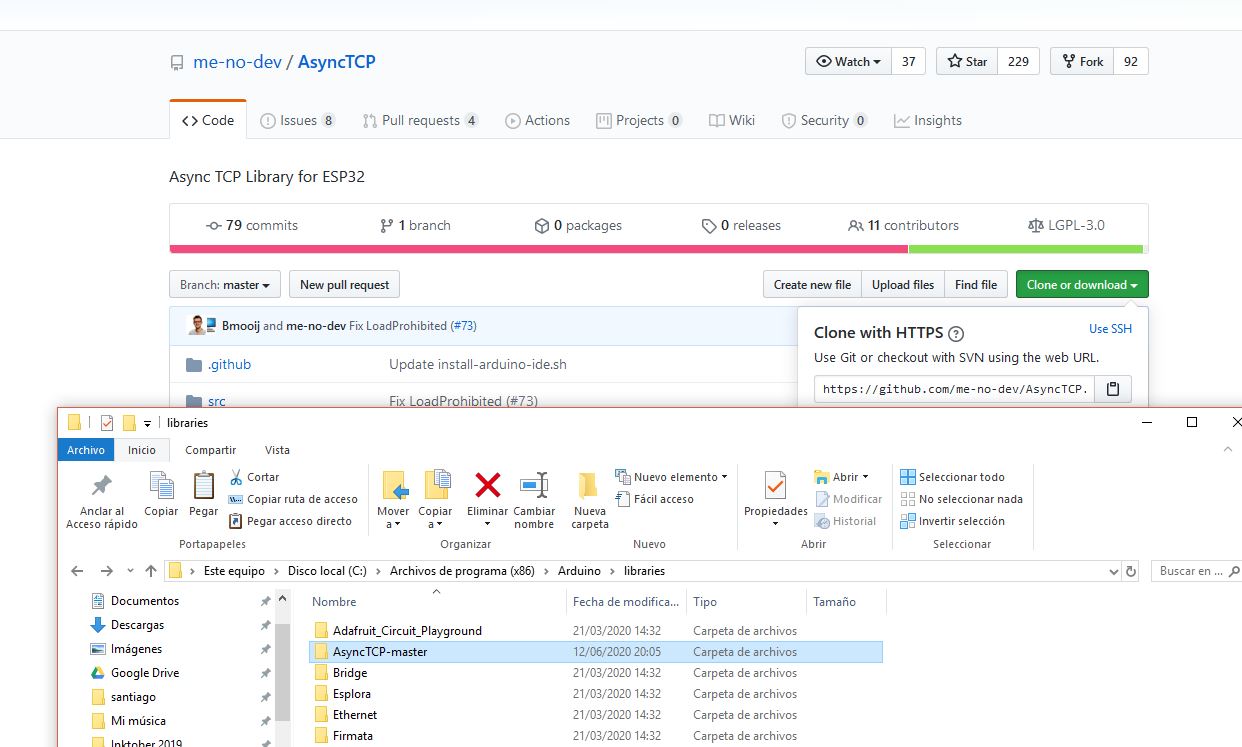
where to download and where to put it
Now that we have it, it should at least compile.
And it works!
yay.jpg
Now I can work from this.
I’ll quote this from the readme of the library site to summarize the main things to remember (and differenciate) this asyncronous library from the standard one:
    This is fully asynchronous server and as such does not run on the loop thread.
    You can not use yield or delay or any function that uses them inside the callbacks
    The server is smart enough to know when to close the connection and free resources
    You can not send more than one response to a single request
Test the spiff
Ok, I had to install other plugin for using the file system. I installed from here where you can get instructions about the plugin. Then use a FS example to check that everything is ok.
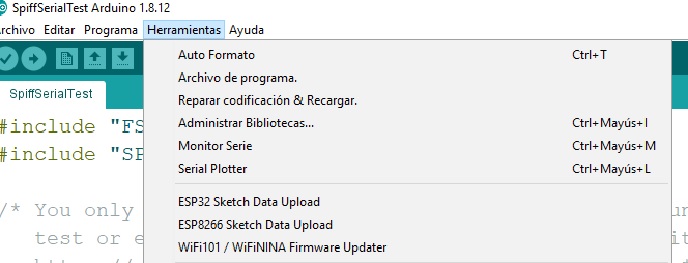
This ESP32 Sketch Data upload it’s what marks that you have it properly installed
So let’s try this sketch:
#include "FS.h"
#include "SPIFFS.h"

/* You only need to format SPIFFS the first time you run a
   test or else use the SPIFFS plugin to create a partition
   https://github.com/me-no-dev/arduino-esp32fs-plugin */
#define FORMAT_SPIFFS_IF_FAILED true

void listDir(fs::FS &fs, const char * dirname, uint8_t levels){
    Serial.printf("Listing directory: %s\r\n", dirname);

    File root = fs.open(dirname);
    if(!root){
        Serial.println("- failed to open directory");
        return;
    }
    if(!root.isDirectory()){
        Serial.println(" - not a directory");
        return;
    }

    File file = root.openNextFile();
    while(file){
        if(file.isDirectory()){
            Serial.print("  DIR : ");
            Serial.println(file.name());
            if(levels){
                listDir(fs, file.name(), levels -1);
            }
        } else {
            Serial.print("  FILE: ");
            Serial.print(file.name());
            Serial.print("\tSIZE: ");
            Serial.println(file.size());
        }
        file = root.openNextFile();
    }
}

void readFile(fs::FS &fs, const char * path){
    Serial.printf("Reading file: %s\r\n", path);

    File file = fs.open(path);
    if(!file || file.isDirectory()){
        Serial.println("- failed to open file for reading");
        return;
    }

    Serial.println("- read from file:");
    while(file.available()){
        Serial.write(file.read());
    }
    file.close();
}

void writeFile(fs::FS &fs, const char * path, const char * message){
    Serial.printf("Writing file: %s\r\n", path);

    File file = fs.open(path, FILE_WRITE);
    if(!file){
        Serial.println("- failed to open file for writing");
        return;
    }
    if(file.print(message)){
        Serial.println("- file written");
    } else {
        Serial.println("- write failed");
    }
    file.close();
}

void appendFile(fs::FS &fs, const char * path, const char * message){
    Serial.printf("Appending to file: %s\r\n", path);

    File file = fs.open(path, FILE_APPEND);
    if(!file){
        Serial.println("- failed to open file for appending");
        return;
    }
    if(file.print(message)){
        Serial.println("- message appended");
    } else {
        Serial.println("- append failed");
    }
    file.close();
}

void renameFile(fs::FS &fs, const char * path1, const char * path2){
    Serial.printf("Renaming file %s to %s\r\n", path1, path2);
    if (fs.rename(path1, path2)) {
        Serial.println("- file renamed");
    } else {
        Serial.println("- rename failed");
    }
}

void deleteFile(fs::FS &fs, const char * path){
    Serial.printf("Deleting file: %s\r\n", path);
    if(fs.remove(path)){
        Serial.println("- file deleted");
    } else {
        Serial.println("- delete failed");
    }
}

void testFileIO(fs::FS &fs, const char * path){
    Serial.printf("Testing file I/O with %s\r\n", path);

    static uint8_t buf[512];
    size_t len = 0;
    File file = fs.open(path, FILE_WRITE);
    if(!file){
        Serial.println("- failed to open file for writing");
        return;
    }

    size_t i;
    Serial.print("- writing" );
    uint32_t start = millis();
    for(i=0; i<2048; i++){
        if ((i & 0x001F) == 0x001F){
          Serial.print(".");
        }
        file.write(buf, 512);
    }
    Serial.println("");
    uint32_t end = millis() - start;
    Serial.printf(" - %u bytes written in %u ms\r\n", 2048 * 512, end);
    file.close();

    file = fs.open(path);
    start = millis();
    end = start;
    i = 0;
    if(file && !file.isDirectory()){
        len = file.size();
        size_t flen = len;
        start = millis();
        Serial.print("- reading" );
        while(len){
            size_t toRead = len;
            if(toRead > 512){
                toRead = 512;
            }
            file.read(buf, toRead);
            if ((i++ & 0x001F) == 0x001F){
              Serial.print(".");
            }
            len -= toRead;
        }
        Serial.println("");
        end = millis() - start;
        Serial.printf("- %u bytes read in %u ms\r\n", flen, end);
        file.close();
    } else {
        Serial.println("- failed to open file for reading");
    }
}

void setup(){
    Serial.begin(115200);
    if(!SPIFFS.begin(FORMAT_SPIFFS_IF_FAILED)){
        Serial.println("SPIFFS Mount Failed");
        return;
    }

    listDir(SPIFFS, "/", 0);
    writeFile(SPIFFS, "/hello.txt", "Hello ");
    appendFile(SPIFFS, "/hello.txt", "World!\r\n");
    readFile(SPIFFS, "/hello.txt");
    renameFile(SPIFFS, "/hello.txt", "/foo.txt");
    readFile(SPIFFS, "/foo.txt");
    deleteFile(SPIFFS, "/foo.txt");
    testFileIO(SPIFFS, "/test.txt");
    deleteFile(SPIFFS, "/test.txt");
    Serial.println( "Test complete" );
}

void loop(){

}
And it worked! This is the result via serial:
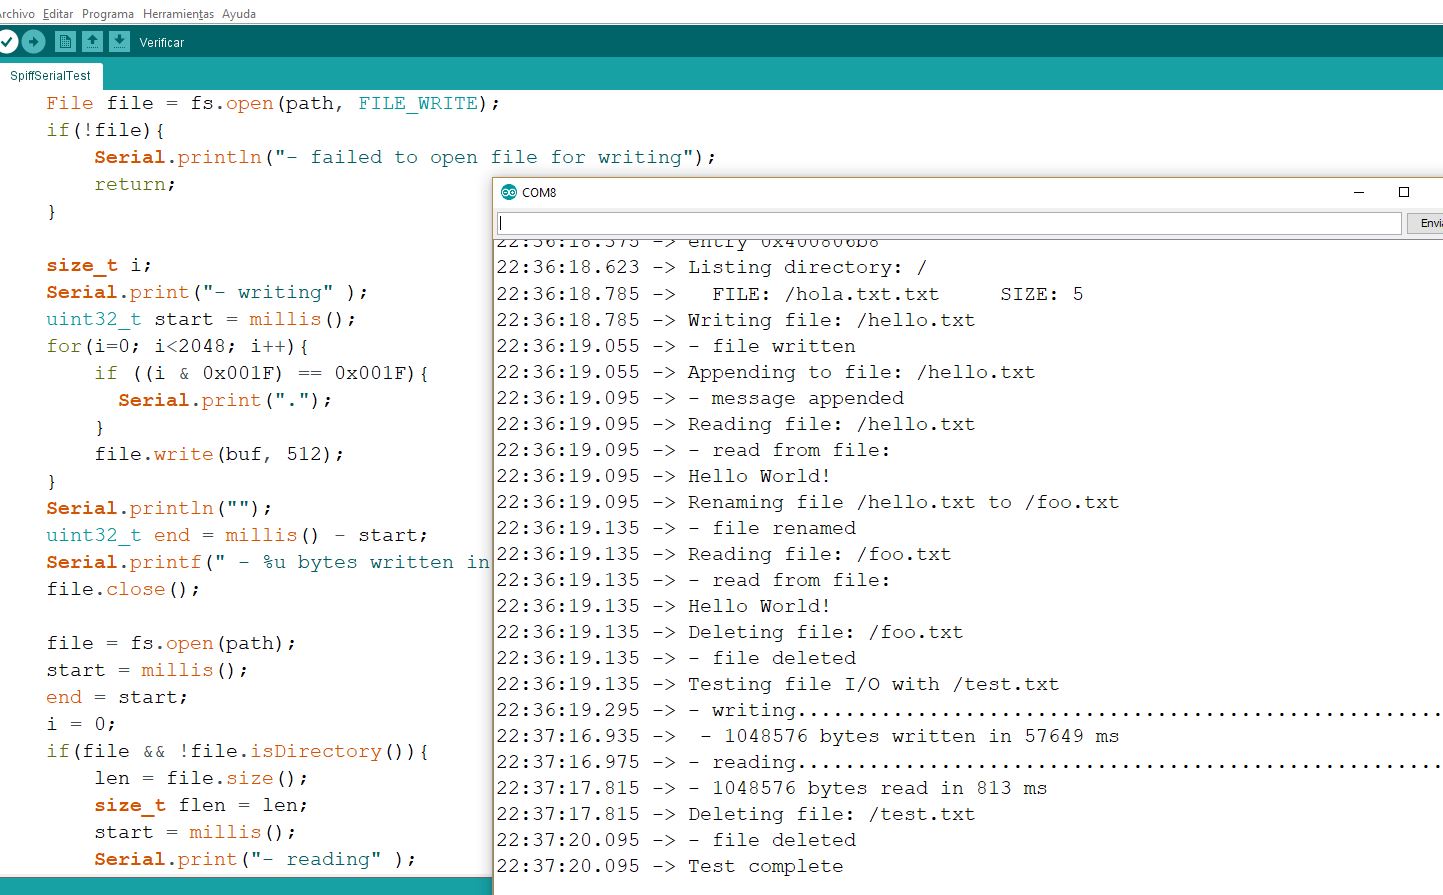
yaaay, this is way faster than the last time
Things to remember when uploading data to the esp32
-
It counts as programming in terms of uploading the data. So follow the protocol.
-
You need to store the data in a folder called “data” inside your arduino project.
That’s for myself in the future.
Now sending a twine file through
Ok, now we can store files. It’s time to send them
And damn the ESAP is complicated to understand. By now I have the same problem that I have before that if I send a file, it doesn’t work as a captive portal. More investigation needed here!
I connected with the global MCU session of june 13th and someone was doing exactly what I’m doing! Lucio is working with the same library and he did what I’m doing.
He made by making an .h the .html
The code where he uses it is here.
The idea it’s like this:
#include "theHtml.h"


// Send web page with input fields to client
server.on("/", HTTP_GET, [](AsyncWebServerRequest *request){
  request->send_P(200, "text/html", index_html, processor);
});
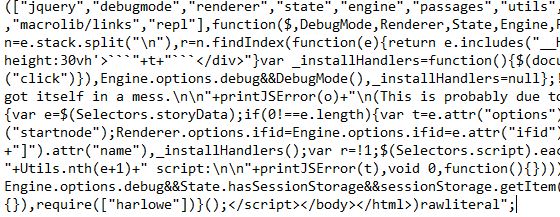
And in the theHtml.h it’s like this:
const char index_html[] PROGMEM = R"rawliteral(
<!DOCTYPE HTML>
<html>
...
</html>
)rawliteral";
Let’s try it. So let’s forget for now about the SPIFF.
It’s fun how the generated html from twine looks like with the extra parts.
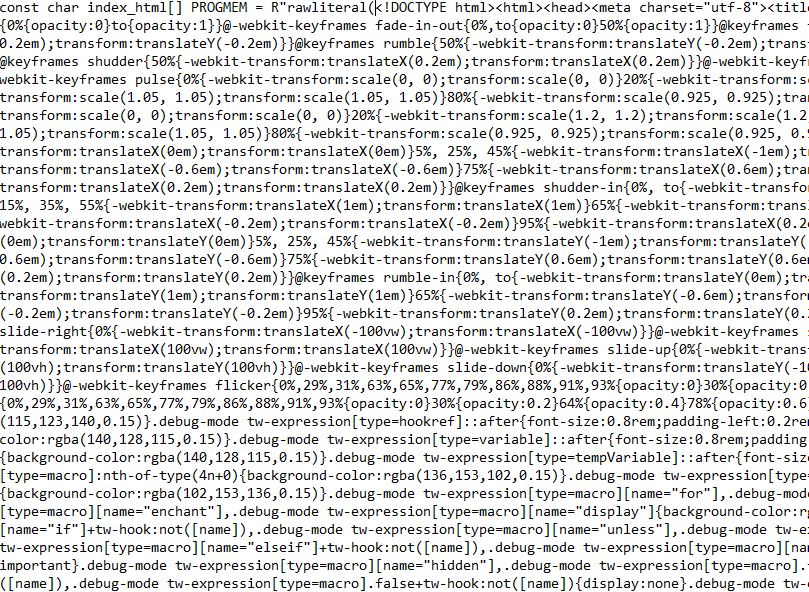
once you understand it you will see the woman in the red dress
The code of Lucio in the response adds a “processor” that I didn’t find. It compiles though. So let’s try.
And… it works.
IT WORKS.
FINALLY. ONE AND A HALF MONTH AT LEAST TO DO THIS. FINALLY. THANKS LUCIO.
< 3
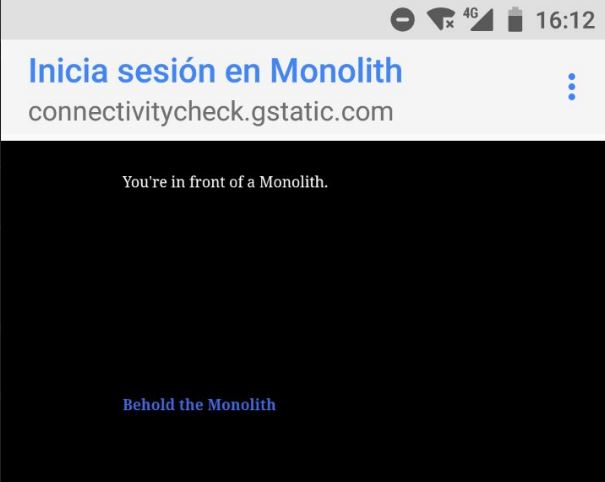
Wiiii
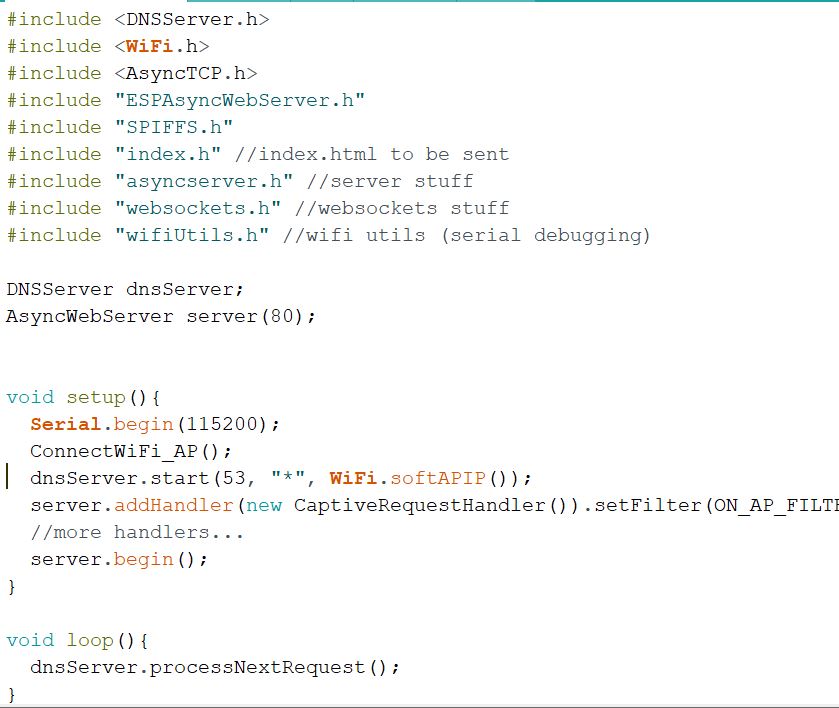
This is the code:
#include <DNSServer.h>
#include <WiFi.h>
#include <AsyncTCP.h>
#include "ESPAsyncWebServer.h"
#include "SPIFFS.h"
#include "index.h"

DNSServer dnsServer;
AsyncWebServer server(80);

class CaptiveRequestHandler : public AsyncWebHandler {
public:
  CaptiveRequestHandler() {}
  virtual ~CaptiveRequestHandler() {}

  bool canHandle(AsyncWebServerRequest *request){
    //request->addInterestingHeader("ANY");
    return true;
  }

  void handleRequest(AsyncWebServerRequest *request) {
     request->send_P(200, "text/html", index_html);
  }
};


void setup(){
  //your other setup stuff...
  WiFi.softAP("Monolith");
  dnsServer.start(53, "*", WiFi.softAPIP());
  server.addHandler(new CaptiveRequestHandler()).setFilter(ON_AP_FILTER);//only when requested from AP
  //more handlers...
  server.begin();
}

void loop(){
  dnsServer.processNextRequest();
}
Doing some magic with the symbols.
On thing is certain that is… if I’m using an AP, I have to encapsulate everything in the same HTML.
For now the idea it’s to have a display similar of the button display of the Keep talking and nobody explodes. The idea it’s to create confusion and emphasize the fact that this is not normal communication.

reference
Understanding Unicode
Ok, let’s supose that we have unicode in the browser that it’s reading the html. Let’s try to make a simple HTML with some unicode.
I’m using this reference but I also have this one with more symbols to navigate with.
Digging up I have this code:
<!DOCTYPE html>
<html>
<style>
body {
font-size: 20px;
}
</style>
<style type="text/css">
span {
display: inline-block;
width: 110px;
float: center;
}
</style>
<body>
<span style='font-size:100px;'>☴</span>
<span style='font-size:100px;'>⚗</span>
<span style='font-size:100px;'>ᕜ</span>
<br>
<span style='font-size:100px;'>⚶</span>
<span style='font-size:100px;'>⚷</span>
<span style='font-size:100px;'>⚼</span>
<br>
<span style='font-size:100px;'>⛣</span>
<span style='font-size:100px;'>⛩</span>
<span style='font-size:100px;'>⛬</span>
<br>
<span style='font-size:100px;'>⛮</span>
<span style='font-size:100px;'>⛼</span>
<span style='font-size:100px;'>⍍</span>
<br>
<span style='font-size:100px;'>ᐼ</span>
<span style='font-size:100px;'>ᓾ</span>
<span style='font-size:100px;'>⚟</span>
</body>
</html>
that makes this:
☴
⚗
ᕜ
⚶
⚷
⚼
⛣
⛩
⛬
⛮
⛼
⍍
ᐼ
ᓾ
⚟
Try to use Websockets
Now it’s time to use websockets tecnology because I want to send information back and foward from and to the webpage.
I don’t know if it’s better to still use twine (Because I’d have to fit there the websockets) or to use another javascript framework.
I also have to make a websocket server!
So let’s follow this tutorial.
So they separate the code in several parts. As we know, we can separate the code in several files.
Also this tutorial is for the ESP2866 so probably some libraries are going to work differently.
First we’re going to make this example work with a ESP2866. Once it works in the NodeMCU we start with the changing to fuse it with the “example” I have for the ESP32.
aaaand it doesn’t even compile.
I’m not going to even BOTHER for this.
Let’s change and go, little by little with the ESP32 since, anyway there are lots of changes that we need to make anyway.
Let’s try to add the websocket server at port 81. If the DNS works it should be fine
Dividing the sketch into files
The first sketches were only a 1 .ino file. Right now I have to separate them into several files.
I learnt that .h is what I need because if I put .cpp (c plus plus) there are problems with the compilation. (I guess that the .cpp have to be compiled by their own, the .h can be just a fragment)
The only function (before getting in detail with the websocket stuff) I’m adding is some serial monitoring.
This is how it looks:
nice and cozy
It compiles. Now it’s time to test it!
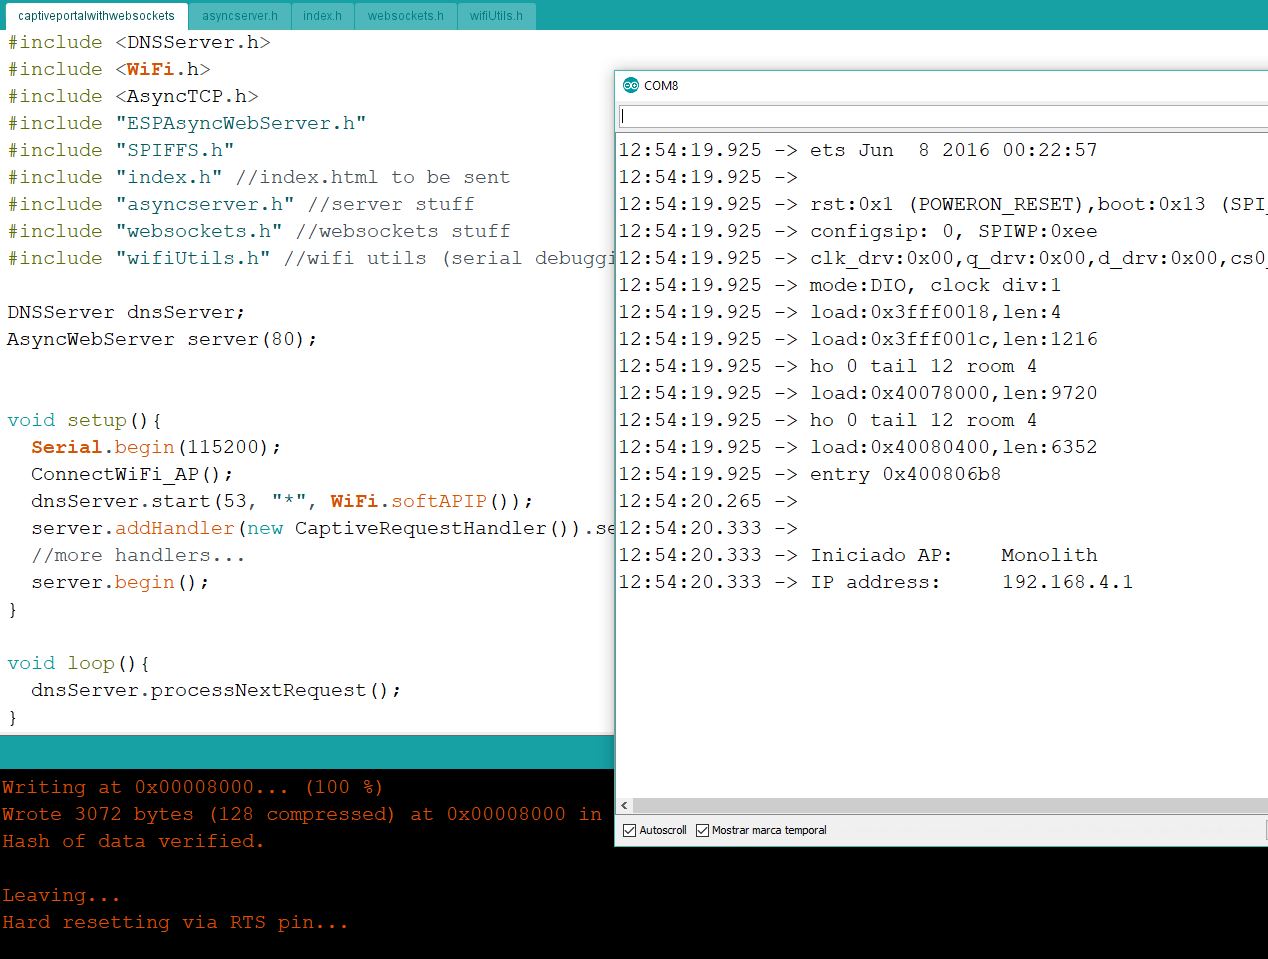
so far, so good
And it works.
The example on the websocket size is an answering machine that gives the millis seconds.
AsyncWebSocket ws("/ws");

String GetMillis()
{
    return String(millis(), DEC);
}

void ProcessRequest(AsyncWebSocketClient * client, String request)
{
    String response = GetMillis();
    client->text(response);
}
I add the websocket.cpp content and I fix some compile issues of the program not finding the right thing in the right time.
I also added the html and the js all combined (with script tag) and I also test how does the unicode symbols look like in the mobile phone.
This is the result:
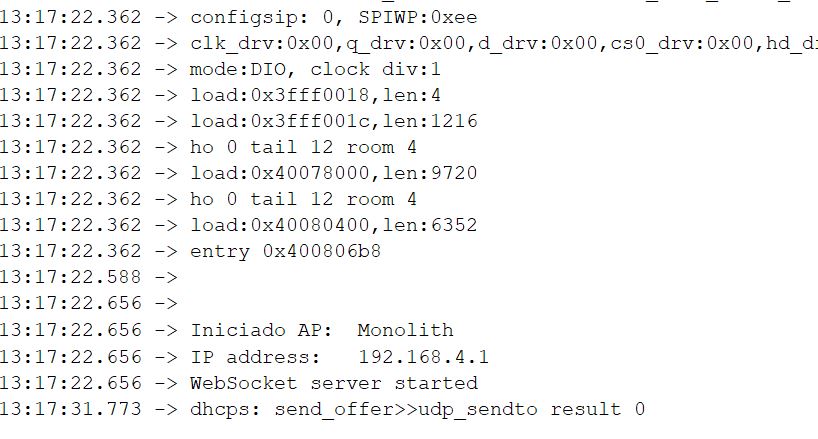
Here it seems fine

but this doesn’t seem fine
I have to check the tutorial again because it says “hi” but it doesn’t make the millis update.
Ok, the problem was that in the example the function that sends the message was commented.
So it works. YAY.

NOW WE’RE TALKING.
Setting the project in the repository
Now I feel confident enough to start the real project
So first that use this very same repository to store this project (instead of drafts) also if I made any change it will automatically replicate in each local repository (I’m doing this project usin 2 computers so thats important)
Neo pixels or adressable LEDS
Now it’s time to work on addressable LED. The idea it’s to create several moods that we can cast them from the web using websockets.
The idea is the following:
-
Use a couple of examples from the arduino library.
-
Make a couple of moods.
-
Try to call them via websockets.
The material I have are these addressable LEDs (I can chop them apart)
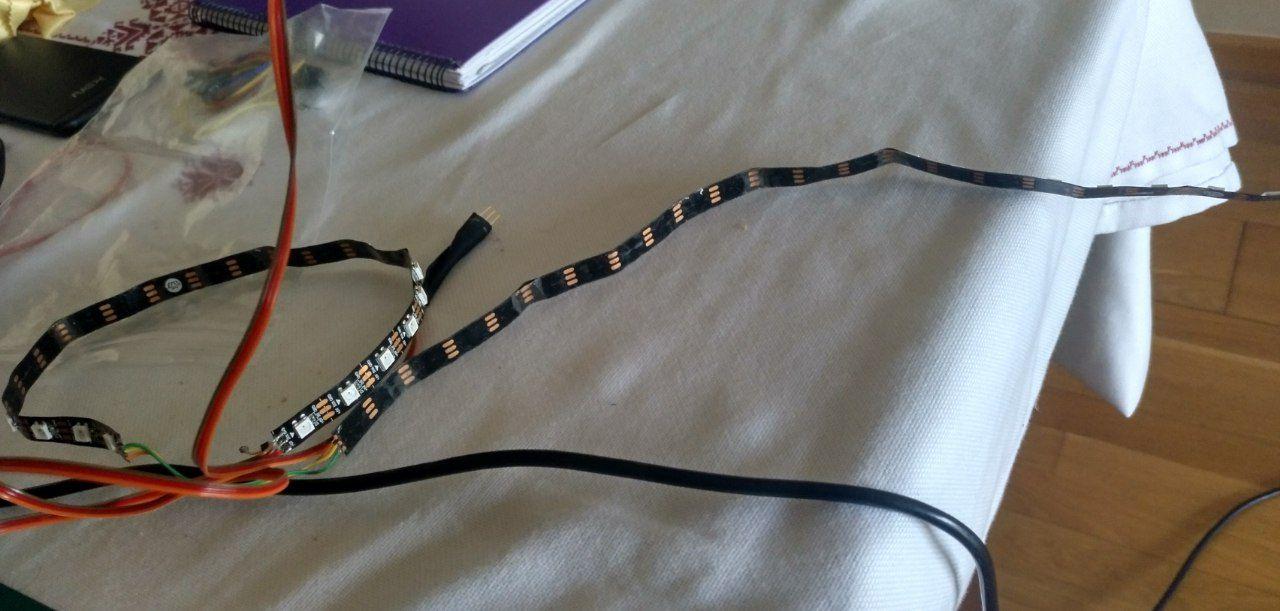
those are 44 LEDs
And this long cable that connect them. (even when I see the best practices says that don’t be that long the cable)
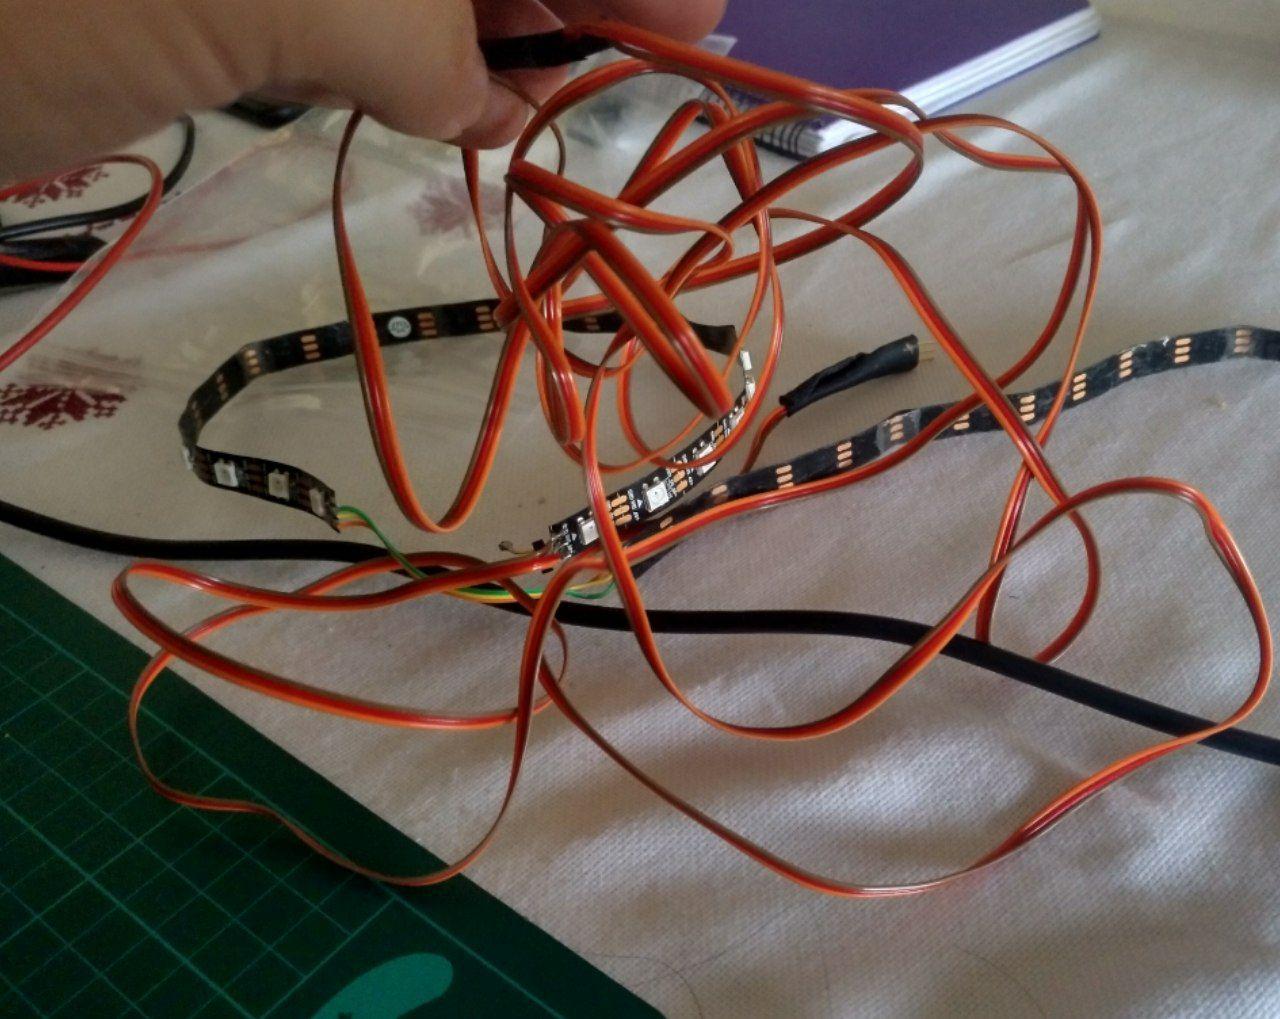
long cable is long
Example neopixel time
I install the neopixels libraries (you have to install 2) using this handy tutorial from adafruit.
Once I installed I keep the process of… looking back the ESP32 pinning because I-ALWAYS-FORGET. So let’s see it
And remember by the example that the built in led is called “13”.
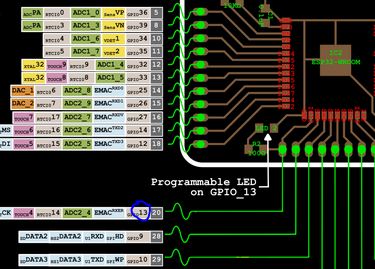
HERE
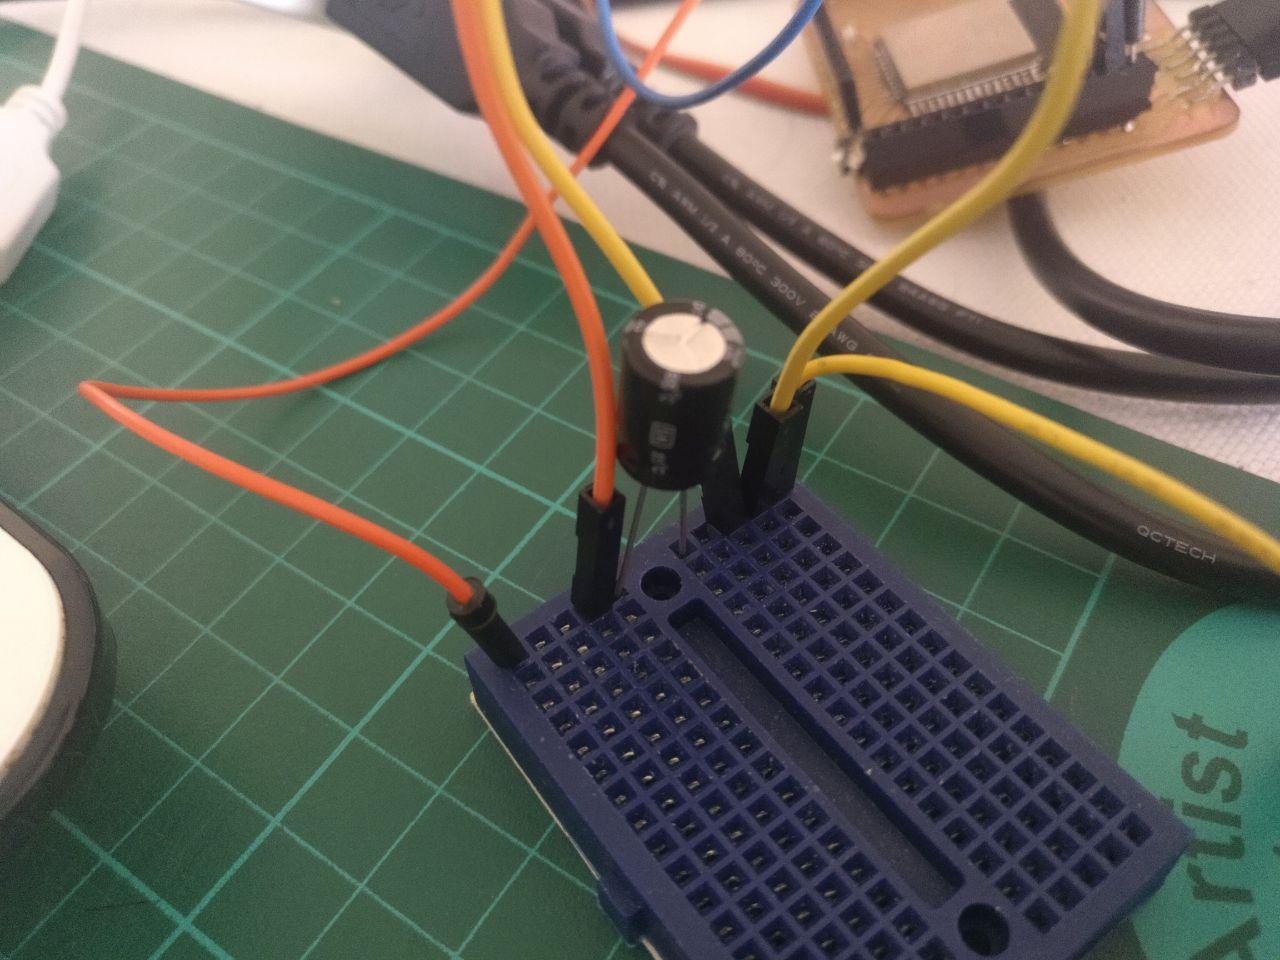
I used the Strandtest that has a lots of things. I set the pin the number 13 because I can monitorize it via the built in led. And also I set the 44 led number.
I added this capacitor just to be sure.
I don’t like breadboards but this is still testing
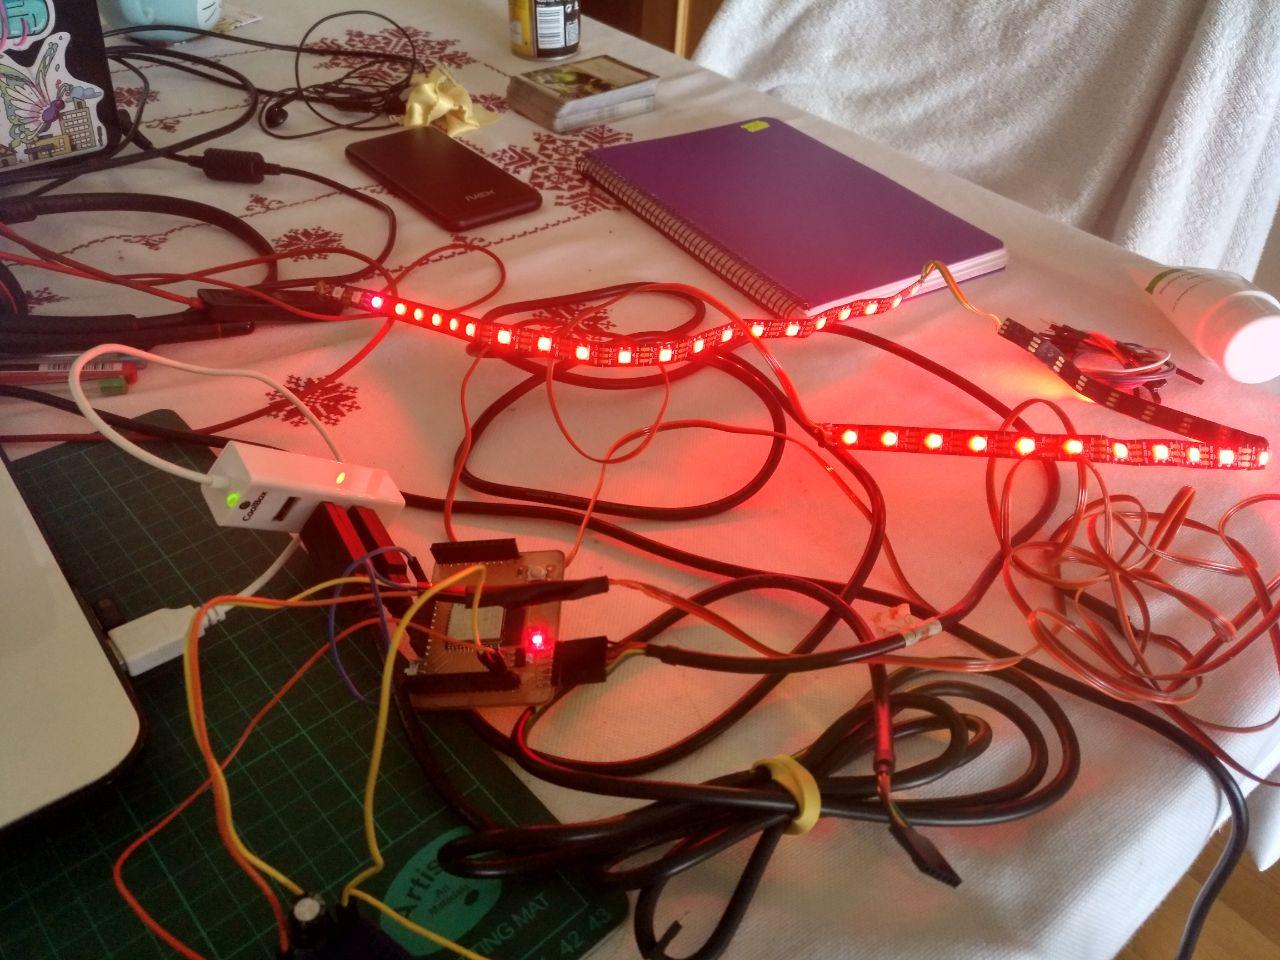
I had an issue because I attached to a 5V but the ESP32 goes on 3v3 line so it didn’t work. Then I changed and powered it up via the 3v3 pin and it worked nicely!
lights!
Here you can see the built in led flashing.
That was easy. Thank you libraries and documentation!
Get into the mood
Ok, now let’s define some moods to work on. From the twine I have several.
-
Start
-
Fade away
-
Breathing
-
Interested
-
Annoyed
-
Stressed
Now it’s time to set those moods and encapsulate them!
Uhm, I see that I need the “delay()” in everything I do. I don’t think that’s compatible with the DNS. Let’s ask the instructors about it.
Oscar recommended to check out the library JLED, but it doesn’t seem to support addressable LEDs. Should I try then an array of normal LEDs in paralel? Let’s look for another solution.
FastLED Library
Let’s try to use fastled that seems that has those capabilities with “Recurring event triggers EVERY_N_MILLISECONDS, EVERY_N_SECONDS, EVERY_N_MINUTES, and EVERY_N_HOURS” that I see in the blog. Yay.
Example fastled time
Ok, I’m using the demoreel example of fastled library (once you install it via the library manager, you can access through file-> examples)
This was the setup
#define DATA_PIN    13
//#define CLK_PIN   4
#define LED_TYPE    WS2811
#define COLOR_ORDER GRB
#define NUM_LEDS    44
And the demo reel is AWESOME.
I like specially the going back and forth of the luminosity. I think I’m going to use that for several moods.
Now I’m using another example to get inside. I see that there is an example called ColorPalette.
Let’s try to get it through the main program and see if it breaks.
To do so I create a leds.h that I include in the main file.
Then I encapsulate what it does in the setup() in a function called “initLEDs” and what it does in the loop in a “loopLEDs” function after all the others. If you don’t do that there may be problems of “blibliblu not declared on scope”.
And it works! I can get millis from the websocket server and the ledstrip works independent from it. Cool!
Personal notes on the palettes
Now that it works let’s keep exploring this collor pallette thing to get some experiments towards the mood system.
currentBlending = LINEARBLEND;
The linear blend is pretty nice and soft. The NOBLEND is sharper. I think NOBLEND is by default.
This example uses this in the loop:
#define UPDATES_PER_SECOND 20
...
    FastLED.show();
    FastLED.delay(1000 / UPDATES_PER_SECOND);
And a updates per second of 100. If I change to 20 what happens is that the change is slower as spected.
This is the main “magic” about this light that it’s keeping the flow:
void loop()
{
  //  ChangePalettePeriodically();

    static uint8_t startIndex = 0;
    startIndex = startIndex + 1; /* motion speed */

    FillLEDsFromPaletteColors( startIndex);

    FastLED.show();
    FastLED.delay(1000 / UPDATES_PER_SECOND);
}

void FillLEDsFromPaletteColors( uint8_t colorIndex)
{
    uint8_t brightness = 255;

    for( int i = 0; i < NUM_LEDS; i++) {
        leds[i] = ColorFromPalette( currentPalette, colorIndex, brightness, currentBlending);
        colorIndex += 3;
    }
}
Even if the examples are helpful the documtation of fastled is not as good as it could be.
I found this link that maybe useful using fade ins (instead of fade out).
Also the demoreel of 100 lines of code is cool but I feel too smart for me, so I’m trying my best to understand it.
Oh, damn, one of the creators, Daniel García, passed away 9 months ago = (
I also found these demos of someone on github, it seems to be aligned with music
And I finally have the warm up snippet:
void startWarmUplightning()
{
  int REFRESH_PER_SECOND_WARM_UP = 120;
  for( int i = 0; i < BRIGHTNESS; i+= 10){
    //warm up
    FastLED.setBrightness(i);
    for( int j = 0; j < NUM_LEDS; j++) {
      //black dot rolling
      if ( j > 1)
      {
        leds[j-1] = CRGB::Aquamarine;
      }
      leds[j] = CRGB::Black;
      FastLED.show();
      FastLED.delay(1000 / REFRESH_PER_SECOND_WARM_UP);
    }
    //last led
    leds[NUM_LEDS] = CRGB::Aquamarine;
    FastLED.show();
    FastLED.delay(1000 / REFRESH_PER_SECOND_WARM_UP);
  }
  // stay
  FastLED.delay(1000);
  // fade out
  for( int i = BRIGHTNESS; i > 0; i-= 3)
  {
    FastLED.setBrightness(i);
    FastLED.show();
    FastLED.delay(1000 / REFRESH_PER_SECOND_WARM_UP);
  }
}
Now I’m going to make a pallette of colours so I can make with the same palette different effects for different moods.
I realize that the demoreel use an object called “getCurrentPatternList” and it’s an array of functions:
// List of patterns to cycle through.  Each is defined as a separate function below.
typedef void (*SimplePatternList[])();
SimplePatternList gPatterns = { rainbow, rainbowWithGlitter, confetti, sinelon, juggle, bpm };
this is advanced c for me
// Call the current pattern function once, updating the 'leds' array
gPatterns[gCurrentPatternNumber]();
Then is called by
// Call the current pattern function once, updating the 'leds' array
gPatterns[gCurrentPatternNumber]();
In the loop.
I have to encapsulate this in a function because I need to leave clean the loop. And also I’d like to set up a palette. The idea is to generate a random palette and use it in the “normal loop” moods (Breathing/interested/annoyed/stressed).
I tried to set up a palette but it doesn’t seem to work so let’s begin with some pattern and then change the palette.
I can encapsulate the demoreel like this:
void loop()
{
 showLEDs();

}

void showLEDs() {
    // Call the current pattern function once, updating the 'leds' array
  gPatterns[gCurrentPatternNumber]();

  // send the 'leds' array out to the actual LED strip
  FastLED.show();
  // insert a delay to keep the framerate modest
  FastLED.delay(1000/FRAMES_PER_SECOND);
   // do some periodic updates
  EVERY_N_MILLISECONDS( 20 ) { gHue++; } // slowly cycle the "base color" through the rainbow
  EVERY_N_SECONDS( 10 ) { nextPattern(); } // change patterns periodically

}
Now I’m working on set before the loop the palette I’m working on because it might change over time. So I have something like this:
CRGBPalette16 palette = LavaColors_p;

void setup() {
 ...
  setupMoodPalette();
}

void setupMoodPalette() {
  palette = OceanColors_p;
}

void loop()
{
 showLEDs();

}

void showLEDs() {
    // Call the current pattern function once, updating the 'leds' array
 //gPatterns[gCurrentPatternNumber]();

  uint8_t BeatsPerMinute = 62;

  uint8_t beat = beatsin8( BeatsPerMinute, 64, 255);
  for( int i = 0; i < NUM_LEDS; i++) { //9948
    leds[i] = ColorFromPalette(palette, gHue+(i*2), beat-gHue+(i*10));
  }


  // send the 'leds' array out to the actual LED strip
  FastLED.show();
  // insert a delay to keep the framerate modest
  FastLED.delay(1000/FRAMES_PER_SECOND);
   // do some periodic updates
  EVERY_N_MILLISECONDS( 20 ) { gHue++; } // slowly cycle the "base color" through the rainbow
  EVERY_N_SECONDS( 10 ) { nextPattern(); } // change patterns periodically

}
Here I see if everything is ok by defining the lavacolors and checking that gets changed to the ocean colours.
For now it works! Now let’s get to the personal palette!
Setting a personal palette
For now what I have is this:
setup(){
  ...
setupMoodPalette();
}

void setupMoodPalette() {
  // 'black out' all 16 palette entries...
fill_solid( palette, 16, CRGB::Black);
// and set every fourth one to white.
palette[0] = CRGB::White;
palette[4] = CRGB::Green;
palette[8] = CRGB::Grey;
palette[12] = CRGB::White;
}
It works, but it’s not personalized. With a bit of work I set this for now:
void setupMoodPalette() {
  // 'black out' all 16 palette entries...
fill_solid( palette, 16, CRGB::Black);
  // decide if this is going to be 1/2/3 colours palete + black
  uint8_t mood_palette_number_of_colours = random(3);
  if (mood_palette_number_of_colours == 0)
  {
    Serial.println("one colour palette");
    // Set random colour
    palette[0] = CHSV( random(255), 200, BRIGHTNESS);
    // Copy it to the 8th position of the palette
    palette[8] = palette[0];
  }
  else  if (mood_palette_number_of_colours == 1)
  {
    Serial.println("two colour palette");
    // Set random colour
    uint8_t Hue = random(128);
    palette[0] = CHSV( Hue, 200, BRIGHTNESS);
    // set the complementary
    palette[8] = CHSV( Hue + 128, 200, BRIGHTNESS);

  }
  else
  {
    uint8_t Hue = random(85);
    Serial.println(mood_palette_number_of_colours);
    Serial.println("three colour palette");
    // Set random colour
    palette[0] = CHSV( Hue, 200, BRIGHTNESS);
    palette[5] = CHSV( Hue +85, 200, BRIGHTNESS);
    palette[10] = CHSV( Hue +170, 200, BRIGHTNESS);
  }

}
I tried to use random8 or random16 but I always got the same result so I switched back to old random() function.
The idea is to set if there is going to be 1,2 or 3 colours. If one, random color:
example
If there are two, it takes 2 complementary colours.
And if there are three, it takes a complementary triad.
Modifying the pulse
It’s pretty simple but for now it works the empty spaces are useful. My idea it’s to have a palette generator so once you start the game, you have a new “set of colours” because (spoiler alert) the entity of the Monolith is different.
Buuut it’s also interesting to show another kind of tension so Cool
This is with bpm = 14
~~If I change the value of the variable “BeatsPerMinute” I can see diferent paces.
uint8_t BeatsPerMinute = 14;
14 bpm seems interested.~~
No the bpm it’s not what controls that.
It controls another pulse. See what happens when the BeatsPerMinute is on 124:
Buuut it’s also interesting to show another kind of tension so Cool
Ok, I have some personal palete doing sinus, and that’s cool. Now I see that they use some kind of “fract8” thingy that seems numbers but they are not.
This is what I got now:
void showLEDs() {
    // Call the current pattern function once, updating the 'leds' array
 //gPatterns[gCurrentPatternNumber]();
 // Serial.println("rizando el rizo");
  uint8_t BeatsPerMinute = 124;

  uint8_t beat = beatsin8( BeatsPerMinute, 64, 255);
  for( int i = 0; i < NUM_LEDS; i++) { //9948
    leds[i] = ColorFromPalette(palette, gHue+(i*2), beat-gHue+(i*10));
  }

    // send the 'leds' array out to the actual LED strip
  FastLED.show();
  // insert a delay to keep the framerate modest
  FastLED.delay(1000/FRAMES_PER_SECOND);
   // do some periodic updates
  EVERY_N_MILLISECONDS( 20 ) { gHue++; } // slowly cycle the "base color" through the rainbow

}
You can read more here but it’s about a fract8 represents a fraction between 0 and almost 1 where 0 is 0 and 255 is 255/256.
309 // typdefs for fixed-point fractional types.
310 //
311 // sfract7 should be interpreted as signed 128ths.
312 // fract8 should be interpreted as unsigned 256ths.
313 // sfract15 should be interpreted as signed 32768ths.
314 // fract16 should be interpreted as unsigned 65536ths.
315 //
316 // Example: if a fract8 has the value "64", that should be interpreted
317 //          as 64/256ths, or one-quarter.
318 //
319 //
320 //  fract8   range is 0 to 0.99609375
321 //                 in steps of 0.00390625
322 //
323 //  sfract7  range is -0.9921875 to 0.9921875
324 //                 in steps of 0.0078125
325 //
326 //  fract16  range is 0 to 0.99998474121
327 //                 in steps of 0.00001525878
328 //
329 //  sfract15 range is -0.99996948242 to 0.99996948242
330 //                 in steps of 0.00003051757
They use it here, for example:
void rainbowWithGlitter()
{
  // built-in FastLED rainbow, plus some random sparkly glitter
  rainbow();
  addGlitter(80);
}

void addGlitter( fract8 chanceOfGlitter)
{
  if( random8() < chanceOfGlitter) {
    leds[ random16(NUM_LEDS) ] += CRGB::White;
  }
}
As I said it’s kind of messy all the layers that they have for this. xD
In this case the probabilities of getting a glitter are 81/256, more than a 25%. And it will light up one between 0 and the number of leds. (I think they use the 16 version because even if it takes more ram, it’s not the same value than random8).
Sending a message to change the palette and connect leds with the pad
Ok, the idea now it’s to effectively use the websockets to change the palette.
So let’s make use of the tryit editor of w3schools, because since everything is encapsulated in one html the preview should match. Also let’s make some fancy buttons with this info about the css
This is how it’s looking right now:
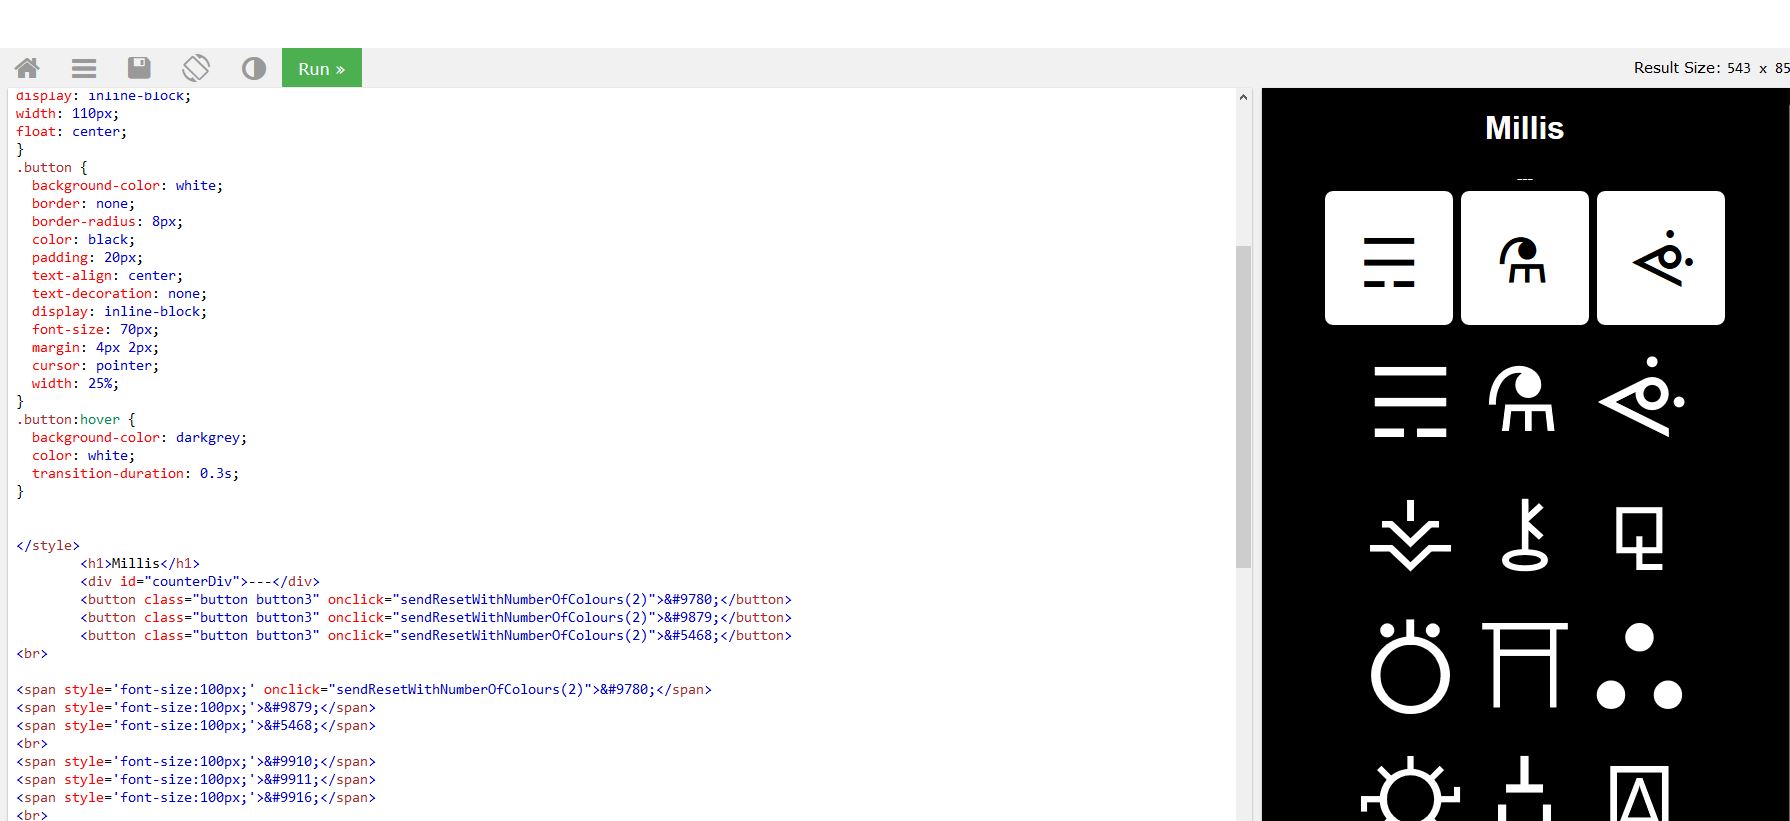
And with hover effects!
Now the idea it’s to send a message. Of course for that I have to test it, but the code is at follows:
html:
<button class="button button3" onclick="sendResetWithNumberOfColours(2)">☴</button>
<button class="button button3" onclick="sendResetWithNumberOfColours(1)">⚗</button>
<button class="button button3" onclick="sendResetWithNumberOfColours(3)">ᕜ</button>
javascript:
function sendResetWithNumberOfColours(numberOfColours)
{
console.log('sending reset and this number of colours: ' + numberOfColours);
myDiv = numberOfColours;
connection.send("Reset"+ numberOfColours);
};
Now let’s package this and see if the message arrives and I can parse it properly on the ESP32 point.
This what I’ve added. Note that I have to change the include order to include first the led include before the websocked include because if I don’t the websocket won’t know what it’s the variable “uint8_t mood_palette_number_of_colours”
This is what I’ve added:
void ProcessRequest(AsyncWebSocketClient * client, String request)
{
  if(request == "")
  {
  String response = GetMillis();
  client->text(response);
  }
  else if(request == "Reset1"){
    Serial.println("Received reset 1 color palette");
    mood_palette_number_of_colours = 0;
    setupMoodPalette();
  }
    else if(request == "Reset2"){
    Serial.println("Received reset 2 color palette");
    mood_palette_number_of_colours = 1;
    setupMoodPalette();
  }
      else if(request == "Reset3"){
    Serial.println("Received reset 3 color palette");
    mood_palette_number_of_colours = 1;
    setupMoodPalette();
  }
      else {
        Serial.println("Received message: " + request);
      }

}
I put several serial.println because, well it’s still testing xD
I also have to add a new variable: warmupended to check if the warmup animation has ended or not.
I found a problem in the javascript that the connection was not defined so the message is not sent. So let’s rewrite that.
And now it doesn’t work so let’s rework al the led because in one of the FastLED.show(); it reboots everything.
So let’s forget about the entrance animation for now.
It works (once I fixed one “conection” for a connection with two n).
Connect from the chip to the web.
Now let’s go backwards and try to send and parse a message from the chip (sent by serial)
For now I’m using the “SerialEvent” to avoid “delay()” clauses. It’s on the examples -> communication.
I also take notice of what Benjamin has done also with the basic websocket stuff here and the asyncwebsocket documentation here. It’s important that I’m using AsyncWebSocket so I finally use textAll for communication.
This is the code.
loop()
{
  serialEvent();
}

void serialEvent() {
  while (Serial.available()) {
    // get the new byte:
    char inChar = (char)Serial.read();
    // add it to the inputString:
    inputString += inChar;
    // if the incoming character is a newline, set a flag so the main loop can
    // do something about it:
    if (inChar == '\n') {
          //show the string:
          Serial.println(inputString);
          // send the string through a broadcast:
          ws.textAll(inputString);
          // clear the string:
          inputString = "";
    }
  }
}
And this is the result!
Doing the gamification
Ok, right now I have established the connections for everything so now it’s time for the first real prototype.
So the idea it’s to have the code in plain javascript. I don’t know if it’s the best way to do it, but let’s give a try.
The plan it’s to create a startGame function and a a object called game to store all the variables that are just for the game.
var game = {
  started : false,
  coloursInPalette : getRndInteger(1,3),
  status : "breathing",
  annoyance : 0,
  timesTouched : 0,
  rhytmsMatched: 0,
  buttonMap: []
};
I took some of the variables from the twine. Thanks twine!
Since the game is to match faces with buttons, I want to randomize it so everytime the face you want to touch is different.
For randomizing the array of buttonmap I’m using this
This even too long for me to paste so I link here the html to be seen or downloaded
For now I achieved to make the very first part of the gamification. Get the interest of the Monolith and once you touch the monolith and one (random but especific) button, the monolith gets interested.
Face test
[To fill]
Setting a capacitive sensor
I know that the calibration will be difficult but let’s give it a try. There is also a motion sensor that I can use to detect the movement.
I tried to use this tutorial and sigh another library called capacitivesensor… that doesn’t work on ESP32.
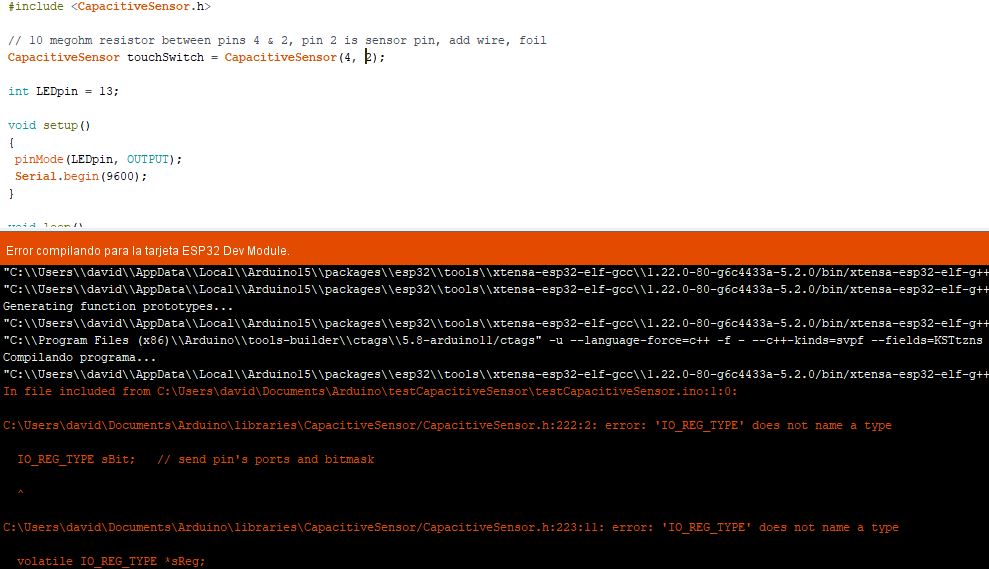
When the error is in the header thingy is probably something inside the library
I’ll try this instead. This seems to work better. It seems that the ESP32 has embedded touch pins. Yay!
For the name of the touchpin I still use the number of the pin of “GPIO”, in this case 12.
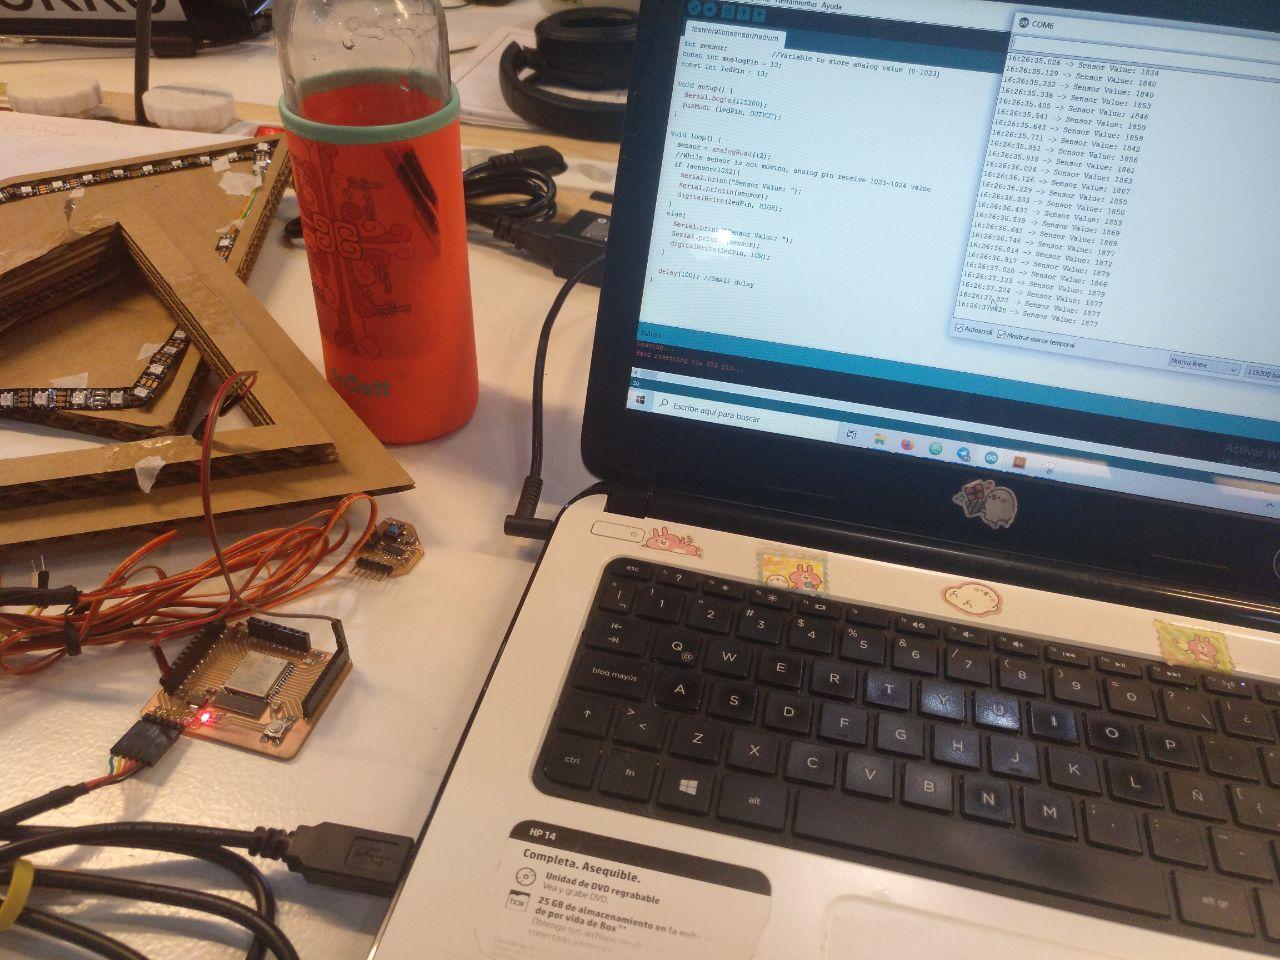
It seems that it works but it needs improvment… humm…
Bruno sent me this link were are some tips to improve the capacitive sensor. But now I think I’m more leaning to a mechanical sensor.
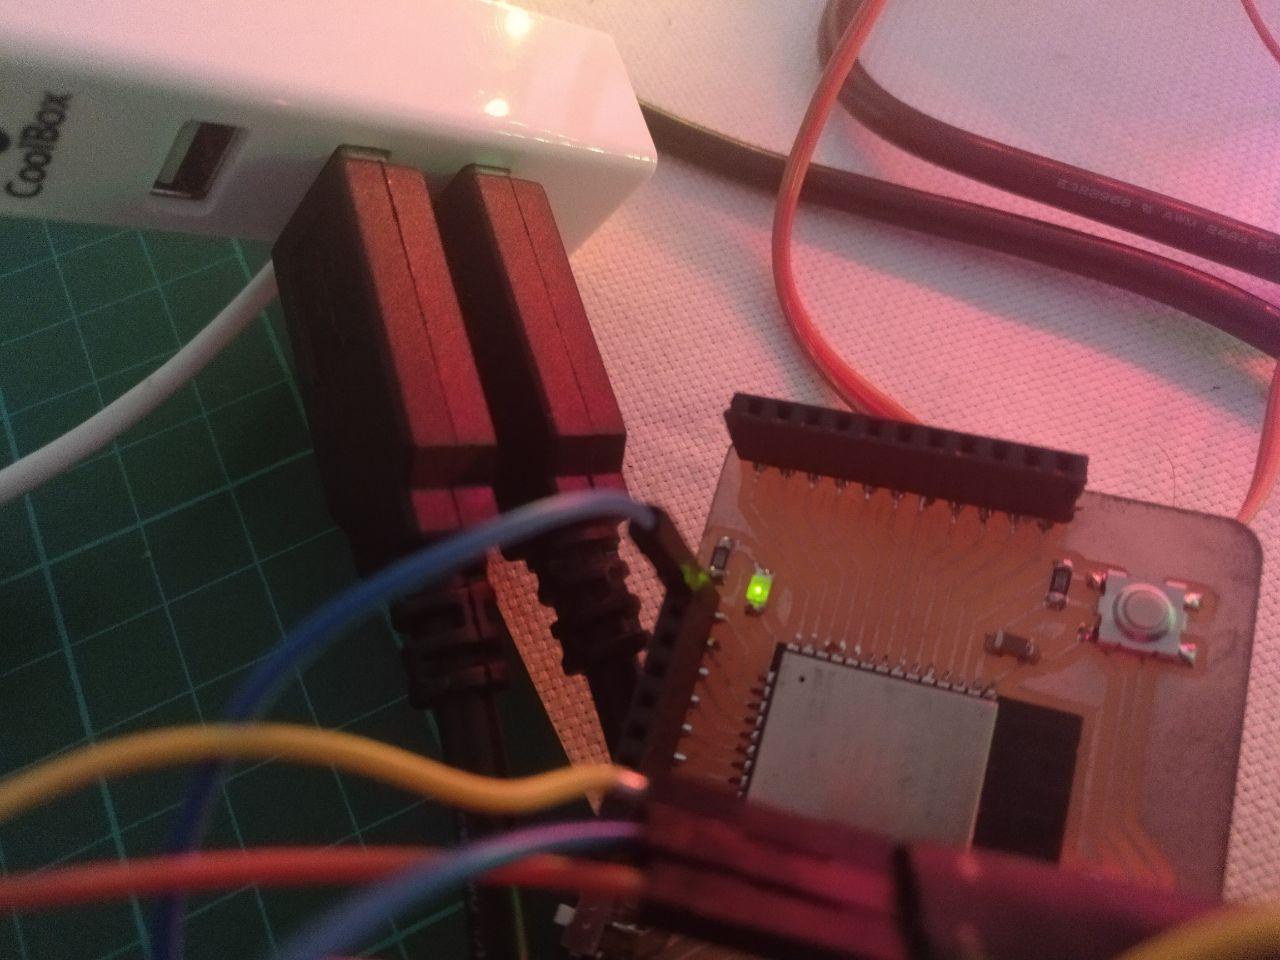
It still doesn’t work properly. For example here you can see the setup (only with the barduino)
I mean if you touched the aluminium field, yeah, it works, but it doesn’t sense through the cardboard nor the acrilic plastic of 3mm.

Setting a vibration sensor
One of the sensor was a vibration sensor.
This one:
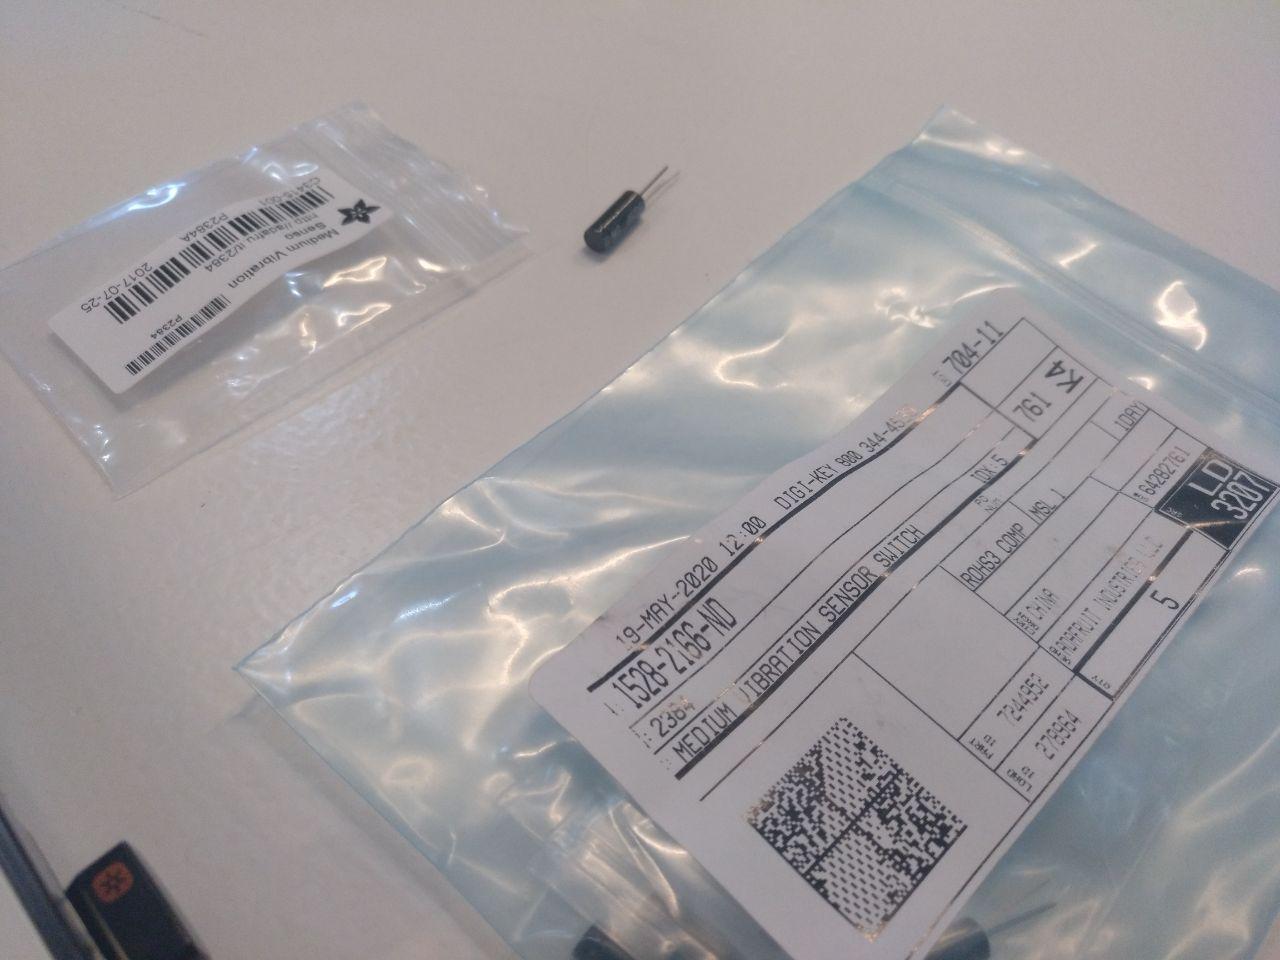
Looking in google I find this instructable and it seems that’s only a resistor, so let’s try it.
This was the setup
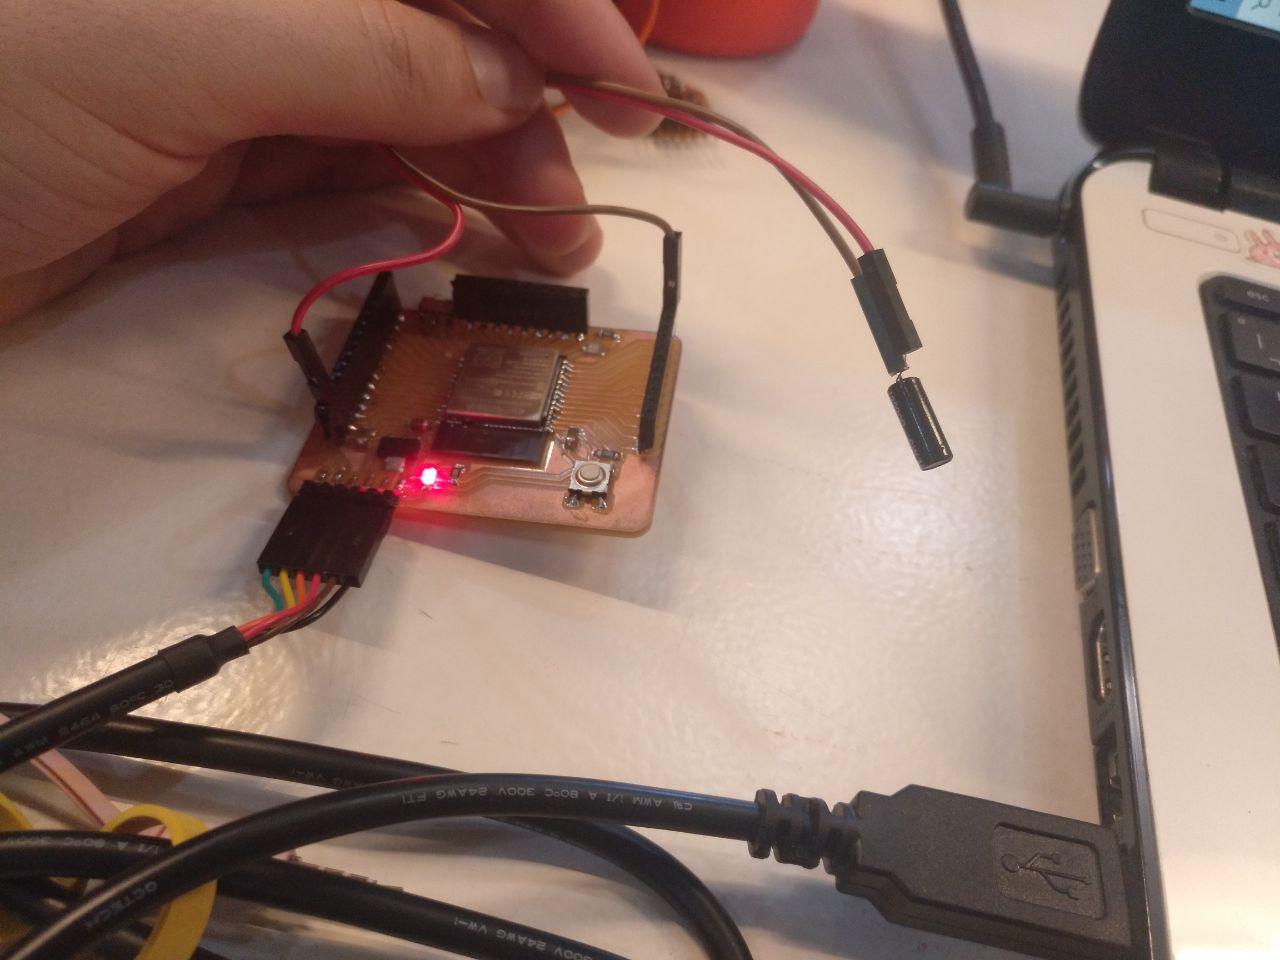
And the results were… well, disappointing
I had also the same problem. The vibrations doesn’t seem very stable. And also it takes some noise that keeps there, so I don’t know what to do next.
Using finally a good ol’ switch
So finally I decided to try to use a switch. Connect a data pin to a pulled-up resistor and make a switch connecting to ground. When the button is pressed, the connection to ground it’s on and I can read it.
It took a long time to manage it but here is the hardware part
Thinking of some changes on the board.
For some time I planned to do a modular boarding. A central ESP32 and some modular ATTiny to control each face. Now even if I think it’s a good idea to make a module, I don’t believe that I have enough time to achieve that in time.
Board: Using a shield
So finally I decided that because of time reasons I could make a shield for the Barduino (that’s what I’ve been using all along for this project) and get away with it. I have enough pins to control the 7 faces and the 7 buttons. So let’s get through it.
The shield stills needs to be redone for now. (spoiler alert) but at least it works.
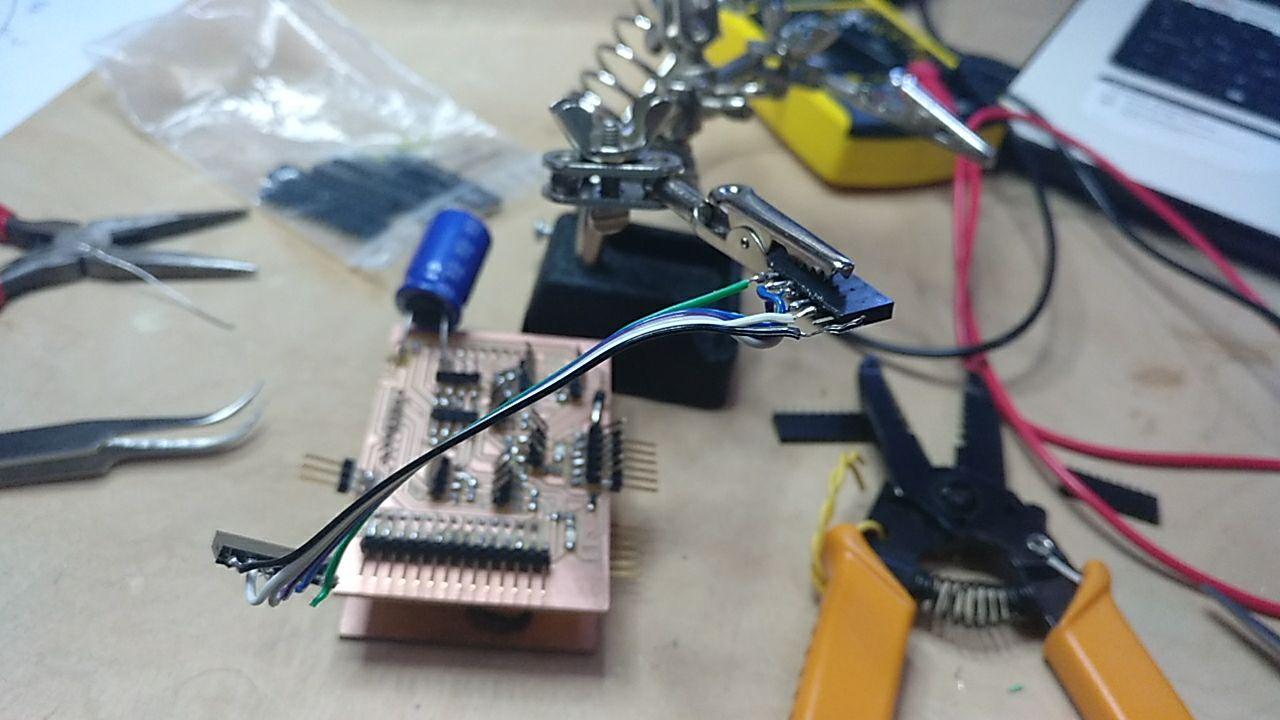
Testing the power input
First I was going to need to know what I’m going to use as a power supply I thought of a LiPo battery, so with Eduardo we made some measurements regarding the capacity of the processor and the LEDs (that are supposed to work with 5V)
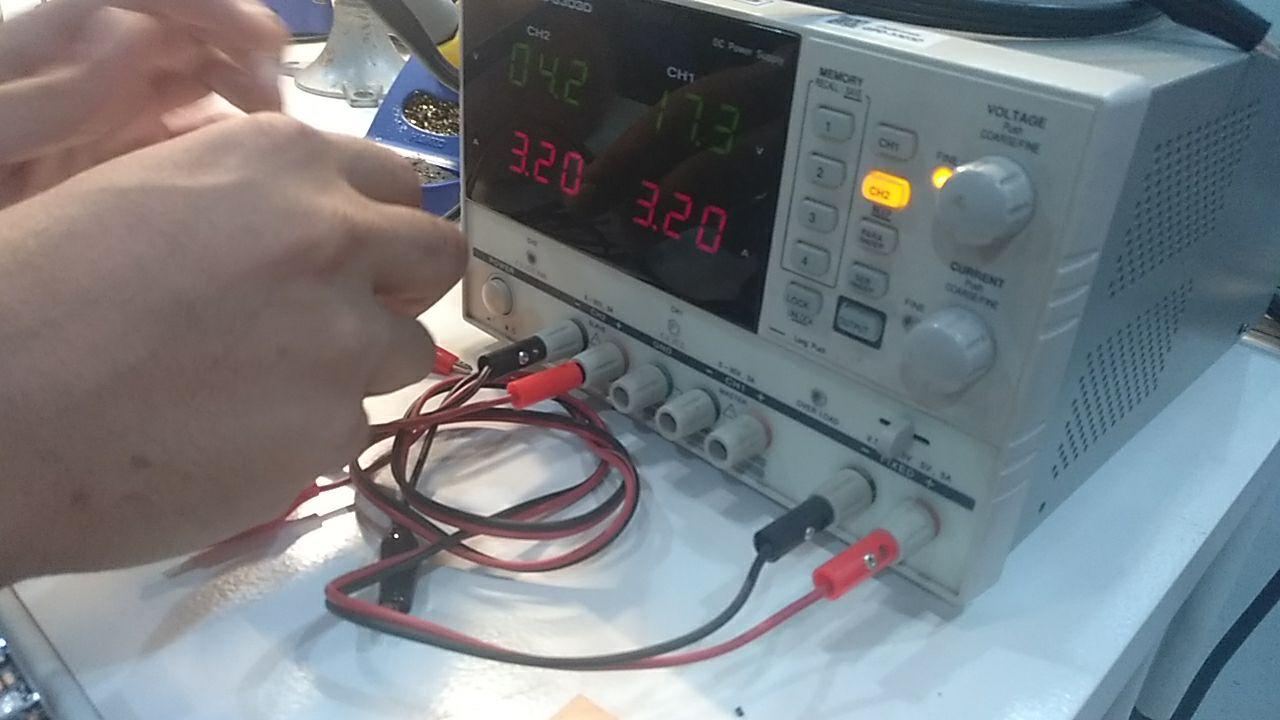
We concluded that the LIPO would need to work between 4.2 and 3.7V to work.
That would be connected to the 5V of the Barduino (that the integrated voltage converter would transform into 3.3V) and the 5V of the addressable LED. With that it works and the signal works well.
But in the end…
In the end I end up using a 5V USB charger with a FTDI cable. The LEDs could be fed with the 3.3V from the barduino because if I connected the 5V from the battery the signal was not strong enough.
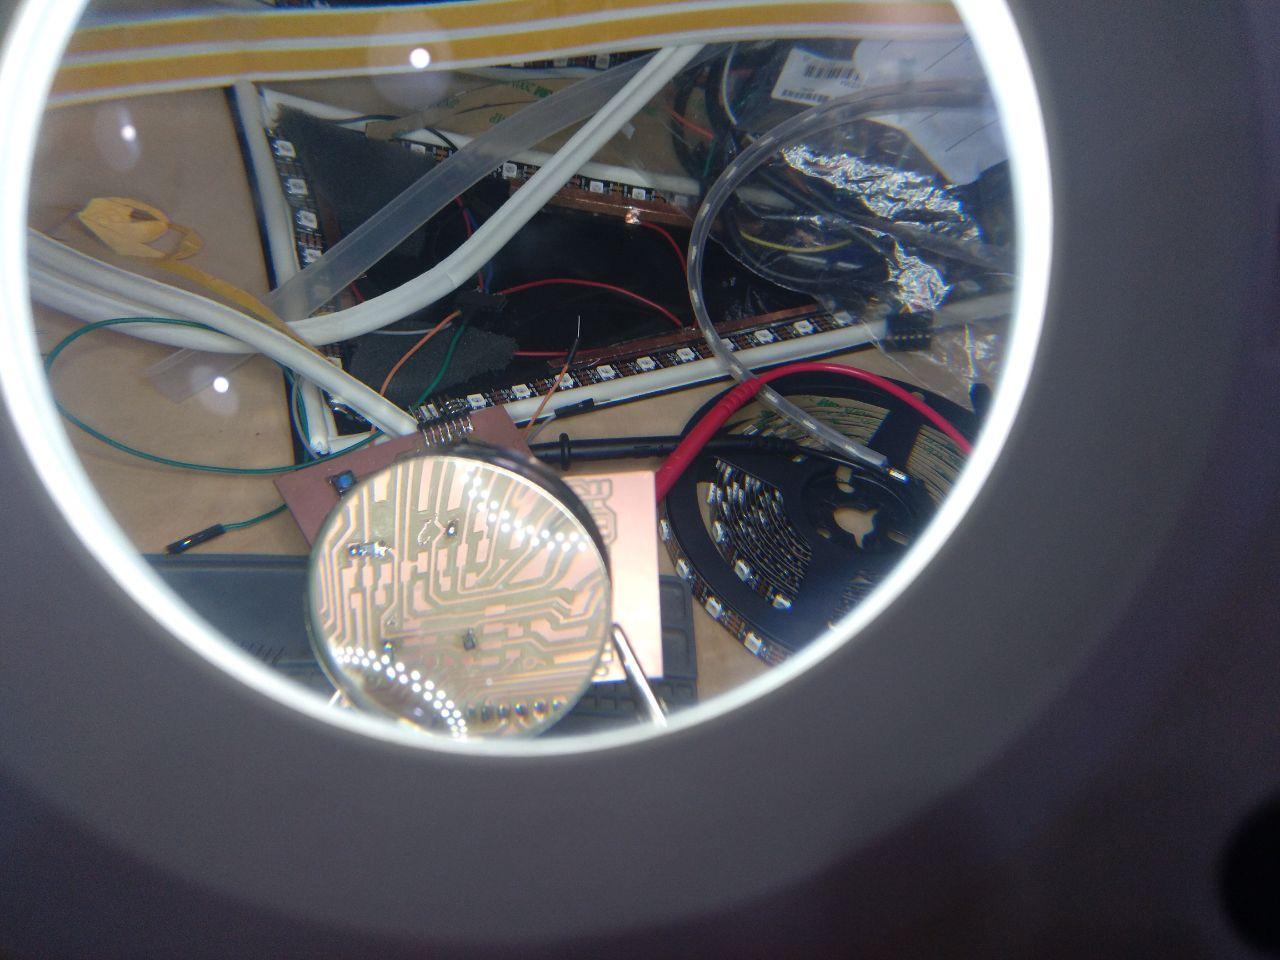
Concept and schematics
Ok, then let’s explain this mess:

mess01.jpg
We have 7 faces and each of the need:
-A Ground pin for the addressable LED -A Data Pin (that should go through a 500Ohm resistor) -A 5 V Pin -A Data Pin for the button. That pin should be pulled up to 3.3V
In the first draft I also added what it’s advised of putting a capacitor between the ground and the 5V. But once I made the design and the tetris they told me that with one big for the 7 faces should be enough.
So this is how it looks:
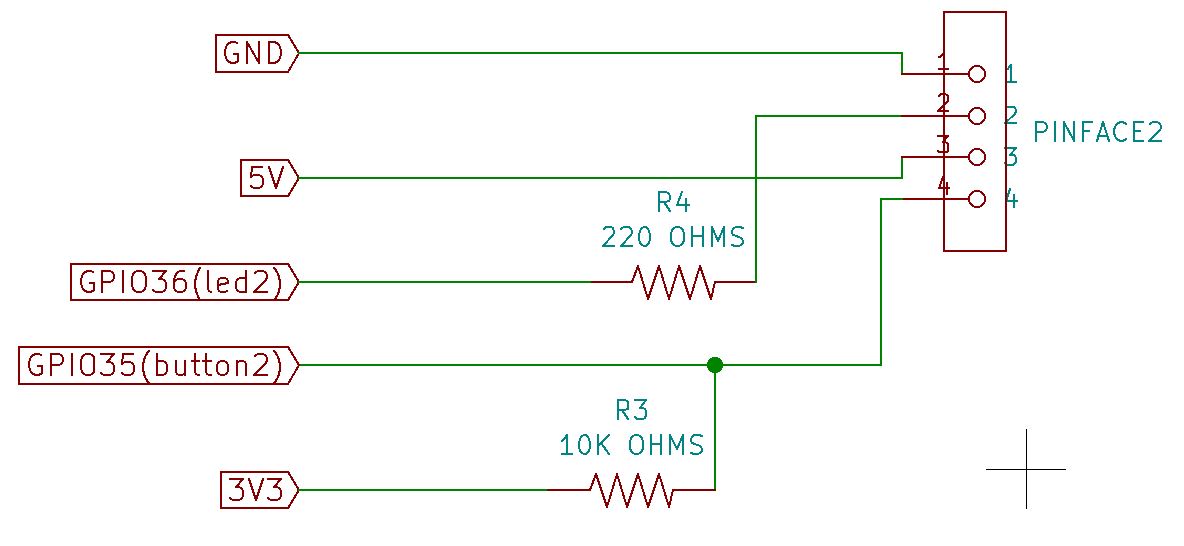
one connector
I finally put 8 connectors in case I add another face I don’t need to change the shield.
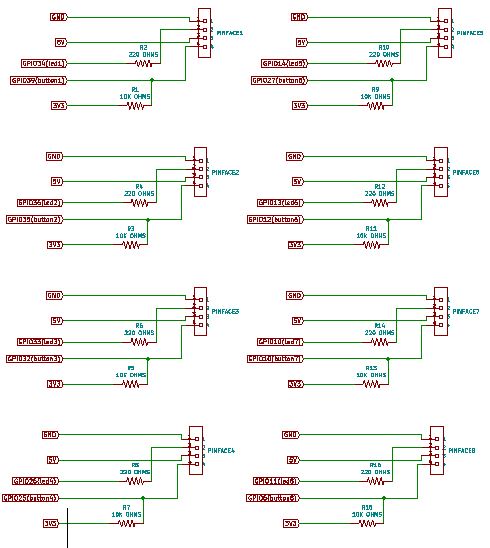
That explains half of the mess
This is also the one big capacitor line:
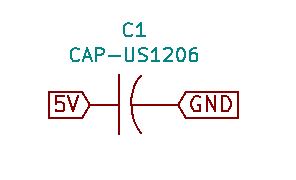
capacitator gonna capacitate
All those data pins come from he connectors of the barduino. So I have to connect them. I added a couple of connectors so the spare pins are still available to connect things. Since it’s a prototype I it’s better to keep things open.
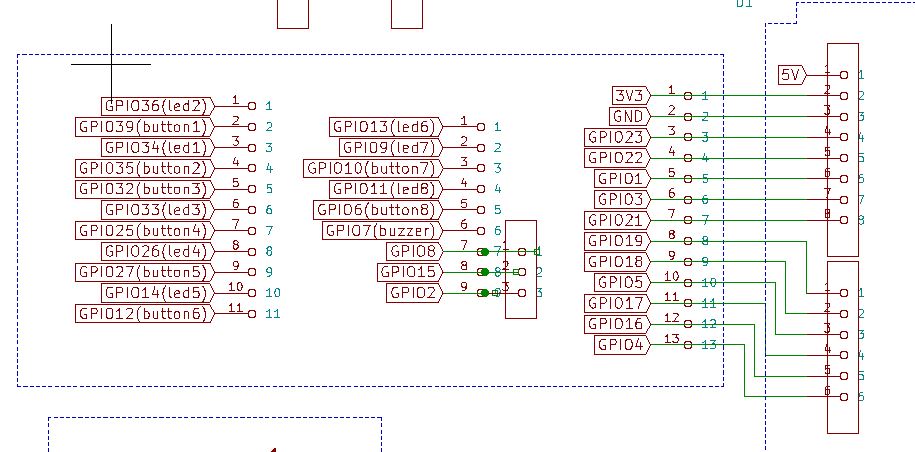
This means “connection to down on the shield and other connection to future connections”
I’d like to have the spare pins free so if I add something later. So I added that.
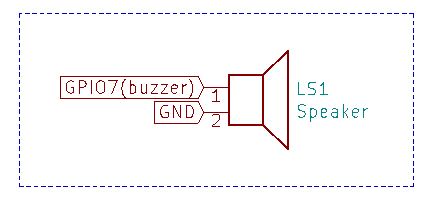
I like that there is a speaker symbol
Also for the battery I needed the help of Arman to make the footprint of the LIPO battery. I included a diode to ensure the proper way of the current.
Besides I added a couple of leds indicators so I know that the 3V3 and 5V are working just fine
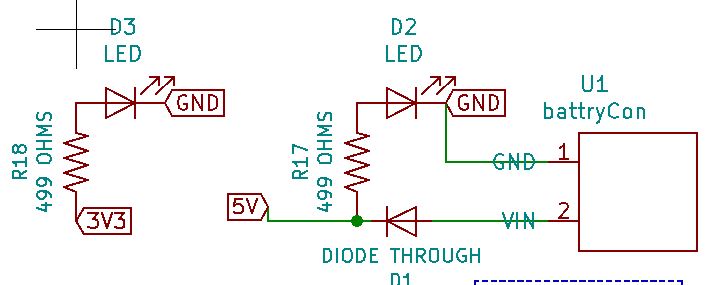
battery section
Last but not least I added a couple of FTDI sockets (that share the Ground and 5V) so I could connect back down to the Barduino with the 5V of the battery and connect directly from the shield.
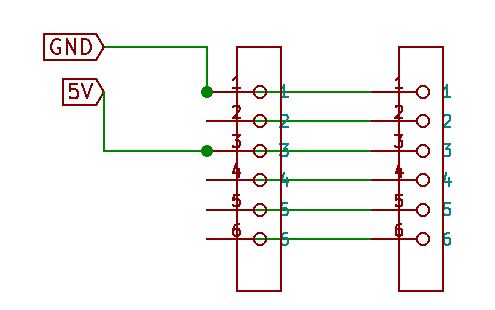
This didn’t work properly (because the connector female-female that I did with hurry seemed to be less than perfect) but I put it into the design.
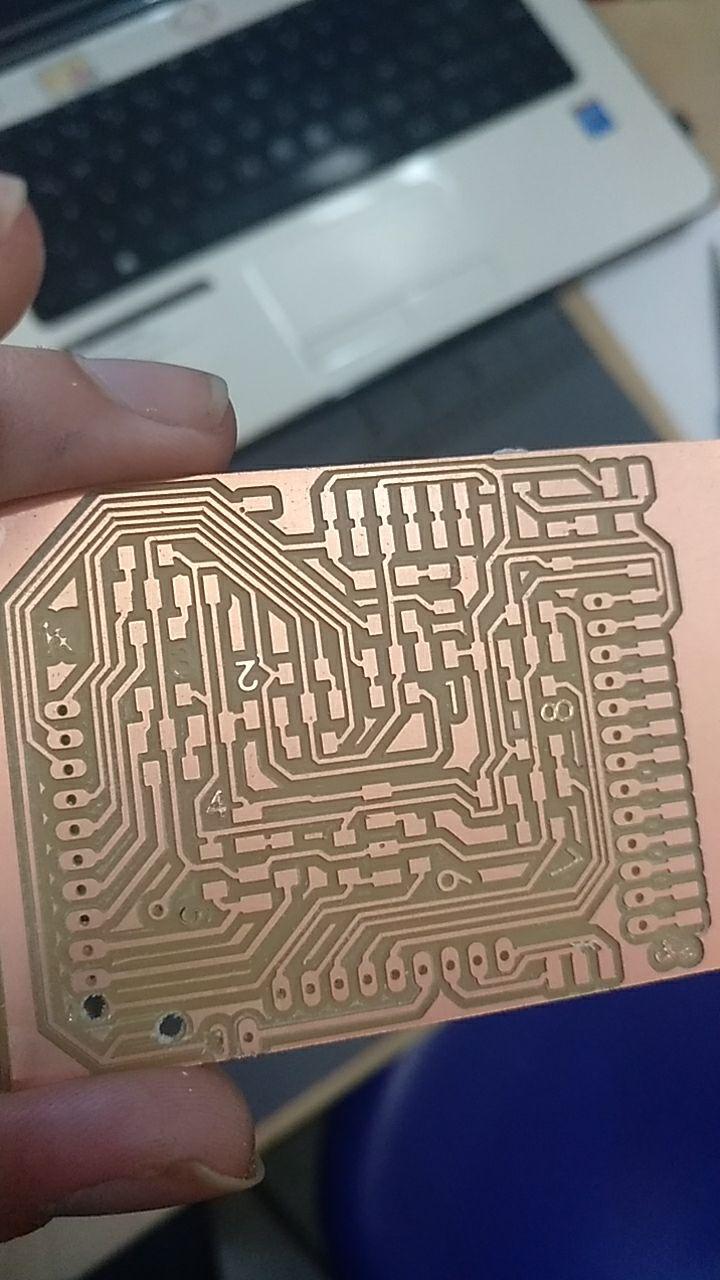
Producing the board
So now to produce the board. I use Kicad because it’s what we have learnt and because GNU. But I still find it a bit messy even comming from an AutoCAD enviroment.
This was the first draft with 8 faces (I put one more face because why not) with the capacitor, the 500 Ohm resistor and the 10 K Ohm pull resistor.
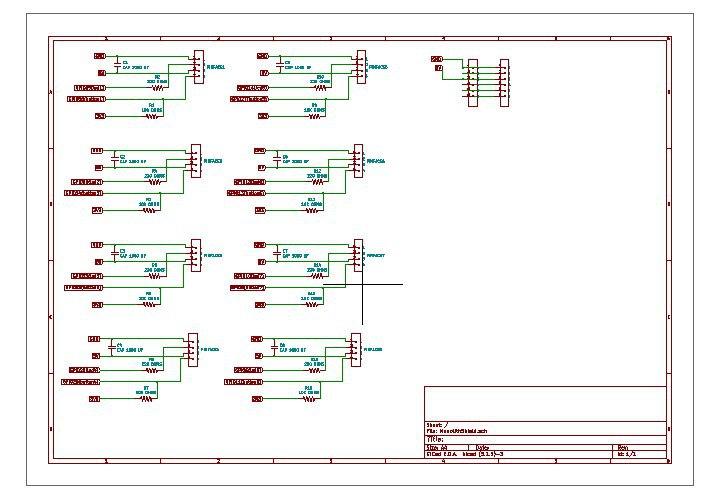
Very easy to understand (no)
I added all the pins and footprints I need. And once I’m done it’s time to:
UNTANGLE THE MESS

Mess: UNTANGLED
I should have seen the instructor first because having more o less capacitors it’s quite time changing everything in place. I also measured the board size (70x50 mm)
This was kind of the way I’ve found to repeat each time with the capacitor, the 2 resistors and the footprint for the connectors.

bip bop
When I showed this the instructors (I think it was Oscar) told me about just put one capacitor between the 5V and the ground and it will be fine.
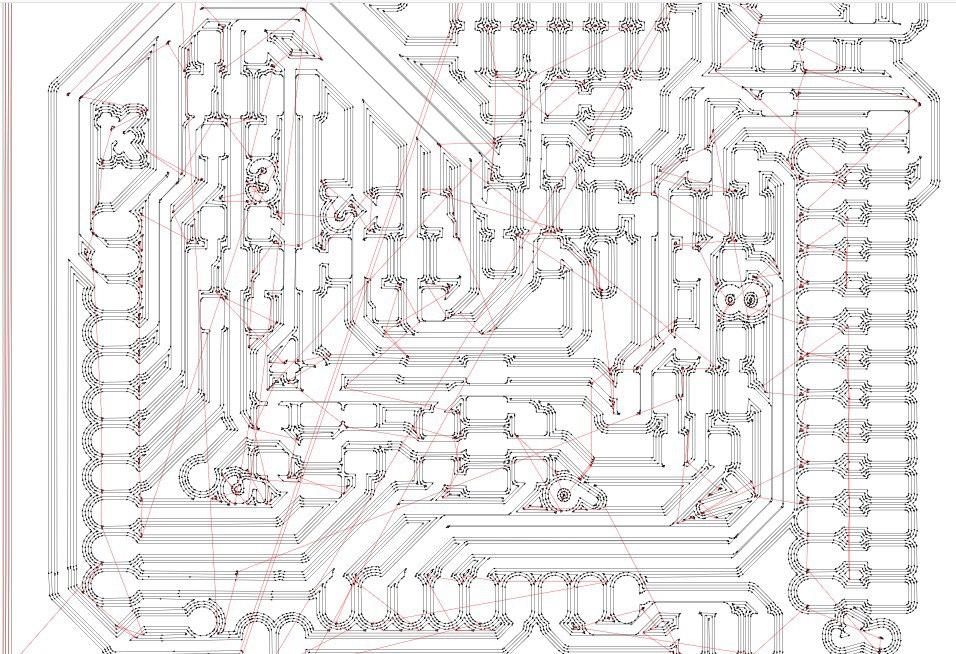
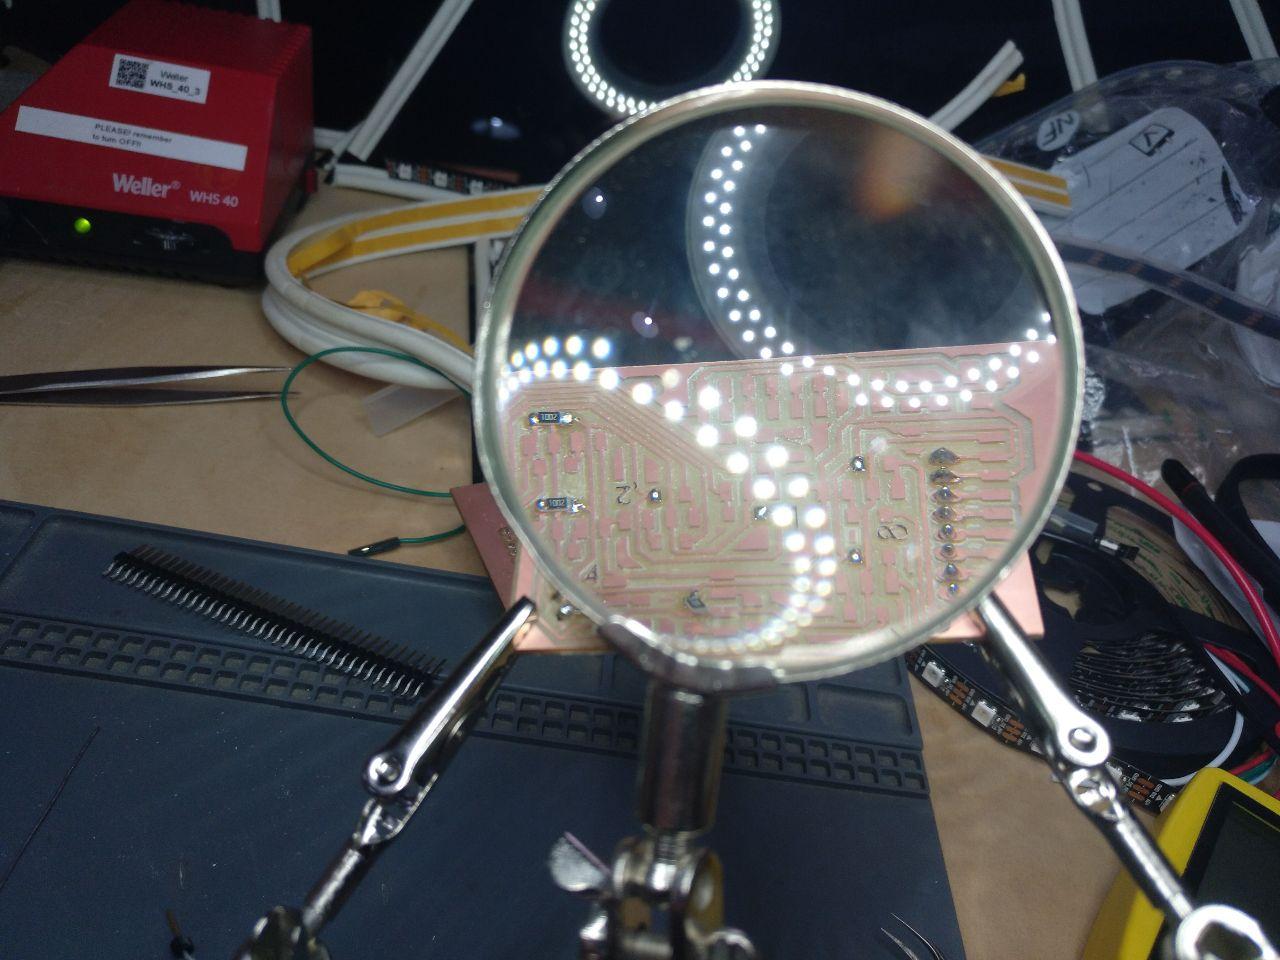
Once I’ve done that changes is time to go to the board and…
Test on mods:
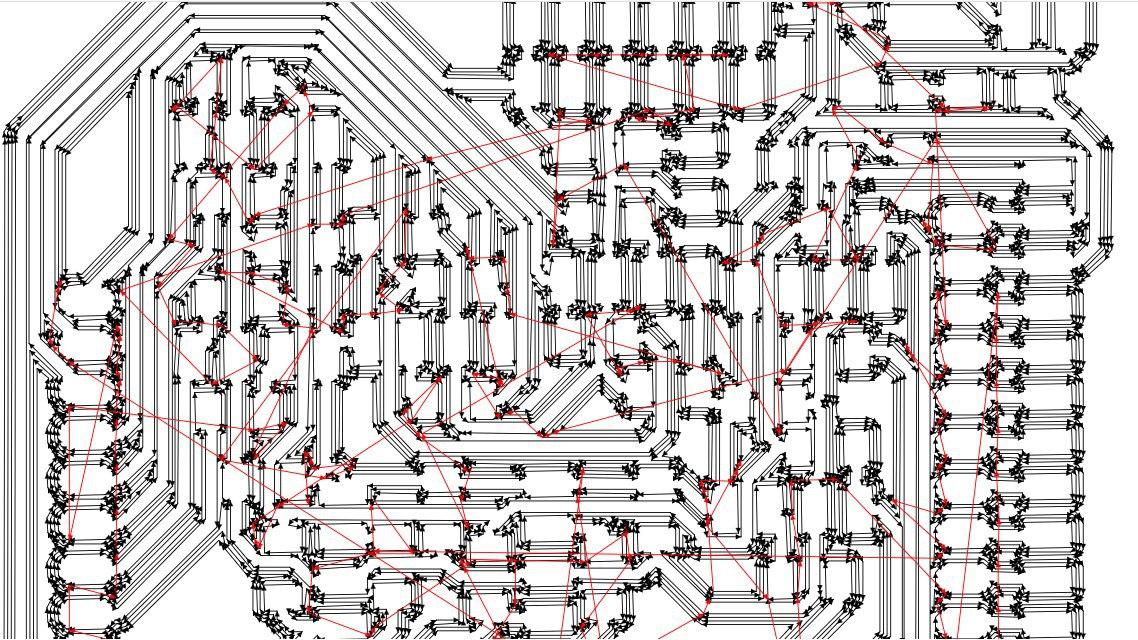
liines
I kind of like how they look in the preview so I took one more screenshot.

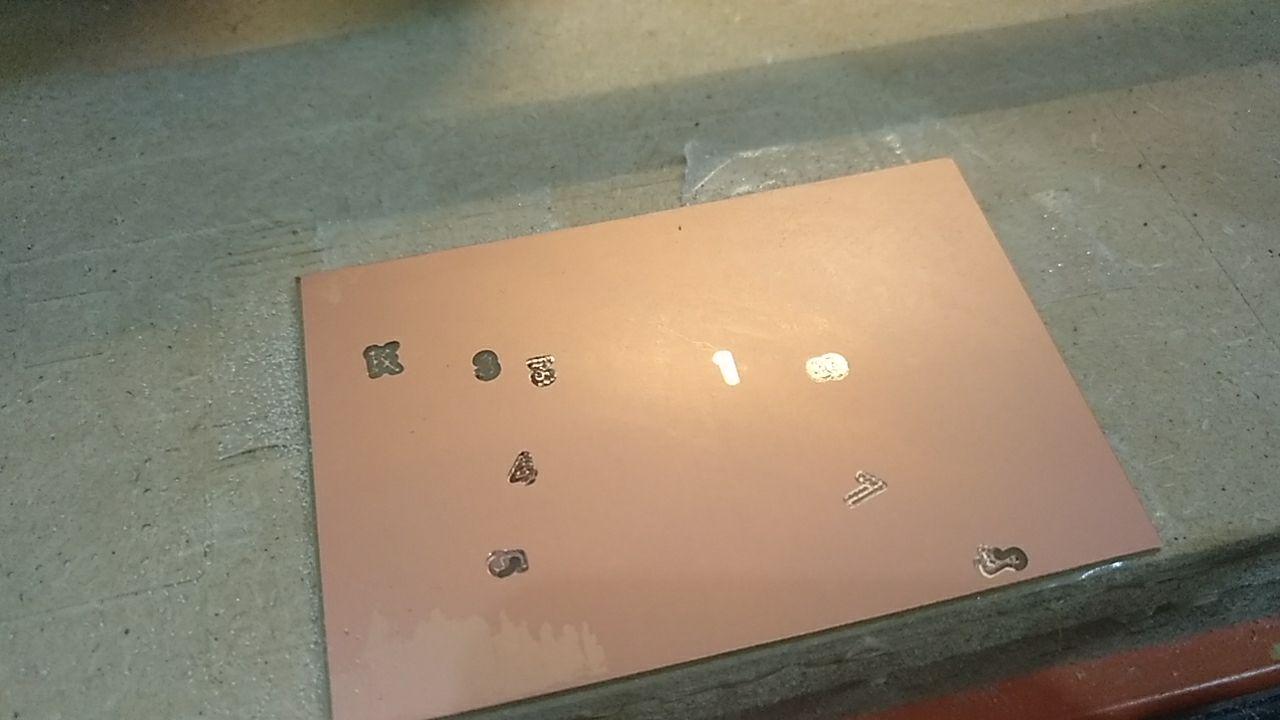
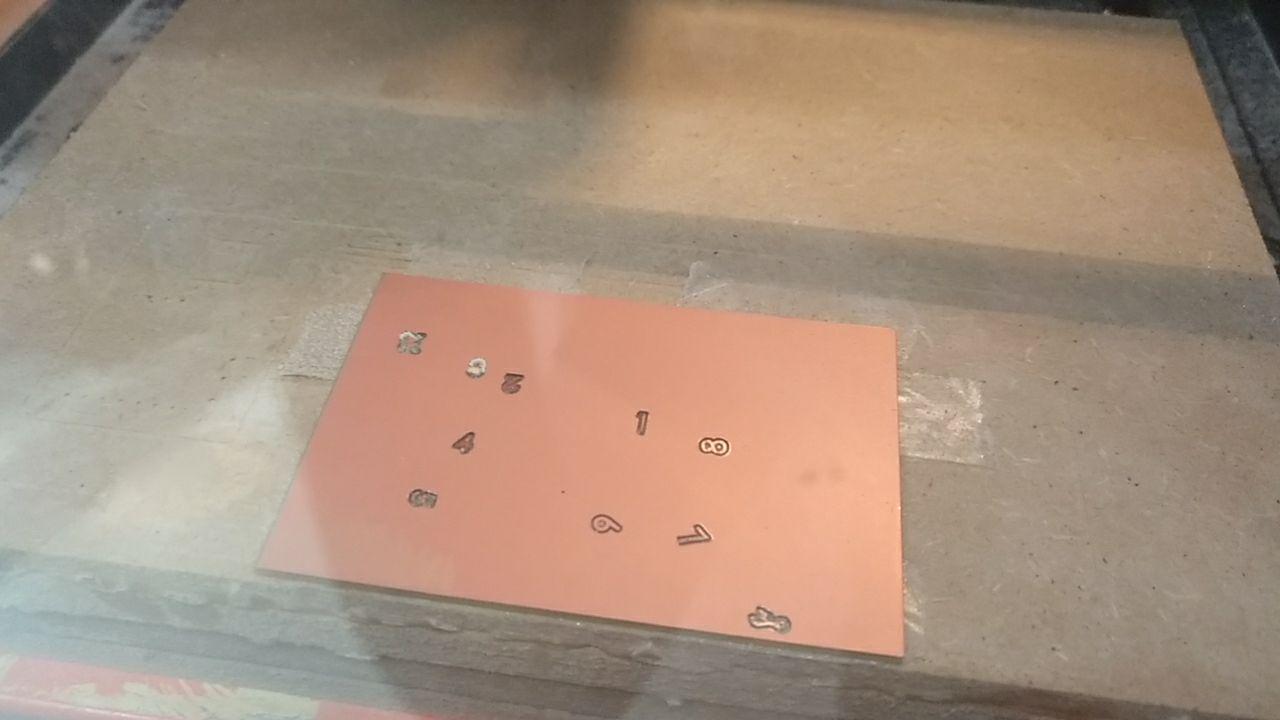
Once I’m done I added a couple of symbols in illustrator and numbers to know which face is which.
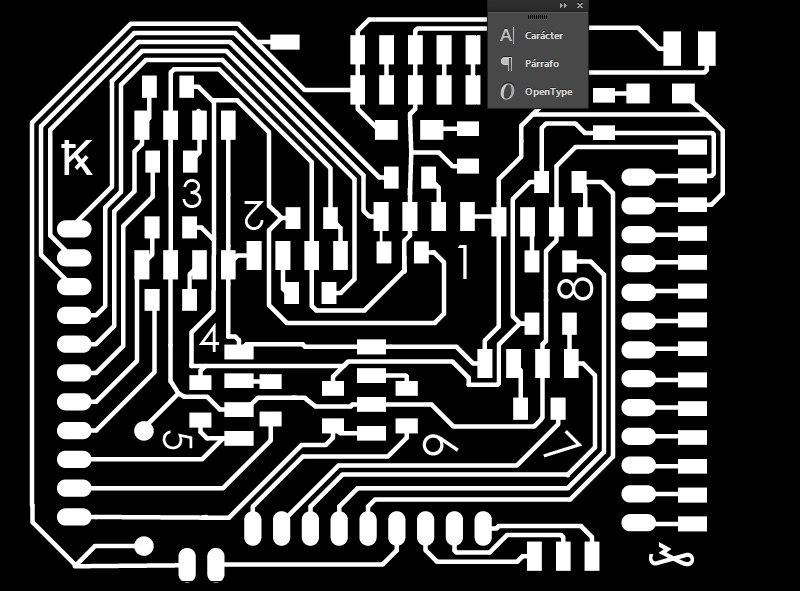
But when I go back to mods there were some lines that they fade just because. (you can see in the bus on the left top corner)

incoming DRAMA
But I didn’t know, so I made first a test with just the numbers since it was going to be easy to remove and if it fail it won’t be any kind of drama.
This is because we have the problem with the SRM-20 from a time now that instead of cut the copper it just polish it.
After adjustments
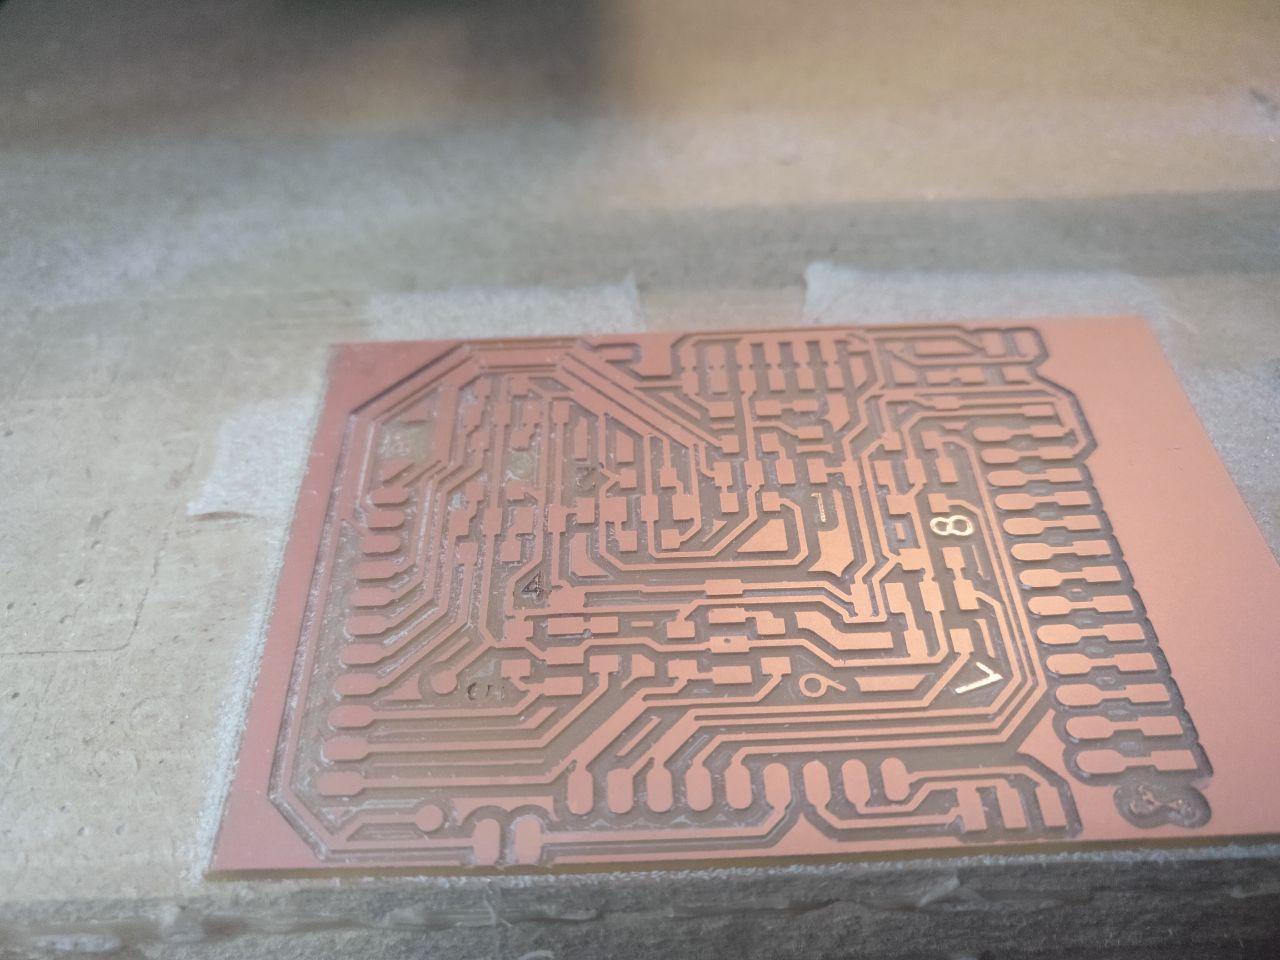
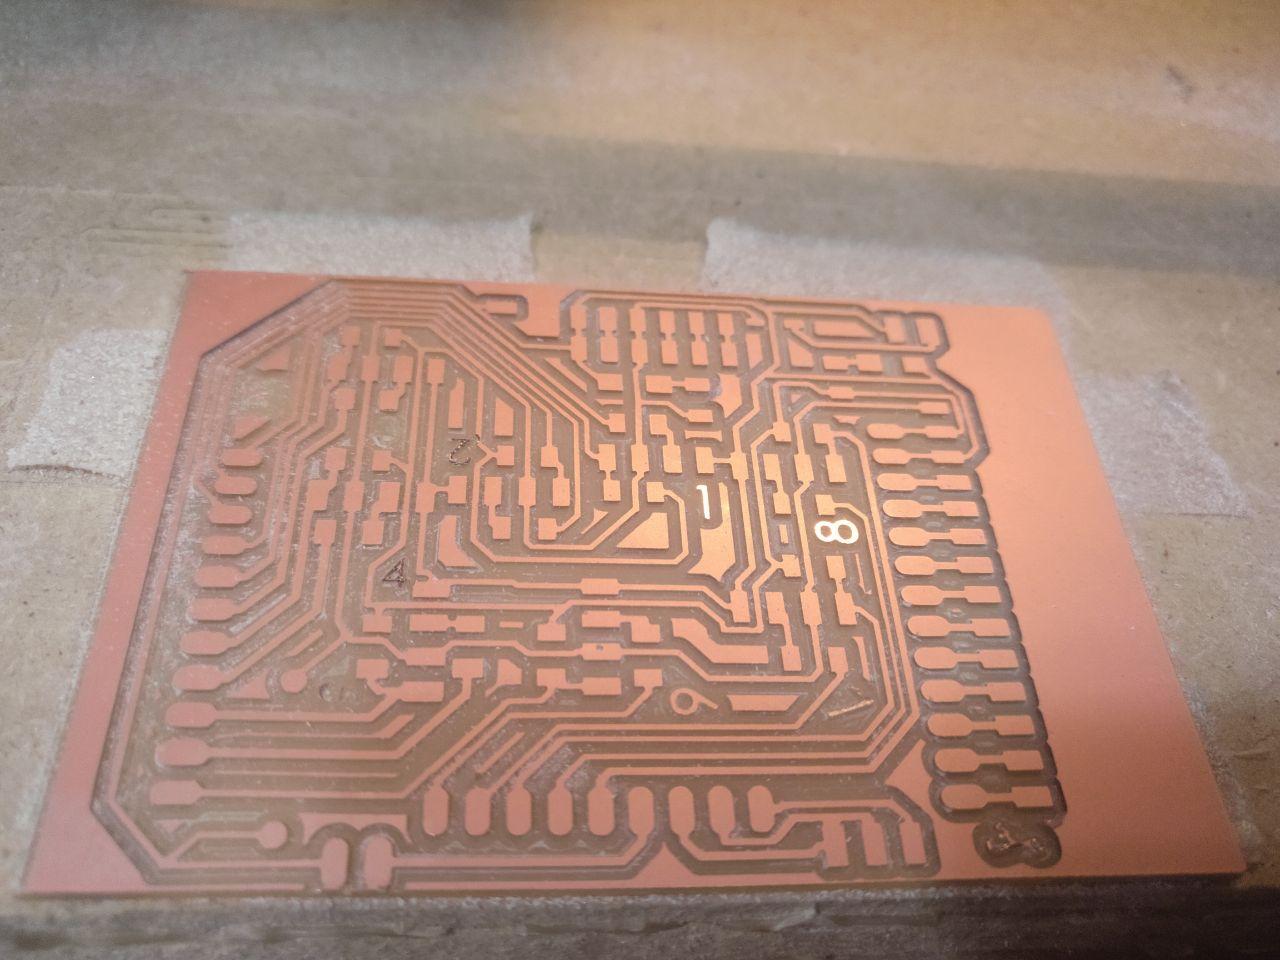
So after the adjustments I send the big file.
Problems producing the board
Once the 1st job of three ended. (Before doing the holes and de final cut) I realize that there are some traces theat they should not go together.
And they are too much to just cut them. So I send another file with only the traces I have to repeat. So I don’t waste (too much) time.

Once I do this and even with a couple of traces that it was easier to cut by hand (in the bottom right of the photo) I send the files for the holes.
And I messed a couple of the holes. I had to redo the file because when doing the mods I put the inverted png.
They look like bullet holes
Keep on going. WE HAVE A DEADLINE
But show must go one because of the deadline. So let’s start soldiering!
starts montage of soldiering with a version of Eye of the Tiger
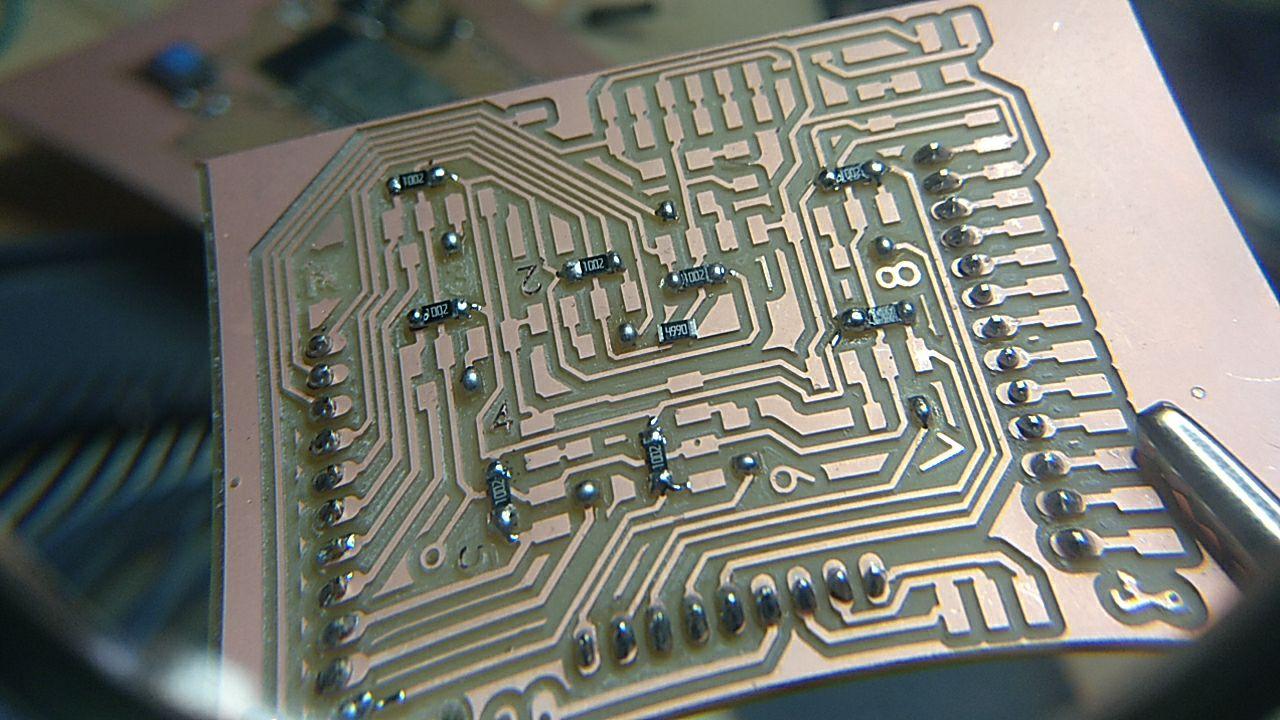
Redoing the barduino
Once I made the shield I noticed that I have my barduino soldiered witht he pins in the other way around. So I had to unsoldier and soldier it again in the other way. Here is the process:
Process
I also needed a couple of jumpers because the traces were to weak after this… surgery.
And I also did a connection between the shield and the barduino so I only need to connect things to the shield. That should be practical.
didn’t go well
And this is the final result.

It seemed that it worked but… not yet…
Problems with the board now the FORBIDDEN PINS
Ok, I read the specifications but it seems that there were several pins that I was using that they were not good to send data signal or read them and being pulled up. Some of them I believe that they even reset the ESP32.
So… I had to test all the pins one by one so I find some suitable pins for the data pin of the LEDs and the buttons. Sigh.
Then I wrote all down and I make the mix and match with jumpers. Very ugly.
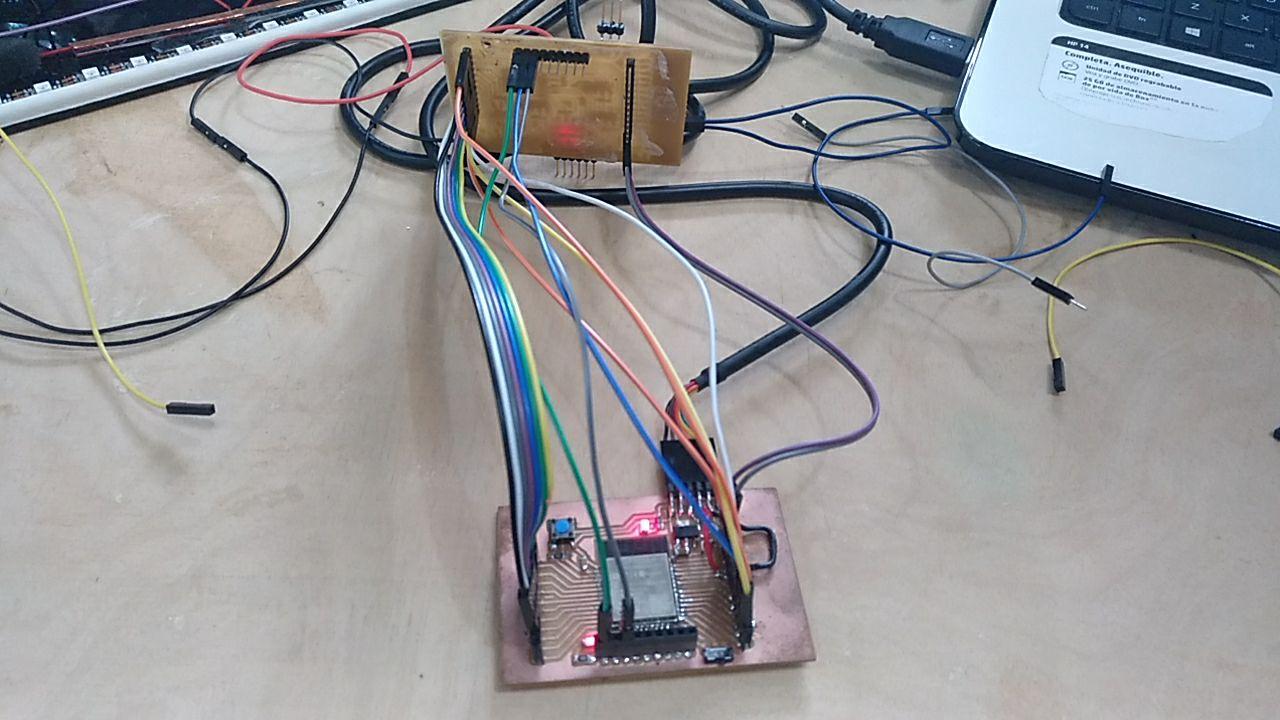
Ugliness
But it worked. And the clock it’s ticking so I put “redo the shield with the proper pins” in the to do list after the presentation.
Programming: using events
I’m going to use an abstraction to handle the buttons: In this case this library seems cool.
I used this example and it seemed to work. I used the const int spinwheelClickPin = 18 and ignored the other.