
My notes :
For 2D designing I'm comfortable in working with photoshop & illustrator, and being in the Lab
I've already worked a bit with inkscape.
So my interest was in starting with a 3D design program Blender.
It is an open source 3D design program, which is also pre-installed
on the computers within our FabLab.
Installation via: http://www.blender.org
I have been warned about the steep learning curve of the program,
and that there is no one in our Lab who is familiar
with that program ...
and also that the program is not good in making proportioned / on-scale designs,
but it is supposed to be good for making creative nice looking renders.
I found this tutorial to give me a introduction of blender, yet it really gives me the feeling of a overload
of information.
(and then you know that there are 6 vid's available).
Like photoshop Blender has a lot of buttons, options and toggle menu's etc, and for a beginner's it's simply to much...
YouTube Blender Basics - 03 - Modelling :
http://www.youtube.com/watch?v=K1DnYxd3iTw
So, I stopped watching, and simply started trying.
:)
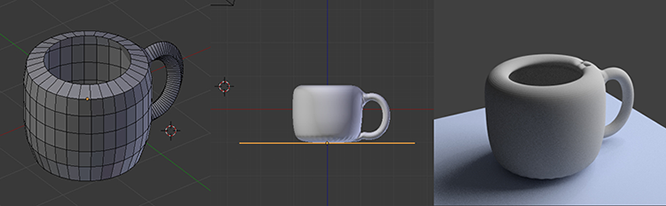
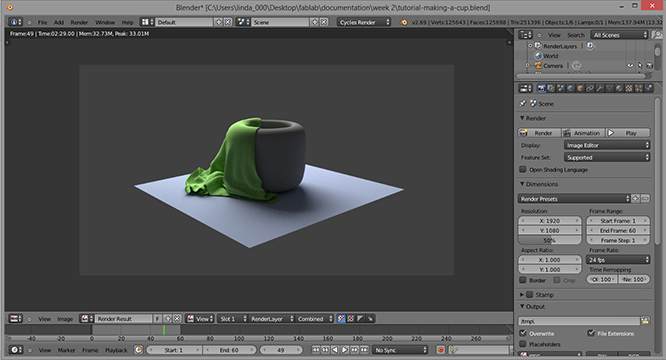
Note : the end file (cup with the cloth physics engine) is 5,33 Mb (and there are 2 ghost files?).
And I also tried the sculpting mode as well, but that quickly became messy.
It can look nice, if you spend enough time on sculpting,
but for know it's impractical (to time consuming).
Also a disadvantage from working with a complex mesh :
is the bigger (and complexer) the mesh gets,
the slower you computer will be (and my laptop definitely can't handle that).
YouTube sculpting part 1 :
http://www.youtube.com/watch?v=mTOBCp2k1R8
YouTube sculpting part 2 :
http://www.youtube.com/watch?v=zTxxZAroC_w
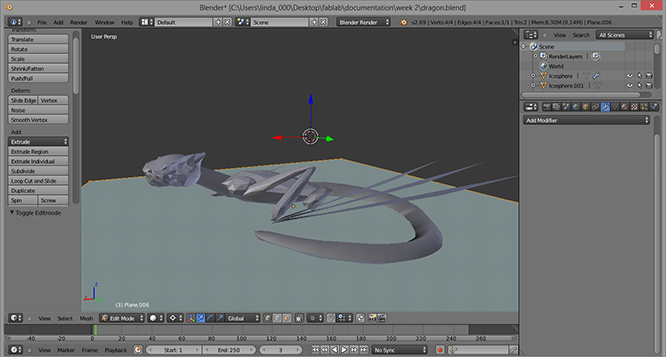
And I also tried building/re-shaping from icospheres, but find myself quickly distracted by
trying to get every shape looking nice.
And the model I made was 'posed', which looks nice when you pan around the design,
but it is very impractical for building.
Every shape is constantly off center to the x/y/z axes, so you spend a lot to time used try
to get it looking right.
I've found a nice photo (from the tv serie Game of Trones) which I want to use as reference for making the model.

step 1 : open Blender
Starting up Blender will automatically open a new file.
step 2 : add image to background for reference.
Note : http://wiki.blender.org/index.php/Doc:2.4/Manual/3D_interaction/Navigating/3D_View
step 3 : build a low polygon shape
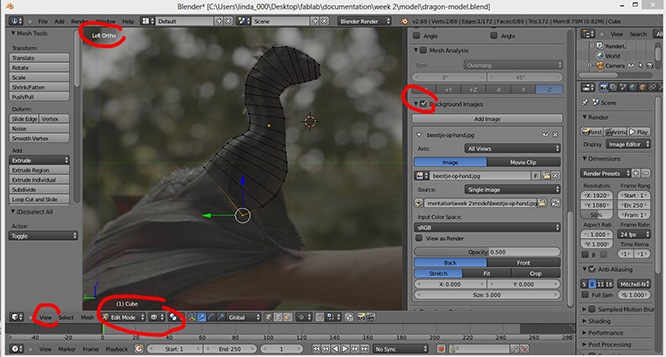
step 4 : add the mirror modifier
Note : to have the mirror modifier working correct, keep the center verticies in the center!
(in edit mode: select the nodes you wish to check) press 'shift' + 'S' (and it will snap back to grid)
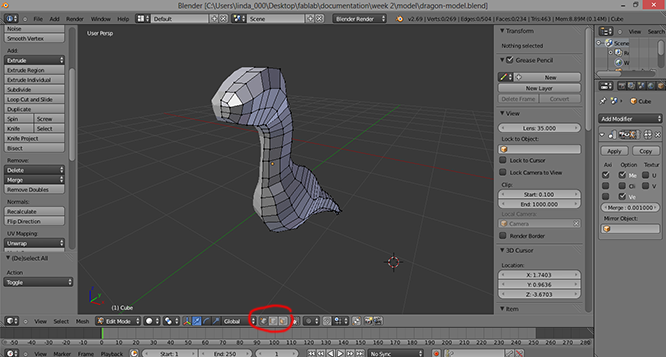
step 5 : refine the polygon shape
Continue to extrude faces of the polygon shape.
While in edit mode use the 3 different edge selector tools to help grab the right face, edge or corner.
'F' = adding new face. (first select the edges you wish to connect, then press 'F'.
To prevent modeling issues, have max 4 edges selected).
'K' = knife tool. (split a face by drawing a line)
Note : How to rig the model is explained in my wk5 notes.
sculpting : if you work in sculpt mode and later on try to mirror it (back in edit mode)
it does not seem to work!
background image : don't change or move the loaded background image,
because it will change in Blender as well. (example: flipping image horizontal).
Personal note : What I Learned this week about modelling, is very helpful/useful/interesting,
but very time consuming.
For next time I need to take note when it's time to stop 'a time consuming empted'
and try looking into a different solution for the problem in question.
 Licenced under Creative Commons Attribution-NonCommercial-ShareAlike 4.0 Unported Licence.