wk3 | Computer-controlled cutting (about lasercutting)
Assignments :
- Learn/test/try/experience the vinylcutter & lasercutter
- Make a pressfit kit with cardboard
Download design file : PDF - pressfit kit design
My notes :
13 feb 2014 | First pressfit cardboard test
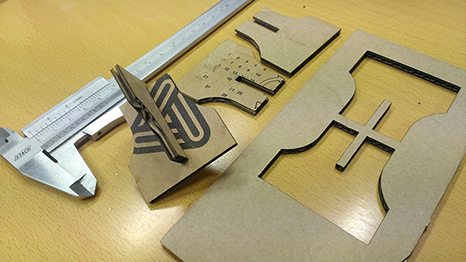
With a piece of cardboard, I'm starting to try for a press fit test piece.
With a calliper I measured the cardboard at 4.5 mm thickness.
(note: these are the settings I've used the first time, later I ajusted the speed to 40 to
quicken the cutting process and get less charcoal edges.)
The test piece I've cutted looks ok but is a little loose for the press fit connection.
The gap on the test piece ended up being 4.8 mm
After consulting with my tutor I re-measured the cardboard again.
(measuring vertical this time, not horizontal, a problem because cardboard isn't perfectly flat.)
and we decided that the card board is 4.3 mm thick.
To get a press fit test piece, the design should be drawn 0.2 mm bigger than the original drawing
(offset the lines).
So test piece number 2 is redrawn at 4.5 mm
result: it fits. :)
Note: As a standard you could assume that the laser machine cuts 0.2 mm of material away.
Special -non tested- material? Start out with laser cutting a 1x1 cm square test piece.
Use a calliper to measure the result difference.
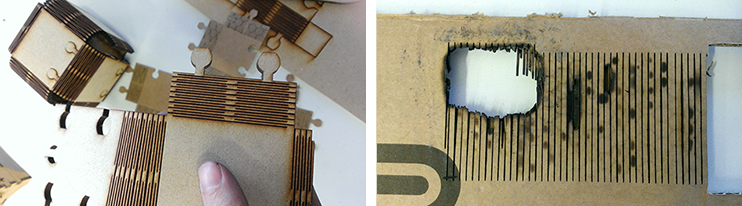
Note : be aware that the lasercutter can burn your design and start a fire.
In this example I tried to lasercut the harmonica folding (that does work well in mdf)
but apparently the same pattern was to small (detailed) for the cardboard or the laser machine settings need to be different.
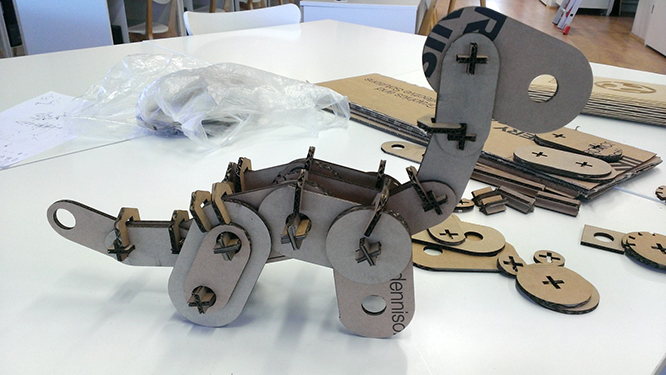
14 feb 2014 | Pressfit kit test pieces
For this week assignment I would like to make a presfit kit with a type of moving joint.
and my tutor pointed out that I should aim to design the pieces as modular as possible (like lego).
I came across this cool website with a kinetic moving animals, a design inspired by the Dutch sculptor, Theo Jansen
(strandbeest).
It is a very nice example of a moving cardboard toy and a good inspiration,
but not a very modular design to use as inspiration.
http://www.kineticcreatures.com/pages/welcome
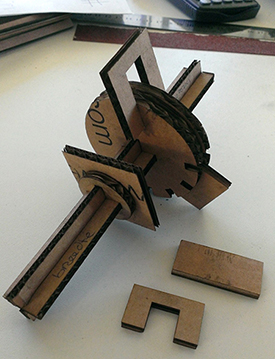
Made some test samples :
The test pieces fits good. But I think the test piece has not enough friction to hold up the weight for the whole design.
Resulting that the animal won't be able hold up the weight of his head.
- Test piece 1 : Sanded the pieces to give it more friction. Works, but a too subtle change.
- Test piece 2 : Round parts with small gaps so I can fit a wig in. Works, but it prevents subtle movements.
- Test piece 3 : Tried to fit the moving parts tighter together, so there will be more friction. Works.
The clip does needs to be offset by a couple of degrees so the pressure can be adjusted when necessary. - For the axel : the test piece is ok, but is best to place horizontal on the cardboard
(to make use of the sturdiness of the cardboard structure).
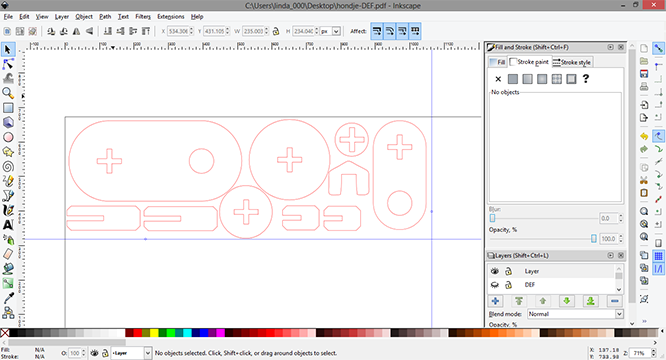
17 feb 2014 | inkscape
With the program inkscape I've drawn a set of shapes.
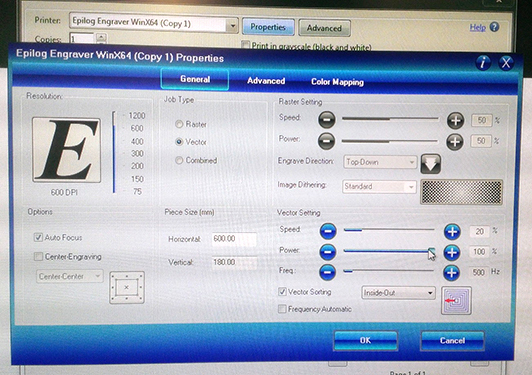
While working with inkscape I did ran into some exporting issues.
The exported pdf looks ok, but our lasercutter (Epilog mini 40 watt) didn't seem to recognize
the file spontaneously at one point,
while it had no issue with my test pieces previously.
After exporting a bunch of different test files, to figure out what the problem is, I learned
that it's important to check every vector shape on the right settings.
Don't assume that if you entered the correct input earlier (in inkscape) in the design,
that it stays that way.
One wrong setting is enough to create exporting errors and end up with weird lasercut machine
errors.
Also there sometime seems to be a issue (unknown cause) when the file has been edited in
illustrator as well as inkscape.
-
Before exporting PDF always check on every shape :
- 'no fill' (paint) selected
- opacity slider at 100%
- stroke paint: (flat color) selected at RGB: 255 R and 255 A. (bright red).
- stroke style at 0.01 mm
(Be aware that internally inkscape thinks in pixels not mm, so it's has a tendency to make calculating/rounding errors quite often.)
18 feb 2014 | Lasercutting the shapes
The simple shapes work well together. Later on, I entered some small design changes to get the pieces more modular.
- every joint piece should only have a circle and a cross shape, to minimize the different pieces.
- the big joint pieces are still a bit overlapping, so I should adjust the shape a bit.
- there should be 3 standard sized axles. (small/medium/big)
- the length of the clips should be a bit shorter, for a better fit.
I made some new test pieces to figure out the correct proportions for every piece.
The fun thing is know, that I have more pieces than I actually had planned beforehand.
I really like that I'm able to remake the shape into whatever I like (modular is good).
Note : The only thing that's now missing is converting the design into a 'parametric' design.
The benefit of a parametric design, is that you're quickly able to change the pressfit (4.1 mm) into something different
(like when you want to cut it out on a material with a different thickness). It's possible this with software like Openscad.