


Electronics production
This week we made the FABISP (an in-system programmer for AVR micro controllers). I used this helpful Tutorial First download the Board files (Tracesand Outline).
 Connect the "FR1" to the milling mat, (we tried to use the modela but it did not work so we used a different milling machine sherline 5410) then generate the png file to G-code by exporting it to fabmudols.
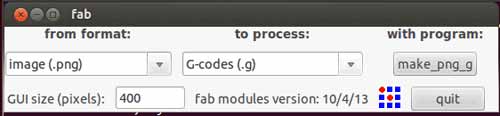 Then check the path data and correct it if needed.
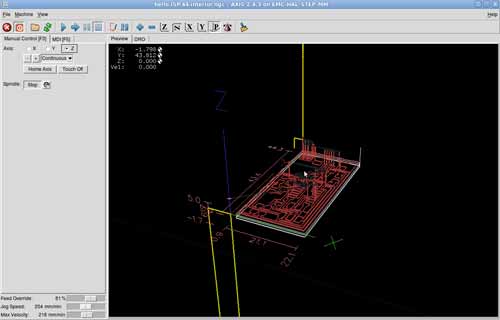
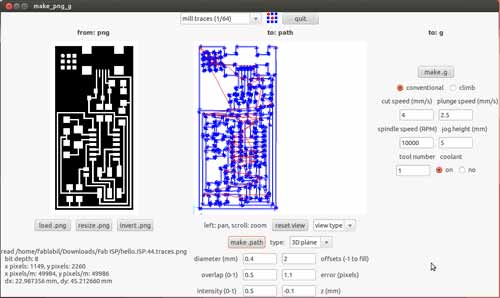 Loud the traces file,
 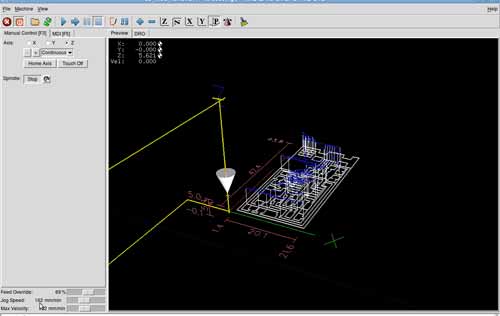 Use a 1/63" milling bit, insert the bit to the machine, set the X and Y factors and lock them, lower the head with the Z factor until your a couple of mm from the board. Hold the bit with the tip of your finger and release the head until it touches the board. Now set the speed to 30,93,93 (that is the speed that was best on the machine we used) and press play.
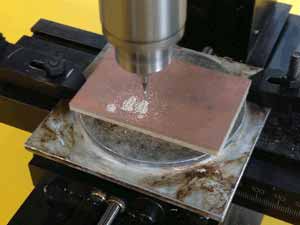
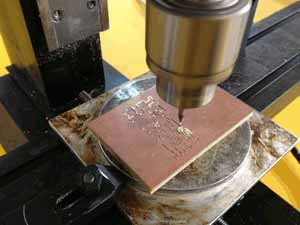 Once its finished change the bit to a 1/32" for the outline, and upload the outline file.
 Change the speed to max and press paly.
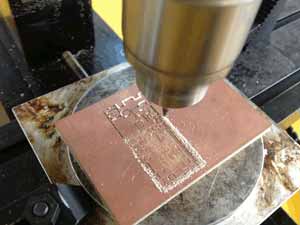 When it's finished separates the board from the excess material.
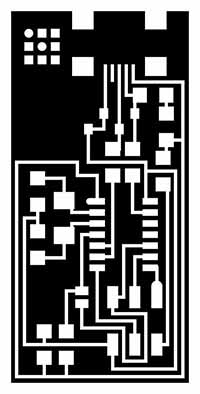
 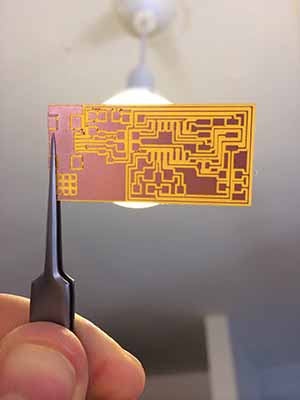 Now use the labeled Board diagramto guide you what components you need and where to place them
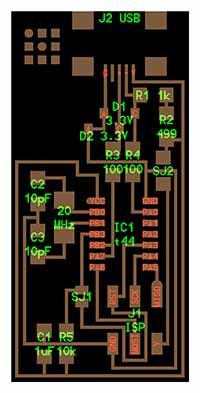
LIST OF COMPONENTS
- 1 ATTiny 44 microcontroller
- 1 Capacitor 1uF
- 2 Capacitor 10 pF
- 2 Resistor 100 ohm
- 1 Resistor 499 ohm
- 1 Resistor 1K ohm
- 1 Resistor 10K
- One 6 pin header
- 1 USB connector
- 2 jumpers - 0 ohm resistors
- 1 Cystal 20MHz
- Two Zener Diode 3.3 V
- One usb mini cable
- One ribbon cable
- Two 6 pin connectors
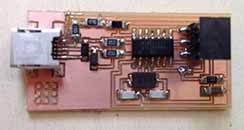 Then check with a multi-meter all the connections to make sure that theirs no shortage on the circuit.
Now test your FABISP and connect it to the computer.
TROUBLE SHOOTING
PROGRAMING THE FABISP
First you need to download the necessary software for AVR programing from this Tutorial then connect your FABISP to the AVR programer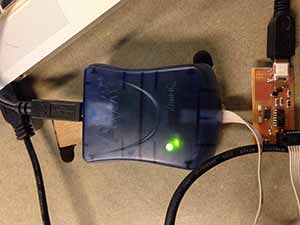 Now open the makefile on your computer,then compile the firmware
Type:
make clean - If you are successful - you will see this response from the system:omerayal:~/Desktop/firmware$ make clean
rm -f main.hex main.lst main.obj main.cof main.list main.map main.eep.hex
main.elf *.o usbdrv/*.o main.s usbdrv/oddebug.s usbdrv/usbdrv.s
Type:
make hex - If you are successful - you will see this response from the system:omerayal:~/Desktop/firmware$ make hex
avr-gcc -Wall -Os -DF_CPU=20000000 -Iusbdrv -I. -DDEBUG_LEVEL=0
-mmcu=attiny44 -c usbdrv/usbdrv.c -o usbdrv/usbdrv.o
avr-gcc -Wall -Os -DF_CPU=20000000 -Iusbdrv -I. -DDEBUG_LEVEL=0
-mmcu=attiny44 -x assembler-with-cpp -c usbdrv/usbdrvasm.S -o usbdrv/usbdrvasm.o
avr-gcc -Wall -Os -DF_CPU=20000000 -Iusbdrv -I. -DDEBUG_LEVEL=0
-mmcu=attiny44 -c usbdrv/oddebug.c -o usbdrv/oddebug.o
avr-gcc -Wall -Os -DF_CPU=20000000 -Iusbdrv -I. -DDEBUG_LEVEL=0
-mmcu=attiny44 -c main.c -o main.o
avr-gcc -Wall -Os -DF_CPU=20000000 -Iusbdrv -I. -DDEBUG_LEVEL=0
-mmcu=attiny44 -o main.elf usbdrv/usbdrv.o usbdrv/usbdrvasm.o usbdrv/oddebug.o
main.o
rm -f main.hex main.eep.hex
avr-objcopy -j .text -j .data -O ihex main.elf main.hex
avr-size main.hex
text data bss dec hex filename
0 2020 0 2020 7e4 main.hex
Type:
make fuse - If you are successful - you will see the following response from the system:omerayal:~/Desktop/firmware$ sudo make fuse avrdude -c usbtiny -p attiny44 -U hfuse:w:0xDF:m -U lfuse:w:0xFF:m avrdude: AVR device initialized and ready to accept instructions Reading | ################################################## | 100% 0.01s avrdude: Device signature = 0x1e9207 avrdude: reading input file "0xDF" avrdude: writing hfuse (1 bytes): Writing | ################################################## | 100% 0.00s avrdude: 1 bytes of hfuse written avrdude: verifying hfuse memory against 0xDF: avrdude: load data hfuse data from input file 0xDF: avrdude: input file 0xDF contains 1 bytes avrdude: reading on-chip hfuse data: Reading | ################################################## | 100% 0.00s avrdude: verifying ... avrdude: 1 bytes of hfuse verified avrdude: reading input file "0xFF" avrdude: writing lfuse (1 bytes): Writing | ################################################## | 100% 0.01s avrdude: 1 bytes of lfuse written avrdude: verifying lfuse memory against 0xFF: avrdude: load data lfuse data from input file 0xFF: avrdude: input file 0xFF contains 1 bytes avrdude: reading on-chip lfuse data: Reading | ################################################## | 100% 0.00s avrdude: verifying ... avrdude: 1 bytes of lfuse verified avrdude: safemode: Fuses OK avrdude done.Now you want to program the board to be an ISP.
Type:
make program - If you are successful - you will see the following response from the system:omerayal:~/Desktop/firmware$ sudo make program
[sudo] password for omerayal:
avrdude -c usbtiny -p attiny44 -U flash:w:main.hex:i
avrdude: AVR device initialized and ready to accept instructions
Reading | ################################################## | 100% 0.01s
avrdude: Device signature = 0x1e9207
avrdude: NOTE: FLASH memory has been specified, an erase cycle will be performed
To disable this feature, specify the -D option.
avrdude: erasing chip
avrdude: reading input file "main.hex"
avrdude: writing flash (2020 bytes):
Writing | ################################################## | 100% 5.68s
avrdude: 2020 bytes of flash written
avrdude: verifying flash memory against main.hex:
avrdude: load data flash data from input file main.hex:
avrdude: input file main.hex contains 2020 bytes
avrdude: reading on-chip flash data:
Reading | ################################################## | 100% 3.36s
avrdude: verifying ...
avrdude: 2020 bytes of flash verified
avrdude: safemode: Fuses OK
avrdude done. Thank you.
avrdude -c usbtiny -p attiny44 -U hfuse:w:0xDF:m -U lfuse:w:0xFF:m
avrdude: AVR device initialized and ready to accept instructions
Reading | ################################################## | 100% 0.01s
avrdude: Device signature = 0x1e9207
avrdude: reading input file "0xDF"
avrdude: writing hfuse (1 bytes):
Writing | ################################################## | 100% 0.00s
avrdude: 1 bytes of hfuse written
avrdude: verifying hfuse memory against 0xDF:
avrdude: load data hfuse data from input file 0xDF:
avrdude: input file 0xDF contains 1 bytes
avrdude: reading on-chip hfuse data:
Reading | ################################################## | 100% 0.00s
avrdude: verifying ...
avrdude: 1 bytes of hfuse verified
avrdude: reading input file "0xFF"
avrdude: writing lfuse (1 bytes):
Writing | ################################################## | 100% 0.00s
avrdude: 1 bytes of lfuse written
avrdude: verifying lfuse memory against 0xFF:
avrdude: load data lfuse data from input file 0xFF:
avrdude: input file 0xFF contains 1 bytes
avrdude: reading on-chip lfuse data:
Reading | ################################################## | 100% 0.00s
avrdude: verifying ...
avrdude: 1 bytes of lfuse verified
avrdude: safemode: Fuses OK
avrdude done. Thank you.
Now after you programed the bored
Remove the solder bridge
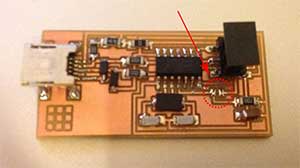 connect it to your computer and you will receive the message
 Now your ready to program with your FABISP