This week assignment is to make some input devices. An input device provides information about a work environment, this information is sensed by a device called sensor and then is processed and measured by a microcontroller. Some sensors like the thermistor measures temperature, hall effect sensors measure the magnetic field or simply buttons that sense the state on a microcontrollers input.
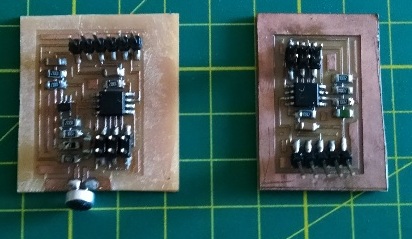
For the assignment I fabbricated two of Neil's input devices, temperature and sound (electret mic). Also I've already fabricated my own version of the Fabduino, and I'll add an old laptop touchpad as an input device.
Temperature Sensor NTC:
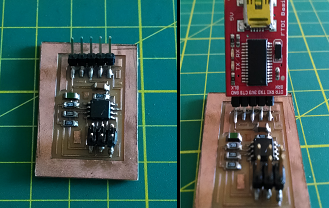
programming the board:
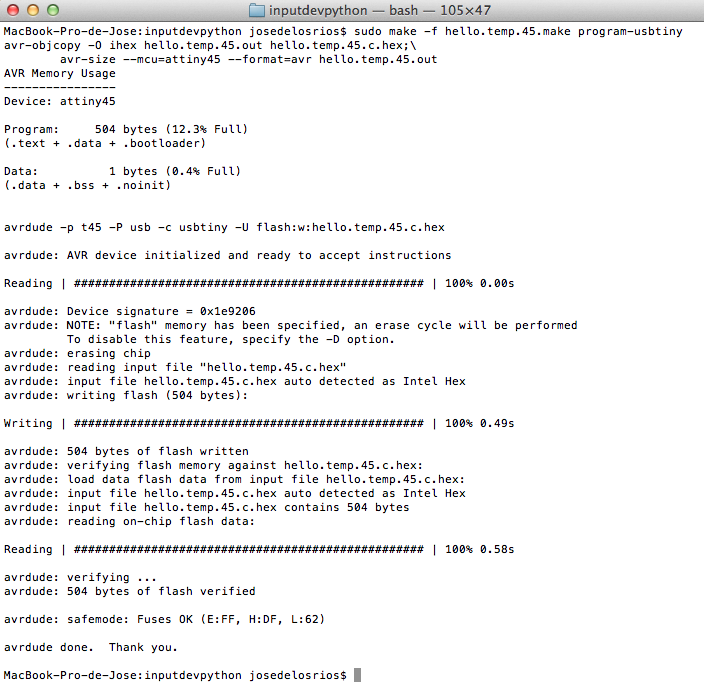
For programming the board you need the C and makefiles, you can grab them from this week class web, download them and put the files in a folder anywhere on your hard drive. Then open a terminal window and change directory "cd" to the folder where you save the files from before. Once there plug both FAB ISP and FTDI cable (check for corresponding black wire with GND pin and red with VCC pin, otherwise you can get your board fried) and in the terminal execute the following commands:
sudo make -f hello.temp.45.make program-usbtiny
With the firmware loaded in the ATtiny45 you can unplug the ISP, the next step is to download the python file wich can be obtained from this week class web. Download the file and save it in the same directory as the C and Make files. Under Mac OSX you need python 2.7 and pyserial, wich can be downladed from the academy web. Usually python 2.7 comes pre-installed with the OS, you can check it by executing the command "python --version" in the terminal. it might output something like this: "Python 2.7.5". For installing pyserial and within the terminal you must go to the folder you extracted the pyserial download and execute the next command:
sudo python setup.py install
and wait until it finish installing. After this you can now run the python script for the assignment, but first you need to get the port at wich your FTDI is connected, in OSX run this command: "ls /dev/tty.*" the output should look like this:
My FTDI is called /dev/tty.usbserial-AD01TQDA. Now run the command for the python app:
Download the corresponding files and follow the same steps as before.
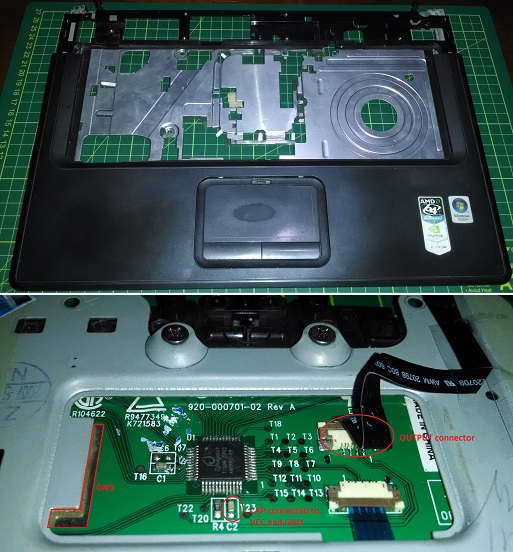
Synaptics Touchpad
I recovered the touchpad from a broken laptop that was lying around at home, before this I made some research on how to interface it with an arduino and found out it uses the PS/2 protocol and luckily I also found a document from synaptics PS/2 protocol wich can be downloaded here.
Wiring up
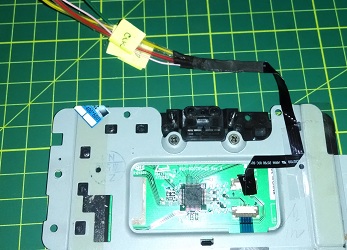
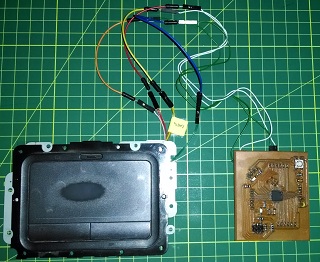
I could't find information about the pinout for the synatics microcontroller also the board had 4 output pins that connected to the laptop's mainboard. So based on some info i found through the web the pins were VCC, GND, CLK and DATA. So the real deal was to find the VCC and GND pins before powering up because an error on the power pins can fry the microcontroller. First I located ground checking continuity between one of the pin from the flex and the copper pour in the board. The next step is locate VCC, look for the capacitors, check one pin is connected to GND so the other one is VCC, then go to the flex cable and check continuity and power is done!. So the missing pins are CLK and DATA, for these I took my chances (this won't burn your microcontroller) and connected as I wanted.
As I already have my Fabduino, I downloaded the PS/2 library from the arduino site and used the example files, for checking if it works but it didn't so the problem could have been DATA and CLK pins, so I went and swapped them and IT WORKS!!!. From this moment I spent some time checking at synaptics PS/2 protocol document and made a simple sketch for getting the synaptics microcontroller firmware version and setting modebyte for setting the touchpad on absolute mode, getting the X,Y and Z coordinates as you touch on the surface(yes Z! I realized of this as I kept reading through the doc, so go ahead and do it too!).