This week assignment is to program the board we fabricated for electronics production assignment. For this I'll be using Arduino IDE with wiring programming language and AVRDUDE and the standard C for AVR.
Setup
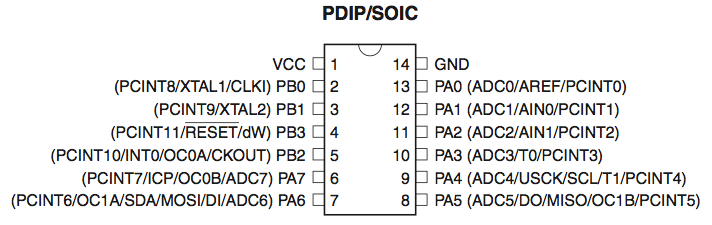
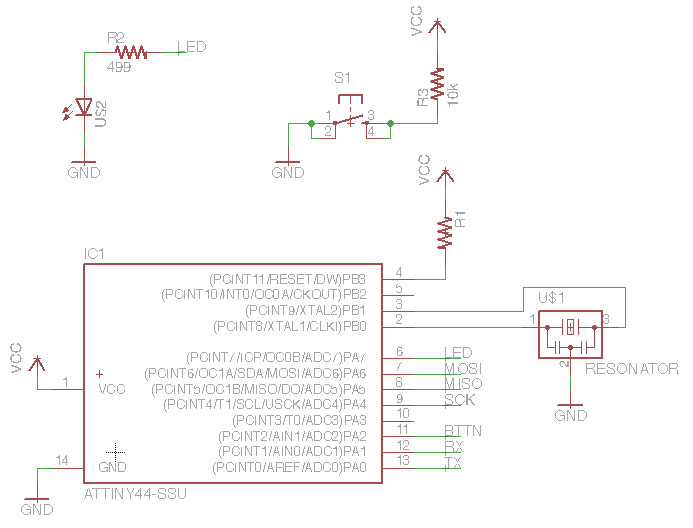
The first step for programming the board is to recognize the ATTiny44A pins that corresponds to our button and LED. In the schematic below I connected the Button to pin 11 and the LED to pin 6, this correspond in the Tiny datasheet to PA2 and PA7 respectively.
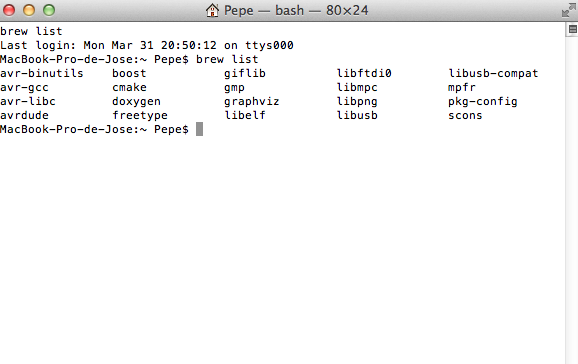
Second step is to make sure we have all the libraries and software required for AVR programming, this are the same we've used for programming our USBTiny ISP. If you're working with OS X you can open a new terminal window and type "brew list" (this works if you installed your libraries using homebrew) in the list there must be at least the following:
avr-libc
avr-gcc
avr-binutils
avrdude
cmake
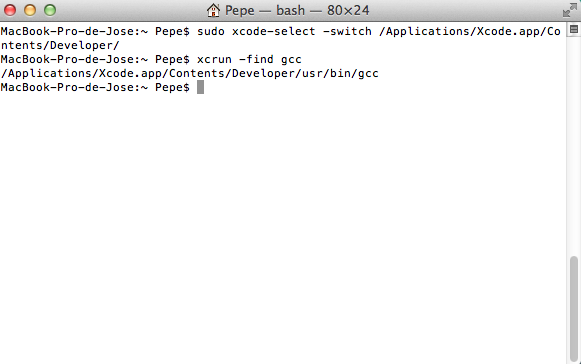
In case you have not installed the libraries and requirements do the next. First check if developer tools with command line tools are installed. for this open a new terminal window and run this commands:
With the last command you must have an output like this: /Applications/Xcode.app/Contents/Developer/usr/bin/gcc. In case you get an error or a not found install xcode from the appstore, it's free and then read apple documentation for installing the command line tools.
Next install Homebrew, you can download it from here or run from terminal:
I installed the Virtual COM Port Drivers or VCP drivers or AKA FTDI drivers this is usefull if you want to check when your board is connected via Arduino IDE or the Terminal. You can download the drivers from here. With all this software installed we'll dive into the setup and programming for Arduino.
Programming with Arduino
Install Arduino IDE
Download and install the Tiny libraries, download from here
Set board
Set Programmer
Start Coding!
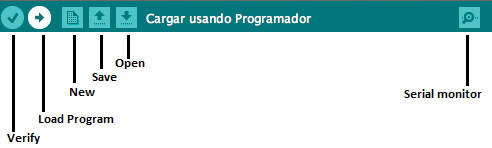
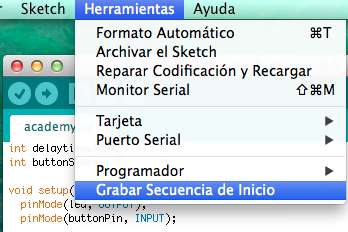
Uploading using Arduino IDE
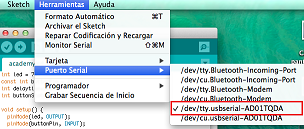
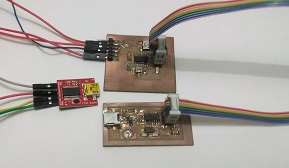
I'm using a FTDI basic from SparkFun Electronics, be careful with source pins and connect Rx from FTDI to TX on your board and Tx from FTDI to Rx from board. Then connect the board with the icsp cable to the FABIsp and back to Arduino IDE set the port to the one named like this: /dev/tty.usbserial-XXXXXXXX. From the tools menu select burn bootloader and wait until finished and the last step is to burn the program you just coded a while ago, for this select the load button and it's done!
My program flashes the LED every 1000 ms or 1 sec everytime you hit the button the delay time will reduce to halve until it is less than 5 ms and then goes back to 1 sec flashing again.
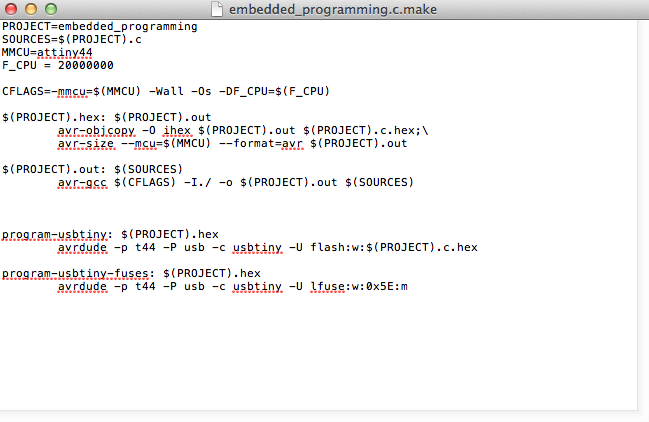
Next we're programming with C and avrdude, the necesary software is already setup and for programming we need to create a makefile first. This is similar to the burn bootloader from Arduino IDE, this file it's in charge of creating the .hex and .out files that will be uploaded to the board and also contains the fuse values. I've modified Neil makefile to only support the USBtiny for progamming and the first line of code to reference my file name.
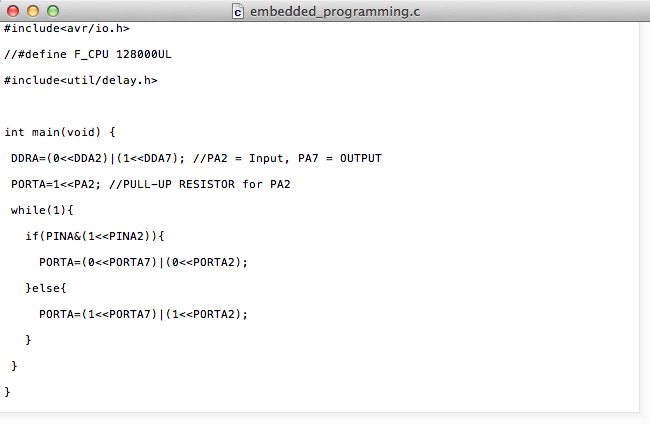
The programming is kind of different here, so I'll explain the most important parts of my code. First we don't have an explicit setup and loop routines, this are replaced with the main routine and an inifinte loop (wich works as the loop routine from wiring). Then we set the ports as inputs or outputs just as stated in the datasheet. The register DDRA must be configured for inputs with the corresponding bit as 0 and the output with it's corresponding bit set to 1. Then we configure the the pin for our button as a pullup register. And for reading the value we only have to check the state of the corresponding pin on PINx Register and set a value for our output.
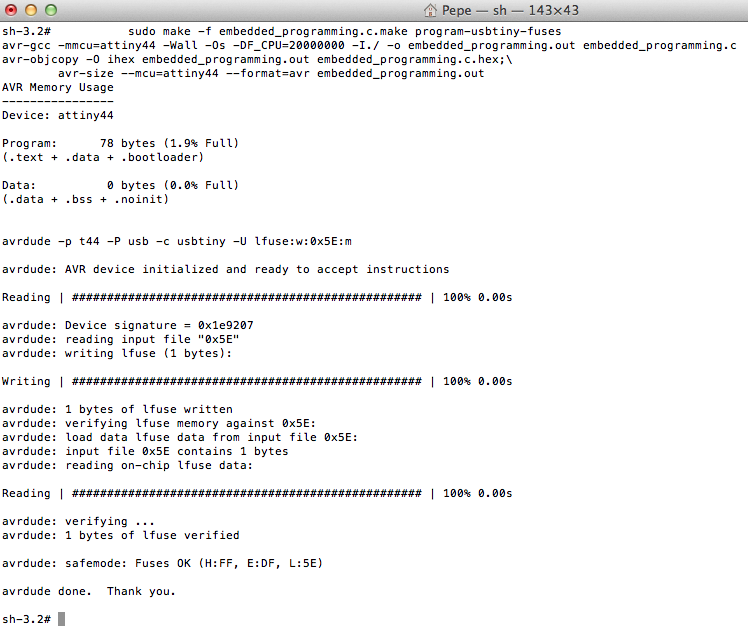
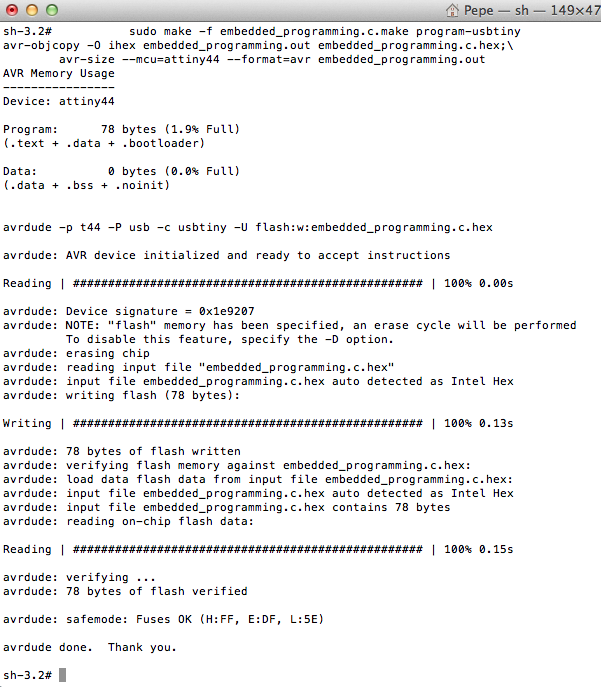
The final step is to burn our code. For this the setup is the same but now we must open a new terminal window and change directory to the project directory. There you have to run the following commands and check for any answer message (It's best recommended to log as superuser with sudo su command).
Remember to replace embedded_programming.c.make with your filename and also make the corresponding changes to makefile in PROJECT line.
$ sudo make -f embedded_programming.c.make program-usbtiny-fuses
$ sudo make -f embedded_programming.c.make program-usbtiny