"Hi everyone , Week 12 Interface and application programming.While doing project related stuff like board designing,3D printing,input devices,output devices , i was thinking how should i send the information/data over a mobile/phone.To meet these requirment I need to know few things such as how to create a GUI and then how should in send the data over a mobile ?.The answer of those will be in this week i.e.Interface and application."
Learn differnt applications , languages & interfacing


- Compare as many tool options as possible
Group Assignment
- Write an application that interfaces a user with an input &/or output device that you made
Individual assignment
Hero Shot
MIT APP INVENTOR
Processing GUI
Table of Content
Objectives
About languages
In this week i am going to cover following languages
- Processing
- MIT App Inventor
- Python
Processing is a flexible software sketchbook and a language for learning how to code within the context of the visual arts.
MIT App Inventor is an intuitive, visual programming environment that allows everyone – even children – to build fully functional apps for smartphones and tablets.
Python is powerful... and fast; plays well with others; runs everywhere; is friendly & easy to learn; is Open.Python is a programming language that lets you work more quickly and integrate your systems more effectively.
GUI in Processing App
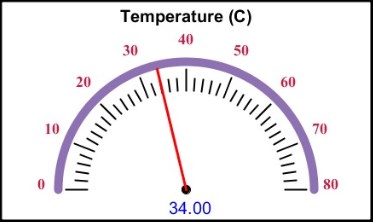
Using this processing app i am going to design one graphical user interface like metar which shows read sensor data continously.Its look more visible for end user to check the sensor data on graphical user interface.
Introduction of Processing IDE
Processing is an open-source graphical library and integrated development environment (IDE) built for the electronic arts, new media art, and visual design communities with the purpose of teaching non-programmers the fundamentals of computer programming in a visual context.
Processing uses the Java language, with additional simplifications such as additional classes and aliased mathematical functions and operations. It also provides a graphical user interface for simplifying the compilation and execution stage.
The Processing language and IDE have been the precursor to other projects including Arduino, Wiring and P5.js.
Features
Download processing software:
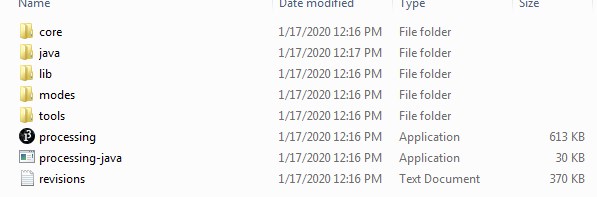
Visit Official website here to download processing software.After downloading extract the file.You will find processing 3.5.4 folder which contain the processing appliction file.Click on it to run processing application.
After running the processing application we can see processing IDE window which is shown below.
Create GUI in processing
Before i go for programming part first i went to official website of processing website.It covers Video Tutorials. Links to videos. to check few tutorials by Daniel Shiffman, Andrew Glassner, Jose Sanchez, and Abe Pazos.
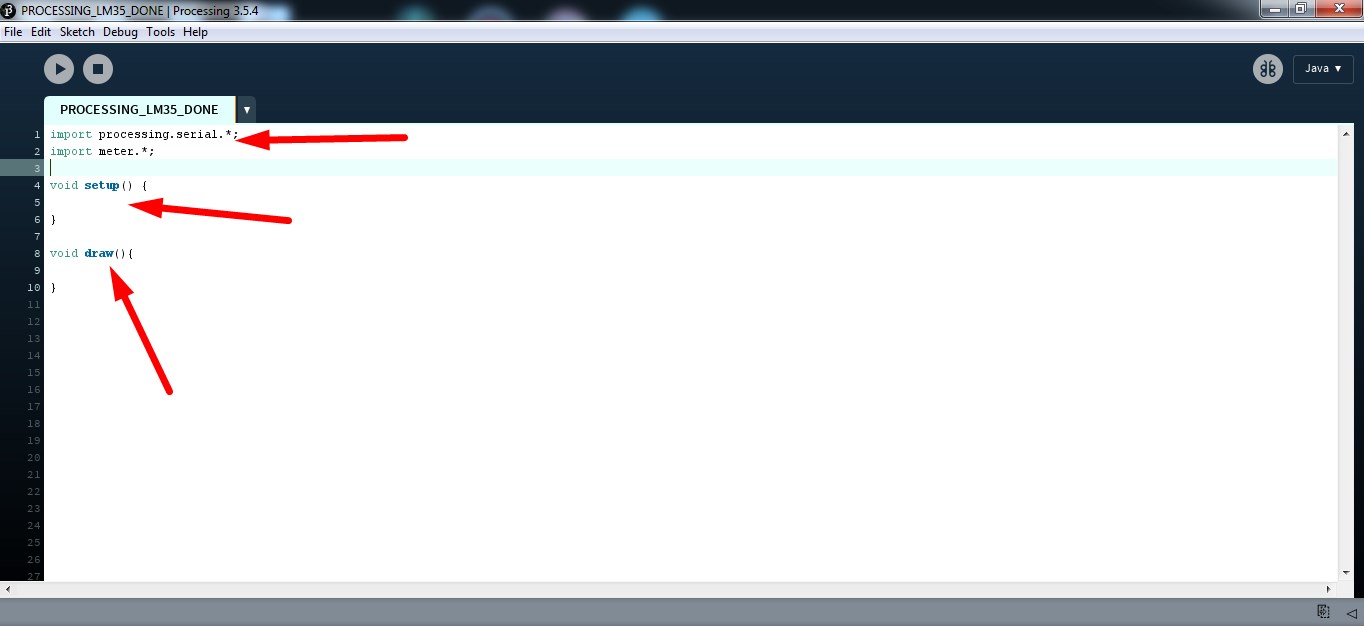
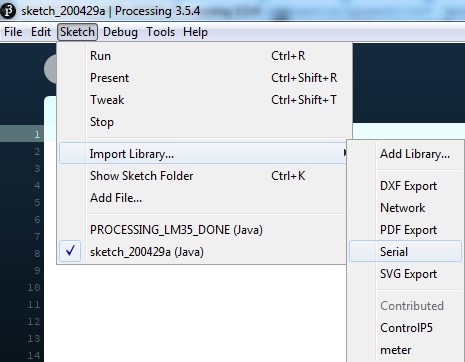
Processing IDE editor window contain the three imporatnt things which is import libraries like processing.serial,void setup( ),void draw( ).You should ensure these three things before you start programming.
Editing Steps in processing IDE
String[] list;
The setup() function is run once, when the program starts. It's used to define initial enviroment properties such as screen size and to load media such as images and fonts as the program starts. There can only be one setup() function for each program and it shouldn't be called again after its initial execution. If the sketch is a different dimension than the default, the size() function or fullScreen() function must be the first line in setup(). Note: Variables declared within setup() are not accessible within other functions, including draw().Refer from processing website
Note:Please put the USB to serial port of your PC i.e."COM7" is for my PC.It may be different for yours.
myPort = new Serial(this, "COM7", 9600);void setup() { size(500, 350); background(0, 0, 0); myPort = new Serial(this, "COM7", 9600); fill(120, 50, 0); m = new Meter(this, 25, 100); m.setTitleFontSize(20); m.setTitleFontName("Arial bold"); m.setTitle("BODY TEMPRATURE (%)"); String[] scaleLabelsT = {"0", "10", "20", "30", "40", "50", "60", "70", "80", "90", "100" }; m.setScaleLabels(scaleLabelsT); m.setScaleFontSize(18); m.setScaleFontName("Arial"); m.setScaleFontColor(color(200, 30, 70)); m.setNeedleThickness(3); m.setMinInputSignal(0); m.setMaxInputSignal(100); int mx = m.getMeterX(); int my = m.getMeterY(); int mw = m.getMeterWidth(); }
Called directly after setup(), the draw() function continuously executes the lines of code contained inside its block until the program is stopped or noLoop() is called. draw() is called automatically and should never be called explicitly. All Processing programs update the screen at the end of draw(), never earlier.
void draw(){
  textSize(30);
  fill(0, 255, 0);
  text("BODY TEMPRATURE", 100, 40);

  if (myPort.available() > 0) {
    String val = myPort.readString();
    String[] list = split (val, ',');
    float tem = float(list[0]);

  m.updateMeter(int(tem));


  println("BODY TEMPRATURE: ");
  }
}
Now i am ready with my GUI code in processing.Next step is how to display the sensor data on GUI.So follow the next topic that will get you to display the sensor data on GUI.
Note: The code written in void setup( ), & void draw( ) is subjected to chnage for individuals.I reffered code from www.hackster.io
Need of Hardware & software
- Atmega 328p board
- LM 35 Sensor
- FTDI cable/Arduino uno acts as FTDI
- Connecting wires
- Arduino IDE
- Processing IDE
Step by step Procedure to display sensor data on GUI
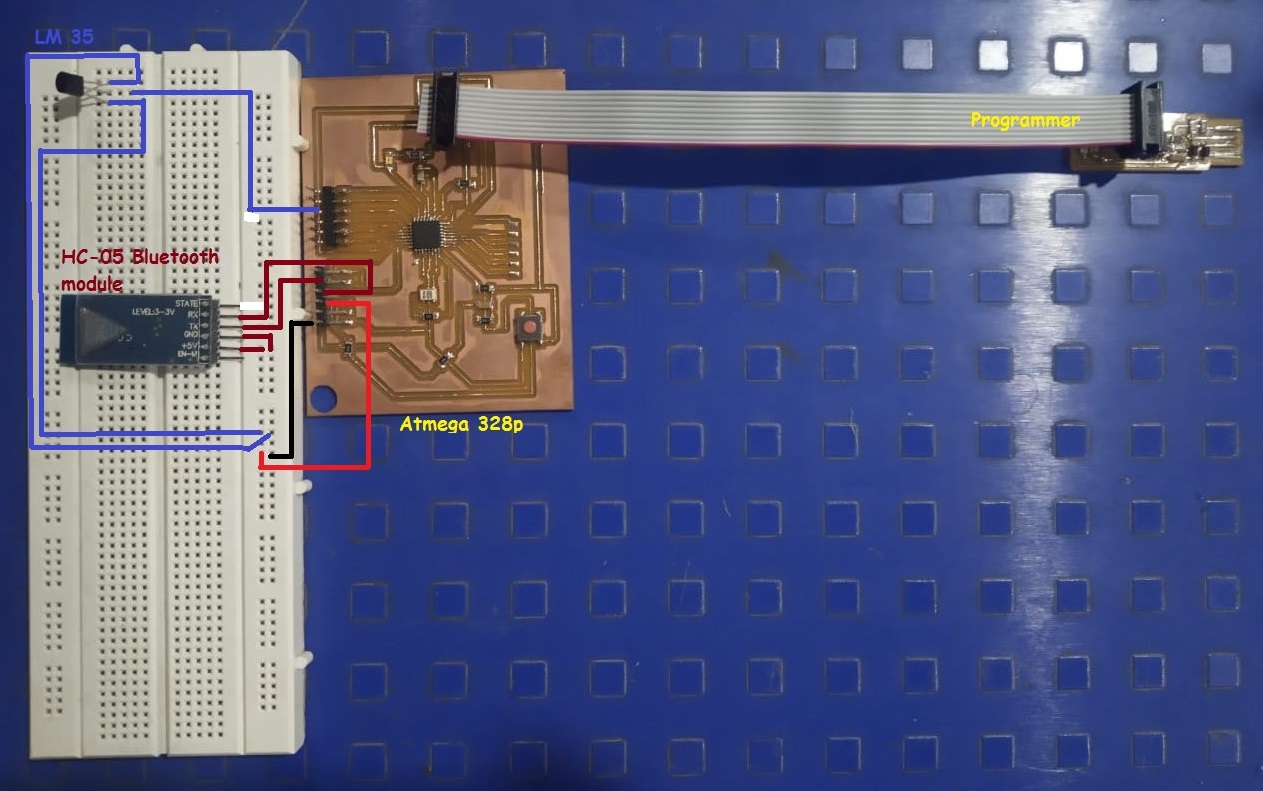
Step 1.Set up the H/W
Connection pin out
Connect FTDI cable to FTDI pin header of ATmmega 328p
If you dont have the FTDI cable then connect Arduino pins to Atmega 328p board as follows

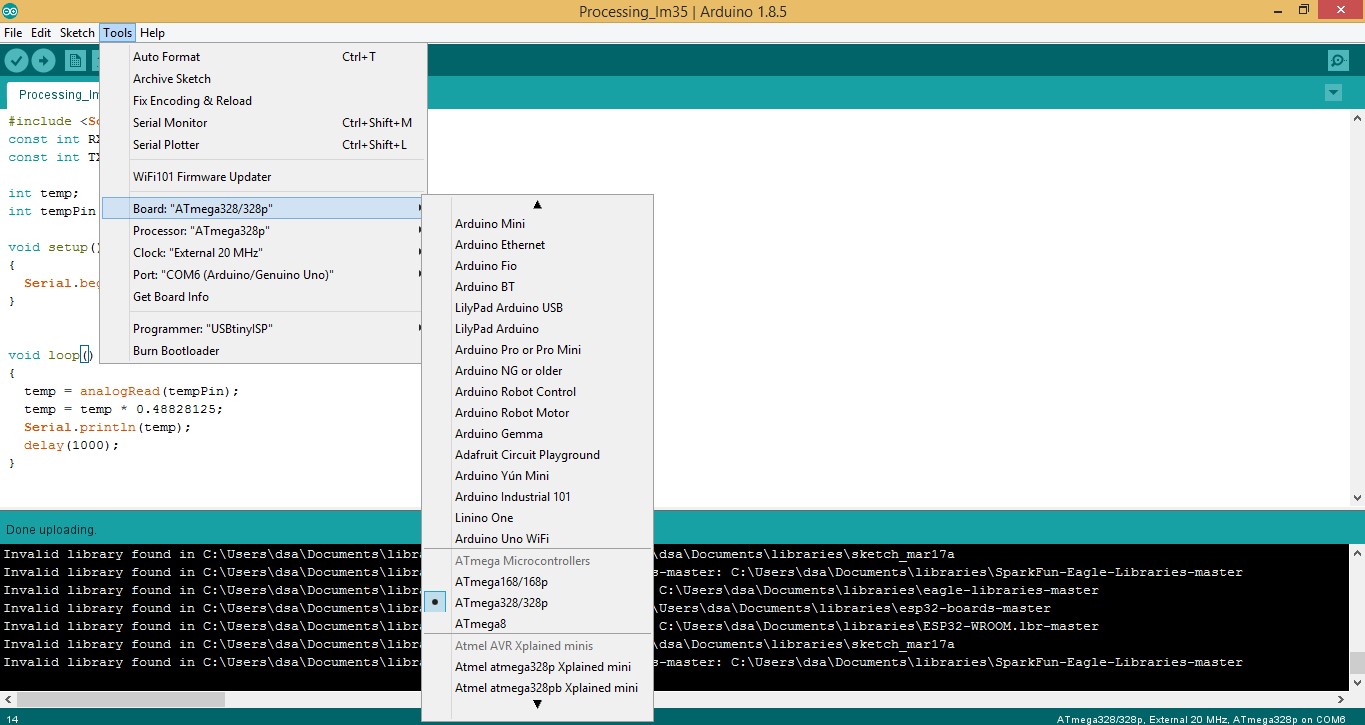
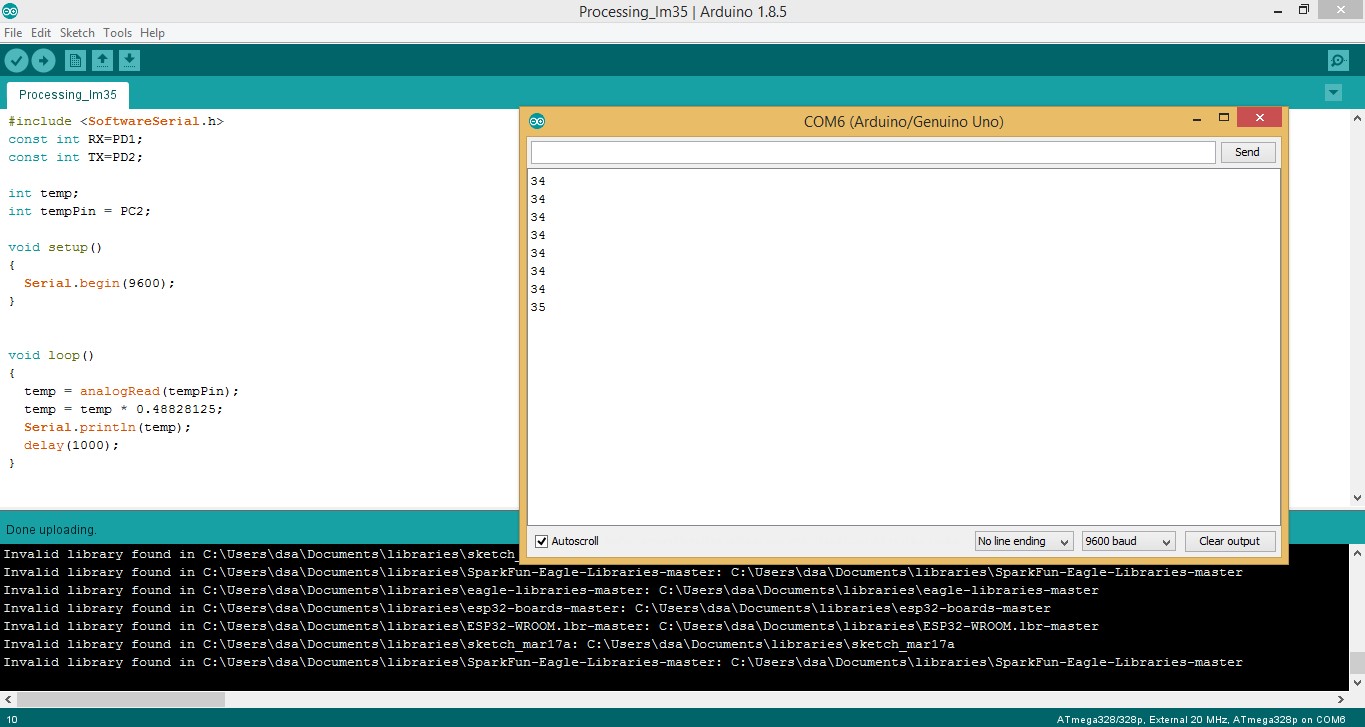
Step 2.Run arduino sensor code in IDE
#include <SoftwareSerial.h>
//initializes/defines the output pin of the LM34 temperature sensor
//this sets the ground pin to LOW and the input voltage pin to high
int temp;
int tempPin = PC2;
const int RX = PD0;
const int TX = PD1;
SoftwareSerial mySerial(TX, RX);

void setup()
{
  Serial.begin(9600);
}

void loop()
{
  temp = analogRead(tempPin);
  temp = temp * 0.48828125;
  Serial.println(temp);
  delay(1000);
}
Step 3.Check the serial monitor
Step 4.Open & Run the processing IDE
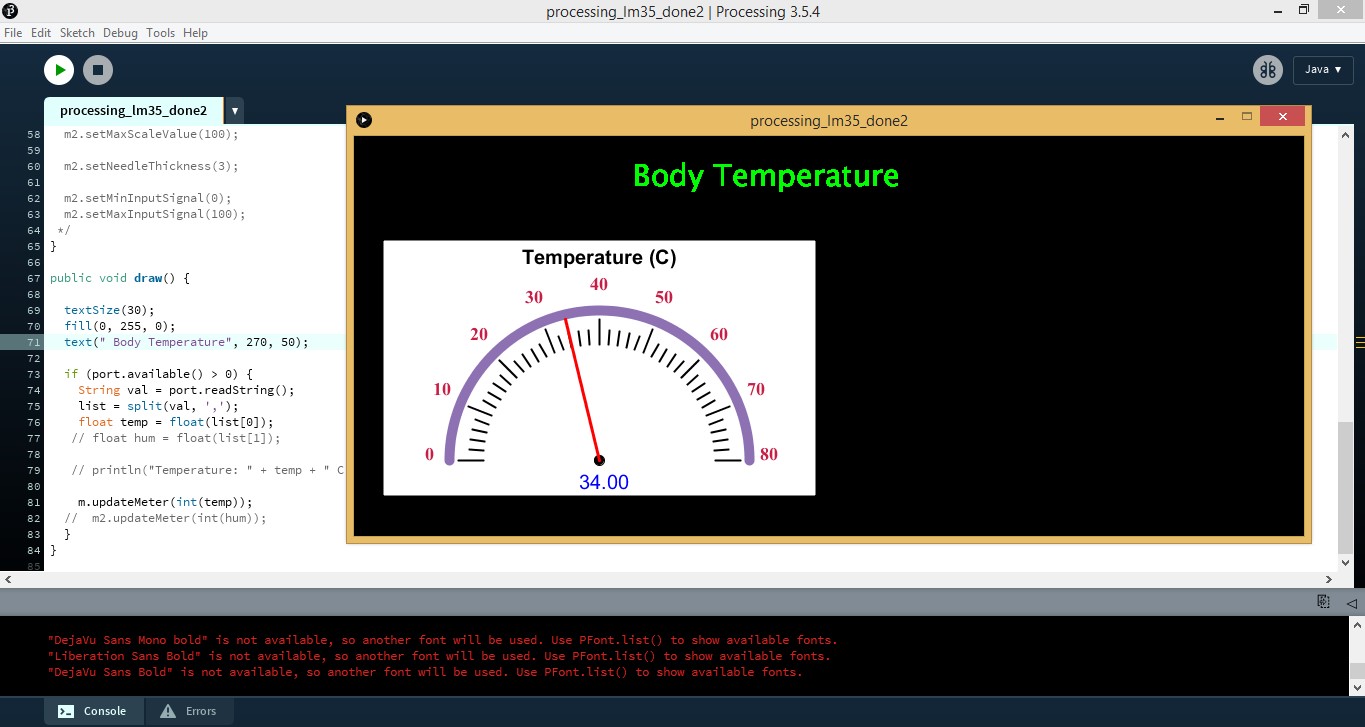
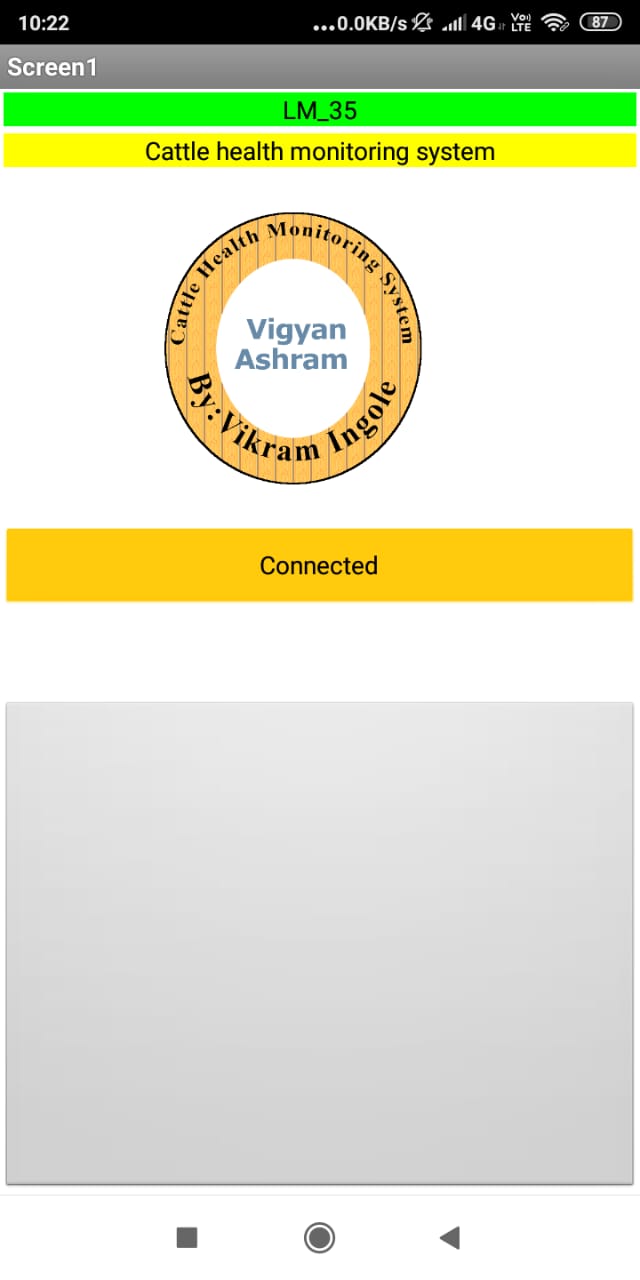
STEP 5.Testing the design
Note:In the above video i tried to demonstrates you how sensor data is being displayed on processing.But the temperature reading which is displayed on processing meter window is an ambient one not the body temperature so to see how LM 35 sense body temperature hold LM 35 by your finger's tight.So that it can warm up and show your body temeprature as well.
TopLearning outcomes
MIT inventor app
MIT App Inventor is an intuitive, visual programming environment that allows everyone – even children – to build fully functional apps for smartphones and tablets. Those new to MIT App Inventor can have a simple first app up and running in less than 30 minutes. And what's more, our blocks-based tool facilitates the creation of complex, high-impact apps in significantly less time than traditional programming environments. The MIT App Inventor project seeks to democratize software development by empowering all people, especially young people, to move from technology consumption to technology creation More detailed visit MIT app inventor.
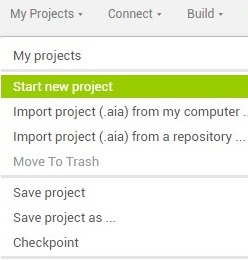
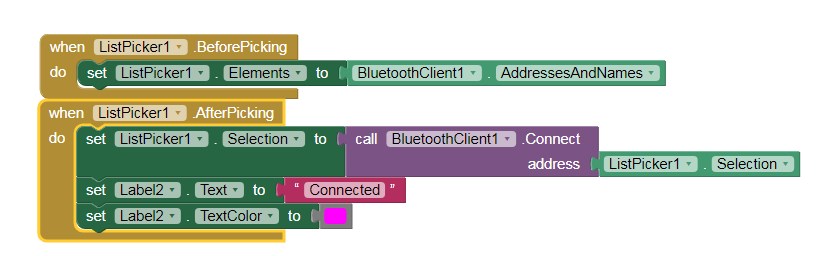
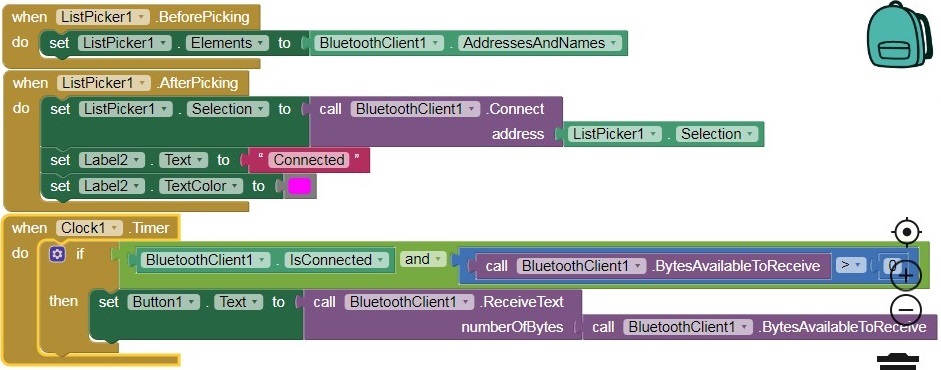
Procedure to develop MIT app to display the sensor data through bluetooth.
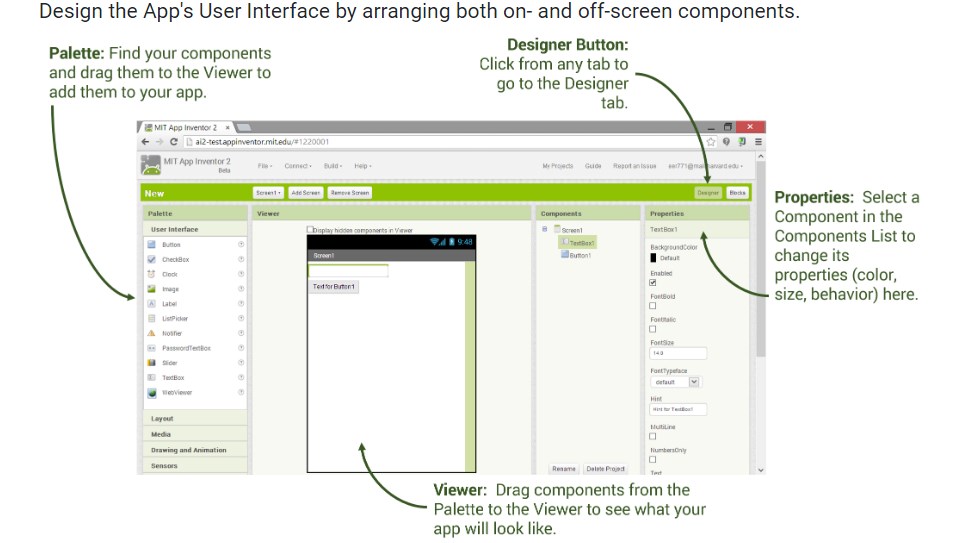
( Image taken from https://appinventor.mit.edu/explore/ai2/share )
This project window has two sections
So first we will see both sections one by one
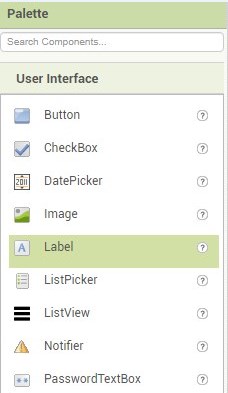
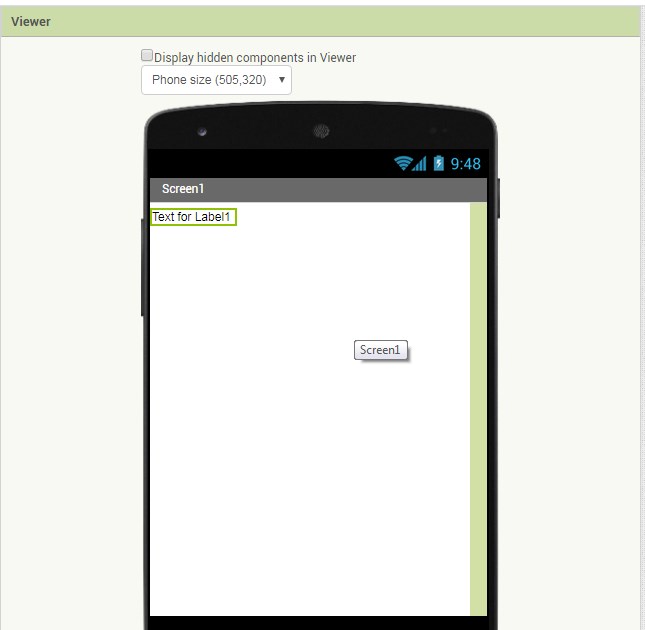
1.Designer button:-For creating GUI:
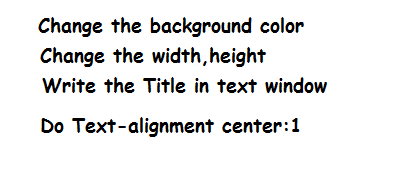
Step 1.1


Step 1.2


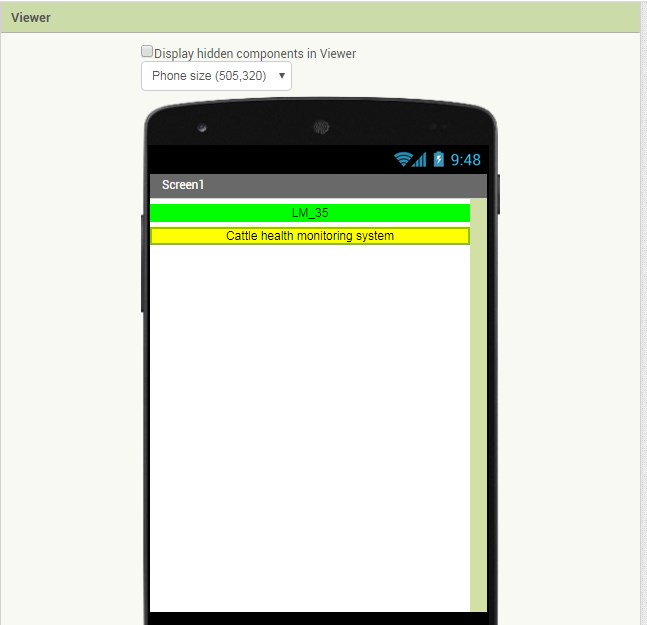
Step 1.3
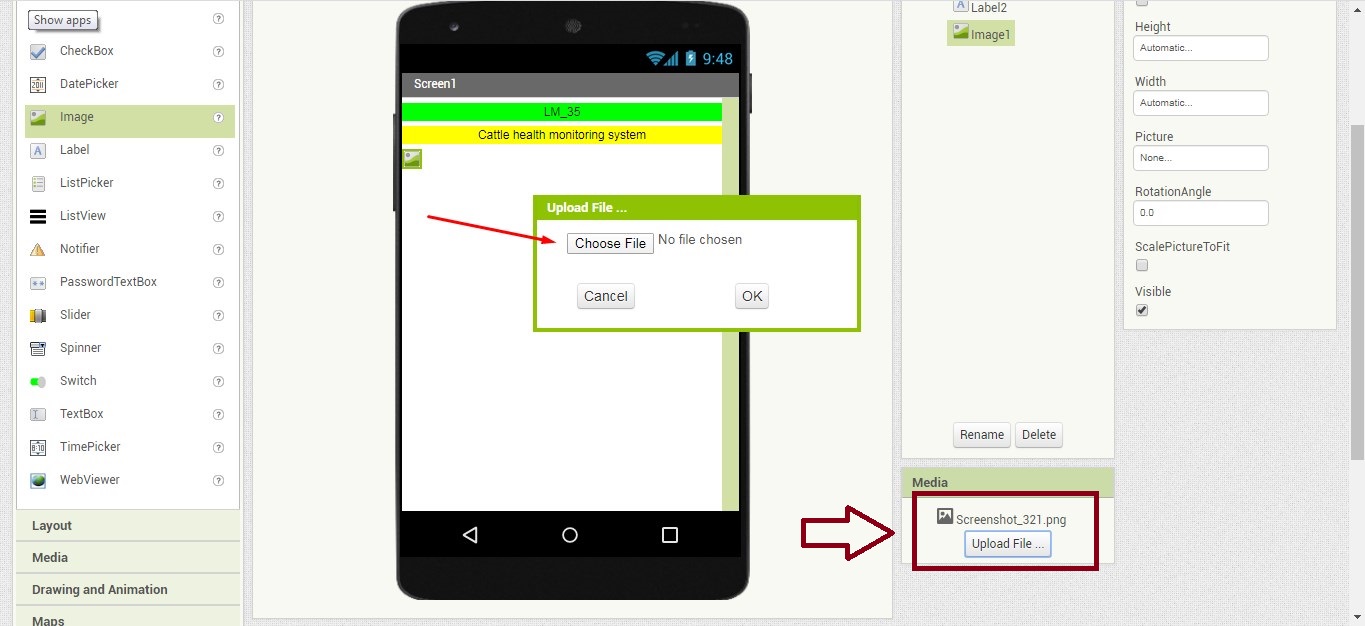
Step 1.4
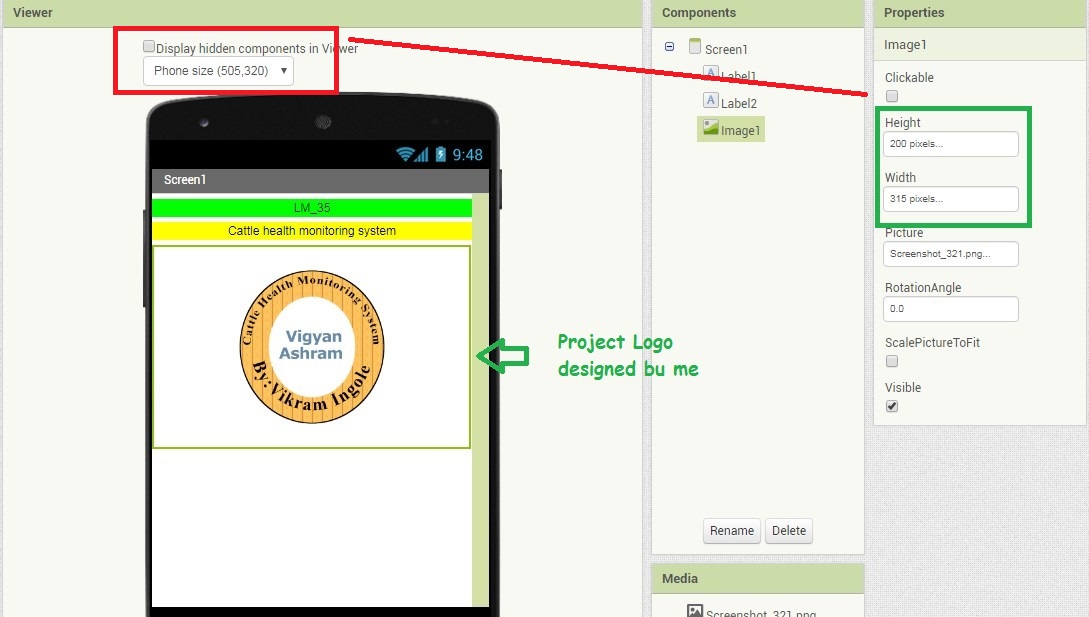
Step 1.5
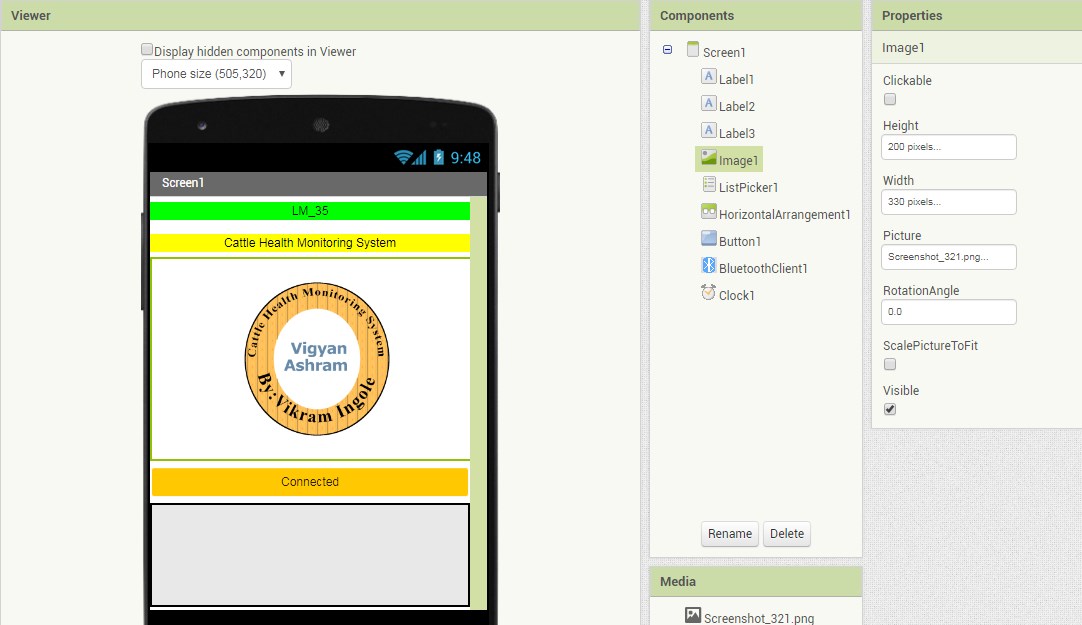
Step 2.1
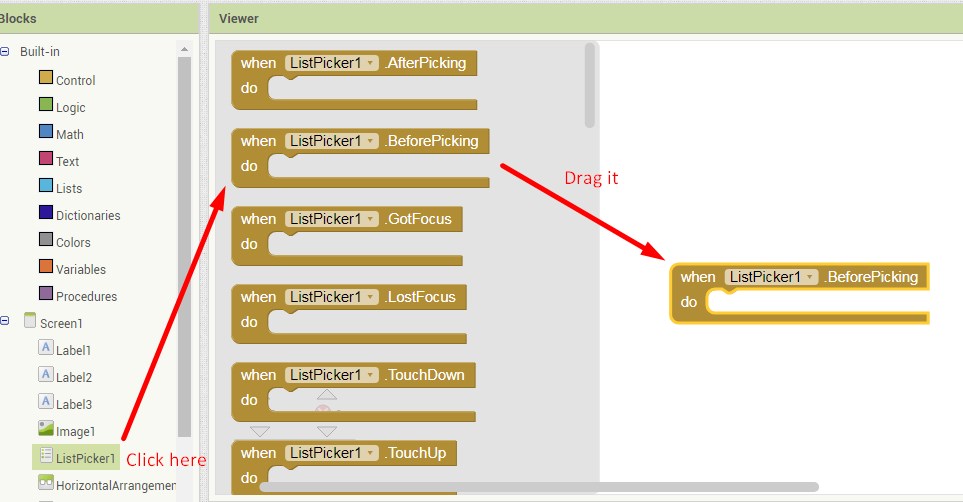
Step 2.2

Step 2.3
Step 2.4
Step 2.5
Step 2.6
Step 2.7

Need of hardware & software
Step by step procedure to display the sensor data on MIT app inventor(Mobile app)
STEP 1.SET UP THE H/W
STEP 2.RUN ARDUINO SENSOR CODE IN IDE
#include <SoftwareSerial.h>
//initializes/defines the output pin of the LM34 temperature sensor
//this sets the ground pin to LOW and the input voltage pin to high
int temp;
int tempPin = PC2;
const int RX = PD0;
const int TX = PD1;
SoftwareSerial mySerial(TX, RX);

void setup()
{
  Serial.begin(9600);
}

void loop()
{
  temp = analogRead(tempPin);
  temp = temp * 0.48828125;
  Serial.println(temp);
  delay(1000);
}
STEP 3.CHECK THE SERIAL MONITOR
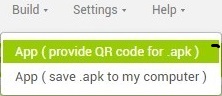
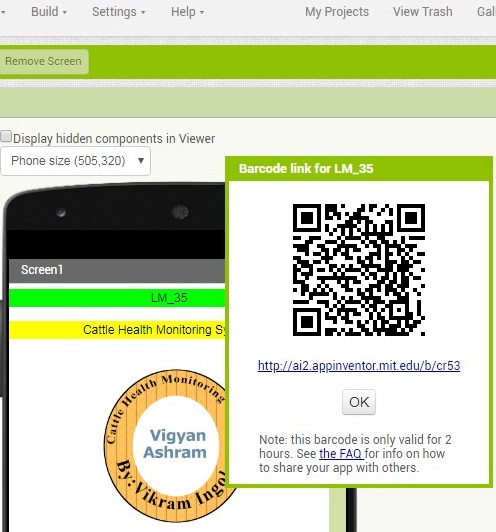
STEP 4.Open and run the MIT APP
STEP 5.Testing the design
Group assignment
As a part of group assignment i studied the process IDE and try to explore it.Also i figure out some imporatnt point while doing this stuff.
Processing: -
- To make application in processing we need install processing software to our operating window.
- Programming language of processing is C++.
- In processing we need to write two codes. One is for creating graphical interface in the programming window of processing and other is for programming our hardware in “Arduino IDE“.
- Here programming window of “Arduino IDE” and “Processing” are independent on each other.
- Programming in processing is quite difficult than MIT App Inventor.
- To create a particular graphical interface in processing ,
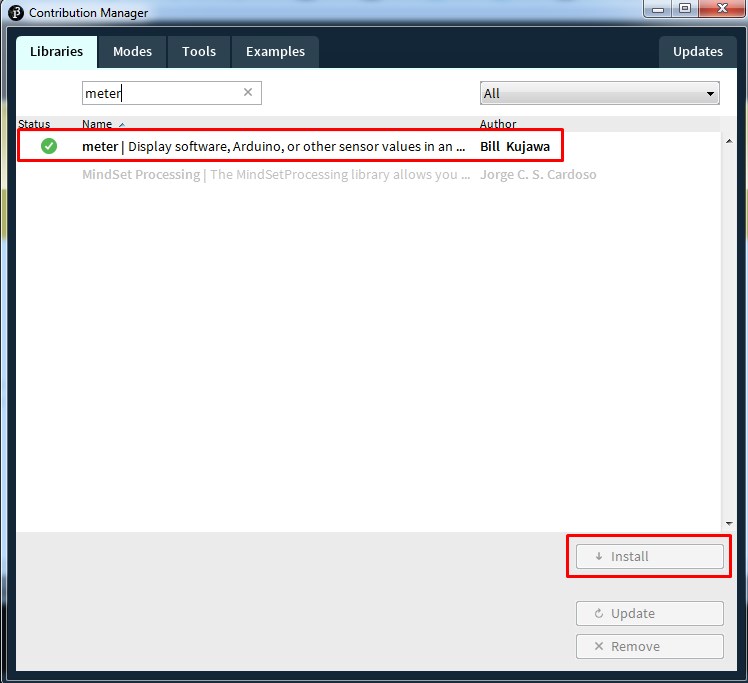
Example: - To create an analog or digital meter We need to install its library in the processing and then we can run the code.
This is the simple program of drawing vertical rectangle and inclined line.
Code: -
size (640,360);
line(100,50,600,250);
rect(100,50,20,250);

For more detailed about group assignment click Group Assignment