Assignment 12 - Machine Building
The Group Assignment is to:
- Design a machine that includes mechanism + actuation + automation
- Build the mechanical parts and operate it manually.
within ONE WEEK!
The group assignment is done by Ting Kok Eng, Noel Kristian, Lucas Lim and Yeo Gau Siong
Due to Covid-19 situation, we are all working from home (WFH) and hence have limited opportunity to meet in person to brainstorm ideas or discuss design details. The team has 2 online meetings using Zoom and MS Team apps.
1. What to make?

The team deliberated on what to make and several ideas come to mind, but eventually the team unanimously decided to work on something useful and related to Covid-19 pandemic. We decided to make a hand sanitizer dispenser machine
The design requirements are as follows:
- Allow sanitiser to be dispensed without physically touching it (Non-contact)
- Able to hold sanitiser sufficient for at least 800 uses without intervention
- Small and can easily transported from one location to another
- Battery Operated
- Notify personnel-in-charge when sanitiser quantity is near finishing (if components are available)-
These design requirements are collectively set by the team taking into considerations such as availability of manpower and other resources. The SP Fab Lab is usually man by one Technical Executive, thus it would be stressful for him if he is required to disinfect the dispenser or replenish the sanitizer every few hours. The human traffic at SP Fab Lab can fluctuate greatly. On a quiet day, there are around 5 people in the lab, but this number can become 8 to 10 times larger when there are several courses running concurrently. Taking an average of 10 times per person per day, on a busy day, the usage can exceed 500 times.
The location where the dispenser is to be placed may be need to be changed due to schedule requirement at short notices and the new location may not have readily available power supply. This is why the dispenser needs to be small and battery operated. The ability to notify the Technical Executive when the sanitizer runs low would be an added advantage and the team sees this as a stretch goal as we are unfamiliar with Wifi transmission protocol and setup.
2. How to make?
We divided this seemingly impossible assignment into several subtasks with assign them to each of the team members as follows:
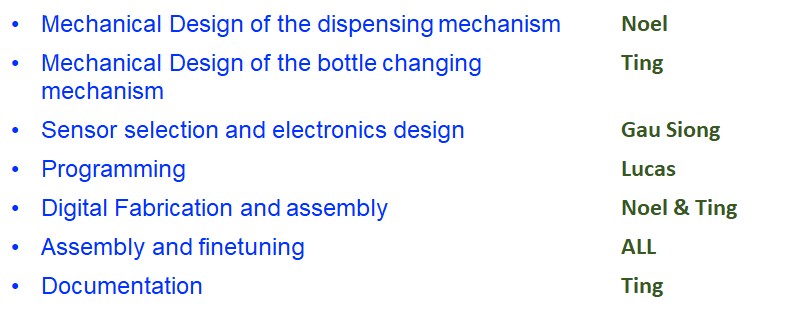
Subtask 1: Mechanical Design of the dispensing mechanism
There are several ways to dispense the sanitizer. Since the sanitiser we plan to use is of low viscosity (comparable to water or alcohol), a mini pump will do a nice job. However this require modification on the bottle to be made. The design should be able to use bottled sanitizer purchased from vendor directly without having to transfer it into special container.
The team researched on various options available and eventually decided to made a pressing mechanism to dispense for sanitizer with lotion dispensing pumps.
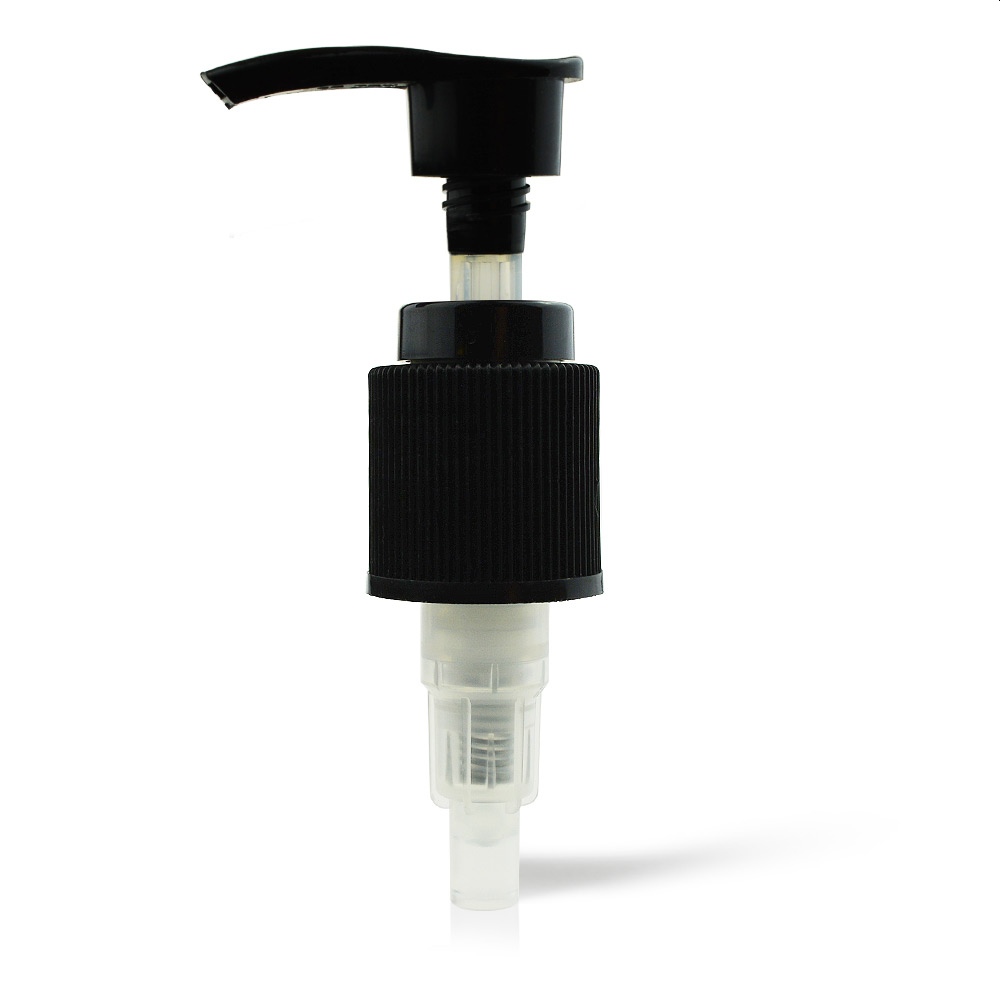
Image from www.raepak.com
There are several good designs available, hence the team does not wish to re-invent the wheel but instead adopt the spiral improvement mindset. We studied the following designs
Mr Innovative from http://electricdiylab.com/
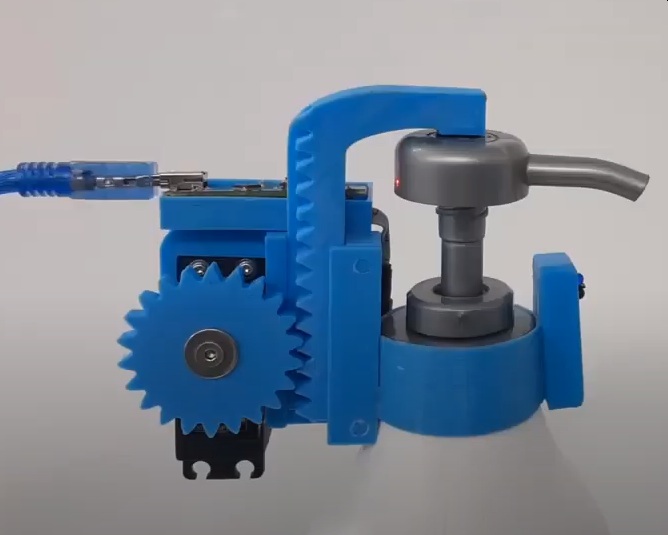
FABRI creator
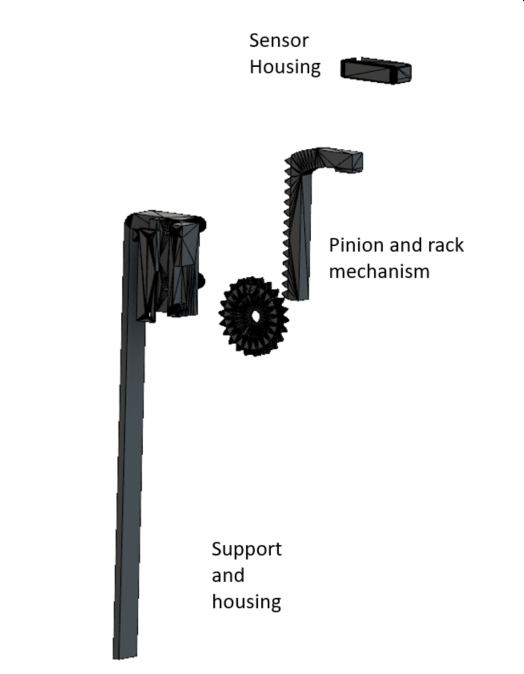
Using these design as reference, the pressing mechanism is designed and shown below. Details about the design can be found on Noel Kristian's personal page on machine building. We adopted Fabri Creators' gear design for the pressing mechanism as it is compact and requires only a simple servo motor. In Fabri Creator's design, the setup is fixed permanently onto the cap of a bottle. This means, when empty, the bottle has to be unscrewed and refilled. This will pose a challenge for places where human traffic is high and frequent replenish is required. We combined the idea from Mr Innovative and Fabri Creator so that the entire bottle can simply be replaced when empty.
Problems encountered
In the design of dispensing mechanism,few problems were faced. These are discussed in detail on Noel Kristian's personal page on machine building.
Some of the problems are listed below:
Hence I need to increase the length just nice to be above the bottle which is 230mm.
But the dimension of the base plate of the Ultimaker 2+ is only 223 mm x 223 mm, hence I need to reorient it into diagonal so that I can 3D print it.
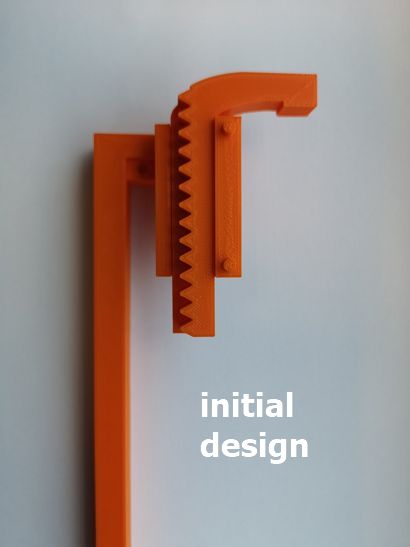
The rack design is reverse, where the part that will push the top of the bottle down to dispense the liquid should be at the bottom, not at the top as shown on the 2 figures below. Left figure is the old design and right figure is the new design. I also make the rack 2 cm longer.

to download the FUSION360 .f3d file for the dispensing mechanism
Subtask 2: Mechanical Design of the Bottle Changing Mechanism
The team sets a target of at least 800 uses before replenishing. The volume of sanitizer dispenses by a typical lotion press is around 1.0ml, this means 800ml of sanitiser is required per day. Most sanitizer sold at around 200 to 500 ml in volume, to meet the design target of 800 times, a bottle changing mechanism is required.
After much brainstorming, the team decided to use the same mechanism from the cuckoo clock where the figurine will turn in a circular motion

As the centre needs to be stationary, team decided to use spur gears. Details about the design of the mechanism is capture in Ting Kok Eng's personal page on machine building.

Note:The fusion 360 file for the gears (sanitizer_base_v8.f3d) is 11 mb in size and hence not included here. It can be downloaded from the Autodesk Cloud from above.
to download the Ting's FUSION 360 file for the marble holder
to download the Ting's STL files used for the 3D printing as a single Zip file
Problems encountered
In the design of this turning mechanism, several issues and challenges were faced. These are discussed in detail on Ting Kok Eng's personal page on machine building.
- Marbles are not of the same size.
- Support beam is too weak and bows when the servo is activated
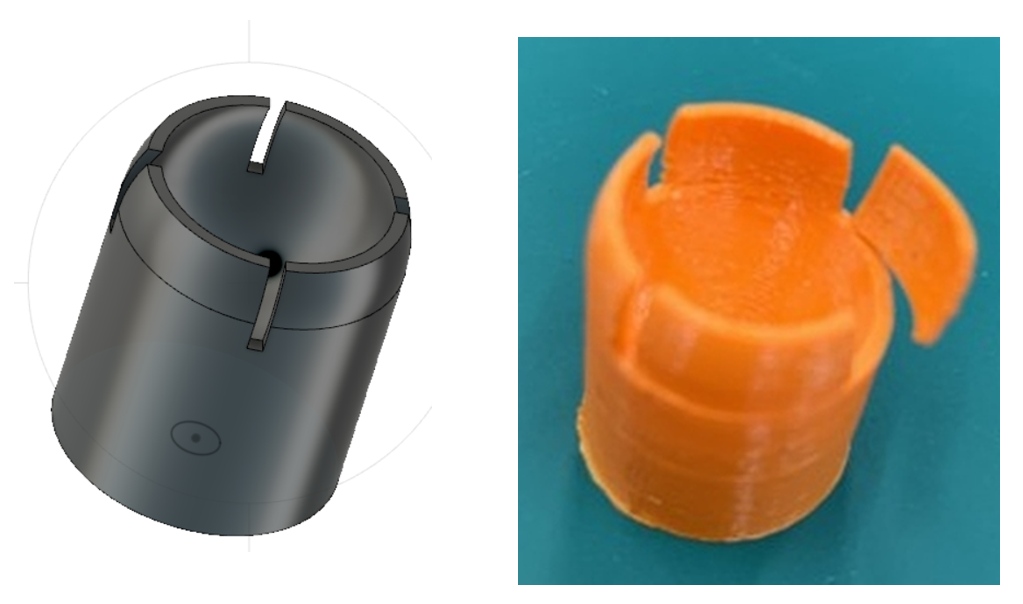
To enable the holder holder to revolve smoothly, I decided to use the idea of a rollerball pen. Without stainless steel balls, I decided to use marbles. It has never occur to me that these childhood playthings can vary so greatly in sizes. After 3G printing the marble holders, I tasted success when I insert the first marble. The marble is able to roll freely inside he holder. However when I tried insert the second marble, it cannot fit. I tried to force it in, but broke the PLA holder. I measured the diameters of the 5 marbles I had on hand and found that the sizes can vary as mcuh as 0.3 mm!. As a result, I have to modify the design and print the remaining two pieces separately.
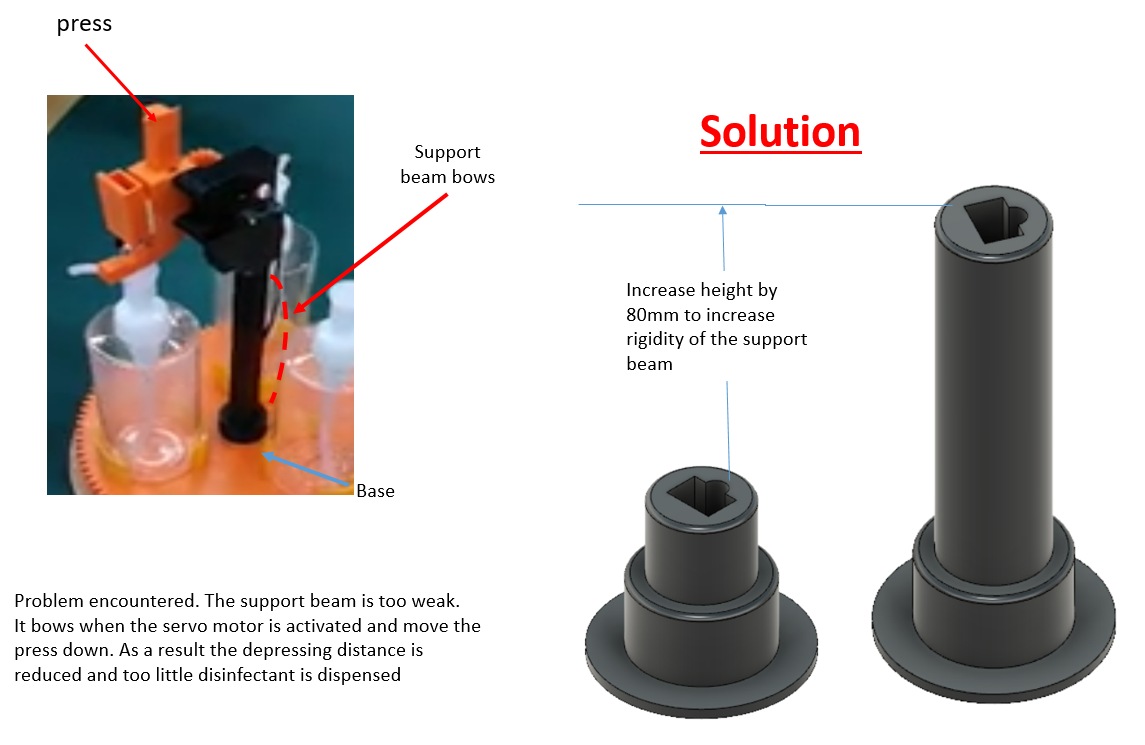
Referring to the image below, the support beam is too weak and it bows when the servo motor is activated and move the press down. As a result the depressing distance is reduced and too little disinfectant is dispensed. To overcome this the support beam can be thicken, but this would also been that the base also has to be changed. After discussing with Noel, we decided to extend the height of the base to provide the required rigidity.
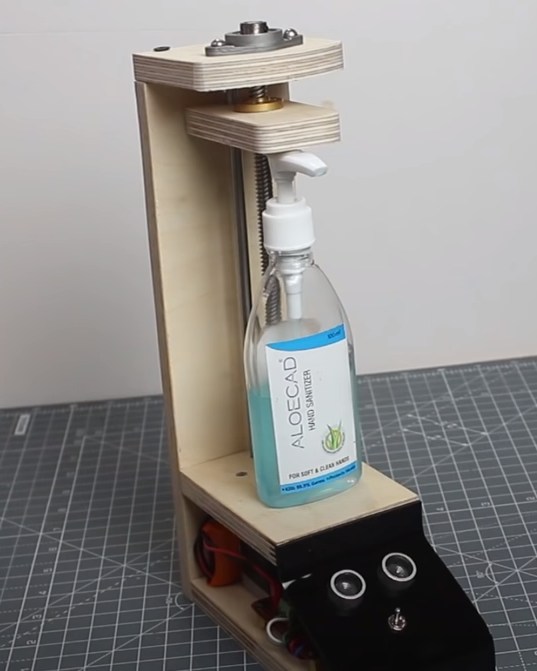
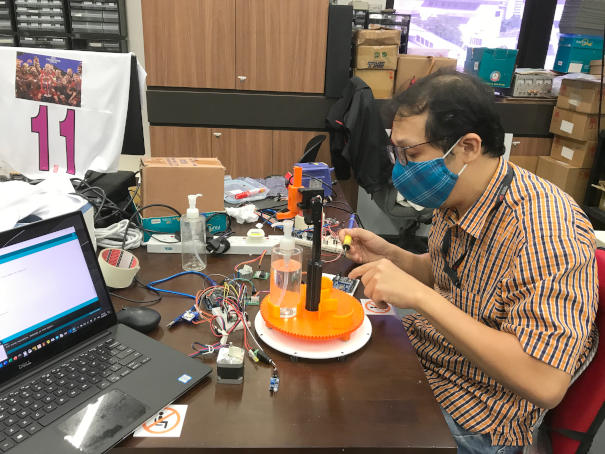
Subtask 3: Digital fabrication and assembly of mechanical parts
SP Fablab was finally opened from 8 June 2020 after 2 months of closure due to Covid-19. The mechanical design was successfully 3-D printed and assembled. The details are on Noel's and Ting's individual pages. The result is as follow :
Subtask 4: Electonics Design and the selection of electronics needed
The team had discussed online via MS Team before breaking up with each focusing on their respective tasks. Both Yeo Gau Siong and Lucas Lim are working toegther in the electronic design as well as selecting the most appropriate components needed to build the hand sanitizer dispenser machine.For sensor selection, the team had shortlisted 2 sensors, the ultrasonic sensor and the infra-red sensor. The team has experience with the ultrasonic sensor as we have used it for the assignment on Input Devices and hence is initially keen to use it. However, the team later decided to change to the infra-red sensor as the ultrasonic sensor is bulky and also may not be suitable for uneven surfaces or contour (the human hand).
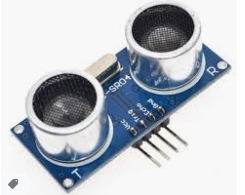
HC-SR04 Ultrasonic Sensor Module
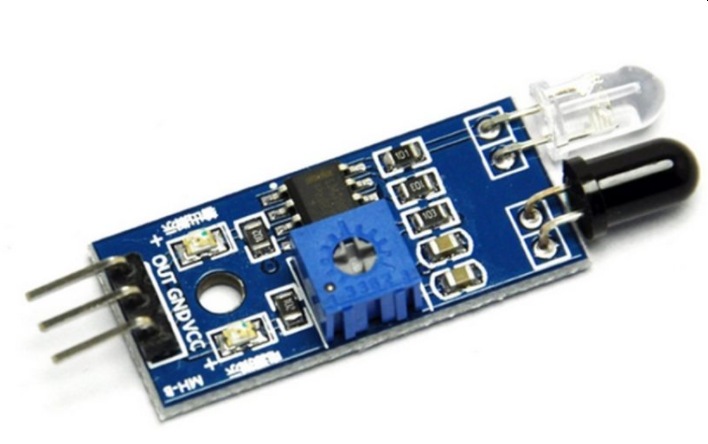
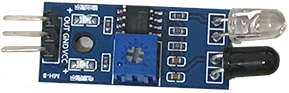
MOD44 Infrared Sensor Module
Details about the sensor selection and testing can be found on Yeo Gau Siong's personal page on machine building as well as Lucas Lim's personal page for stepper motor selection and motor control.
Following is our final list for the electronics to be used in our Hand Sanitizer Dispenser machine, a brief description of it as why as why we chosen it.
Selection of electronics :

|
Microcontroller : Arduino Uno
The Arduino Uno which is readily available in the Fab Lab and we had been programming using the Uno for some time now and were familiar with this microcontroller. Therefore the Arduino Uno is our prefered microcontroller to be used. |
|
Infrared Proximity Sensor MOD44 (or also known as Infrared Obstacle Avoidance Sensor Module) Infrared Proximity Sensor MOD44 is smaller in size and less bulky than the ultrasonic sensor and can be attached to the dispensing mechanism to detect the user hand. We only require to detect the user hand at a fixed distance, just presence or not presence. The infrared sensor module uses IR emitting LED and IR Receiver pair to detect obstacle in front of the sensor with a distance between 2 to around 40cm, and a detection angle of 35 degree. When the sensor detects an obstacle (the user hand), the signal LED indicator lights up, and produce an output digital signal (a low-level signal) in the OUT pin. The sensor has a potentiometer which can be adjusted to change the detection distance. |
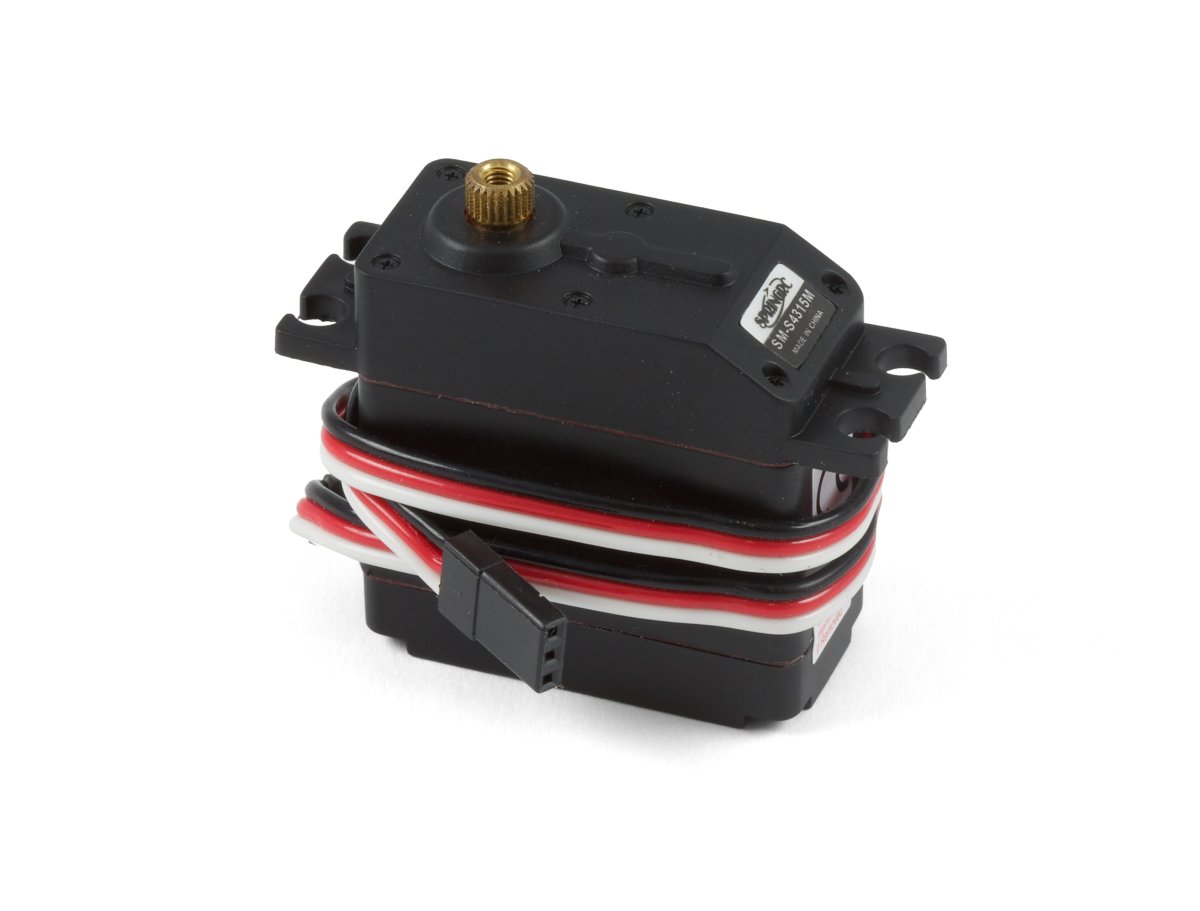 |
SpringRC (SM-S4315M) Metal Gear Servo Motor This servo motor has a metal gear box and runs on 5V. It is easy to wire up and program. We only require the servo motor to turn around 60 to 80 degree. Specifications of SpringRC (SM-S4315M) Servo Motor Range of Rotation : 180 degree Torque: 12.2 kg·cm Gear Train Material : Metal |
|
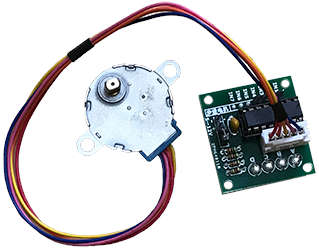
28BYJ-48 stepper motor and ULN2003 motor driver The 28BYYJ-48 is a widely used unipolar (5-wire 4 phase) stepper motor running on 5 volts and connected to the ULN2003 motor driver. We chose this for our bottle changing mechanism as it can rotate to a very precise position. It can also can rotate 360 degree, whereas the servo can only rotate up to 180 degree maximium. However this 5V stepper motor has a low torque and speed than the servo motor. A ULN2003 motor driver is required to drive the motor from the Arduino Uno. Specifications Motor Type: Unipolar Stepper Operating voltage: 5V Step angle: 5.625 x 1/64 (5.625°/64) Pull in Torque: 300 gf.cm In-traction Torque: >34.3mN.m(120Hz) Detent Torque: >34.3mN.m |
|
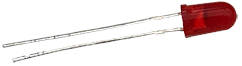
LED Two LEDs are used in the machine as status indicator lights and for debugging purpose. Each LED to be connected to a 470 ohmn resistor. |
|
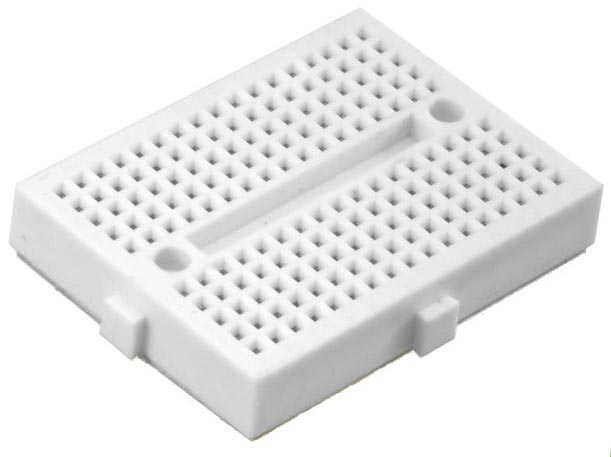
Mini breadboard A mini breadboard (white) of 170 tie-points is used to cater for the additional VCC and GND slots. |
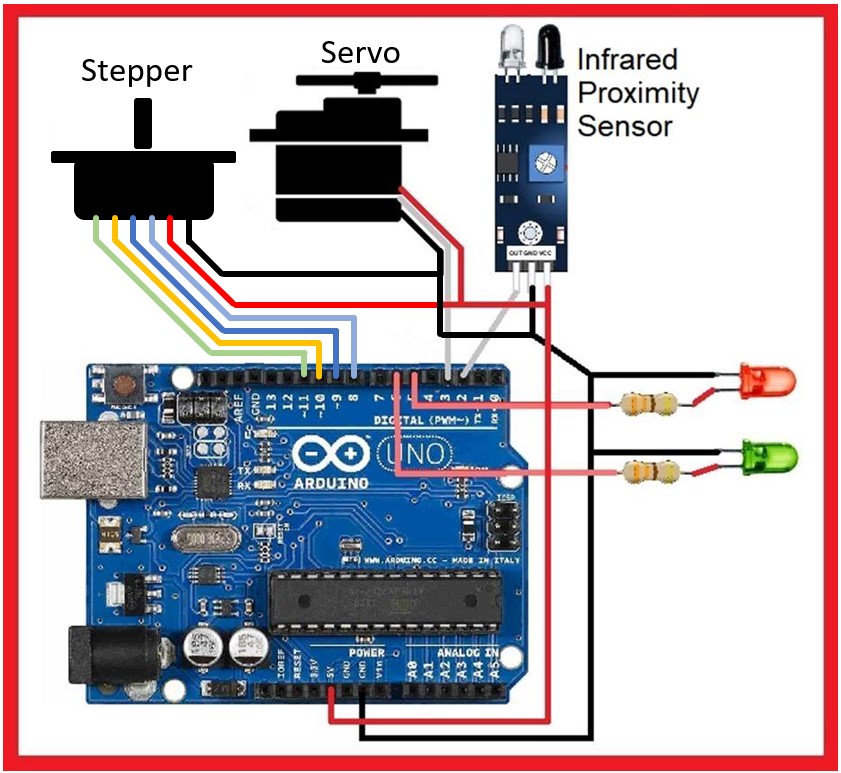
Electronic Design for Hand Sanitizer Dispenser Machine and wiring diagram
- An Arduino UNO is programmed to control all the electronics components. It also provide the VCC supply.
- Infrared Proximity Sensor (MOD44) is used to detect user hand, the 'out' port on the sensor is connect to the microcontroller I/O port.
- Servo motor (SM-S4315M) is used in the dispensing mechanism in our Hand Sanitizer Dispenser machine.
- Stepper motor (28BYJ-48) is used in the bottle changing mechanism.
- Red LED turn on to indicate object is detected
- Green LED turn on to indicate Servo motor is ready to turn (dispensing mechanism)
- Both LEDs blinks to indicate Stepper motor is turning (bottle changing mechanism)
Parts List (electronics) :
| No. | Part Description | Qty |
| 1. | Arduino Uno board R3 | 1 |
| 2. | Mini breadboard 170 tie-points to cater for the additional VCC and GRN pins | 1 |
| 3. | Infrared proximity sensor MOD44 | 1 |
| 4. | Spring RC SM-S4315M 2BB metal gear high torque servo motor |
1 |
| 5. | 28BYJ-48 stepper motor, unipolar | 1 |
| 6. | ULN2003 motor driver for 28BYJ-48 stepper motor |
1 |
| 7. | LEDs | 2 |
| 8. | 470 Ohm Resistor | 2 |
| 9. | AC to DC Power Adaptor UK plug (5.5mm connector) | 1 |
| 10. | Jumper wires (or a roll of dupont electrical wire to manually cut and connect with Male/Female pin terminal and dupont jumper housing) |
20 |
Tools :
| a. | Digital Multimeter for testing purposes | 1 |
| b. | Small screwdriver | 1 |
| c. | Soldering tool and soldering material | 1 |
| d. | Securing means : Glue gun, electrical PVC insulating tapes, small cable ties, others if needed | 1 |
Subtask 5: Programming
The team decided to use Aruino IDE to write our coding, as we are using the Arduino UNO board.
Details about the program algorithm can be found on Lucas Lim's personal page on machine building.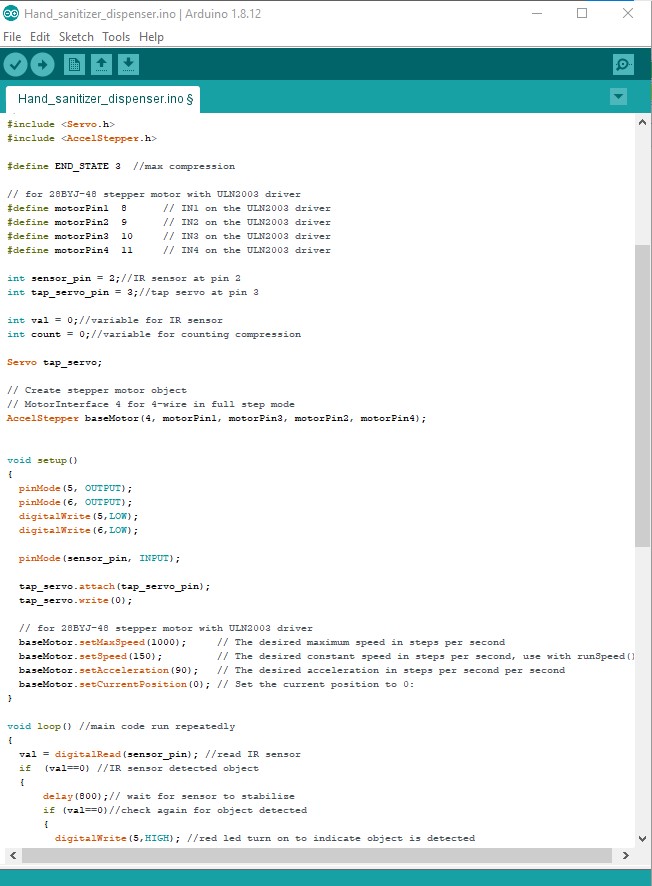
Programming in Arduino IDE
to view or download the coding for the hand sanitizer dispenser machine
Description of Program Code
- Infrared Proximity Sensor (IR sensor) will detect object (user hand) at fixed distance range (eg. 7cm)
- MCU reads the detection status of Infrared Proximity Sensor
- If detection status is true, red LED turns on to indicate object is detected
- Servo motor at dispensing mechanism is activated and will turn, eg. to 80 degree, executing compression, and then turn back to 0 degree, releasing compression
- Counter A that records the number of compression (or pumps) increases by 1
- MCU check detection status of Infrared Proximity Sensor, Servo A remain at 0 degree if object remain detected. No solution is dispense.
- A loop is used to check the detection status of IR sensor again, if object is still presence (detected), nothing happen, no compression is executed. If hand has been removed, exit loop.
- Reset LED, i.e. Red led turn off and Green LED turn on. This LED indicated the sanitizer dispenser machine is really for the next user.
- Check counter for maximum compression on a bottle used, when reached the predefined maximum compression set, the stepper motor at the bottle changing mechanism will rotate the base for the next bottle to be in position
- Both Red and Green LED blink when stepper motor is moving/turning
- Reset counter after stepper motor finished turning. Empty bottle had been changed and new bottle is really for the next user.
Subtask 6: Putting everything together
Finally the team met up and began to put everything together; the infra red sensor, servo motor, stepper motor, etc into with its respective position in the mechanical parts (i.e dispenser mechanism, bottle changing mechanism, enclouse for the infra red sensor) and wiring up everything.
Before this, both Lucas Lim and Yeo Gau Siong tested each individual electronic components (i.e the infra red sensor, servo and stepper motor) to make sure that these individual components are working properly first. Testing was done, with the Arduino board and just the electronic compenents and just running the minimum coding .i.e to see that the motor can turns.
After assembling, Lucas Lim and Yeo Gau Siong integrated their coding together and fine tuned the programming with the actual operation of all the mechanism. Lucas fabricated the enclosure for the electronics. They recorded the video demostration.
Problems encountered
1. The stepper motor has to drop it's speed in order to have the sufficient torque to rotate the base at the bottle changing mechanism. Example, the tested speed is 700 steps per second (without load) but had to be dropped to 150 steps per second to increase the torque.2. The jumper cable supplying VCC for the infra red sensor was having a bit of issue on the second day of testing, but we managed to secure the cable back into position as it was a bit loose under the base. In hindsight, we could have a small openning at the infra red sensor enclosure so that we be able to see the lit-up power indicator LED of the sensor.
3. A buzzer was supposed to be added into the product, this to notify the Technical Executive to refill the bottles, but the mini piezo buzzer was too soft in the Fab Lab environment to be of any use.
Assembly and final testing of the coding
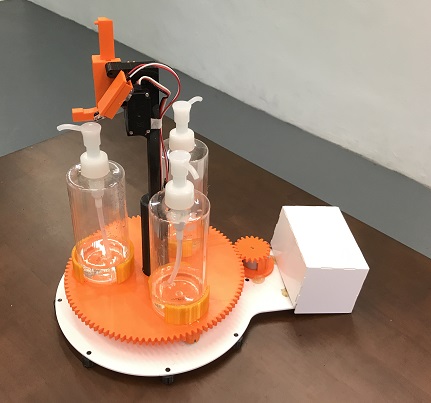
Our completed hand sanitizer dispenser machine
Note :
For video recording and demostration purpose,
the max. number of pump was set to 3, therefore
after three pumps, the stepper motor will be activated
to rotate the base and change to the next bottle.
Duration : 49 secs
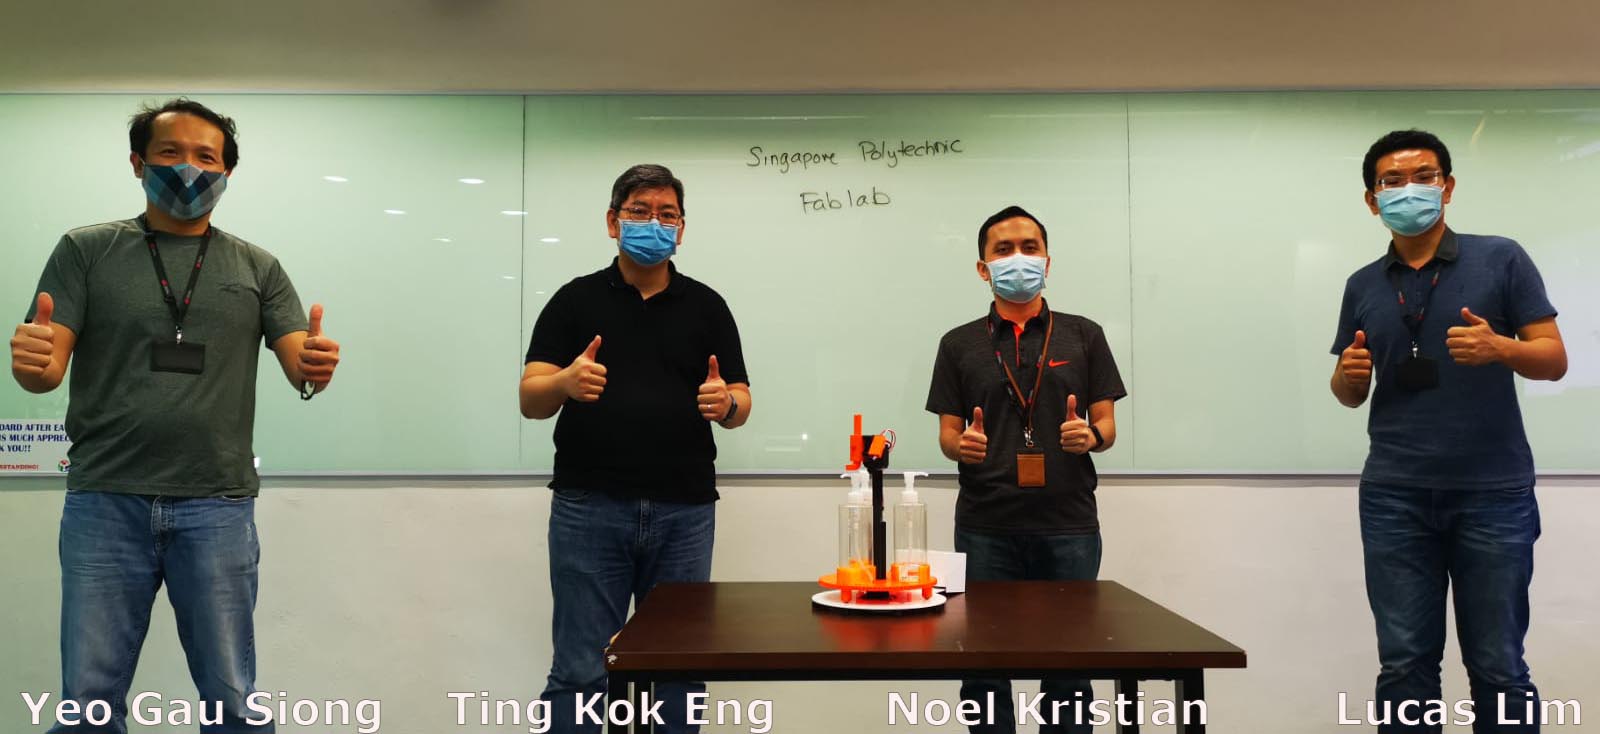
Mission accomplished and our memorable group photo
- Explore the possibility to integrate a ESP32 or any wifi module, so as to be able to send a notification message to the Technical Executive to refill the empty bottles.
- Explore the possibility to have some kind of logging capability (writing to SD card) to observe the daily usage pattern.
Files :
- FUSION 360 file for the dispensing mechanism
- FUSION 360 file for the marble holder
- FUSION 360 file for the sanitizer base
- Hand_sanitizer_dispenser.ino Coding