Embedded Programming
Week 8 is on Embedded Programming. There are 2 assignments; group and individual. The group assignment is documented here
The group decided to compare Micropython with Sketch (C/C++) using ESP8266 and compare ATtiny45 board with this ESP8266 to observe the effect of architecture on performance. In both studies, the "Blink" program is used. The delays between the ON and the OFF removed to examine the response time. An oscilloscope is used to observe the waveform and to measure the cycle-time.
Comparing the architectures of microcontroller board used

Reference from URL on 29/03/20: https://www.mischianti.org/2019/08/20/wemos-d1-mini-esp8266-specs-and-ide-configuration-part-1/
Reference from URL on 29/03/20:https://tech.microbit.org/hardware/
Reference from URL on 29/03/20:https://www.microchip.com/wwwproducts/en/ATtiny45
(A) Different language
Workflow for using Micropython on Wemos D1 Mini
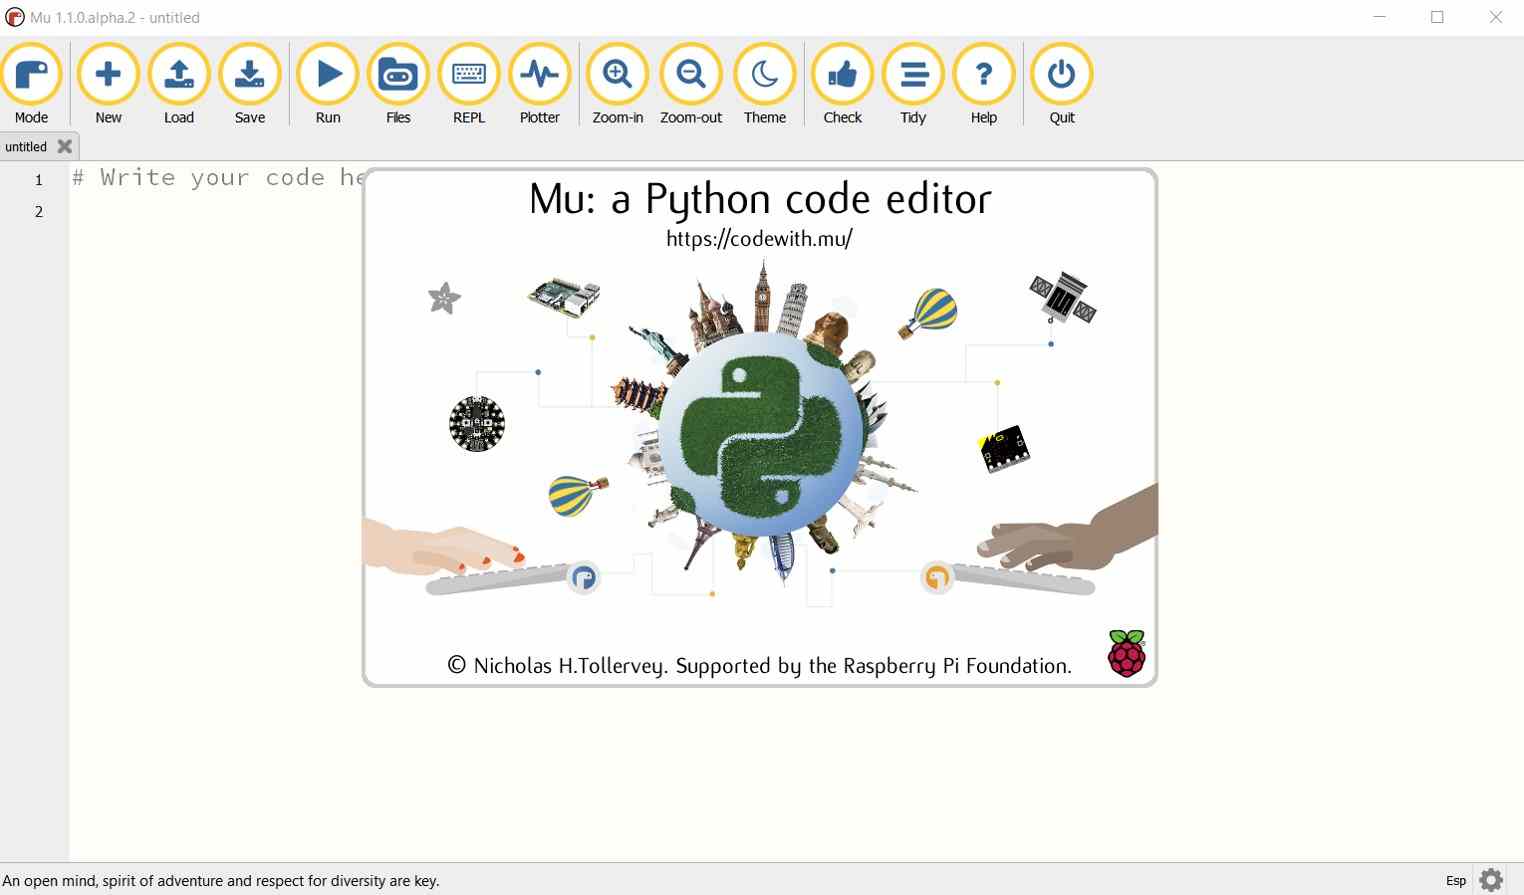
To use Micropython, a Python editor must first be downloaded. The team selected MU.
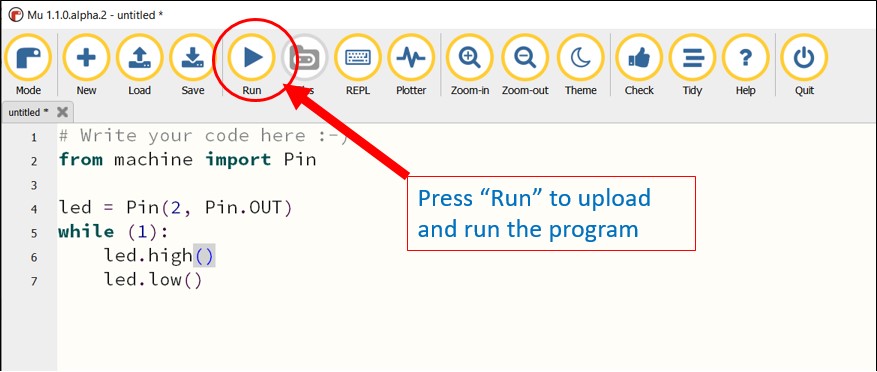
Coding in Micropython is quite similar to Sketch. A simple blink program was written, the delays between ON and OFF is deliberately removed.

Unlike in the case for ATtiny, to upload the program onto the chip, for ESP8266, a programmer is not required, a micro-USB cable is simply used to connect the ESP8266 board to the PC. When the "RUN" button is selected, the program is uploaded and the LED on the board lights up. As there is no delay, the naked eye cannot see the blinking as they are happening too fast.
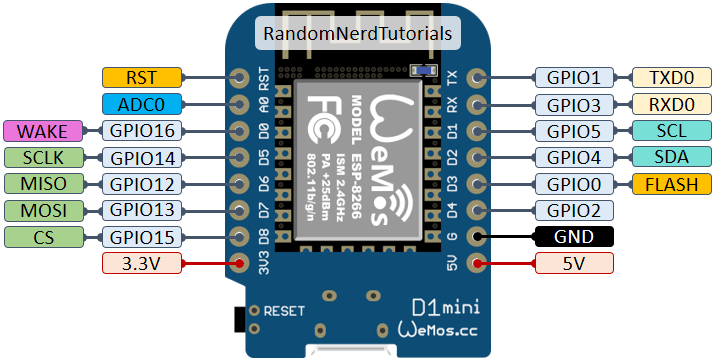
An oscilloscope is used to observe the switching cycle.From Randomnerdtutorials.com the onboard LED for ESP8266 Wemos D1 mini board, is connected to GPIO2 (pin D4), tapping this point and ground, the switching cycle can be observed.
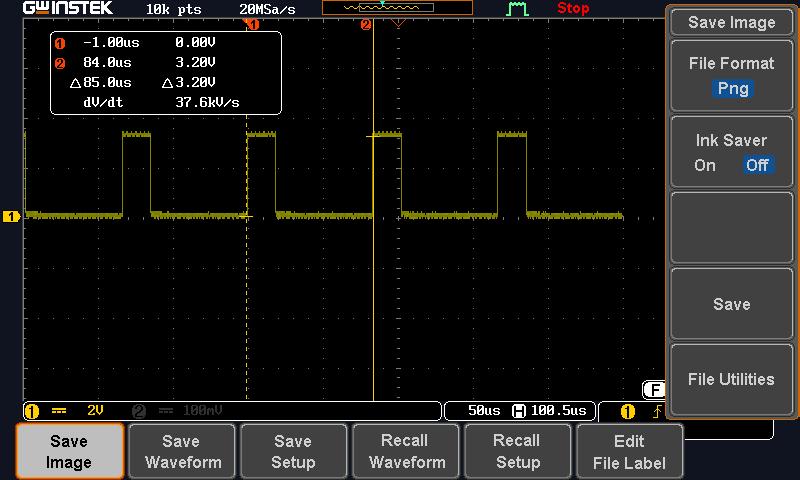
From the image above, the cycle time is 85 µs
Workflow for using Sketch on Wemos D1 Mini
To use ATtiny45 in Ardunio IDE, the Ardunio Core for the chip must first be installed. For ESP8266, this is alo required. To install this, the steps are similar to installing the Ardunio core for ATtiny45.
In Ardunio IDE, select File --> Preference
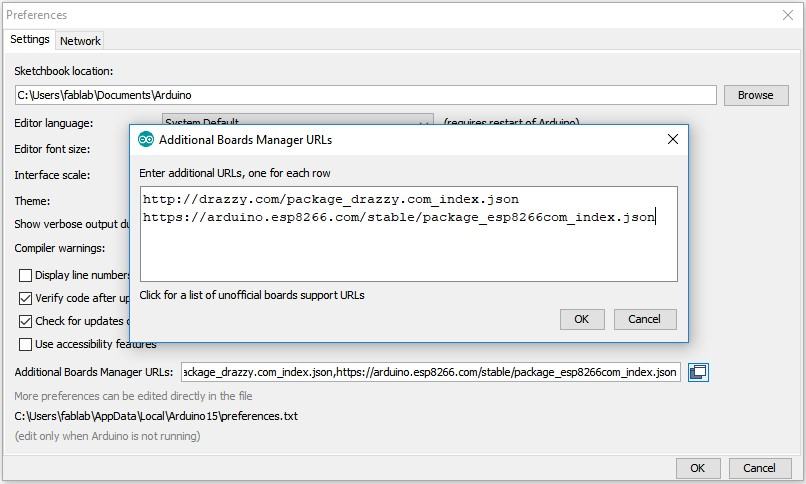
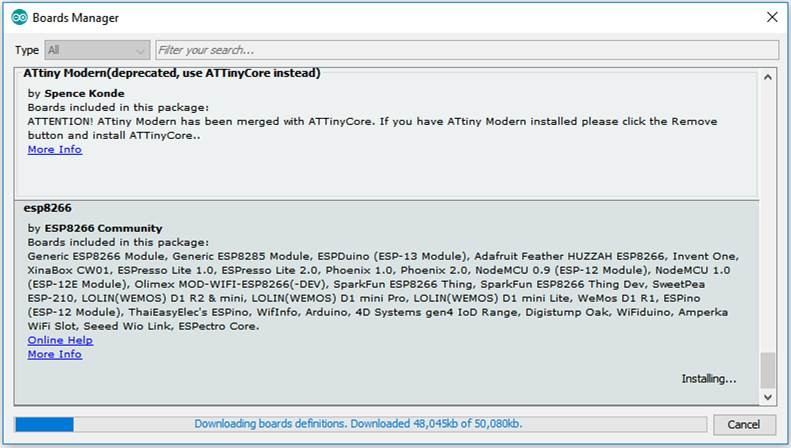
Obtain the URL from github and enter into the field under Arduino Preferences. Next under "Tool" --> "Board Manager" select "ESP8266". This will install the required core to support the chip.
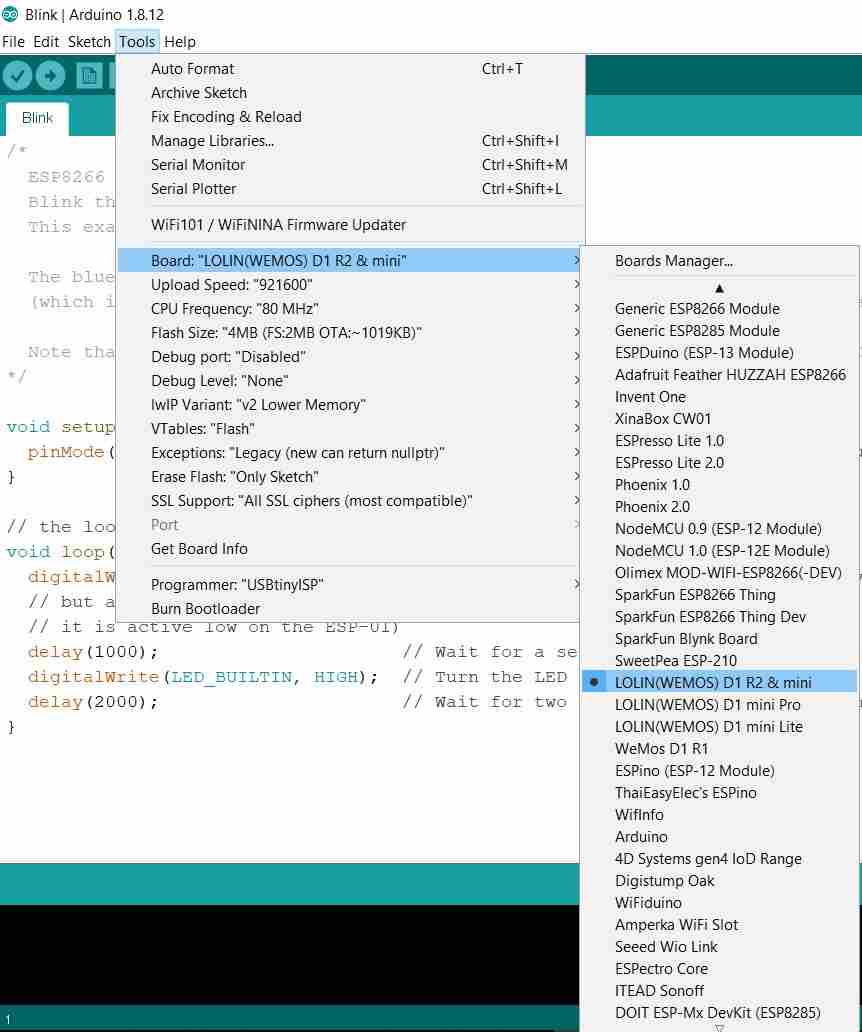
After the installation, go to "Tool" and select "LOLIN(WEMOS) D1 R2 & Mini". This complete the installation to bring support for the ESP8266 chip to the Arduino environment.
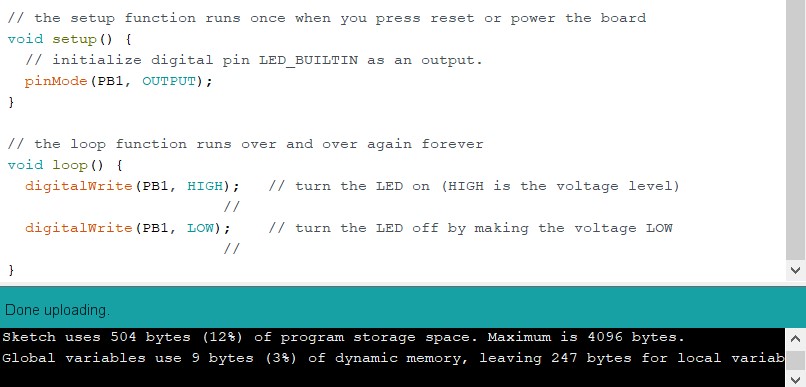
A simple program similar to above (written in MicroPython) is written using Ardunio Sketch.

To upload, the program is first verified and compiled. Uploading is the same as above; directly onto ESP8266, without any external programmer. Interestingly, it is noted that the hex file for this simple program is a whopping 256104 bytes! A slightly longer code in sketch for ATtiny is only about 890 bytes almost 300 times smaller!
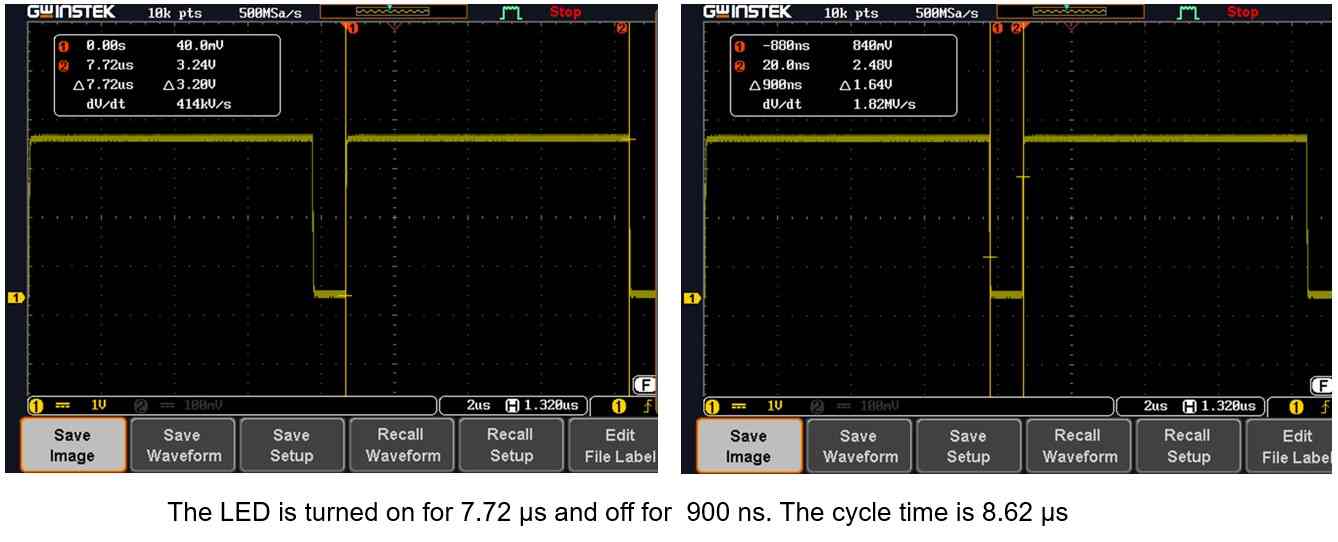
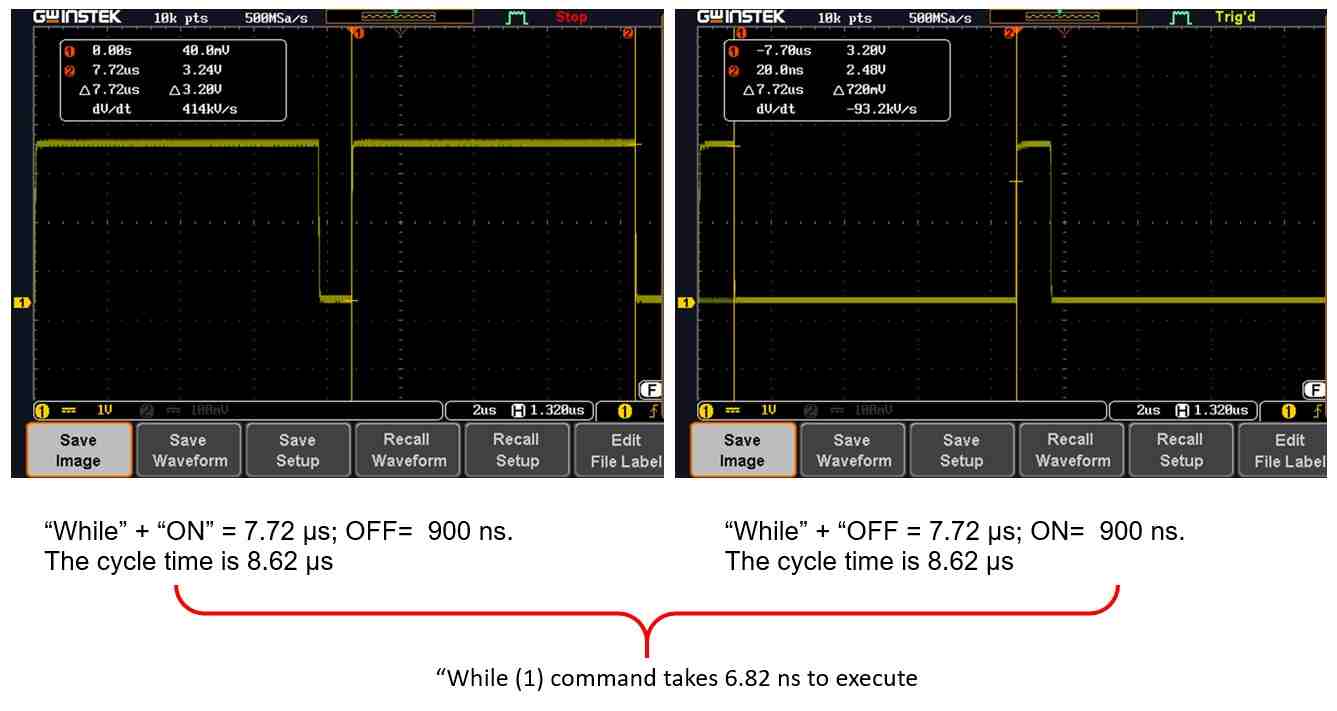
From the image above, the cycle time is 8.62 µs, significantly faster than when MicroPython is used
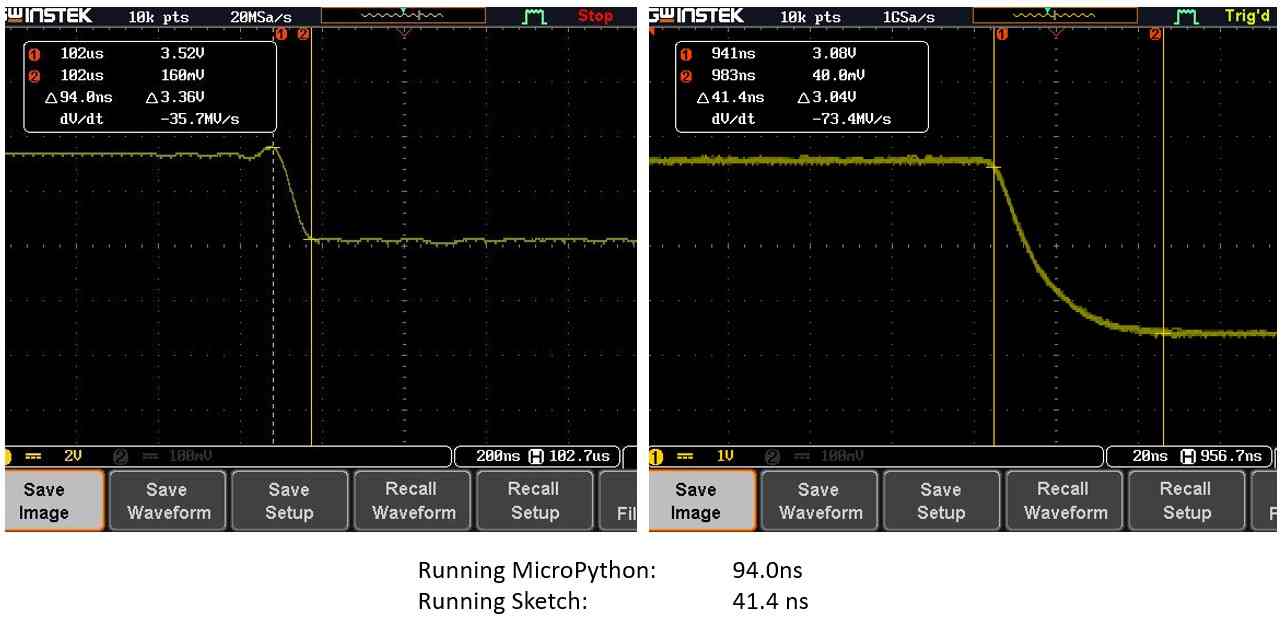
Another interesting observation is the difference in transition time is required for switching logic high to low, there is a significant difference when the same chip is running two different languages.
(B) Different Architectures
What is an ESP8266?
From the maker, Expressif's website, ESP8266 is a low-power microcontroller with highly-integrated Wi-Fi solution. It uses a 32bit processor with 16 bit instructions using Harvard architecture which mostly means that instruction memory and data memory are completely separate.
The Lolin Wemos D1 mini that our team use has 11 digital input / output pins. All the pins are interrupt / pwm / I2C / one-wire supported (except D0) and these IO pins all run at 3.3V. It also has 1 analog input (3.2V max input). USB-TTL is built on board with a Micro USB connection and the board is compatible with Arduino and NodeMcu. An advantage of ESP8266 is that is can be programmed as any other microcontroller and especially any Arduino.
For this study, the Wemos D1 mini is compared to the ATtiny45 hello_board. The same blink sketch program described above is run on the ATtiny45 hello board and the output is observed with an oscilloscope.
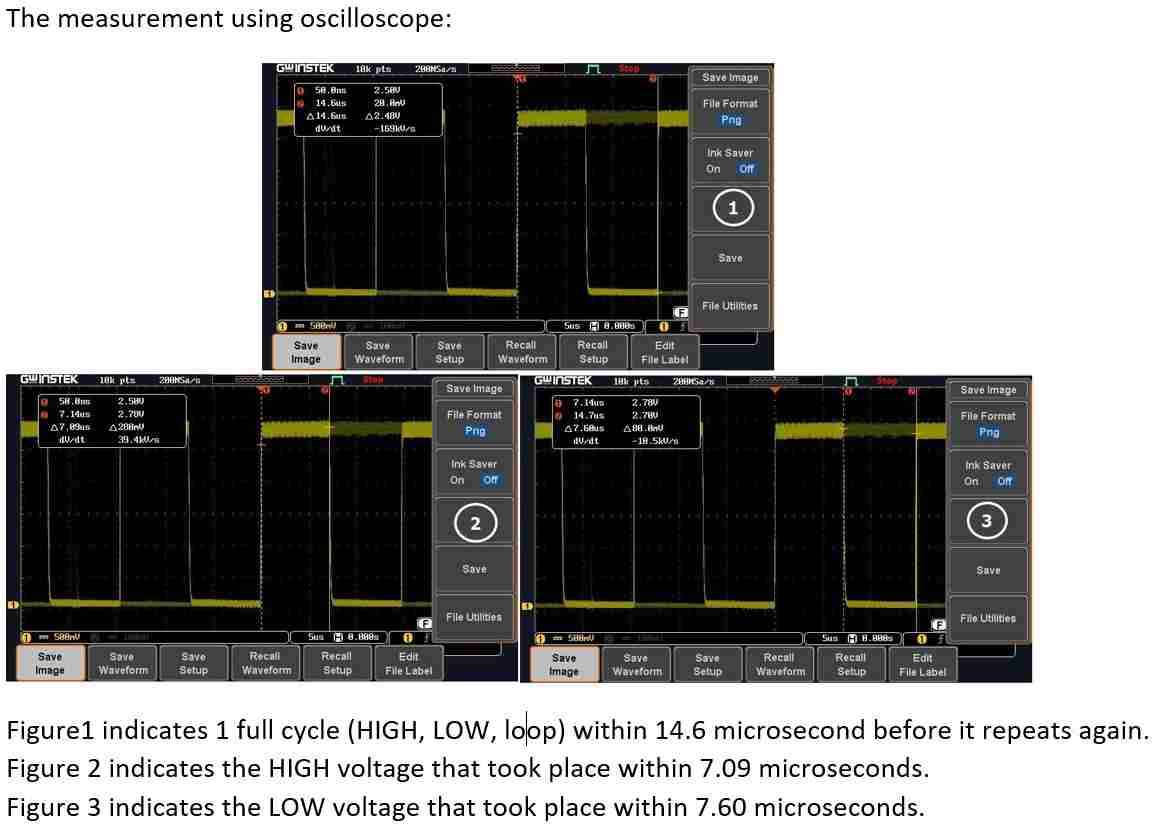
The cycle time is only 14.6µs Although for ATtiny there is almost no time taken for the loop function, unlike for ESP8266, there is a delay of close to 7µs before the cycle repeats, the 32 bits versus the 8 bits for ATtiny still give ESP8266 a much better performance
(C) Microbit Absolute Performance
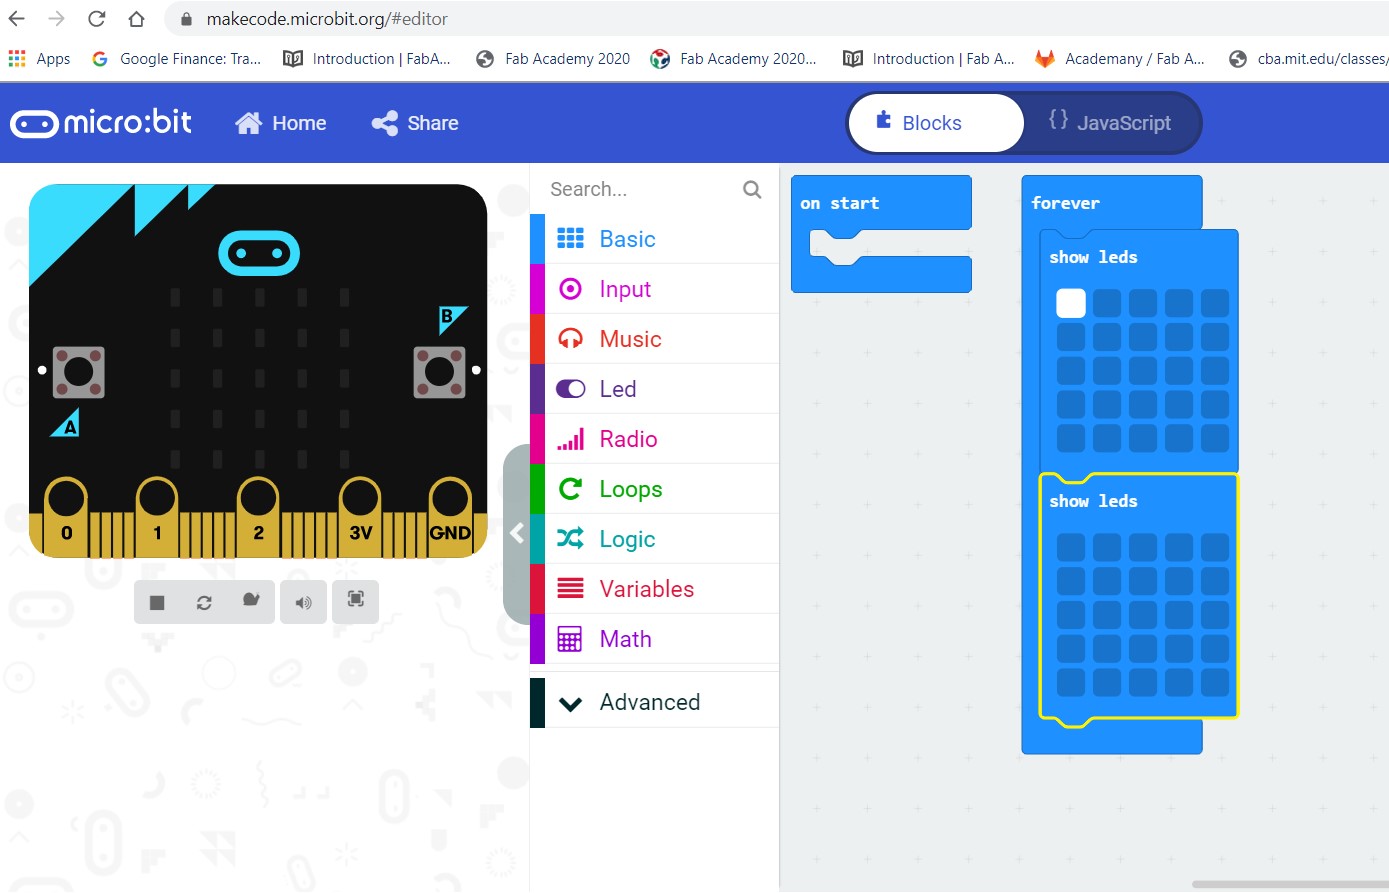
We measure the absolute performance of a microbit using the blink code created using the web-based make code.
Below is the blocks created
We measure the performance using oscilloscope.

The cycle time for this is 17.9 ms
The cycle time is much slower compared to WEMOS D1 mini. This however is not a fair comparison as for microbit, the blink involves lighting up a full array of LEDs, hence the experiment done can't be compared to the previous 2.
Another test was conducted to measure the absolute performance of a microbit board using the blink code, below is the blocks created using digital write to pin 1 switching on and off 3 times without delay, and capture the square wave using oscilloscope as shown below.

See connection using oscilloscope probe, connect to the pads on microbit board label 1 and GND.

We measure the performance using oscilloscope.

The cycle time for this is 11.8 µs, which is much faster than when a full array of LEDs is lit and comparable to the WEMOS D1 mini board.