Final Project
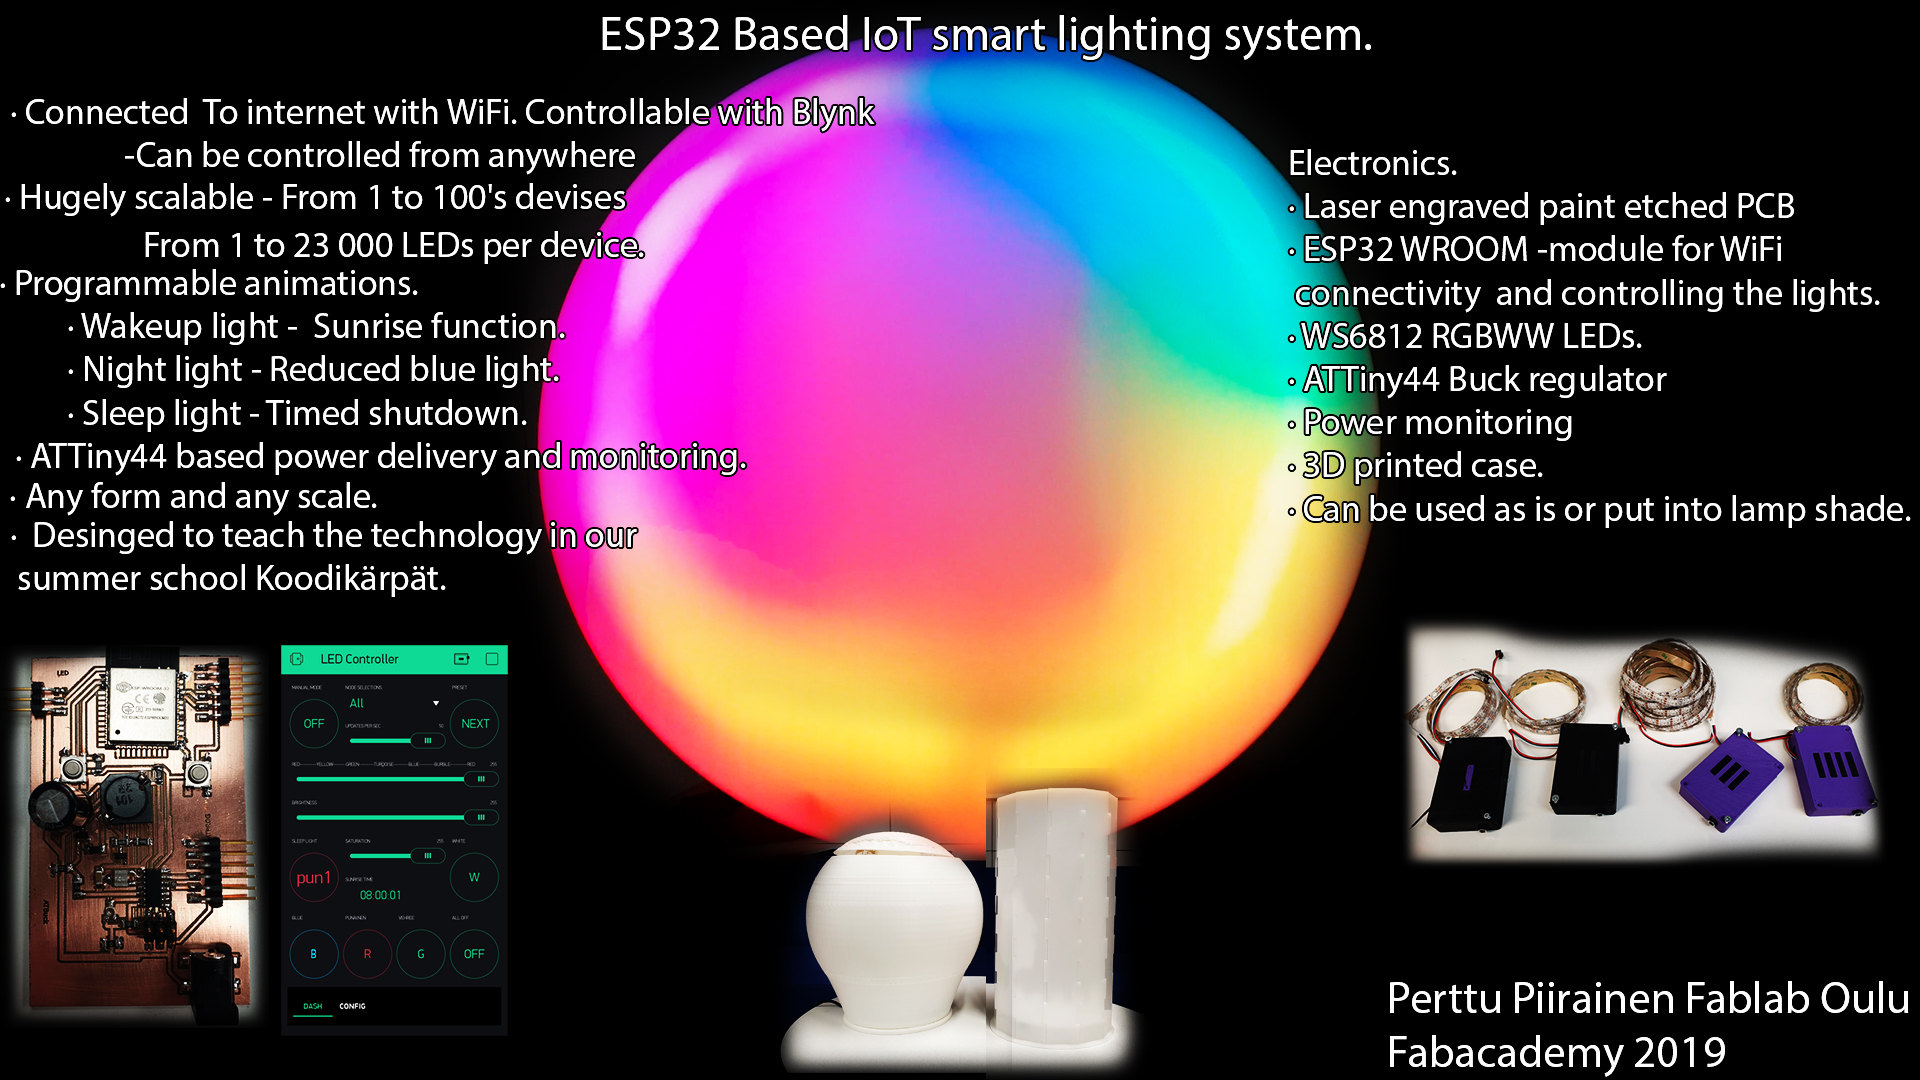
My final project is smart phone controllable WiFi based a RGB lighting system
I designed my project to be an easy entry project in ESP32 and in power management systems project for koodikärpät(koodikärpät.com , Iltalehti , Oulun ylioppilas lehti , Facebook page ,Oulu Lyhti ,instagram , a technology summer job for teenagers from 15 to 17 years old. Last year we had 290 summer jobbers. The teenagers made everything from flabby bird like-game in mobile phone, a VR zombie shooter game with 3D modeled and printed gun with working trigger, mag release, mag reload and working slide to Vive VR glove with positional and finger placement trakking . As good as Arduino is for learning coding microprocessors it is severy lacking multiple key features that teenagers look in modern gadged, which limit heavily its usability in wilder projects. The real deal killer for today’s teenagers is the absence of WiFi. Everything needs to be easy, cheap and internet based. Otherwise, it is seen not as flashy and does not excite the teen much. I hope that smartphone controlled connected animated lights would be more invigorating and not so pointless. The general idea is to be somewhat inspiring, hugely modular, cool looking, and easy to custom to your own likings. All parts are bog-standard and just bogged together. As this will be free and for everybody to use. And I will probably teach to 80 teenagers how to build and code their own version in next 2 to 3 months.
Final project requirements.
What does it do?
The light can be controlled from a smartphone app. It also features: * Wakeup light - A Sunrise of 30 minutes on set time. The light starts as dim red as it gets brighter the light turns yellow and after turs to full brightness and to white light. * Sunset light - Same as the sunrise only backwards. * Night light - Reduced blue light mode. * Nice animations for mood lighting. *16.4 million light colors.
Who’s done what beforehand?
On the market, there is plenty of smart connected lights. Like Philips Hue or Flux Smart. These lights are usually hugely expensive and/or need a central hub to work. One hub can control 50 lights and they need to be in the range of the hub. With mesh, the limit is somewhere 1000 devices and the range is expanded with every device. These lights are usually single die LEDs. the color and color temperature can be usually changed. in the most expensive models, some color pattern animations can be preinstalled. Individually addressable LED strip will be more versatile. Any kind of animation can be programmed.
Mio Kato Has done wireless lighting system. My idea is to get rid of the central controller and every control calculation is made on the mesh cloud ESP:s. Or in the case of the Blynk the server can be anywhere on planet. It does not need to be in the same room.
What did you design?
The PCB, power distribution unit for the 3.3v rail, enclosure and demo model. And some code
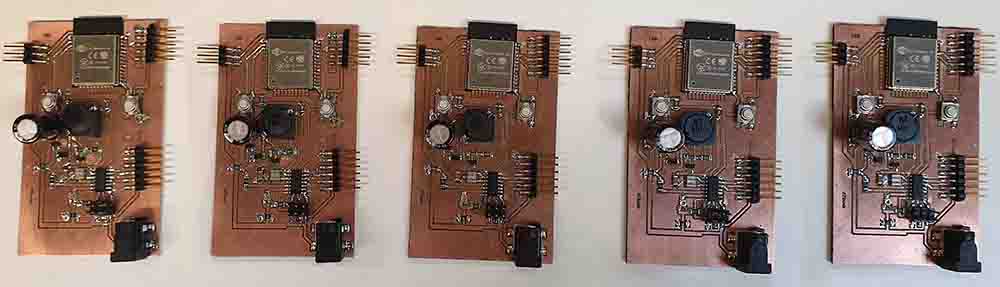
The PCB was designed in Eagle in the same way as the week5

The board was not milled but Laser paint removed and etched in the same way as in the Wildcard week.

The control boards were made into same like form.
</center>
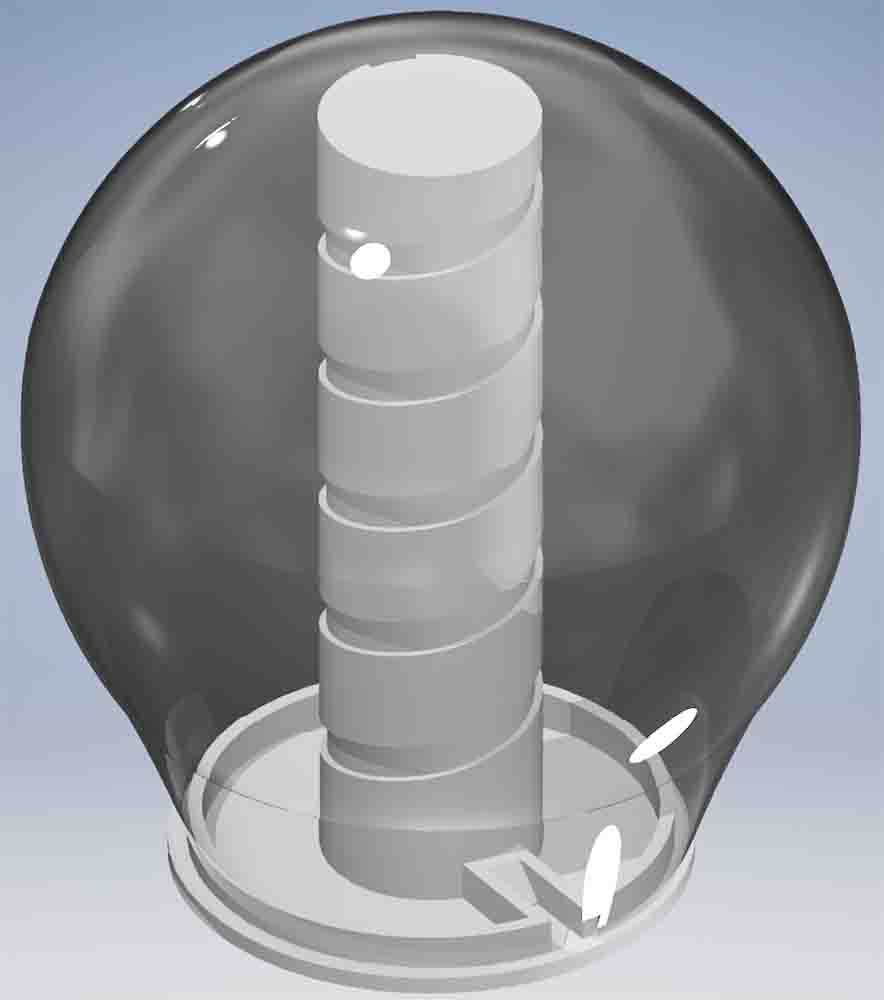
For the controll boards I designed enlosedures.
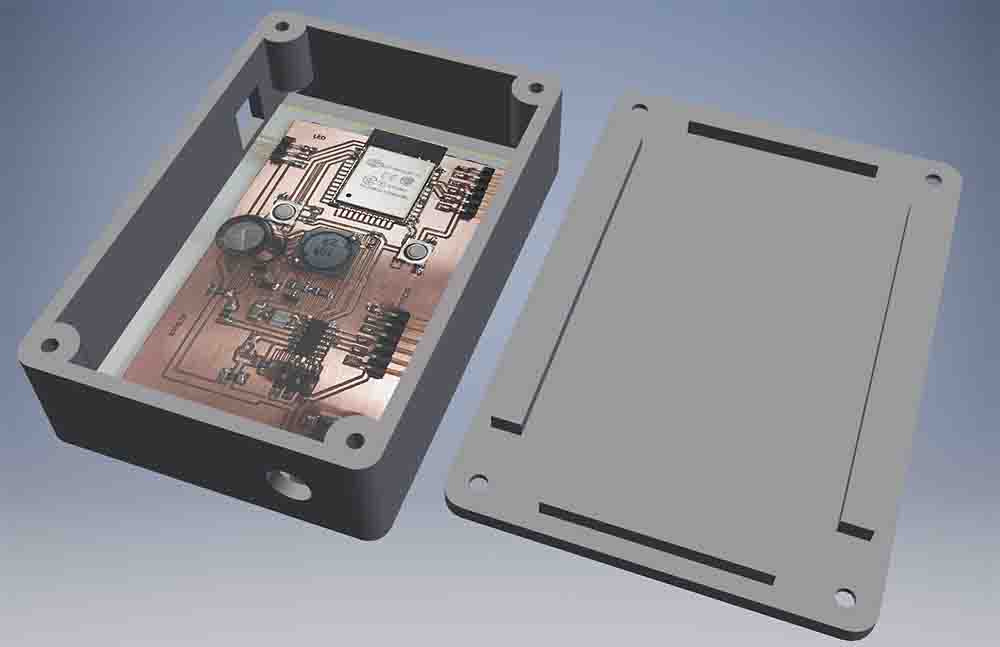
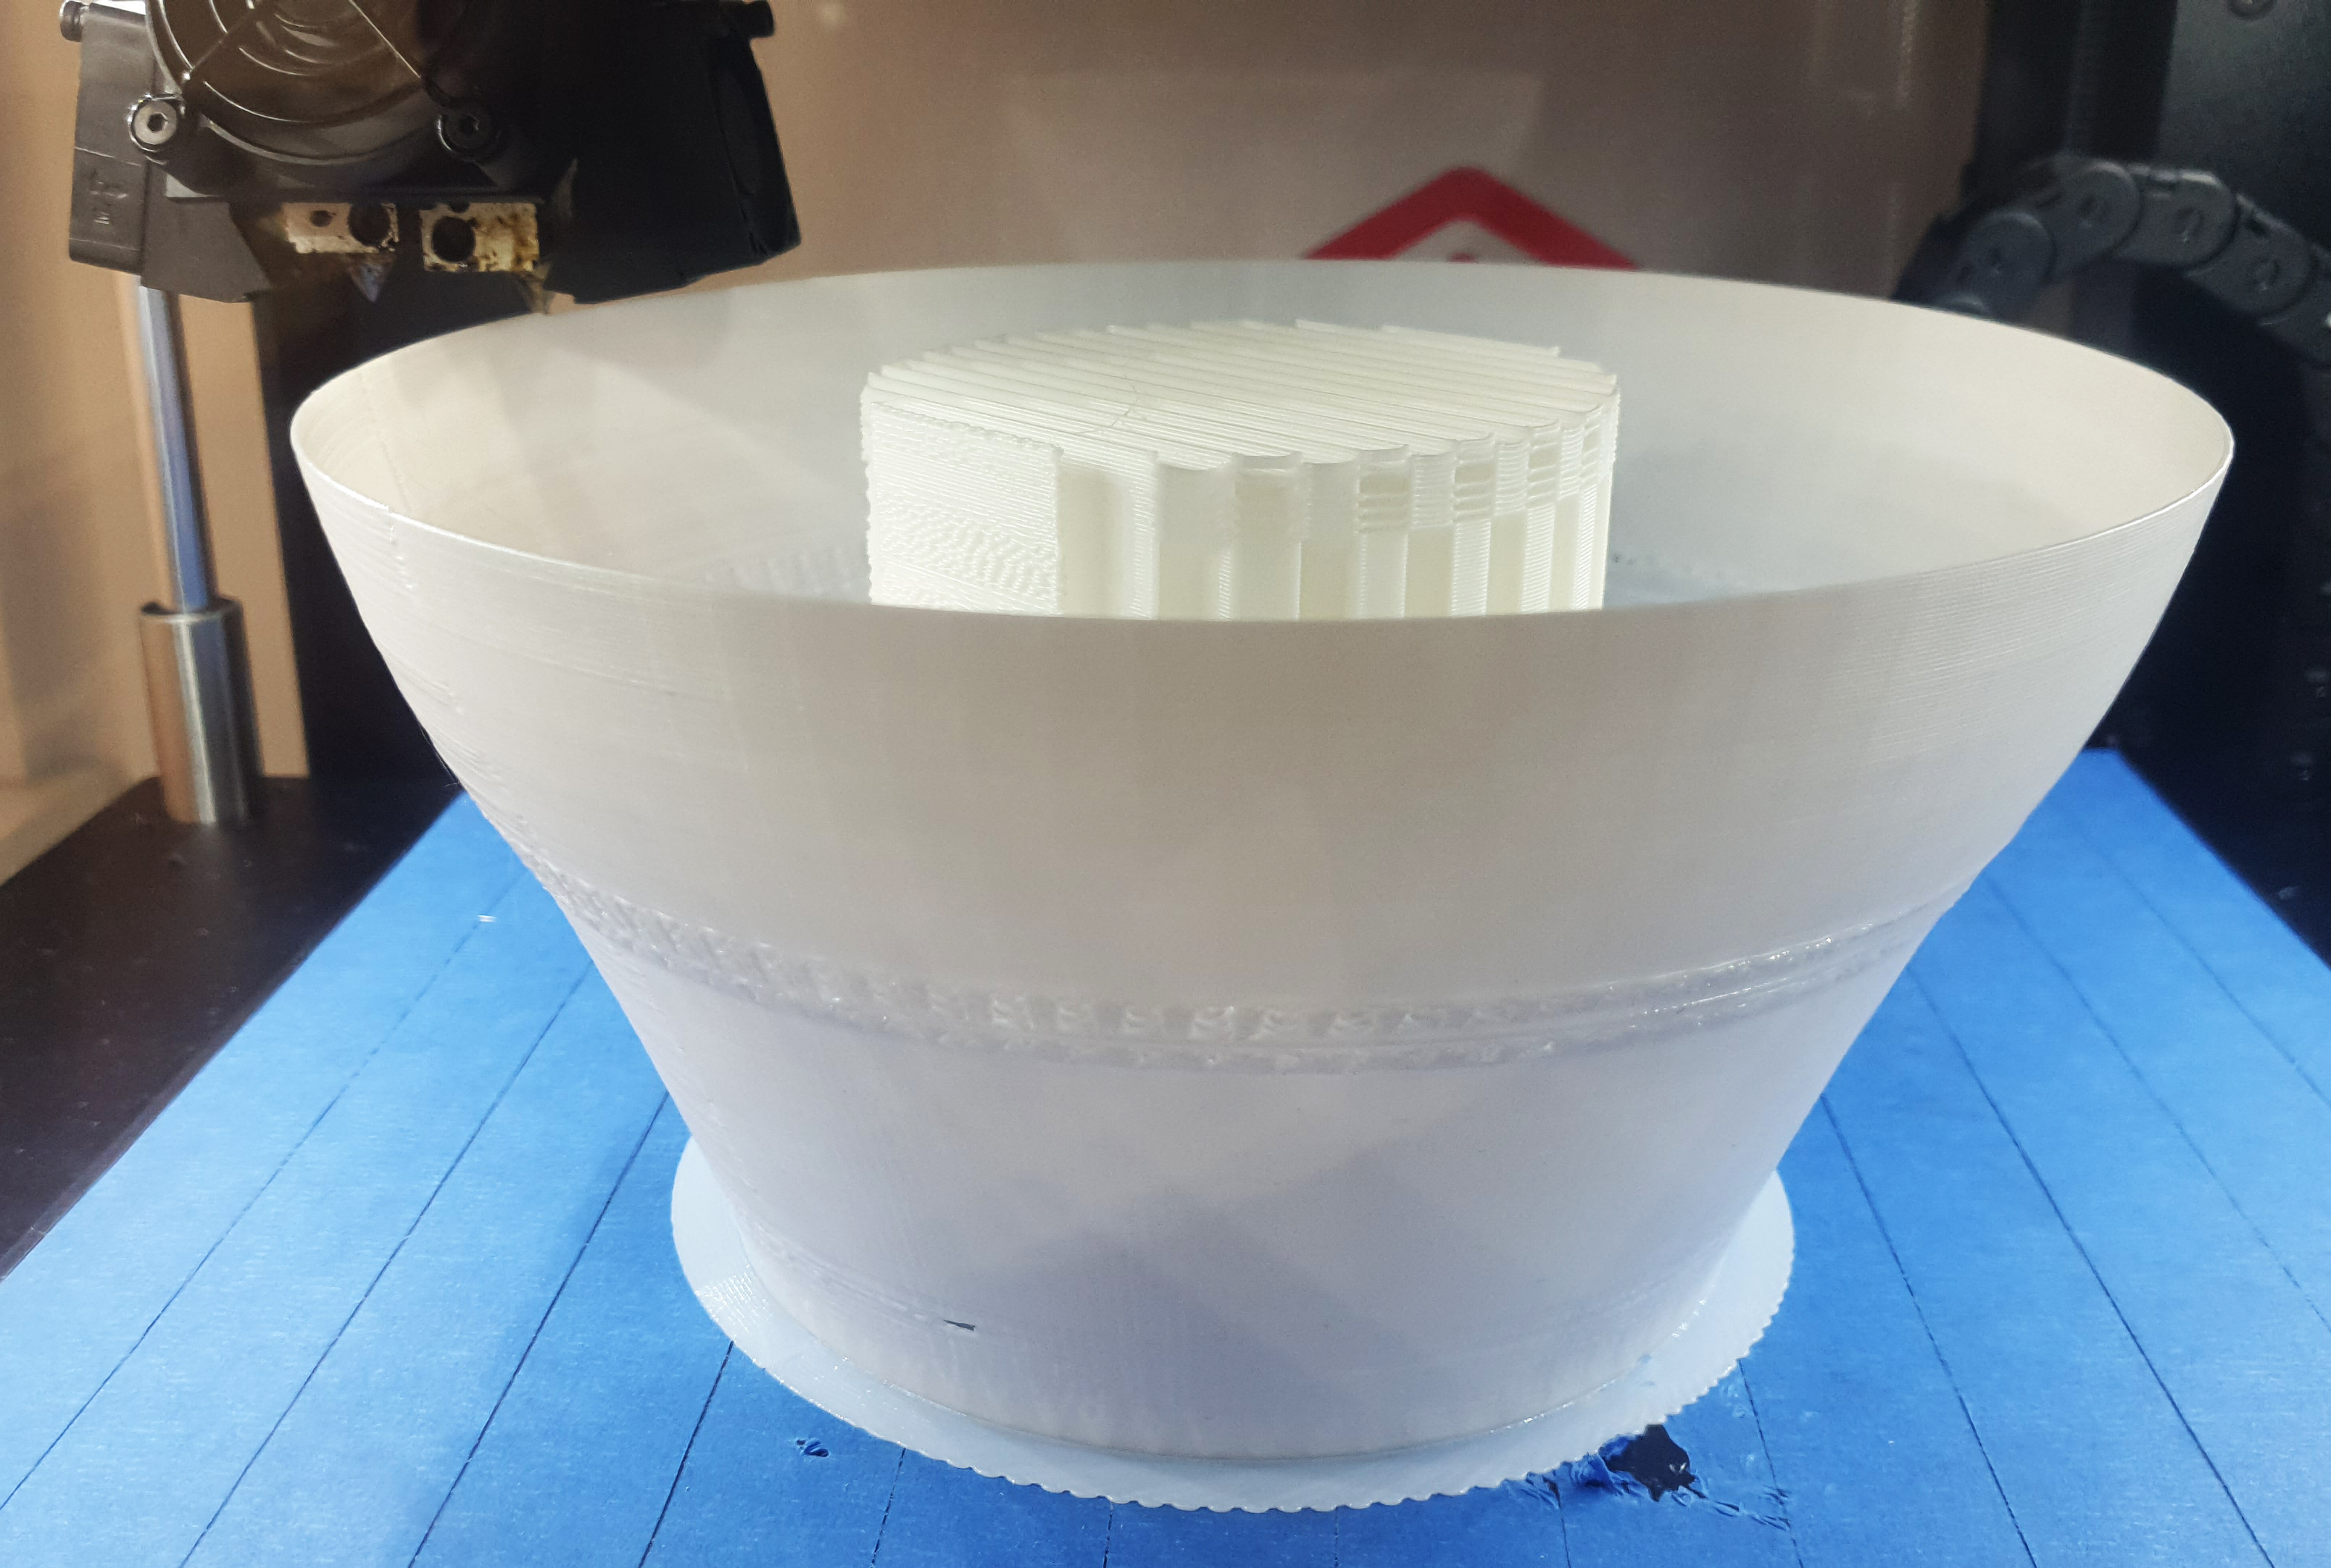
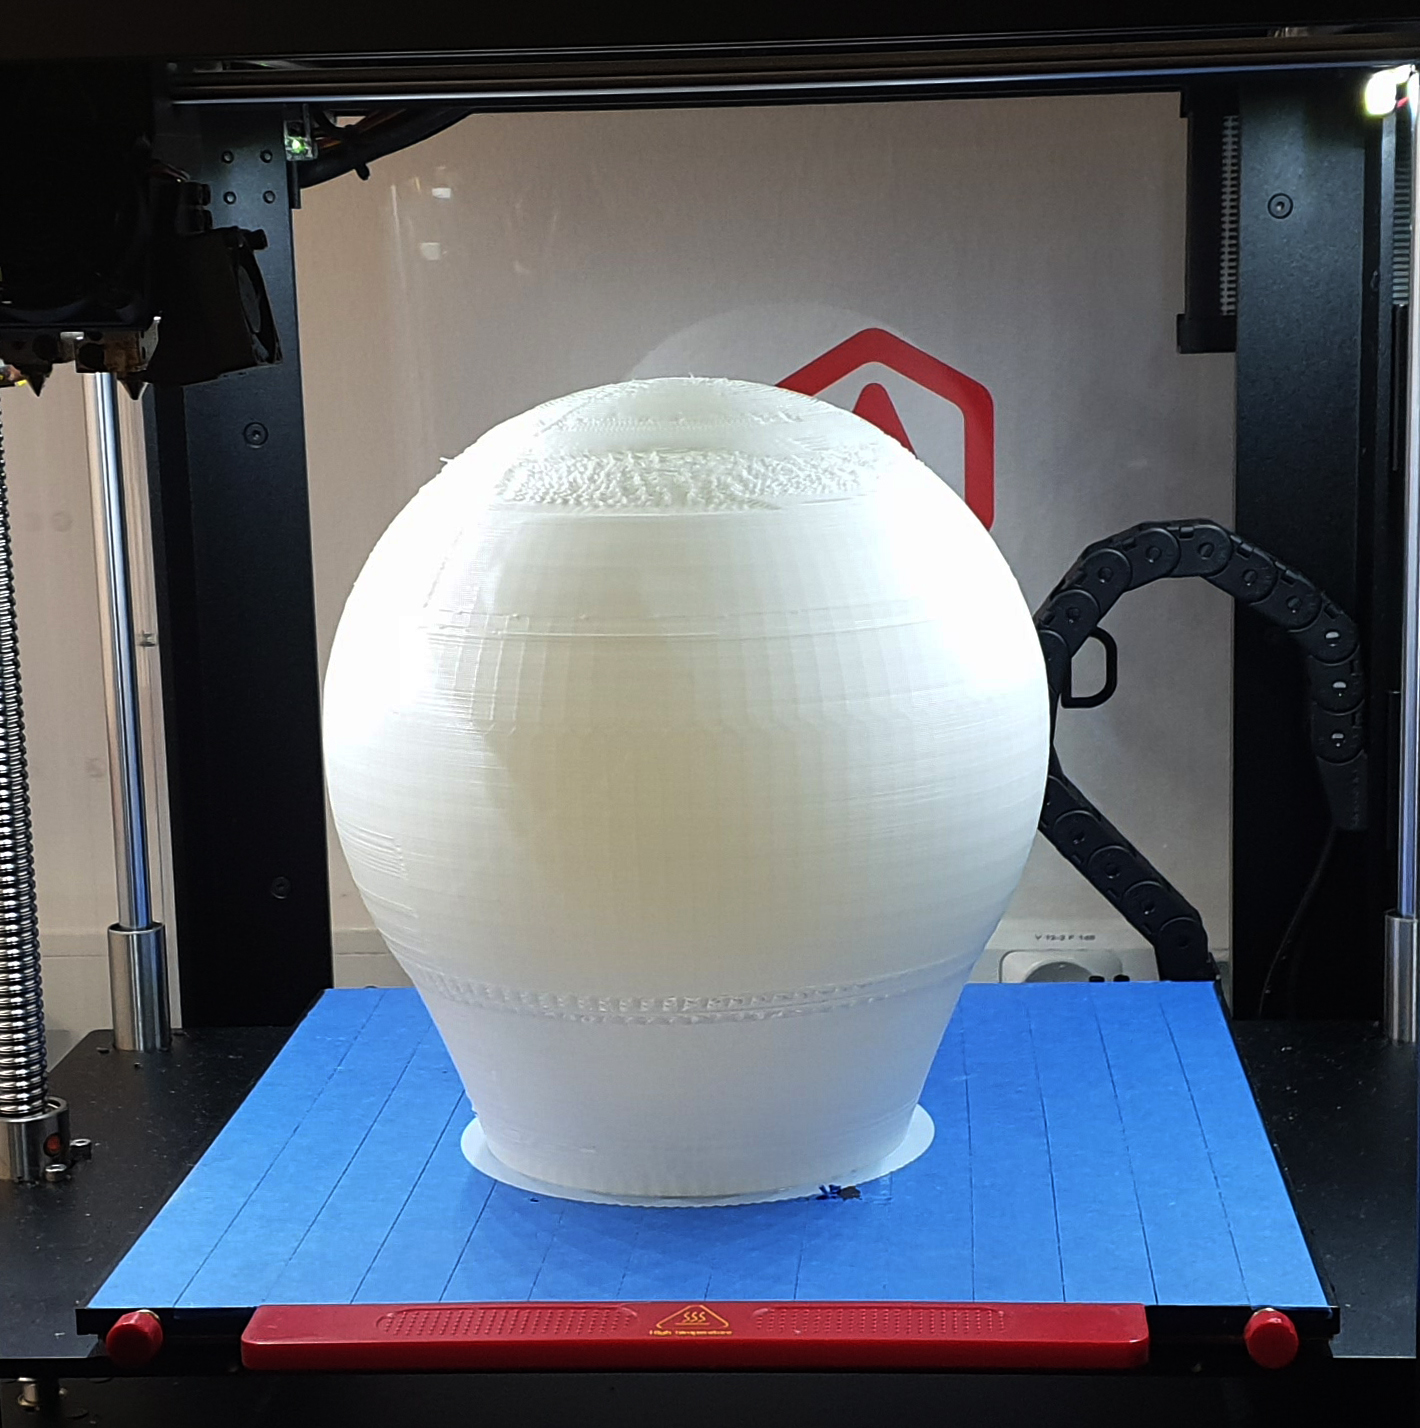
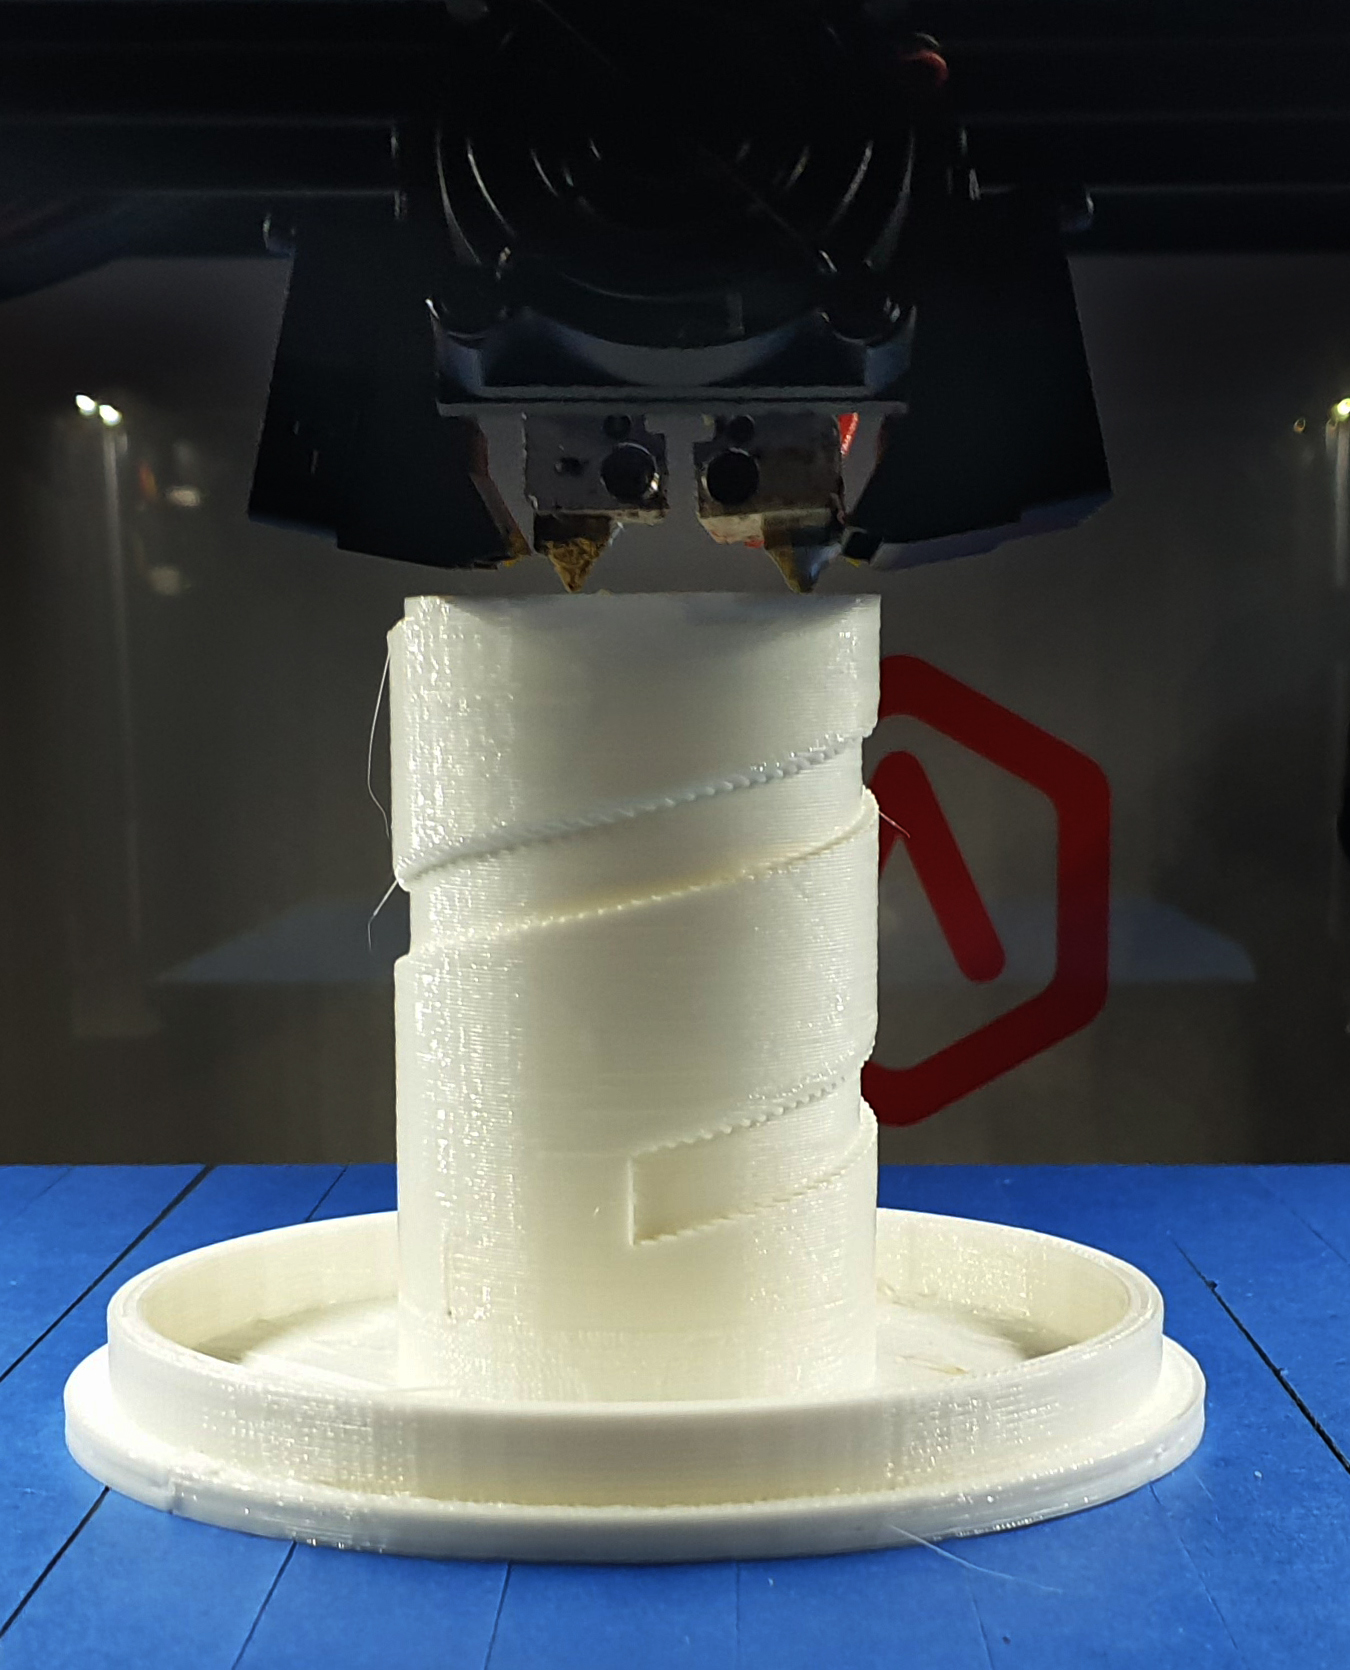
And 3d printed them.
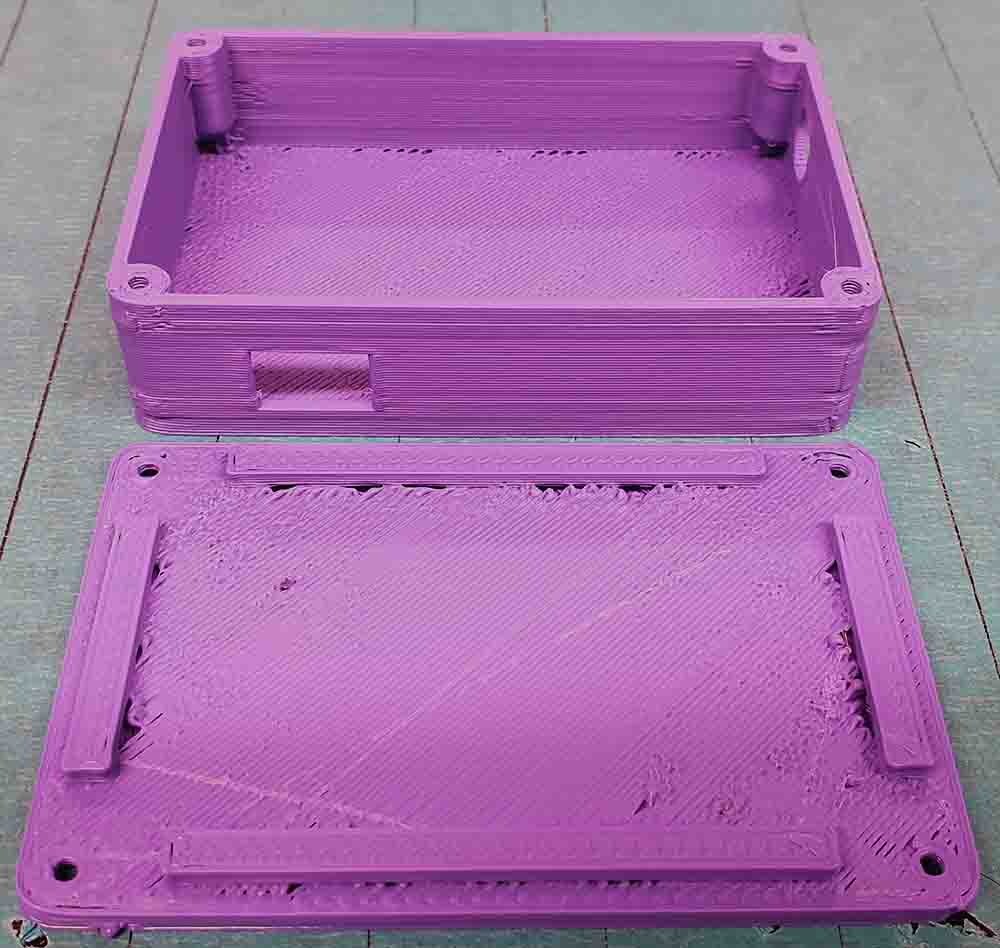
I made couple of version of the enclosedure.

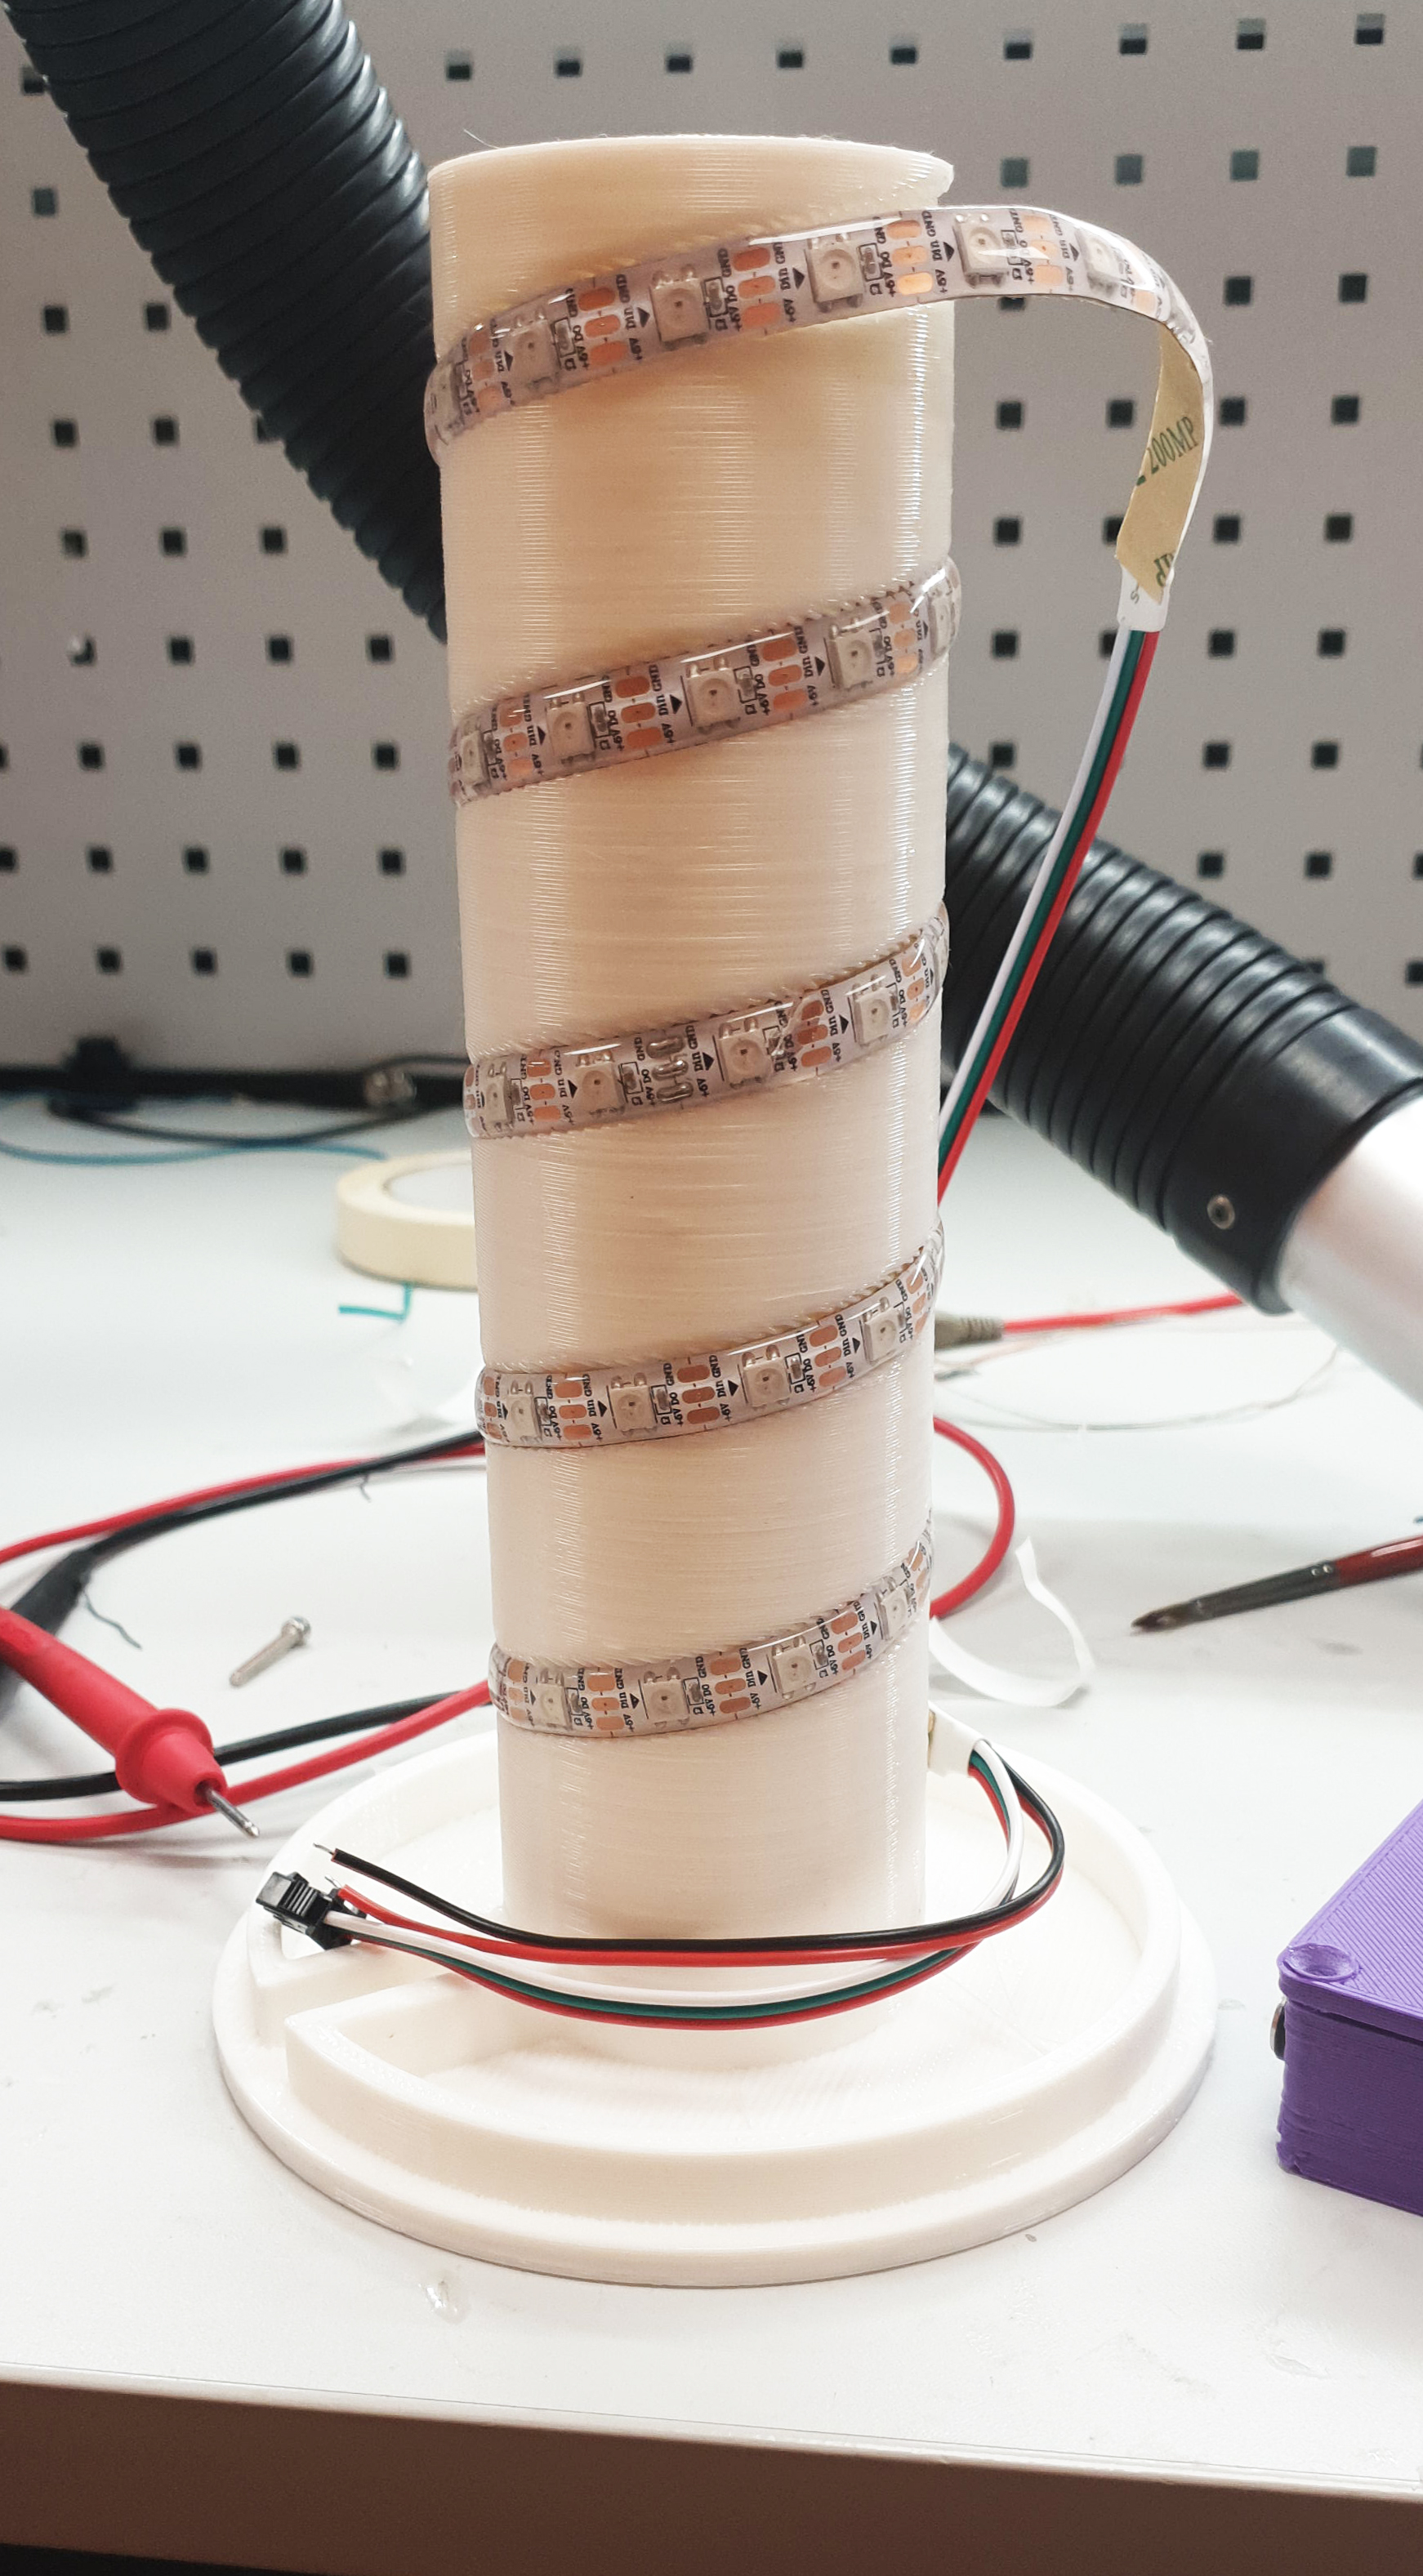
And the LED strip placement boxes were ready.
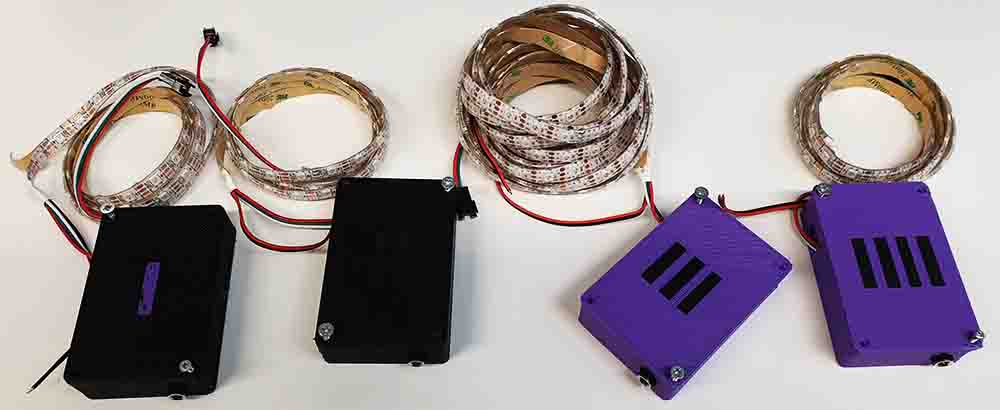
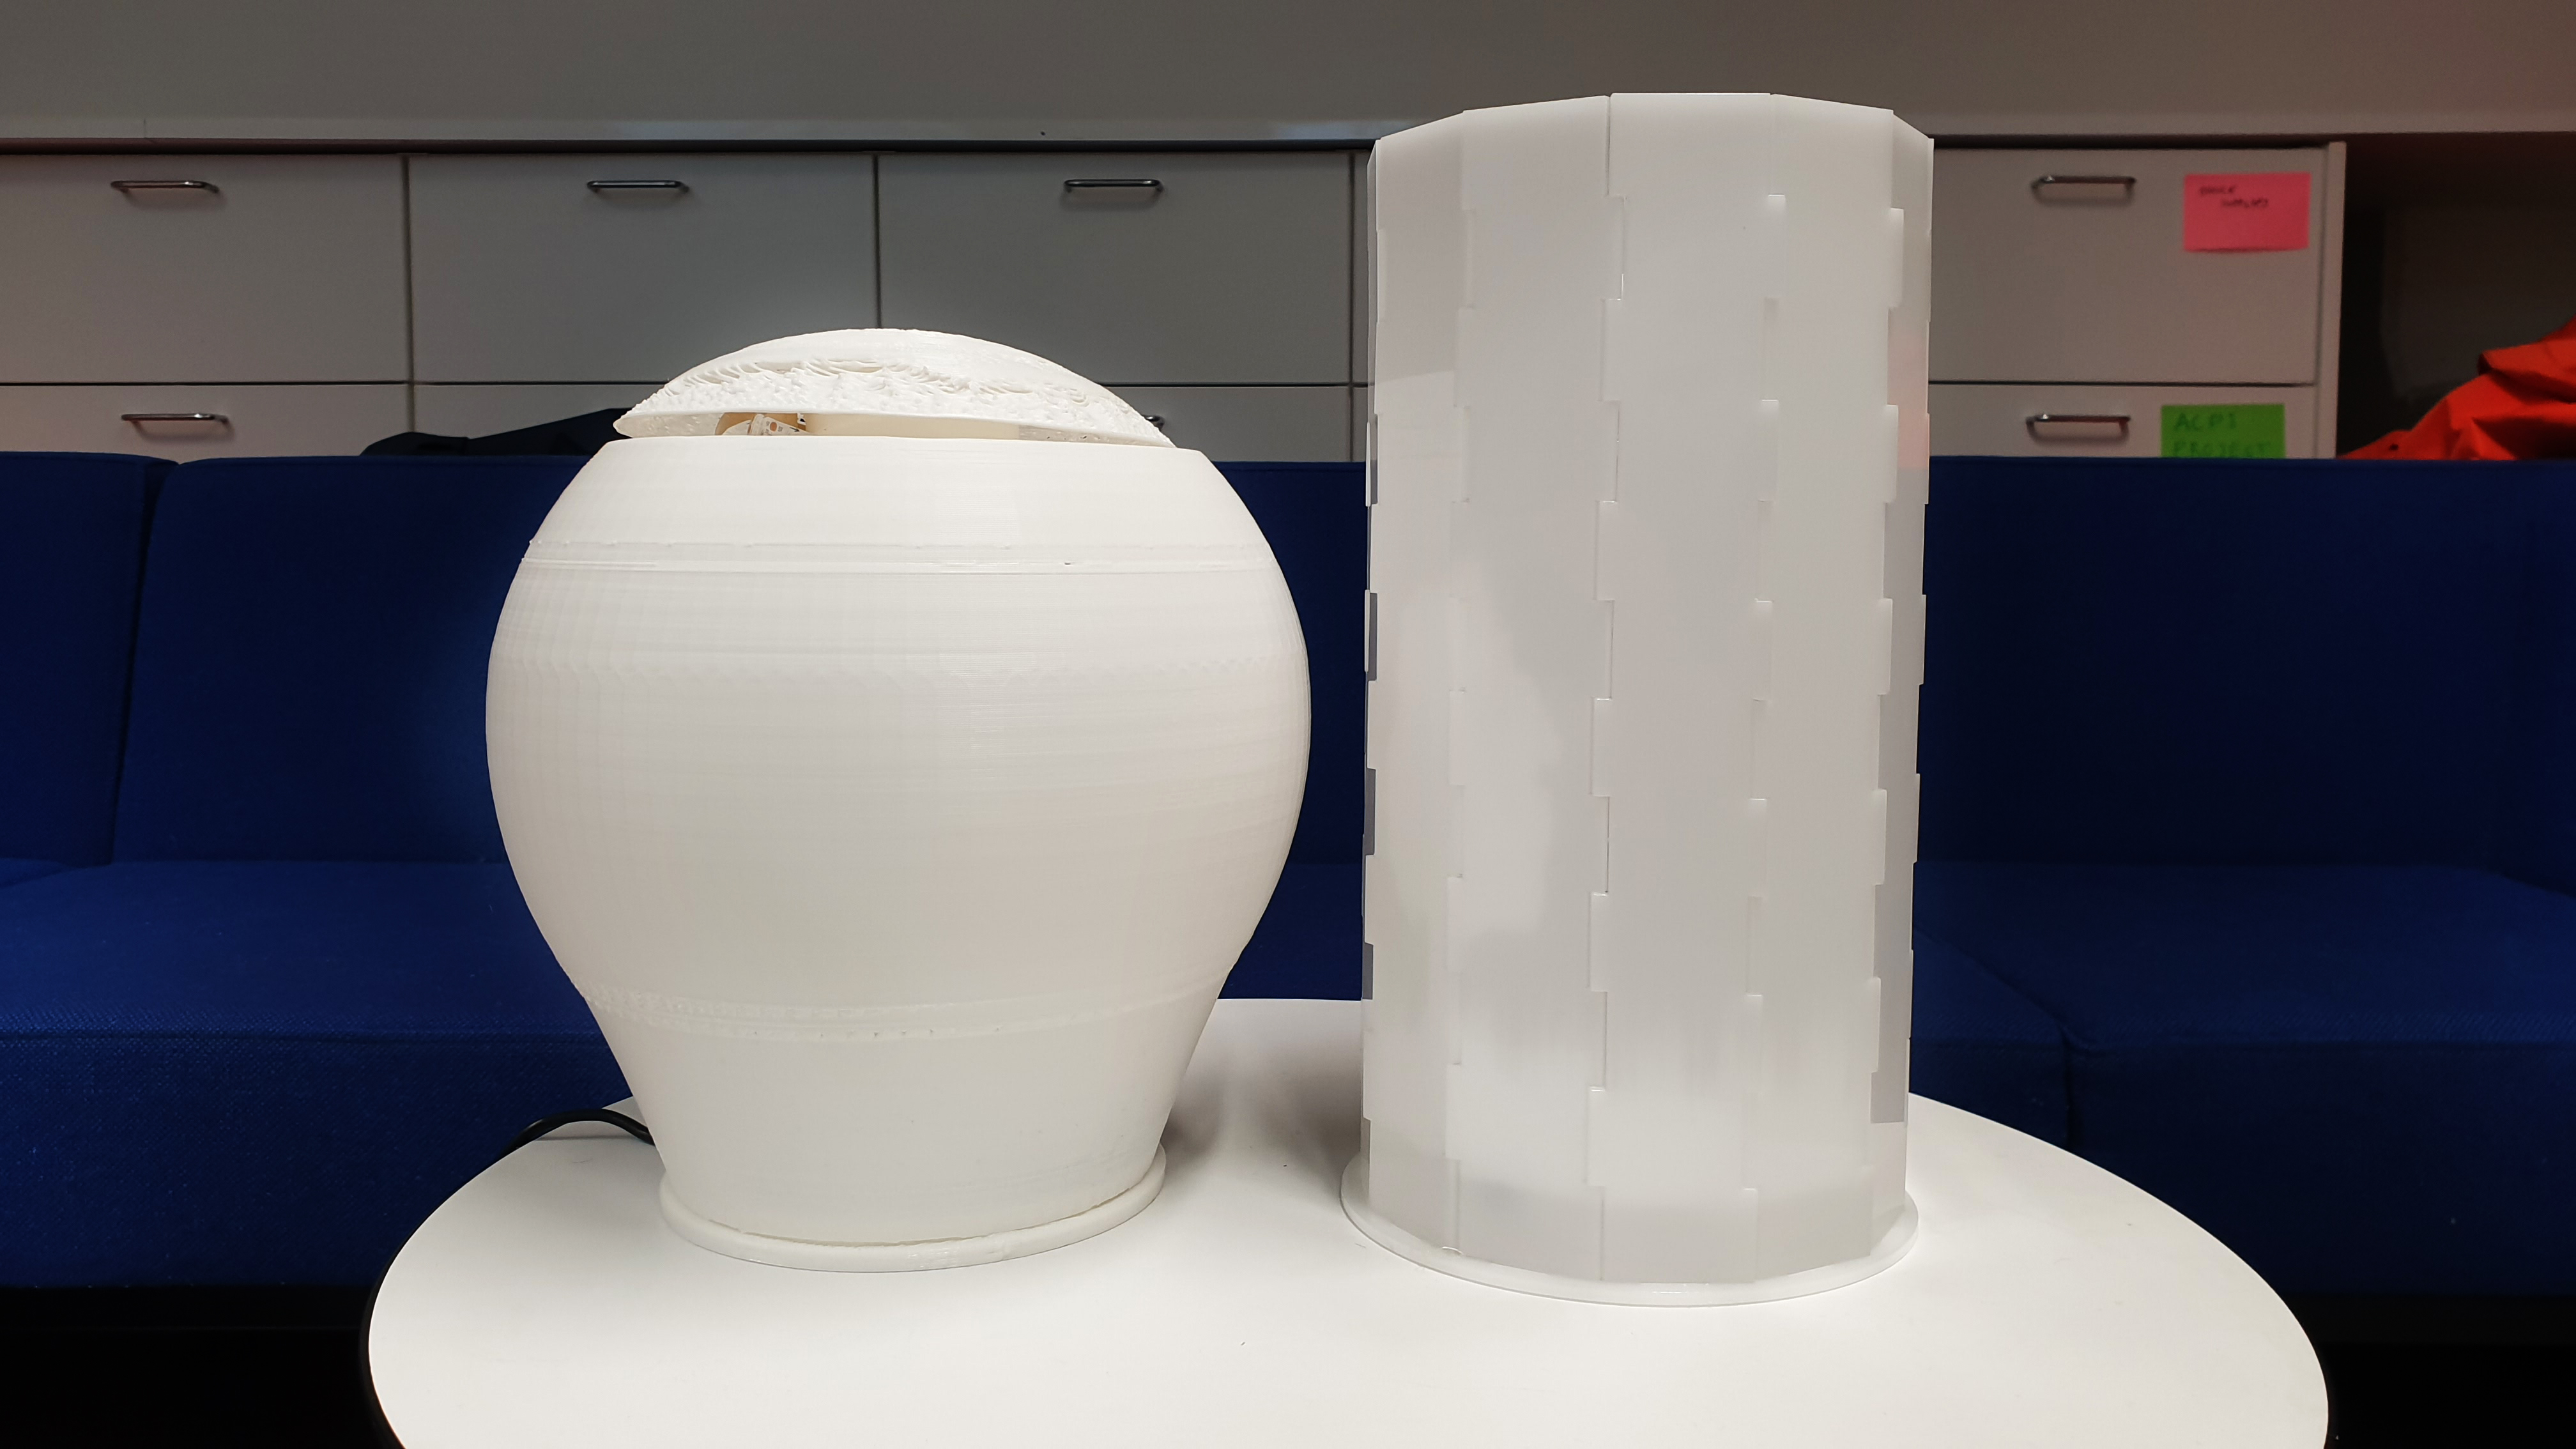
I Also designed a coulpe demonstration lights. One in the computer cutting week and one for the final project.
What materials and components were used?
Microcontrollers ATTiny44 ans ESP32. LED strip. (1 m to 10 m) PlA fot hte printin. Acrylic sheet. (3 mm thickness) Various PCB passive components.
Where did they come from?
Most of th components came from Fab Inventory. ESP32 and LED strips are from Buutti.com Inventory.
How much did they cost?
BOM of the PCB:s
| Part | From | Pcs | Price | total |
|---|---|---|---|---|
| Attiny44A-SSu | Fab inventory | 1 | 1.1€ | 1.1€ |
| ESP32 | Buutti.com inventory | 1 | 3.5€ | 3.5€ |
| 5V SK6812 RGBW LED-strip | Ordered | 1-416LEDs depending on needs of the lighting. | 78.58€/1000pcs | 0,07858-32€ |
| 230Vac to 5VDC 10A trasformer | Ordered | 1 | 20.53€ | 20.53€ |
| MOSFET P-CH | Fab inventory | 1 | 0.34 | 0.34€ |
| MOSFET N-CH | Fab inventory | 1 | 1.13 | 1.13€ |
| Inductor 100mH | Fab Inventory | 1 | 0.78 | 0.78€ |
| Capasitator 150uF | Fab inventory | 1 | 0.48 | 0.48€ |
| Capasitator 10PF | Fab inventory | 1 | 0.05 | 0.05€ |
| Capasitator 1PF | Fab inventory | 1 | 0.05€ | 0.05€ |
| Schottky diode | Fab inventory | 1 | 0.17 | 0.17€ |
| FTDI Header | Fab inventory | 1 | 0.5€ | 0.5€ |
| Pinheader | Fab inventory | 1 | 1,5€ | 1,5€ |
| PCB | Fab inventory | 1 | 1 | 1€ |
| Total | 31,2€ - 63.8€ |
Most of the cost comes from the 230Vac power supply and the LEDs. I ordered known good converter for this project. in the future if the ac power supply can be done straight into the PCB which will cut down the costs.
Acrylic 0,4 m2: 10 Eur
LED strip : 1 m 2.5€ LED strip : 5 m 17.40€
What parts and systems were made?
Lamp shade is made with laser-cutting.
The LED strip holders are made by 3D printing.
The PCB are made by Laser paint removal mask etching method and hand soldering.
The picture in the demo lamp shade is done by vinyl cutting.
What processes were used?
- Painting and surface cleaning for the PCB pretreatment.
- Chemical etching for the PCB making.
- Laser cutting: The PCB and the demolamp shade.
- 3D printing: The enclosedures for the LED strip holders.
- Electronics design, milling and soldering: The PCB boards.
- Embedded programming: The ATTiny Ardubuck and the ESP32 led controller.
What questions were answered?
The world of power electronics are exiting and vast. The Attiny does have enough power to run steadily and give stable voltage to ESP with a few tweaks and fitting the surrounding hardware.
How was it evaluated?
The LEDs can be controlled from the phone. THe ESP32 worked and did not catch fire. The animations works and the Sunrise and Sunset funktions works.
I will install these light to my home. Hope the sunrise will help me in the next winter.
What are the implications?
- 2D and 3D design: LED strip holders, Lamp shade, The PCB laser cut template.
- Additive and subtractive fabrication processes: 3D printing fro the LED strip holders and Lamp shade, Laser cutting for the Lamp shade and the PCB.
- Electronics design and production fir the PCB board
- Microcontroller interfacing and programming: ESP32 interfacing with mobile phone and programming for the Attiny44 and for the ESP32
- System integration and packaging: Assembling everything and coordinating the light devises.
2D and 3D designing
The Cases for the LED strip holders and the demolamp shade are 3D designed.
The PCB laser cut lines are designed in 2D based on the PCB layout from Eagle.
License
On week 19 I selected for my final project the Creative Commons (CC) license for my project and Apache for my coding part.
Presentation material
The video was edited in Vegas Pro like in the Week 17 With the coding to FFmpeg. No music this time.
All my desing files can be found in my GITlab repository