6. 3D Scanning and Printing
The given tasks:
- Group assignment:
Test the design rules for your printer(s)
- Individual assignment:
Design and 3D print an object (small, few cm3, limited by printer time) that could not be made subtractively 3D scan an object (and optionally print it) Learning outcomes Identify the advantages and limitations of 3D printing and scanning technology Apply design methods and production processes to show your understanding. Have you Described what you learned by testing the 3D printers Shown how you designed and made your object and explained why it could not be made subtractively Scanned an object Outlined problems and how you fixed them Included your design files and ‘hero shot’ photos of the scan and the final object
I.Evaluate your 3D printers:
As stated @ 1:11:55 ” the goal of group assignment is to understand your printer limitations. I. How thin of a wall can your printer make.II. what angle can you print before it falls over and needs support. III. How big of a space you need before a part can turn.”
This means to print a test that has a series of thin walls to evaluate the thinnest wall capable by the printer. The test should also have an overhang test of known angles and outer wall separation test of known separations.
In the Fablab Oulu there is 10 available 3d printers:
Fortus 350mc
3x Tevo Tarantula For 3D printing learning and printer modifications
Used 3d printers.
To evaluate 3D printers three different printers were selected. The selected range was FFF printers in price order. The Fortus 350mc the top-of-the-line most expensive, The Leapfrog Creatr HS as little older Smack-on-the-middle four figure printer and Raise3D Pro2 as four figure 2019 Newest-of-the-new 3D printer.
The use of Formlabs Form2 was scrapped because the carsanogenity and the toxicity of the resin Although the printer itself was deemed interesting.
Stratasys Fortus 380mc 

The overhang or bridging limits are solved by the use of soluble support. That allows printing complex geometries and practically anything. Fortus can print very large variety of materials.It can be configured to do many things from detail to fast big prints. Easily swappable extrusion nozzles and very robust method of build plate adhesion using PET films to grip the prints. The Specifications are quite impressive:
SYSTEM SIZE AND WEIGHT
129.5 x 90.2 x 198.4 cm
601 kg
BUILD SIZE
380mc: 355 x 305 x 305 mm
LAYER THICKNESS
0.330 mm (depends on the nozzle)
ACCURACY:
Parts are produced within an accuracy of ± .127 mm or ± .0015 mm/mm , whichever is greater). Z part accuracy includes an additional tolerance of -0.000/+slice height. Note: Accuracy is geometry-dependent. Achievable accuracy specification derived from statistical data at 95% dimensional yield. Full specs
Also Big, Noisy and will burn you if not handled with brains.
Leapfrog Creatr HS,
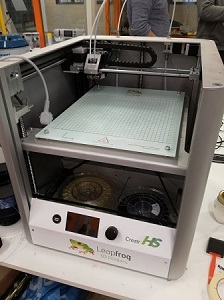
TYPE: FDM
Supported materials:
PLA
PLA PRO
ABS
PVA
HIPS
Hybrid
Nylon
Brick
Build volume :23 x 30 x 18cm
Min layer height; 20 microns
Max printing speed: 300mm/sec
Open material support: Yes
Heated platform:Yes
Filament diameter: 1.75mm
Connectivity: USB
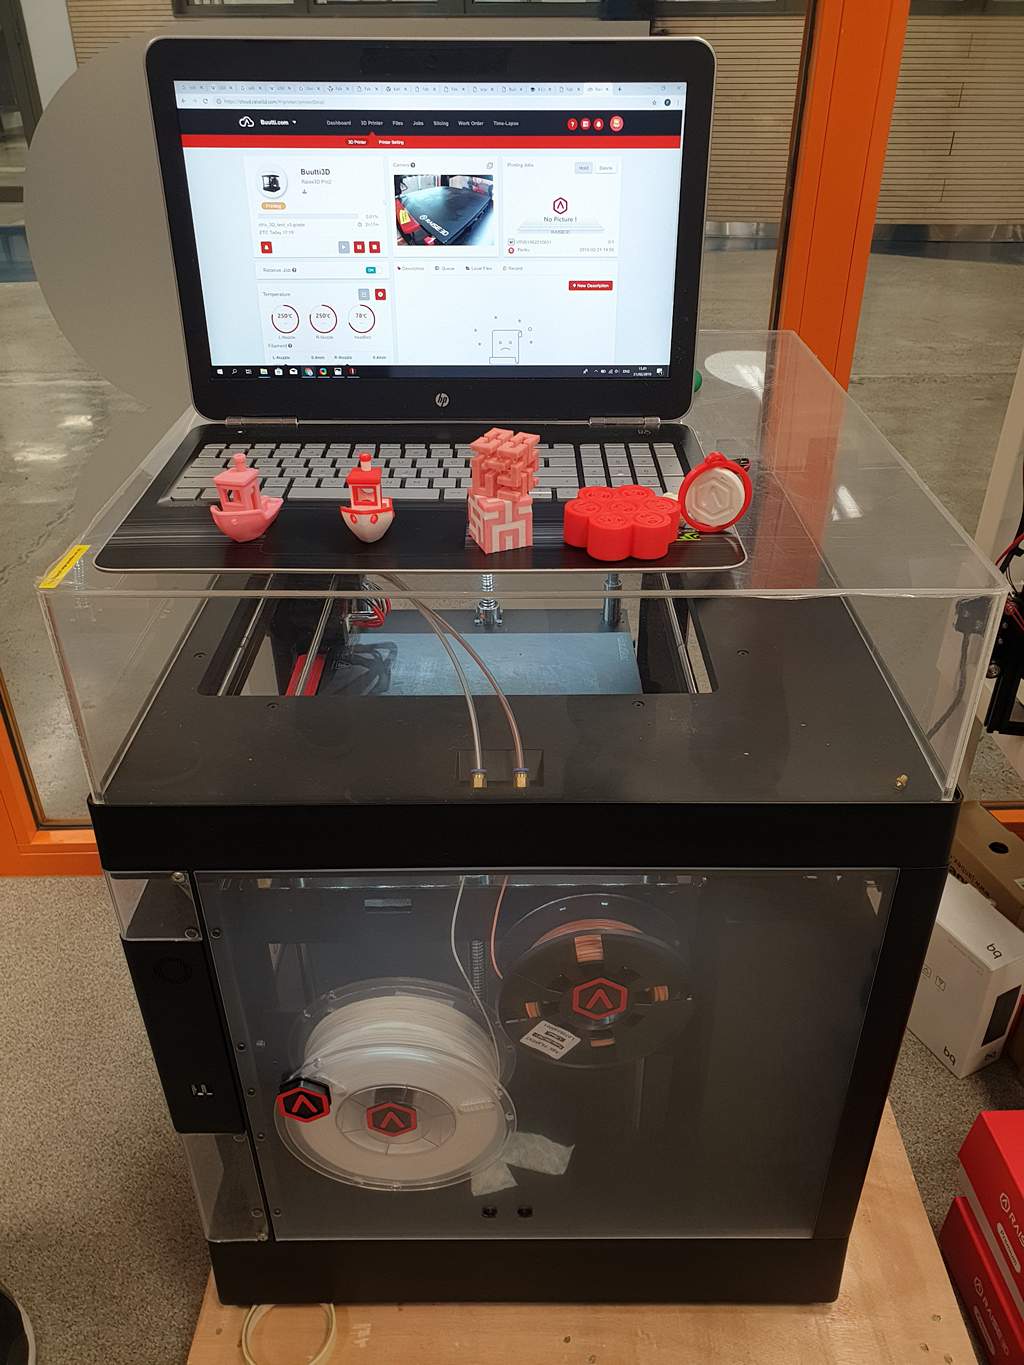
Raise3D Pro2
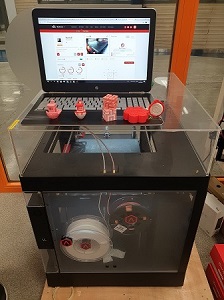
Highly anticipated new kid on the block 3D printer. At the price point can do really much.
Specifications rival with the Fortus system:
Build Volume
- Single Extrusion Print: 305×305×300 mm
- Dual Extrusion Print: 280×305×300 mm
Machine Size : 620×590×760 mm
Print Head: Dual-head with electronic lifting system
Filament Diameter: 1.75mm
XY Step Size: 0.78125 micron
Z Step Size: 0.078125 micron
Print Head Travel Speed: 30 - 150 mm/s
Build Plate: Heated aluminum build plate with magnetic holding
Max Build Plate Temperature: 110 ºC
Heated Bed Material: Silicone
Supported Materials:
PLA
ABS
HIPS
PC
TPU
TPE
NYLON
PETG
ASA
PP
PVA
Glass Fiber Filled
Carbon Fiber Enforced
Metal Particles Filled
Wood Filled
Nozzle Diameter: 0.4 mm (Default), 0.2/ 0.6/ 0.8/ 1.0 mm (Available)
Max Nozzle Temperature: 300 ºC
Connectivity: Wi-Fi, LAN, USB port, Live camera
Noise emission (acoustic): <50 dB(A) when building
The real-time camera over the internet makes monitoring the printer really easy. Supports [Cloud based printing)(https://cloud.raise3d.com) prints can be started,monitored and adjust through the cloud on the fly. Because of the dual nozzle a variety of soluble support method can be used.Water soluble PVA support can be used to print PLA. PLA can be dissolute to 8M NaOH and can be used to support ABS and PEGT . HIPS dissolutions to limonene and can be used to support ABS,PEGT,Nylon6,6 and ASA.
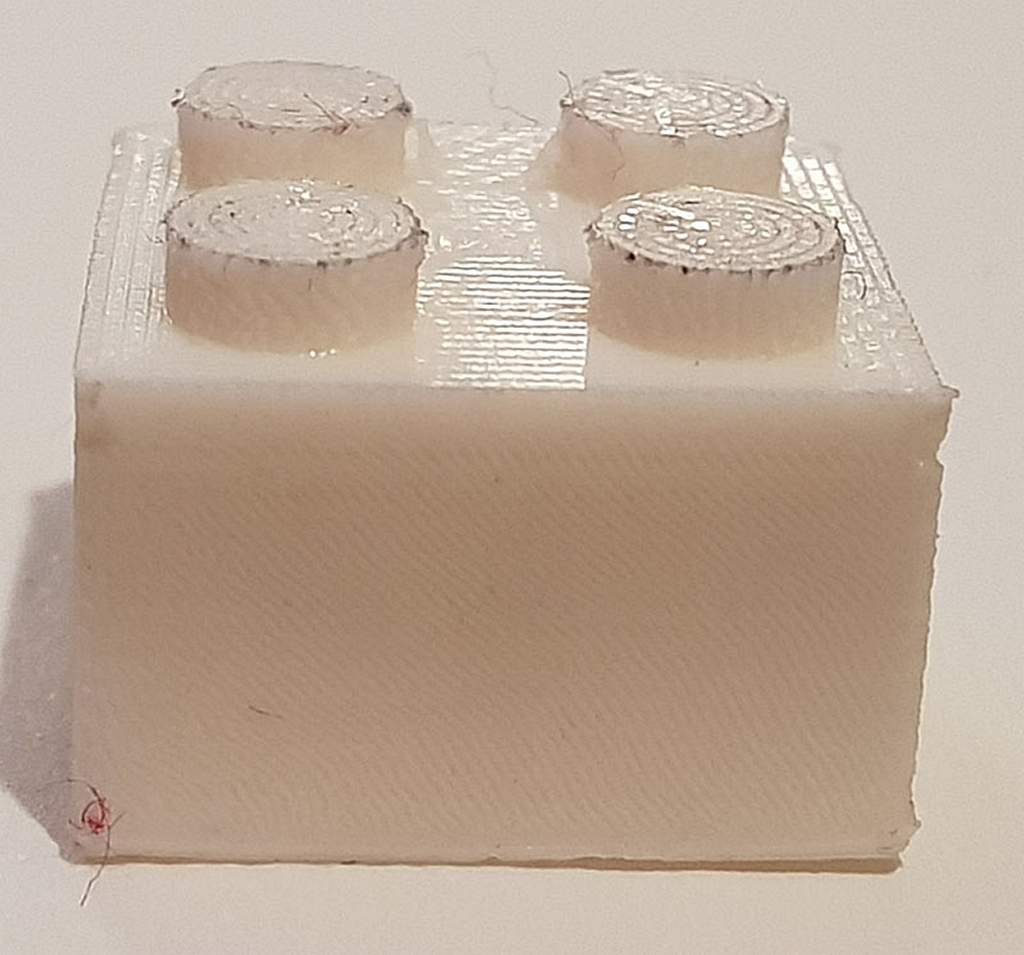
### To test the nominal use case a popular test piece was printed on all printers.
the test features test:
01 Nut, Size M4 Nut should fit perfectly
02 Wave, rounded print
03 Star, Sharp Edges
04 Name, Complex Shapes
05 Holes, Size 3, 4, 5 mm
06 minimal Distance: 0.1, 0.2, 0.3, 0.4, 0.5, 0.6, 0.7 mm
07 Z height: 0.1, 0.2, 0.3, 0.4, 0.5, 0.6, 0.7, 0.8, 0.9, 1.0, 1.1 mm
08 Wall Thickness: 0.1, 0.2, 0.3, 0.4, 0.5, 0.6, 0.7 mm
09 Bridge Print: 2, 4, 8, 16 mm
10 Sphere, Rounded Print 4.8mm height
11 Sphere Mix, 7 mm height
12 Pyramid, 7 mm height
13 Overhang: 25, 30, 35, 40, 45, 50, 55, 60, 65, 70°
14 Warp, does it bend?
15 3D Print Font, optimized for 3D printing
16 Surface, Flatness
17 Size, 100 x 100mm x 23.83 (10mm width)
18 Spike, minimum Layer Time, 21 mm height from Bottom (include Baseplate)
19 Hole in Wall, 4 mm diameter, check for proper print
20 Raft Test, raft should be just under the model
21 Retract Travel, check retract settings for longer travel
The Evaluated features are the
06 minimal Distance: 0.1, 0.2, 0.3, 0.4, 0.5, 0.6, 0.7 mm
08 Wall Thickness: 0.1, 0.2, 0.3, 0.4, 0.5, 0.6, 0.7 mm
and
13 Overhang: 25, 30, 35, 40, 45, 50, 55, 60, 65, 70°
first printer to be tested is the Leapfrog Creatr HS, A run of the mill bulk PLA was used. Print temperature 200C Bed temperature: 60C Glass with PVA glue 1/3 diluted on top. Brim no support. Nozzle width 0.4mm layer height 0.3mm print speed: 60mm/sec outer perimeters 45mm/sec infill 60mm/sec perimeters 2 top/bottom layers 2 Retraction 0.4mm Wipe to inner perimeter 1mm
Second test piece is the Fortus 350mc Material M30 ABS. And T16 nozzle is used. layer height 0.2540mm quality: Normal The slicer program was tricked to not use the soluble support. This shortened drastically the print time and made the judging of the print quality fair.
Third machine was the Raise3D PRO2. Layer height : 0.3mm Nozzle diameter: 0.4mm Print temperature 250*C Bed temperature : 100’C Material Bulk ABS.
| Stratasys Fortus 380mc | Leapfrog Creatr HS | Raise3D Pro2 | |
| Material | ABS | PLA | Bulk ABS |
| Layer height | 0.254mm | 0.3mm | 0.3mm |
| Printing temperature | N/A | 205C | 250 |
| Printing time | 25min | 1 h 15min | 1 h 55 min |
| Bridge Print |
 The numbers are good and readable. The bridges show a little droop. Not enough cooling. The numbers are good and readable. The bridges show a little droop. Not enough cooling.
|
 The machine is not clearly spected to do anything this size. Horrible stringing on the overhang test pillars and the numbers are unrecognizable. The machine is not clearly spected to do anything this size. Horrible stringing on the overhang test pillars and the numbers are unrecognizable.
|
 Numbers are absolutely perfect. The bridges are beautiful. Numbers are absolutely perfect. The bridges are beautiful.
|
| Bridge Print Cont. |
 On the longest bridge the droop is dramatic. On the longest bridge the droop is dramatic.
|
 The same as in first, but more droop because longer distance. The same as in first, but more droop because longer distance.
|
 The bridges are beautifull. The bridges are beautifull.
|
| Thin walls |
 The zigzag is decent. the thickest thin walls are made to standard widht and under sized walls are omitted The zigzag is decent. the thickest thin walls are made to standard widht and under sized walls are omitted
|
 Zigzag pattern is good. Thin walls are made thinker by default. Horrifying stringing between the thin walls. Cooling and retractions settings needs to be checked. Zigzag pattern is good. Thin walls are made thinker by default. Horrifying stringing between the thin walls. Cooling and retractions settings needs to be checked.
|
 The zigzag line shows some under extrusion mut curve is perfect. The thin walls are printed to exact thickness at every point. Everyhinh is printed and everything is as modelled. The zigzag line shows some under extrusion mut curve is perfect. The thin walls are printed to exact thickness at every point. Everyhinh is printed and everything is as modelled.
|
| Sphere |
 Text is so muddy that it is glogged. The thin spaces are overextruded. Text is so muddy that it is glogged. The thin spaces are overextruded.
|
 The dome is decent. no "mud" or over extrusion. The dome is decent. no "mud" or over extrusion.
|
 The dome is decent. The dome is decent.
|
| Tolerances |
 The thin spaces are over extruded. Only 0.9 and 0.8mm are open. rest are fused. The thin spaces are over extruded. Only 0.9 and 0.8mm are open. rest are fused.
|
 the thin spacesing suffers from elephant footing and over extrusion. 0.9 - 0.7 mm are open. Rest are fused. the thin spacesing suffers from elephant footing and over extrusion. 0.9 - 0.7 mm are open. Rest are fused.
|
Last two thin spaces are fused at places. This is to be expected as the tolerance for the nozzle and filament combo is 0.12mm
|
| Wall Vertical Holes |
 Walls in between are not round. The overextrude flattens them against each other. Walls in between are not round. The overextrude flattens them against each other.
|
 The vertical hoelas are good. tiny stringing is apparent. The vertical hoelas are good. tiny stringing is apparent.
|
 holes are round and in diameter speck. Some nozzle path optimization error can be seen. holes are round and in diameter speck. Some nozzle path optimization error can be seen.
|
| Vertical text |
 The text isoverextruded to unuselfulness. The text isoverextruded to unuselfulness.
|
 Text tightest corners are a little bit muddy. over extrusion and nozzle path optimization error can be seen. Mabye little acceleration vibration hysteresis also. Text tightest corners are a little bit muddy. over extrusion and nozzle path optimization error can be seen. Mabye little acceleration vibration hysteresis also.
|
 Text text is more visible than the others. Some nozzle path optimization error can be seen. Text text is more visible than the others. Some nozzle path optimization error can be seen.
|
| Vertical star and hexagon |
 Star and hexagon hole are overextruded to unuselfulness. Star and hexagon hole are overextruded to unuselfulness.
|
 Star's corners and the hexagon are decent. again nozzle travel optimization fail has ironed lower corner of the star a little. Star's corners and the hexagon are decent. again nozzle travel optimization fail has ironed lower corner of the star a little.
|
 Star and hexagon shapes are good. Star and hexagon shapes are good.
|
| Bowl |
 bowl is decent. bowl is decent.
|
 Bowl is decent. Bowl is decent.
|
 Bowl is decent. Bowl is decent.
|
| Square based pyramid |
 square based pyramid is decent. square based pyramid is decent.
|
 Pyramid is descent. little stringing on upper layers. minimal layer time needs to be lengthened. Pyramid is descent. little stringing on upper layers. minimal layer time needs to be lengthened.
|
 Square based pyramid is decent. Square based pyramid is decent.
|
| Spike |
 Spice suffers from sringingess and from too short cooling time between layers. Spice suffers from sringingess and from too short cooling time between layers.
|
 Spike is suffering from muddynes. the minimal layer time and revisit cooling time needs to be lengthened. Spike is suffering from muddynes. the minimal layer time and revisit cooling time needs to be lengthened.
|
 Spice is perfect. No stringing, no sighs of over tempearture or over extrusion. Spice is perfect. No stringing, no sighs of over tempearture or over extrusion.
|
| Bowl |
  Overhans are decent. Stringiness is somewhat underwhelming Overhans are decent. Stringiness is somewhat underwhelming
|
  overhangs show sringing. No failure in underside of the overhangs. overhangs show sringing. No failure in underside of the overhangs.
|
 Overhangs are decent. Little sighin can be seen. Overhangs are decent. Little sighin can be seen.
|

toinen
THe steps,half sphere and the vertical hole were at the same level of detail on visual inspection. -tl:dr:- In summarium: Fortus has not been set up for this small of a print and makes a every problem in the book: Bridging error,mud in fine details,over extrusion in small perimeters, omitting of features.
Leapfrog does good work but shows its age.
Raise3D Pro2 aces every test.
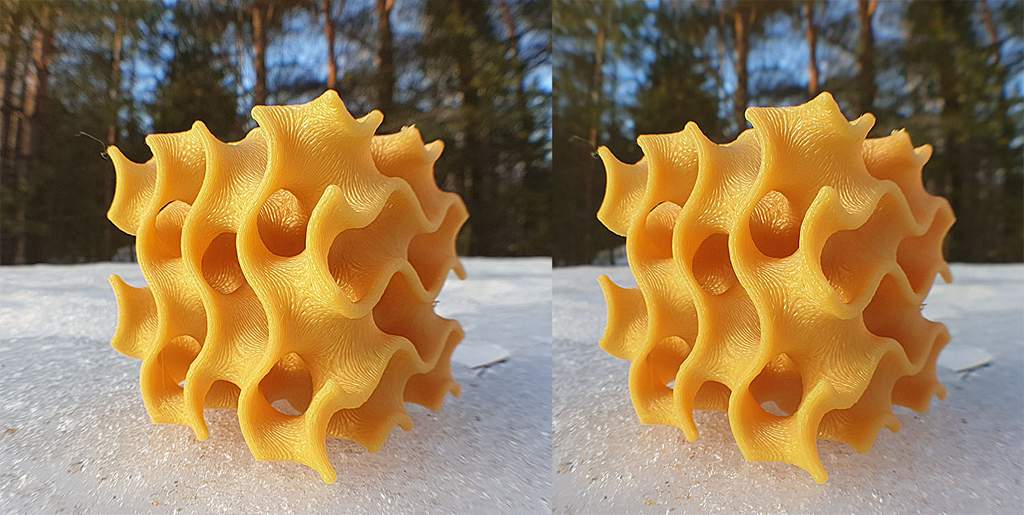
Individual assignment: 3D printed part that cannot be made subtractively - A. H. Schoen’s 3-fold non-trivial embedded gyroid
The gyroid was designed in Blender and printed with PLA as a soluble support and ABS as main material using. Raise3D RPO 2 printer Gyroid is one of the periodic minimal surface 3D structures that occupy the whole volume
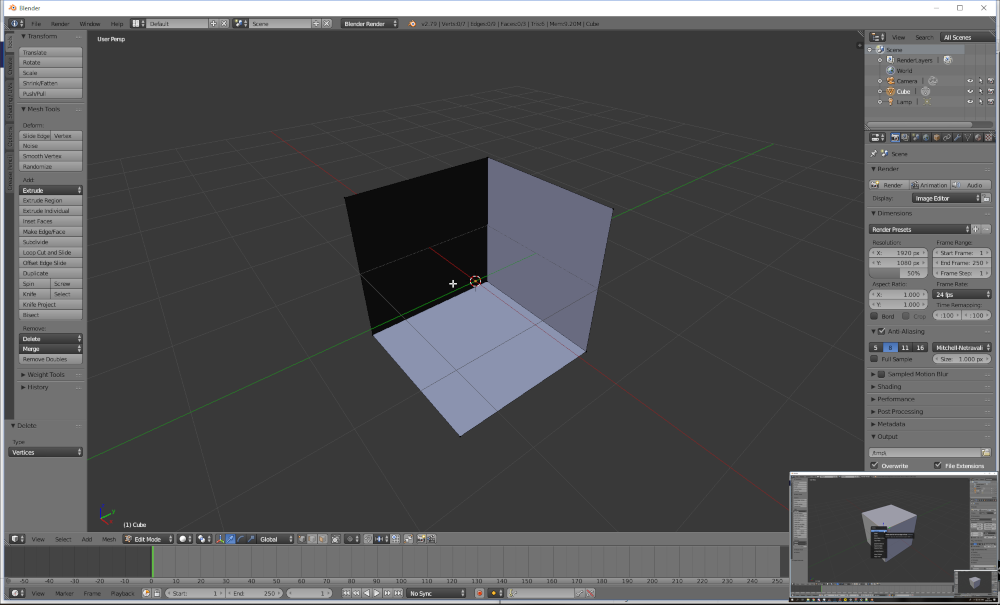
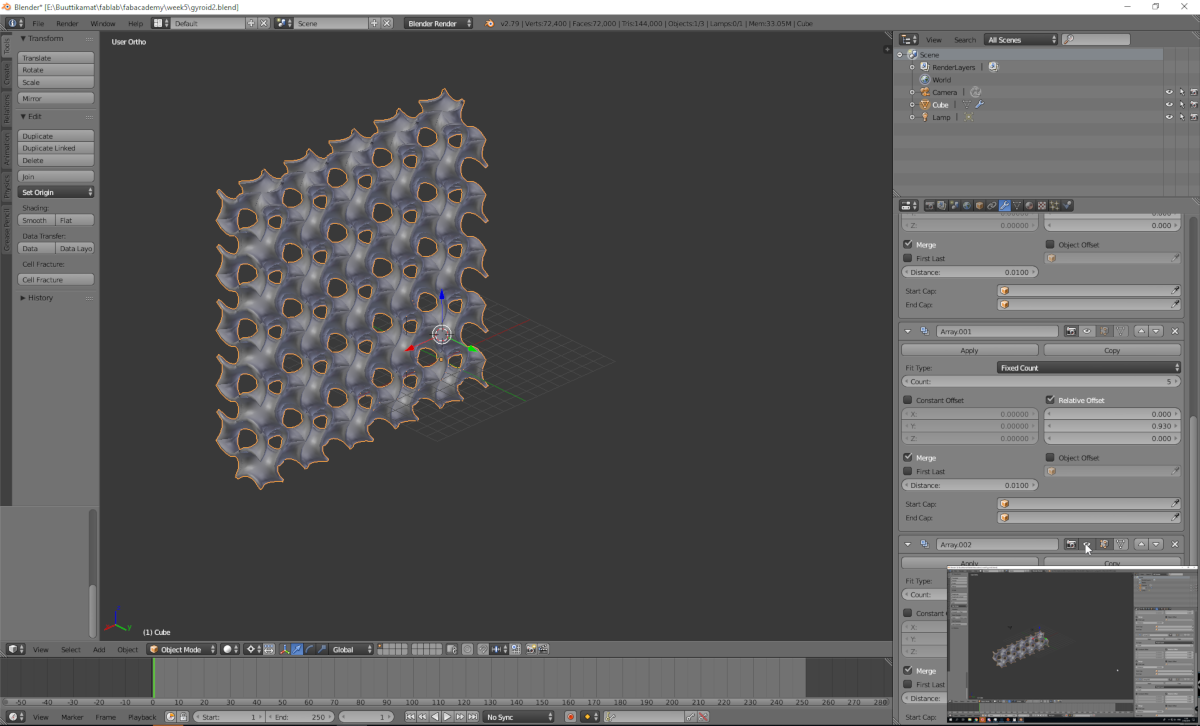
Gyroid was designed in Blender .
This method of design does not result perfect gyroid but a 3D print tolerance approximation.
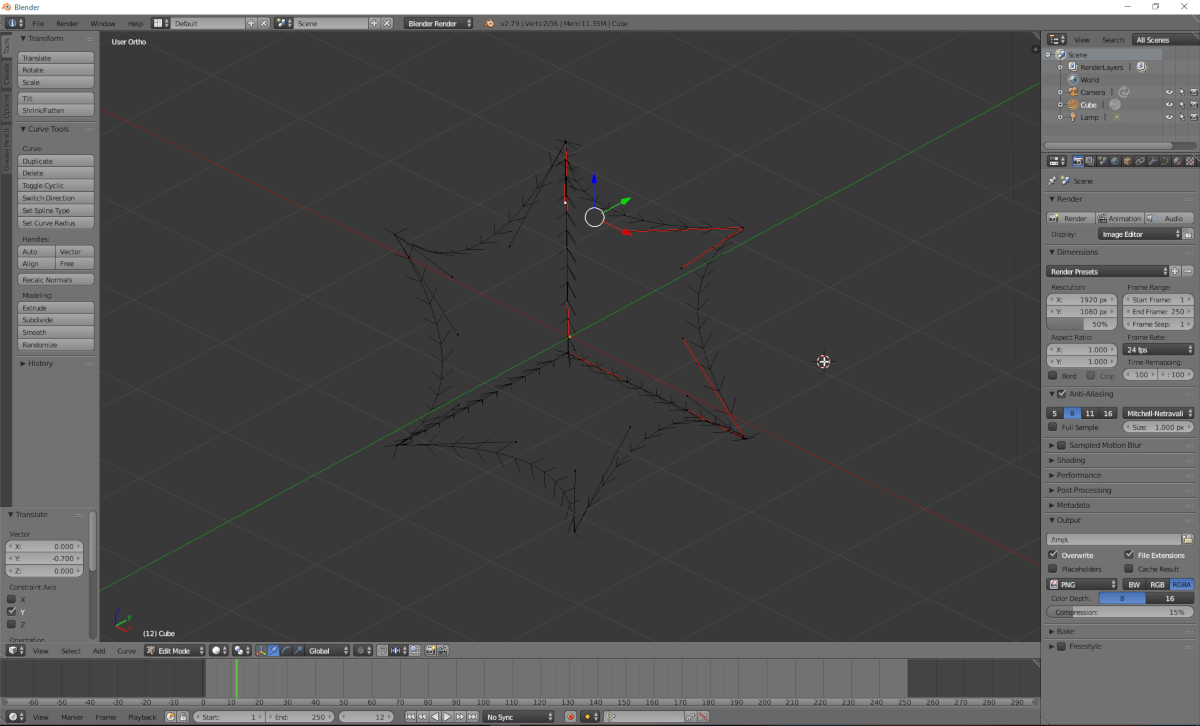
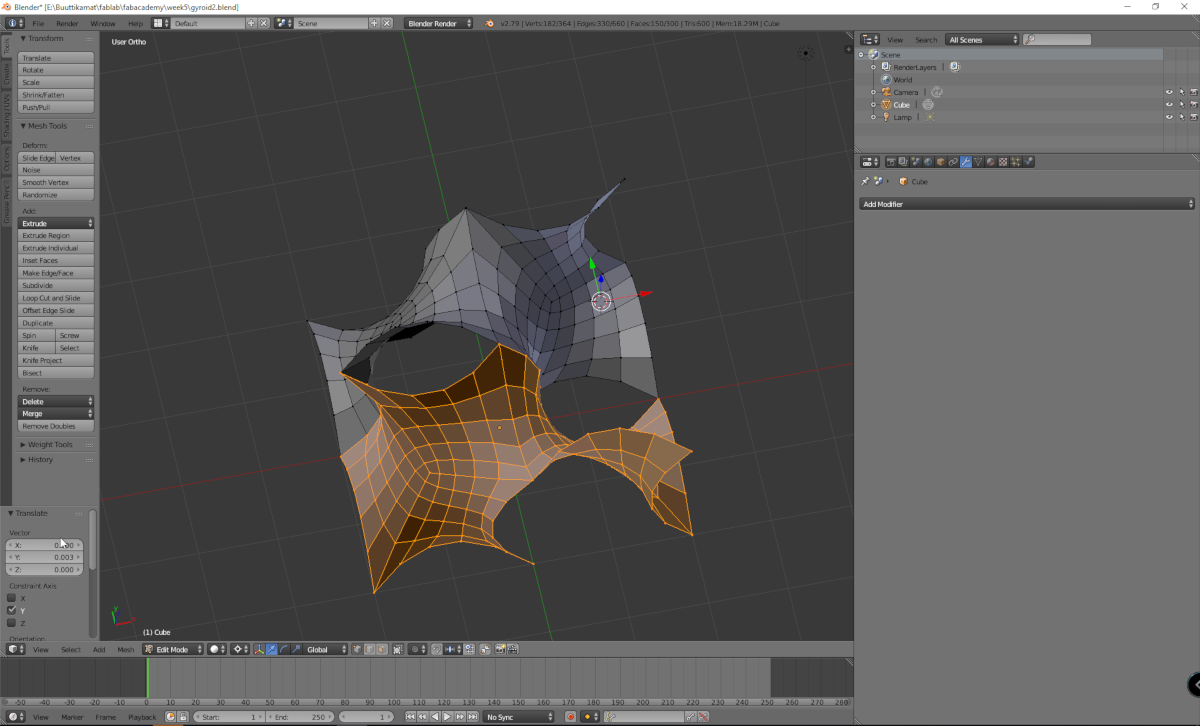
The default cube was modified to make a dual consist curve. First step is to delete one corner vertex.

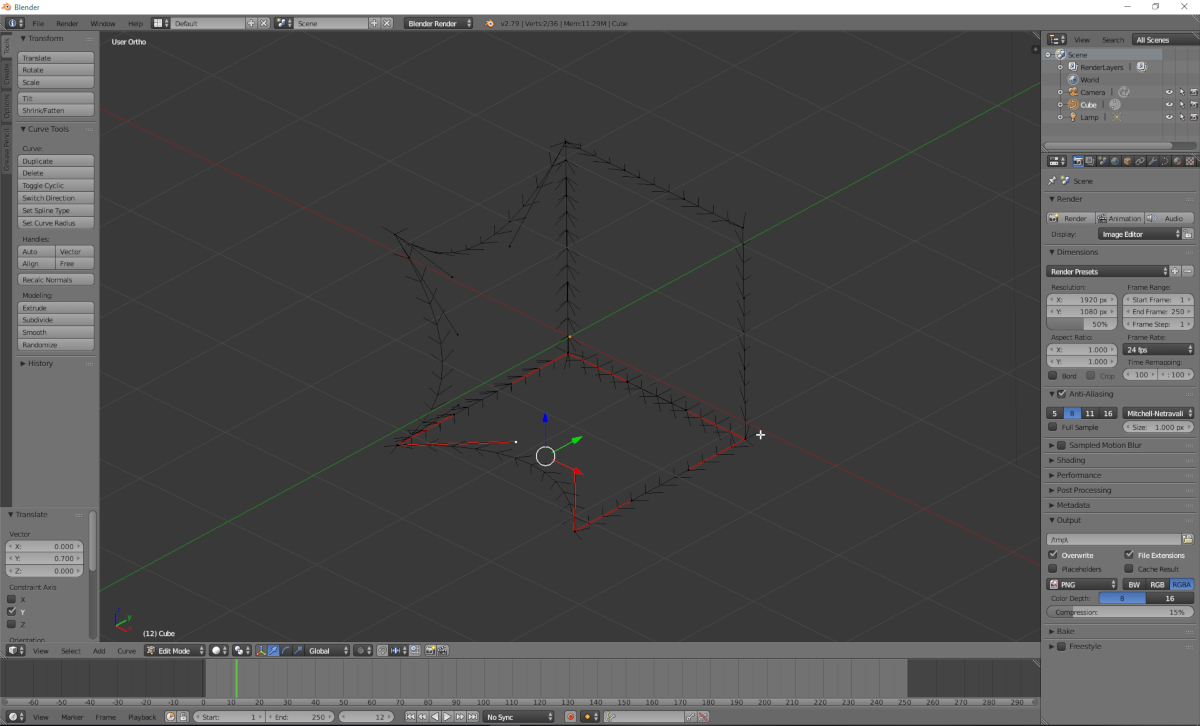
The resulting sides was maked into curves.

then the side vectors was moved by 0.7 to needed direction. by: Z:-0.7, X:0.7, Y:0.7, Z:0.7, X:-0.7, Y:-0.7. counter clock vice from rightmost Z side.
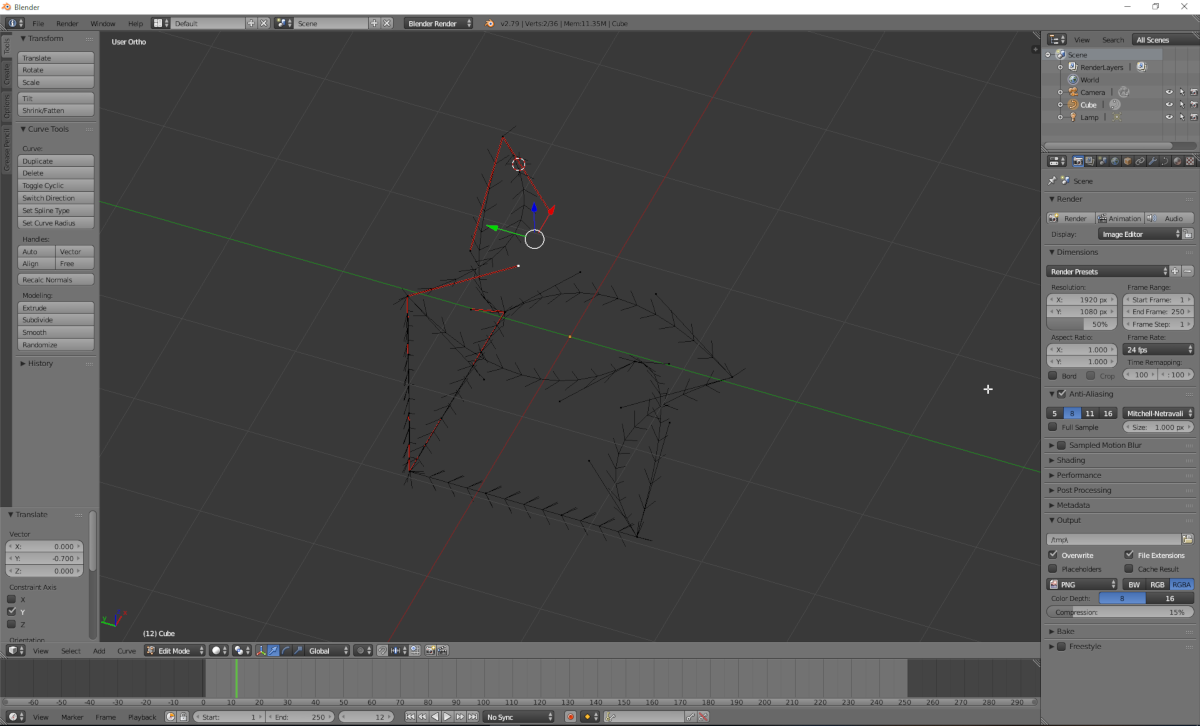
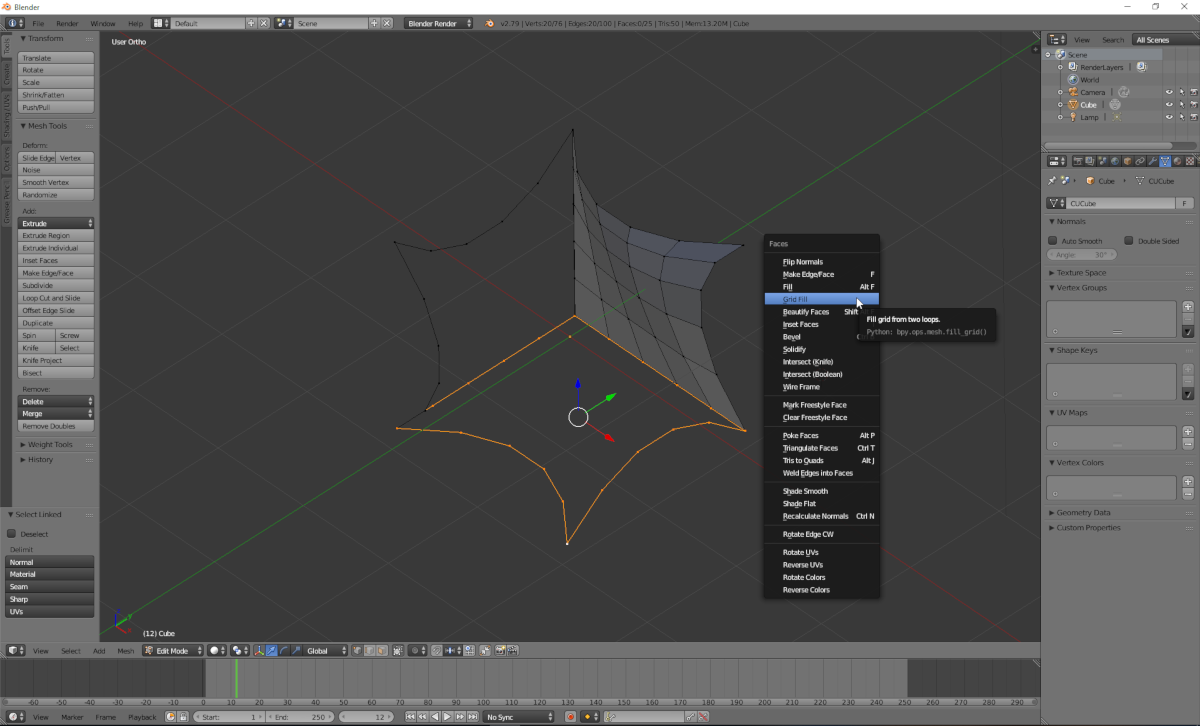
The remaining vectors are made back to mesh by reconnecting the outline and making a grid fill.
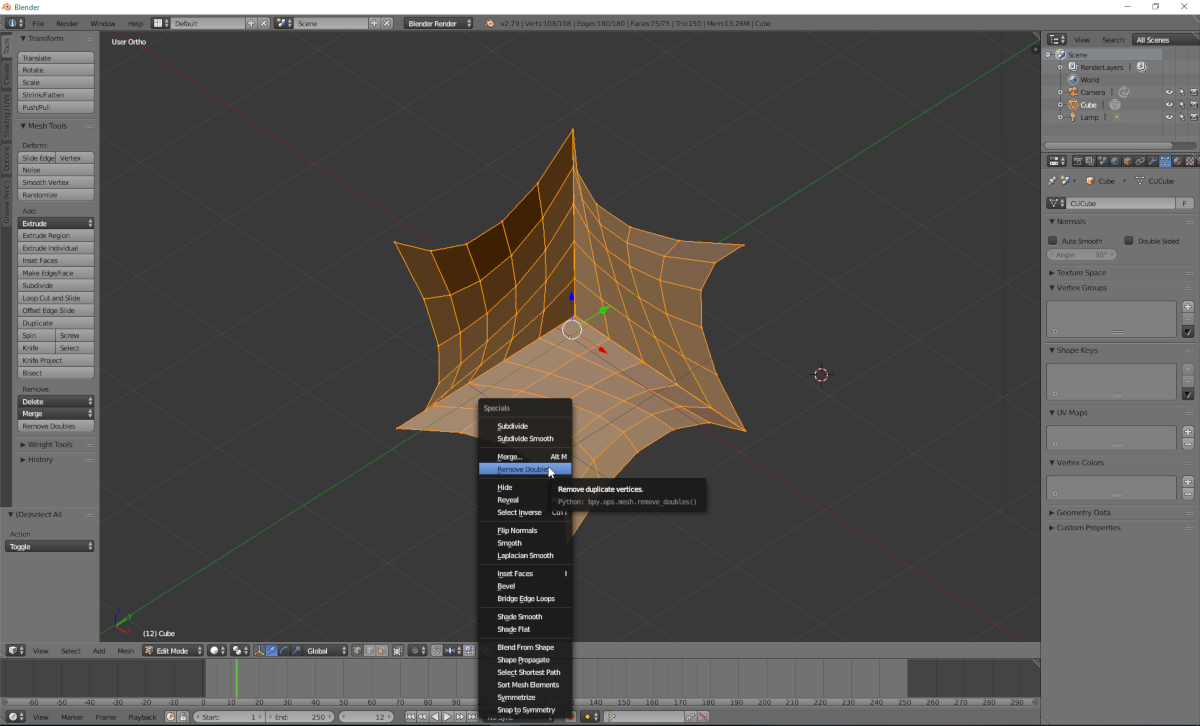
Grid fill will make some doubled vertexes on the intersection of the grid faces. they are removed by selecting all faces and removing doubles.
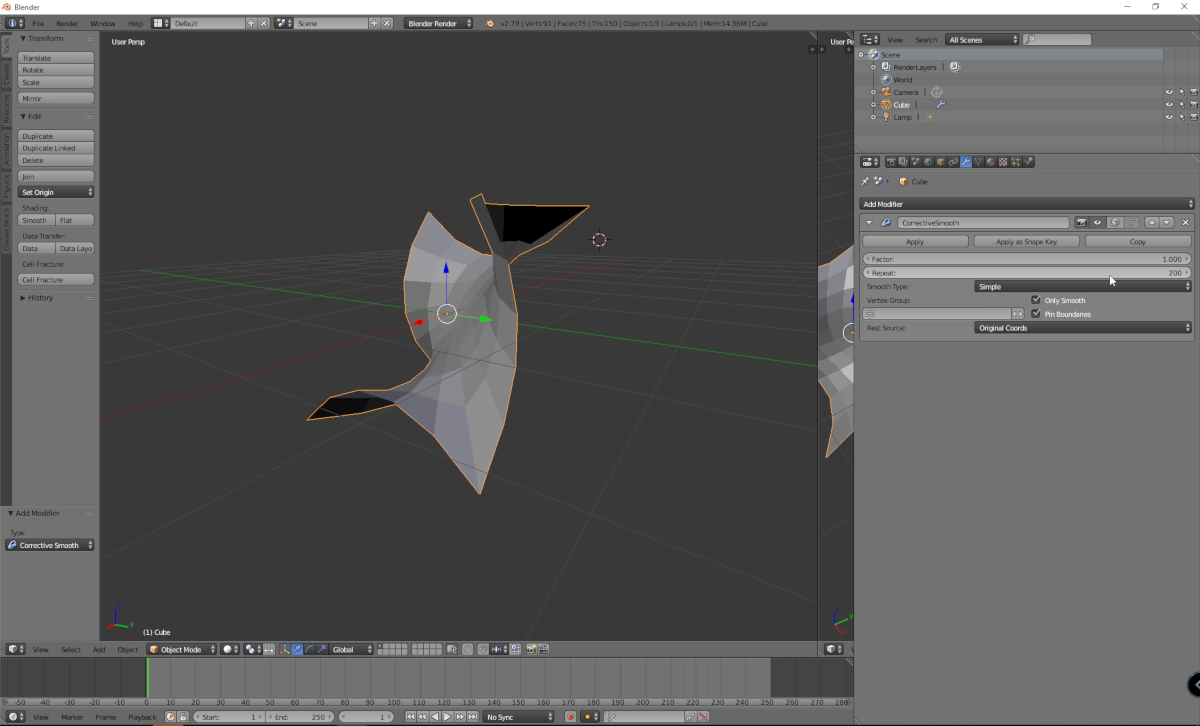
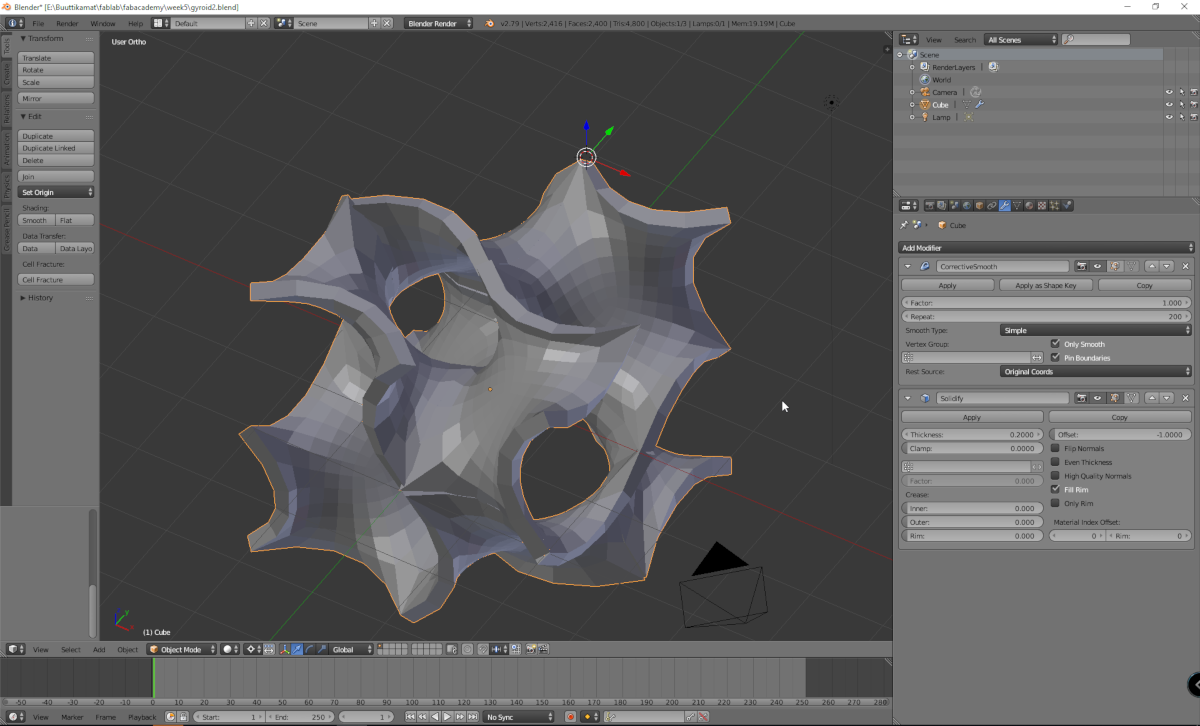
The final primitive shape part is optained by applying corrective smoothing -modifier.
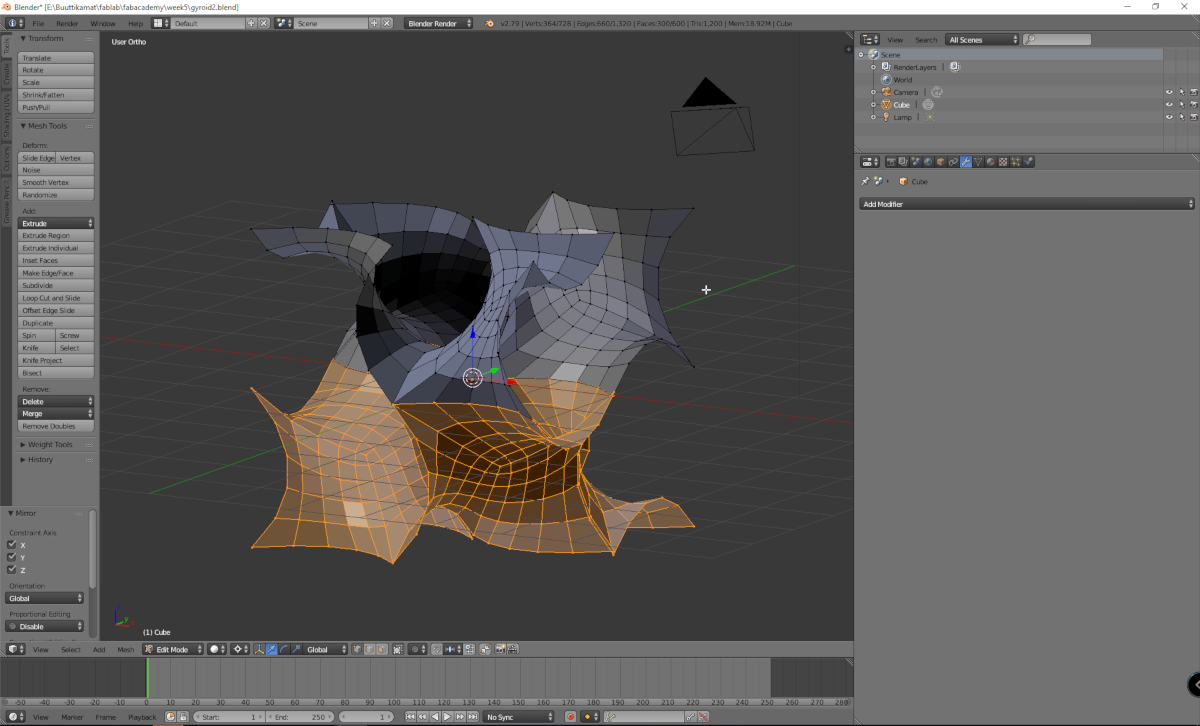
From the primitive the principal structure is made by duplicating the primitive and mirroring the duplicated faces in X and Y axis. After mirroring process, duplicated faces are moved in Y direction by 2 “Blender Unit” to align it with the original one.
The result is then again duplicated and mirrored in Y and in Z direction. After the process, duplicated faces are moved in Z direction by 2 “Blender Unit”.
Result is duplicated and mirrored in all Z , X and Y direction.
To the models a thickness is added by adding solidify modifier.
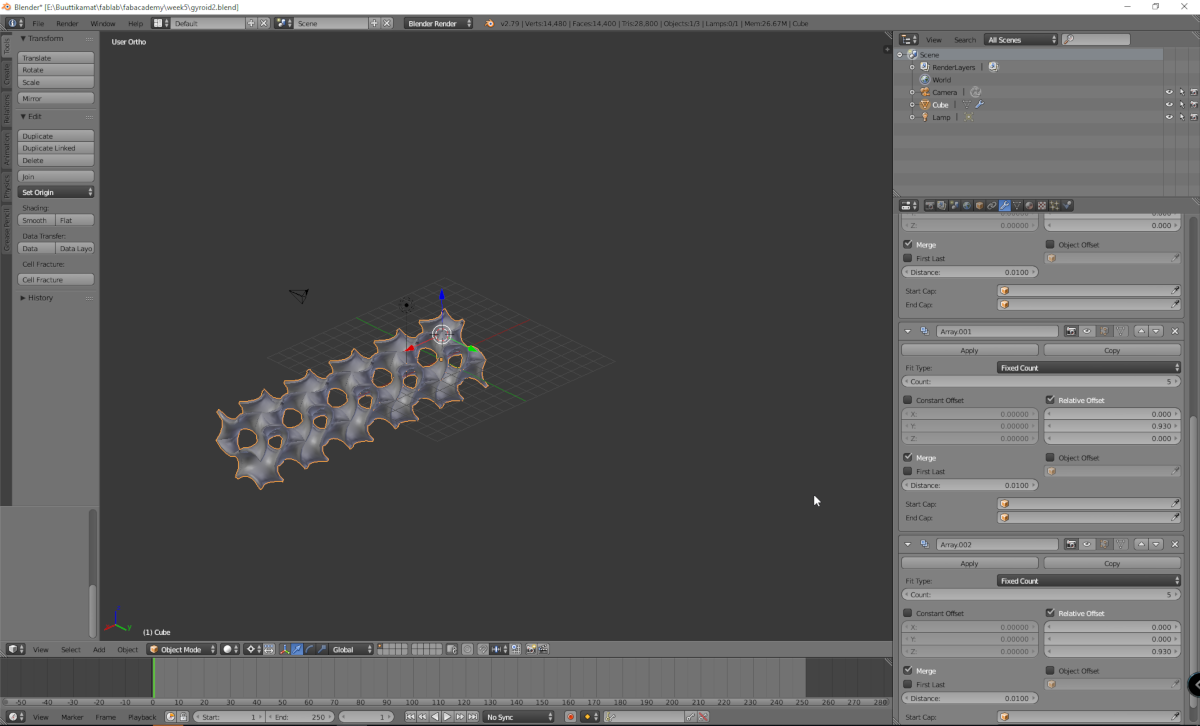
The model is now unit cell of the gyroid. and it is tile-able. An Array modifier was added no make 2 extra copies of the unit cell in all X.Y and Z direction.

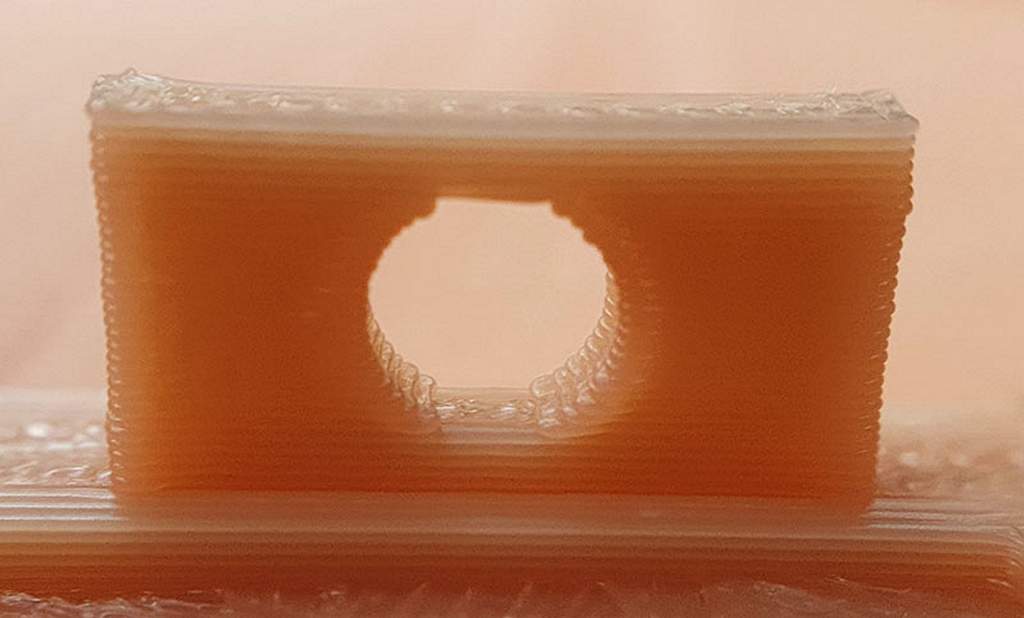
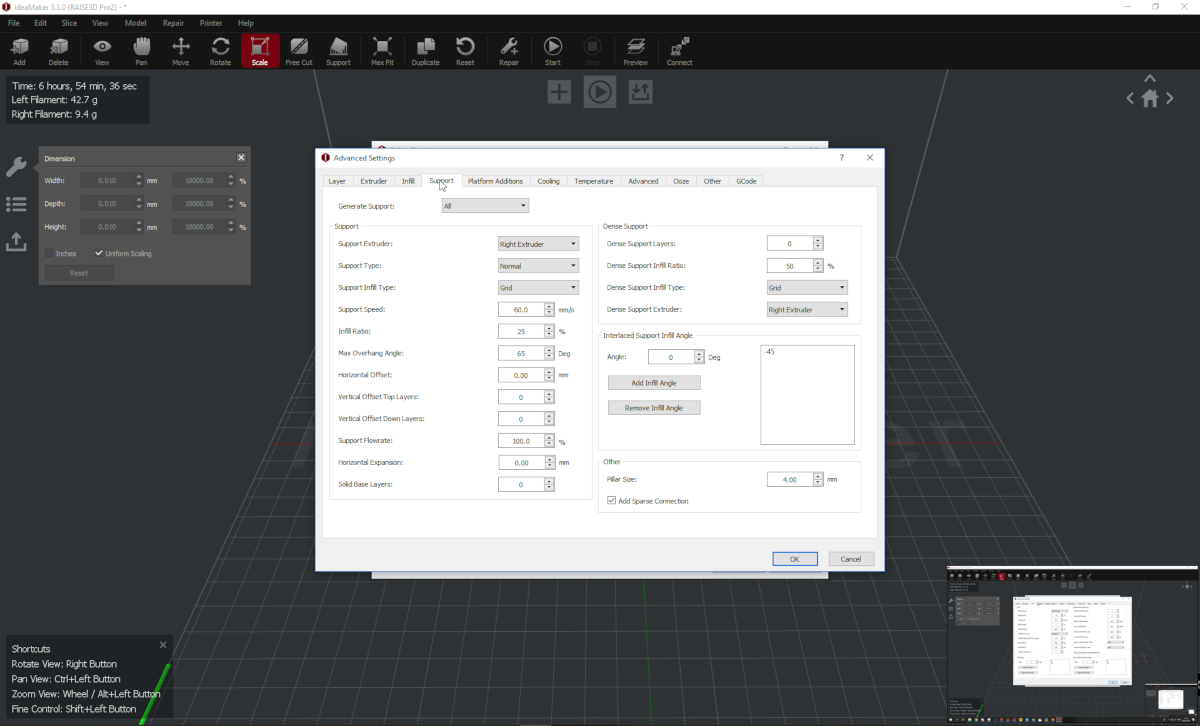
The gyroid structure is impossible to manufacture with subtractive methods and is also difficult to make via FFF additive methods because of the overhangs and bridges of the structure. The blind surfaces(surfaces that cannot be accessed from outside) inside the structure cannot be accessed directly and the structure needs to be supported when printing. Traditional breakaway support cannot be used. Only way to print gyroid is to use solvable support. In this print I used ABS as the print material and PLA as the support material. The PLA is dissolved into NaOH buffer solution after the print is finished.
By using the PLA support for ABS printing profile the gyroid can be print.
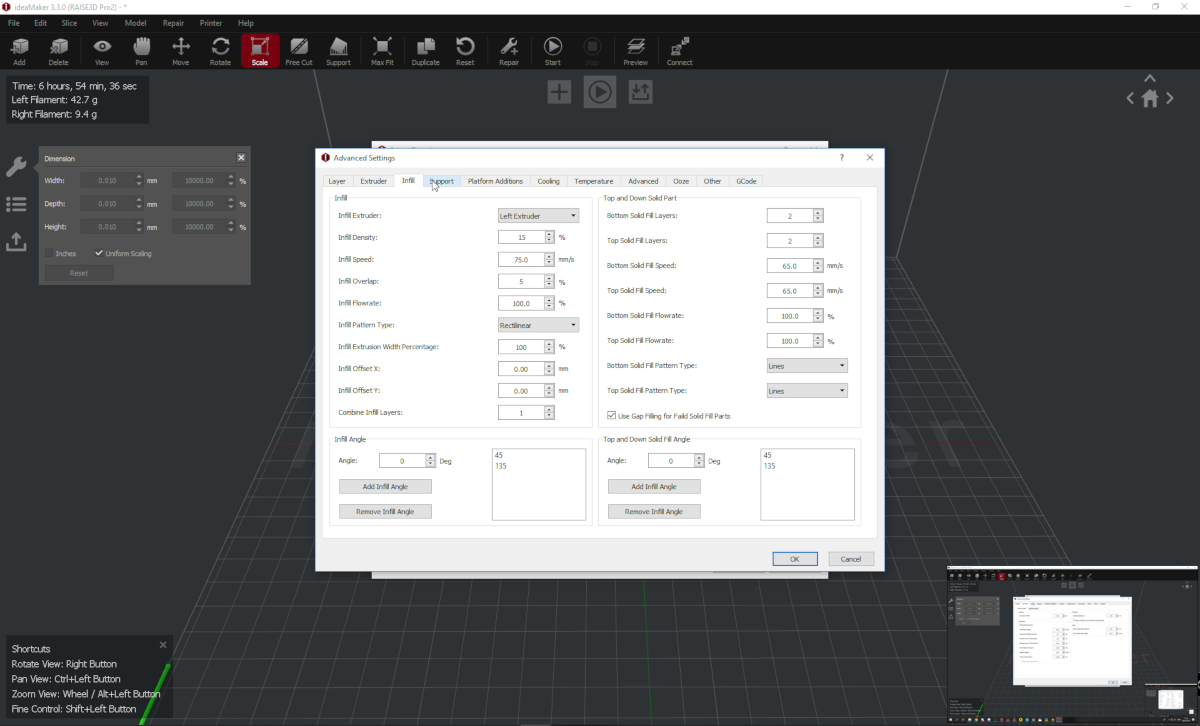
In gyroid there are a lot of blind surfaces where no tool can reach after the gyroid is made. Thus it cannot be made in subtractive methods The result was exported to STL file and opened in Raise3D Ideamaker. In Ideamaker the result via scaled to 50x50x50mm cube to save print time.
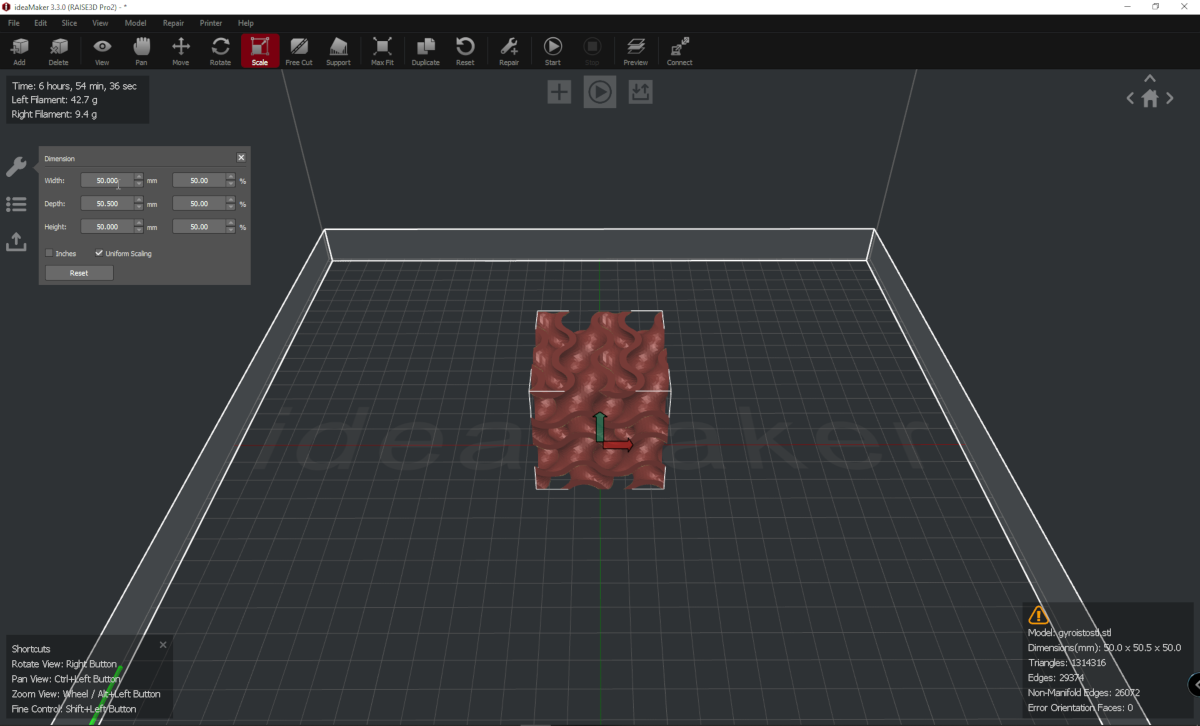
The slicing profile was the printer default for both of the ABS that the gyroid was printed in and for the PLA from witch the support was printed.
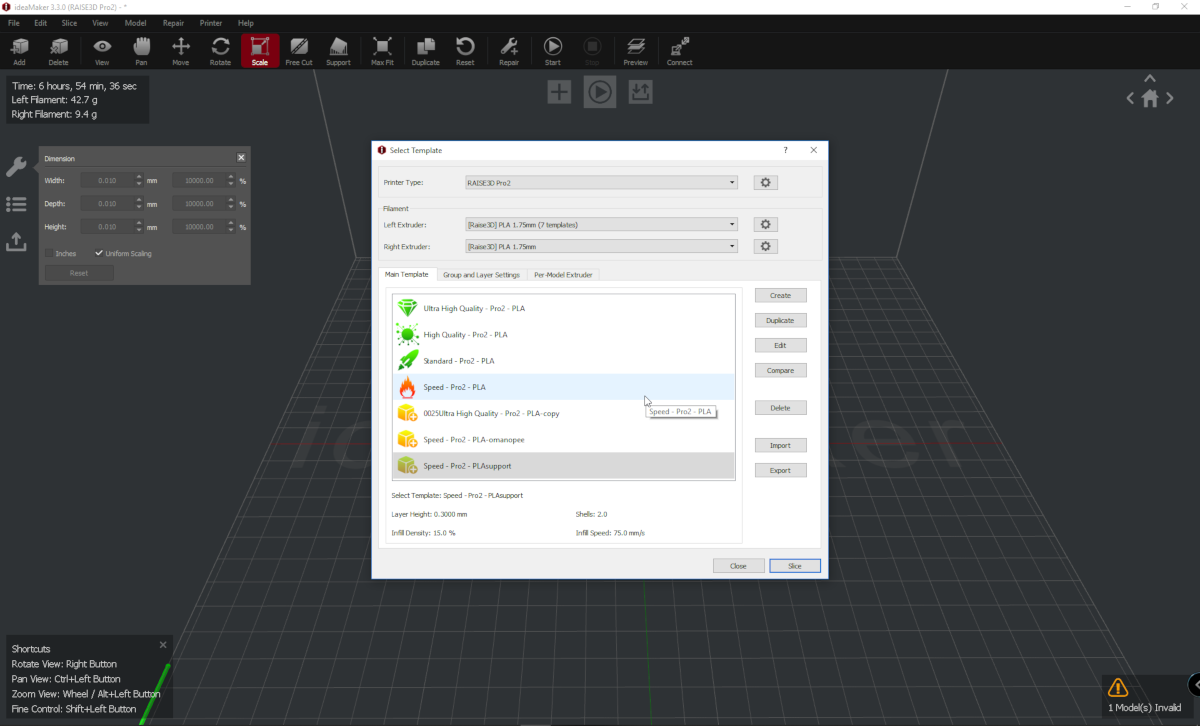
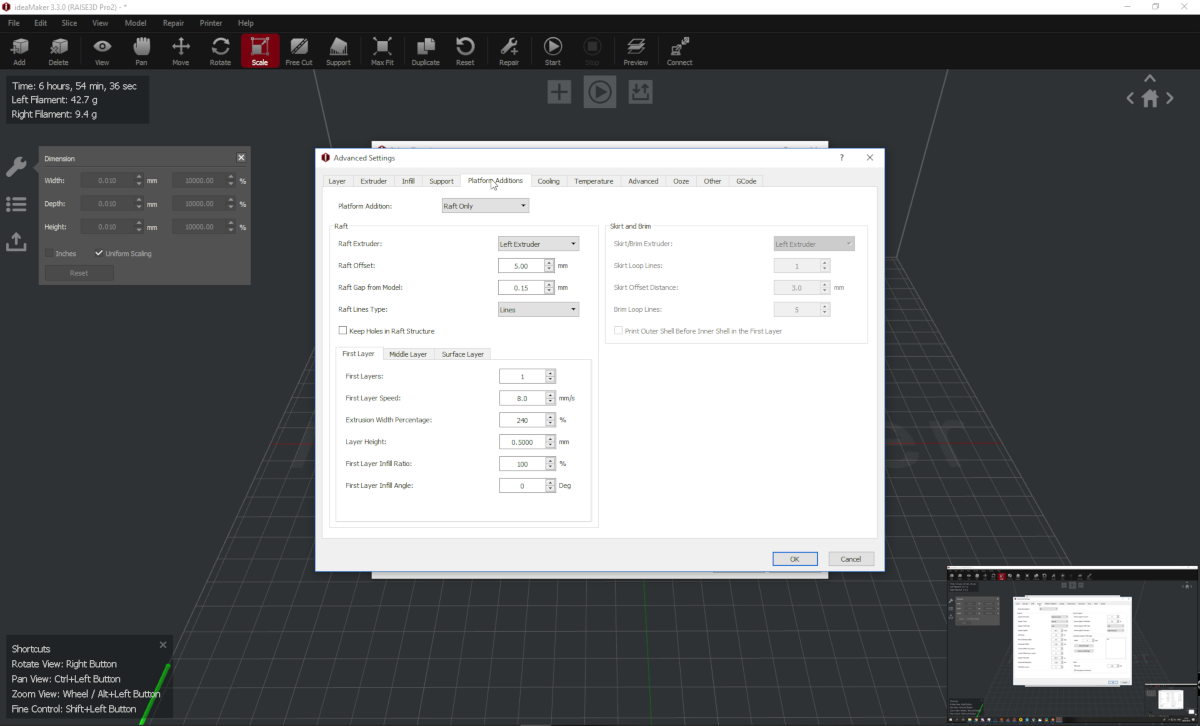
To limit the printing time a 0.3mm layer height, 2 shells and 2 bottom and 2 top layers were used. The print temperature for the ABS was 250C and for PLA was 205C. The Bed temperature was for raft 100C and after raft adhesion secured the bed temperature was lowered to 85C. The lowering of the bed temperature secures the PLA support from drooping in too high temperature.
To secure good print quality a Retraction and Wipe settings are set for specific filament.
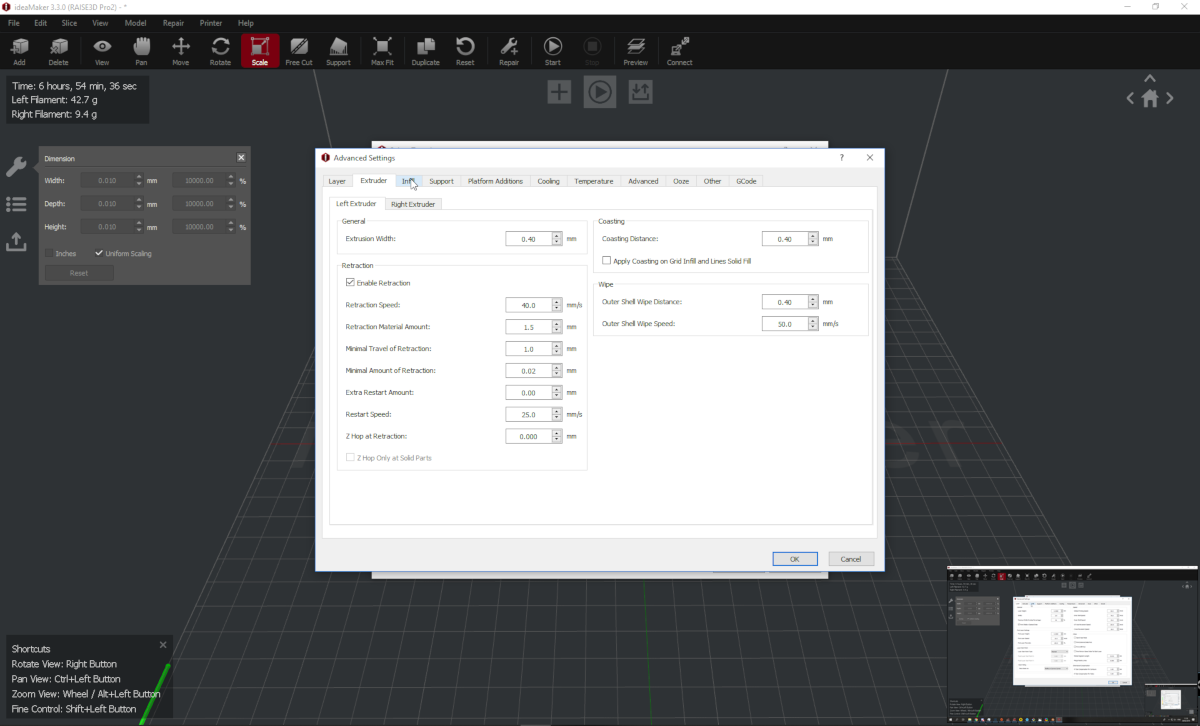
Infill is not important. The print is basically only walls.
Support is configured to be on the PLA extruder. THe support is configured to be in contact of the main print and by lovering the overhang angle a lot of support is generated.
A thick raft is used to remove warping and to heat shield PLA from overheating.
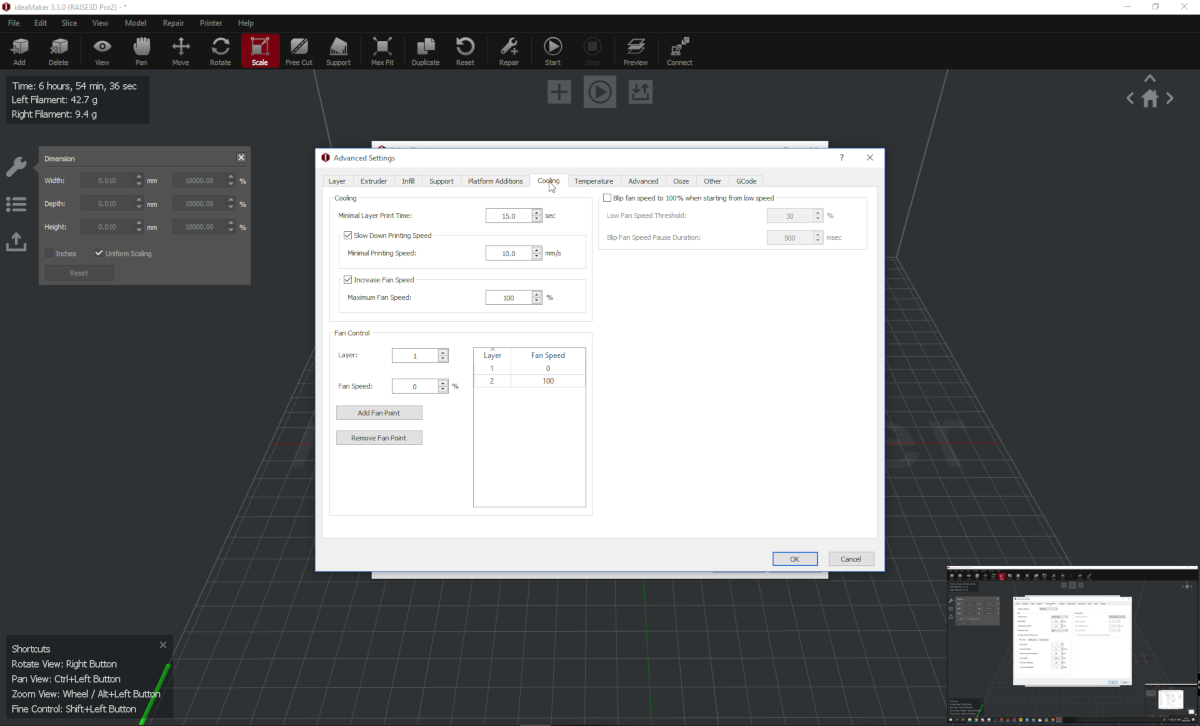
Minimal layer time is not really an issue in this print because it does not have narrow spikes. Normal Print cooling was used.
In temperature the right nozzle temperatures are set and the bed temperature change is configured.

The gyroid was then printed.
.jpg)
.jpg)
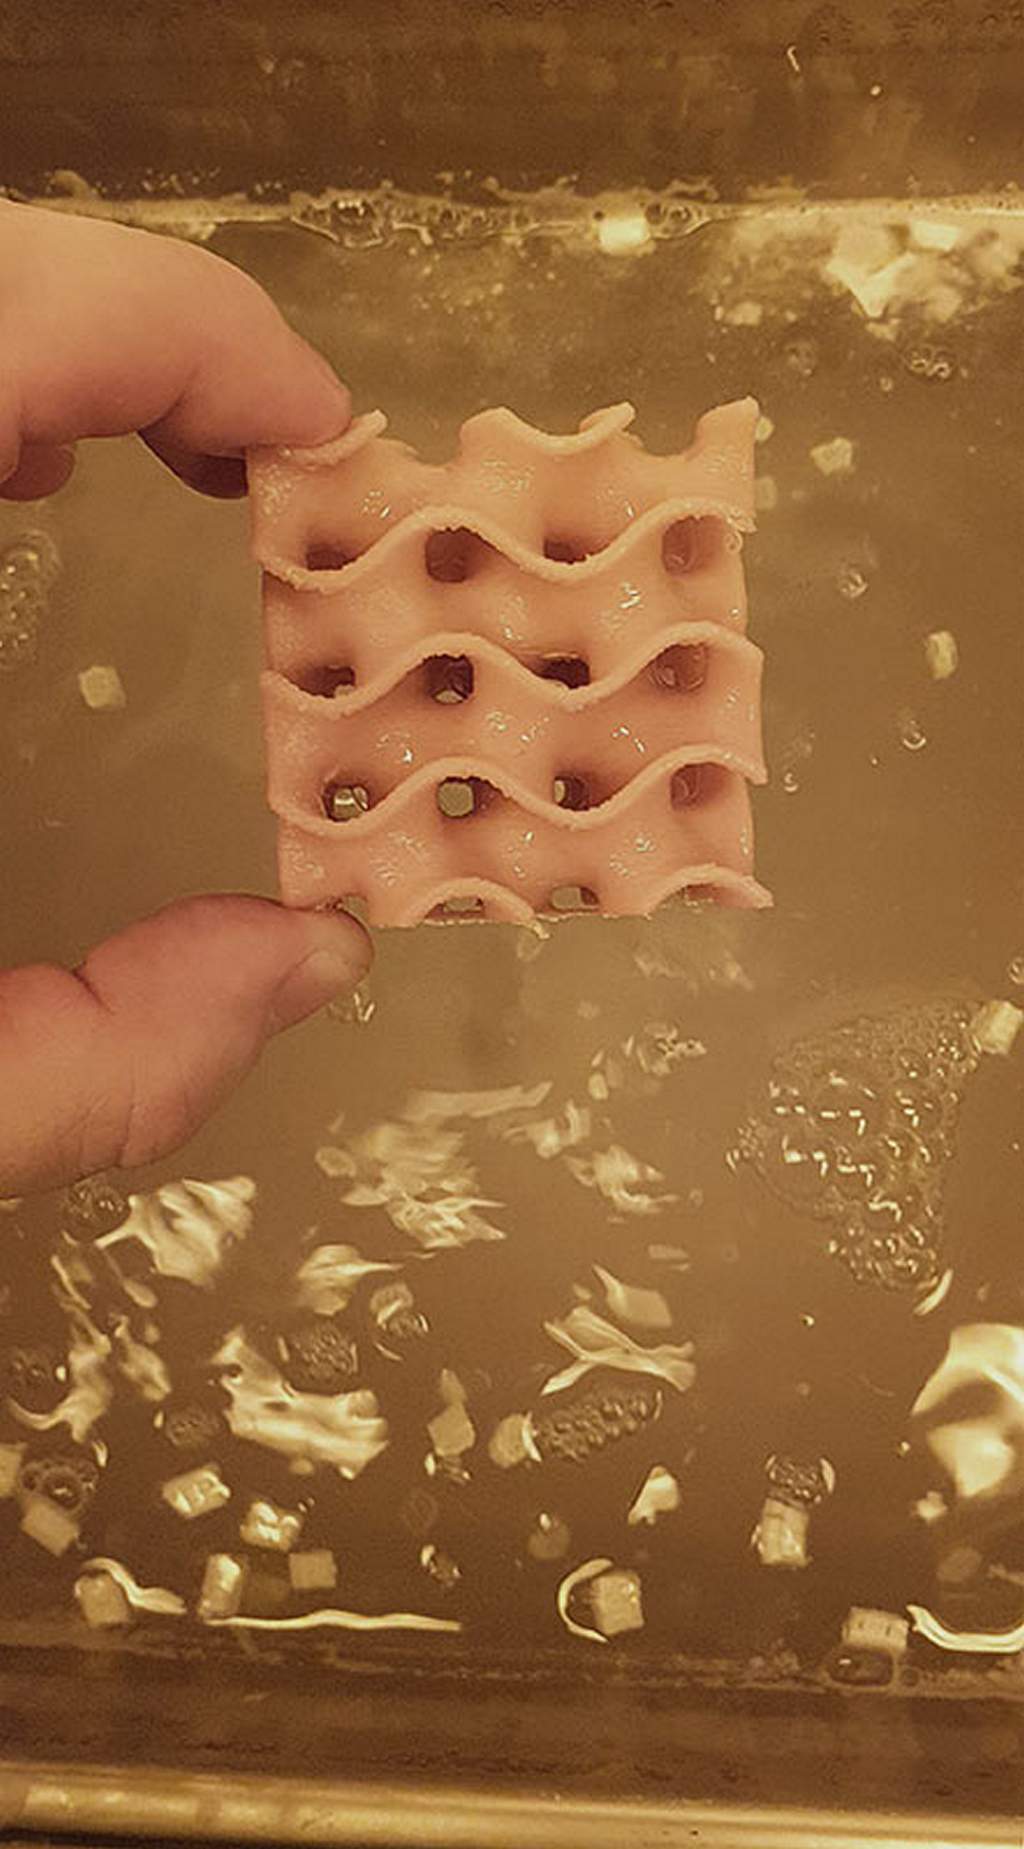
The final print was successful. A few over temperature caused oozing blobs can be seen. Maybe a wipe wall would be better to have.
.jpg)
.jpg)
The print was removed from the build plate by using sharp spatula.
.jpg)
The raft came nicely and no droop or overhang problems can be seen. The print is now ready for the chemichal support removal.
.jpg)
The support removing solution is a water based base solution. The PLA will decompose in warm sodium hydroxide. The use of base solution needs a chemical resistance tank. A plastic or a corrosive resistant metal can be used, Because of the heating requirement a stainless steel was selected. In the Fab Lab there is a ultrasonic washer that matches these requirements.
.jpg)
The support remover solution was made by combining 3M NaHCO3,8M NaOH 0.1M Sodium dodecyl sulfate and 1M 2-Hydroxypropane-1,2,3-tricarboxylic acid. After every addition the solution was left to cool down. “First the water, then the /acid/base” Is good to remember when handling exothermic dissolutions. The additional substances are to mitigate basic solutions reaction with atmospheric CO2. The additional chemicals act as a buffer. This makes the solution longer lasting.
.jpg)
Heating the solution will accelerate the solvatation process. The tank is set to 60ºC. No ultrasonic energy is used. Because the tank makes a huge noise that nobody can stand to listen.
.jpg)
The print was taken from the base solution after 8 hours. The PLA support has been dissolved completely.
The print was washed with tap water to remove the extra base.
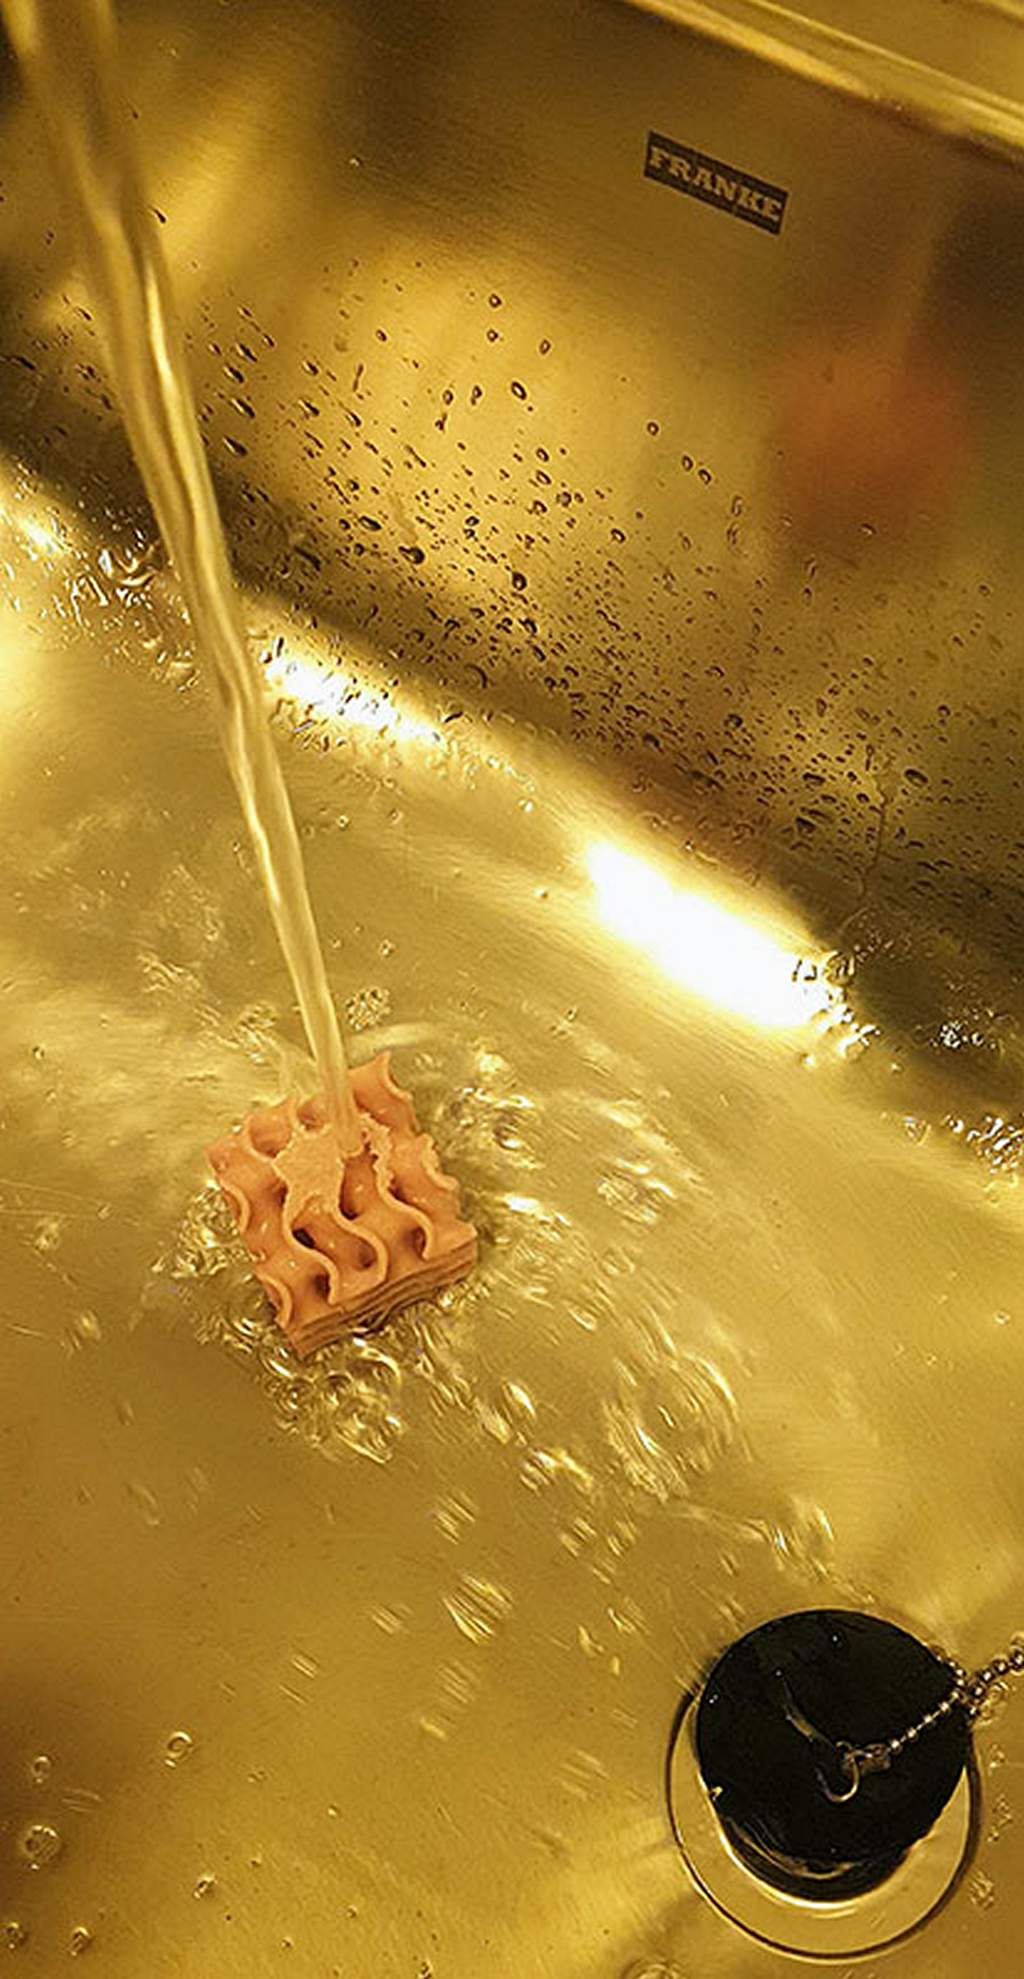
The finished product was taken outside to sun to be photographed.
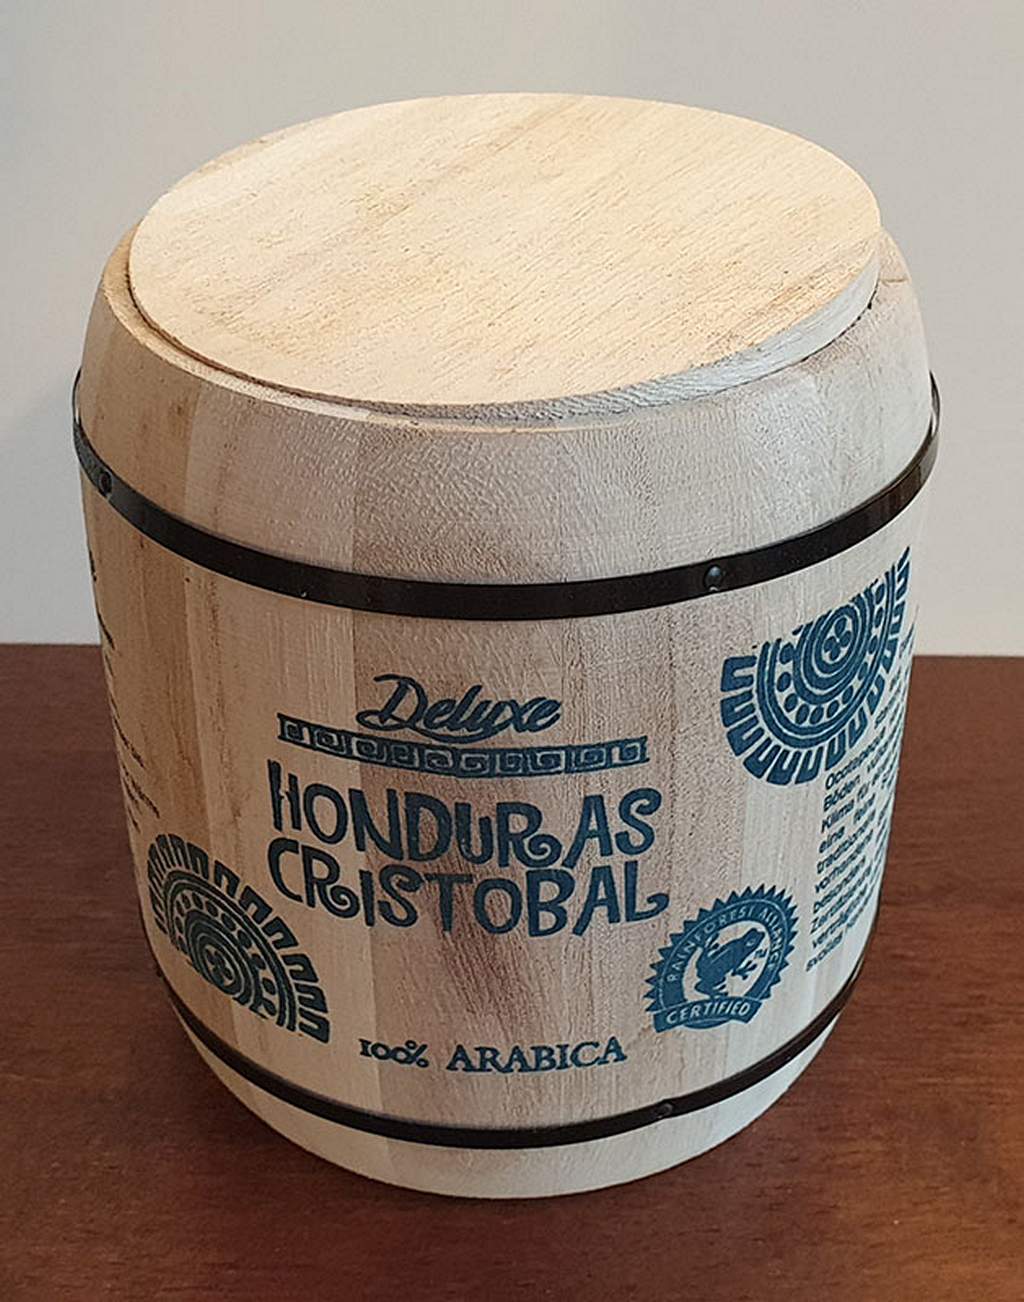
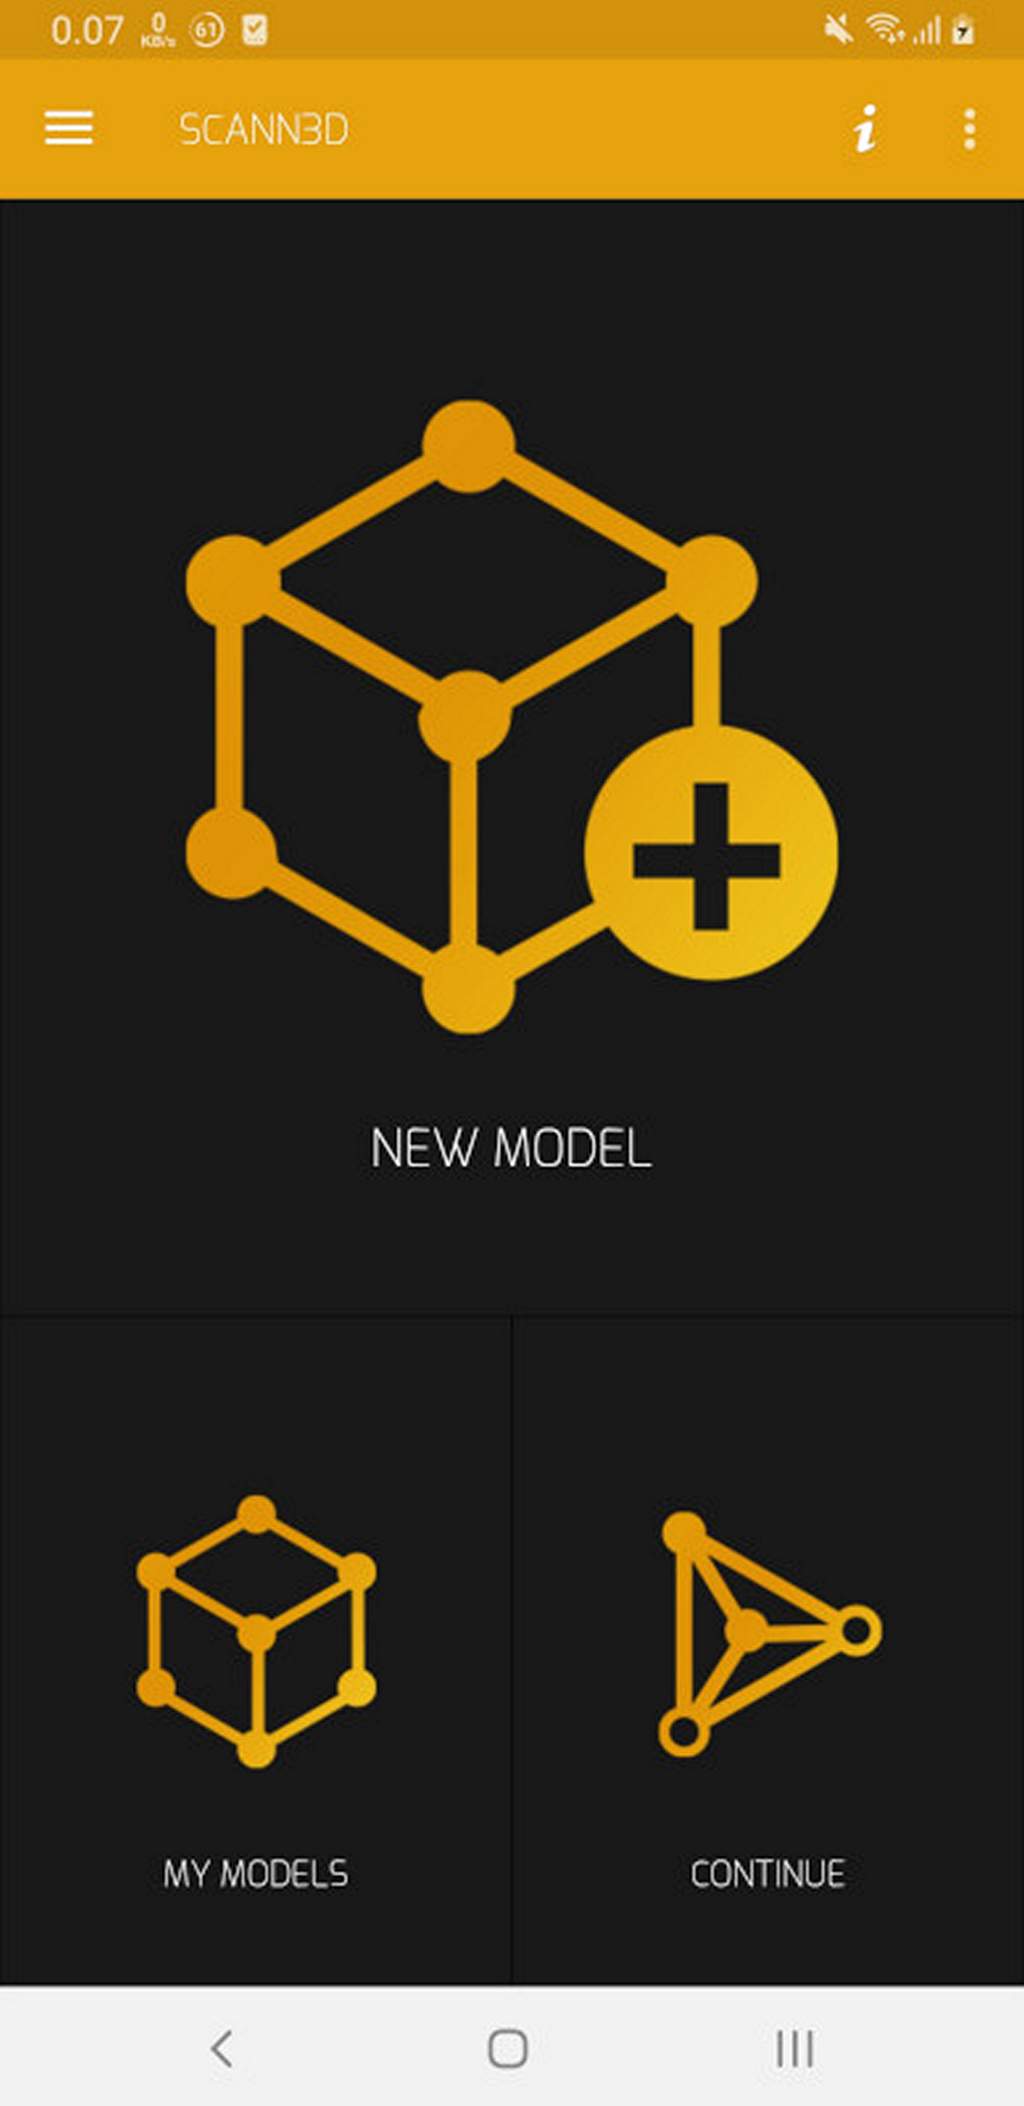
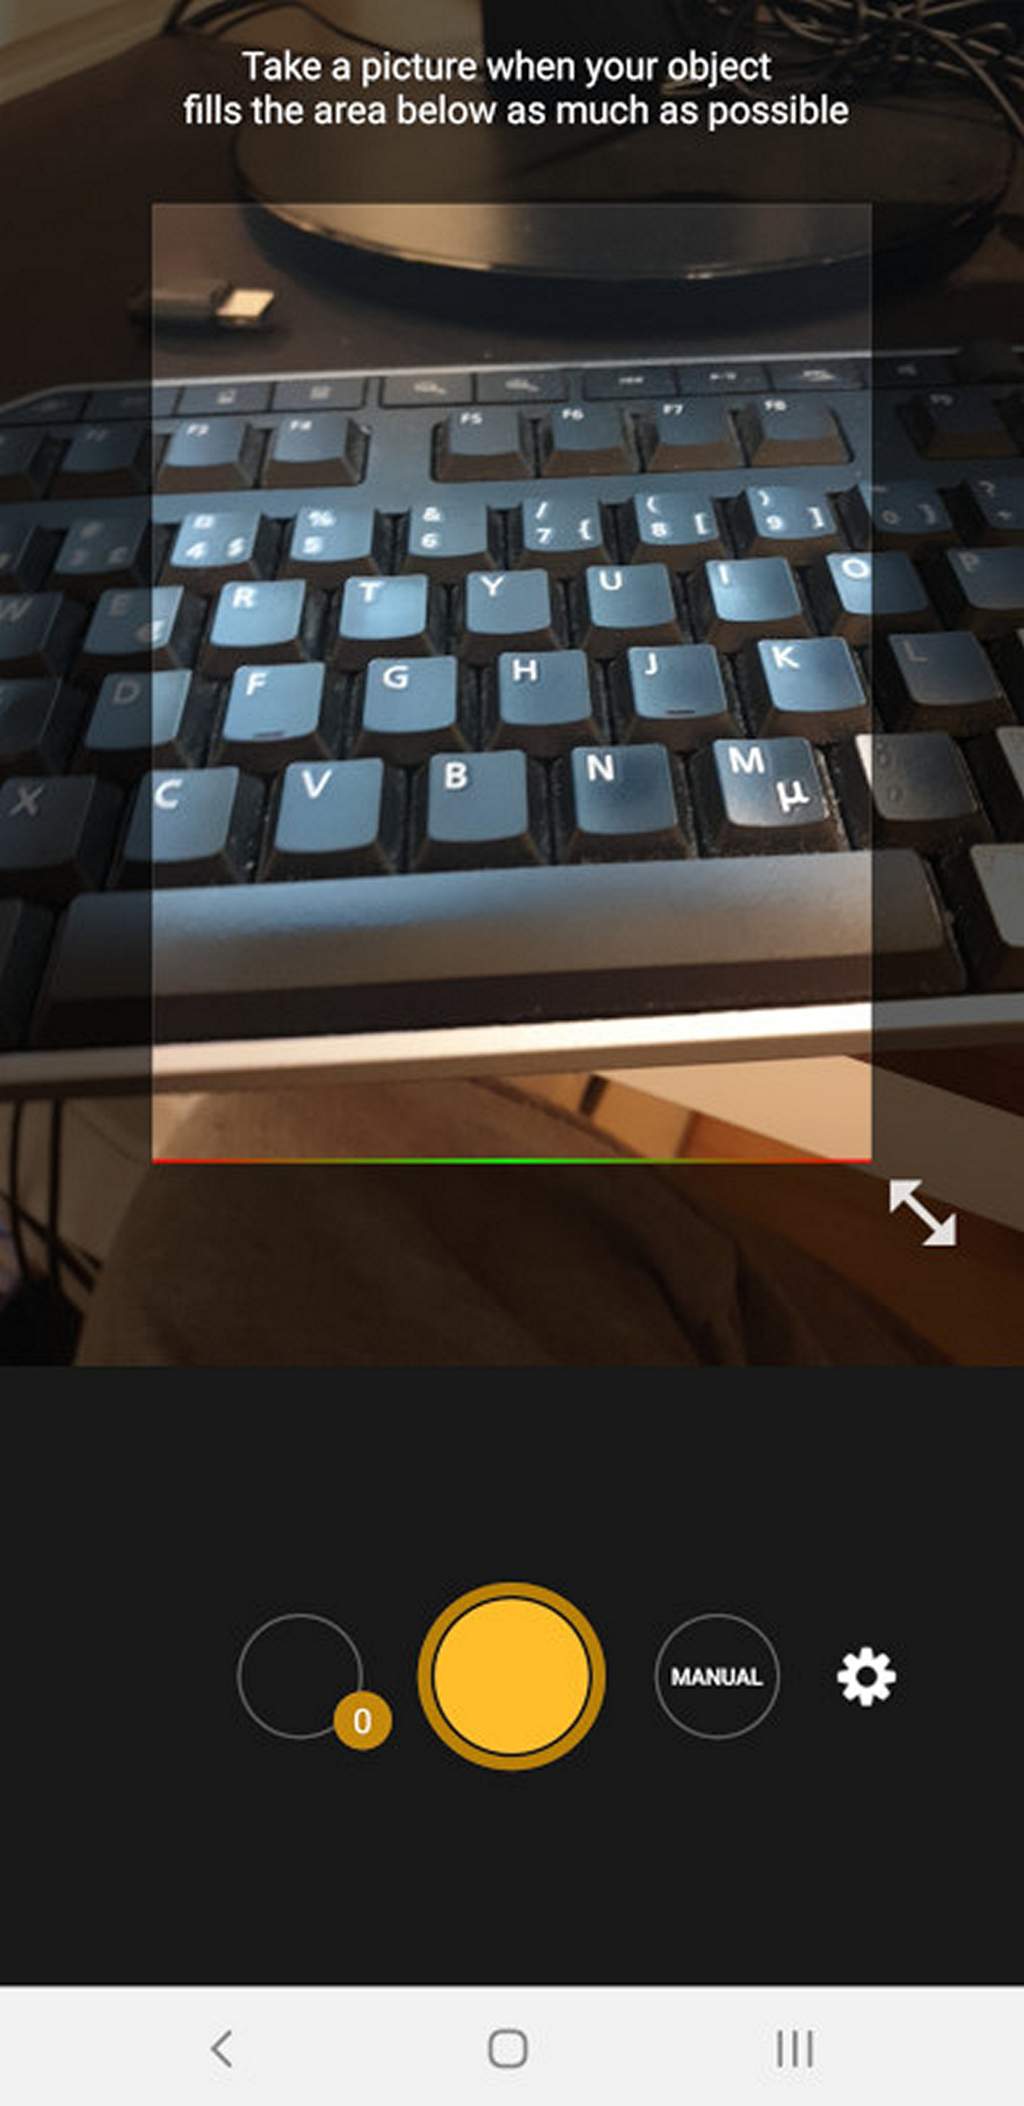
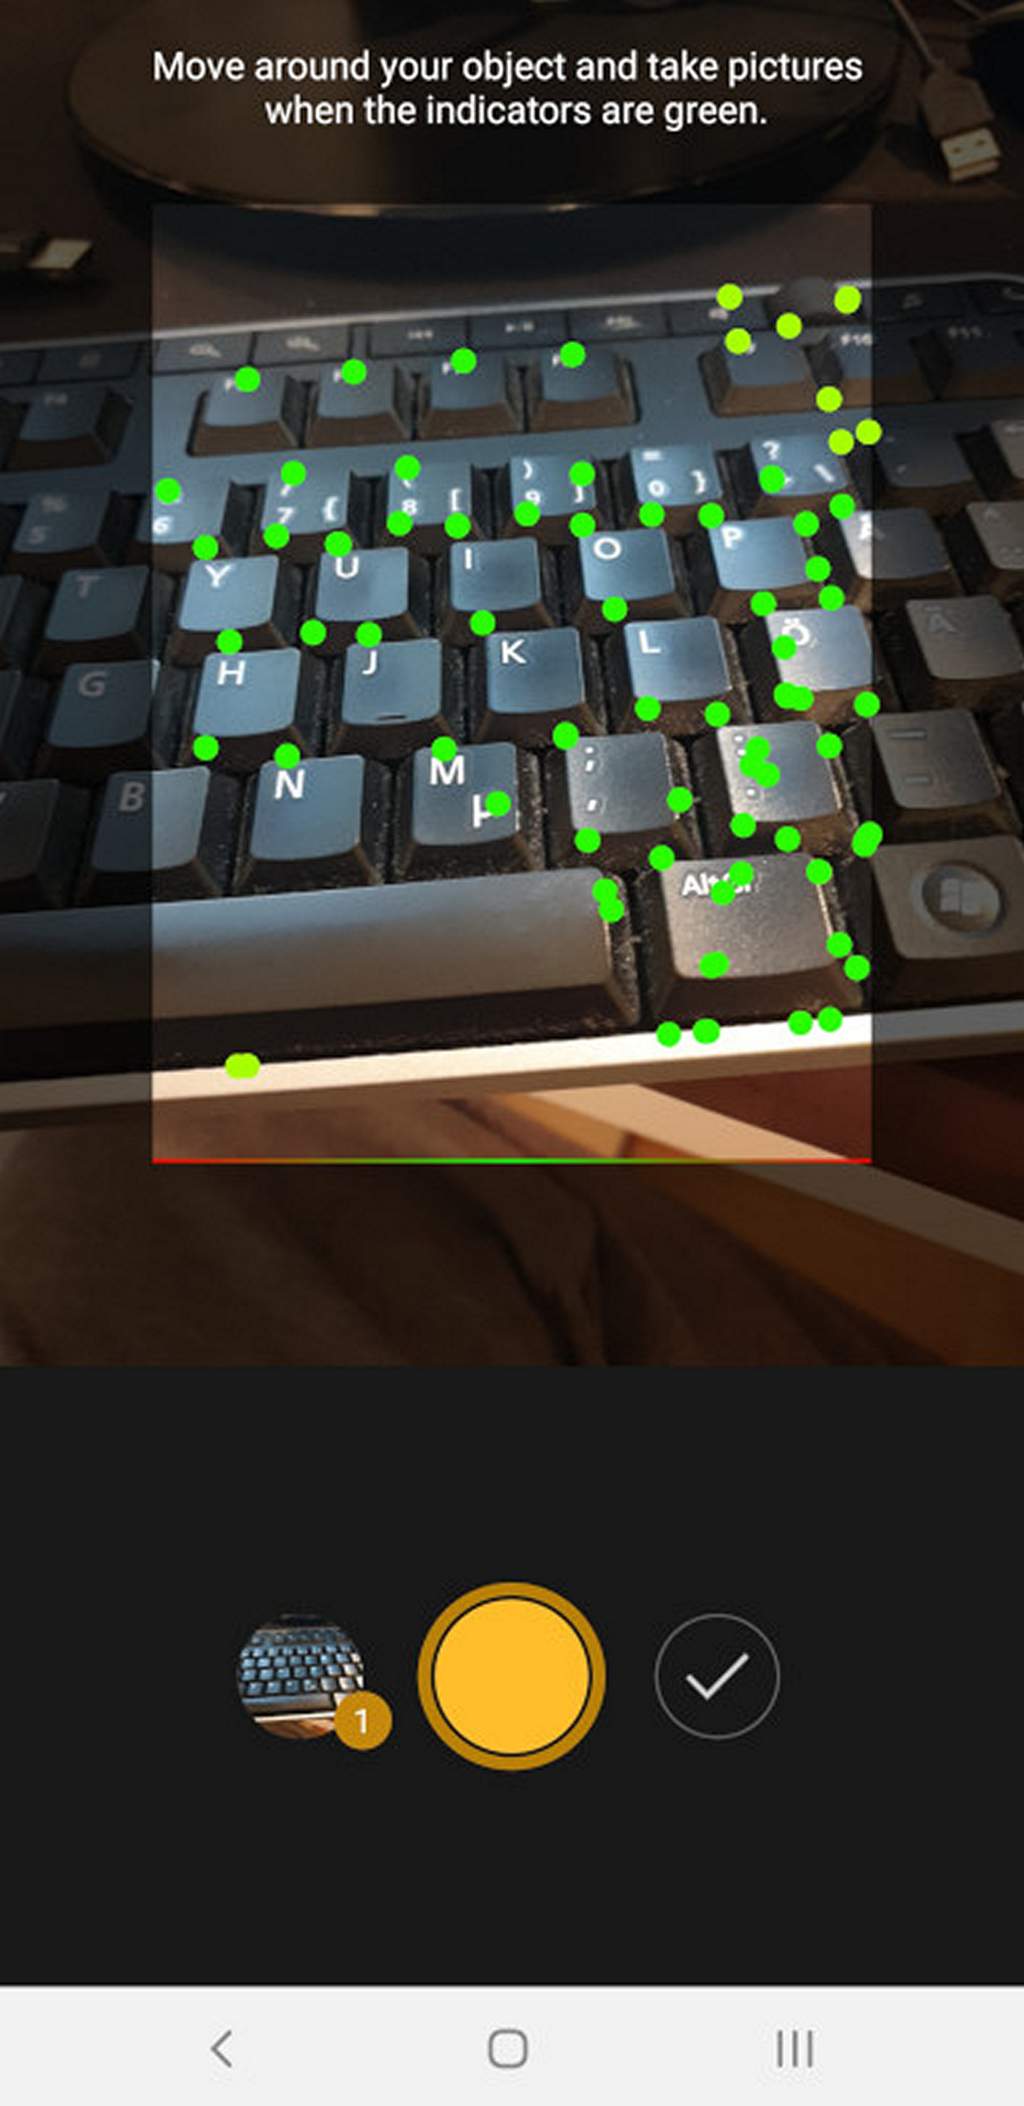
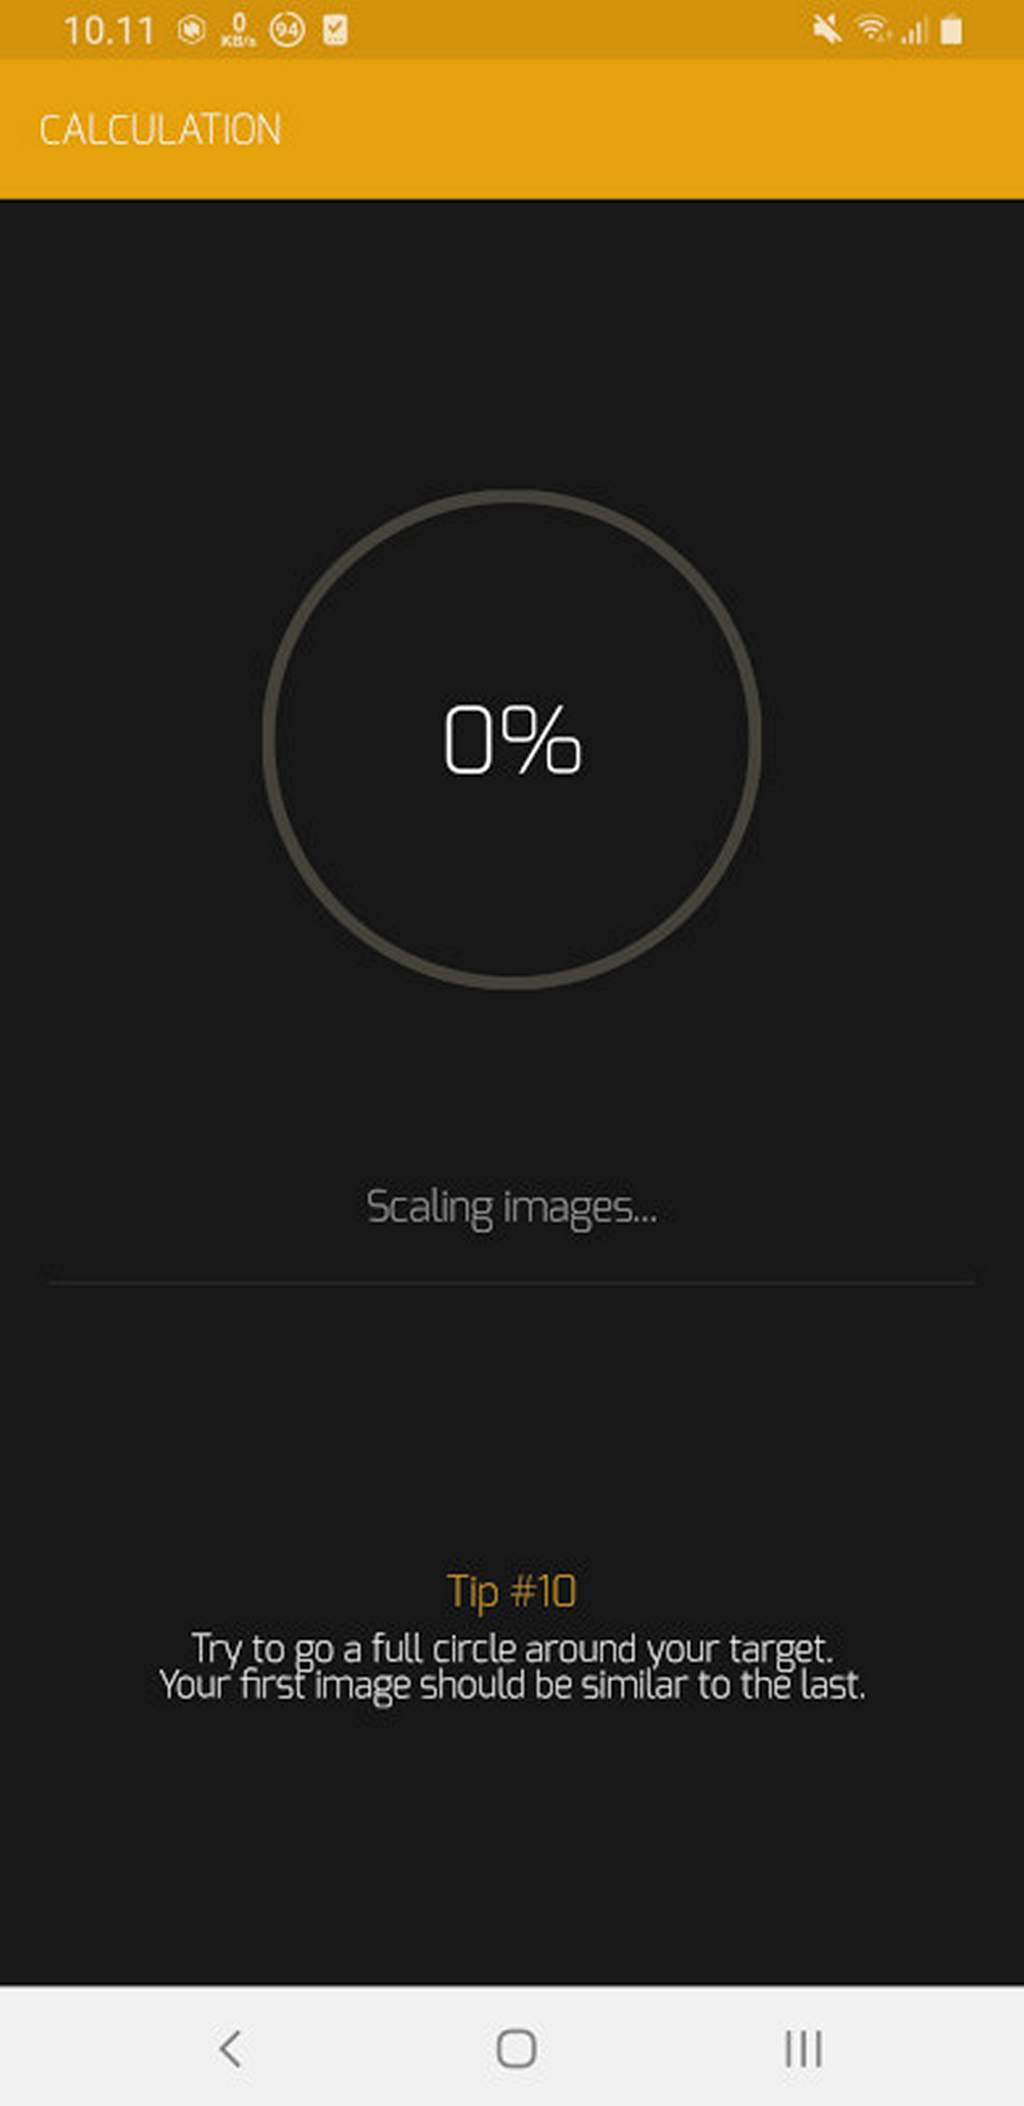
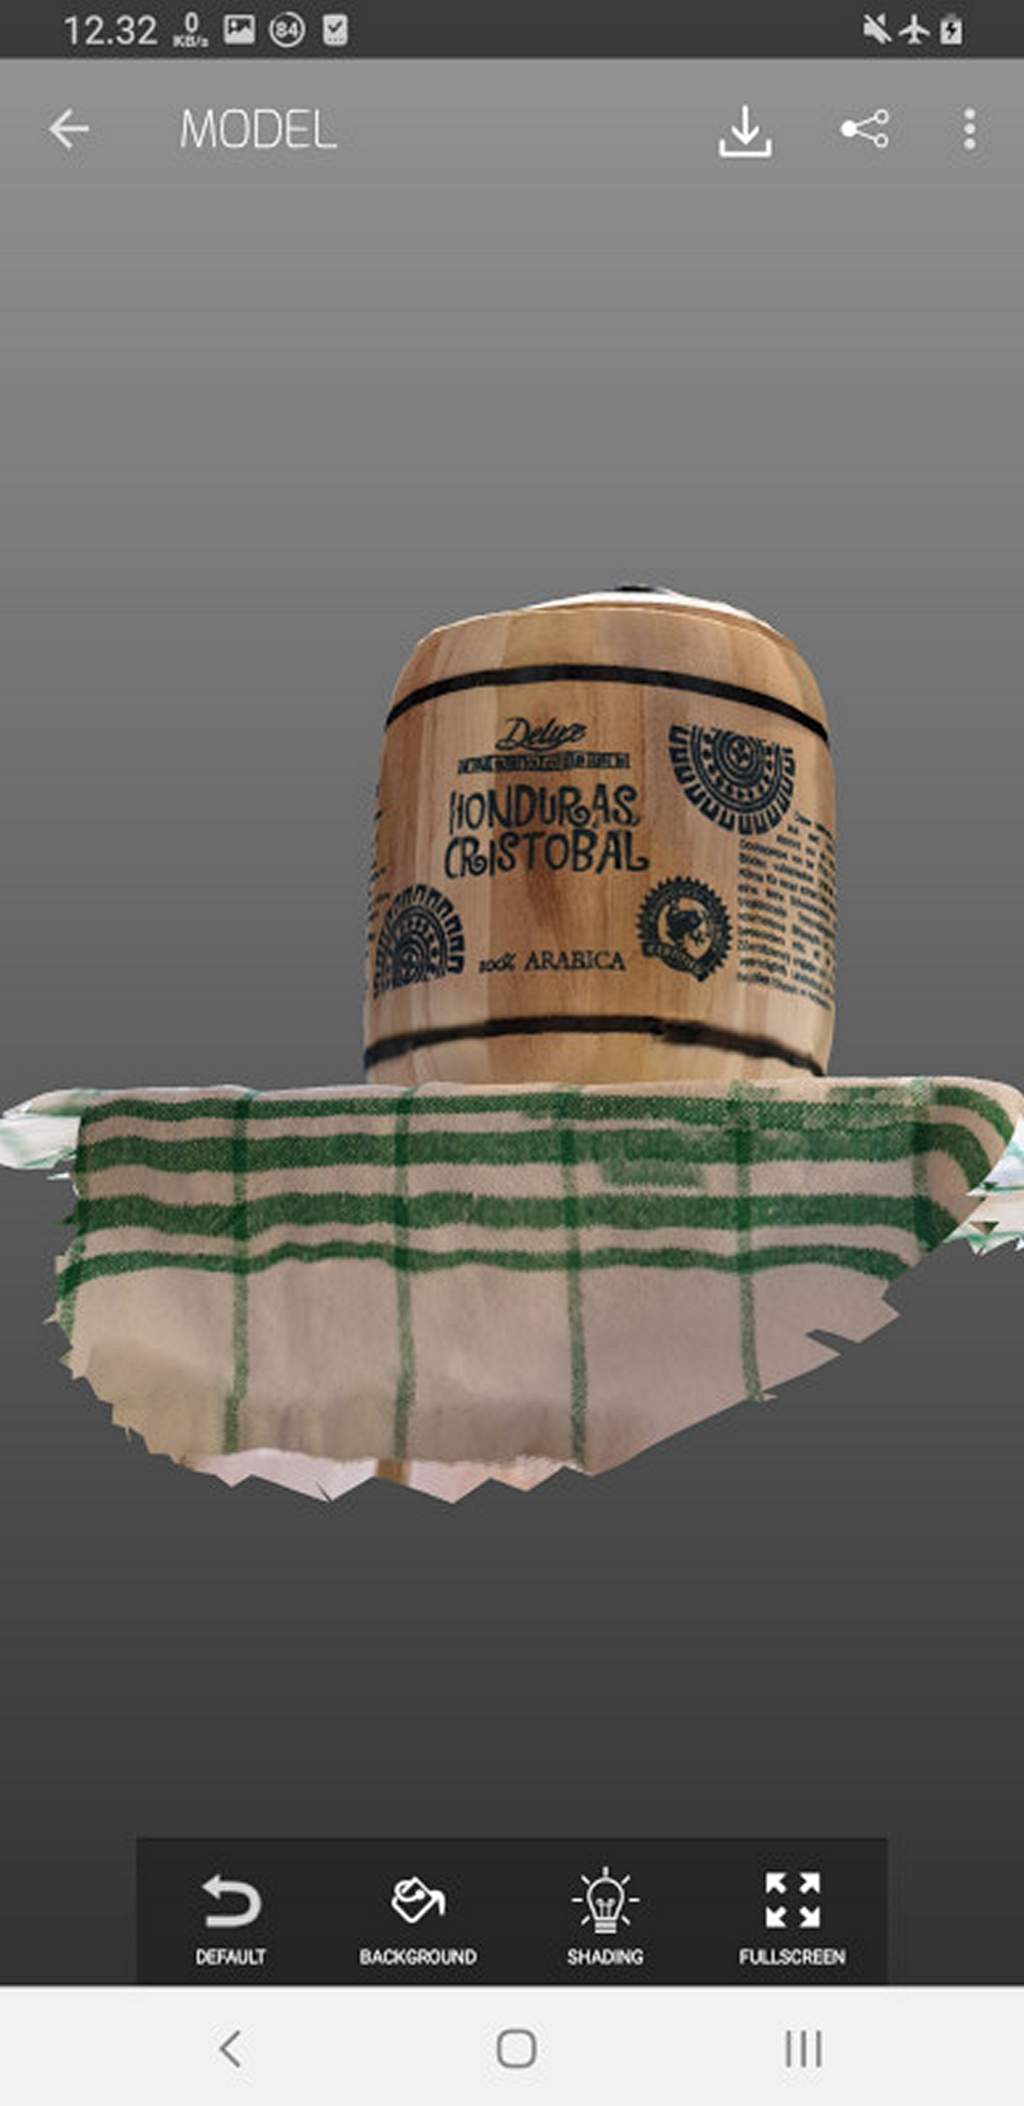
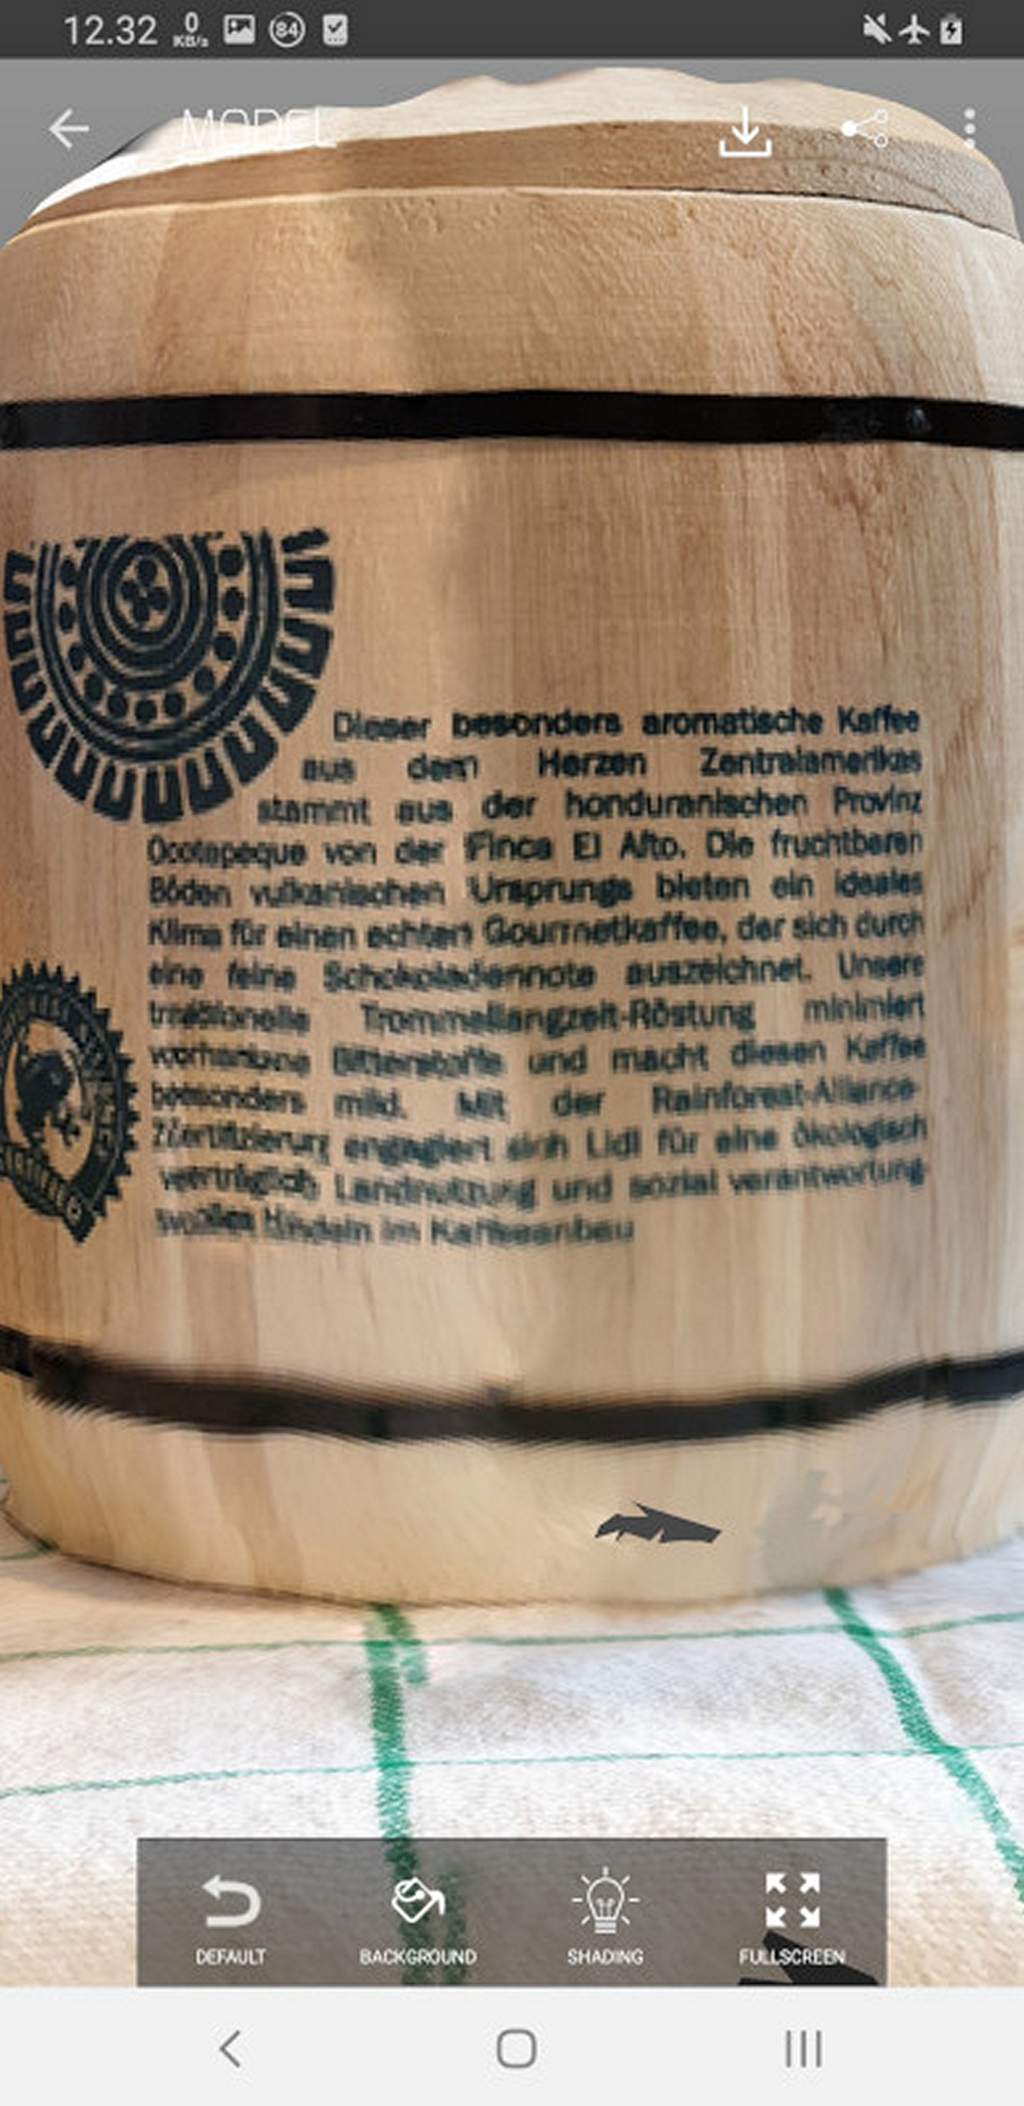
3D scanning a SCANN3D phone program was used.
A coffee can was put on a towel which has a pattern to help the photogrammetry. The wooden coffee barrel was selected because it is not reflective so photogrammetry can work, it has small details to pattern for surface pattern recognizing. And it was at hand distance away from where I was sitting.


.png)
In Meshmixer the mesh is cleaned.
.png)
.png)
.png)
.png)
.png)
.png)
All my designed files can be found on Git repository Disclaimer:
Reflection:
The 3D printers are developing steadily all the time and the precision, print quality and the print materials get better year by year. This shows in the selected printers.
The gyroid was fun to design and make. This was the first time I make my own base solution for PLA solvating. It was easier than I thought. Chemistry background helps a little.
3D scanning is a good tool to digitize real world objects. Photogrammetry enables easy scanning without complex devices.
Another doneded things: