Assignment 10 Molding and Casting
In this weeks Assignment we had to make different molds and the cast something with those molds.
In the first part of the Assignment we had to make a mold from an existing object to make duplicates from this object.
The second part consisted of designing a mold on the computer and then machining it. So we could cast a whole new object.
In our group assignment we had to measure the analog levels of some input devices. Usually the raw analog input
can be between 0 and 1023 (at least for ATTiny and ATMega chips there are some with an higher resolution).
The are two different kind of analog sensors one type generates the analog signal completely autonomous especially
when another microcontroller is build into the sensor. The other one creates the signal by changing for example
its resistance like the thermistor I am using later on. The second type need a another resistor to work. You connect then usually like this :
GND->SENSOR->DATA->RESISTOR->VCC
Where Data is the point where you connect your controller. The second resistor normally should have the same size as the maximum resistance of the sensor (which can be found in its datasheet) but you can play around with its size do get better values.
GND->SENSOR->DATA->RESISTOR->VCC
Where Data is the point where you connect your controller. The second resistor normally should have the same size as the maximum resistance of the sensor (which can be found in its datasheet) but you can play around with its size do get better values.
Tools used
- Silicone Shore 32
- Silicone color
- Concrete
- Dough
- Wax
- Metal Mold
- Rubber Bands
- Clamps
- Scale
- Spray
Making a Mold of an Object
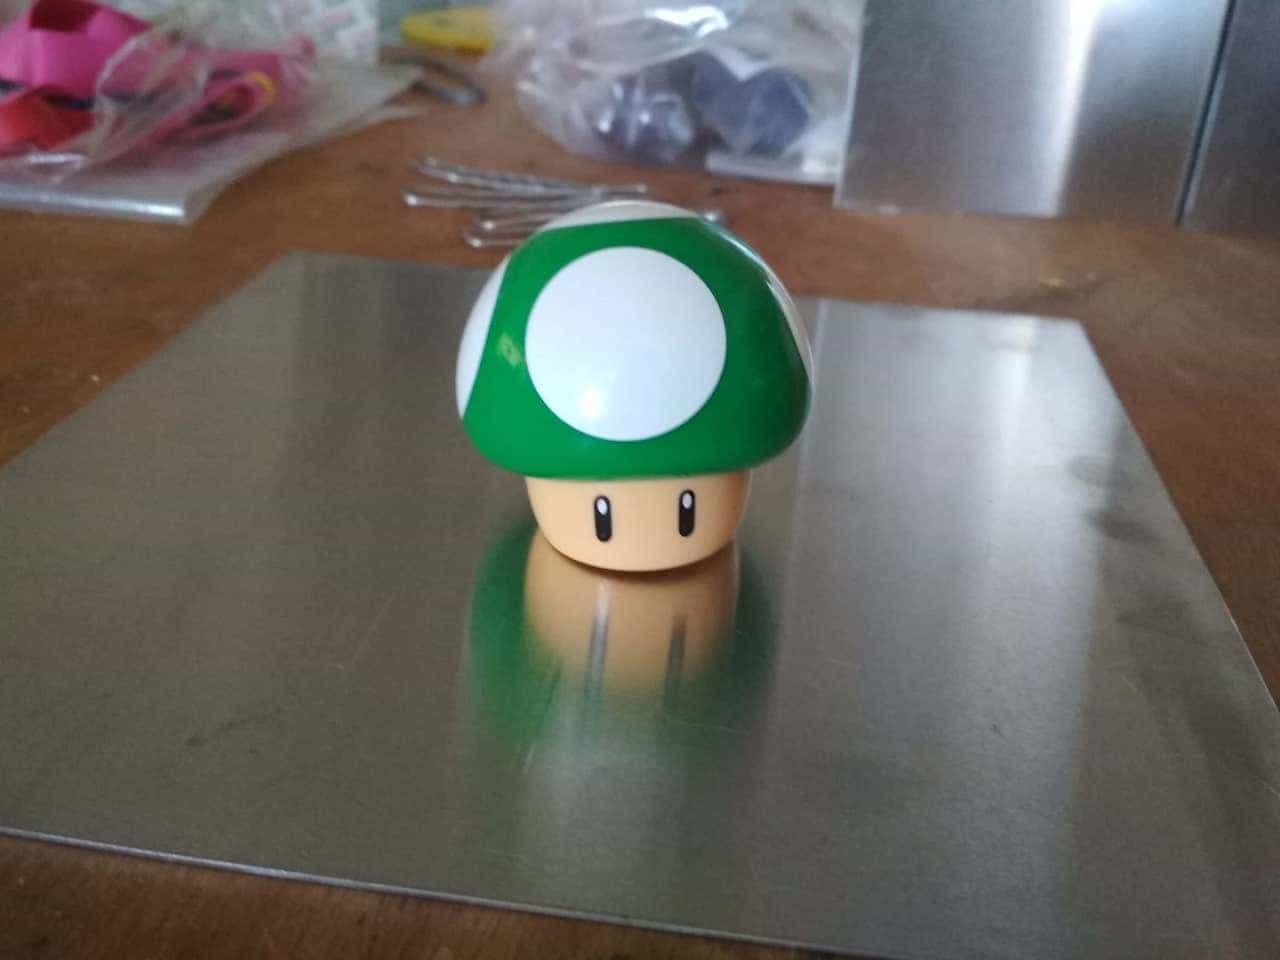
I decided to make a mold from this 1up-Mushroom Happy Meal Toy.
I started by closing all openings with the dough.
I started by closing all openings with the dough.

Then I covered one half of the mushroom with dough to make the first half of the mold.

The I started to seal up the bottom and all connections of the mold.
At this point I used giant paperclips to hold everything I place. Later I switched to clamps because the the clips were way to loose.
Make sure that you seal up everything really good to prevent leakage at the following steps. Leaked silicone is quite a mess and a pain in the ass to clean up.
At this point I used giant paperclips to hold everything I place. Later I switched to clamps because the the clips were way to loose.
Make sure that you seal up everything really good to prevent leakage at the following steps. Leaked silicone is quite a mess and a pain in the ass to clean up.

Now I placed the mushroom into the metal mold. I used some additional dough to "glue" it in place.

Now it was time to mix the silicone. For detailed mixing instructions refer to the manual of your silicone. In my case had to mix it in a 1 to 1 ratio.
To fill the mold completely I needed about 400g silicone. I used a peace of wood to stir the component. For the coloring I used about 2 drops of silicone color.
When everything is mixed together I poured it slowly into the mold. Be careful to create as little bubbles as possible.
Then wait until the Silicone is dried. In my case it took about 3 hours.
Then wait until the Silicone is dried. In my case it took about 3 hours.

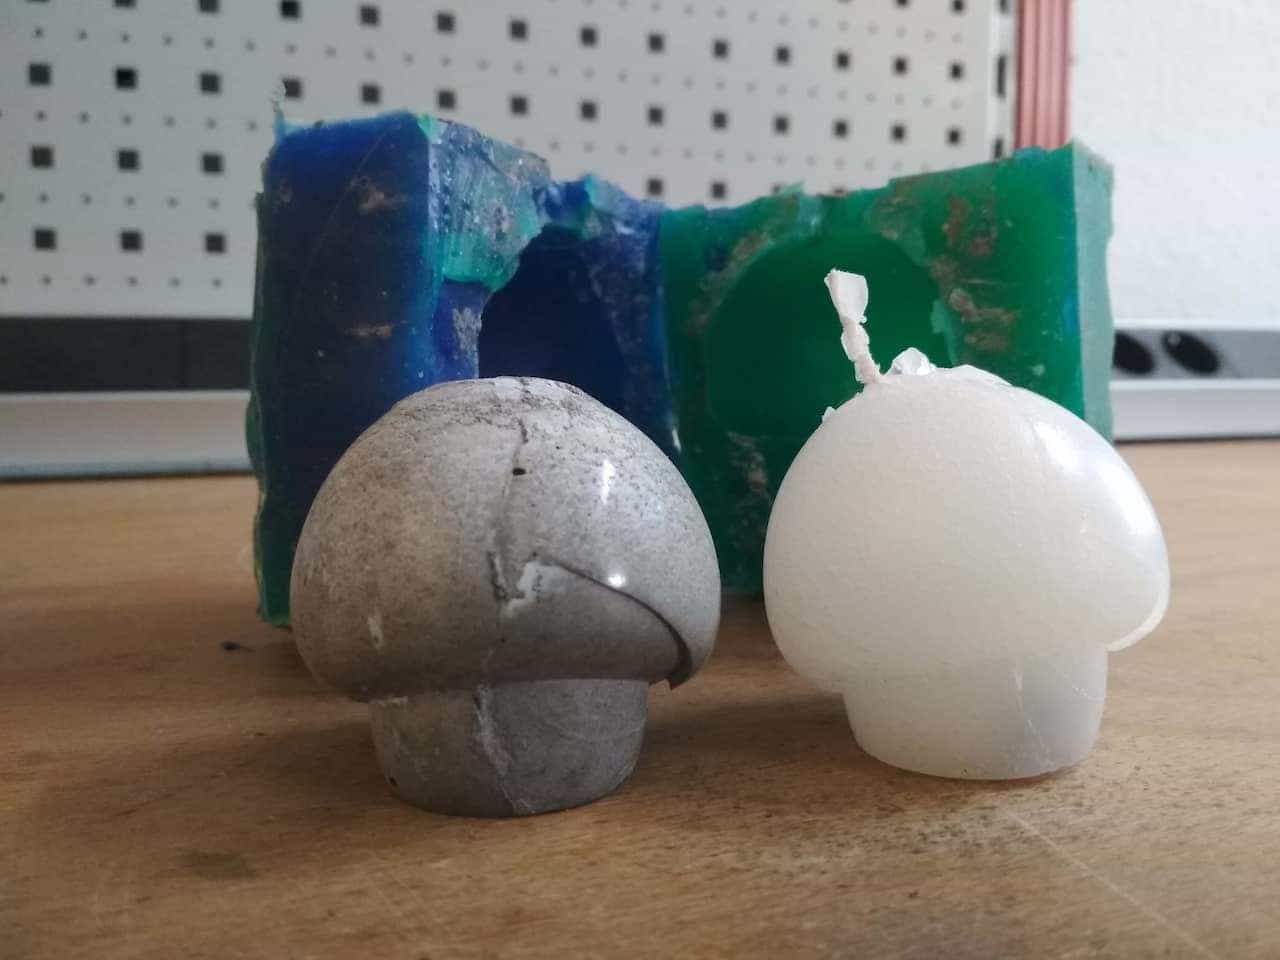
After the silicone was hard I removed the metal mold. Next I carefully removed the dough that was used to seal the corners.

With a little bit of wiggling the mushroom came right of the mold.

To make the second half of the mold I reassembled the metal mold and placed the mushroom an the first half inside of it.
Do not forget to use some dough to seal up the corners and the bottom.
Do not forget to use some dough to seal up the corners and the bottom.

To prevent that the second half sticks to the first half of the mold apply some silicone-spray.(When in doubt if you have used enough apply just a little bit more)

When everything was sealed up I mixed the second batch of silicone and poured it into the mold. Here
I used an other color than the first time to visually separate the two parts.

After I removed the metal mold it was very hard to separate the both parts of the mold. But after the use of a
knife and some brute force I managed to separate them.

Now withe the two parts separated I removed the every blu silicone from the green mold and vice versa.
After that I took the knife again to cut an opening into the top of both molds. This will come in handy when casting something.

For my first cast I tried to make a candle. So I used a clamp to hold both parts of the mold in place. Later on
I used rubber-bands which proved to be more practical. but you have to be careful when casting something hot.
If something like that touches the bands there is a high chance that they will snap. In another
approach I tried to reuse the metal mold but that resulted in a waxy disaster, because almost every bit of the wax leaked out.

After melting and pouring the wax I let it cool of for about 24 hours. It looks like silicone is a pretty good isolator.
After the wax was cool the mold I removed the mold without any problems and I got this nice candle.
After the wax was cool the mold I removed the mold without any problems and I got this nice candle.
Machining a Mold
Now to the machining part: I used wax for the mold because is has a smooth surface and does not "suck up" the silicone like wood. The downside of this material is that it is relatively fragile and you cannot cast something hot. For the casting I used exactly the same material as stated above (Silicone shore 32 + coloring).To make object that can be machined you have to keep some things in mind. The two most important things are:
The drill cannot "phase" through the material so every part of the object must be reachable from the top (no ledges etc.). A good rule of thumb is that your model should get smaller from top to bottom and not bigger (Like a V). The second one is that a cnc Mill cannot cut sharp inner corners that is due the round shape of the drill, you can add "dogbones"(see here for more info ) to avoid that (or just use round corners).
For the other limitations of subtractive manufacturing please refer to the 3D-Design Assignment

Making my heart shaped mold is really easy:
First make a Sketch:
First make a Sketch:
- Make a square, the base of the heart
- Add 2 circles(diameter = side length of the square)
- Add a square that is slightly bigger than the heart, this will make it easier to cast later on because it works like a funnel
- Make a big square which represents the material from which you cut the mold (here the size is arbitrary)

Now you have to create the solid:
I wanted the heart to have a thickness of 2 cm and the thickness of the funnel should be 1 cm:
So the heart had to be extruded 2 + 1 = 3 cm deep and the "funnel" 1 cm deep.
Now just export it as a stl and that's it
- Use the extrude function create a solid from the biggest square (choose a depth bigger than the depth of the heart but smaller than the thickness of your material)
- Now you can use the same function to extrude the heart from this solid (for the depth you have to add the depth of the "funnel" square)
- Now extrude the "funnel square" use the extrude function again here
- Lastly use the rounding tool to make the the lower edges round.
I wanted the heart to have a thickness of 2 cm and the thickness of the funnel should be 1 cm:
So the heart had to be extruded 2 + 1 = 3 cm deep and the "funnel" 1 cm deep.
Now just export it as a stl and that's it
Milling the Mold
For the milling of the mold I used the Roland SRM-20.
First add your stl via File->Add.

Then use the menu on the top right to select the material (here Wax) finally
click on the compass to open the orientation menu.

Now select the orientation in the menu and click ok.

To add Milling steps click on this symbol.

First choose surfacing this step will ensure that the material hat an even surface. If your
material is already flat you can skip this step (I recommend a surfacing of 0.2 mm for every task)

Select the tool properties in my case I used a 3mm tool.

Finally you have to select the size of the milling area. For my design you have to select an area that has the
same size as the outermost square of the mold (this prevents the machine from milling the outer sides).
Now repeat the steps for Roughing and Finishing.
Now repeat the steps for Roughing and Finishing.

To start the milling process click the "Cut"-Button in the lower right.


When the machine is finished clean the mold and you can cast the silicone (Like in the first part).

Favourite beverage of the Assignment

Young punks get off my lawn.
-Soldier: 76