Molding and Casting
Link to class: Molding and Casting
Link to class: 3d Scanning and Printing
The assignment for this week: Design a 3D mold, machine it, and cast parts from it.
STEP ONE: Design a 3d model
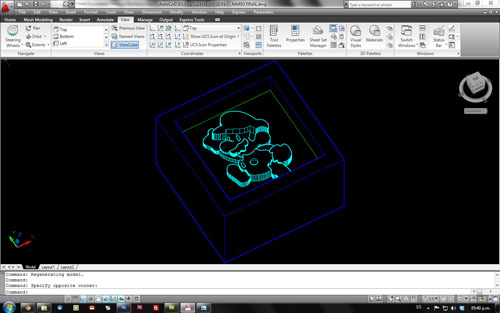
I've wanted for a very long time to make a 3d Mario Bros Model. I thought it would be fun to make a chocolate figurine of Mario Bros. First of all I tried to 3d scan a Mario action figure I had, but it turned out I needed to make a lot of extra work on refining it, so for the time I had to make the assignment, I decided I wasn't going to use it for now, but here's an image of the 3d model on 123D Catch. It need a more detailed work on Rhino for it to make a reliable image of Mario bros. Then I began with my second option: making a 2d model with volume. I took an image from internet and then work on it on Autocad, then export it to a DXF format to open it on Rhino, then save it on STL format. For this exercise we had to work on a 5x5 cm format because of the time we would have to use to machine a 3d mold that was larger than that. I decided for this image because of the limited time we had to use the machine and also to complete the assignment. I finished my 3d mold on Saturday, but up to this day I haven't been able to use the Modela, because other people's assignments are on the line and mine is still pending. Although, I've used this time to know more about the molding and casting, the materials we can use to make a 'negative' mold and what could be the final look of the part.
STEP TWO: Machine it.
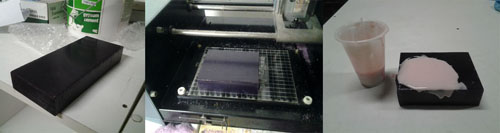
I'm using FAB MODULES to machine my mold, and Ana Kaziuna's tutorial to help me out through this part. I uploaded the STL format to the Fab Modules, but I got into trouble because of the design that was too small for the size of the mill. Although I finished it in less than 10 minutes, record time. The design was not completed as I wanted to, you can still see the shape of the little Mario, but you can see his mustache, so I want to make the mold again.Since I also wanted to experience the casting with silicon, I prepared it anyways. The casting is still pending, because the silicon hasn't dried out yet.
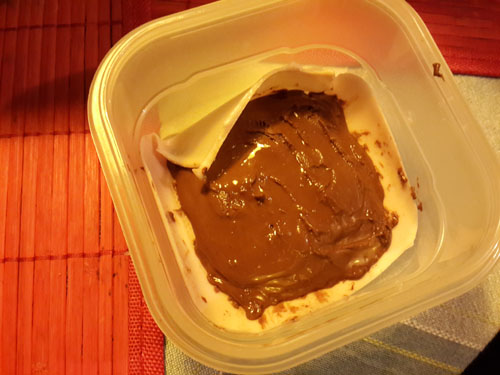
I'm going to use a chocolate brand special for covers, meaning is made for melting and drying fast, special for sweets. The preparation is simple: Put the chocolate in a recipient resistent to heat, then put the recipient in a pan filled with water. This is called "baño maría" in spanish, and is the best way to melt chocolate withouth burning it. It has to be heated at 85°, so you also need a termoter special for food.
STEP THREE: Silicon Formula for Chocolate making.
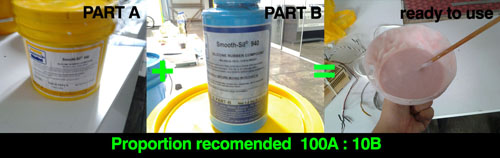
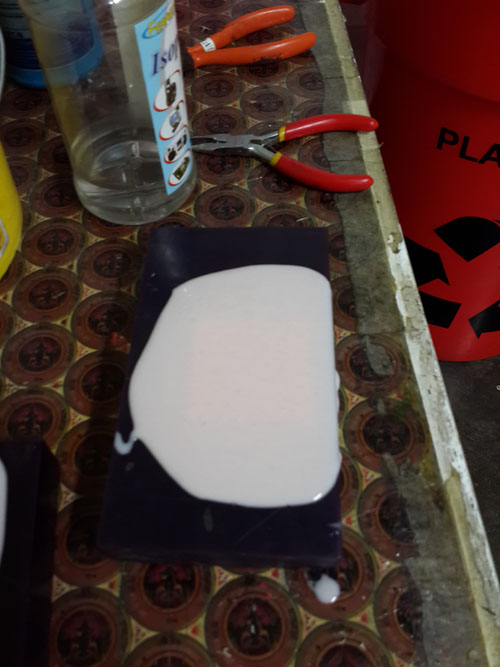
On the Fab Lab Lima we have several material to work with, but I've decided to make a Silicon mold to use it on chocolate. This is a new experience for this Fab Lab because no one has ever worked with the silicon mold. As I've said before, my mold is still pending, but I tried to get ahead and try out the materials I was going to use later on it.Silicon Mold for chocolate parts:
To make the mold for food you need to use a Silicon based formula. In the Fab Lab Lima we had Smooth-Sil® 940 - Shore 40A hardness. The proportion is explained on the specification of each compound. The final result of the mix is a slightly pink paste that looks like gum. Up to his point is ready to be used on the wax 'positive' mold.
Second attempt at the silicon mold:
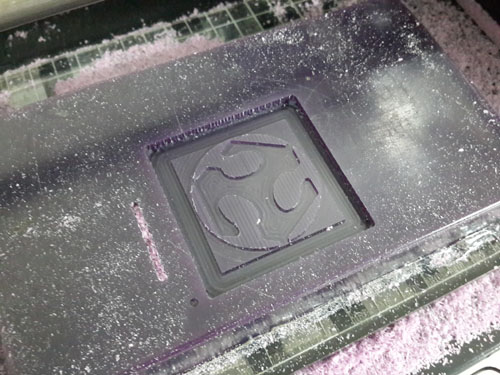
My first attempt wasn't so great, since I didn't get to make a actual Mario Bros that was easily recognizable. So, I made a second try with a different mold and design. I took the FabLab logo and decide to make it of chocolate. This is the image I used on the Roland Modela. I just adjusted the parameters like the next image to add depth.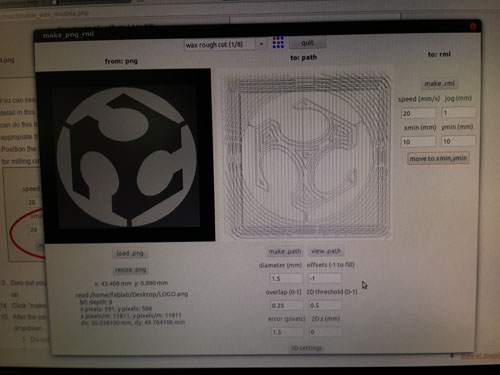
Some of the parameters I put in the fab modules. I had to play a lot with the 3D settings. My first attempt ended with me breaking one of the mills. It was a combination of bad measurement of depth and poor grip of the mill.

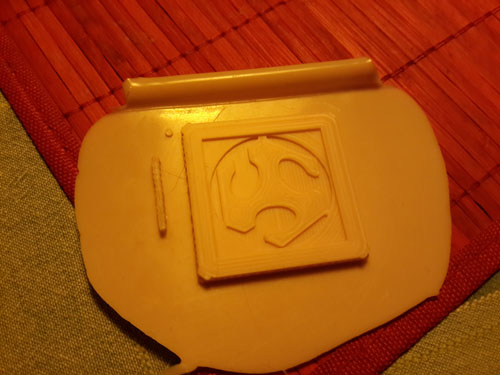
Also, I had to use hot glue this time. Its really helpfull and easy to remove afterwards.

You can download the 3d image of Mario Bros here (right clic and download)
© vane_montezuma. All rights reserved.
Design by TEMPLATED.