
Imput Devices
This week's assignment is to measure something: add a sensor to a microcontroller board and read it.
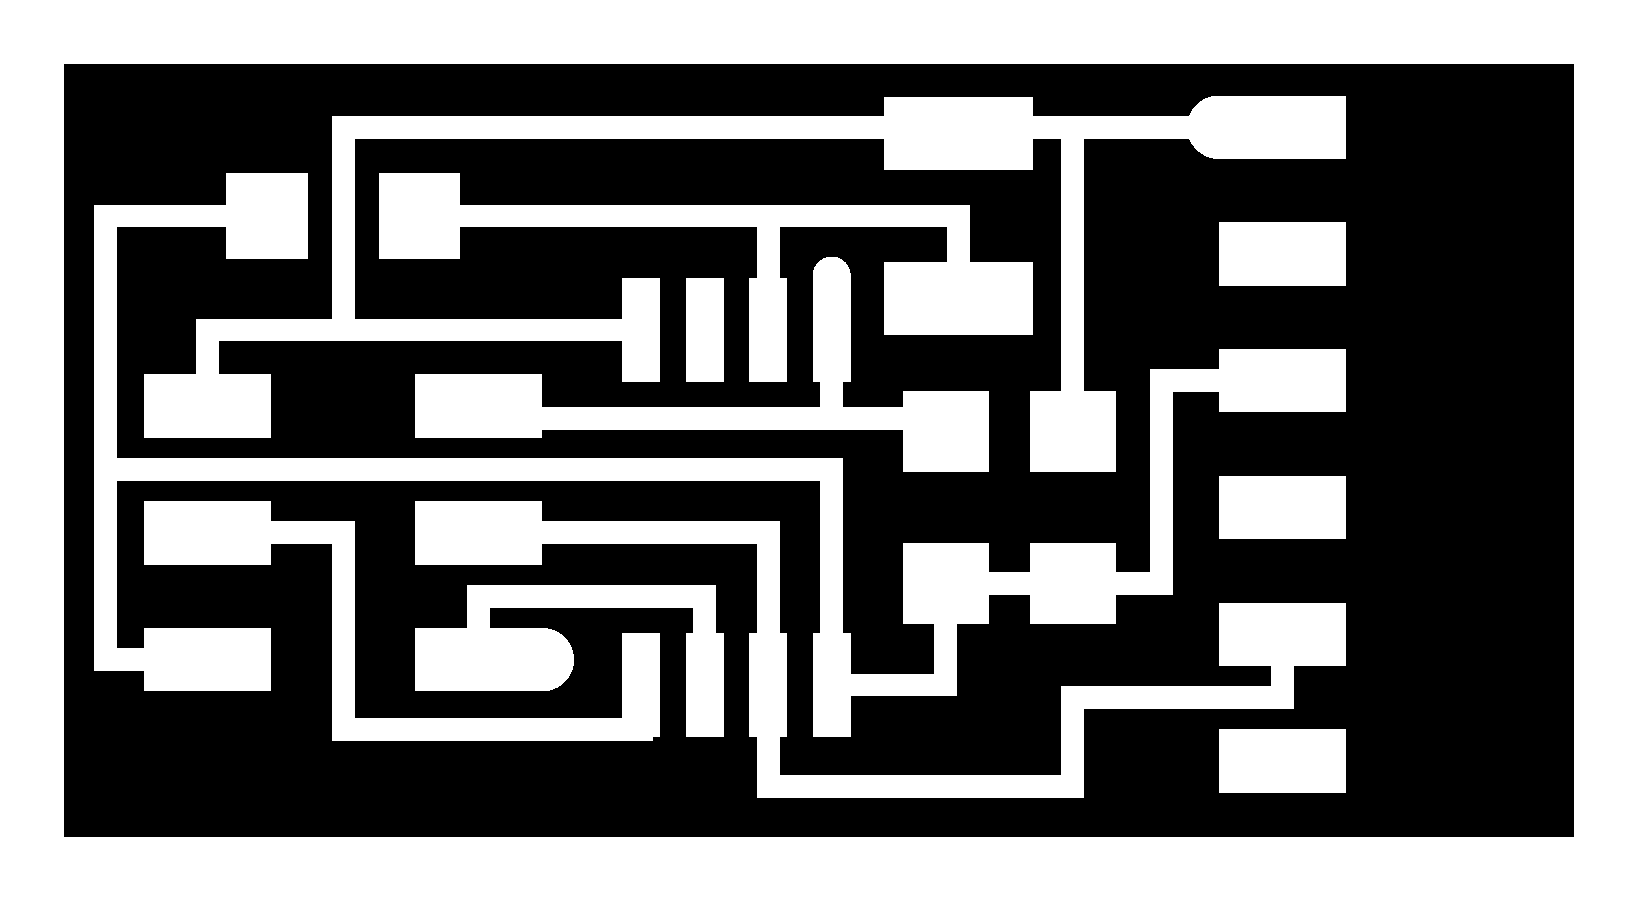
We had many options for making boards this week, but I decided to focus more on my final project and work on something with light sensors that I could finally use. This time after many tries I didn't have any problems with the Roland Modela and could mill correctly the boards I wanted to use. I had a lot of trouble with the welding though. On my first try I believe I burned something, but I can't really tell what.
Step ONE: Milling the board
This part was fairly easy after all the attempts I had in previous assignments. The main issue with the mill is to calculate exactly the Z axis. This is very important specially for us because we are using other type of mill. It has a cone shape and that made a little difficult to calculate the depth of the boards. But I did it.My recommendation for people stuck on milling with the Roland Modela is to team up with someone the other fabbers, because some of them might had the same issues and had already solve it. It is a matter of pacience and a lot of tries.
Hello.Light
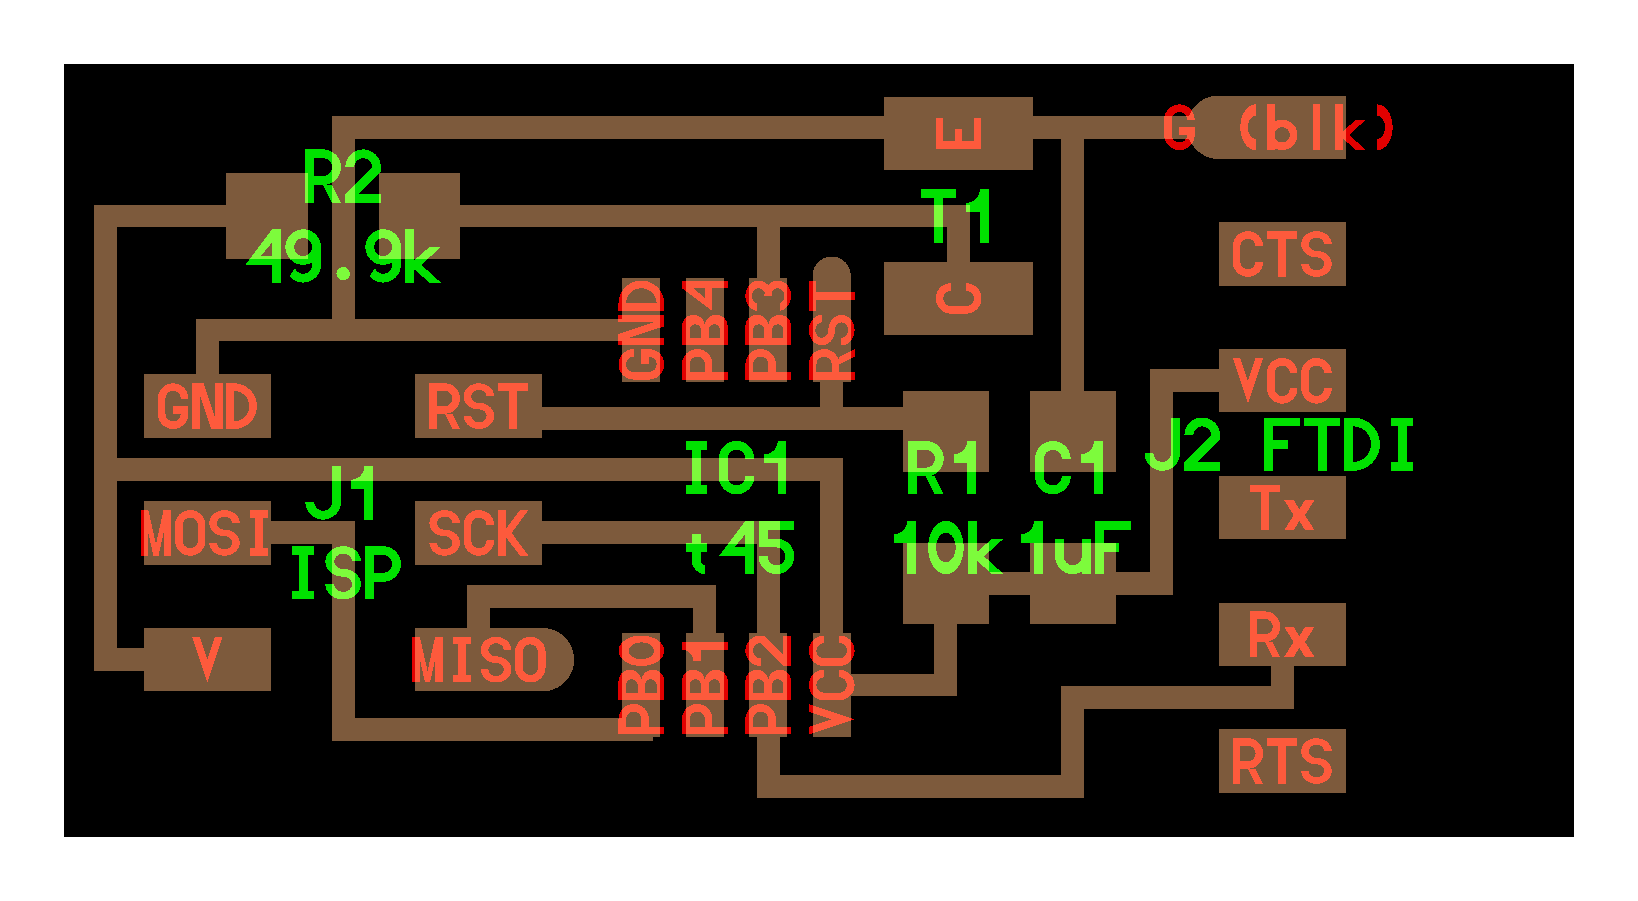
Step TWO: Welding the components
I chose the phototransistor board. The traces and the components are in the Fab Academy page, so it wasn't much of a problem to do it. I decided to program it on Ubuntu, using the terminal. I believe this is the easiest way, since I saw my friends had a lot of trouble programming on Windows.We have decided to work more as a team in Fab Lab Lima, so Satoshi help us and teached us how to program it and don't die trying. He compiled all the files on a folder we could find on the Desktop in Ubuntu and how to program this board.
Once on the terminal, I had to find the folder were the MAKE file was. After locating myself on the folder, I typed the following: (You will need the FabIsp for programming this)
sudo make -f hello.light.45.make program-usbtiny
If everything is connected correctly, you are going to get this:
fablab@fablab-desktop:~/assigndiez/light/firmware$ sudo make -f hello.light.45
.make program-usbtiny
avr-objcopy -O ihex hello.light.45.out hello.light.45.c.hex;\
avr-size --mcu=attiny45 --format=avr hello.light.45.out
AVR Memory Usage
----------------
Device: attiny45
Program: 530 bytes (12.9% Full)
(.text + .data + .bootloader)
Data: 1 bytes (0.4% Full)
(.data + .bss + .noinit)
avrdude -p t45 -P usb -c usbtiny -U flash:w:hello.light.45.c.hex
avrdude: AVR device initialized and ready to accept instructions
Reading | ################################################## | 100% 0.01s
avrdude: Device signature = 0x1e9206
avrdude: NOTE: FLASH memory has been specified, an erase cycle will be performed
To disable this feature, specify the -D option.
avrdude: erasing chip
avrdude: reading input file "hello.light.45.c.hex"
avrdude: input file hello.light.45.c.hex auto detected as Intel Hex
avrdude: writing flash (530 bytes):
Writing | ################################################## | 100% 0.29s
avrdude: 530 bytes of flash written
avrdude: verifying flash memory against hello.light.45.c.hex:
avrdude: load data flash data from input file hello.light.45.c.hex:
avrdude: input file hello.light.45.c.hex auto detected as Intel Hex
avrdude: input file hello.light.45.c.hex contains 530 bytes
avrdude: reading on-chip flash data:
Reading | ################################################## | 100% 0.15s
avrdude: verifying ...
avrdude: 530 bytes of flash verified
avrdude: safemode: Fuses OK
avrdude done. Thank you.
Although I did this right, my phototransistor wasn't working. It went crazy giving me values from 1000 to 300000. I replaces the transistor, thinking it got burned in the weldering process, but it gave me the same values and didn't work properly when near to light. So I had to make another board, weld the parts and then do all the programming again. Happily, this time it worked. I guess the second try is the one that works for me.