

Networking and Communications
Link to class: Networking and Communications
This week's assignment was to build a wired &/or wireless network with at least two nodes. I decided to make the Hello Bus and followed the tutorial by Ana Kaziunas and Henry Medina to get myself through it.
Step ONE: Milling, Stuffing, etc.
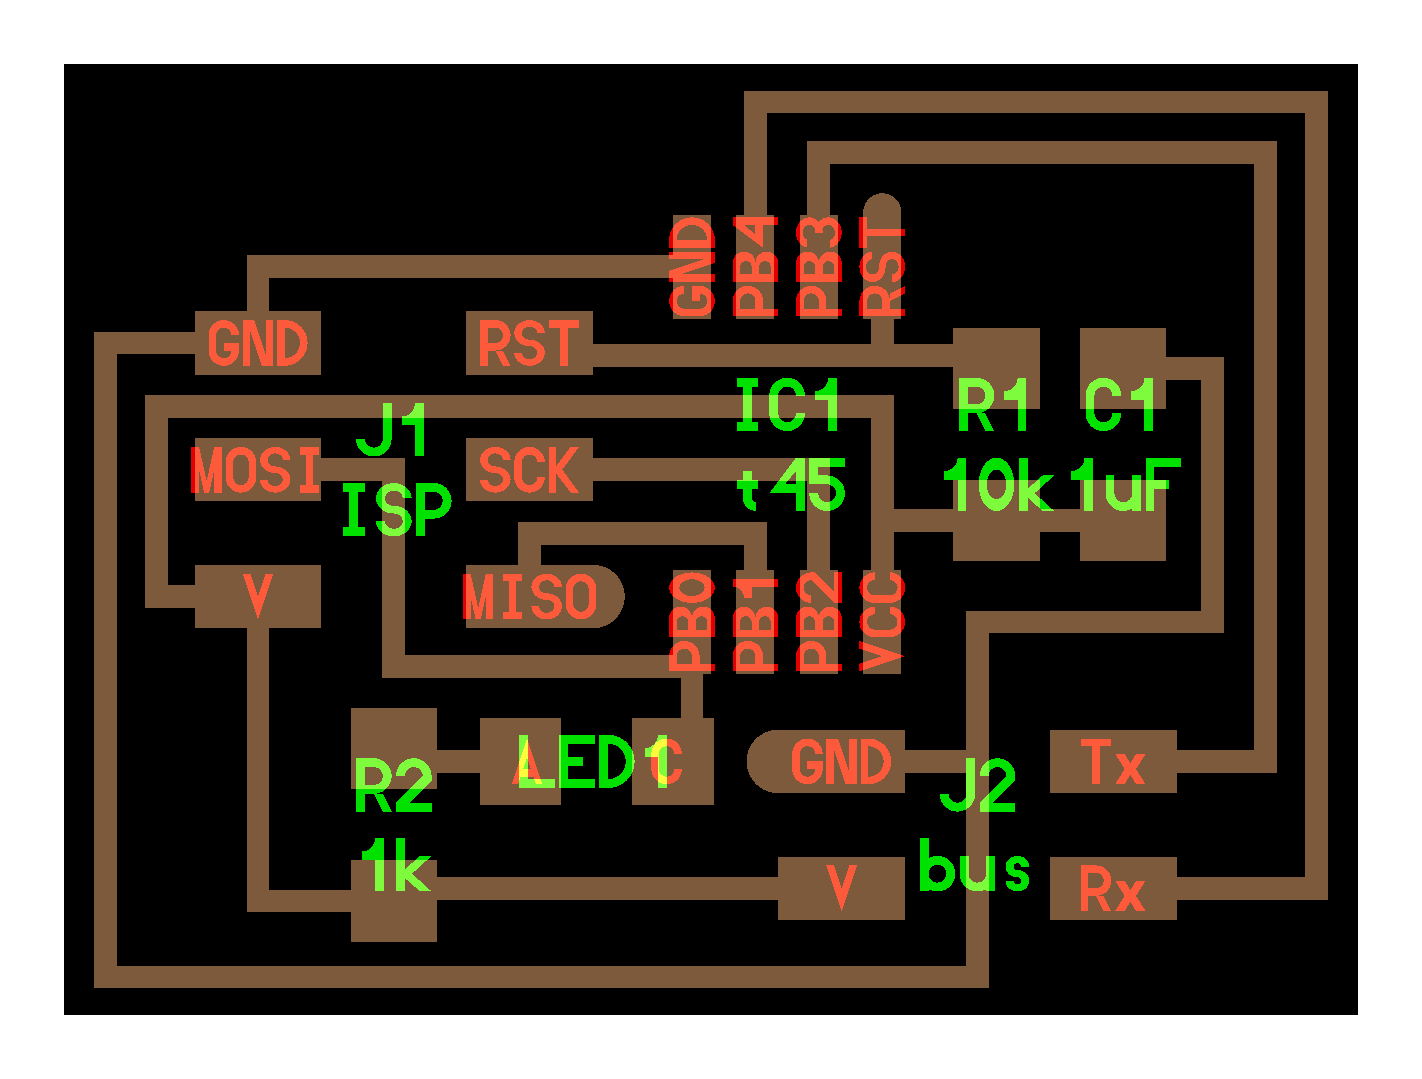
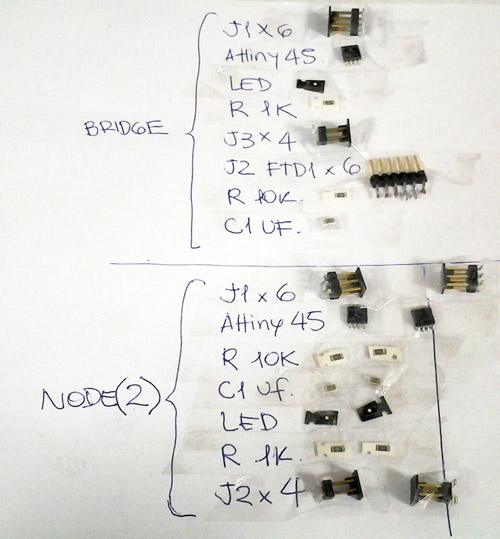
First of all, I downloaded the traces I wanted to use, in this case they where under the "bus" tittle. To make a succesfull network you need one bridge and two nodes (at least two). So, you'll need two Hello.bus.45.node and one hello.bus.45.bridge.
Hello.Bus.Bridge board & traces
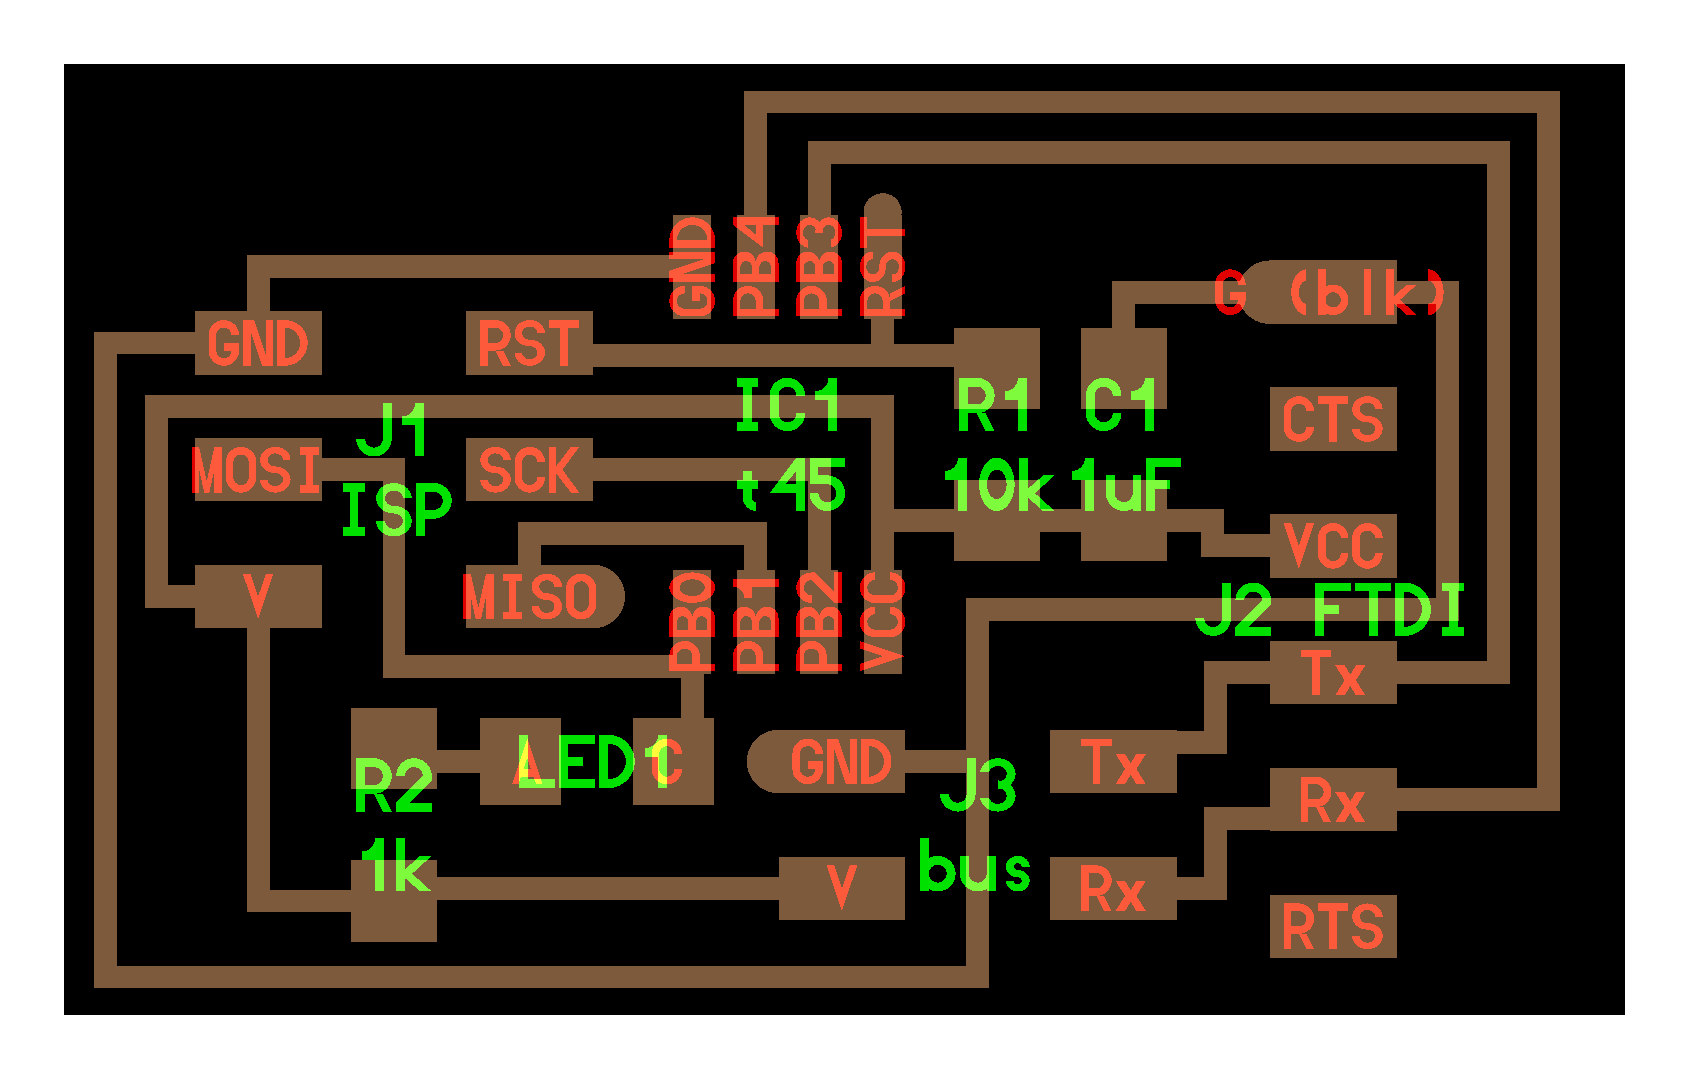
Hello.Bus.Node board & traces
Components weren't quite as easy to track down, because I'm still not that familiar with the eagle sketch and even for my tutors it was difficult to tell me exactly which one it was withouth an image of the actual component. After looking for the components and stuffing the board I was ready to make the programming.
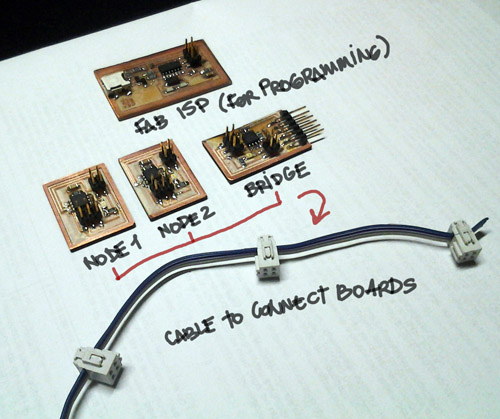
Except for one thing: I stuffed the attiny45 microcontroller from the bridge board in the wrong direction. Smoke came out and I was done. Even though my fab tutors told me the attiny had to be change, I believe I need to make another bridge from scratch. FabIsp is needed again to program the bridge and then each node. Also a four wire cable with connectors for the Jackx4 available in all the boards.
Second try:
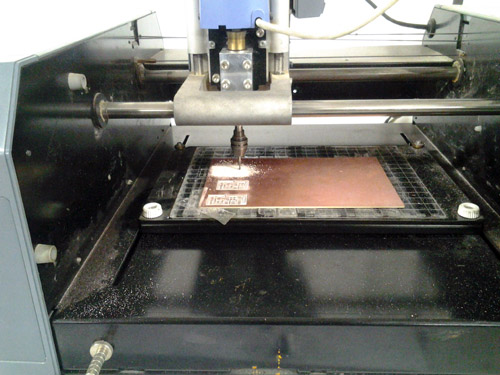
After a while I made another try on the networking and communications assignment. I milled and stuffed my boards once again, but with a lot of difficulty because the mounting head of the Roland Modela was changed again due to modifications in the Fab Lab. After adjusting myself again to the interaction with this machine I finally made again the bridge and nodes neccesary. Thankfully my FabISP is still working. Although I tried to make the board to flash, I couldn't because the traces where too delicate. After a little work on trying to stuff them, I realize the copper was wearing off. I tried to make a board on adhesive copper but it didn't worked either.
Third try:
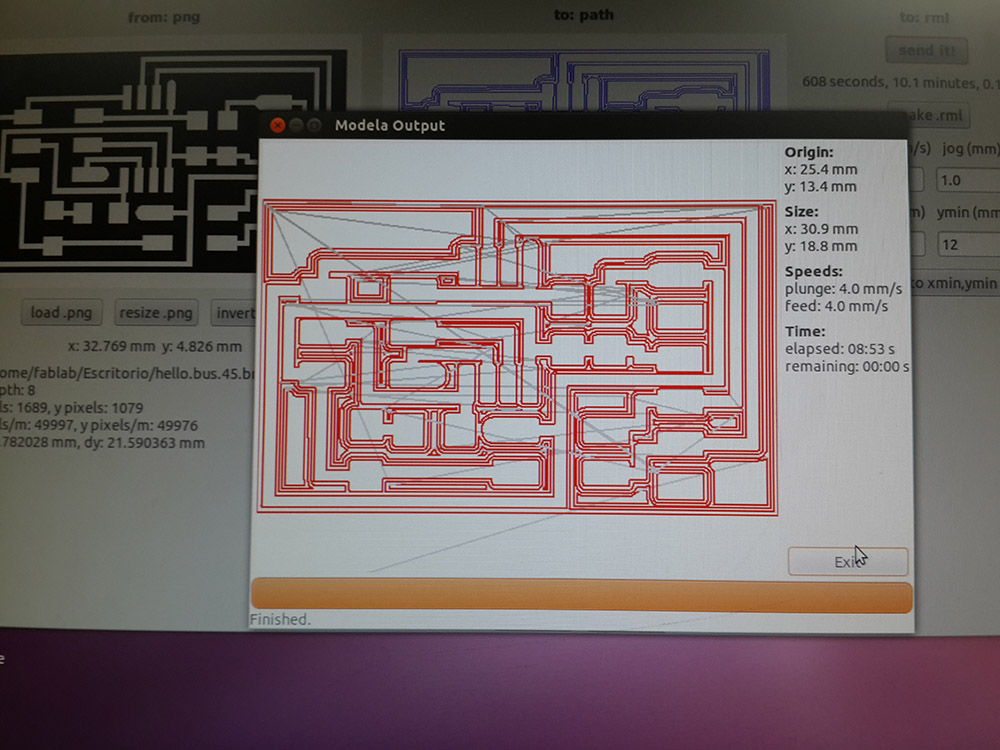
Finally I tried for the third time to make this assignment, and finally did it. I got to try the new Fab Modules. It has great improvements, like being able to see the progress of the milling and how much time is left until the board is ready. Also, FabLab UNI has a new mill, that made everything easy and awesome.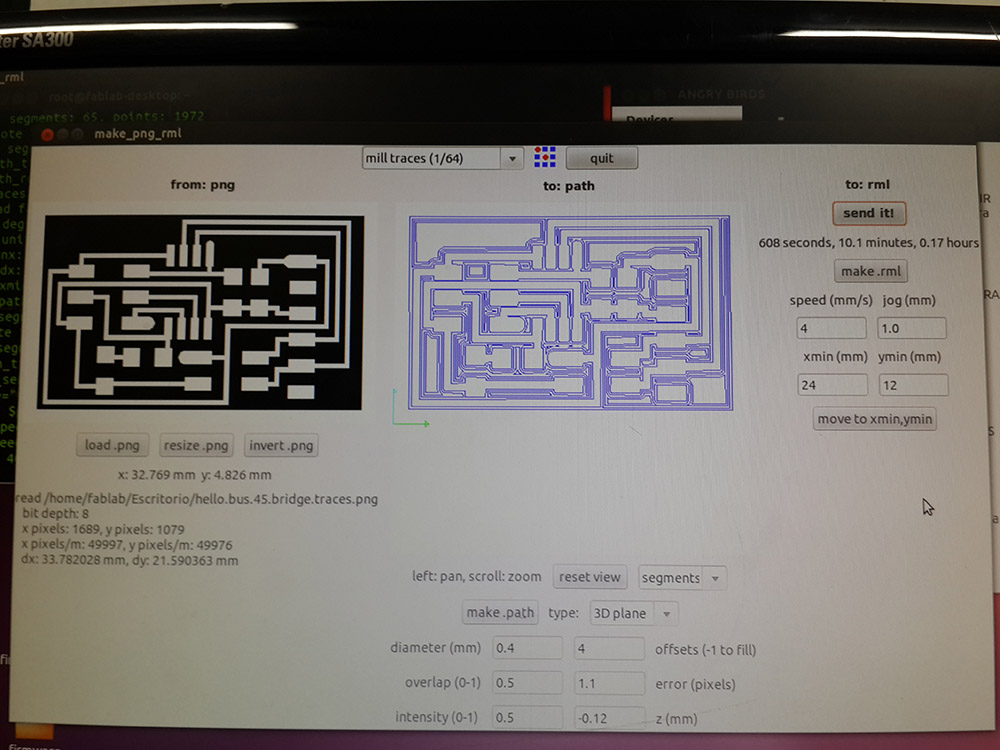
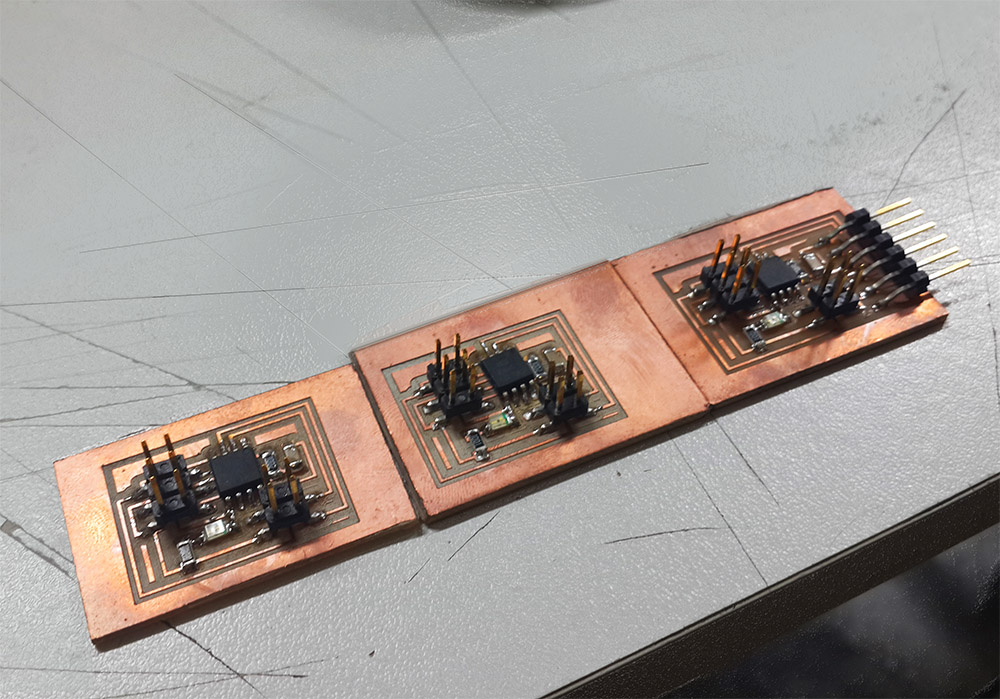
I made one bridge board and two nodes. I have a hard time finding my FabISP, so I programmed it using an AvrISP. Programming on a Avr is not different from doing it on the FabISP.
For those who had the same issue, or maybe your FabISP wasn't working, you can do it on the Avr by simply changing the command line.
Do as follows:
Plug the bridge first.
On the "hello.bus.45.c" change the following line: #define node_id '0'.
I named my bridge board with '0', and the two nodes with '1' and '2'.
To flash them with and AVR:
sudo make -f hello.bus.45.make program-avrisp2
After flashing each board, I try them on Arduino. Since I tried it on Windows, I had to download the drivers. I found a link in an Arduino Forum.
If you have the same issue, you could try this link: http://www.ftdichip.com/Drivers/VCP.htm and download the correct driver for your OS.
Finally, after all this, I did it! Open Arduino, then open the serial monitor, check if you have the 9600 baud rate, and then just watch the magic happen... (watch the video below).