
Electronics Production
For this week's assignment we made a FAB ISP and then program it. We had to made the carving on the plate, weld it to the different parts of it and then program it, test it and finally, get it to be recognized by the computer.
STEP ONE: Making the plate
Tools:
Materials:
Parts:
IMPORTANT: Get help from a Fablaber. It is very important to have assistance while weldering and also programming, because although it seems fairly easy, there are some important tips you can miss because you haven't done this before and make this stage a lot harder. You can look at Henry Medina's Tutorial here.
TIPS FOR BEGGINERS: I got this from my advisors at Fab Lab Lima.
I've made all of this mistakes, so I had to make two plates!
First I produced the plate on the Fab Modules. A few mistakes where made here:
STEP TWO: Weldering the parts
Then I had the plate and began the weldering.
TIPS FOR BEGGINERS:
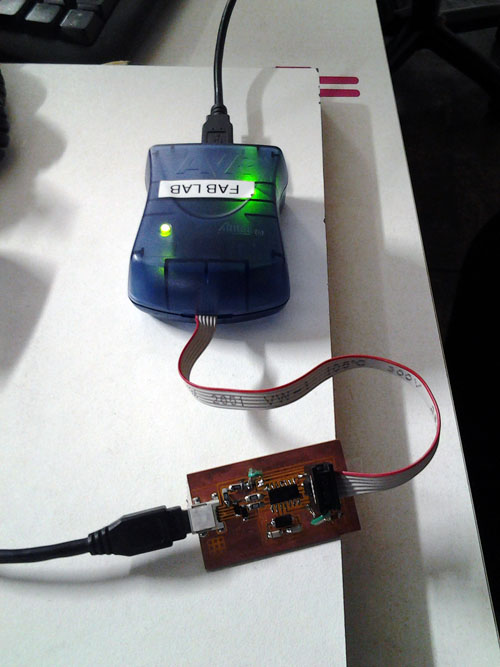
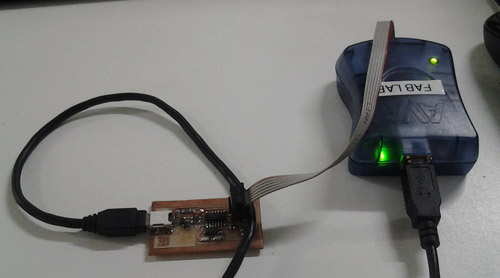
The weldering is fun, but the sad part comes when your plate doesn't work at an electronic level. The weldering part (when you already know what you're doing and how to weld ok) takes 30 minutes topx. Then you have to make all the parts are connected. Go to the computer and connect the usb. The first plate never did connect. My second plate had a little trouble at first with the usb mini connection and some other points, but then worked fine and finally the green light appear.
Mistakes made:
At first I used a weldering iron that was too wide and didn't use a magnifyer glass. I burn some parts and the weldering was terrible as you can see on the video above. Then I made another plate and began the process again. This time the plate was more clean and it did work, after a while. I'm beggining to perfect my weldering, one plate at a time.
STEP THREE: PROGRAMMING
Easiest part of this assingment. The problem here is that your usb mini connector is not weld ok. So you have to check that if it doesn't get recognized by the computer. First you need to install the software, and then it's about writing the commands to verify the whole process.
In your computer at Ubuntu: Go to the terminal root. Copy this to install the Necessary Software for AVR Programming
sudo apt-get install flex byacc bison gcc libusb-dev avrdude
sudo apt-get install gcc-avr
sudo apt-get install avr-libc
sudo apt-get install libc6-dev
Program the Fab ISP, locating in the firmware folder (one line at a time):
make clean
make hex
make fuse
make program
Time of thruth: To verify if your FAB ISP is working correctly
lsusb
If your Fab ISP has been successfully programmed, you should see a list of the USB devices plugged into your computer. The Fab ISP will be listed in a line like the following:
Bus 002 Device 004: ID 1781:0c9f Multiple Vendors USBtiny
FabIsp vs. 2.0: SUCCESS!
My first FabIsp wasn't working correctly. We though at first it was a Ubuntu matter, but clearly it wasn't. Although my FabIsp was flashing green, when I tried to program it, Error 1 appeared.
After a long time from this assignment, I had the time to sit down and make another FabIsp from scratch, with all the knowledge I have now on working with the Roland Modela and soldering, the board was made and worked on the FIRST try!
Some things I learned from this process:
The lead drops on the board NEED to be shiny. If you wear them out by passing and passing the soldering iron over them too many times, its probable that your board will not work. Or you'll burn the components, which is even worst. Using the Modela is harder than it seems, but after you get the grip of it, it becames almost natural. Tutors need to be right next to you to help you out in every step. Here are the parameters I used for milling (Ricardo help me on this) :
To PATH
to RML
Soldering should be made with a lot of pacience, a lot of light and with a good Soldering Iron special for electronics. The one available at Fab Lab where not good, the tip was too wide, so it allowed for a lot of mistakes.
Most common errors begin and end with the USB TINY. Make sure you weld it ok and do it first of all, because reaching to it its hard when all the other components are already welded.
Although the board seems fine (connecting all the points) It doesn't mean you will be able to program it. I guess its a matter of practice, because It took me A LOT of boards to get to this point. Its what you get to understand once you already have taken the fab academy: You'll fail a hundred times before making success.