
3d Scanning and Printing
Link to class: 3d Scanning and Printing
Link to class: Molding and Casting
This week's assignment is to 3d scan an object, design and 3d print and object and for extra credit: edit and print and object that you scanned. My goal for this week was to scan the arm of a model t-rex I bought and assemble a few weeks ago. Why? Because the model came with only ONE arm and through this exercise I'm going to investigate how accurate the 3d machine is, how we could use it to correct the flaws of mass production, and also how to recreate models for teaching purposes, since this is used already for creating actual bone replacement for humans.
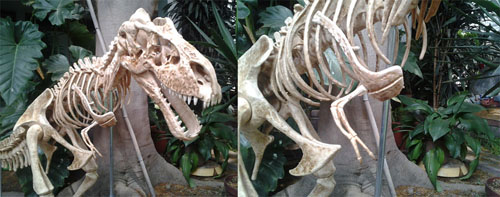
STEP ONE: 3d scan an object
I decided to do it using Autodesk 123D Catch. To make it more accurate, I hang the bone piece from a fishing line and took as many photos as I could. I used a Kodak EasyShare CX7330 camera.A very useful tutorial is available at 123D Catch page (http://www.123dapp.com/howto/catch) and will help you to take better pictures and making the process easier.
I've also modigied the pictures in Photoshop, and I show how to make changes in Batch, when you have more than 50 pictures and you need to change them all at once.
STEP TWO: 3d printing
When you finish scanning the object, you need to convert this into a mesh that can be modified and then later be recognized by the 3d printing program than comes with the machine. When in 123D Catch go to 'Export Capture as' and then select .OBJ to open it on Rhino. Then, when in Rhino, save it on a SLT format. Now you can go to the printing software.Since we got limited time and I wanted to try the machine, I downsized the dinosaur arm for easy printing. This is what happened and what I finally got:
The machine needs a few minutes to heat and then it started printing. It tooks me aproximately 14 minutes to make a little arm of 5x3x1cms, counting the machine heating process.
You can download the T-rex little arm in 123d catch format.
Or you can download it on .OBJ format (for rhino).