Molding and Casting
For this week I designed a two part mold. The aim was to create an M composed by cylinders and spheres. I thought about this design where the M would not have any flat surface as something I could not do at the 3D printer. The result was far from what I expected, main issues have been:
- Designing 2 holes on the mold. One for being able to put the material inside the mold, the other to help the air from the chemical reaction of the bright white liquid plastic leave the mold.
- The 3mm diameter bit was too big for some parts of the design.
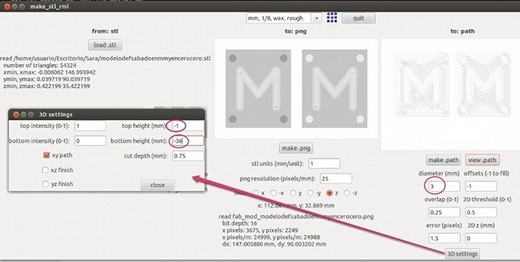
- 3D settings at FabModules. When selecting "mm, 1/8, finish" it is very important to change at "3D settings" --> "top height" from "0" to "-1".
- Bubbles of air inside the bright white liquid plastic while depressing it into the mold.
Designing a positive mold model
Following ass220 tutorial, the first step is to design the mold. I design it with Rhino. This is my first attempt to design a positive mold model.
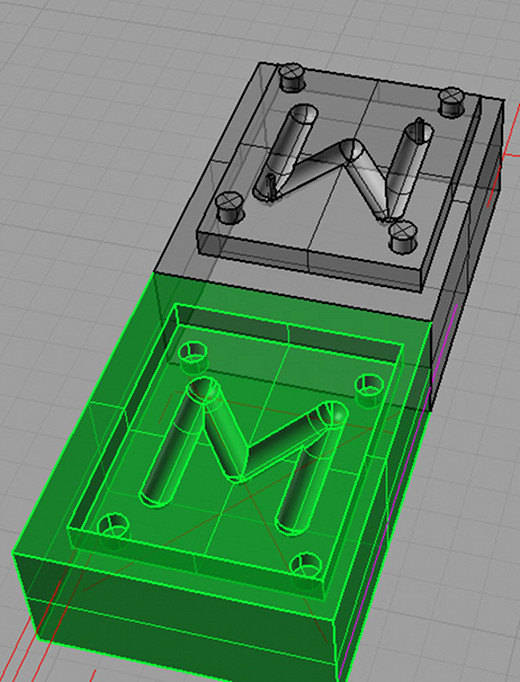
THIS IS NOT A POSITIVE MOLD MODEL!!!! This would be ok if we were going to print this model on the 3D printer, but this is not what we want to do.
The second attempt below was the right one. As we can see from the image, there are no holes for pouring the material inside. This will be a problem afterwards.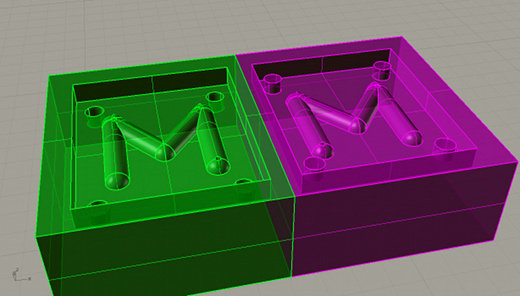
This is the STL file I exported from Rhino:

The milling machine works on mm, so don't forget to check in what units have you design in Rhino. The STL file has to be in mm and it is also a good idea to set up the (0,0,0) of your design at the (0,0,0) of the file.
Making a mold out of wax
Now that we have the stl file for the milling machine, we open fab modules and select:
- "from format"-> "model(.stl)" and "to process"-> "Roland Modela (.rml)".
- "load stl". We select our file.
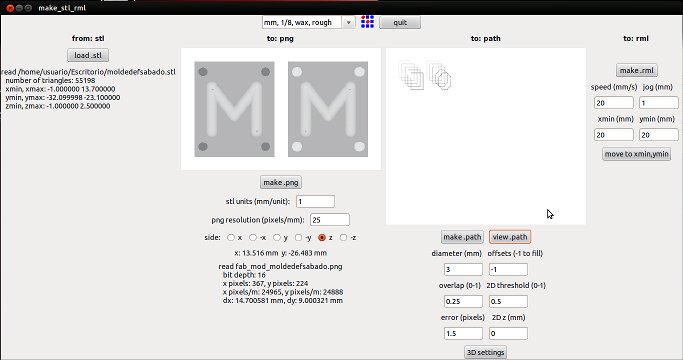
- Select "mm, 1/8, rough"
- "make png"
- Set settings:
- Check "diameter(mm)". This is the diameter of the mill you are using. In my case was a 3mm diameter mill.
- 3D settings: change "top height" to "-1" and "botton height" to the height of your design, in my case "-36".
- "make path" and "view path"
This is the result I had from my first attempt after "make path" and "view path":
 Something was wrong because the path made where too small. I checked and discovered the dimensions of the stl were too small. I hadn't checked the units of my design, I had design it with Rhino on cm, so I had to change the units of the design and re-export the stl file. This is how the path looks when the units of the .stl file are correct:
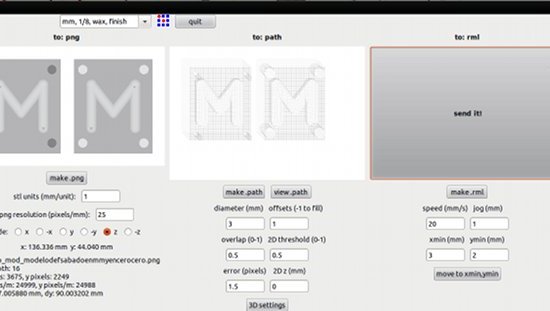
Now that we have checked every settings we can:
- Place our (0,0) and "move to xmin, ymin".
- "make rml".
- Send it to the Modela.
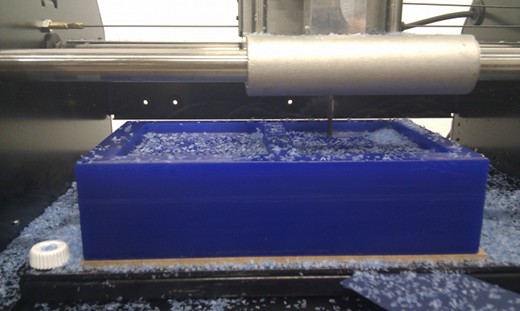
This is the result: the 3mm diameter bit was too big for some parts of the design. The curvature of the cylinders of the M was not perfect because of this.
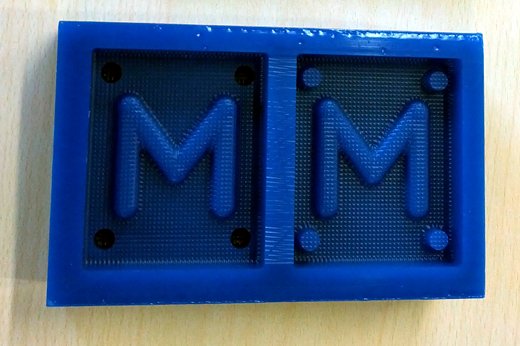
Mold Urethane rubber
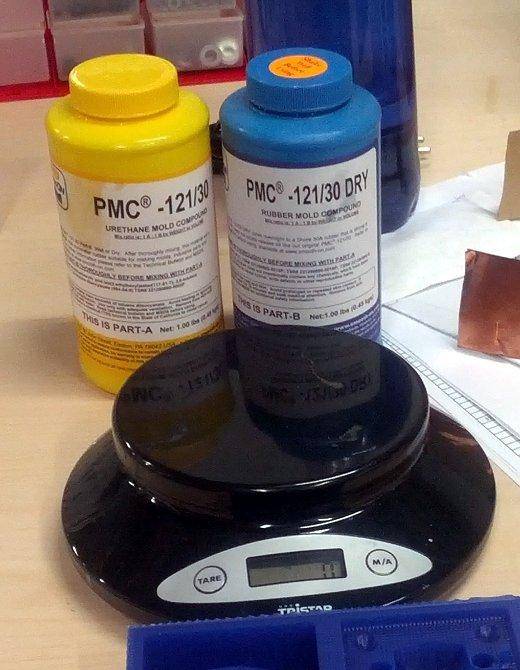
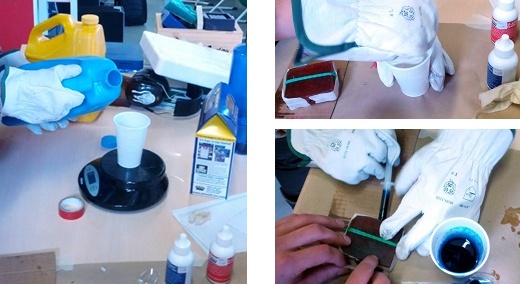
To prepare the urethane rubber it is necessary to mix the same quantity of material from this two yellow and blue bottles using a weighing scale.
Once the mix is brown we can pour it very slowly into the wax mold till it is full. Then we wait 14 hours for the rubber to forge. Once it is ready it is very easy to remove the flexible mold from the wax mold.
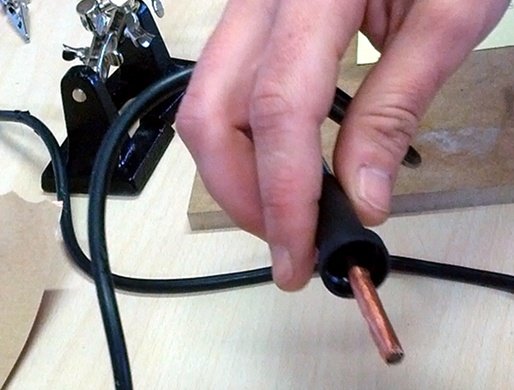
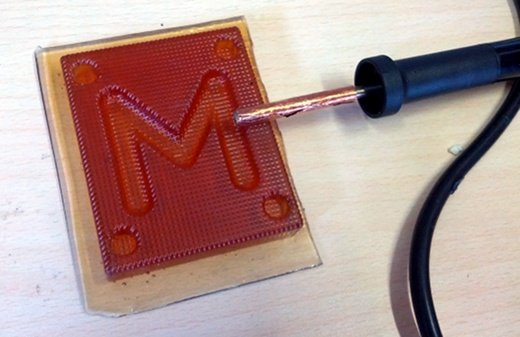
Here is the process I follow to create additional holes in the mold, in case you forget to put them in the first place. I used the soldering iron and a piece of cupper paper for the vinyle cutter. I removed first the soldering iron tip, and then I put the cupper around the soldering iron. Once the soldering iron was hot I approached it to the mold rubber and it left it footprint. Even this worked, I do not recommend you to do this, the smoke is horrible. It is better to checked your model before milling the wax :)

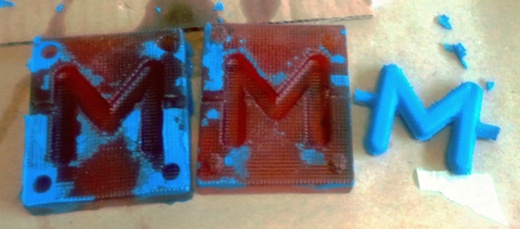
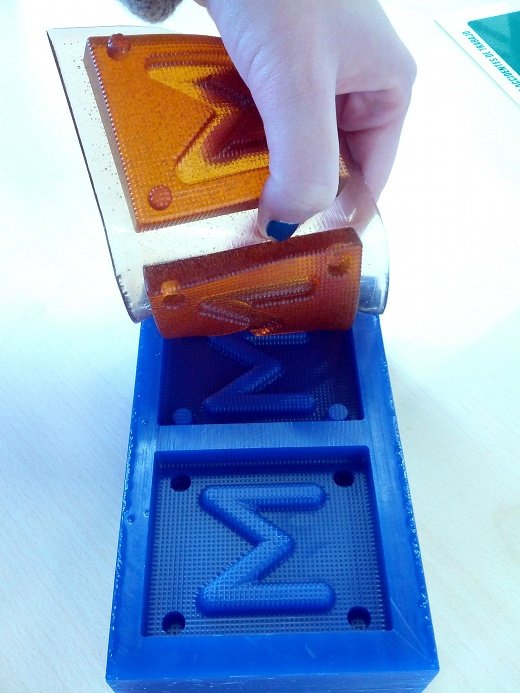
Casting
We followed the steps below to produce our cast:
- Prepare the rubber mold spraying a demolding solution
- Prepare one syringe
- Find something to fix both parts of the mold.
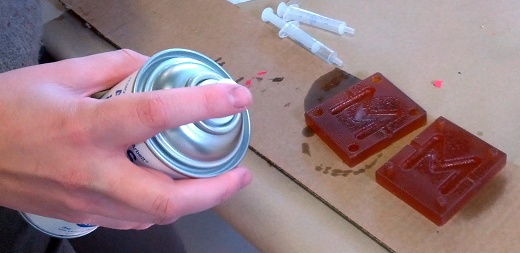
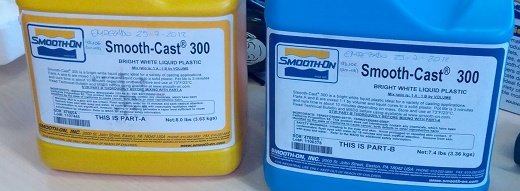
- Prepare the bright white liquid plastic mix using the same quantity of material from this two yellow and blue bottles using a weighing scale.
- Mix and add tint to the liquid plastic
- Pour the material into the mold with the syringe
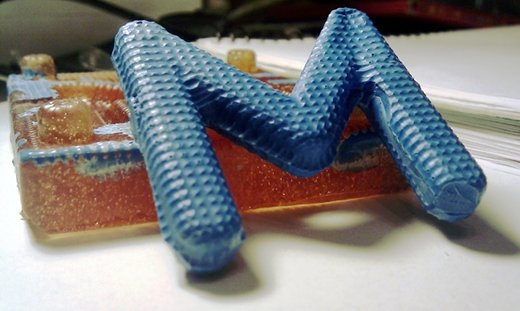
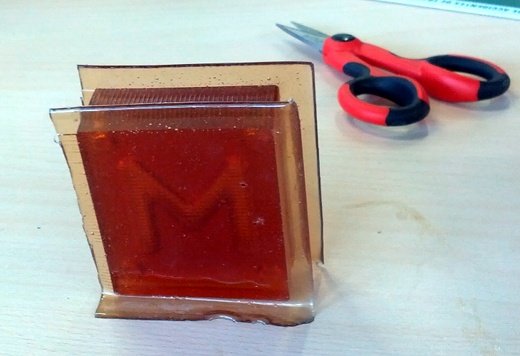
Once all the material is inside the mold, we waited for 20 minutes. At the begining the mold was very hot because of the reaction among liquids. We took the M out of the mold once it was not hot anymore: