Electronics Production
Modela milling machine and fab modules
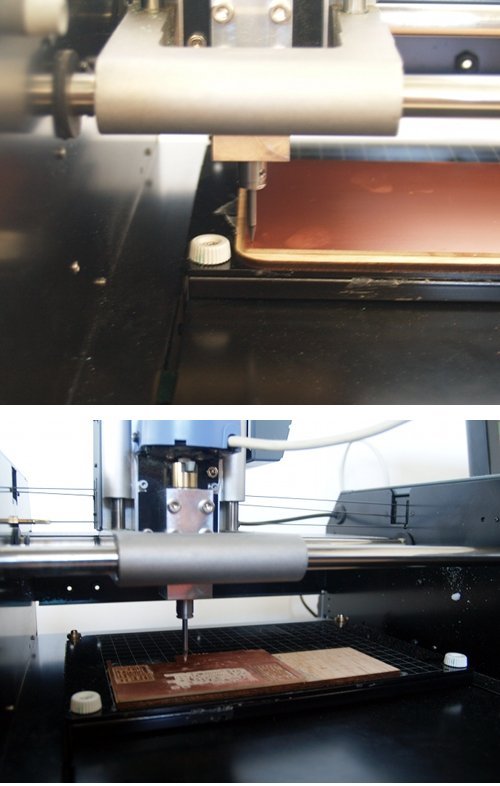
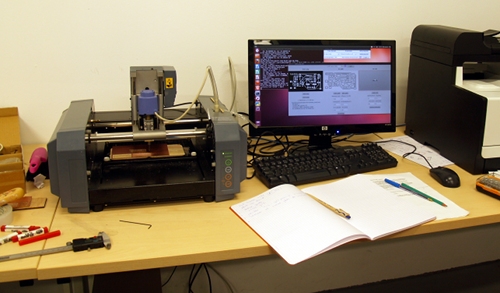 We used a FR1 paper based copper plate, a Roland Modela MDX-20 and fab modules to produce our PCB. When we started working with it, with an old endmill just to try, we realized that it was not milling out all the traces of the circuit board with the same depth. The ones that were on the right part of the board were not milled out enough.
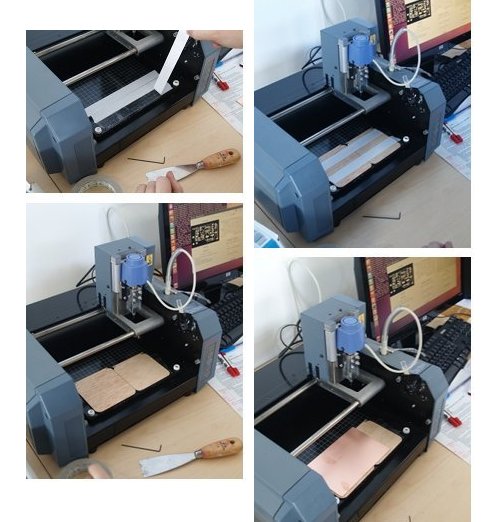
We had a look at the user's manual and decided to re-fix the workplate attachment, as it was said in the user's manual "press it all the way until flush". We tried again and it did not work, so we decided to change the sacrificial board underneath the board that we were milling.
Once we had cleaned the workplate with alcohol and a scraper, we attached the sacrificial board to the workplate of the modela with double sided tape. We repeated the same process to attach the board we were going to mill out. It is important to press down firmly ensuring that it's level. The png files we need to produce the FabISP can be found here. In our next try we changed parameter 2D z (mm) on fab modules from 0.1 to 0.2, and the result was now OK.
PCB production
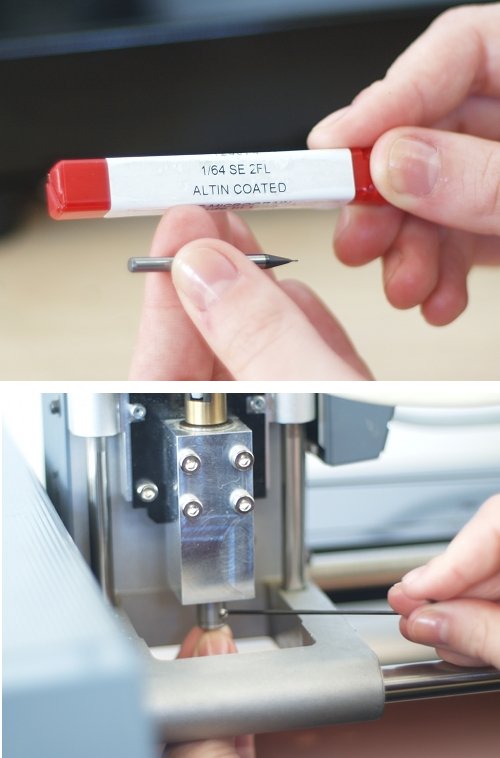
We started by milling out the traces so we selected the 1/64" endmill. We used the Allen key to release the old endmill we were using for the first try; then replaced it with the 1/64" endmill and locked it in the bit.
- Select "PNG" to "Modela". Click "make-png-ml"
- Load the PNG image for the track.
- Select "milltraces 1/64" from type drop down box. Check parameters.
- Set the (0, 0) of the PCB and click "move to xmin/ymin" to check location. (Write down the coordinate)
- Press the tool "down" key from the switch panel to set the endmill at about 6mm from the surface of the PCB. To set the Z axis value carefully release the bit till it is in contact with the surface of the PCB.
- Click "view Path" and then "make Path" & "make RML".
- Click "send it" to begin machining.
After this we sent the drilling data to Roland Modela. To do this one can follow these steps:
- Replaced the 1/64" endmill by the 1/32" endmill
- Load the PNG image for the outline
- Select "1/32" from type drop down box. Check parameters.
- Set the (0, 0) of the PCB, same coordinates than before, and click "move to xmin/ymin" to check location.
- Press the tool"down" key from the switch panel to set the endmill at about 6mm from the surface of the PCB. To set the Z axis value carefully release the bit till it is in contact with the surface of the PCB.
- Click "view Path" and then "make Path" & "make RML".
- Click "send it" to begin machining.

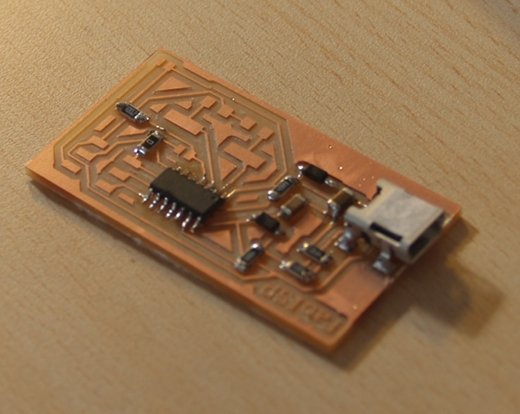
Something we learnt from fab module is that once you have click on "make path "any changed on the parameters will not be made, it is necessary to "make path" again before "send it" to the machine. This is the result.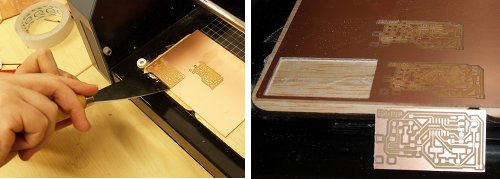
Assembling
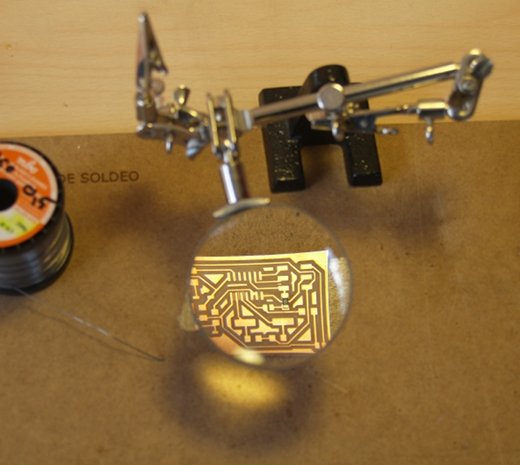
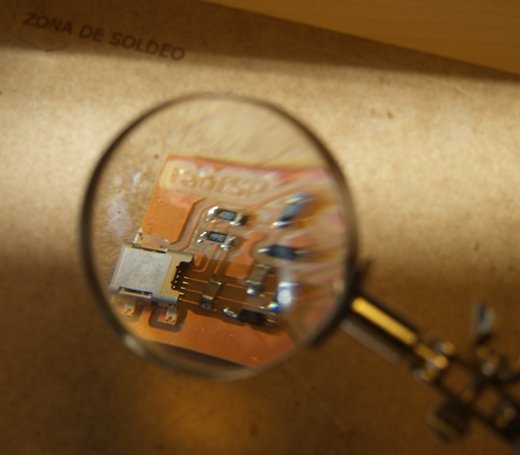
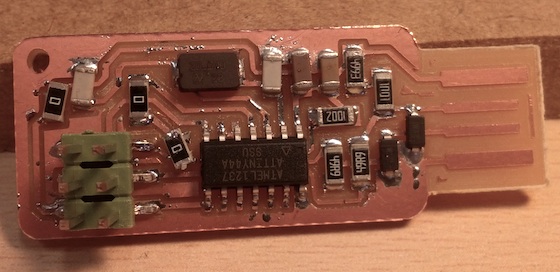
Once we had the PCB we started soldering. This was my first time soldering SMD. I watched this video first. The USB and the ISP header were very hard to solder.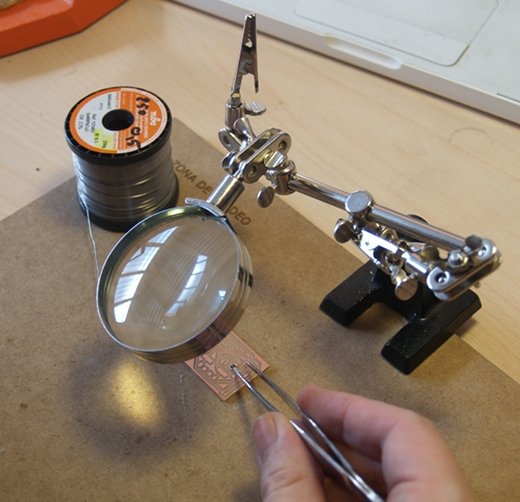
Programming the ATtiny
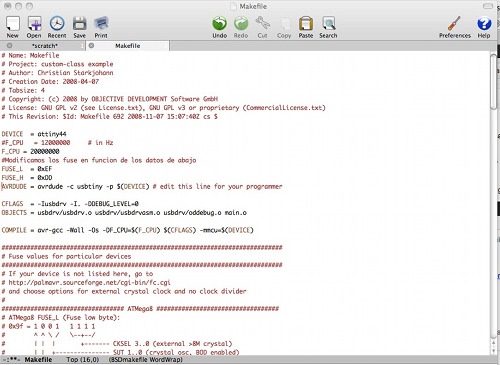
We soldered the SJ1 jumper near the microcontroller on our board. I used another FabISP to program my FabISP. We connected the 6 pin cable of the other programmer to our FabISP (being sure to orient it correctly (pin 1 to pin 1); and connected it to power. I download the firmware and modified the Makefile as David explained. Then I learnt how to use command-line to move across directories. Once at the firmware folder I run "make program" from the command line to program the firmware onto the ATtiny44 on the FabISP.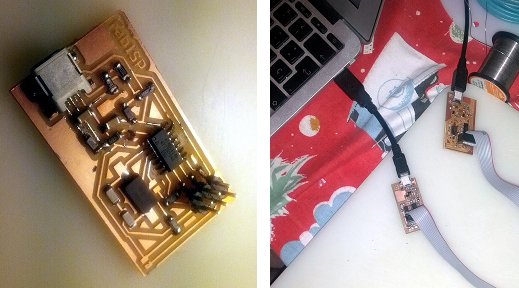
Result
It is not working. I checked USB tiny ISP Frenquently Asked Questions on ladyada.com: "Are there any cold-solder joints or bridges?" Probably a lot, I will repeat the board this week :)
Fab ISP. Second attempt
This time I tried the FabISP key. I added to the image the list of components need.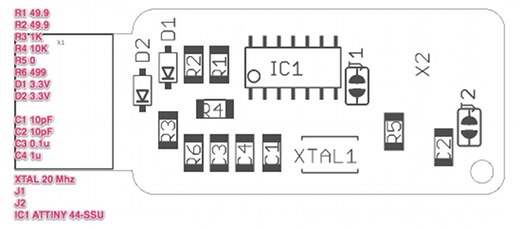
Programming. I checked this tutorial again:
* "make clean"
MacBook-de-Sara-Alvarellos:firmware sara$ make clean
rm -f main.hex main.lst main.obj main.cof main.list main.map main.eep.hex main.elf *.o
usbdrv/*.o main.s usbdrv/oddebug.s usbdrv/usbdrv.s
* "make hex"
MacBook-de-Sara-Alvarellos:firmware sara$ make hex
avr-gcc -Wall -Os -DF_CPU=20000000	 -Iusbdrv -I. -DDEBUG_LEVEL=0
-mmcu=attiny44 -c usbdrv/usbdrv.c -o usbdrv/usbdrv.o
avr-gcc -Wall -Os -DF_CPU=20000000	 -Iusbdrv -I. -DDEBUG_LEVEL=0
-mmcu=attiny44 -x assembler-with-cpp -c usbdrv/usbdrvasm.S -o usbdrv/usbdrvasm.o
avr-gcc -Wall -Os -DF_CPU=20000000	 -Iusbdrv -I. -DDEBUG_LEVEL=0
-mmcu=attiny44 -c usbdrv/oddebug.c -o usbdrv/oddebug.o
avr-gcc -Wall -Os -DF_CPU=20000000	 -Iusbdrv -I. -DDEBUG_LEVEL=0
-mmcu=attiny44 -c main.c -o main.o
avr-gcc -Wall -Os -DF_CPU=20000000	 -Iusbdrv -I. -DDEBUG_LEVEL=0
-mmcu=attiny44 -o main.elf usbdrv/usbdrv.o usbdrv/usbdrvasm.o usbdrv/oddebug.o
main.o
rm -f main.hex main.eep.hex
avr-objcopy -j .text -j .data -O ihex main.elf main.hex
avr-size main.hex
   text	   data	    bss	    dec	    hex	filename
      0	   2020	      0	   2020	    7e4	main.hex
* "make fuse"
MacBook-de-Sara-Alvarellos:firmware sara$ make fuse
avrdude -c usbtiny -p attiny44  -U hfuse:w:0xDF:m -U lfuse:w:0xFF:m

avrdude: AVR device initialized and ready to accept instructions

Reading | ################################################## | 100% 0.01s

avrdude: Device signature = 0x1e9207
avrdude: reading input file "0xDF"
avrdude: writing hfuse (1 bytes):

Writing | ################################################## | 100% 0.00s

avrdude: 1 bytes of hfuse written
avrdude: verifying hfuse memory against 0xDF:
avrdude: load data hfuse data from input file 0xDF:
avrdude: input file 0xDF contains 1 bytes
avrdude: reading on-chip hfuse data:

Reading | ################################################## | 100% 0.00s

avrdude: verifying ...
avrdude: 1 bytes of hfuse verified
avrdude: reading input file "0xFF"
avrdude: writing lfuse (1 bytes):

Writing | ################################################## | 100% 0.01s

avrdude: 1 bytes of lfuse written
avrdude: verifying lfuse memory against 0xFF:
avrdude: load data lfuse data from input file 0xFF:
avrdude: input file 0xFF contains 1 bytes
avrdude: reading on-chip lfuse data:

Reading | ################################################## | 100% 0.00s

avrdude: verifying ...
avrdude: 1 bytes of lfuse verified

avrdude: safemode: Fuses OK

avrdude done.  Thank you.
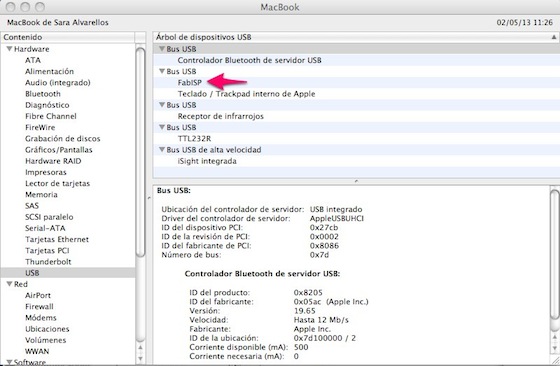
This time everything goes right. After the installation succeded we saw how the fabISp was being recognized: