14 - Molding and Casting
Summary
We were tasked this week to learn all about molding and casting, how to mill 2,5d and Henk challenged us to work with bio-materials.
Approach
This week my aim was to learn what is possible when working really small and detailed with such a big mill. Just like with 3D printing in week 5 I tried find out whether this fabrication process is suitable for my final project.
Assignment
- group assignment:
- review the safety data sheets for each of your molding and casting materials, then make and compare test casts with each of them
- compare mold making processes
- individual assignment:
- design a mold around the process you'll be using, produce it with a smooth surface finish that does not show the production process toolpath, and use it to cast parts
- extra credit: use more then two mold parts
- extra credit: make your own materials
Wax milling on the ShopBot
This week we'll be using the ShopBot again, just like we did for computer-controlled machining in week 7. That week we were only using 2D designs just like you do on a lasercutter, but the ShopBot can of course do 2,5D milling. Since we haven't done this before our week started with a run trough from Henk of the process involved in going from a wax block to a final cast.
The computer connected to the ShopBot runs a version of VCarve specifically for ShopBot. Here you can draw shapes directly or load a design made elsewhere and translate these shapes into G-code instructions.
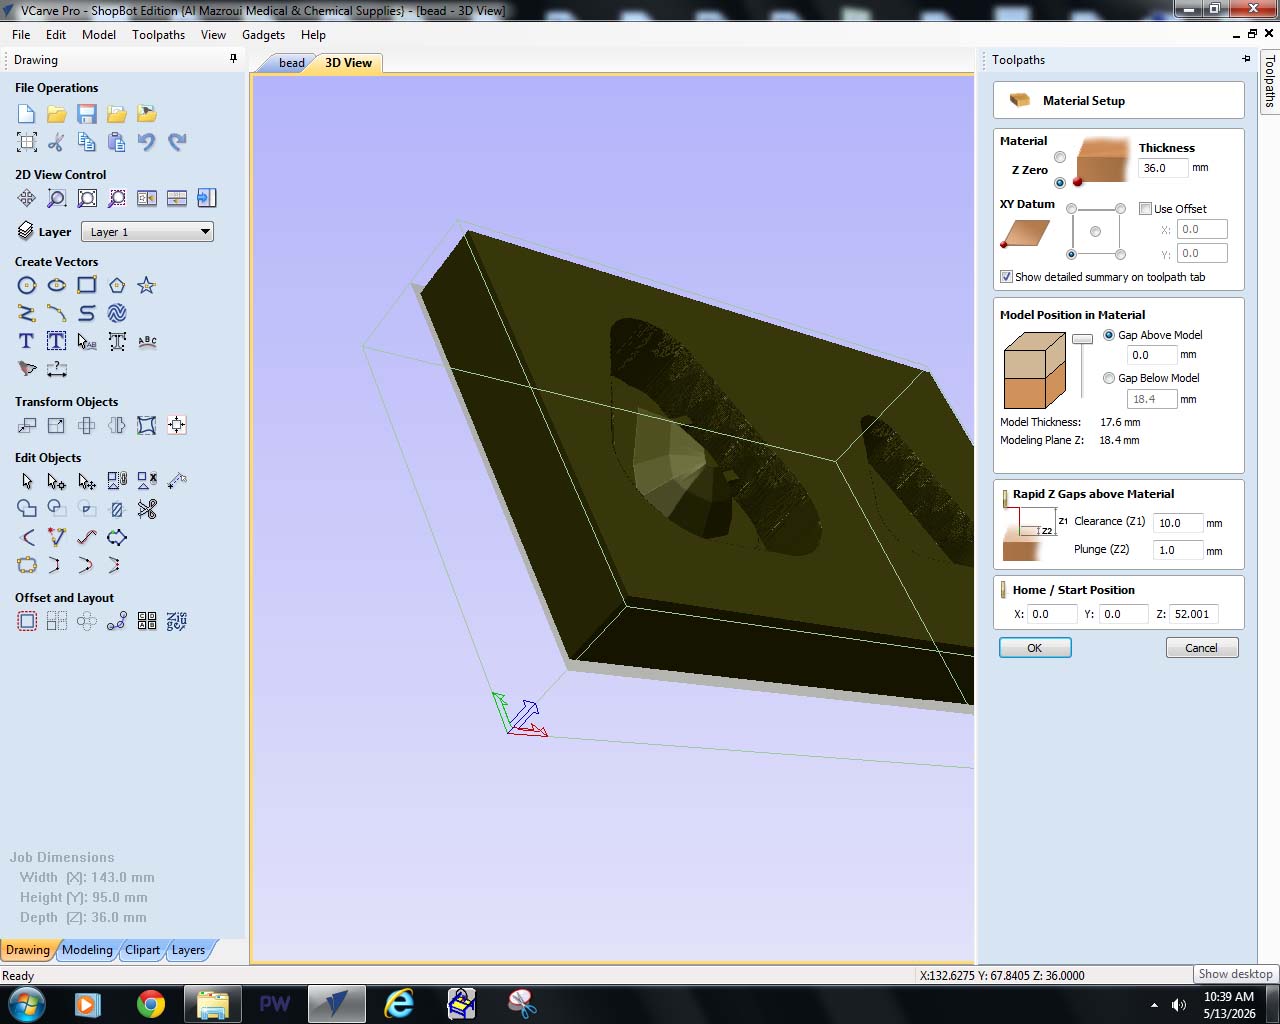
To setup vCarve for 2.5D milling:
- set up a new job and set your material settings; set the
Material(Z)and theXY Datum positionto the bottom left corner - load your stl file (File > Import > Import Component / 3D Model)
- orientate your model on your material, the red wireframe is the material box, the grey plane is the modeling plane:
- rotate it so the orientation is the same as the material
- set the
Zero Plane Position in ModeltoBottomsince we've set Material(Z) to the bottom of the material - scale your model so it fits within the material box
- add roughing machine toolpath
- settings:
- model boundary: 0
- machine allowance: 0
- z-level: raster Y
- no ramp plunge moves, 0
- don't touch the bottom part
- set the milling bit to:
- diameter: 5mm
- pass depth: 2.5mm
- stepover: 90%
- spindle speed: 5000rpm
- feed rate: 40mm/s
- plunge rate: 10mm/s
- tool number: 1
- settings:
- click
Preview Toolpathsto double check - add a finishing toolpath
- settings:
- model boundary: 0
- area machine strategy: raster
- don't touch the bottom part
- set the milling bit same as the roughing toolpath besides (there is no pass depth):
- stepover: 10%
- settings:
- click
Preview Toolpathsto double check - export to g-code, to make sure the shopbot does the job in the right order it's recommended to export both toolpaths separately
- start setting up the shopbot, don't forget to leave off the extractor and set the right spindle RPM's when working with wax
Group assignment
After you milling is done you should have a positive mold that you can then cast with a material to get your negative mold (which you can then cast with a material to get your final positive model). We didn't actually mill a mold after Henk showed us how to, but instead used one from a previous year to do our group assignment.
"Bio silicone"
Henk showed us how to make a "bio silicone" from water (2 parts), gelatine powder and glycerin (both 1 part); Mix glycerin and water in a container and warm it in the microwave. While stirring, gradually add the gelatin powder until it dissolves completely. This mixture actually gets more smooth every time it's heated up and mixed, so if you want you can heat the mixture again briefly and stir once more to ensure it’s smooth. Then pour it into a mold and let it cool until it sets.
The first time we tried the cast broke while we took it out of the mold, the second time we applied a release agent (sunflower oil) to the mold before pouring in the mixture, this one came out very nice and detailed. You can clearly see the milling path captured by the bio material.
Plastics
Henk showed a box full of Smooth-On products, a company specialized in molding and casting materials. Most of these materials need a good ventilation due to their toxicity so Henk also showed us the ventilation chamber with HEPA/coal filter that we used for all our casts.
We tasked ourselves by each studying the datasheet of one product and then determine steps for us to cast the material. I took the "bright white liquid plastic" called Smooth-Cast™ 305 and studied the bottles, the safety datasheet (SDS) from the box and looked up the latest version online.
Instructions from the bottles
- stir both parts before mixing
- by volume 1:1
- by weight: 100A:90B
- pot life: 7 minutes
- cure time: 30 minutes
- store and use at 23C
Safety
- part A
- skin irritation/allergic
- don't inhale
- outdoors or well-ventilated
- wear protective gloves/eye protection/face protection
- store well ventilated
- part B
- not hazardous
- except in California
One thing I had not realized is that the box it self also has important information on it, not just ads for Smooth-On, we later learned this the semi hard way.
Remco had chosen Mold Star 16 Fast, the 16 stands for the hardness of the material (a value called shore). Remco did a good job a documenting this material on his page. We decided to cast this one first, Remco picked up a cup and threw in a nut, so we could study the tread detail in the cast. Since I was the only one with hands small enough to fit the gloves comfortably I got to do the mixing and casting all day, which was really fun.
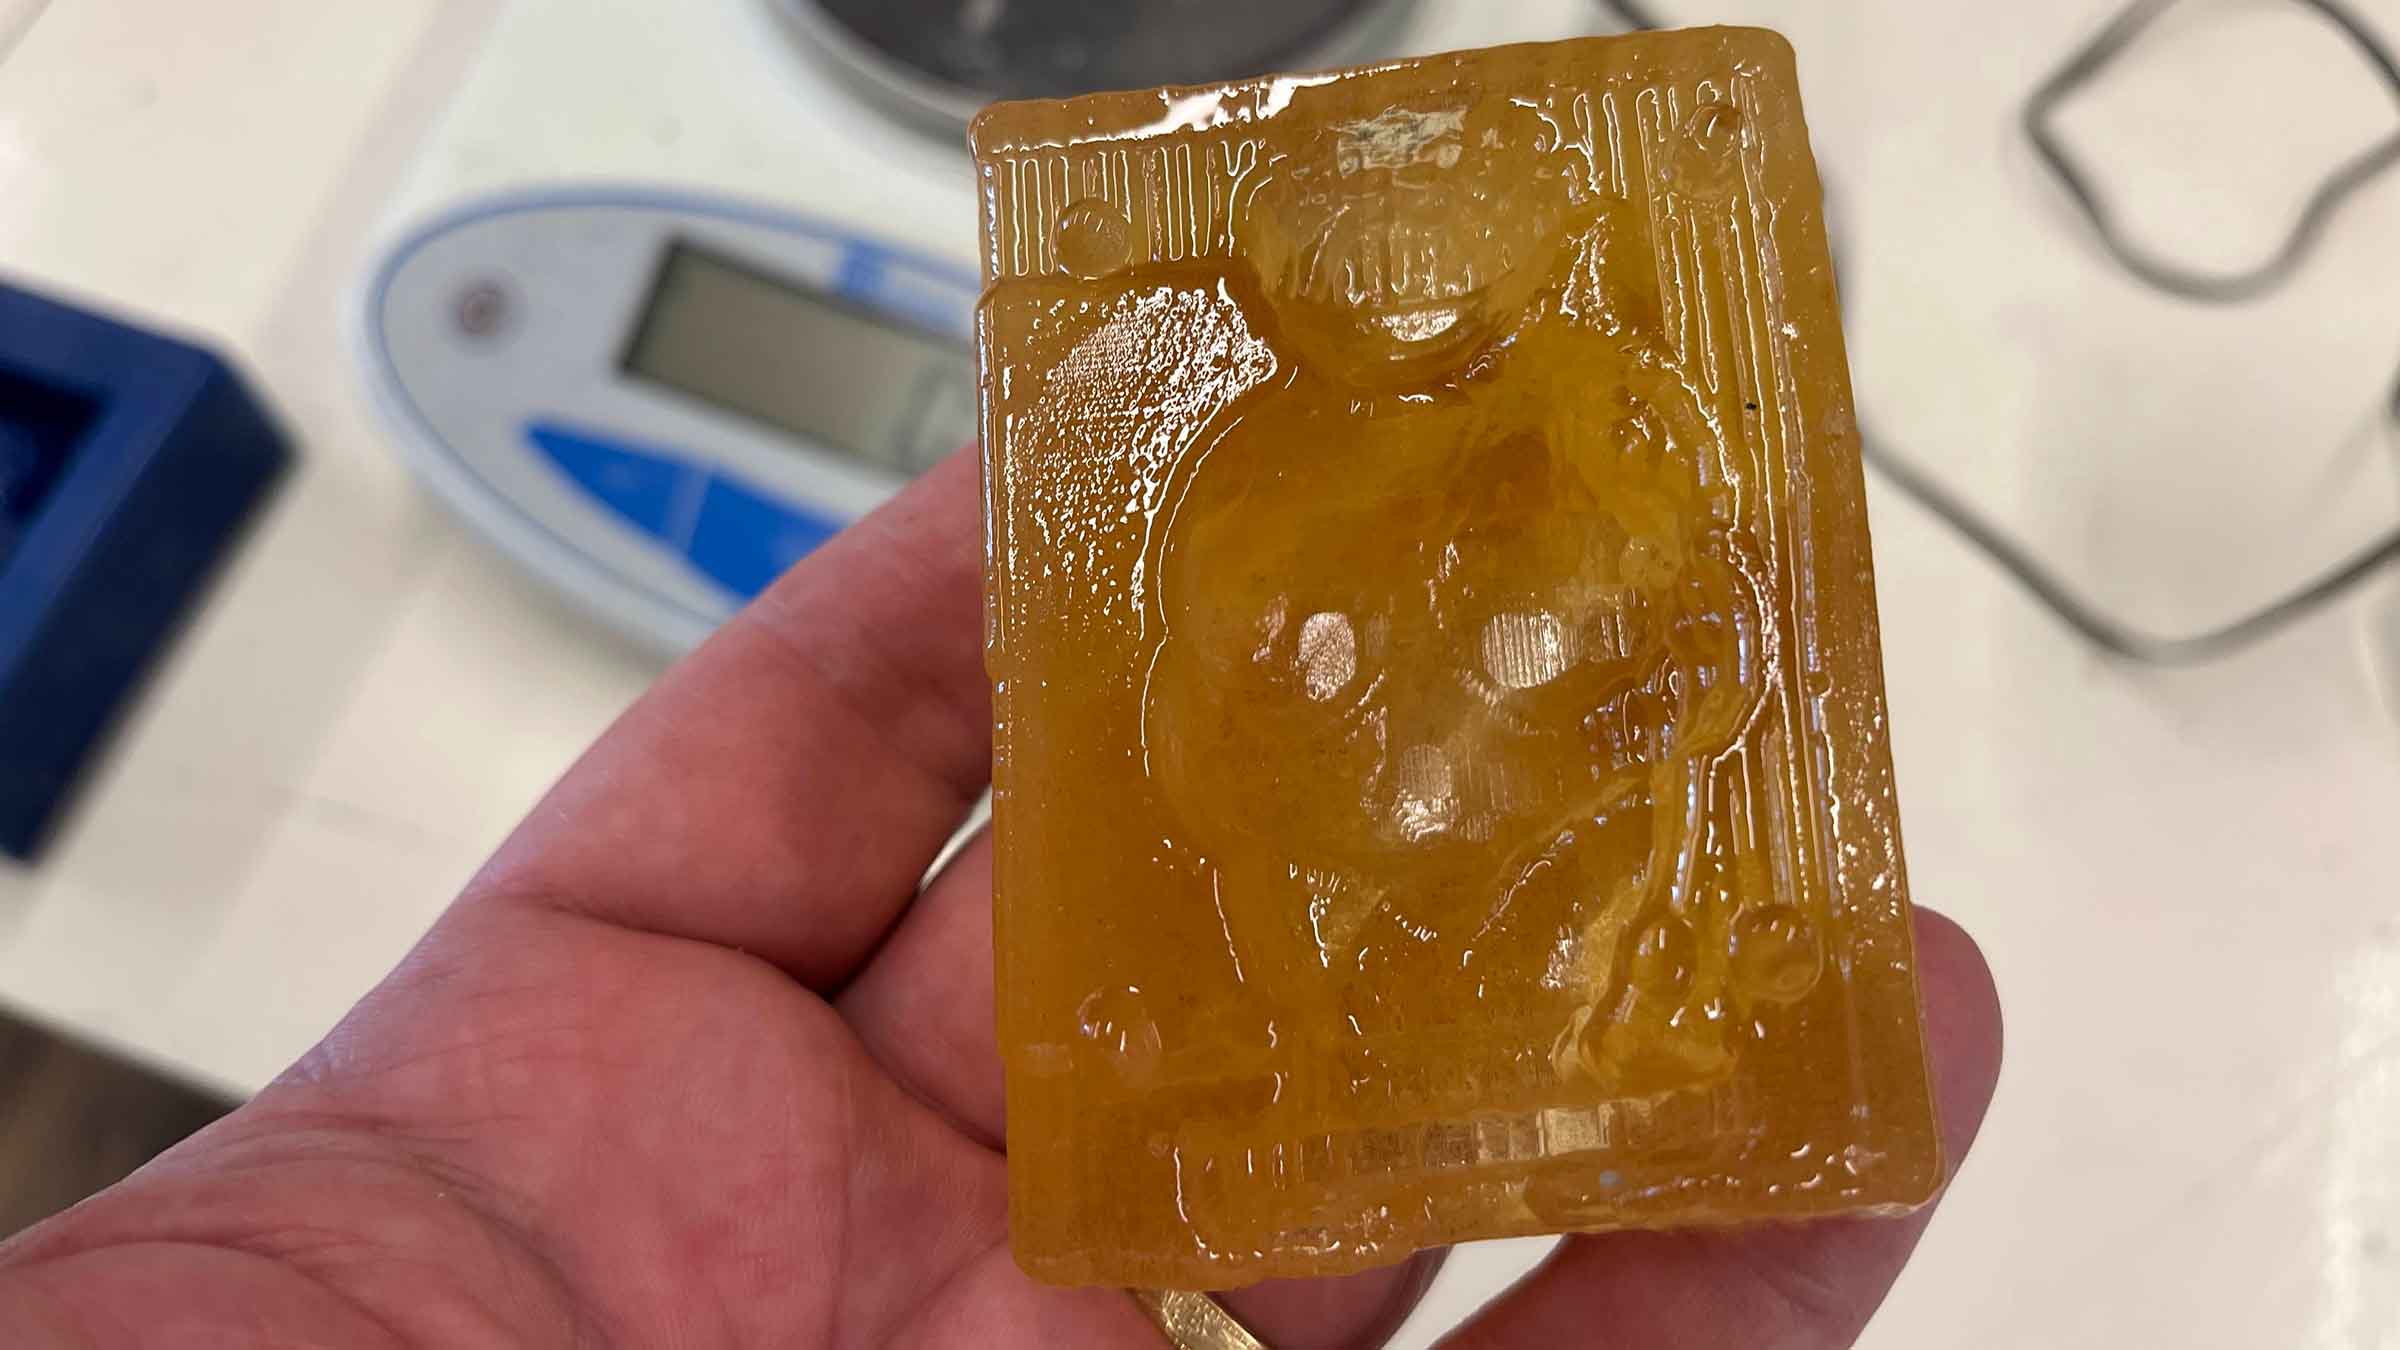
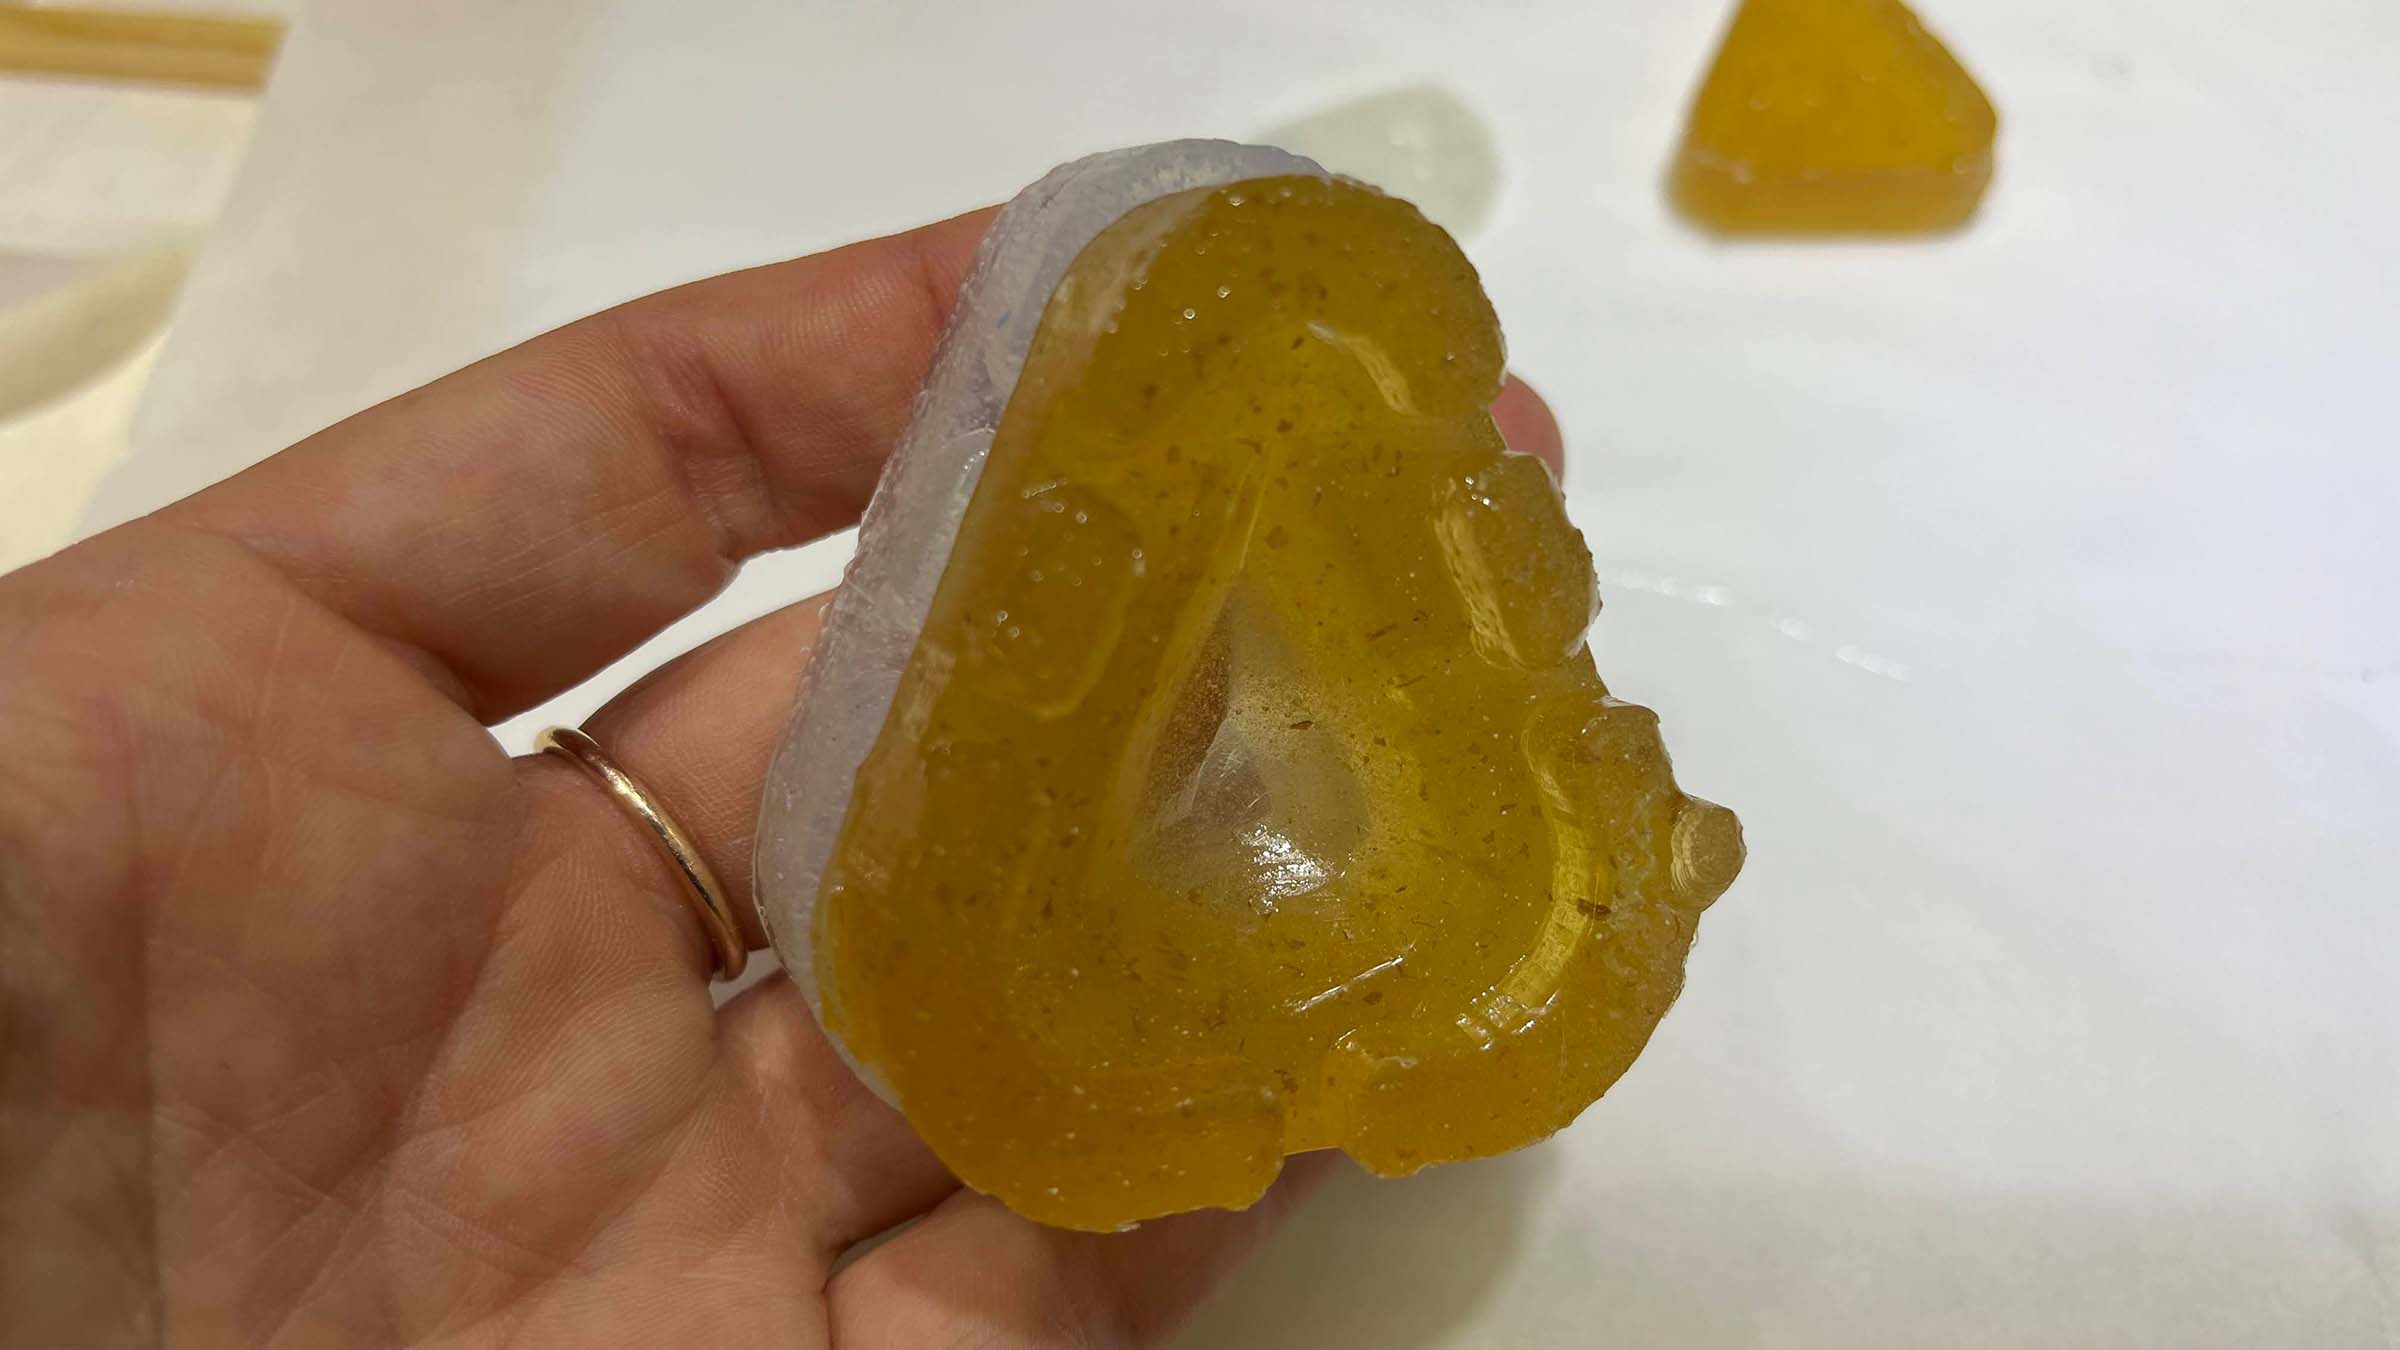
After his cast was poured and curing we decided to continue with my material, of which we accidentally made a little too much for just a test, so we decided to pour some into the gelatine molds we made earlier. One, to me, surprising thing happened: the mixture got hot, which I had not come across on the bottle instructions nor the datasheet. One thing I had found strange (but stupidly didn't question) is that both the bottles and the datasheet had instructions for the two different parts, nowhere had I found details on what happens when you pour them together. Turns out there's supposed to be another paper in the box called the technical bulletin, I didn't know about. Nor had I found it on the website, cause I googled the SDS pdf directly. This bulletin indeed had the information I was missing: details on the final material, like its strength and shrinkage and most importantly it gets hot!
The heating of the mixture during curing actually melted the gelatine mold, luckily we placed it in a plastic box so the liquid plastic had nowhere else to go. The mold had slightly melted and our lady came our looking a little droopy, I love her <3
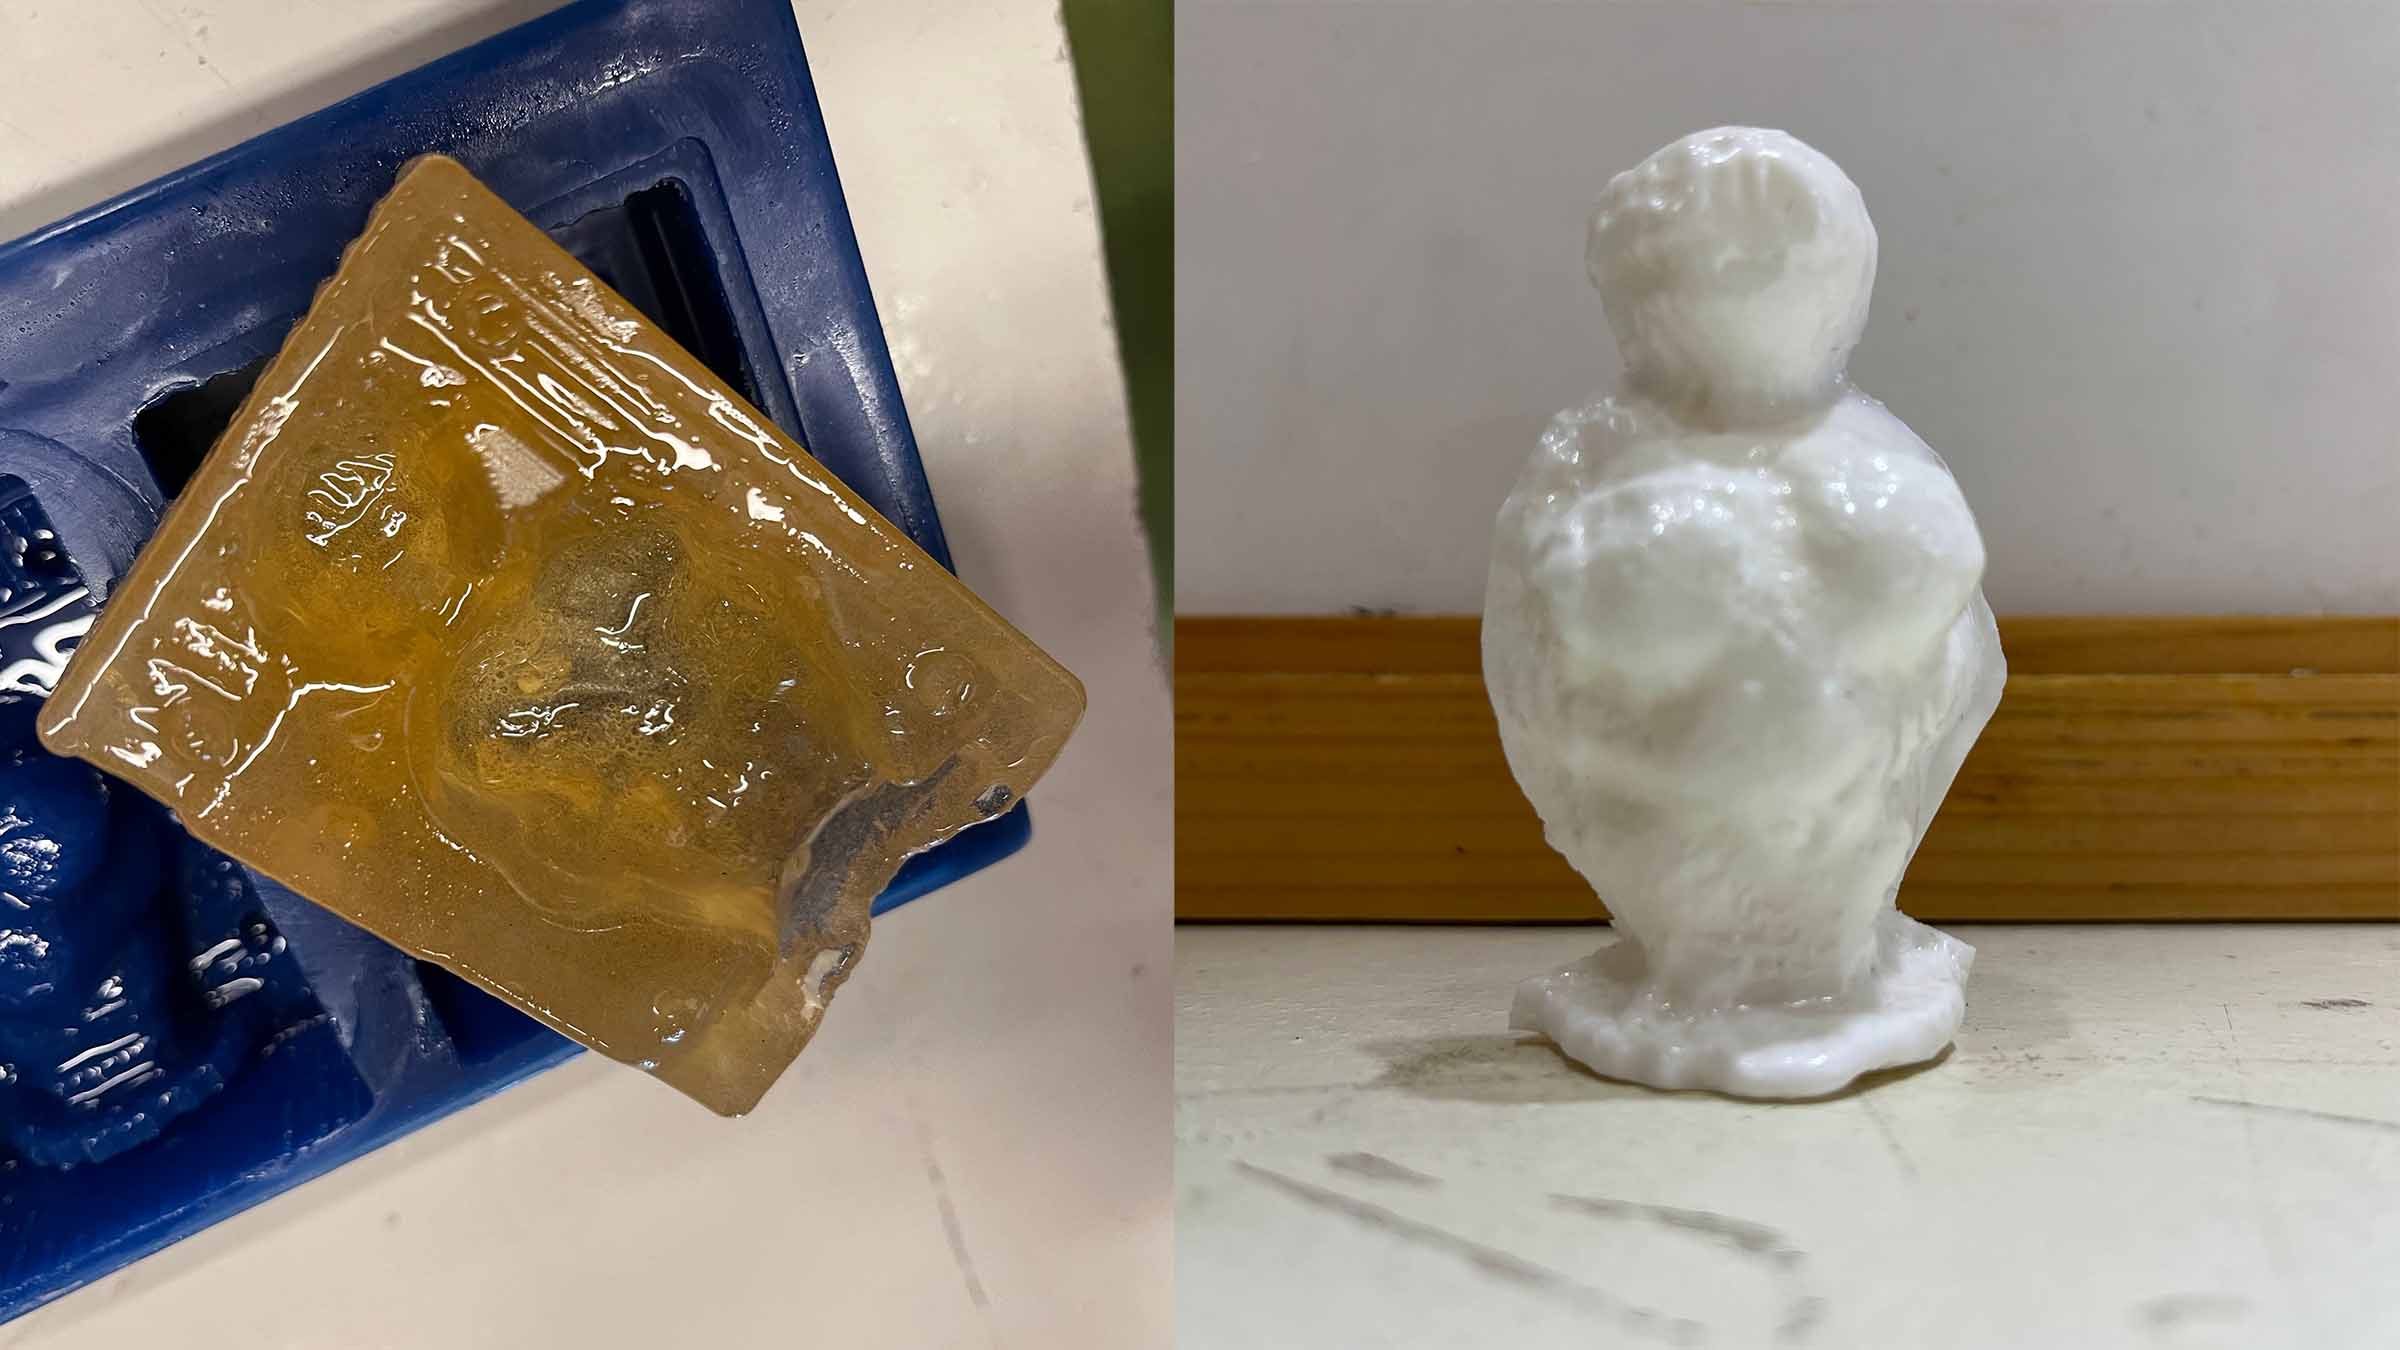
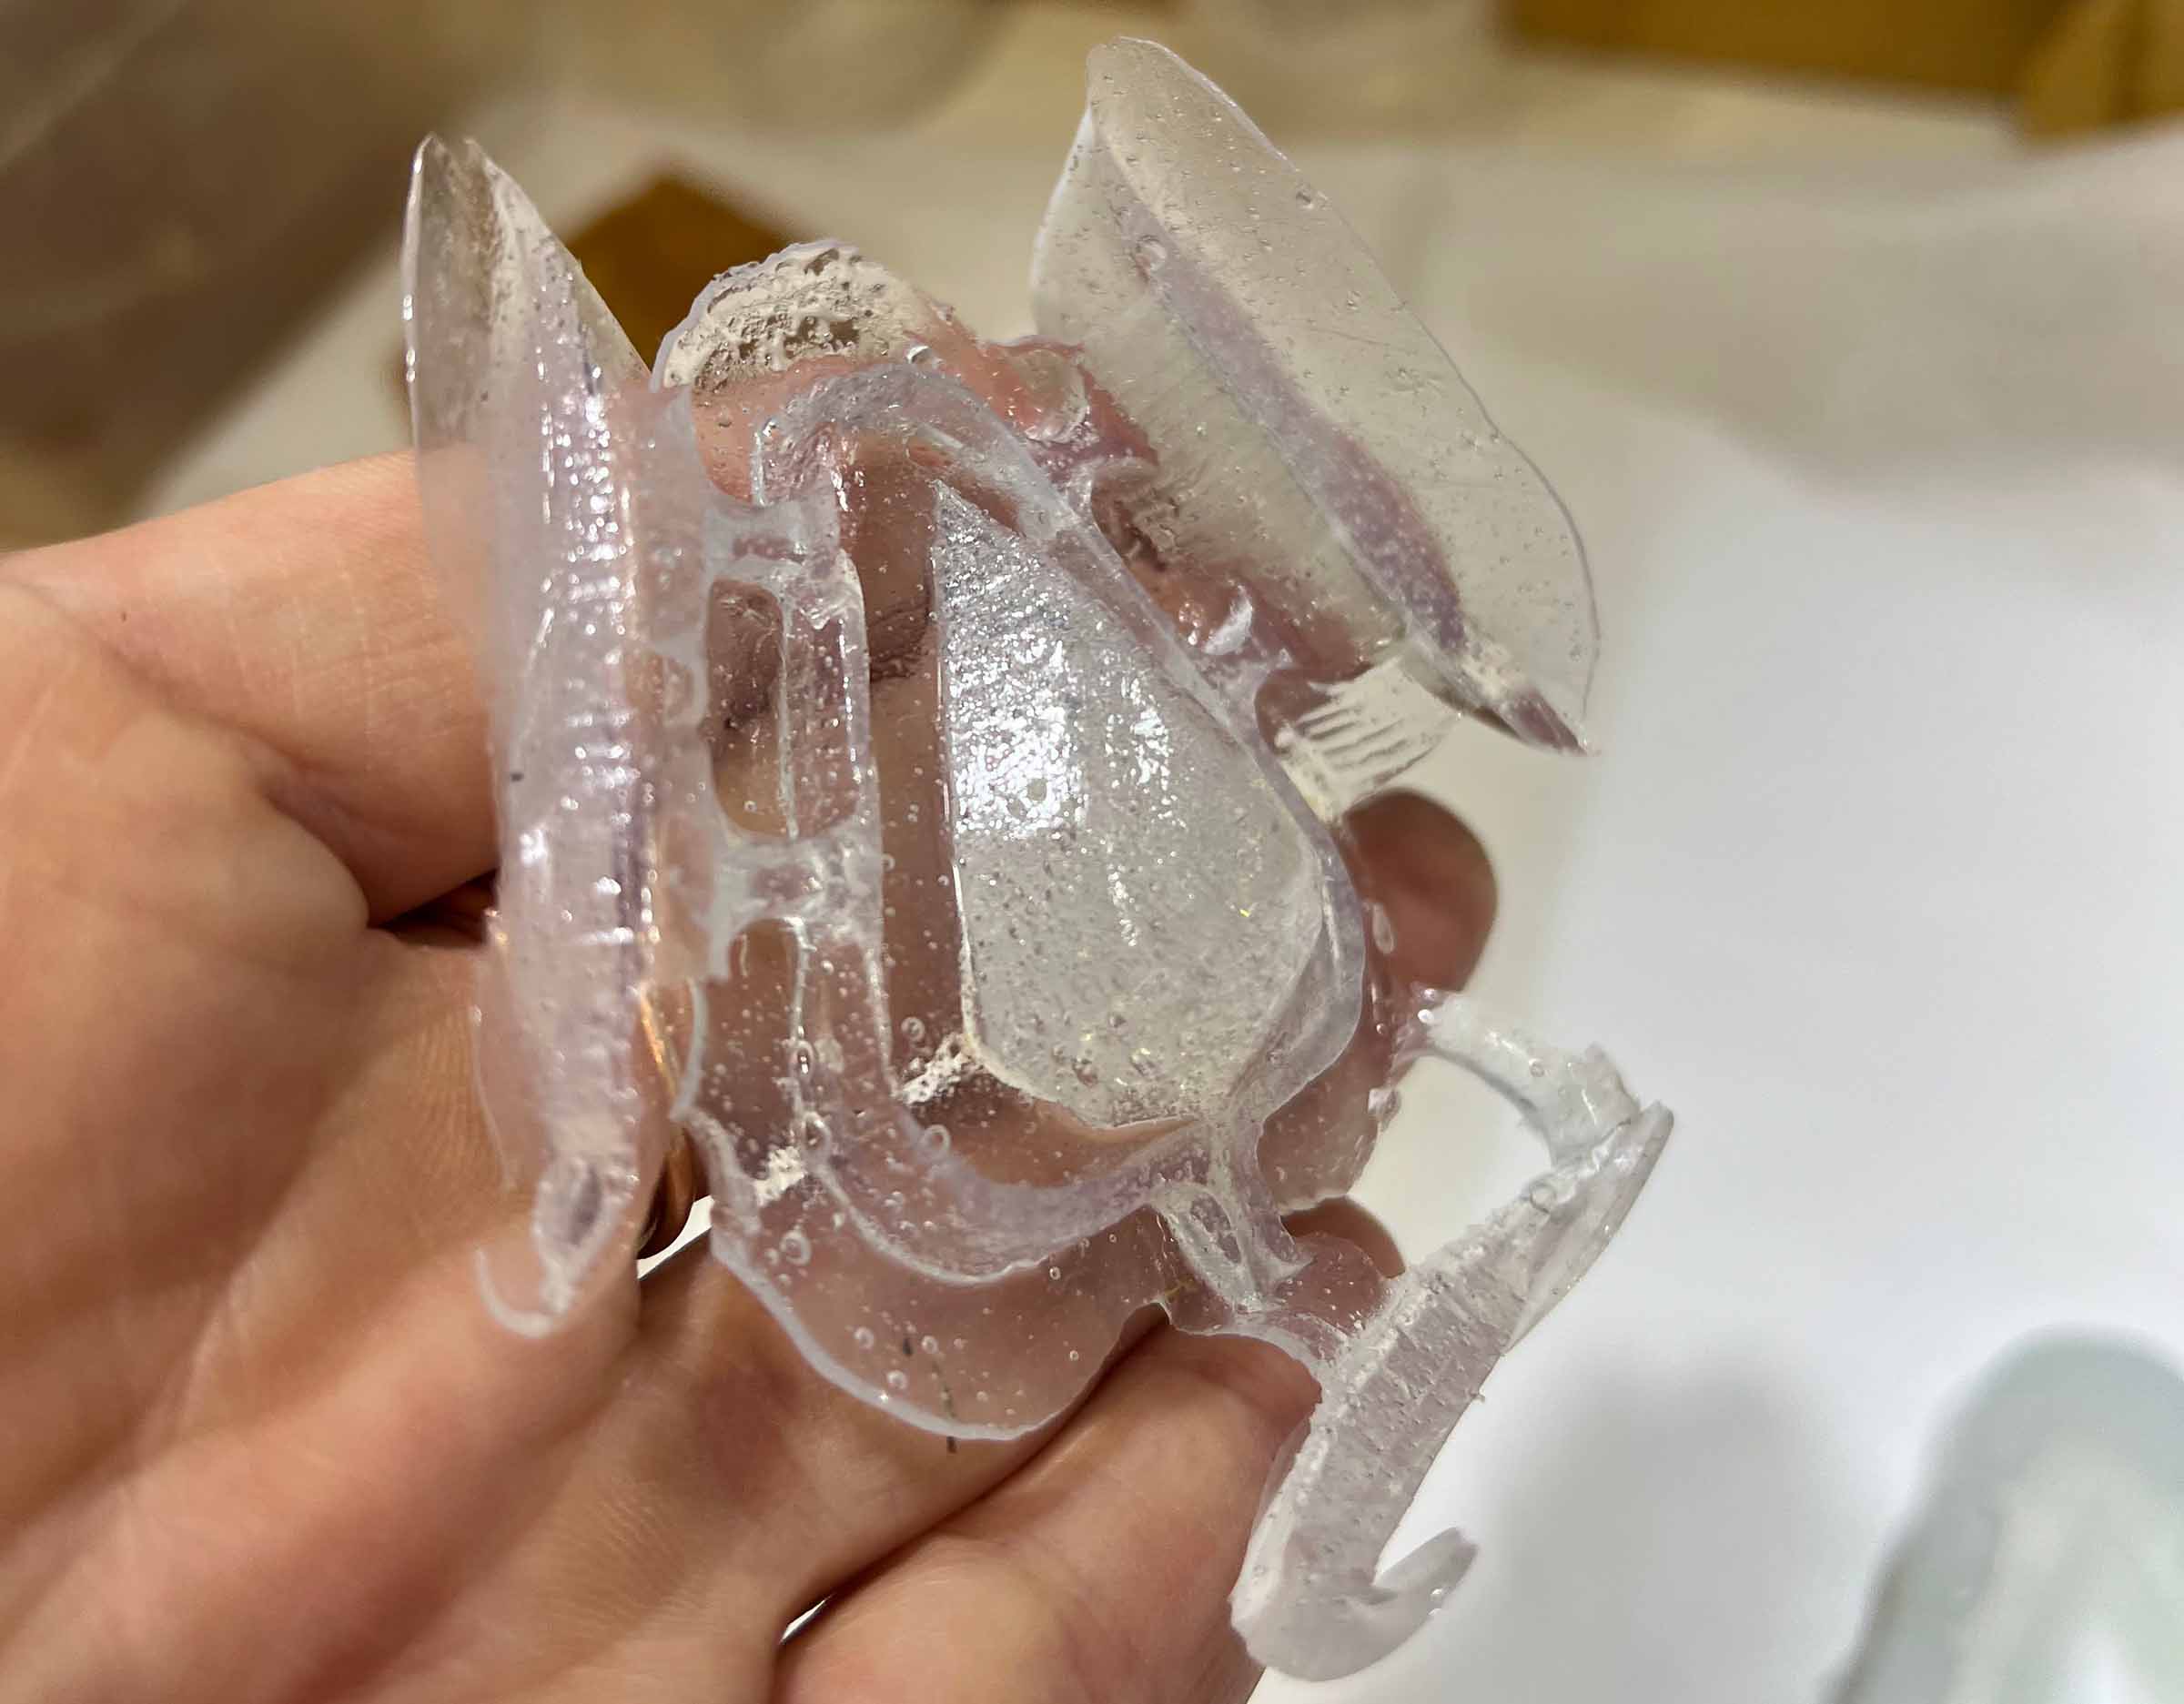
Next up was Christian's material, unfortunately we didn't realize we had picked almost the same material, he just had the 300 version. Since we had already cast my material, he had to pick a new one and do the whole reading of the sds and bulletin again which he documented nicely (sorry Chris). This time he went with Sorta-Clear 18 and clear plastic with hardness 18, kinda flexible. We were excited by the mild success of the gelatine mold and decided to do this process again, since Sorta-Clear doesn't heat up and it would allow us to study the milling details in the final cast. It worked really well and she came out looking a lot more detailed.
![]()
Individual assignment
For a while I’ve been considering casting as a method to make custom beads for my final project. After talking to Henk, I quickly learned to lower my expectations. It turns out that casting clear, hard plastic is quite difficult and also too toxic to safely work with in a Fab Lab environment. The more silicone- or rubber-like options don’t transmit enough light, and the process may also be far too labor-intensive depending on how many custom beads I want to make. Even though I trust Henk’s advice and have shifted toward laser-cut plexiglass beads, I still think it’s worth testing how the making of a custom bead with molding and casting could go.
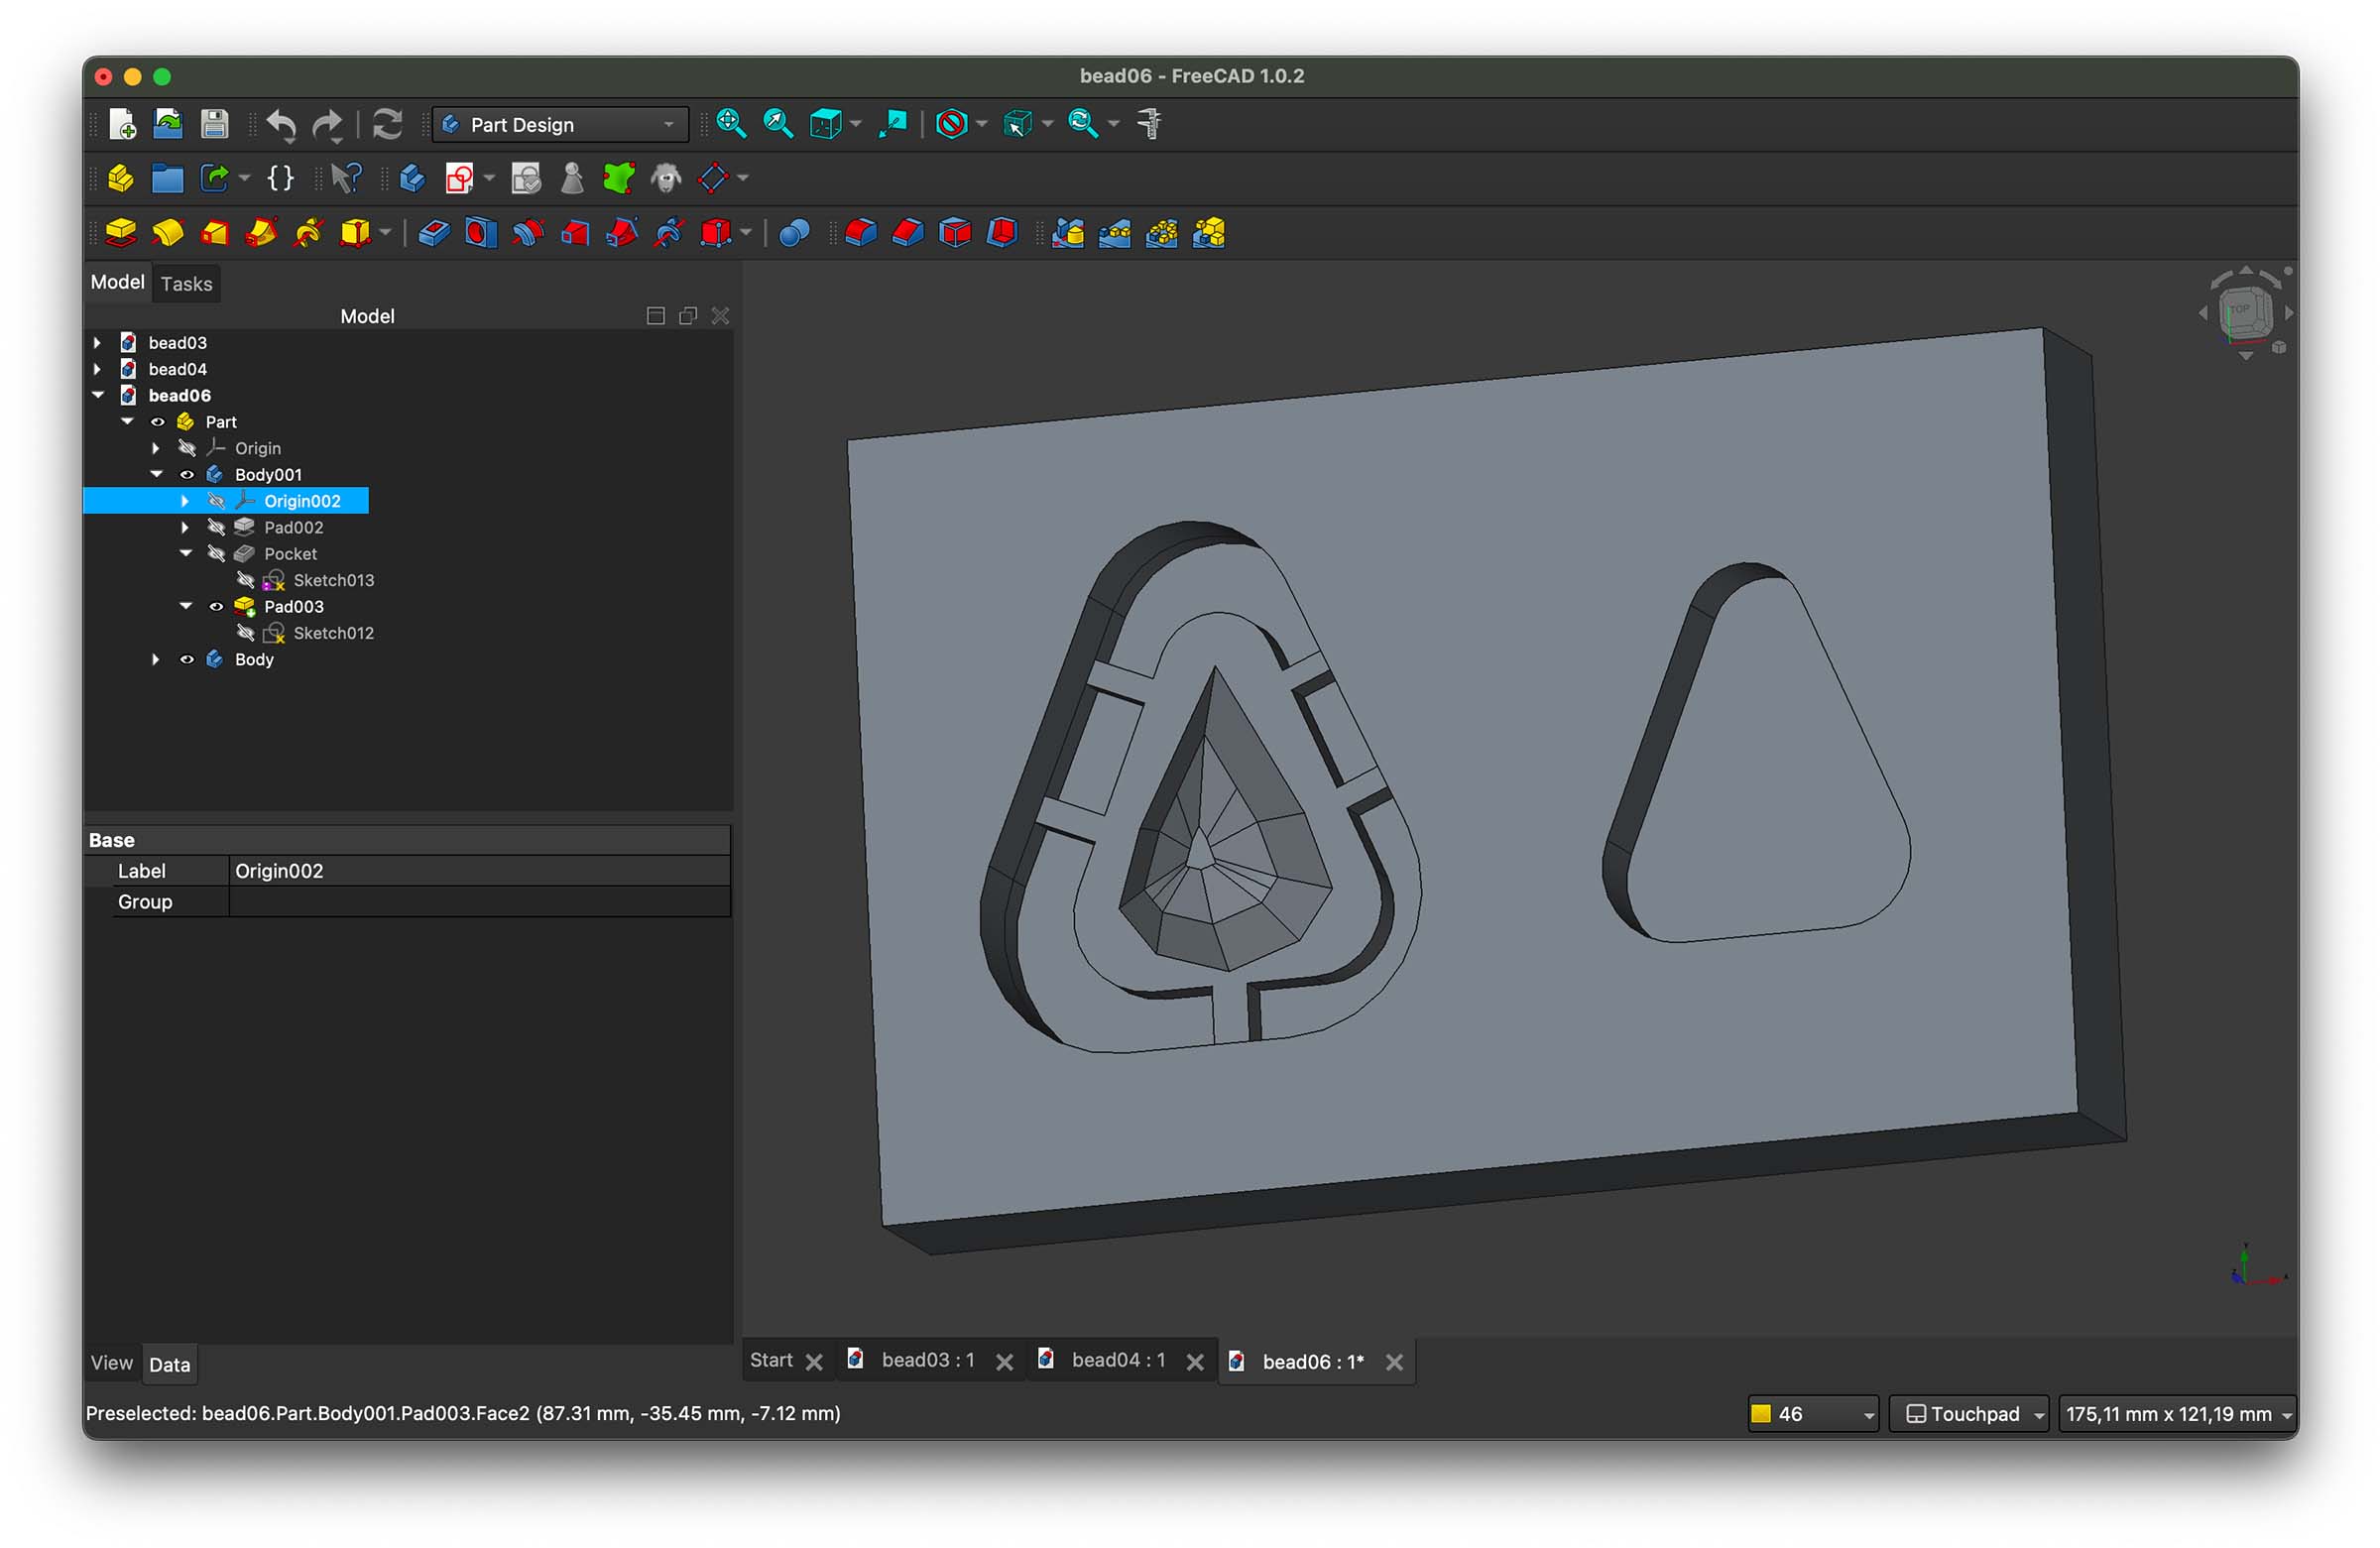
So my design features a simple, but small facetted pear shaped diamond. I was curious to see how well these facets would come out of the milling process. Since I read on the assignment page that it's acceptable to just make negative mold and cast a positive from it my first design is just that.
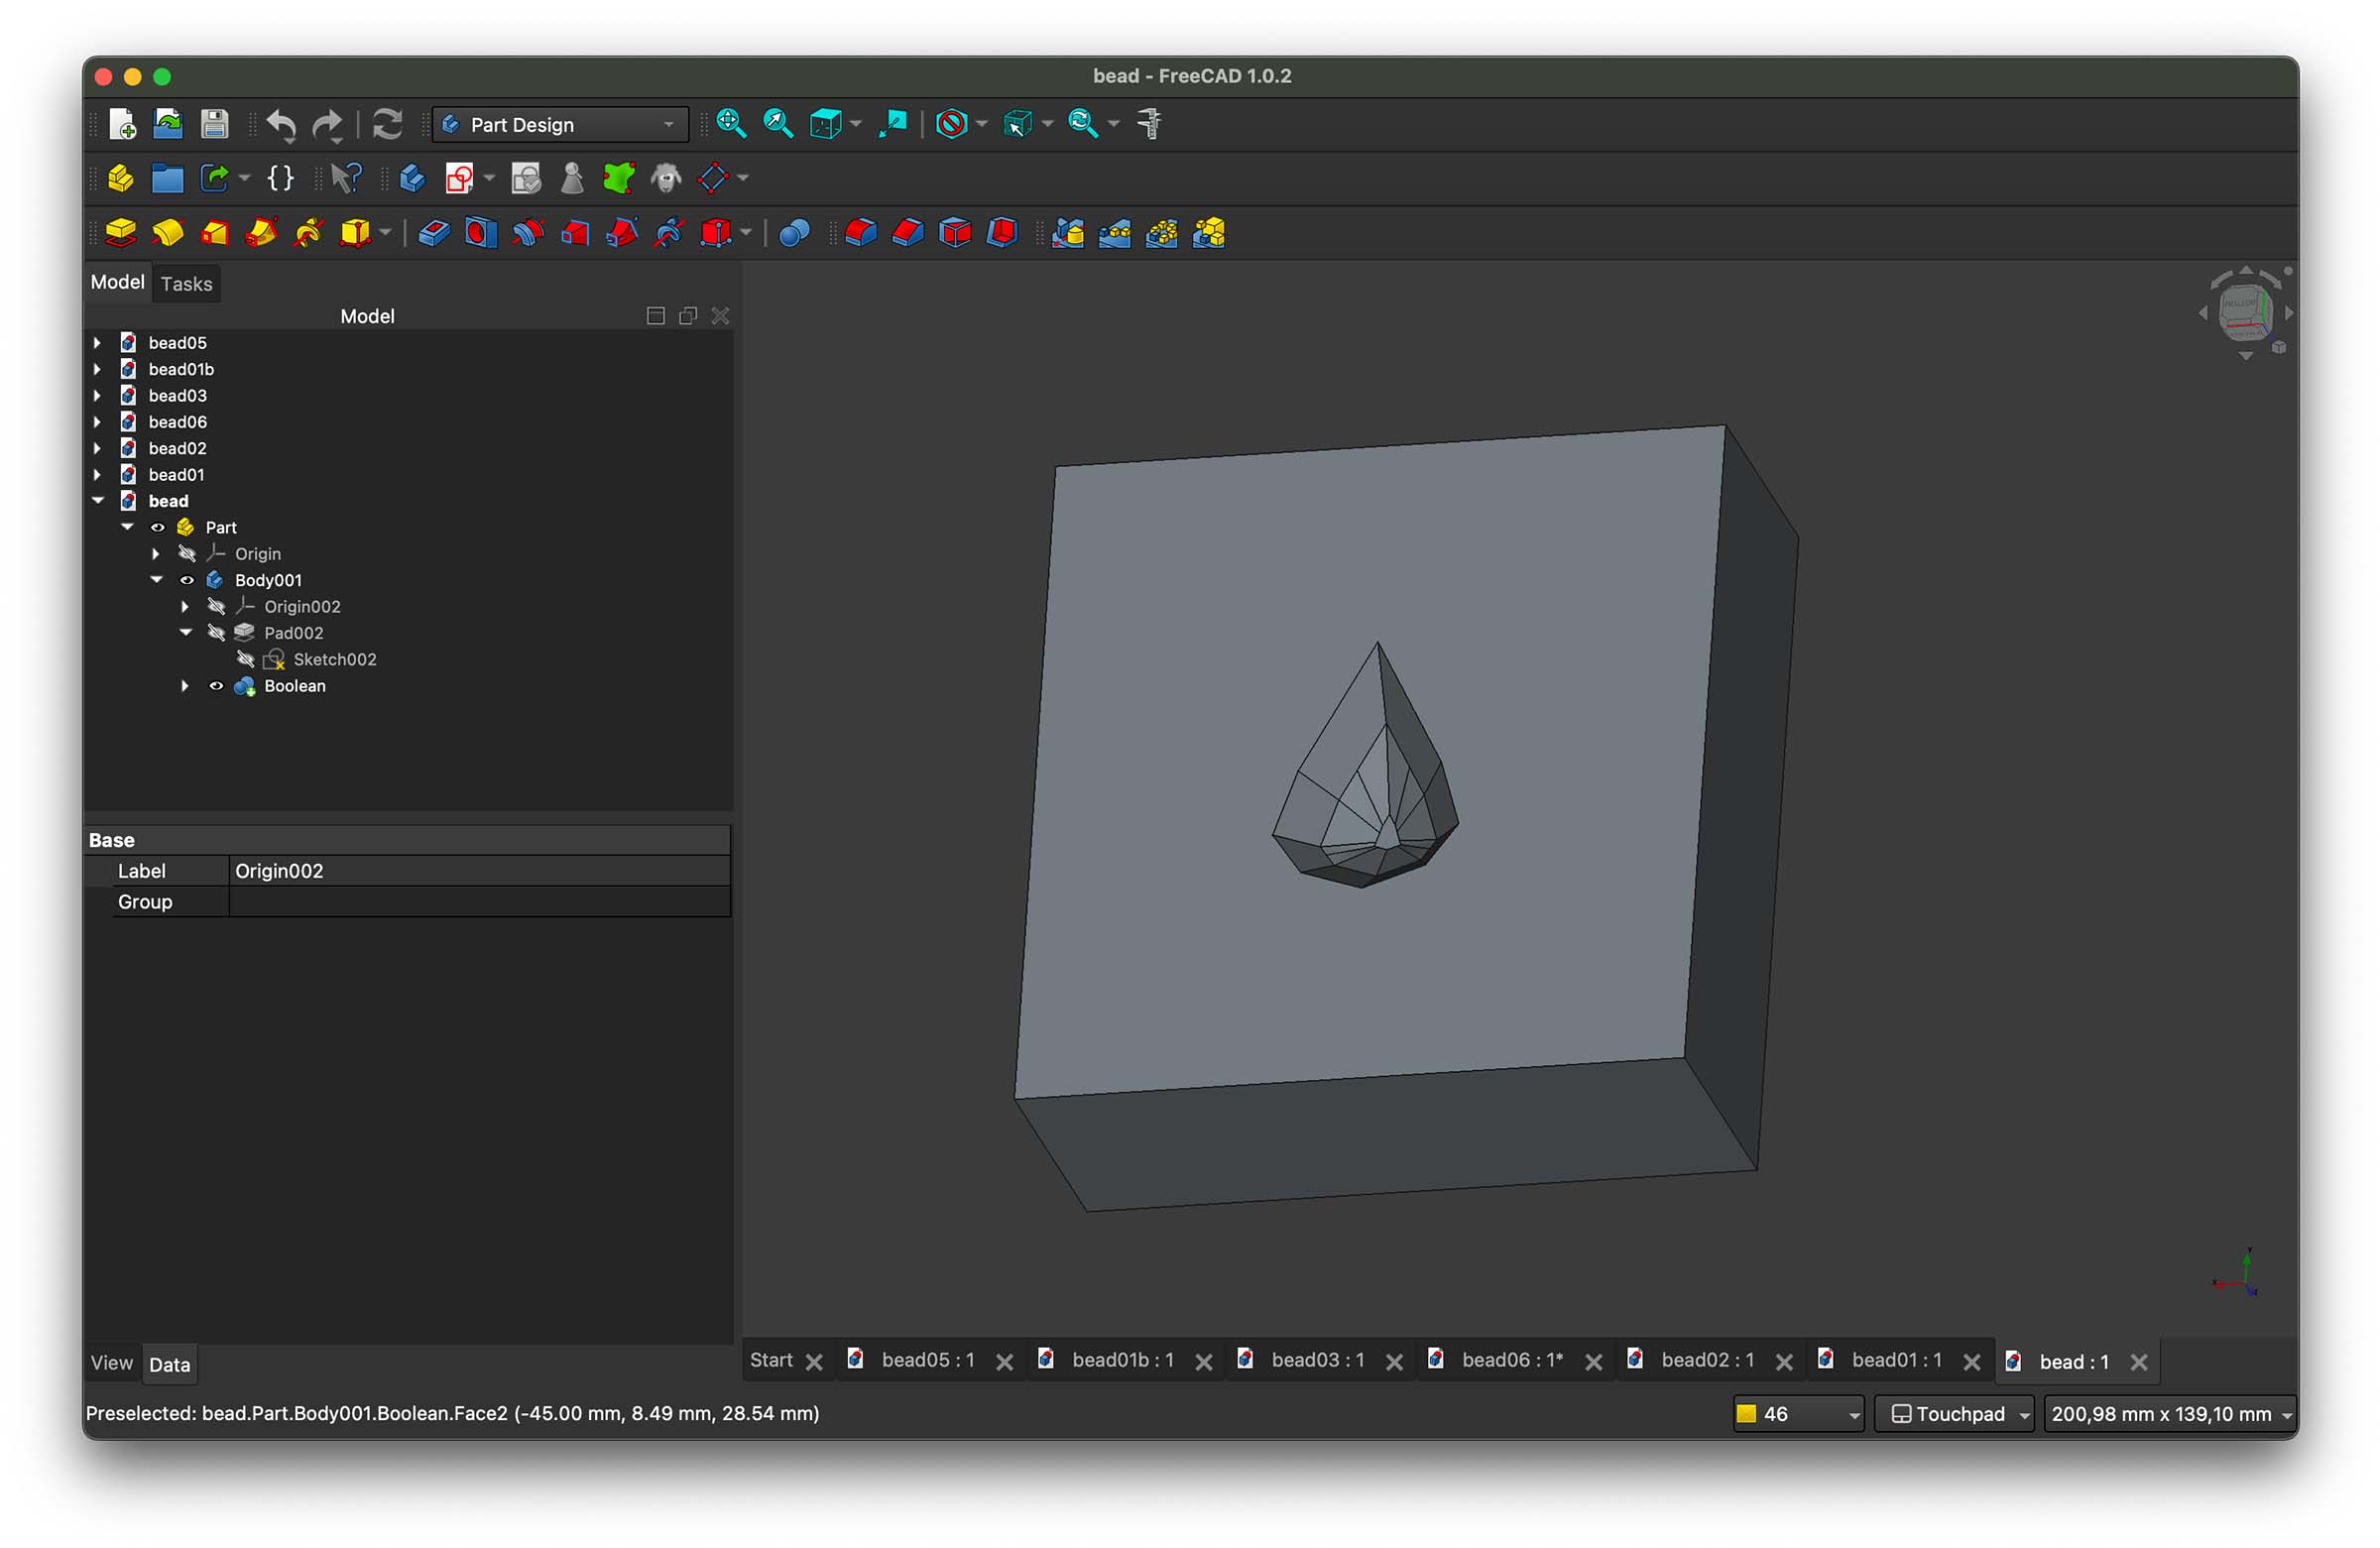
Henk, however, has always challenged us to go slightly beyond the requirement and really get a good understanding of the challenges involved in whatever technique we're learning. I know the whole positive-negative-positive design process can be a bit of mind boggling experience, so I figured Henk is going to challenge me to do more than just a negative mold this week. So I make a new 3D model, this time I also use the size of the block I'll be using to get an idea of scale.
I then have the idea to embed one of my LED pebble strings from week 10 into my cast, so I can see how well the light travels through the clearest materials we have at the lab, like the Sorta-Clear used in the group assignment. I figure I could leave some space for it in the mold, so it sits nice and flush at the back of the bead.
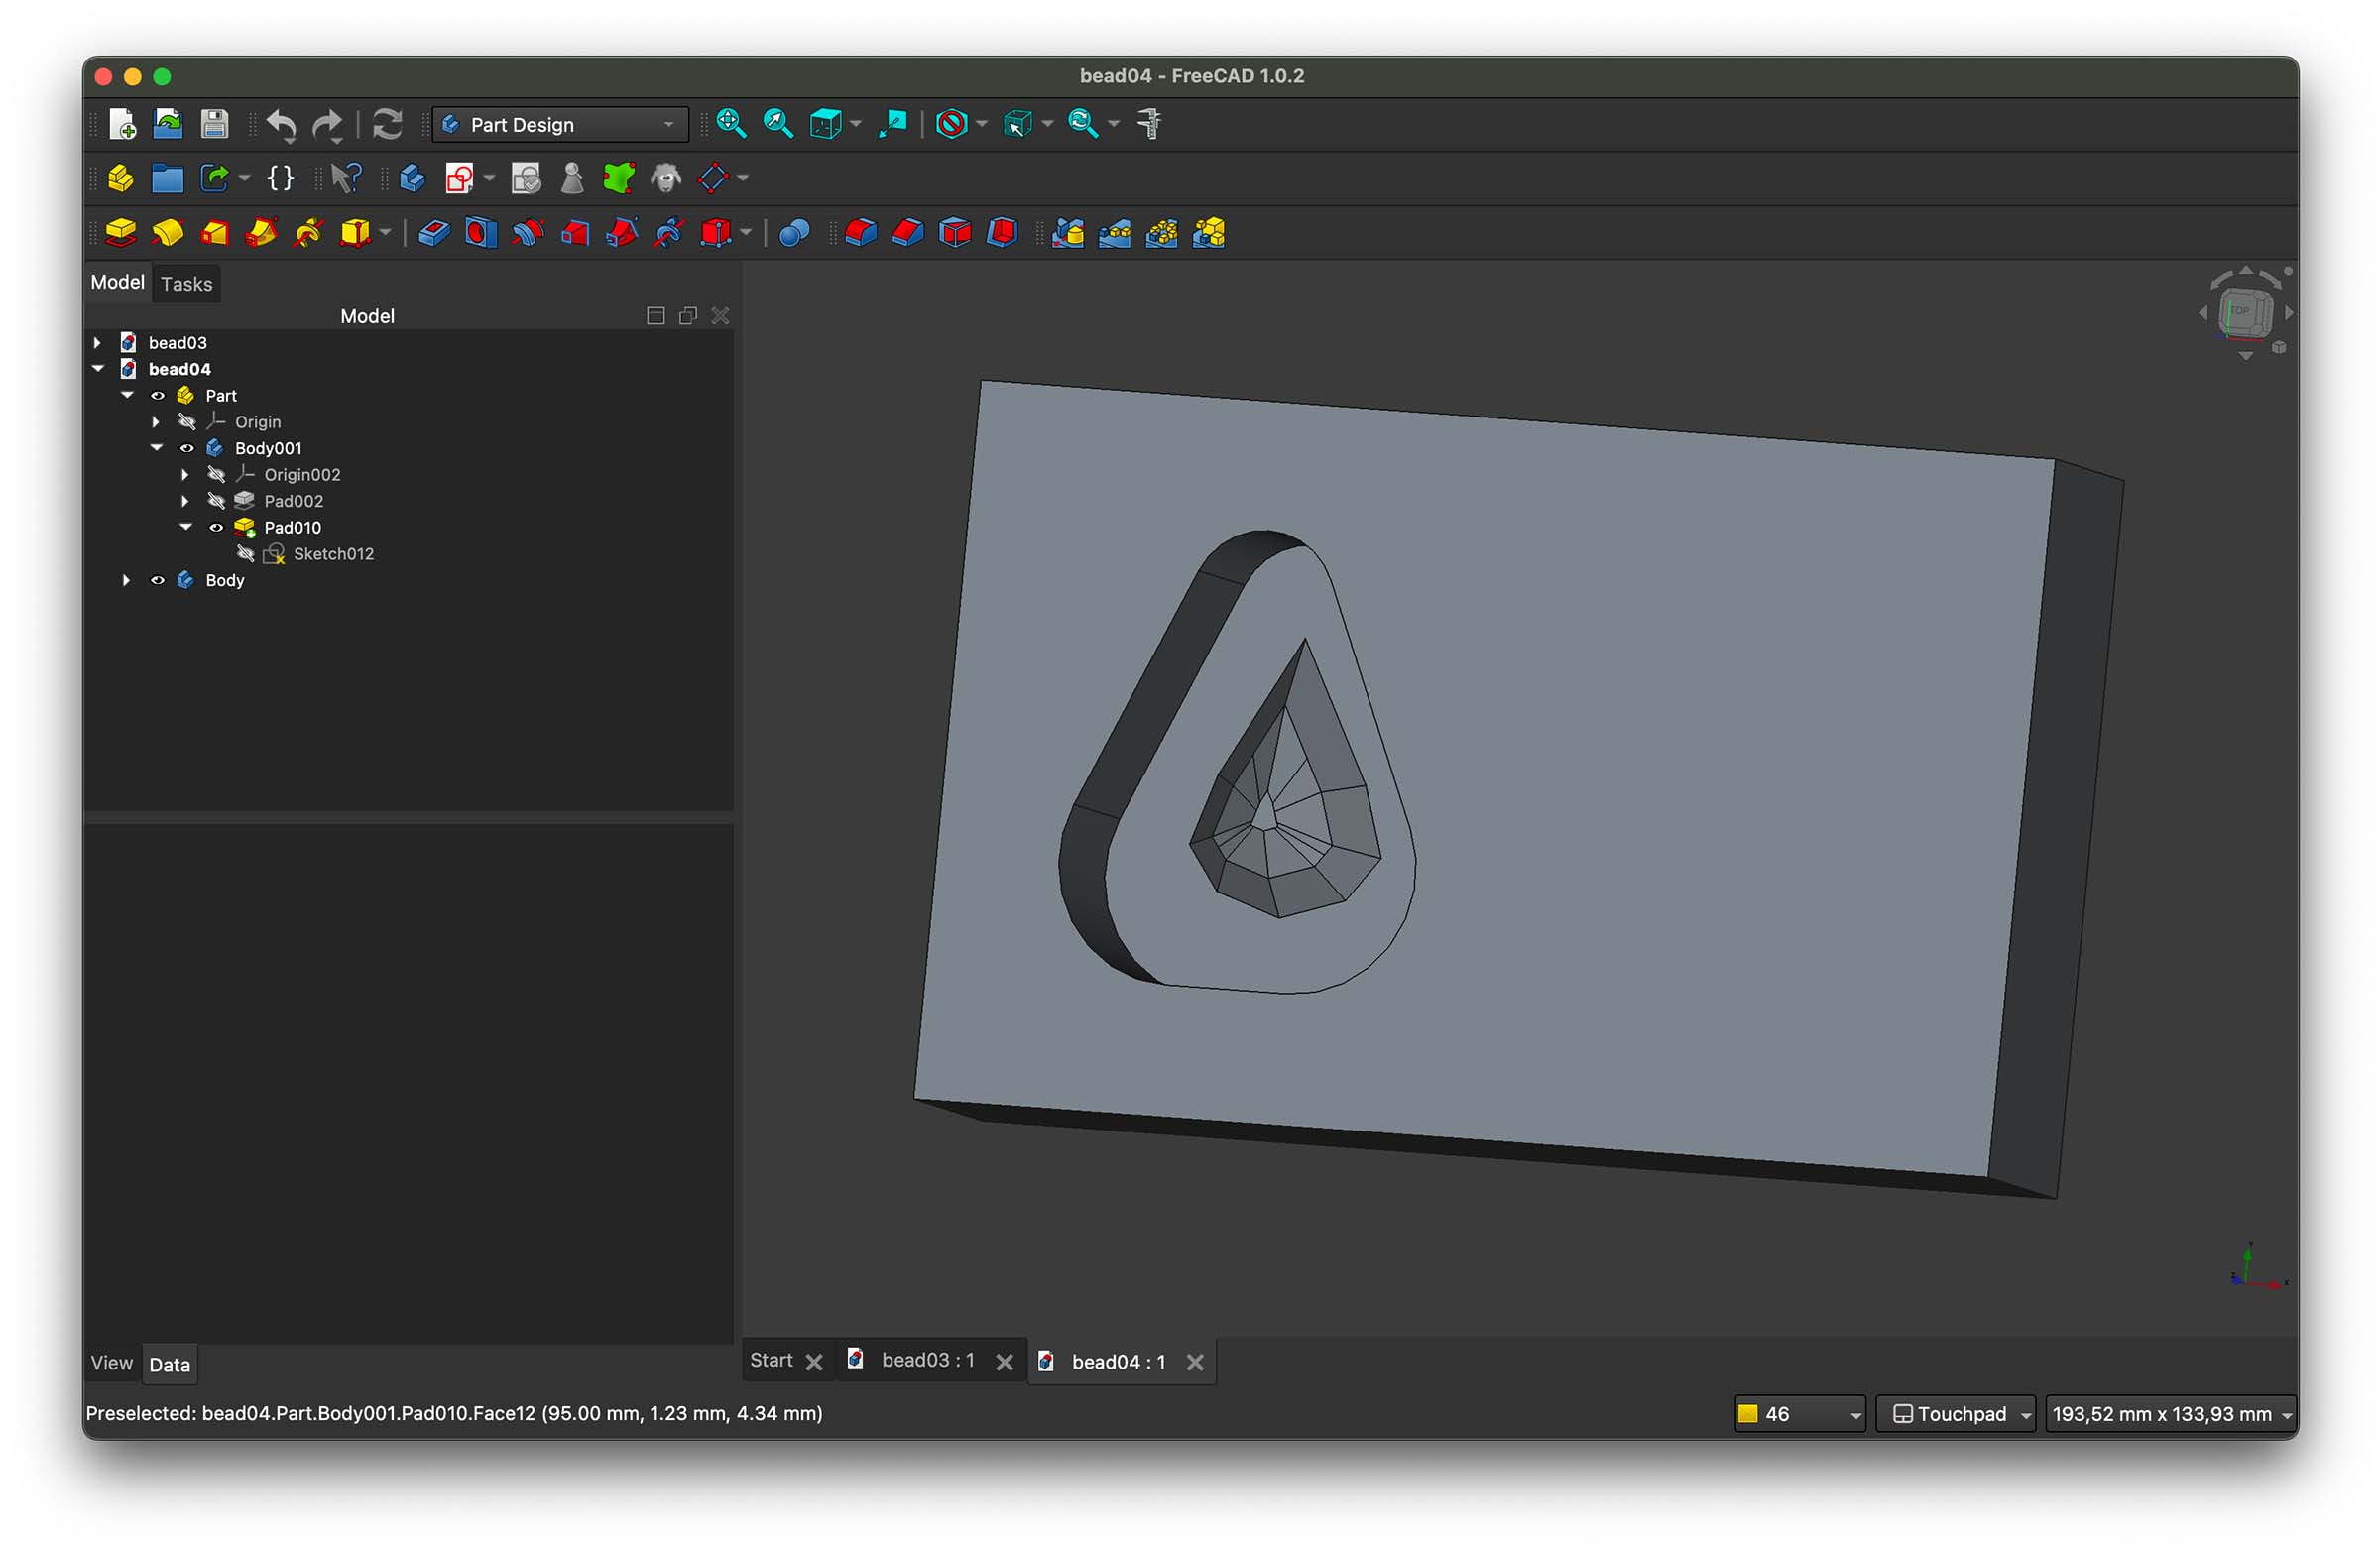
However, I'm running behind on documentation from previous weeks, still have my week 11 assignment to finish and I'm very tired from machine week, so I promised Henk to keep it simple this week. This doesn't feel simple, the embedded LED could mess with the curing process and I could end up having no result at all. I decide to scratch this idea and don't even mention it to Henk. What I do mention to Henk he's not too impressed by, fair enough neither am I. He suggests I should think more about how the material flows and challenge myself with a vent, pouring hole, anything. To prepare myself for this week I read Nadieh's documentation and here design also featured a triangular shape with a flat bottom, but she did make a two part mold. I decide to take hers as inspiration and add a lid and some channels for overflow material to flow through.
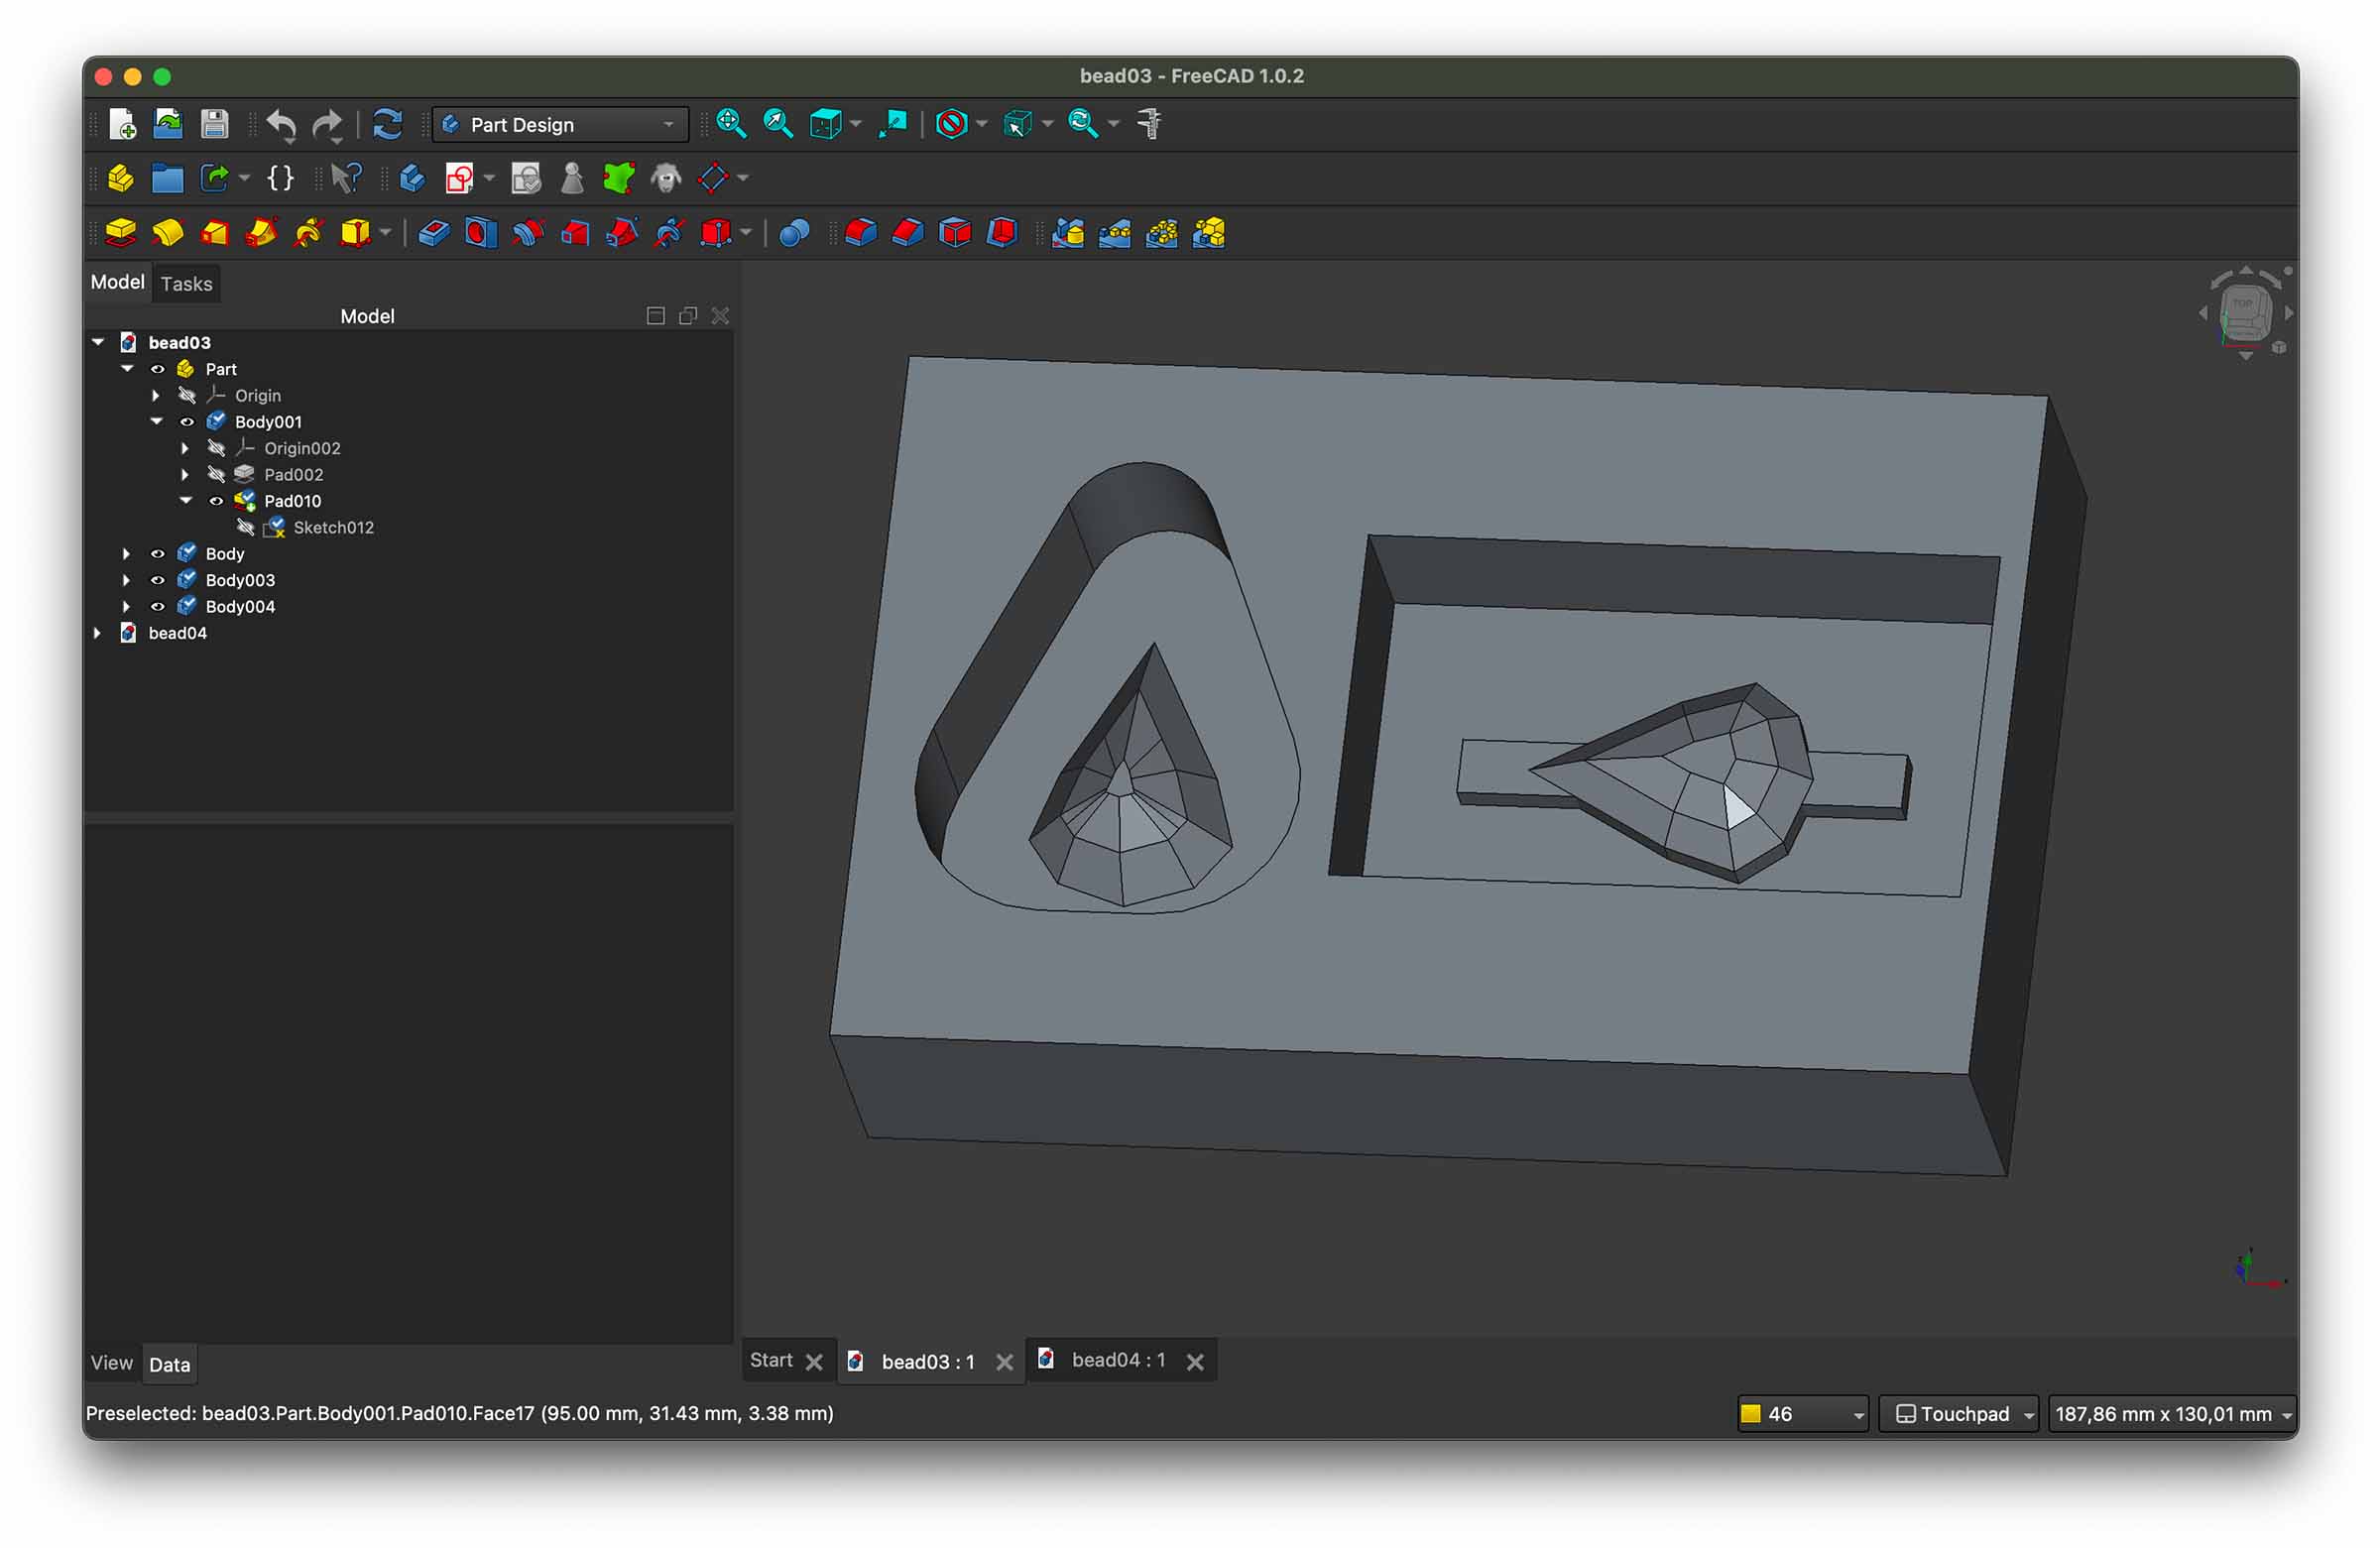
Pretty happy with the design I continue by setting up toolpaths for my model in vCarve like described above. I have some trouble positioning my model within the material, it keeps ending up on the bottom and milling loads of the top; this will be messy and takes a long time and simply it's unnecessary. Henk shows me a hidden feature after loading in your model: go back to your material settings and you can adjust the model position within the material.
On my first try I put the block in the wrong direction, luckily I quickly notice and no harm is done yet. Henk does notice the first milling is a bit deep and decides to lower the pass depth of the roughing toolpath. These are the settings I end up using:
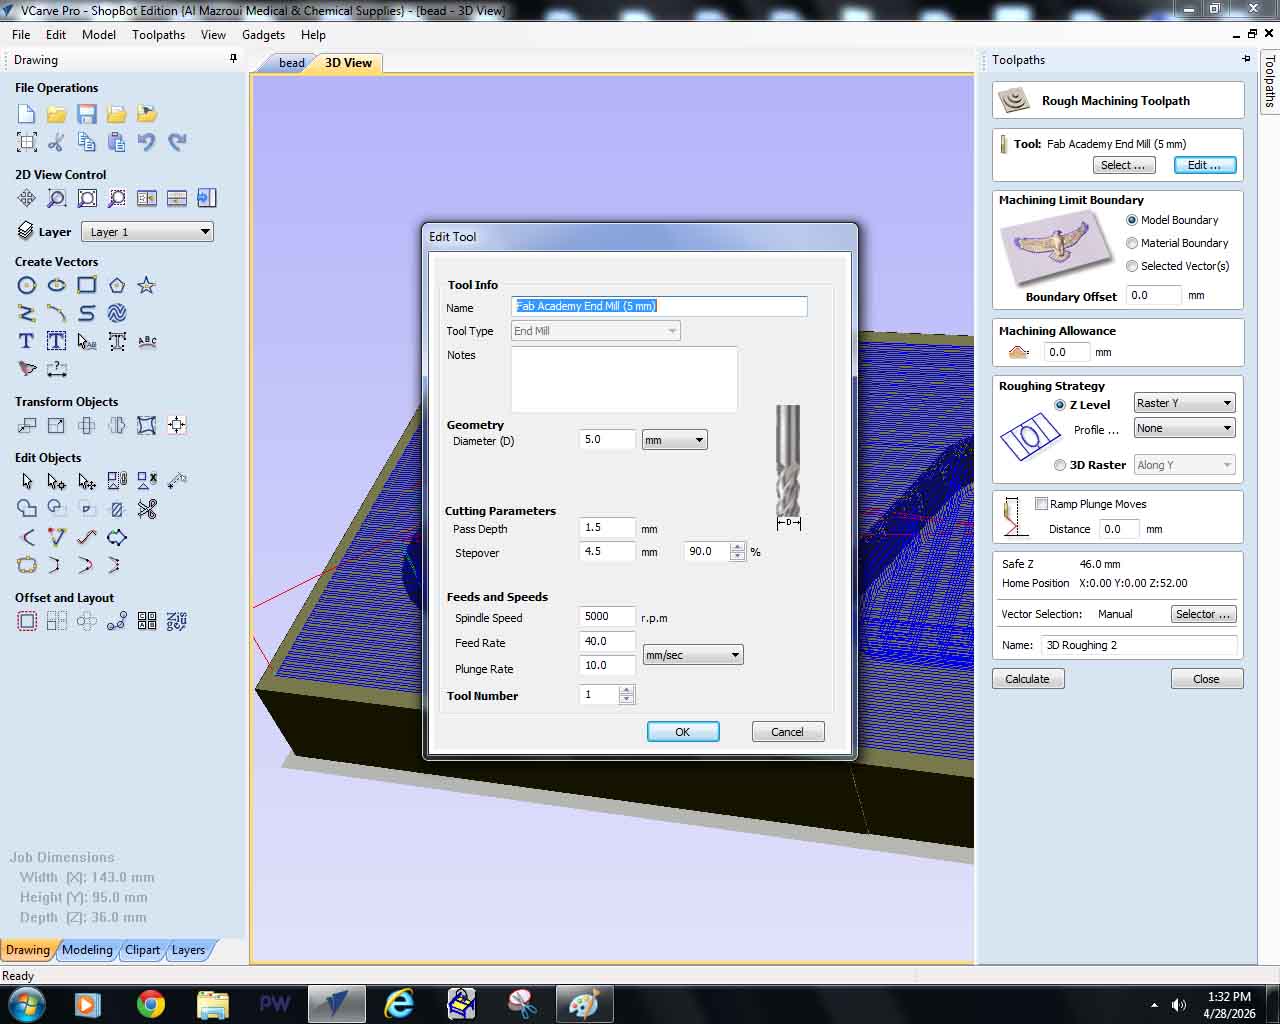

With this milling bit I think the end result is always going to be a bit rough, but I'm not unhappy when the milling is done. You can still see the roughing toolpath in the wrong direction at the top.
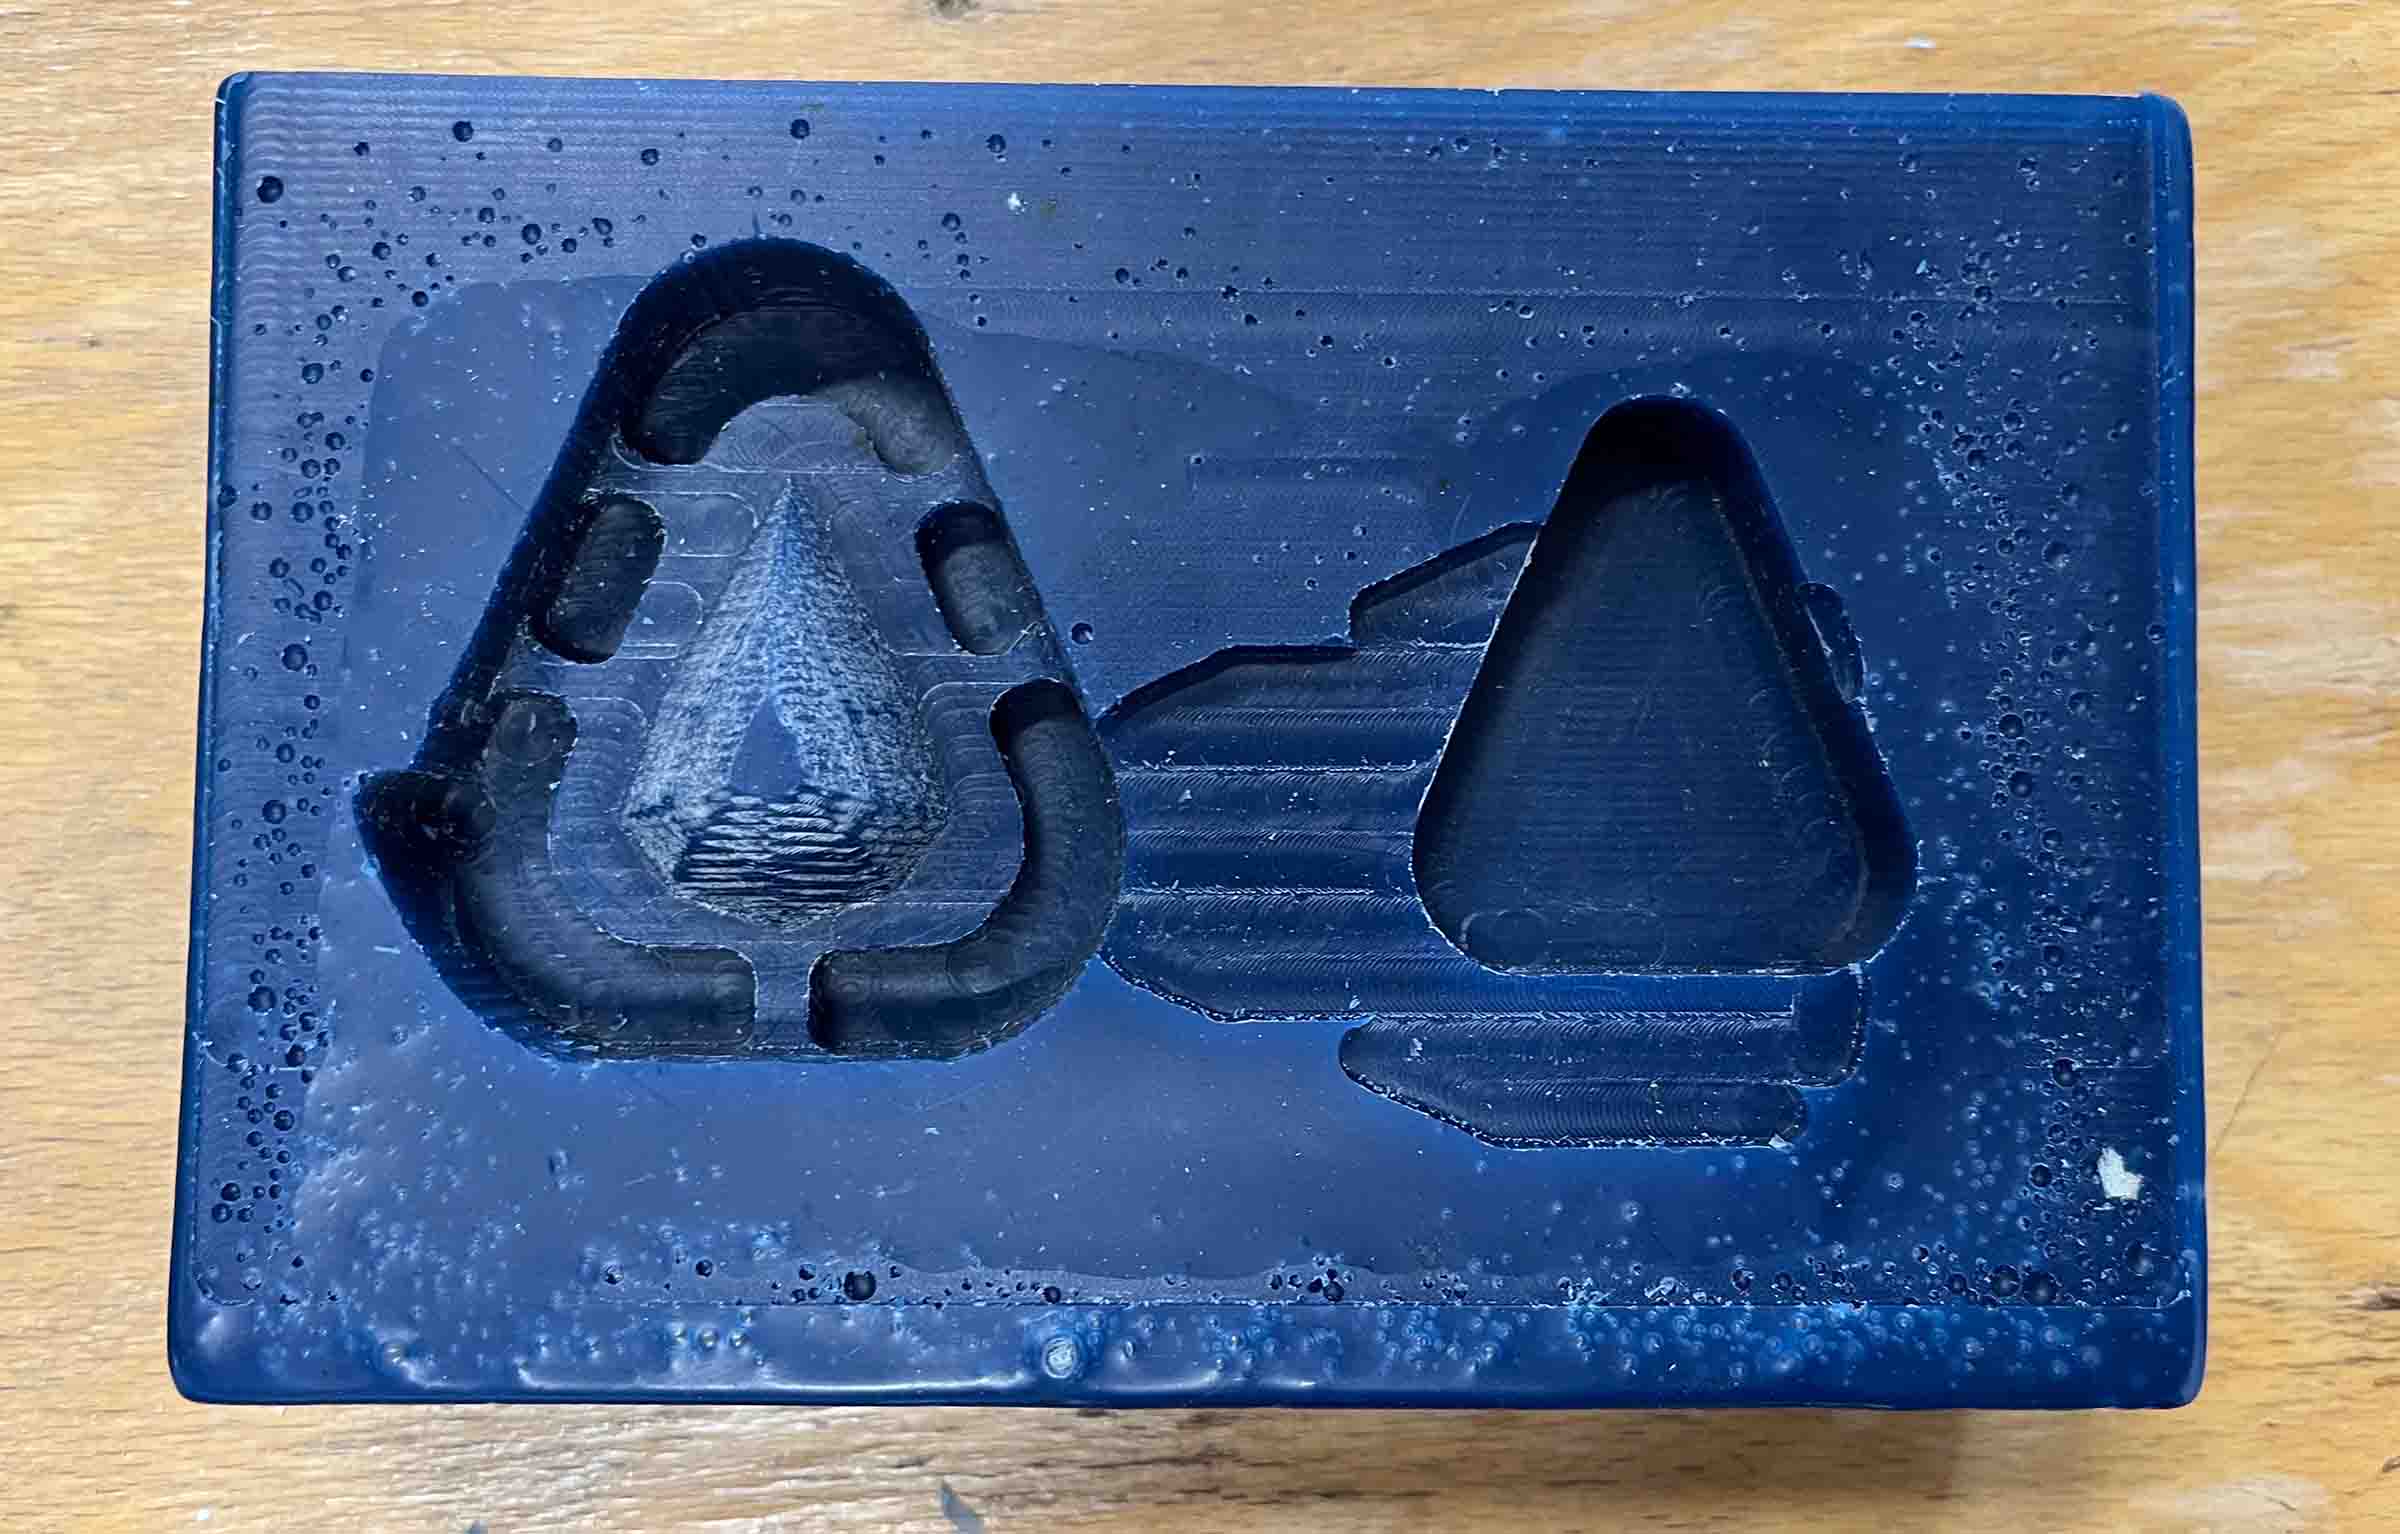
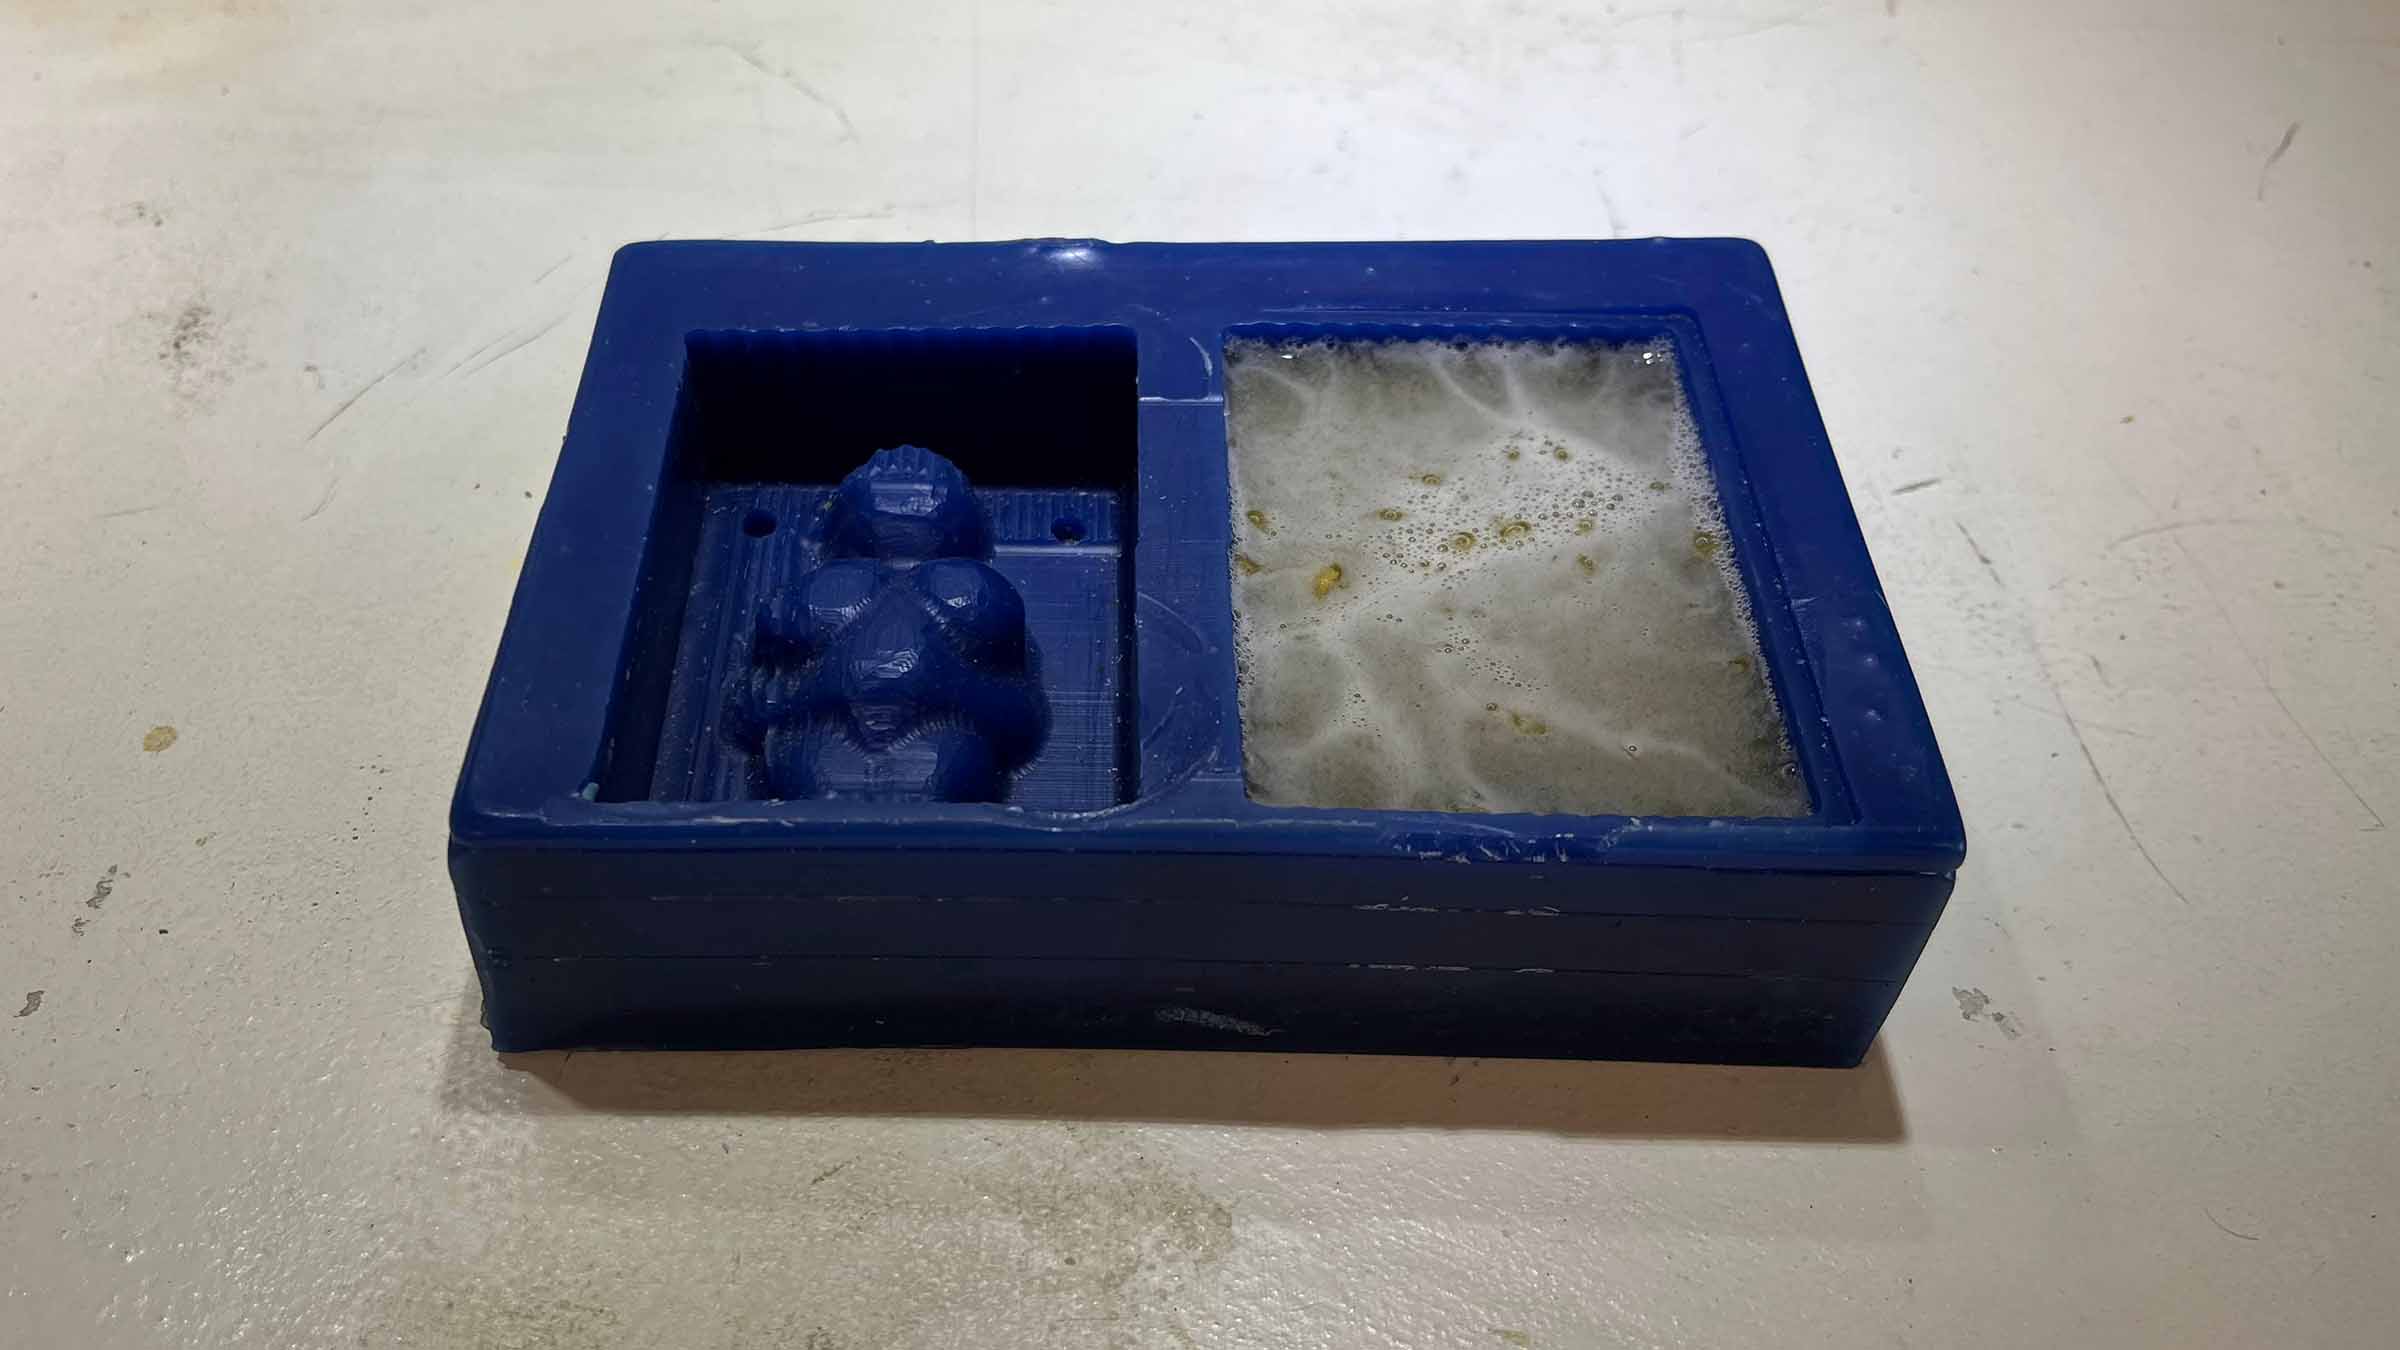
I sand down the bead to minimize the toolpath traces in the mold and final cast and use the bio-gelatine we also used in the group assignment to cast my mold.
After a few days I'm back at the Waag and am surprised by how much the gelatine has shrunk, seems like the water evaporated.
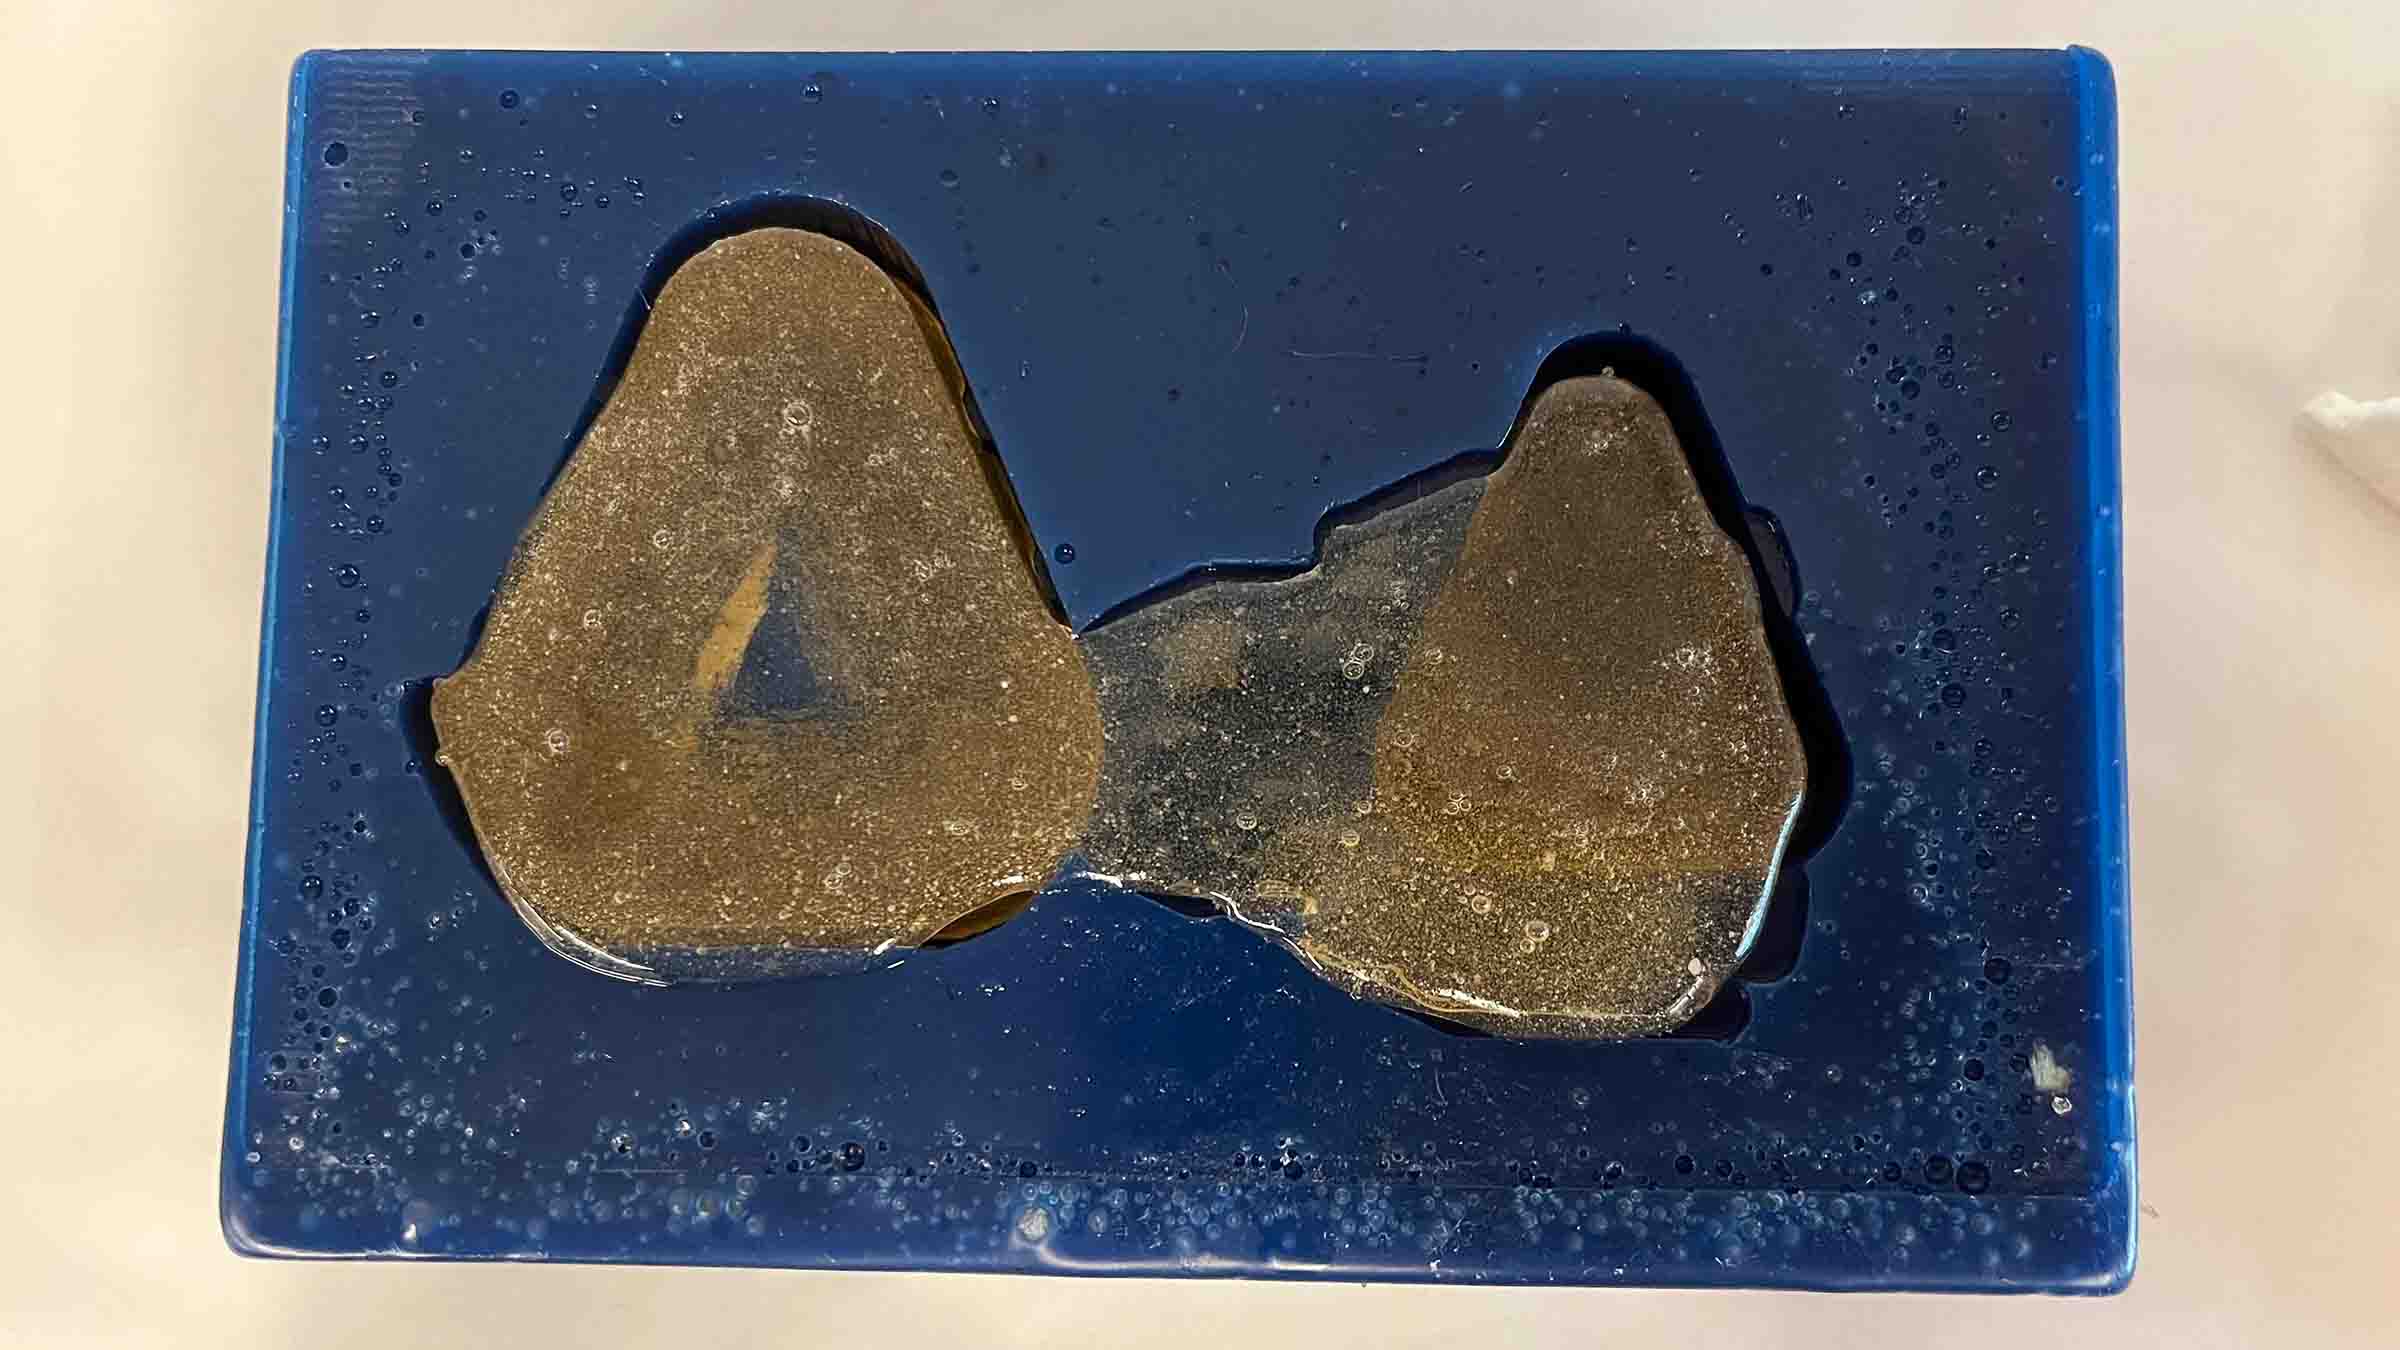
The mold still comes out nicely. The release agent (sunflower oil) has taken on some of the blue color from the wax but is easily wiped off. I use a pair of scissors to separate the pieces and clean the edges.
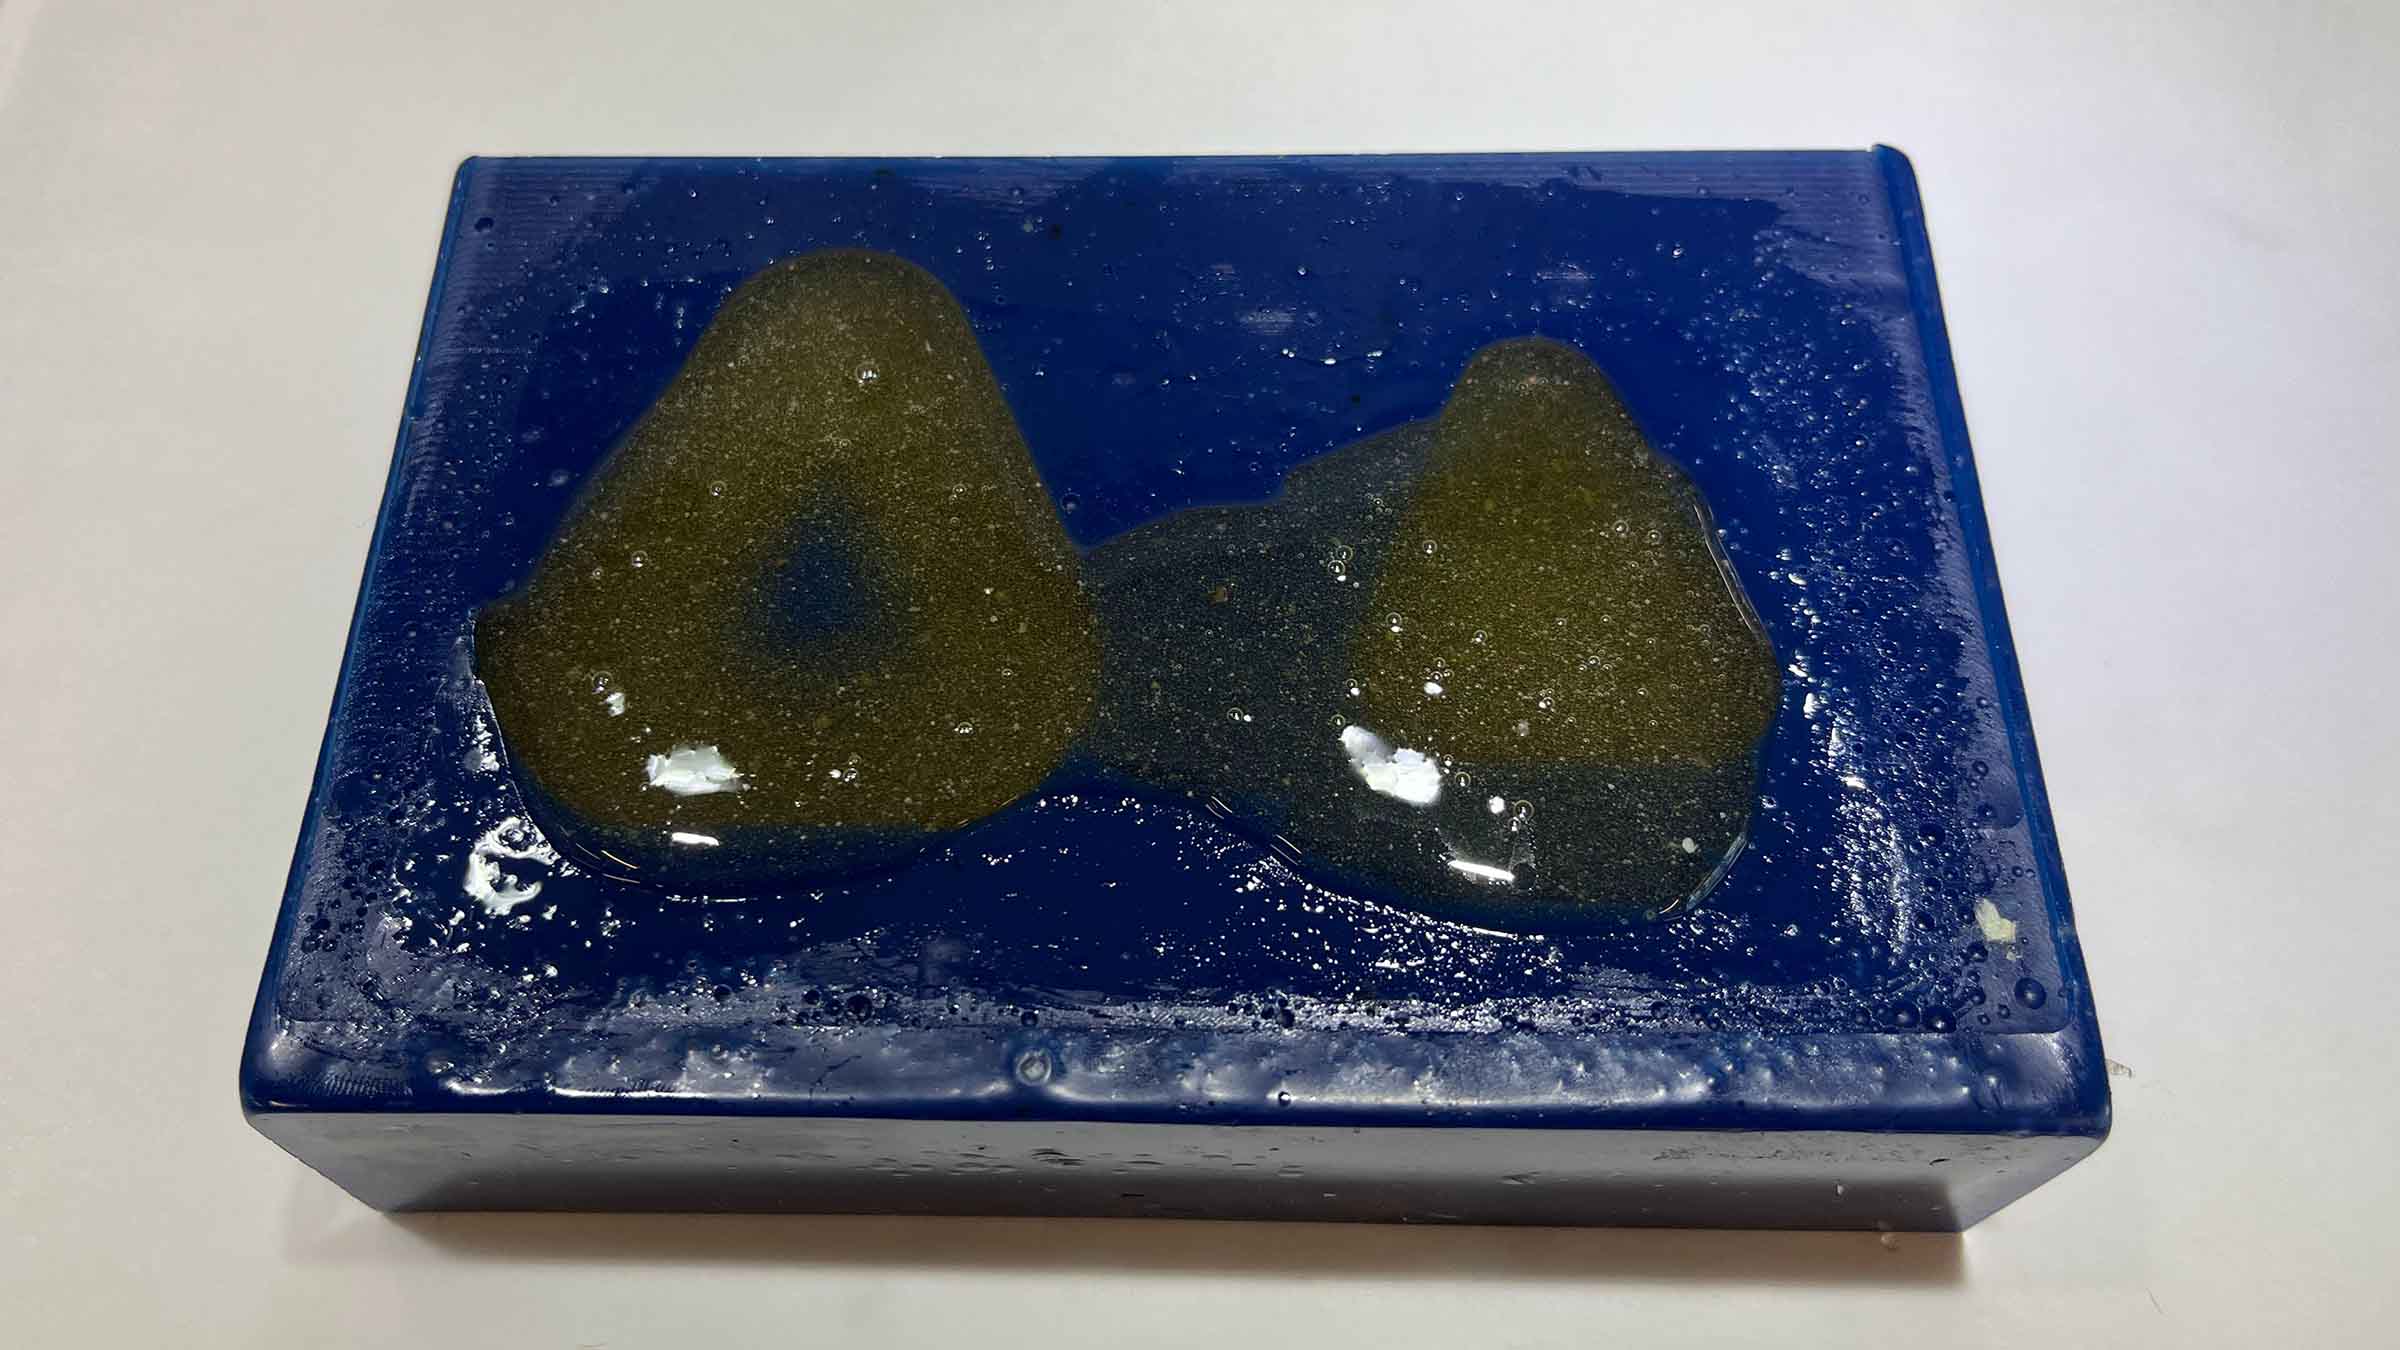
Then I fill the mold with the Sorta-Clear 18 we also used in the group assignment and place the lid. I also pour Sorta-Clear into the wax model so I can compare the amount of shrinkage later.
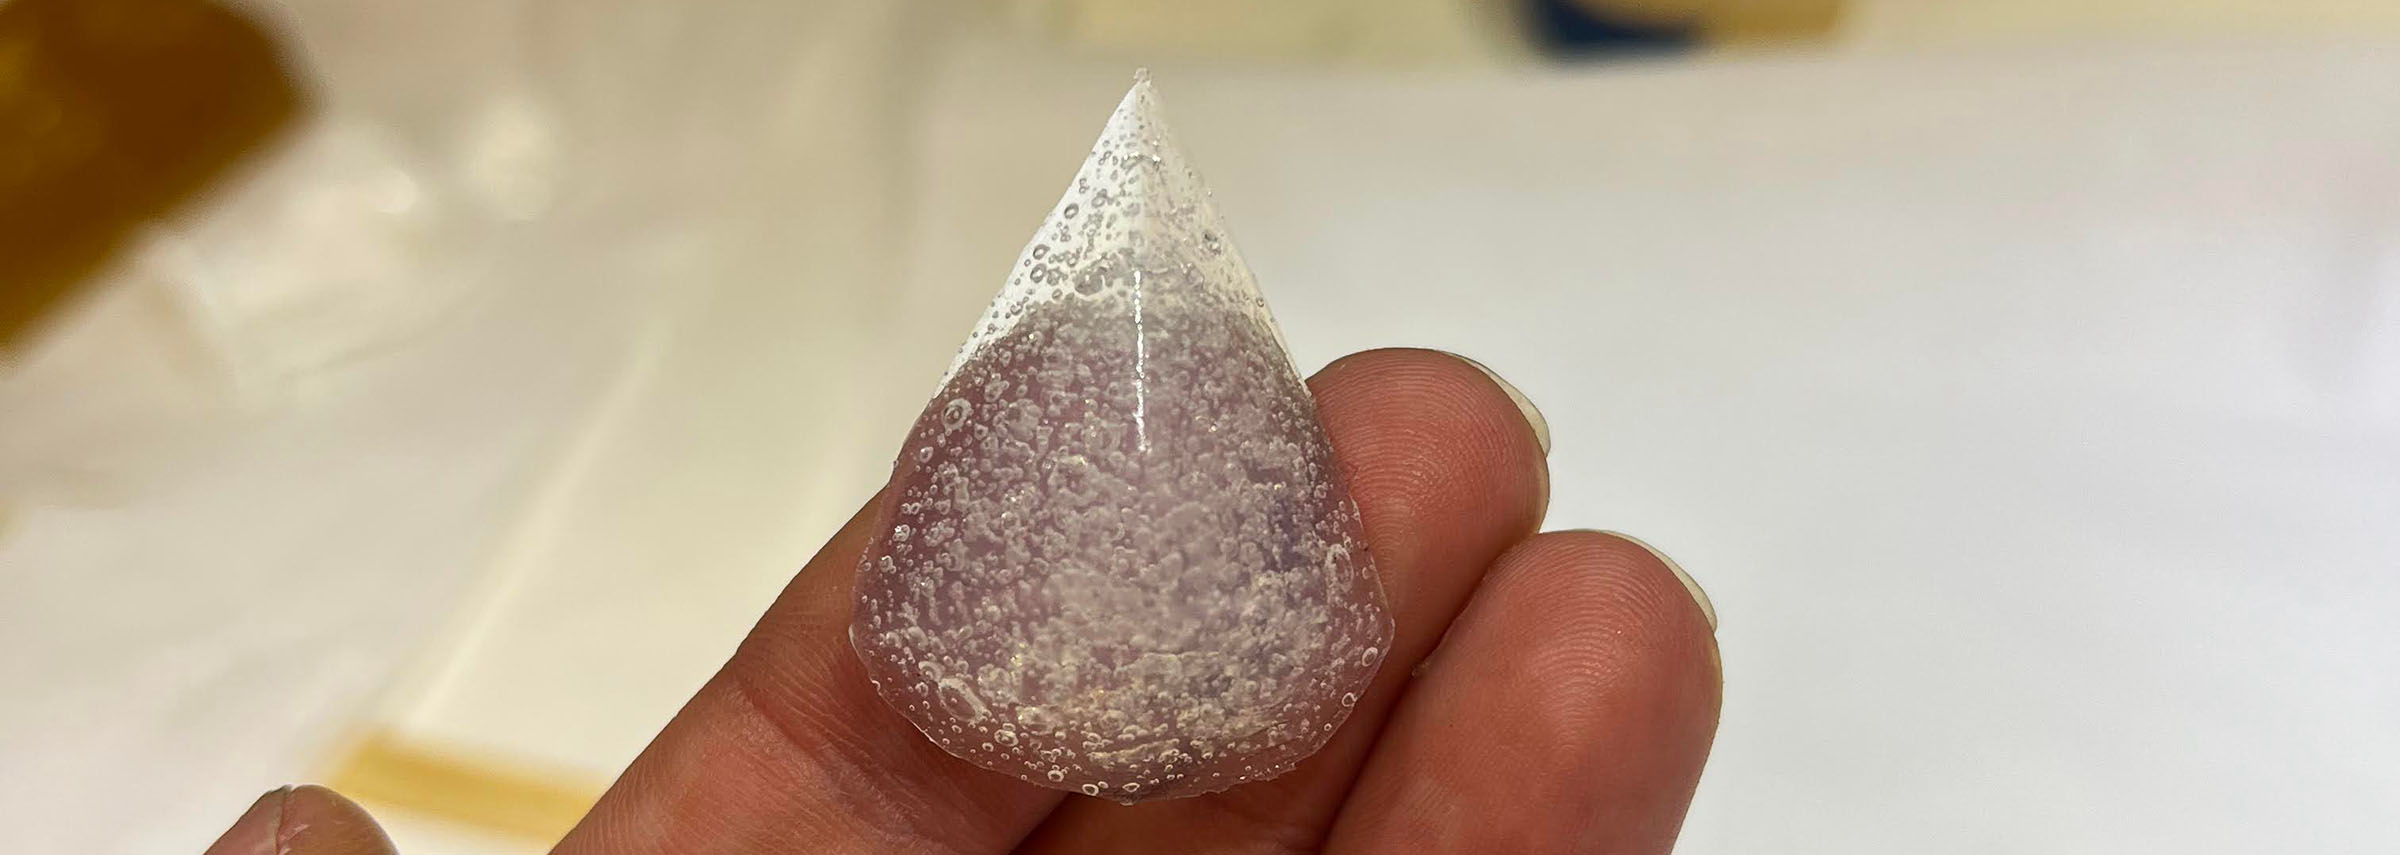
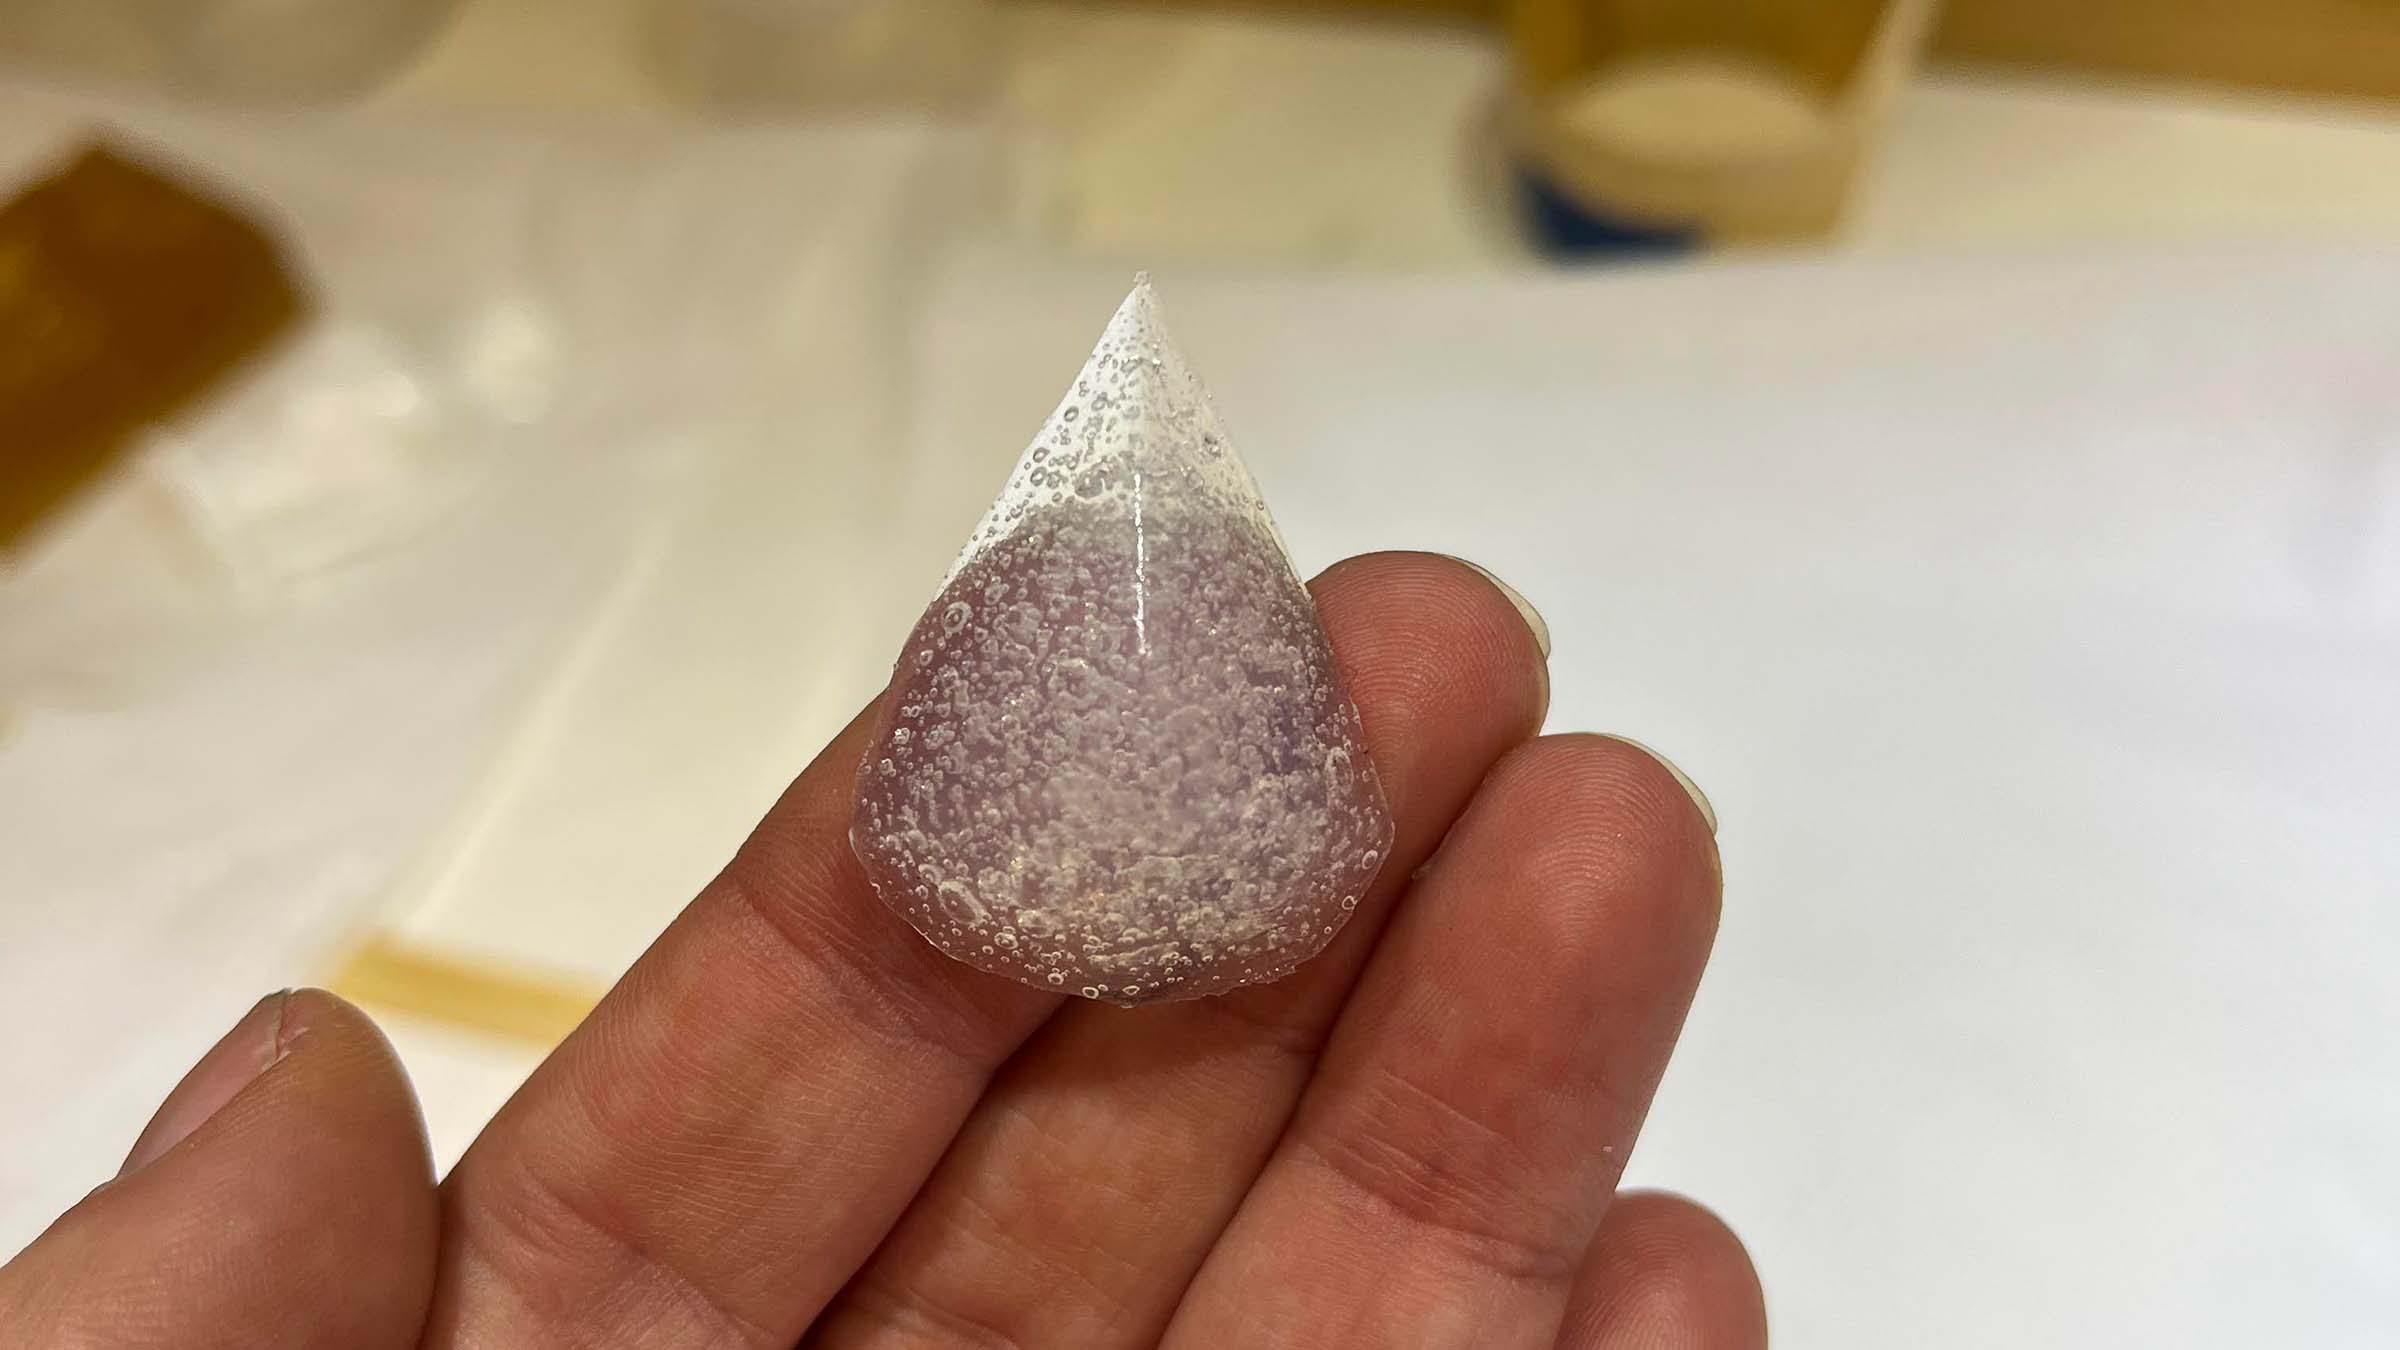
A few days later the Sorta-Clear is cured and comes out nicely. You can still see the traces a bit of the toolpath, but I'm not unhappy with the result.
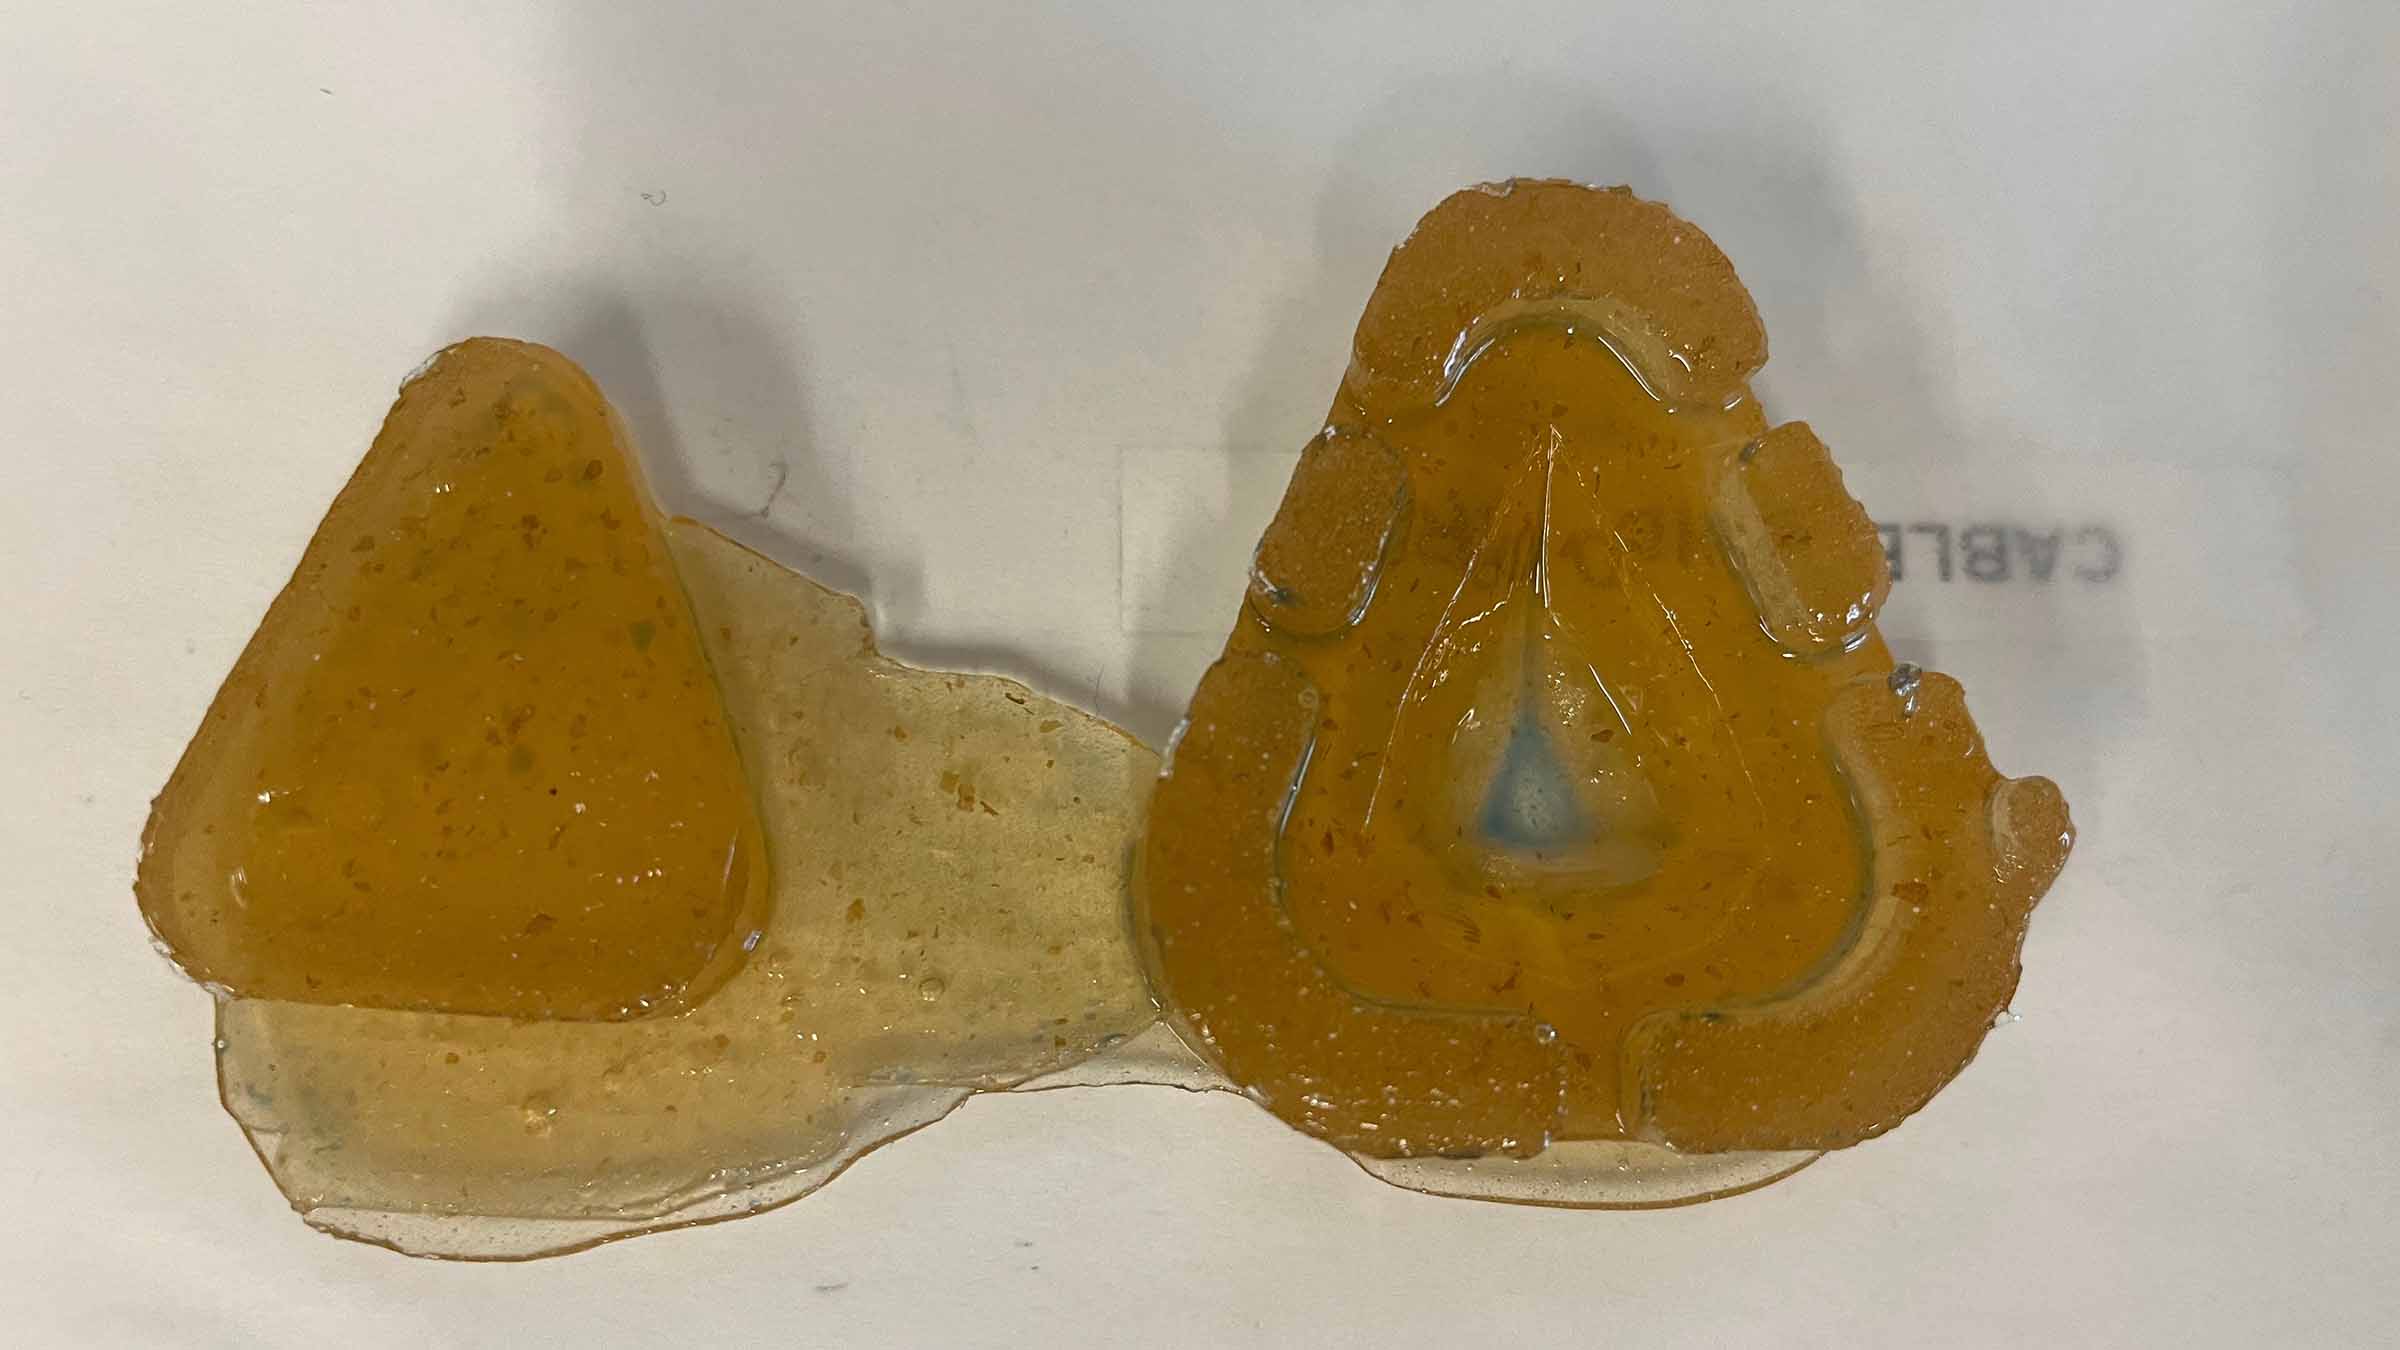
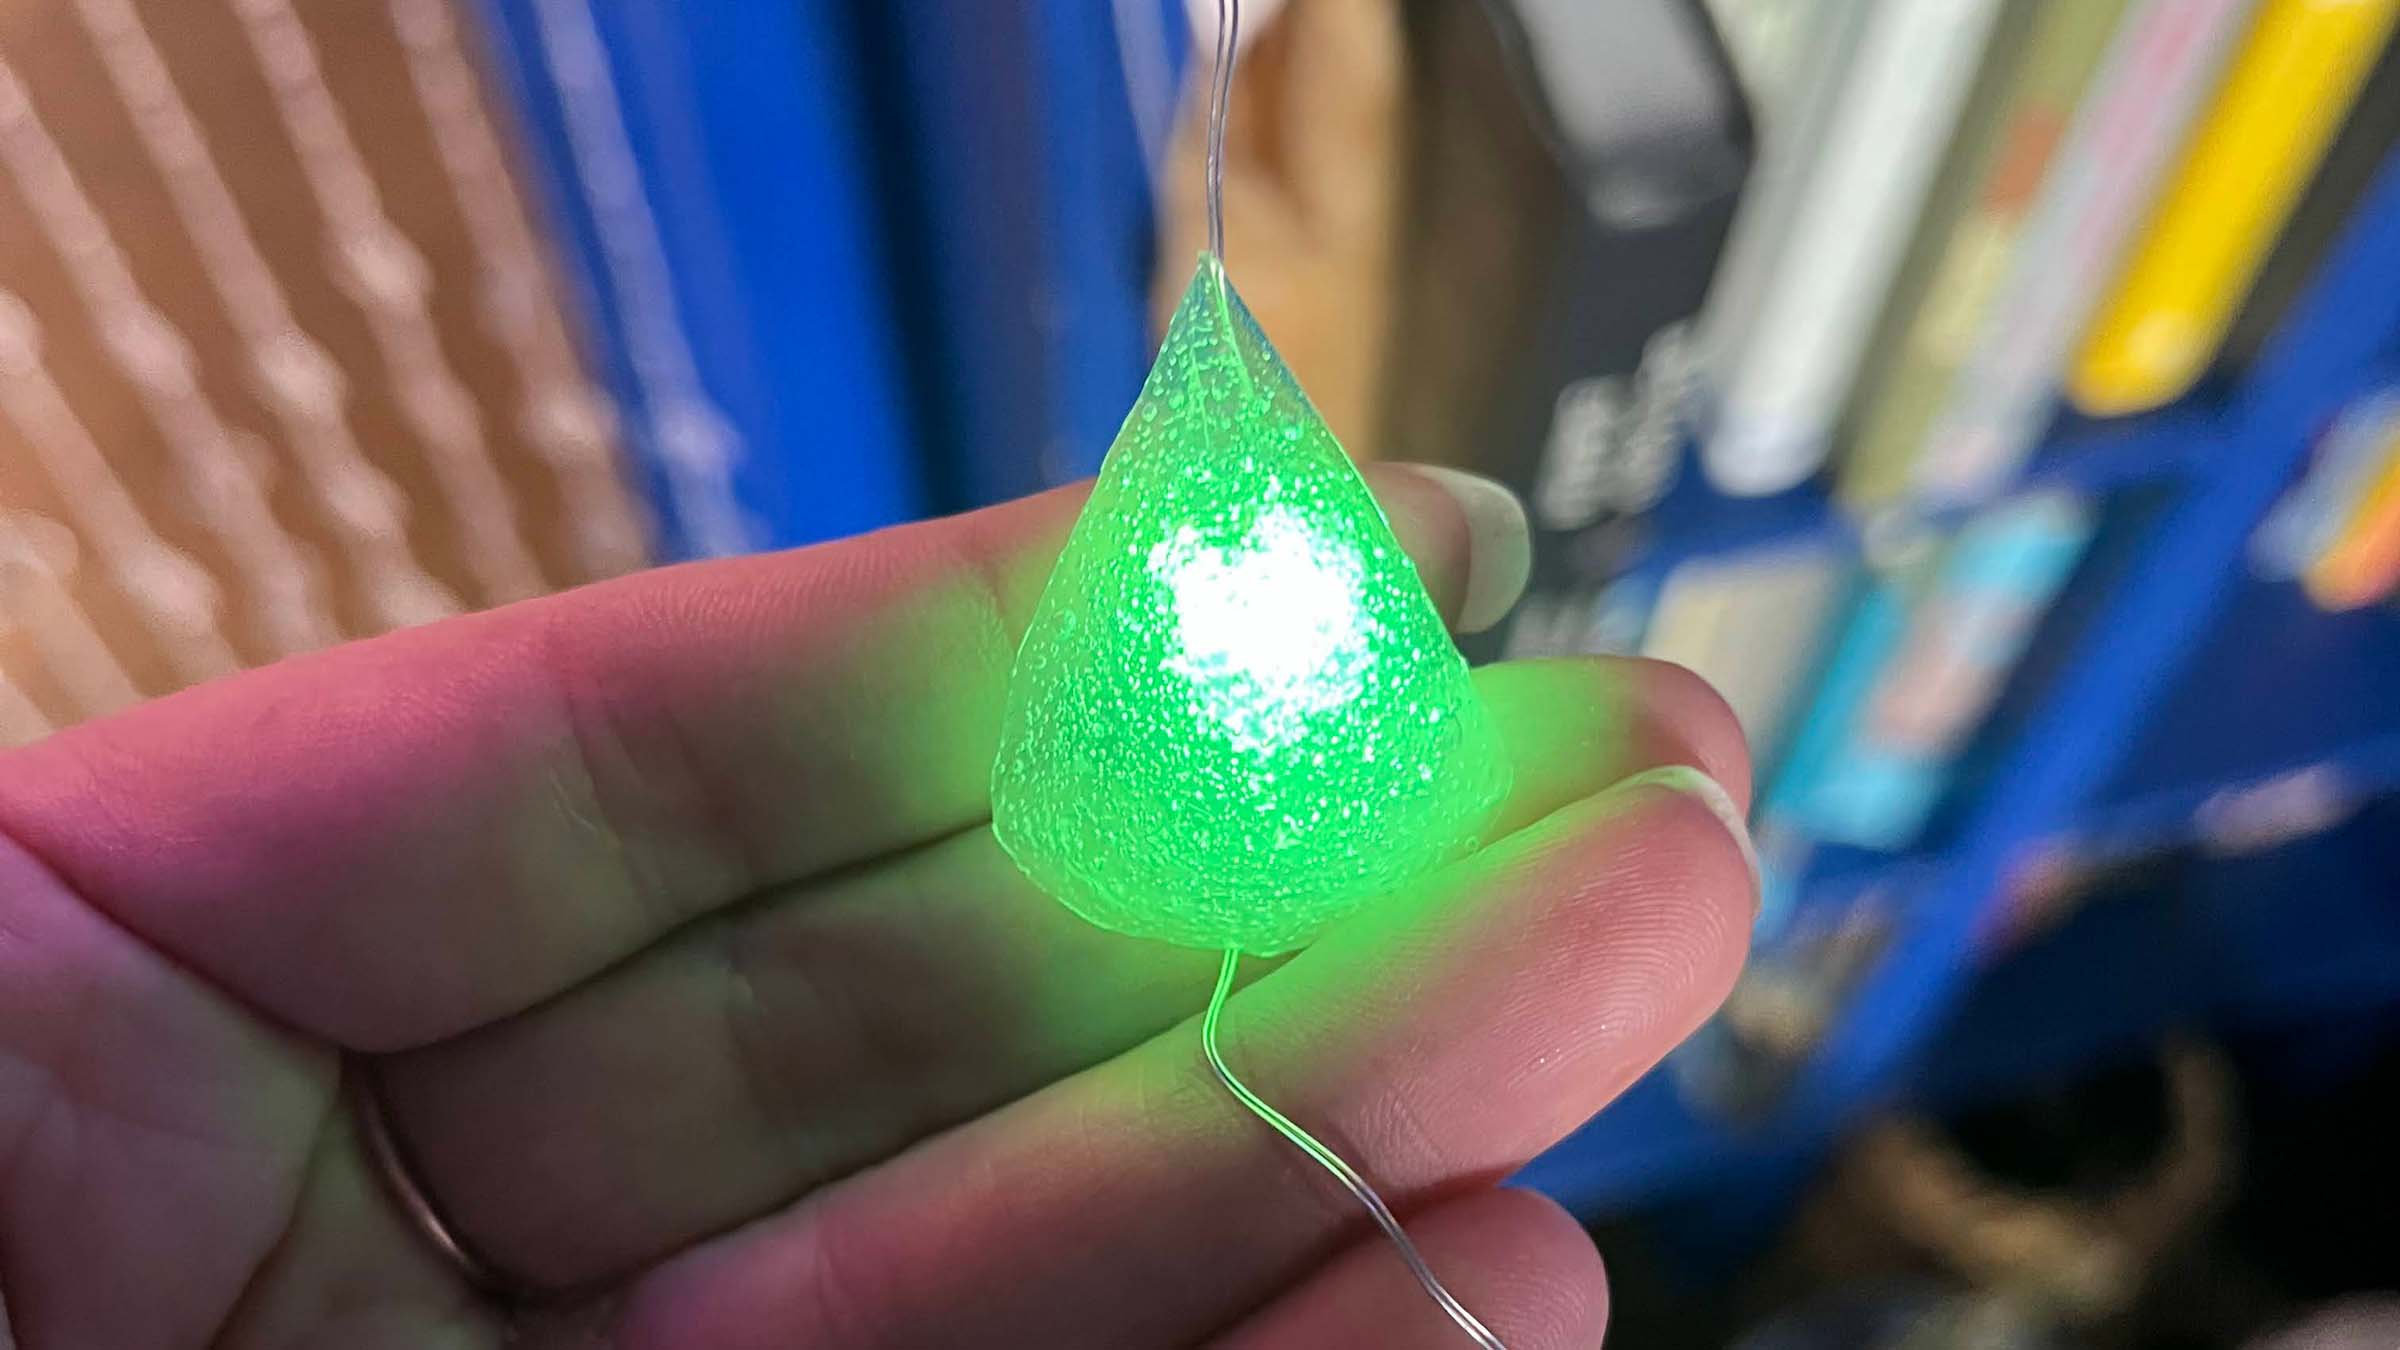
Again I use scissors cut off the off cuts.You can see there's a lot of bubbles in the cast, these formed naturally when mixing the two components, since I'm interested in light deflection I decided to leave em in during casting as this makes for a more interesting pattern than just a clear transparent bead with a light in the middle.
I also put a little LED behind it to see how this material would work for my final project. Although I like the effect I think I can create something similar with 3D printing which would be less laborious for 200 beads.
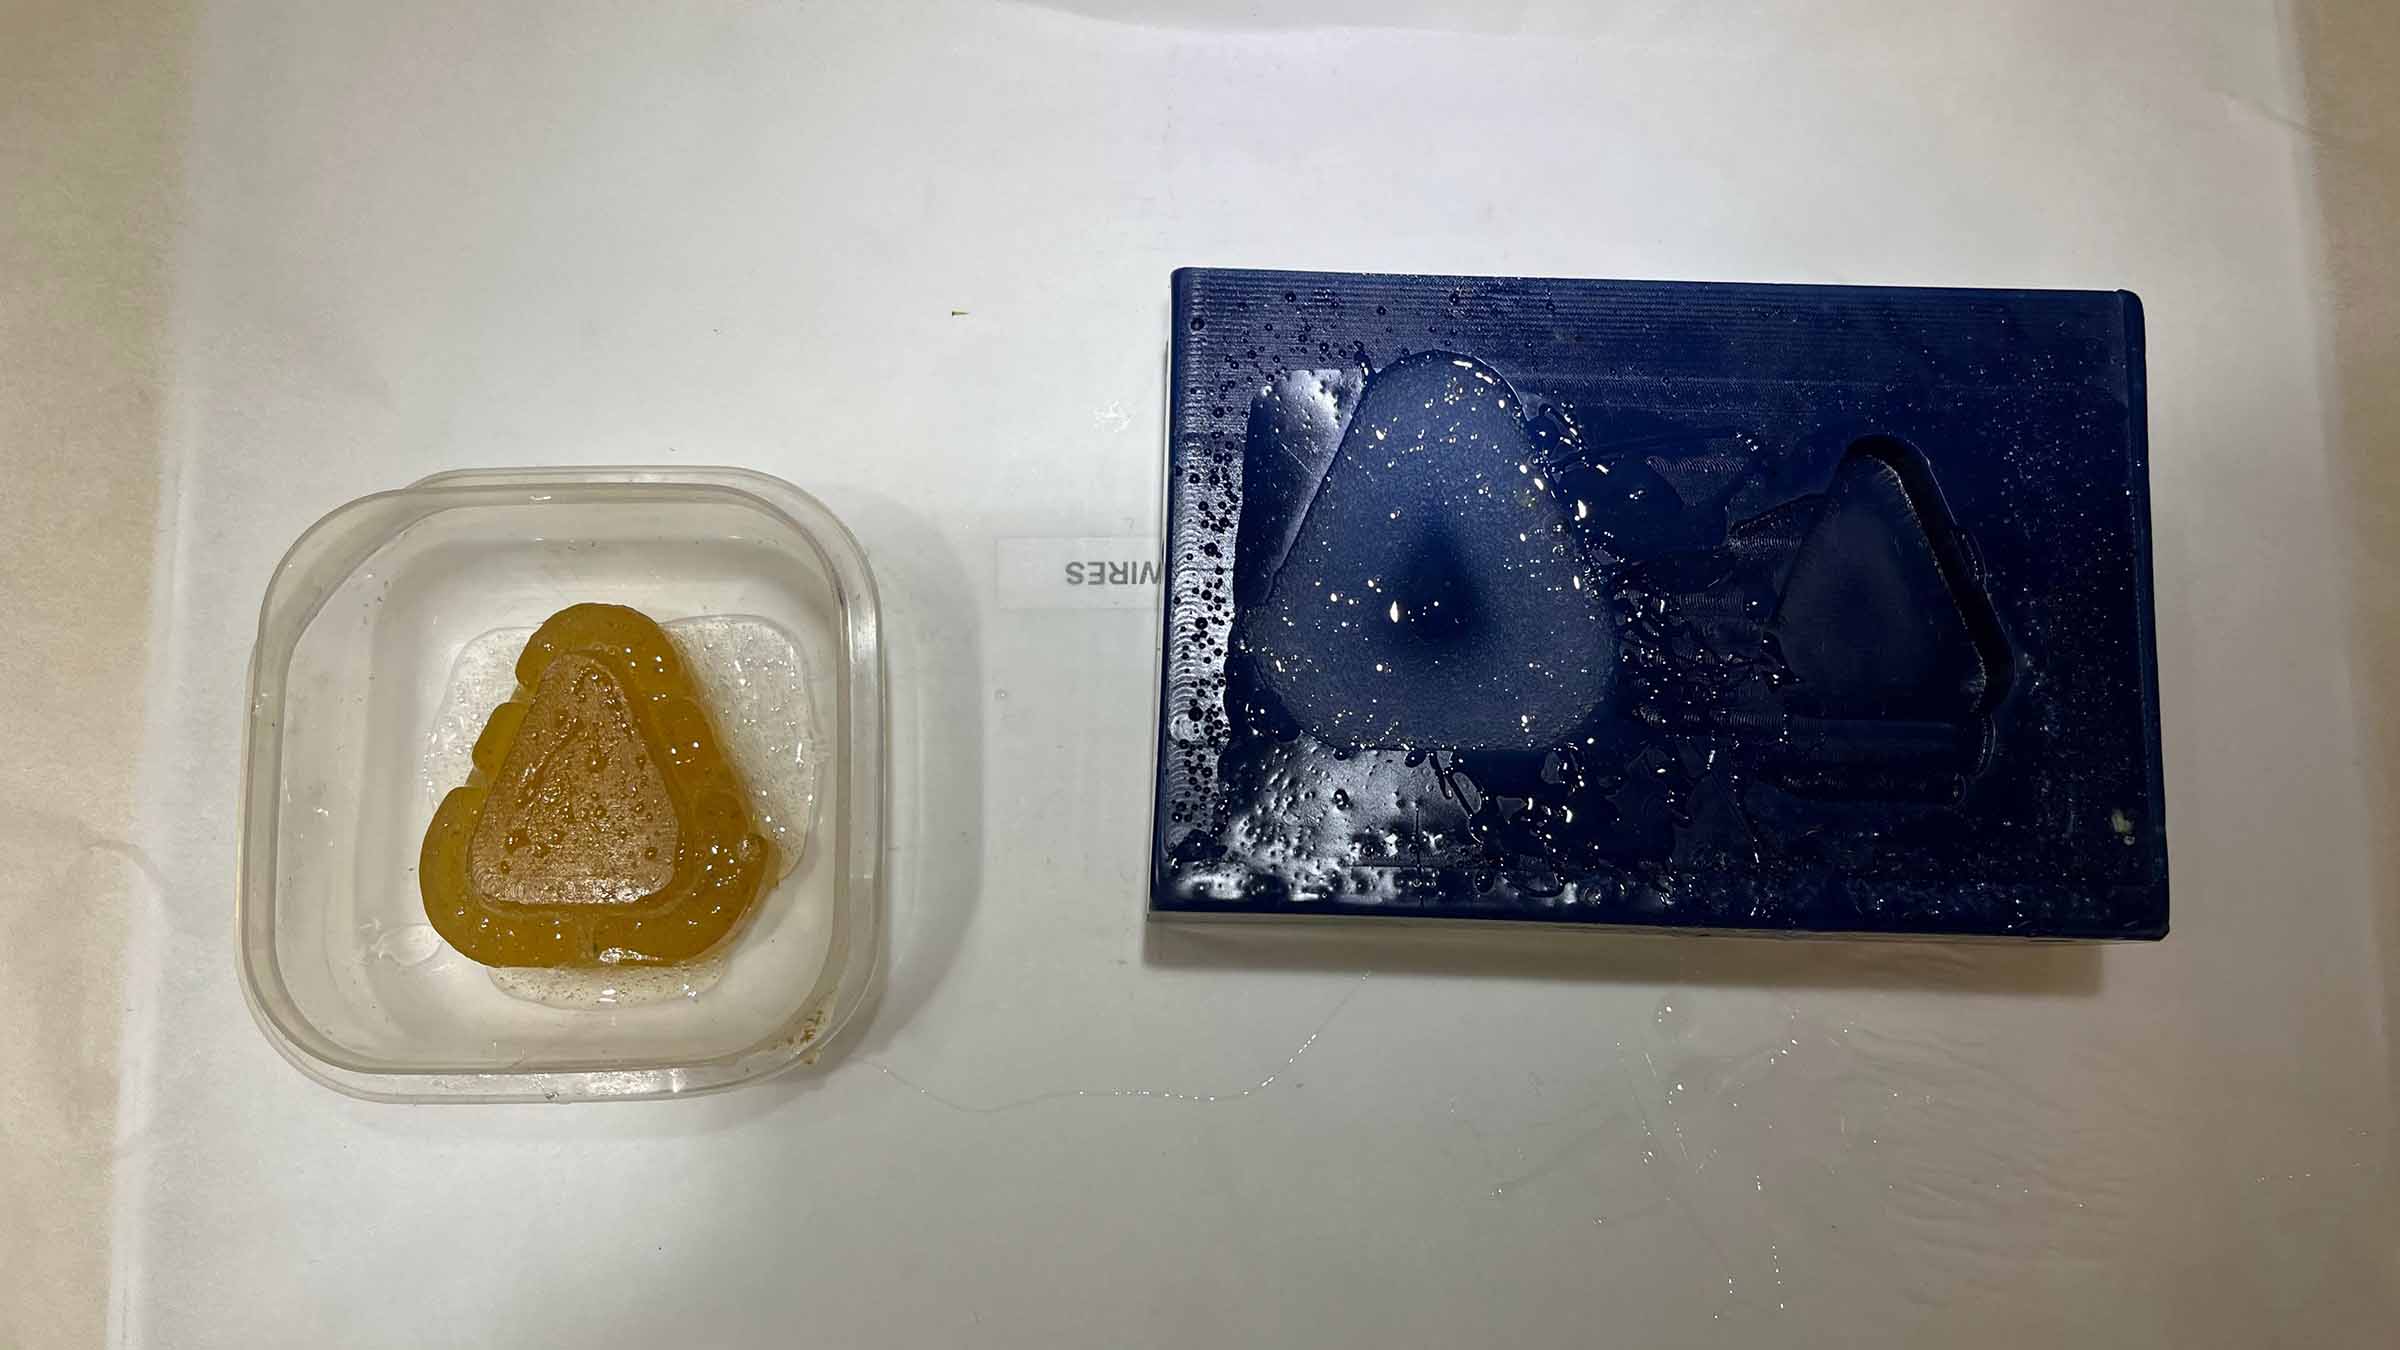
The cast in de the wax also comes out nicely and when comparing the two molds you can clearly see the gelatine has shrunken by a few millimeters. Since both are soft materials they're a bit hard to measure, but I measure a difference of about 5mm.
Files & resources
Leftovers previous week
- week 10 documentation
- week 11 assignment
- week 12 documentation
- nueval feedback henk
- nueval feedback take
Further exploration
There's a lot more to learn about both molding and casting, and bio-materials, that was out of scope for this week. A fun topic for me to dive into after Fab Academy.