10 - Output Devices
Summary
This week we had to play around with output devices, both measuring their power consumption and adding one to a lab made board.
Approach
This week I was all about them Neopixels! Since currently the idea is to only have light as an output device for my final project, this is quite an important one. Therefore my focus this week was to really understand the landscape of addressable RGB LED's, both in esthetics and their technical differences.
Assignment
- group assignment:
- measure the power consumption of an output device
- individual assignment:
- add an output device to a microcontroller board you've designed, and program it to do something
Group assignment
In this group assignment, we used a bench power supply to test how different output devices use power. You can set the supply to keep either the voltage or the current steady. When you do that, the other value changes depending on what the circuit needs, which makes it easy to see how the device behaves.
We tested this with a NeoPixel strip. The power and ground were connected to the power supply, and a XIAO RP2040 controlled the LEDs. We changed the number of LEDs, their color, and their brightness. When more LEDs were on, the strip used more power. Different colors also used different amounts of power.
We also worked with a stepper motor using a DRV8825 stepper driver carrier and controlled it with a XIAO RP2040 through MicroPython.
import drv8825
drv = drv8825.DRV8825(0)
drv.steps(10)
Getting it to run took a bit of trial and error. In the beginning, the motor didn’t react at all. After checking the setup, we found that the RESET and SLEEP pins on the driver need to be tied together for the board to function. Once that was fixed, the motor started responding, but it only produced a buzzing sound instead of turning.
The issue turned out to be the supply voltage. We were powering it with 5V, which wasn’t enough. After switching to 12V, the motor began spinning as expected. My classmate Christian has some extensive documentation on our experiments with the stepper motor.
Individual assignment
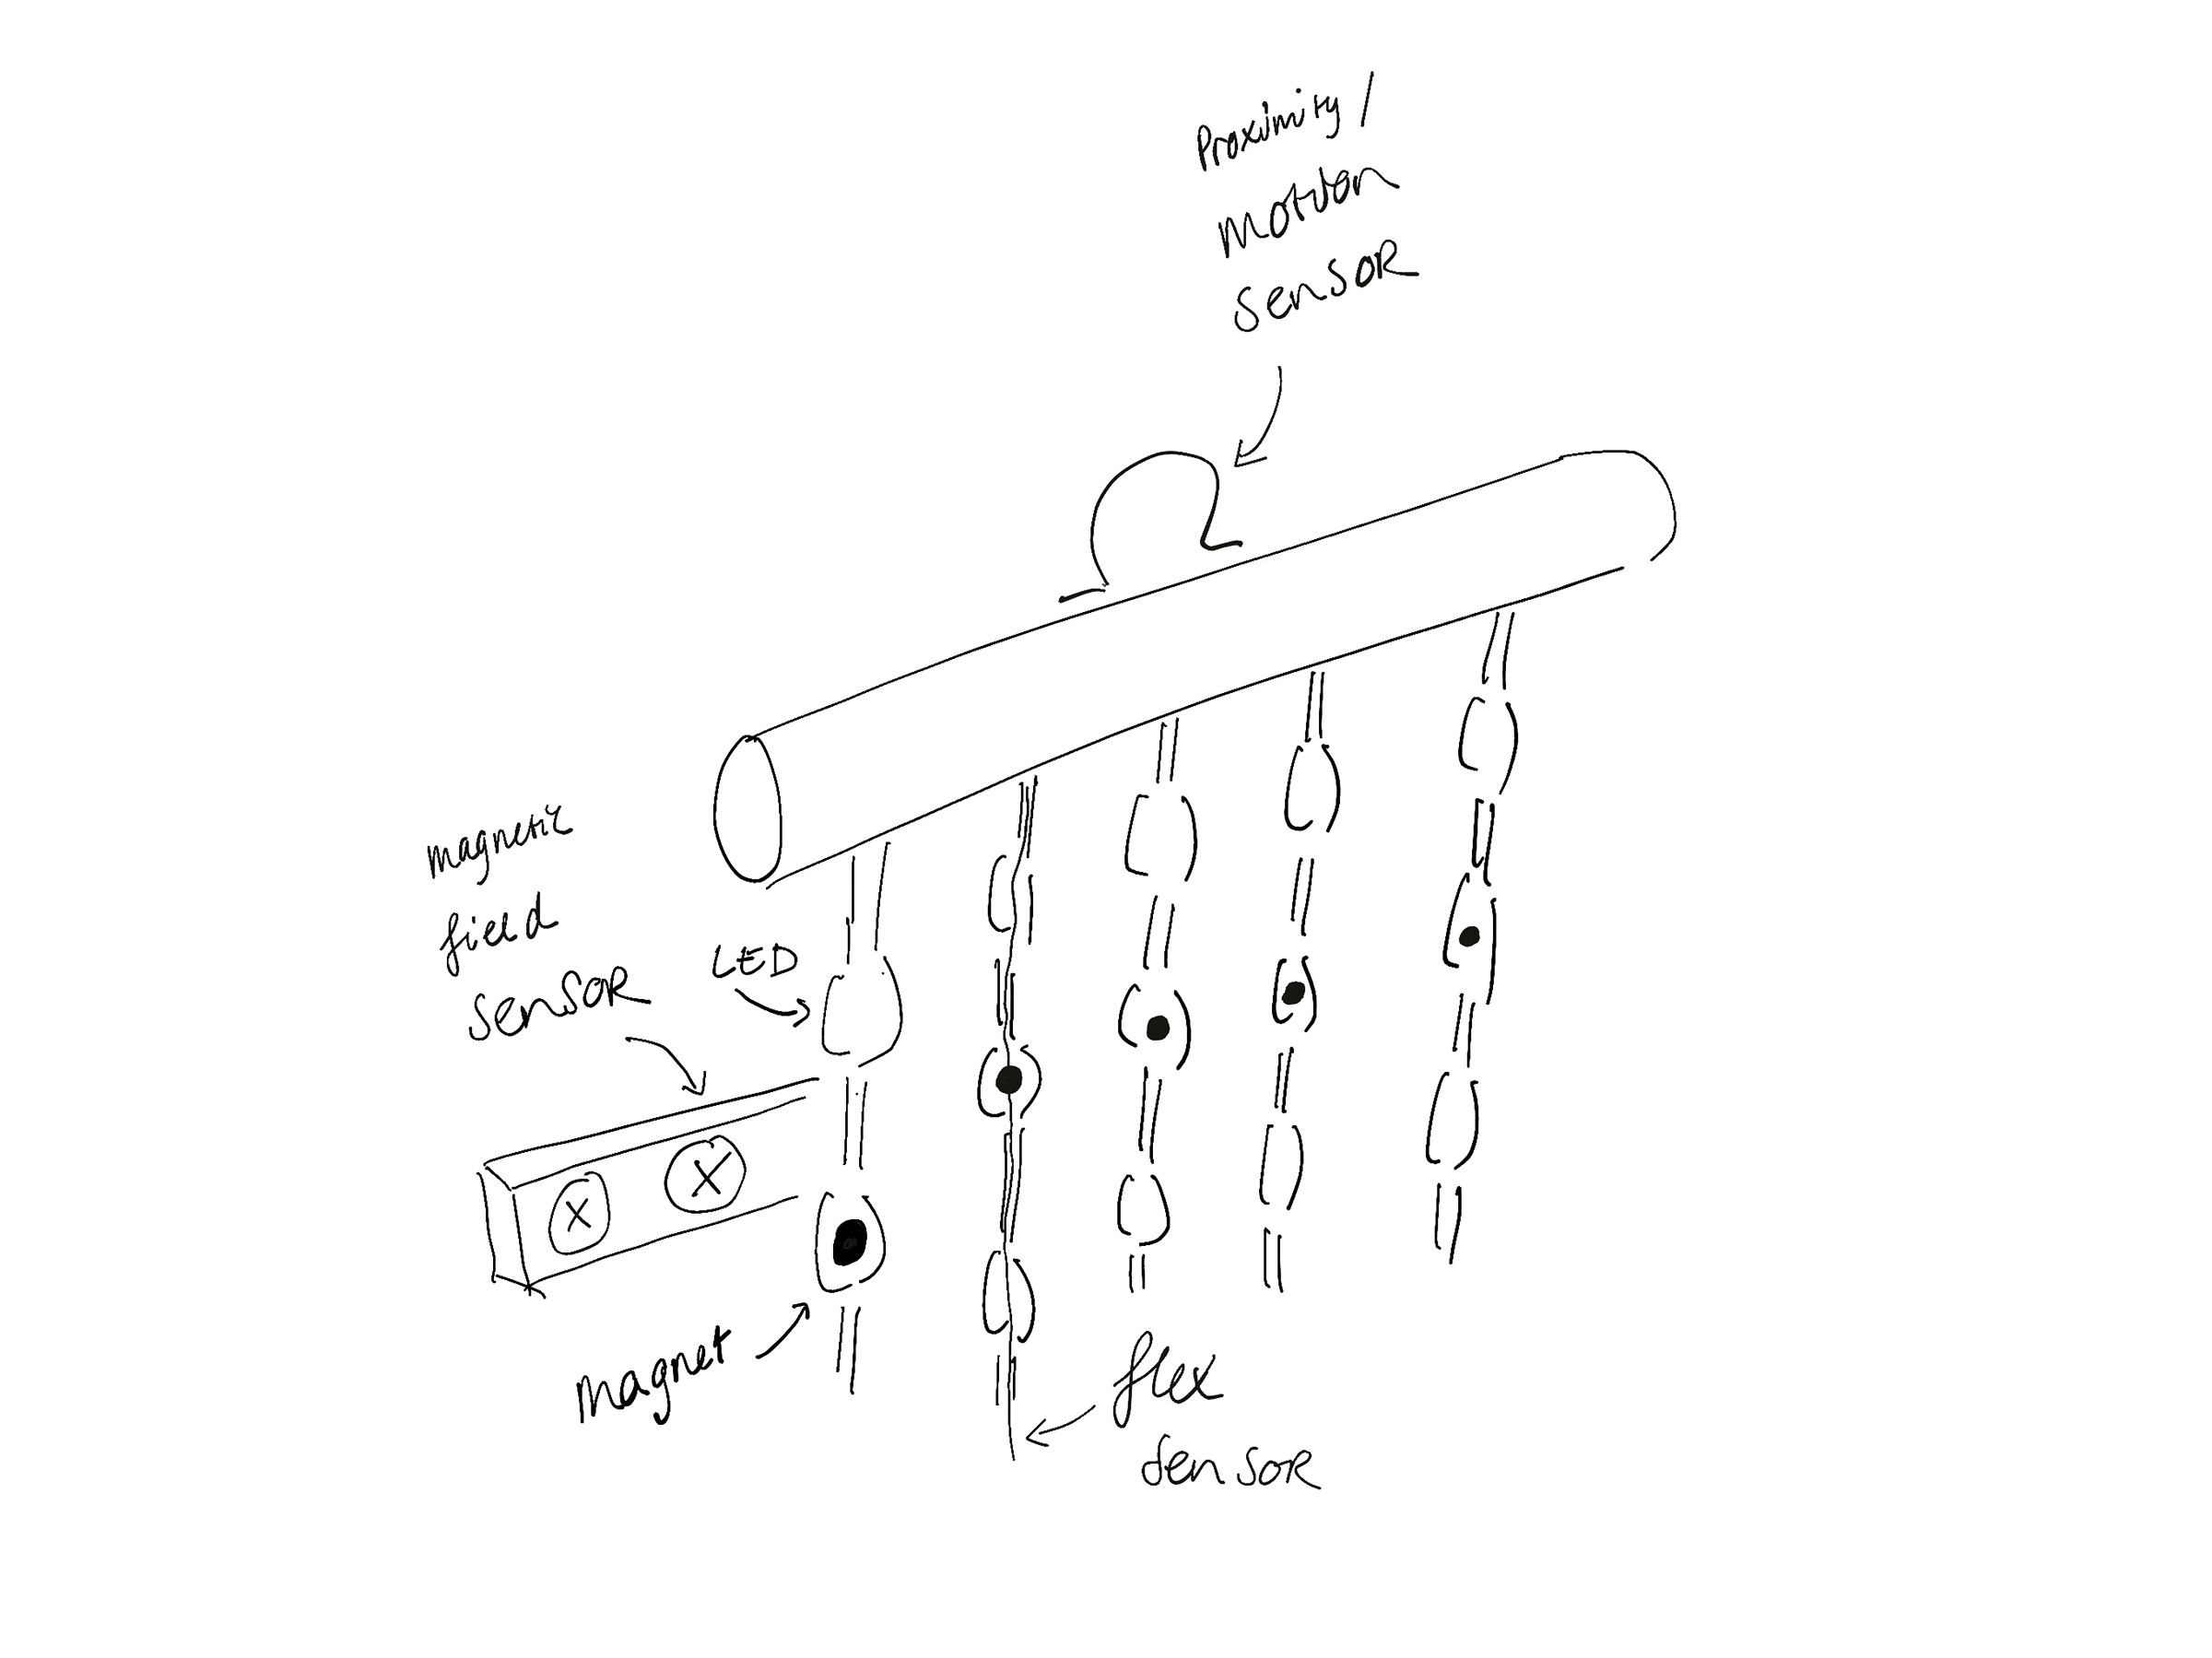
Since I'm trying to make a interactive bead curtain for my final project my only planned output is light, I've briefly thought about making my own strands out of RGB LEDs and a lot of Charlieplexing, but always figured some sort of led strings must be available. So after learning about Neopixels they definitely seemed the way to go and I didn't bother with other LEDs this week.
One strip
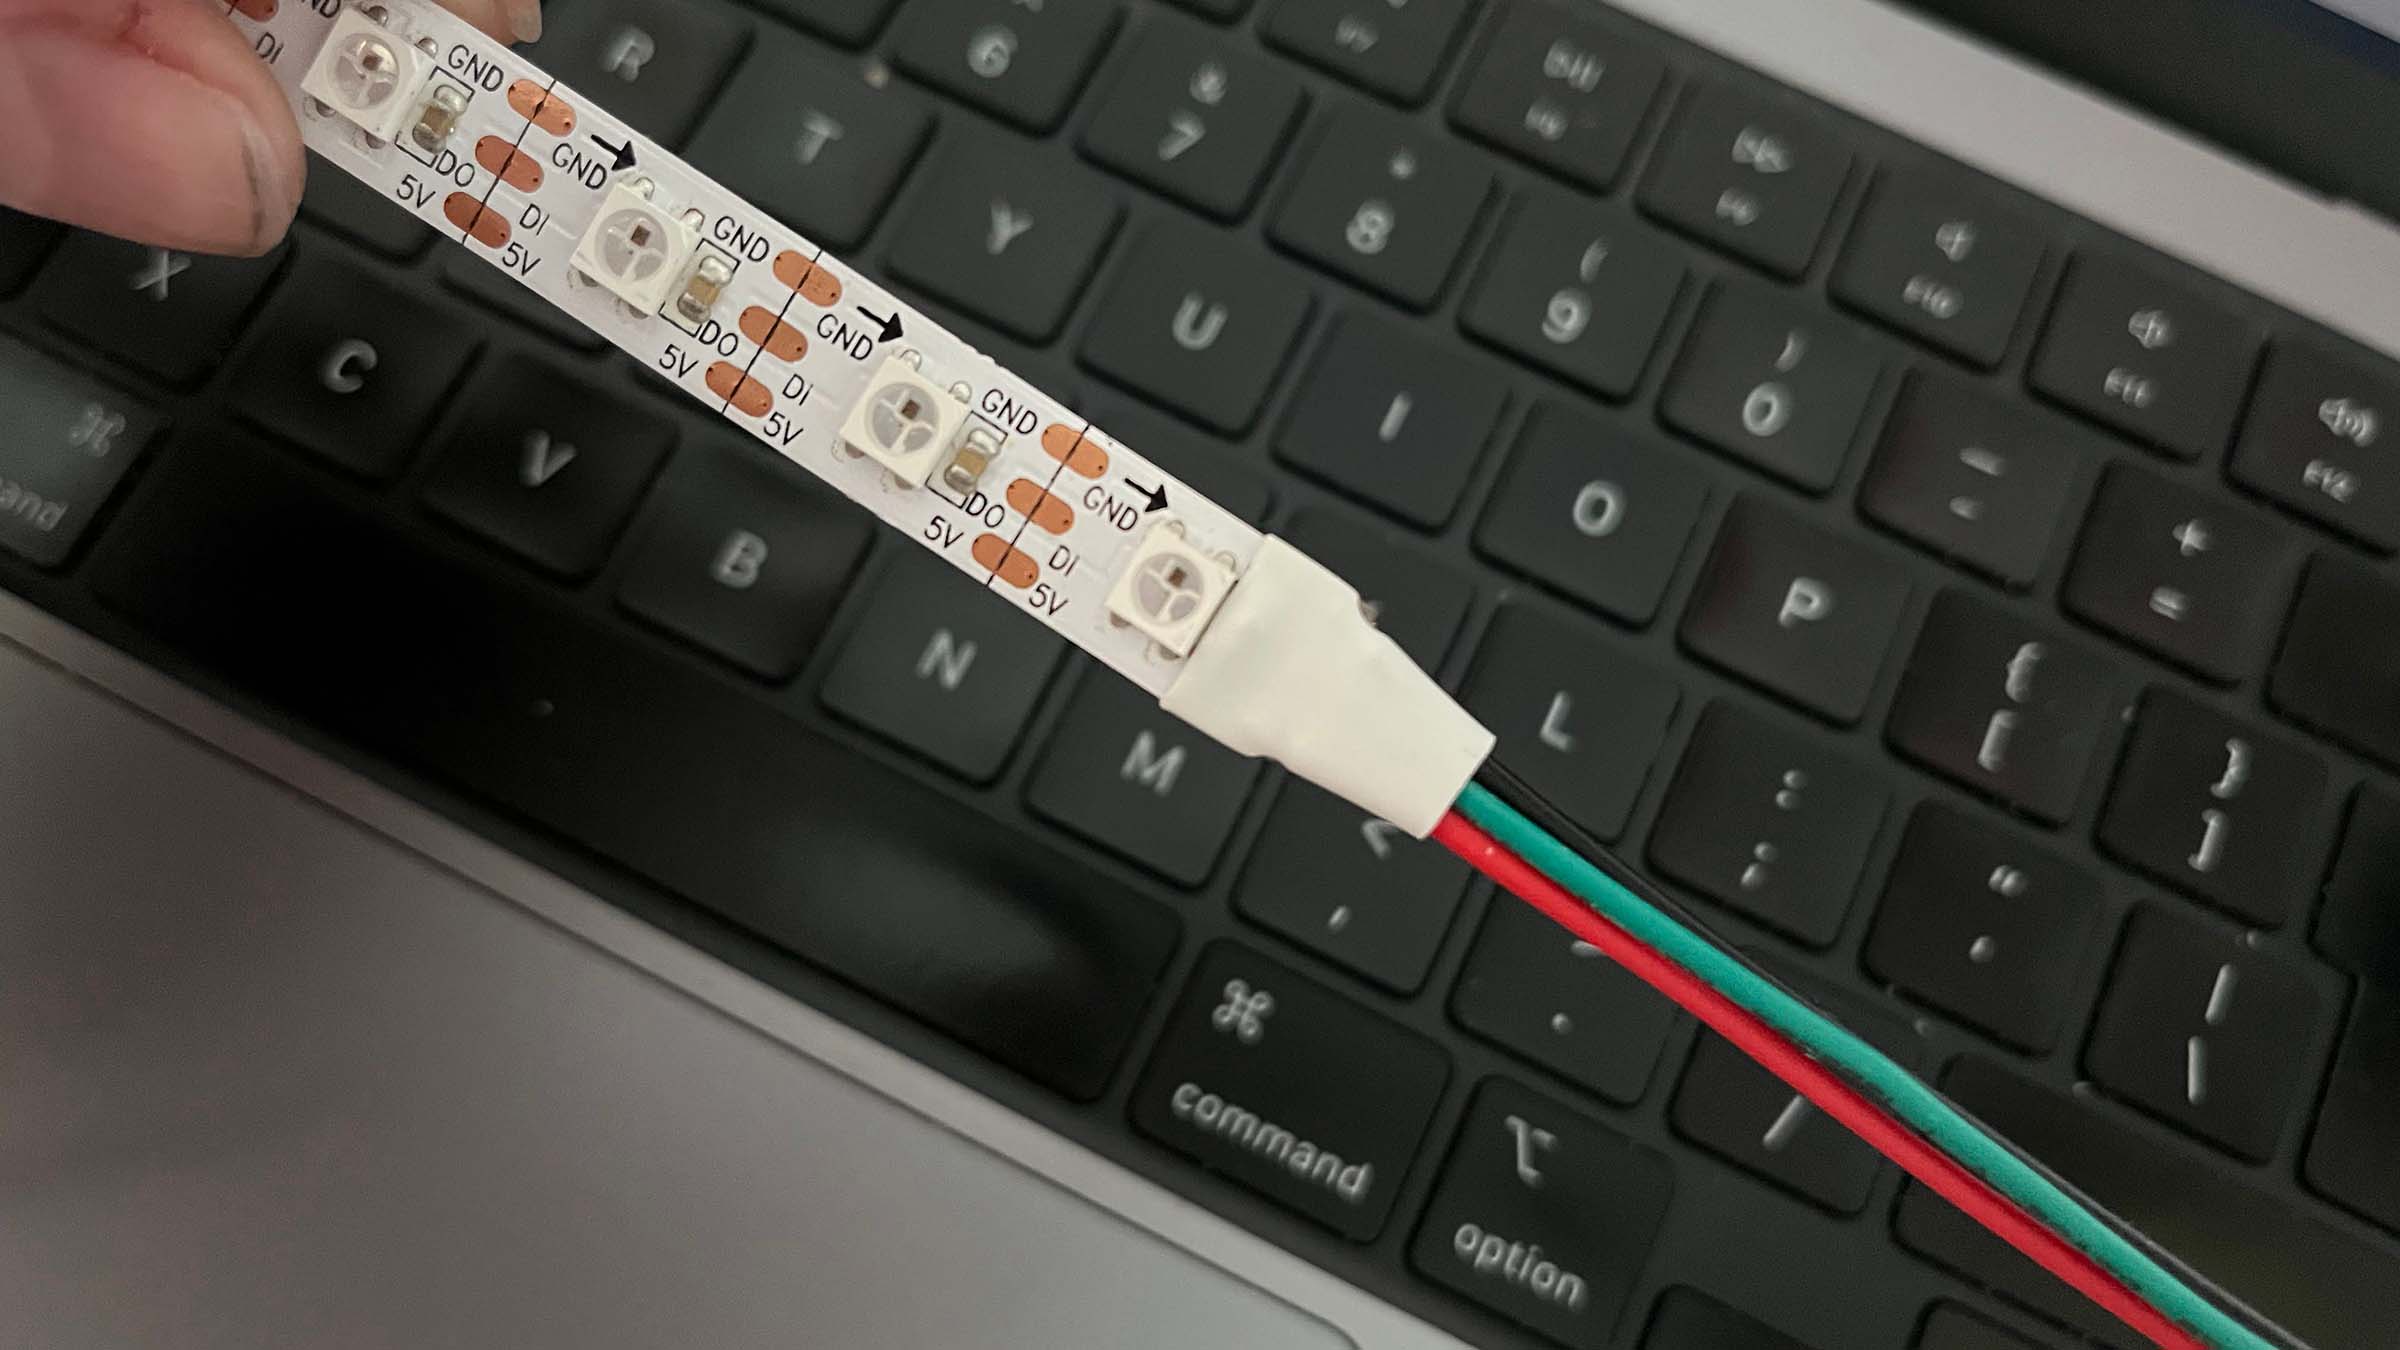
After we finished the group assignment I took home a strip of WS2812 Neopixels, which I then tried to hook up to both my Arduino and my RP2024 with a breadboard. In both cases I could not get them to turn on, they would briefly flash when I hooked them up to power. After a confused debugging session with code by ChatGPT, Fab instructor Quentin Bolsee and Adafruit I tried the same code on the Neopixel embedded on the RP2040 which ran just fine. Turns out I took home a bit of strip that cables connected only to the end of the strip, so I was pushing data into the data out line.
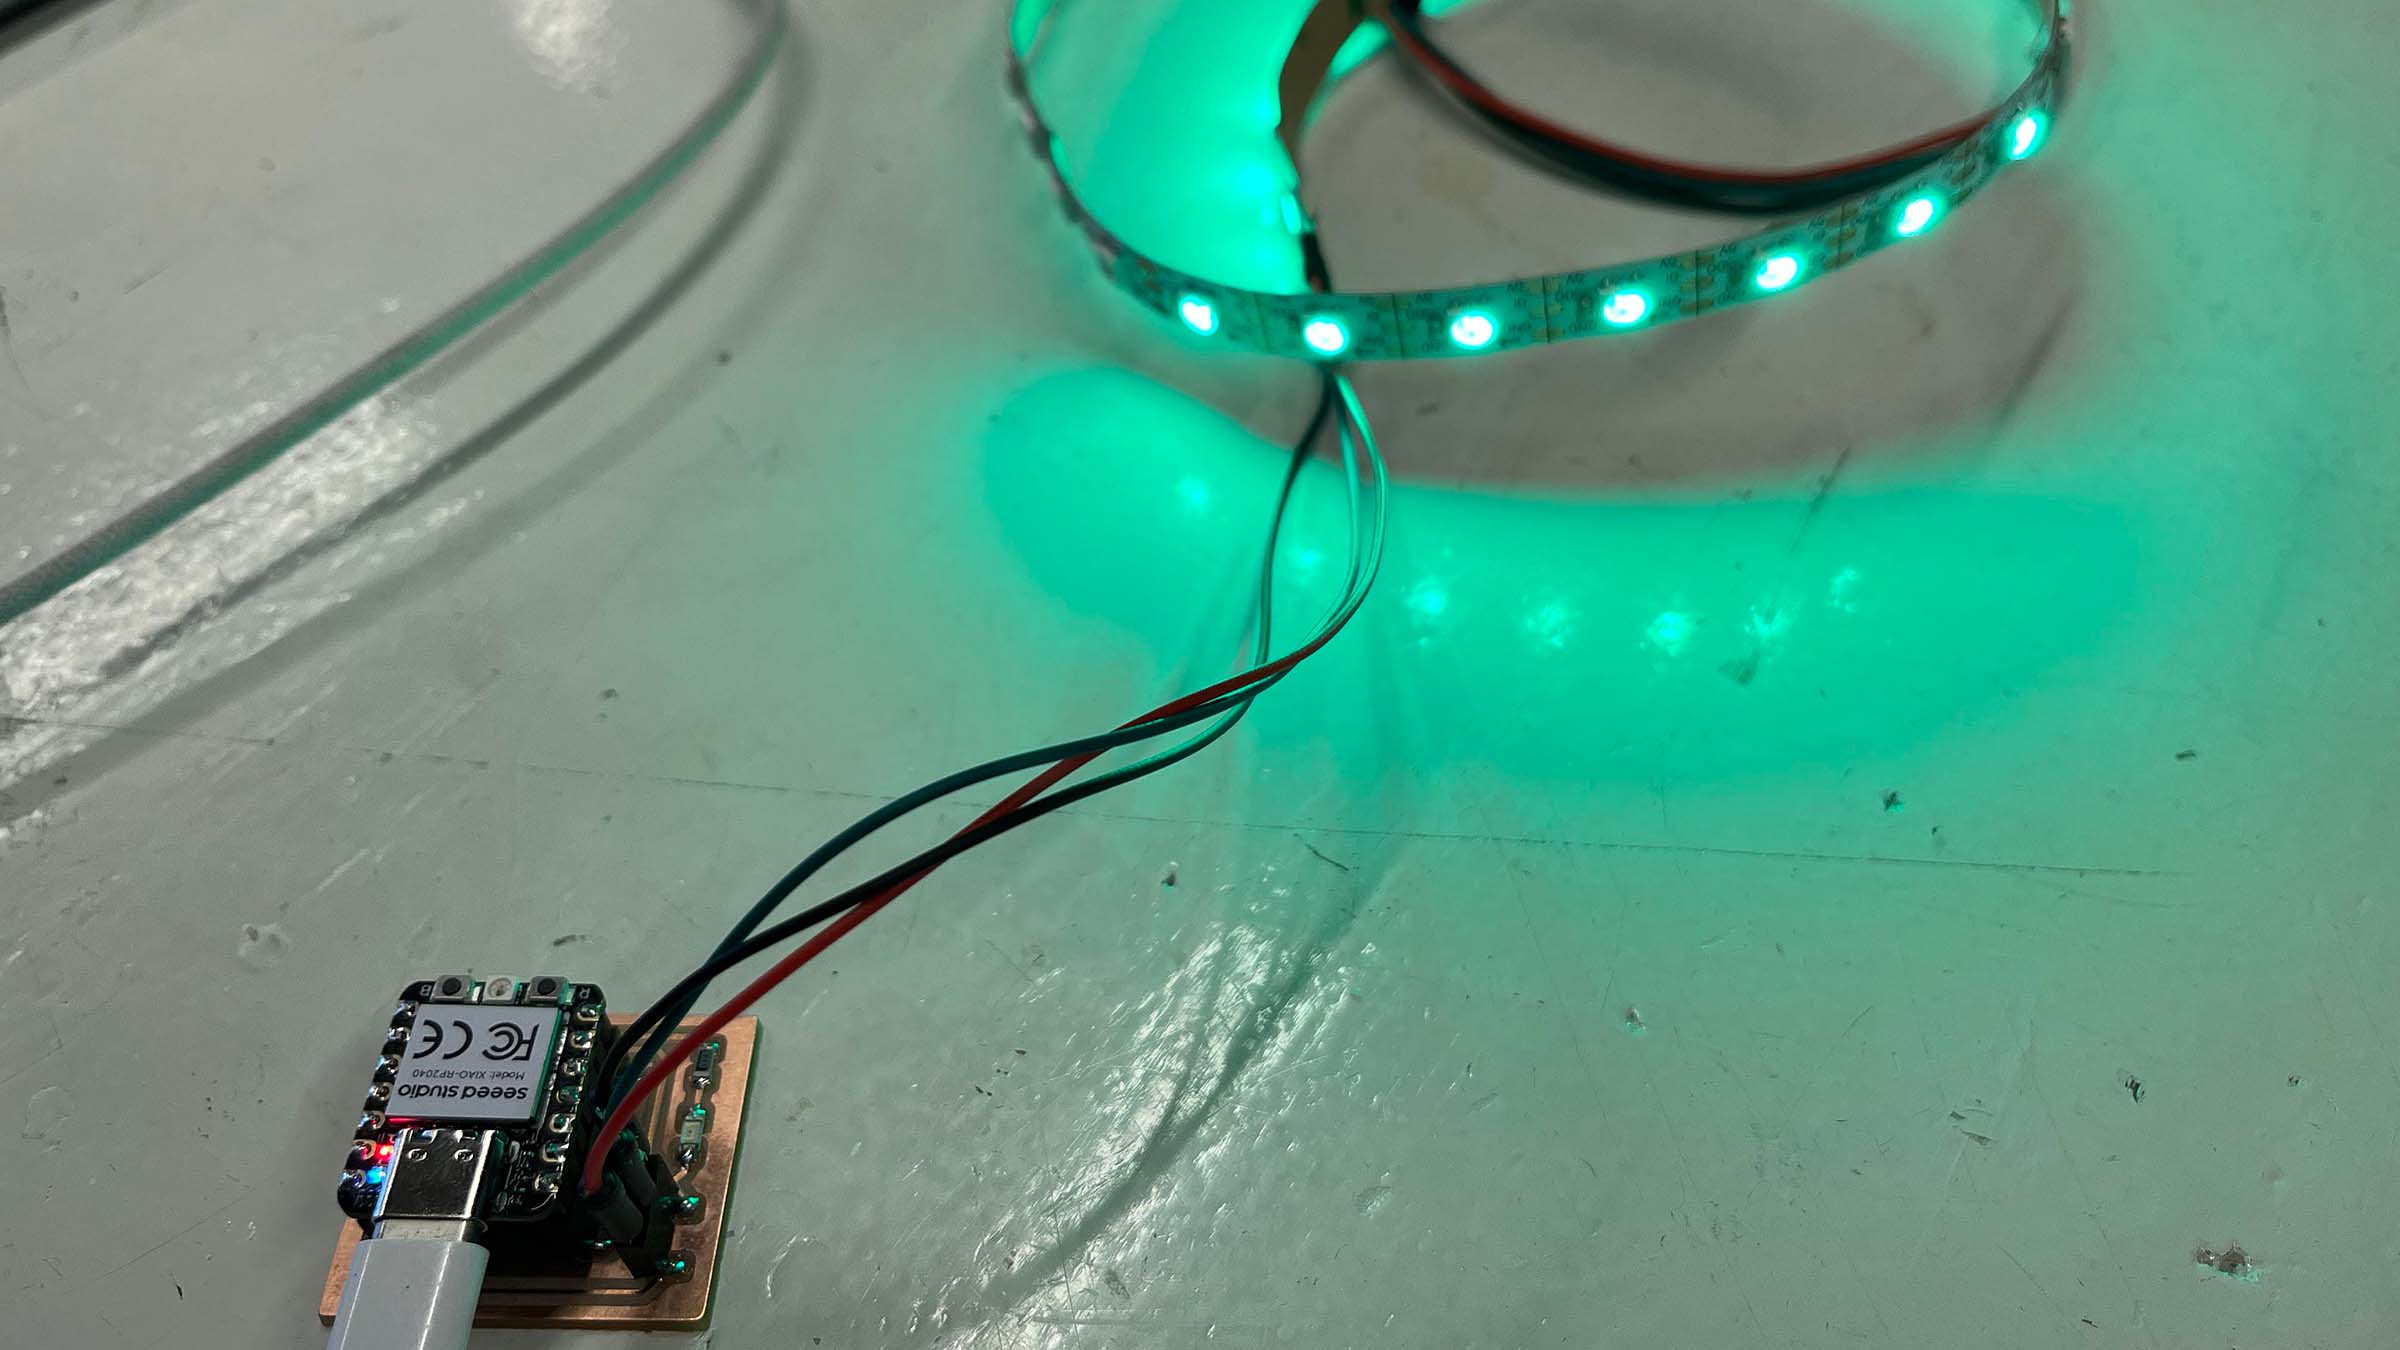
After a quick trip to the hardware store I am now the proud owner of a soldering iron. I sacrificed three jumper cables from my Arduino kit and finally got the strip to run smoothly when it was already dark out; they lit up the whole room, which was very satisfying.
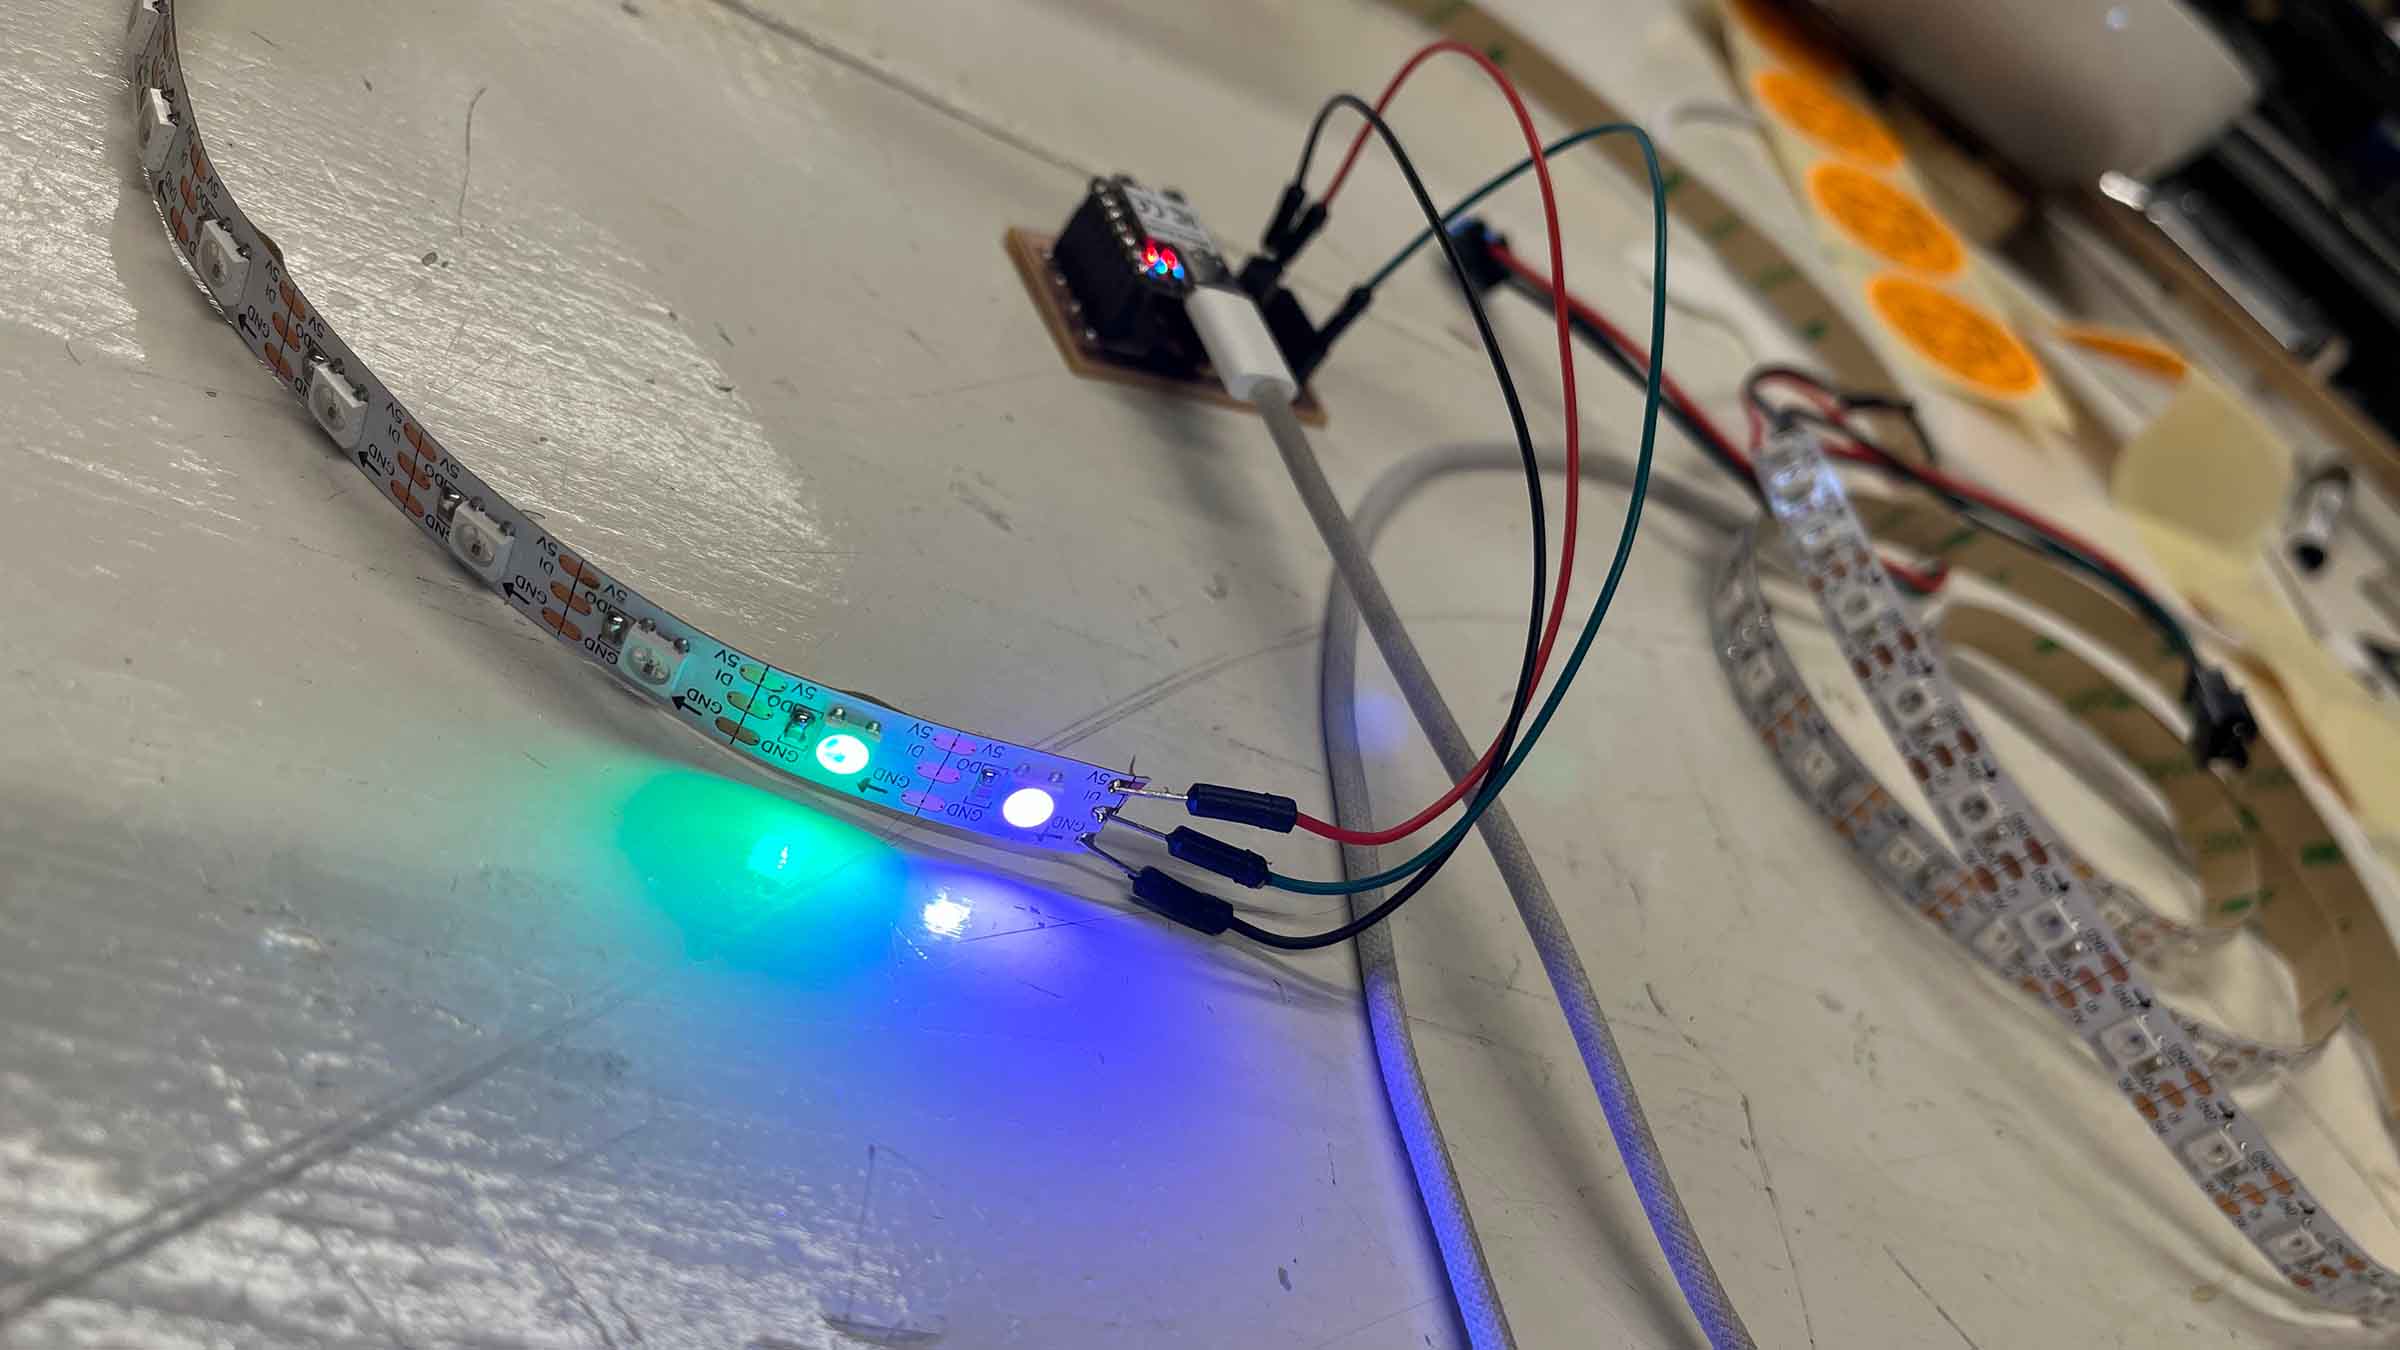
Then I realized my board from last week has a pin socket with exactly the three lines needed to run the strip: power, ground and a GPIO output pin for the data signal. So I replaced the breadboard with my board from last week and ran the strip that way, which worked beautifully.
Five strips
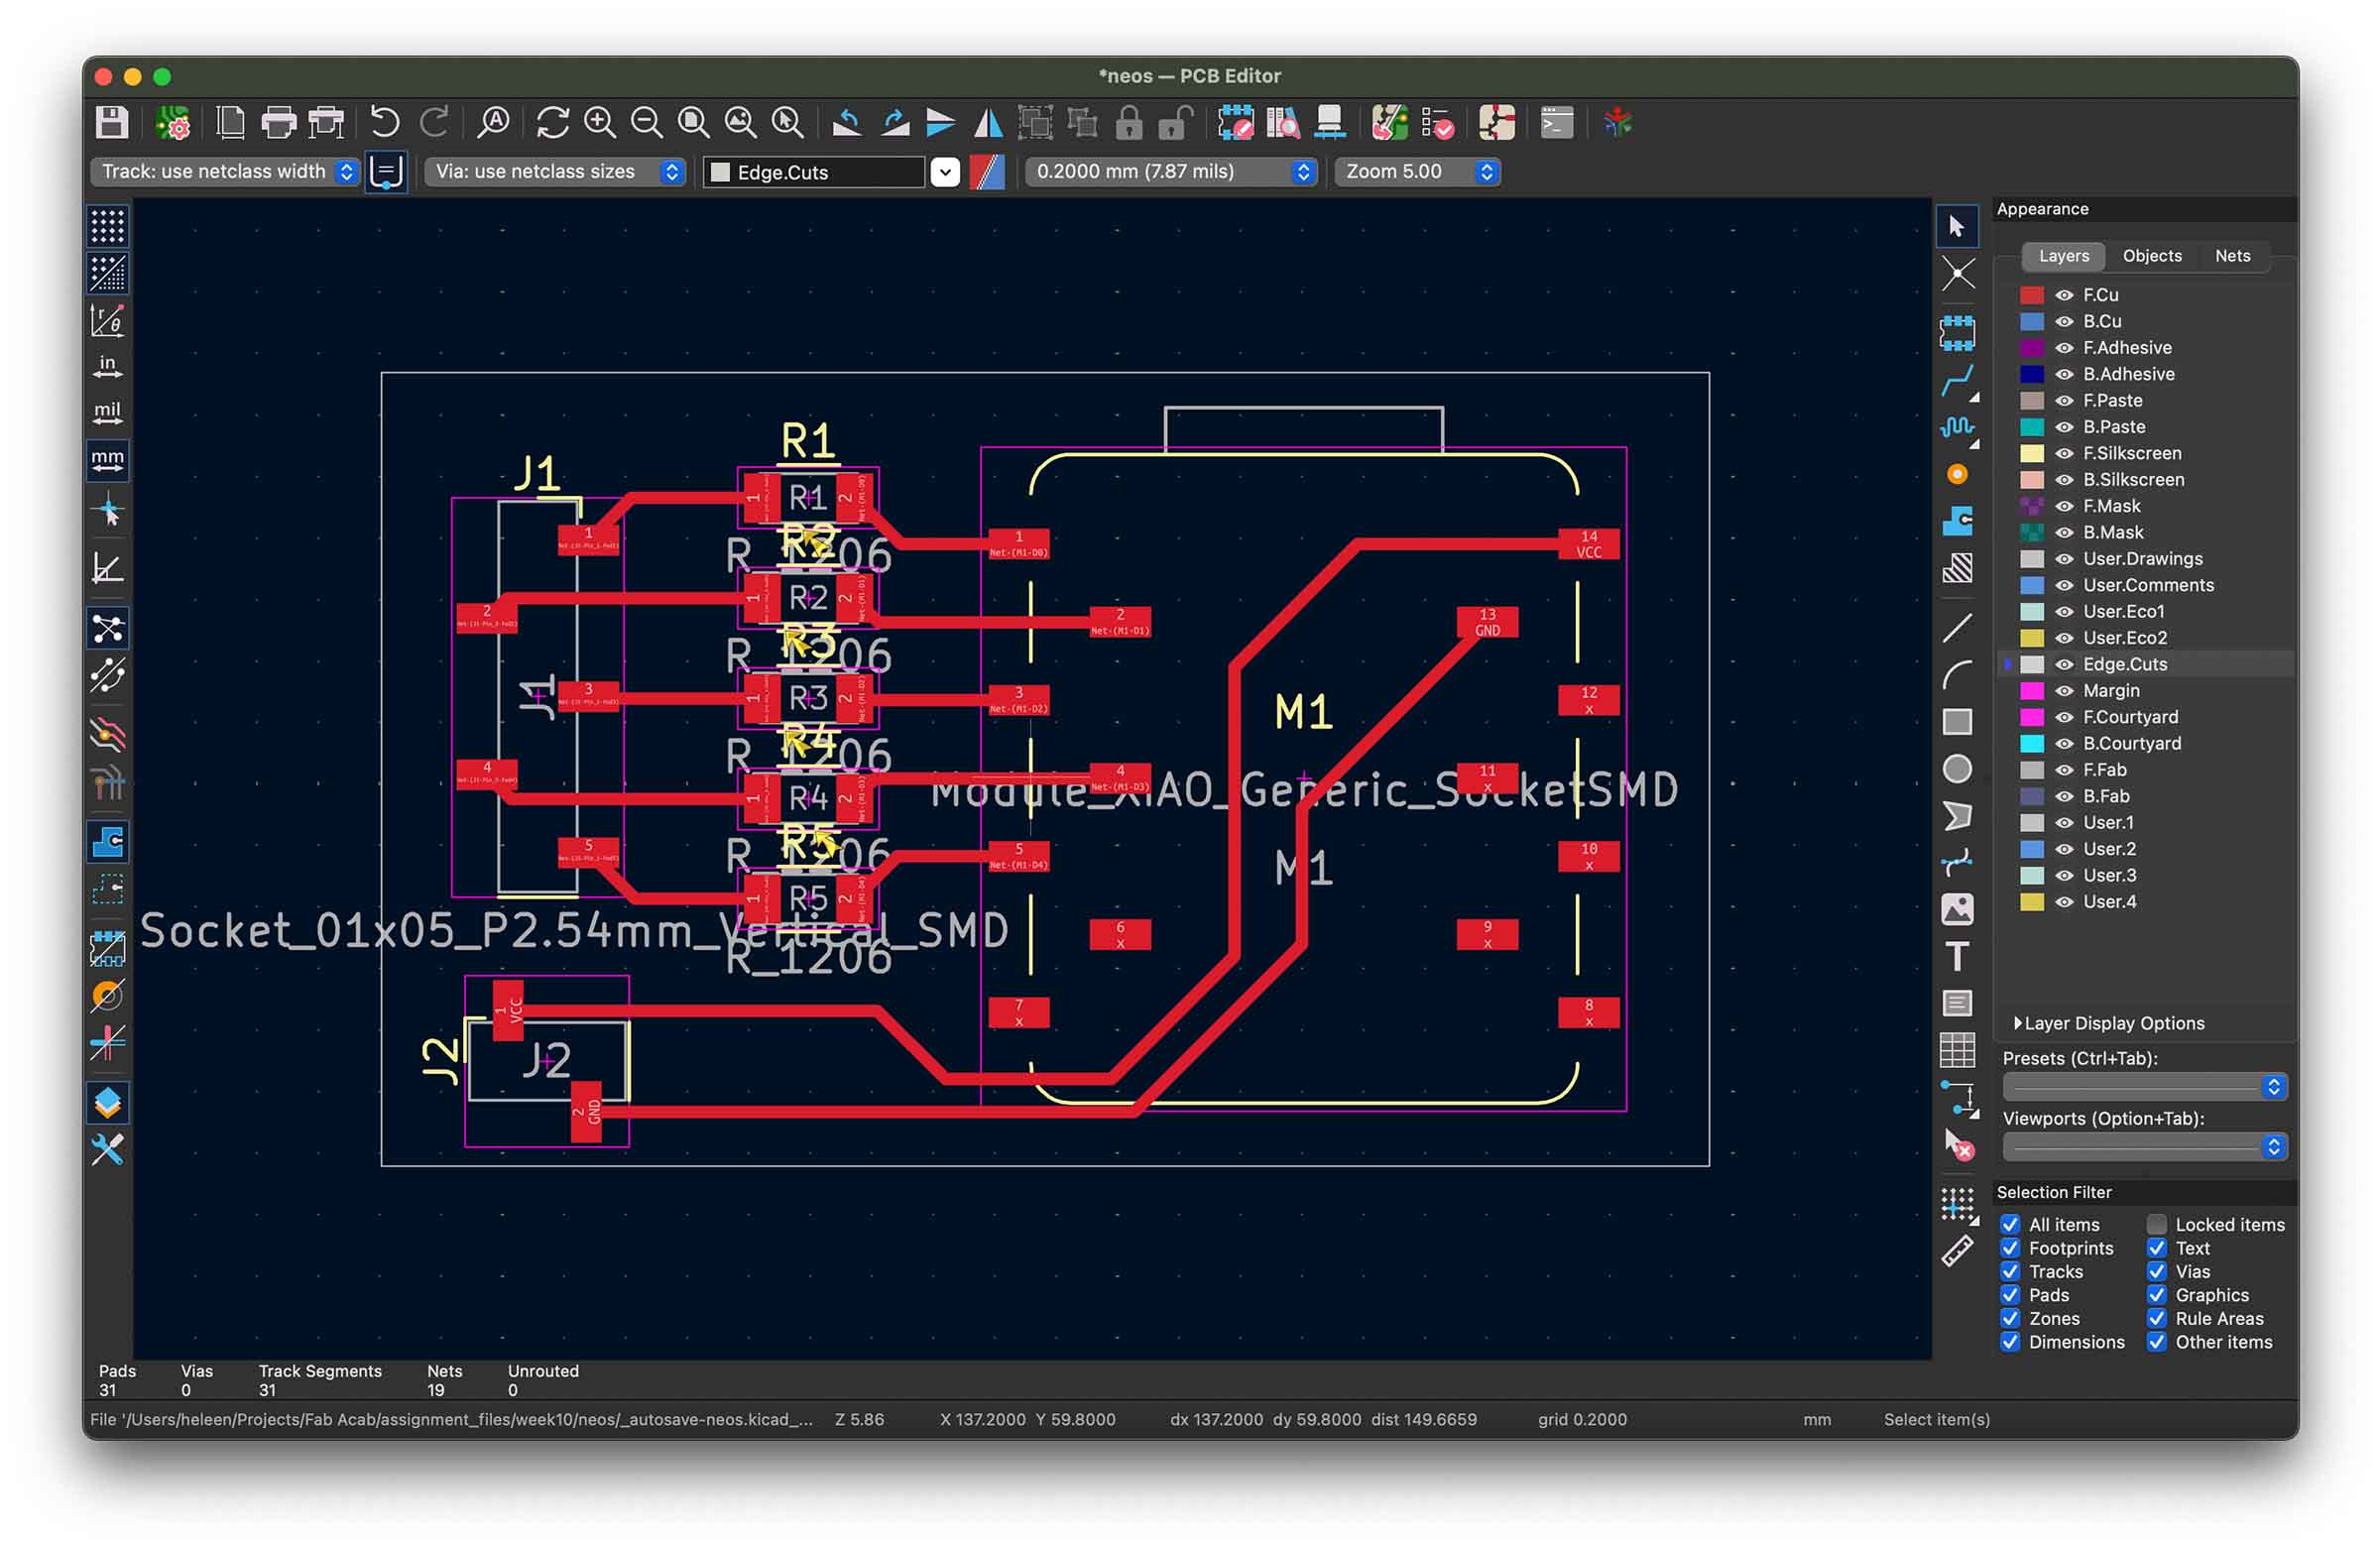
Now it was time to come up with a new board for this week. On my final project I want to run several strings and since they have to be free flowing at the bottom of the curtain they can't be chained; this means each string needs a separate data pin. A Xiao RP2040 also won't be able to generate enough current to power multiple strips of about 2 meters, so I would need to use an external power supply. For these reasons I decide to design a board that can control 5 strips either 5 or 12V with 40 LEDs per strand (one every 5 cm). To get a better understanding of the power requirements when running a long or a lot of strips I read an article by SparkFun that explains it very well.
From this I learn that since I'll be powering the strip externally the power supply and my microcontroller need to share a ground. This is because otherwise the strip would compare the data to it's power ground and not the RP2040's ground. So next to a pin socket for 5 GPIO pins I also add a socket for ground and while I'm add it VCC, since this will make it easy to test an individual strip without an external power supply. I also learn that with such high currents running through the strip I have to add a resistor to protect each data pin.
Time to do some milling, I perform the same steps I've followed the last two weeks, only the Gerber2PNG tool is offline so I use the older Gerber2img. Here you have to be careful, cause you can't turn off the edge cut, but if you upload the traces gerber file without the edge cut its cropped to trace outer cut and will be smaller than intended. Luckily I caught this when comparing the downloaded png's and uploaded the gerber with both the traces and edge cut. This meant thought that my edge cut was now visible in the traces png and would also be milled with an offset, not sure how to prevent this, but it only added a few minutes to my milling process so I didn't care.
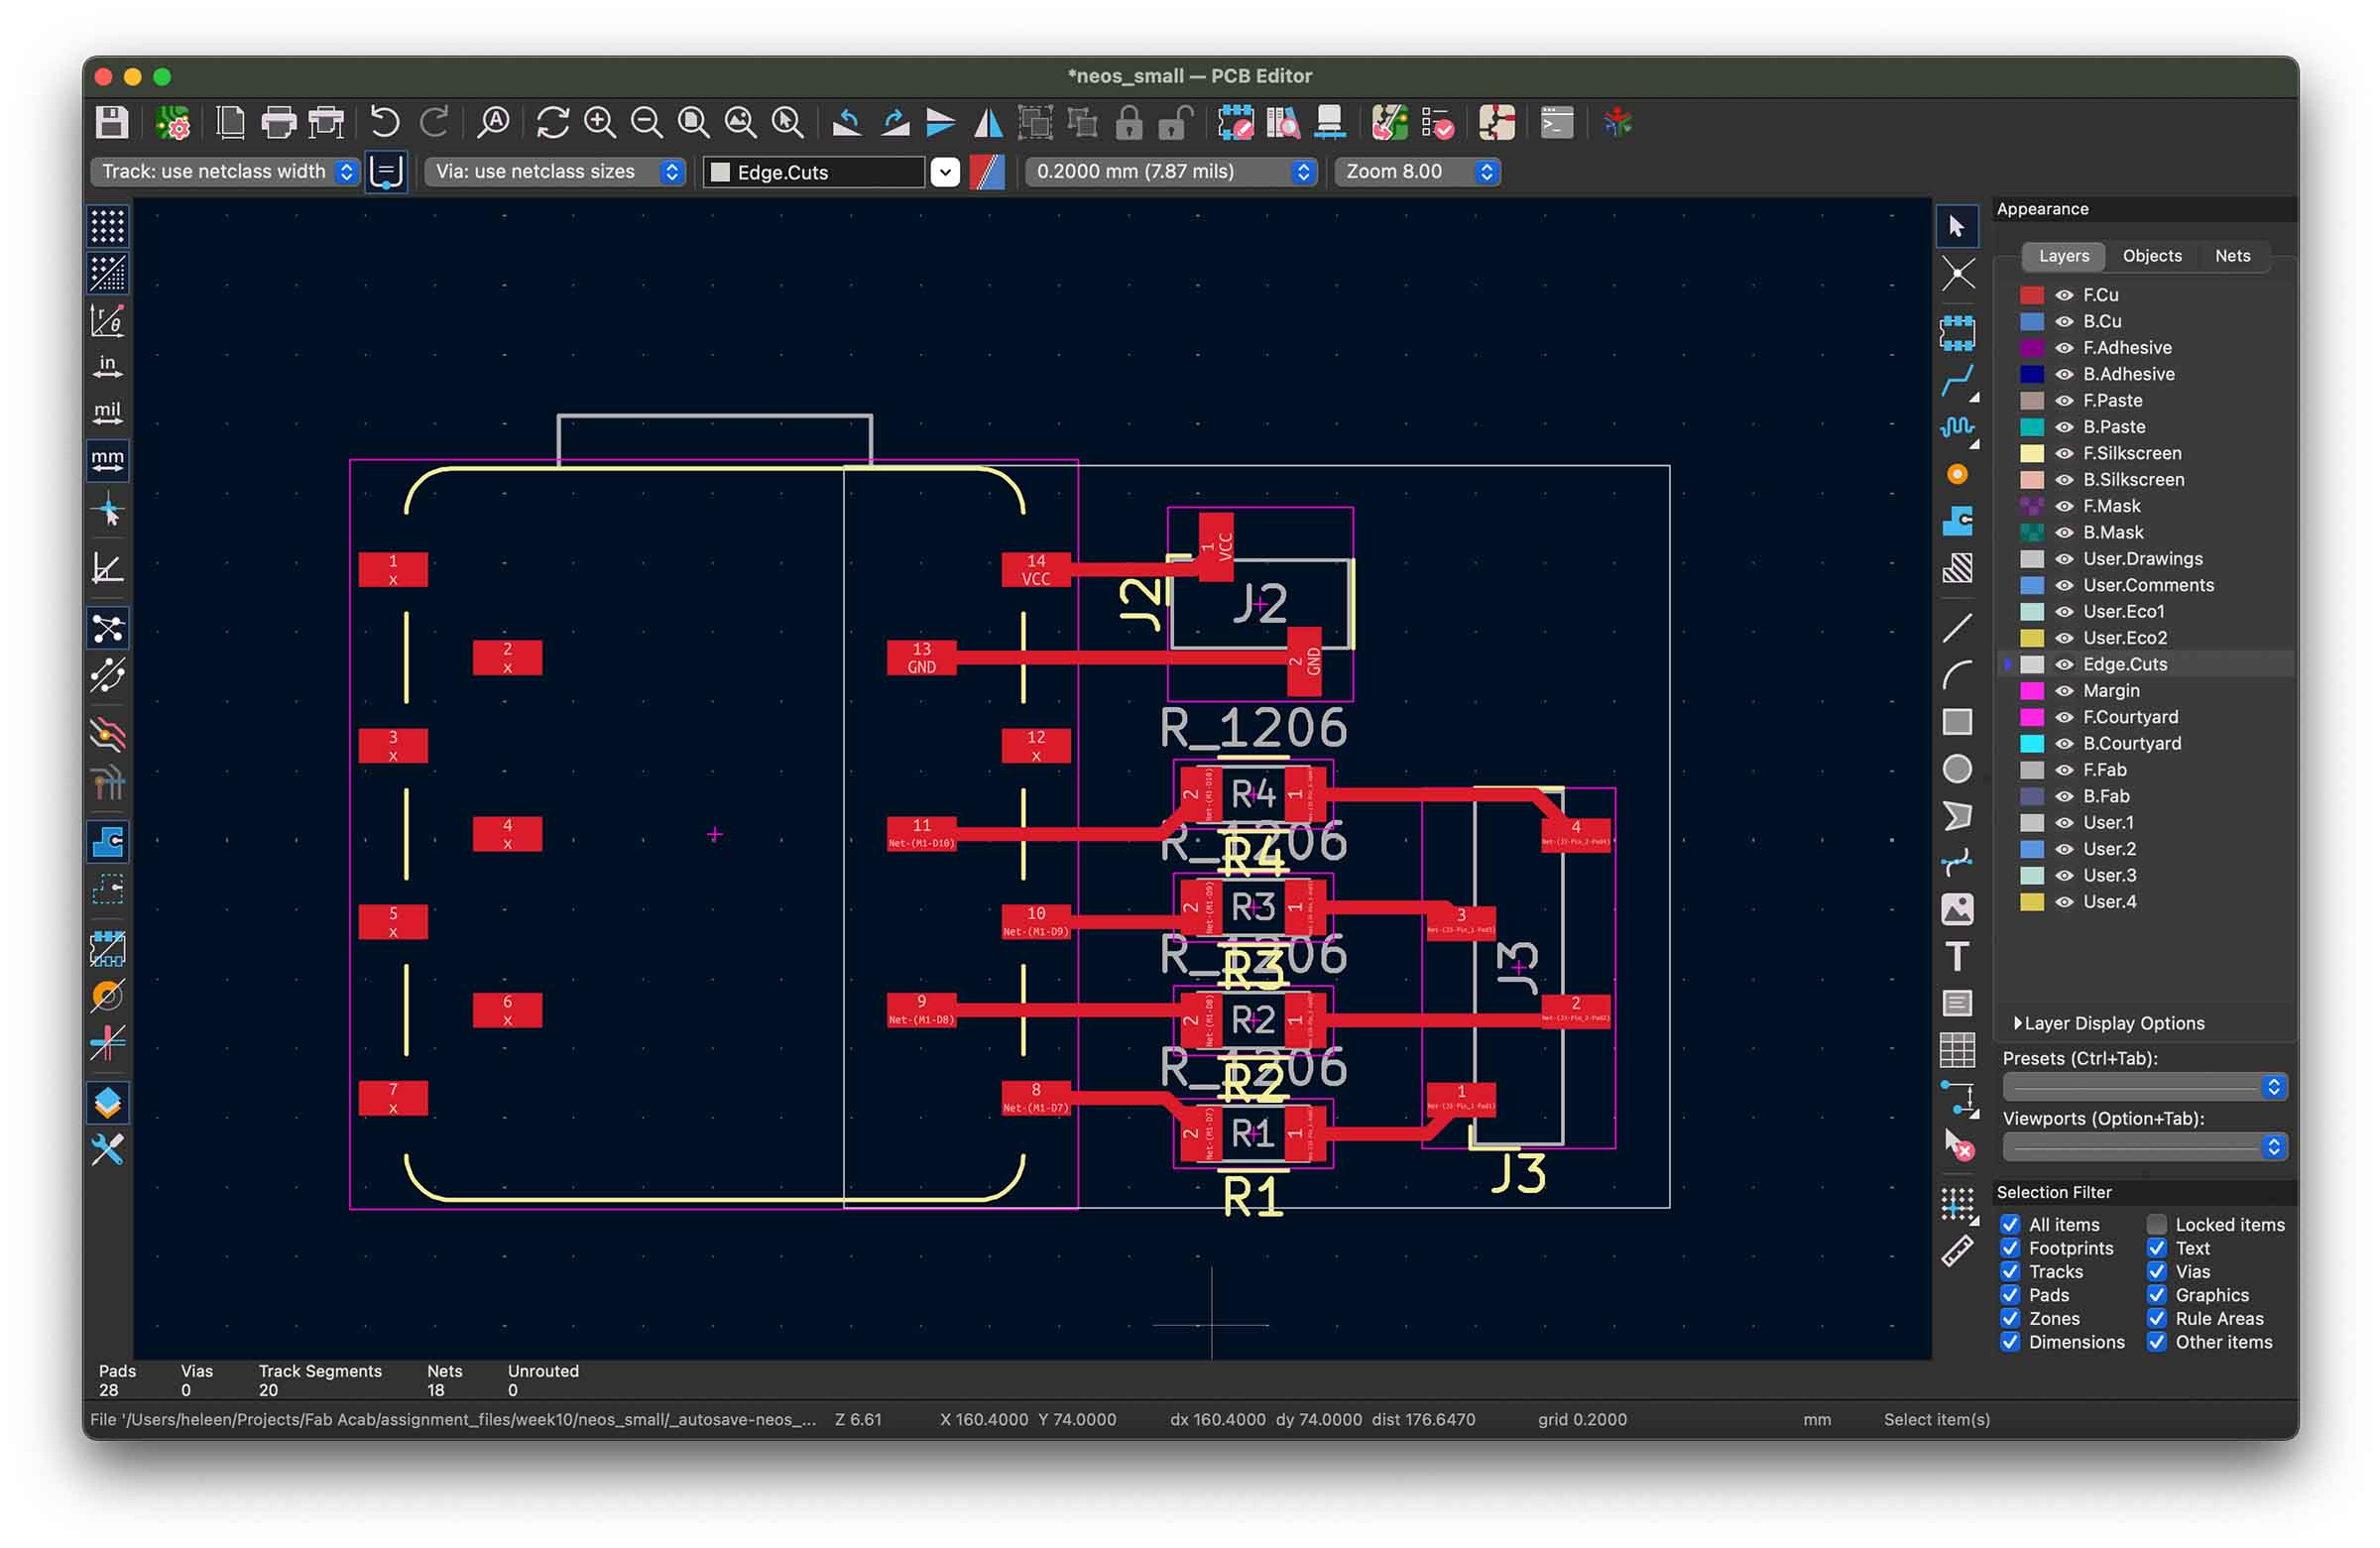
While designing my board I've used 5 pins for data because that's the minimum amount I would like to use for my final project. But while laying traces in KiCad I realize that with 4 pins I can make an even smaller footprint by not connecting one side of the Xiao. So as I'm waiting on the milling to finish I quickly whip up a design in KiCad. Could be a funny thing to try in a future week.
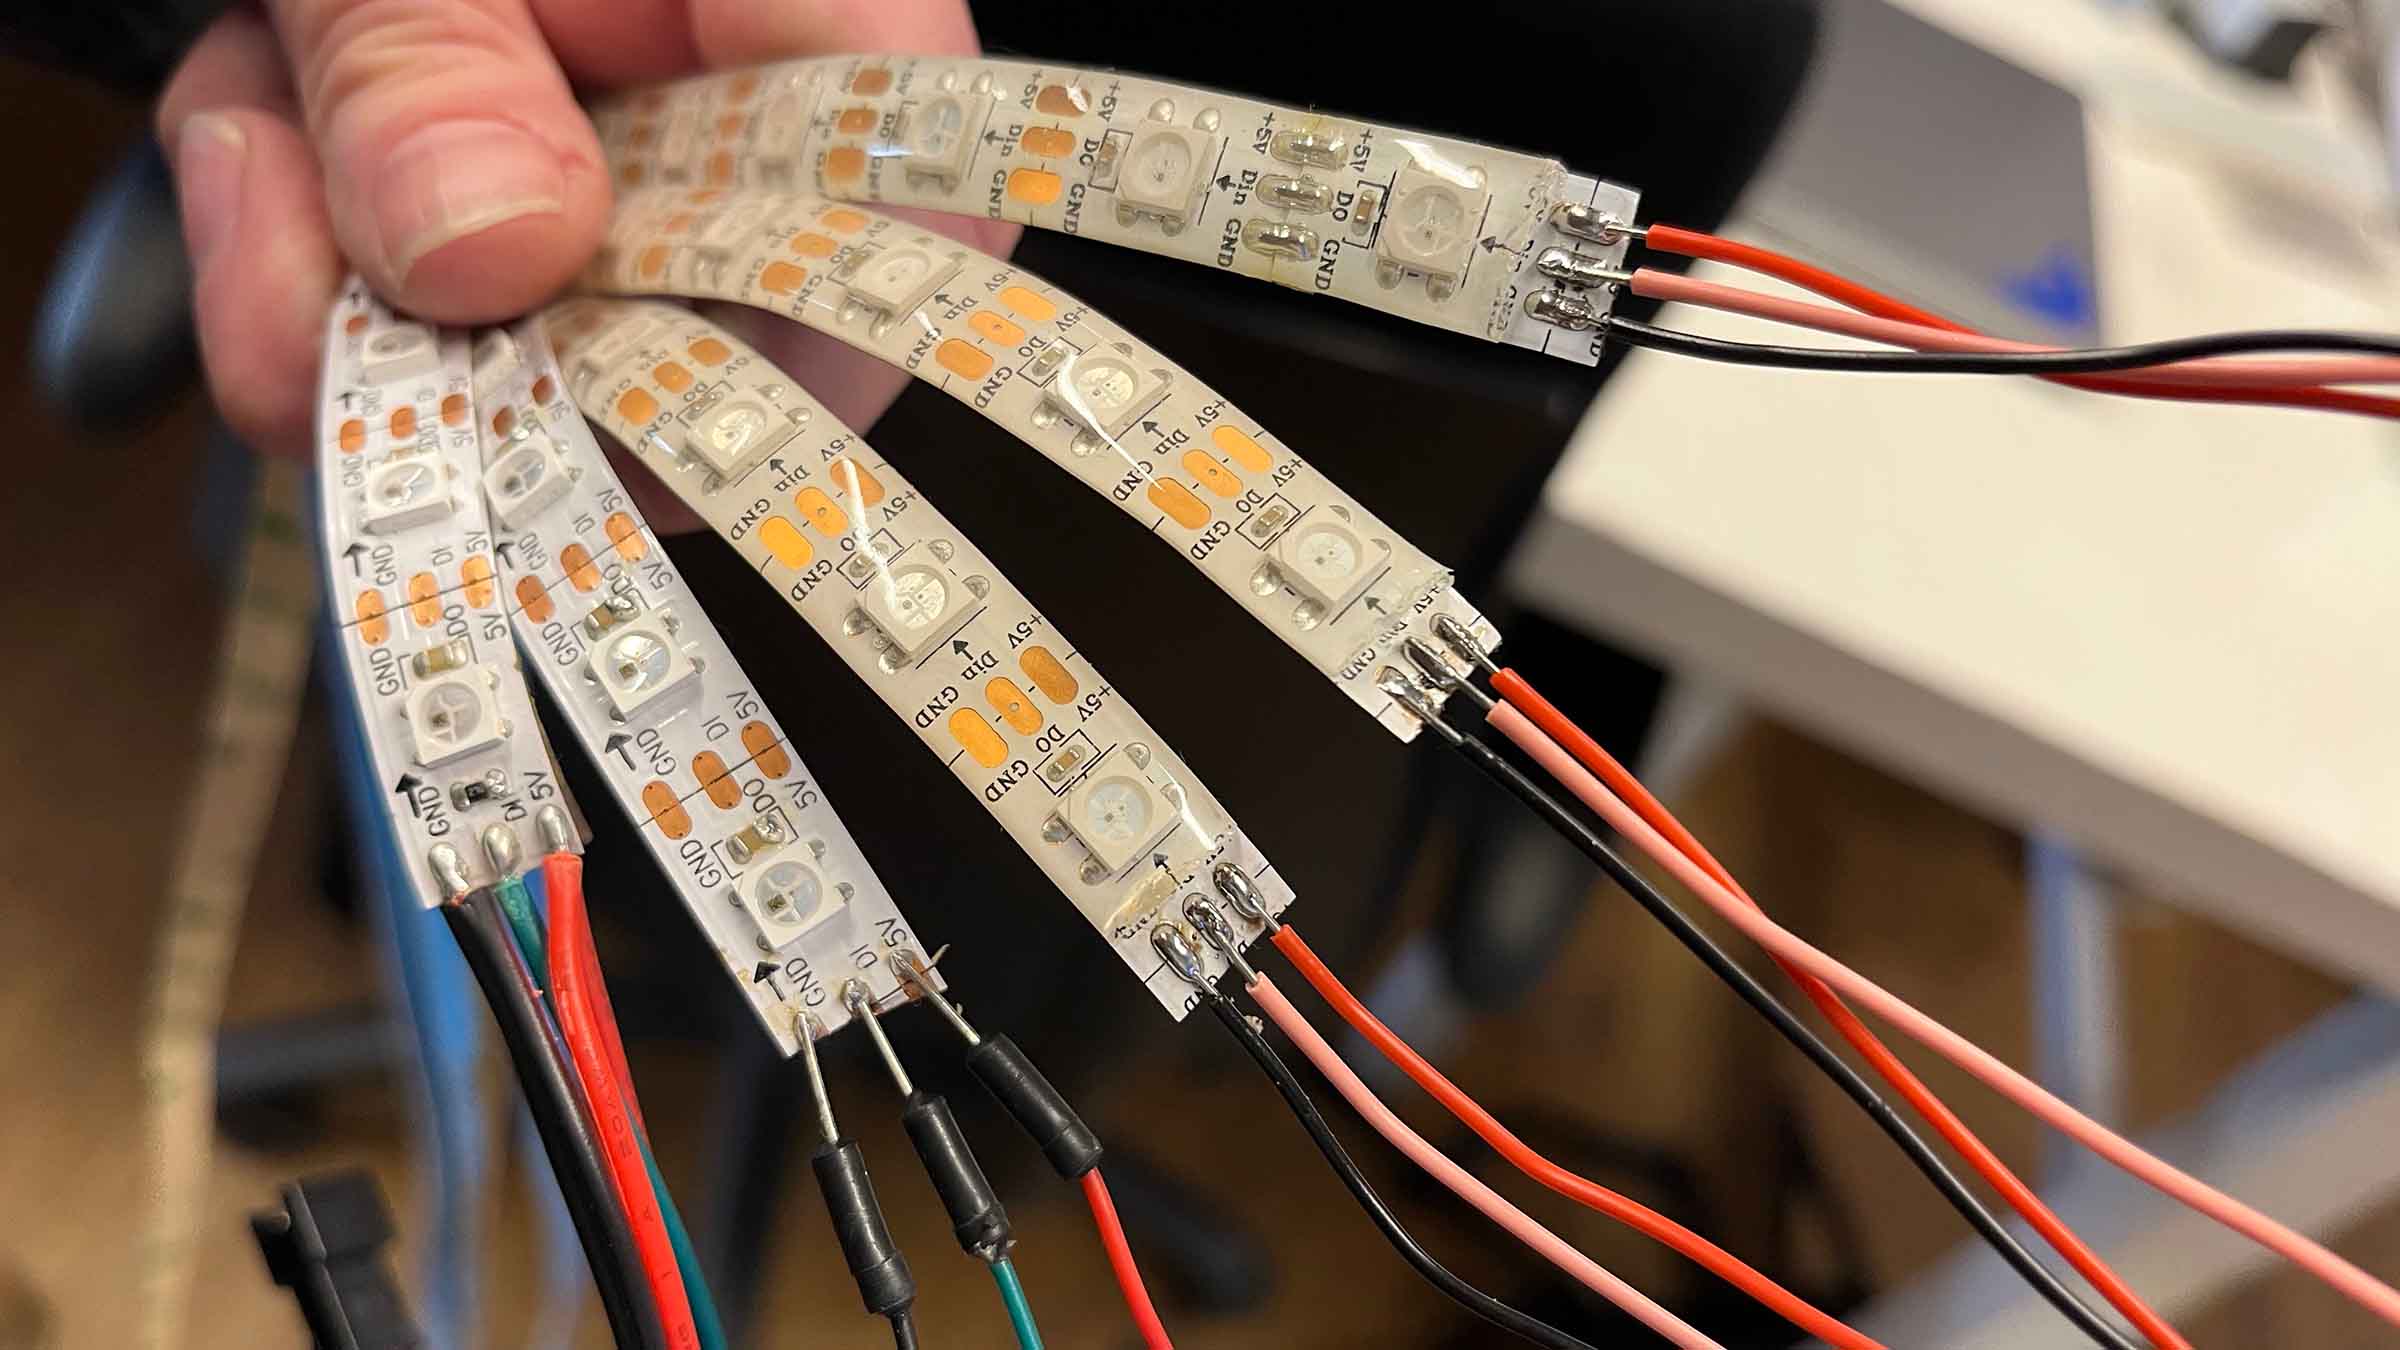
I still have some time left waiting for the edge cut to be done so I decide to prep 5 strips to hook up to my board latter. Two strips around the lab have cables on the input side, but three do not. I strip back a bit of the plastic covering and Henk shows me how to use flux and tin the coper pads to make soldering cables to them easier later. I do this for all three and attach cables to each pad.
The board comes out pretty well from the mill, the traces are pretty rough so sanding takes a long time. I solder on all the components and test them with the multimeter like I did in week 8 as I go.
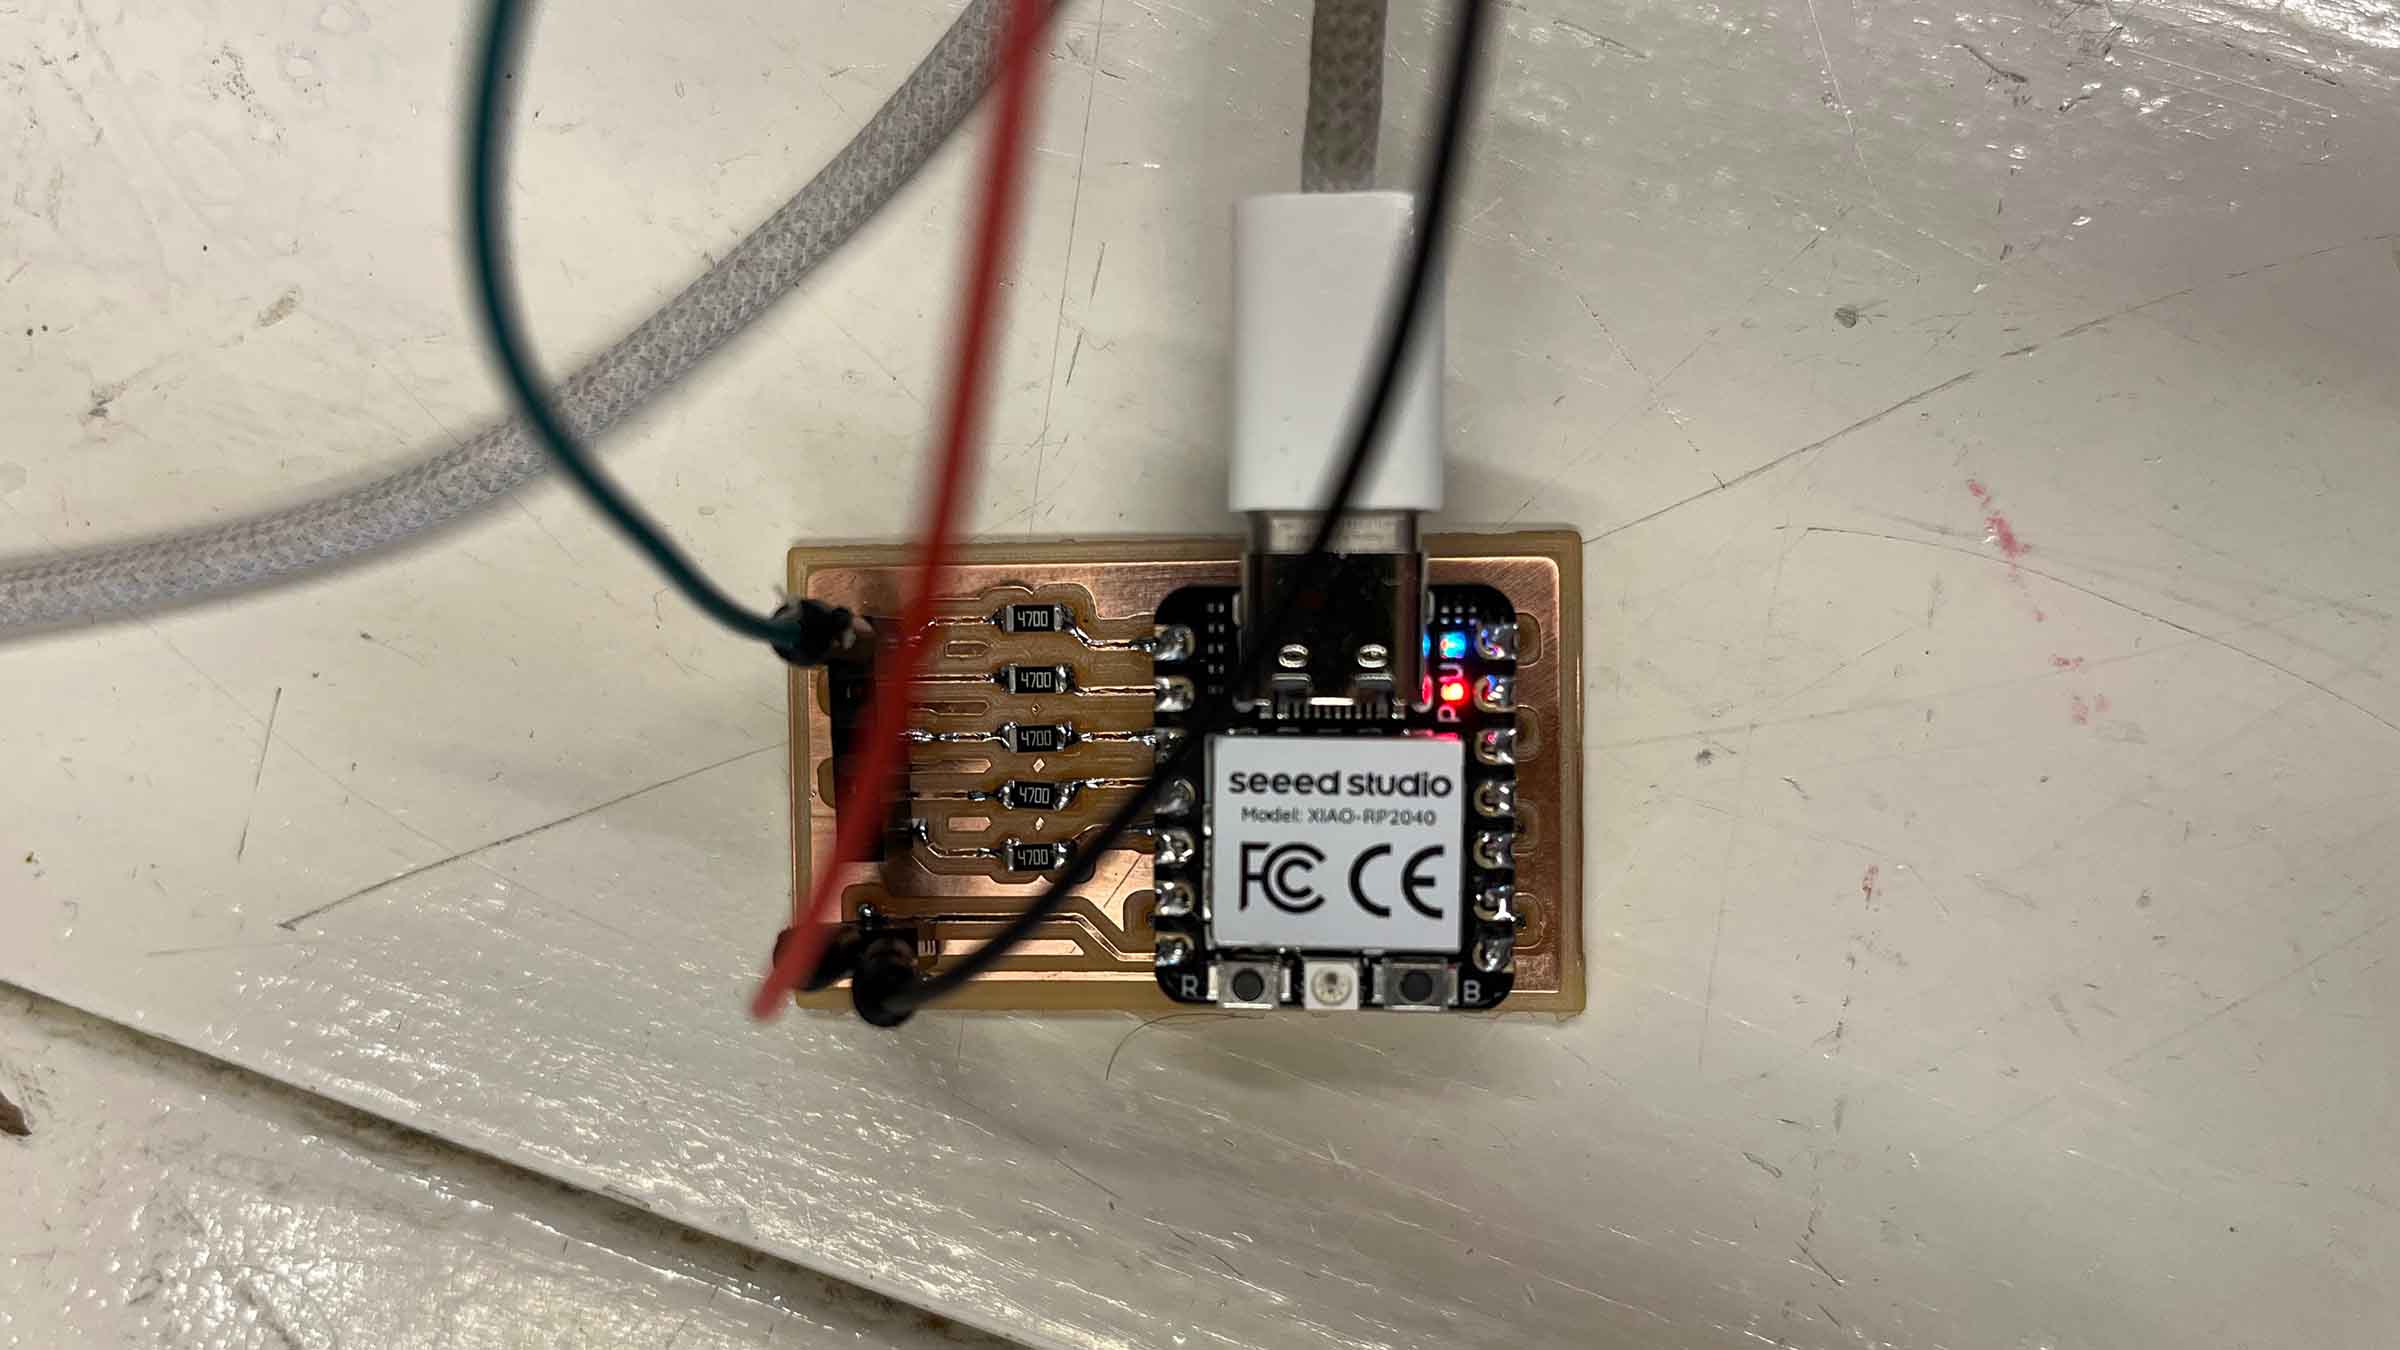
When I'm done soldering I then try to hook up my led strip to my new board, but can at a maximum get only two leds to turn on.
I double check my board and soldering with a multimeter like I did in week 8 but can't find any faults. Henk double checks my work and also can't find any issues. He asks me to show the setup, so I show him how the exact same code on the same pin on the exact same Xiao on a different board works fine. The only difference is, it doesn't have the resistors on the data lines. Henk takes a jumper cable and connects the pin and the data in line from the strip directly and the whole strip lights up. This suggest that with the external power source it may all be fine, unfortunately the day is over and we have to leave the testing for another day. The next day it was time to hook up multiple strips which to the board, I kept adding one at a time while increasing the current on the external power device. Luckily this all worked well.
Other strip types
Since for my final project I'm looking to mimic beads on strings I decided to check what other addressable led products are available out there. To understand what I was looking at I first had to get a better understanding of the different types of chips. Sofar I've been working with leds with WS2812 chips, which comes with it's own protocol, there are other types available that all come with their own specifics.
WS2811
We found some of these lying around Waag and although we didn't test them I was curious how they differ from WS2811. These strips can be found in both 5v and 12v versions. The biggest difference with WS2812 is that they have a separate chip in a strip often controls three leds at once. These means the leds aren't individually addressable, so for my final project these aren't as relevant.
WS2812
These seem to be the most common types of led strips at the moment, they have the driver chip built into the led which makes them individually addressable. They are chained, so they have a data in and data out line, next to 5v power and ground.
WS2813
Strips with WS2813 driver chips have an extra data in and out line that means that if one led dies it can skip over it and still feed data to the next led. Since there might be some strain on my curtain as people pass through or get caught in it this seems like a nice feature for my final project.
WS2814
These 12v strips are designed for RGBW leds for projects that need true white light, not rgb white. They are more like WS2811 strips in that the chip is separate from the leds and they are often grouped.
WS2815
Next to a lot of WS2812 led products I also find there's quite some WS2815 products available, whereas the other chip types are more rare. These strips are like the WS2813 strips in that they have an extra data line, but they also have 12v for more stable runs on longer distances.
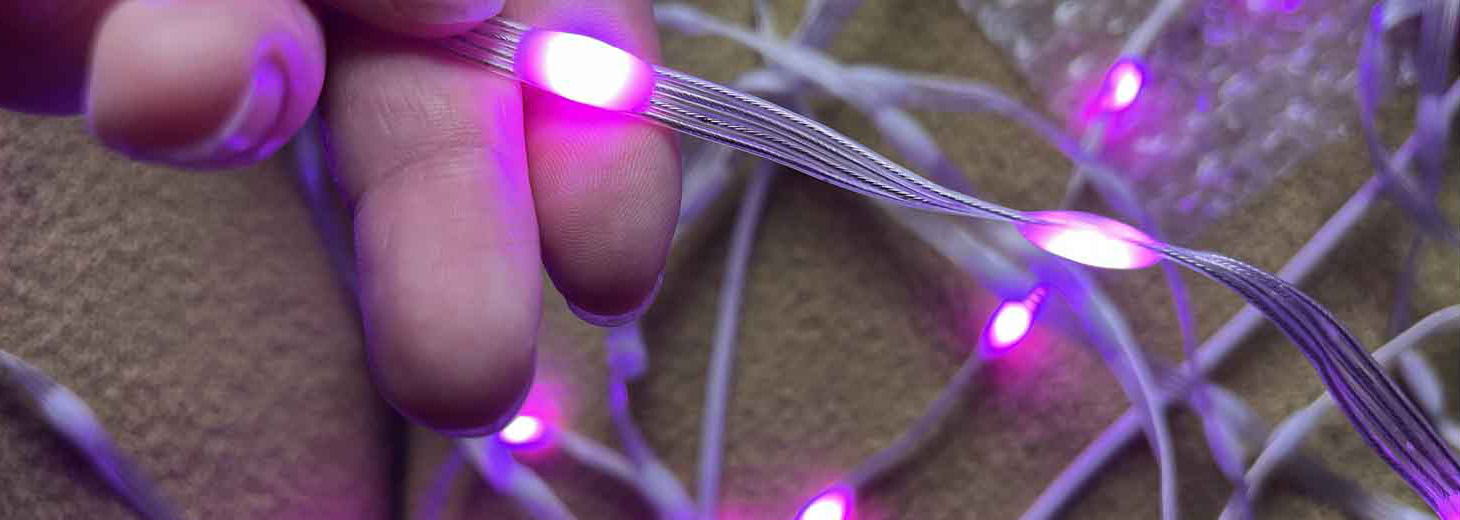
On AliExpress I find something called pebble strings, these are leds in a small plastic pebble on 4 strings instead of a flat strip. I decide to order a WS2815 piece to see if these fit my final project. I'm not sure yet about the spacing of the beads but decide to order 5m of 5cm spaced leds to play around with. When it arrives I hook it up to my board from last week and test them out. Eventhough this is only 5v and 12v would be required for a more stable signal they light up! I like how the light gets diffused around the string and is more 360 than the strips, though you can definitely see a front and back side.

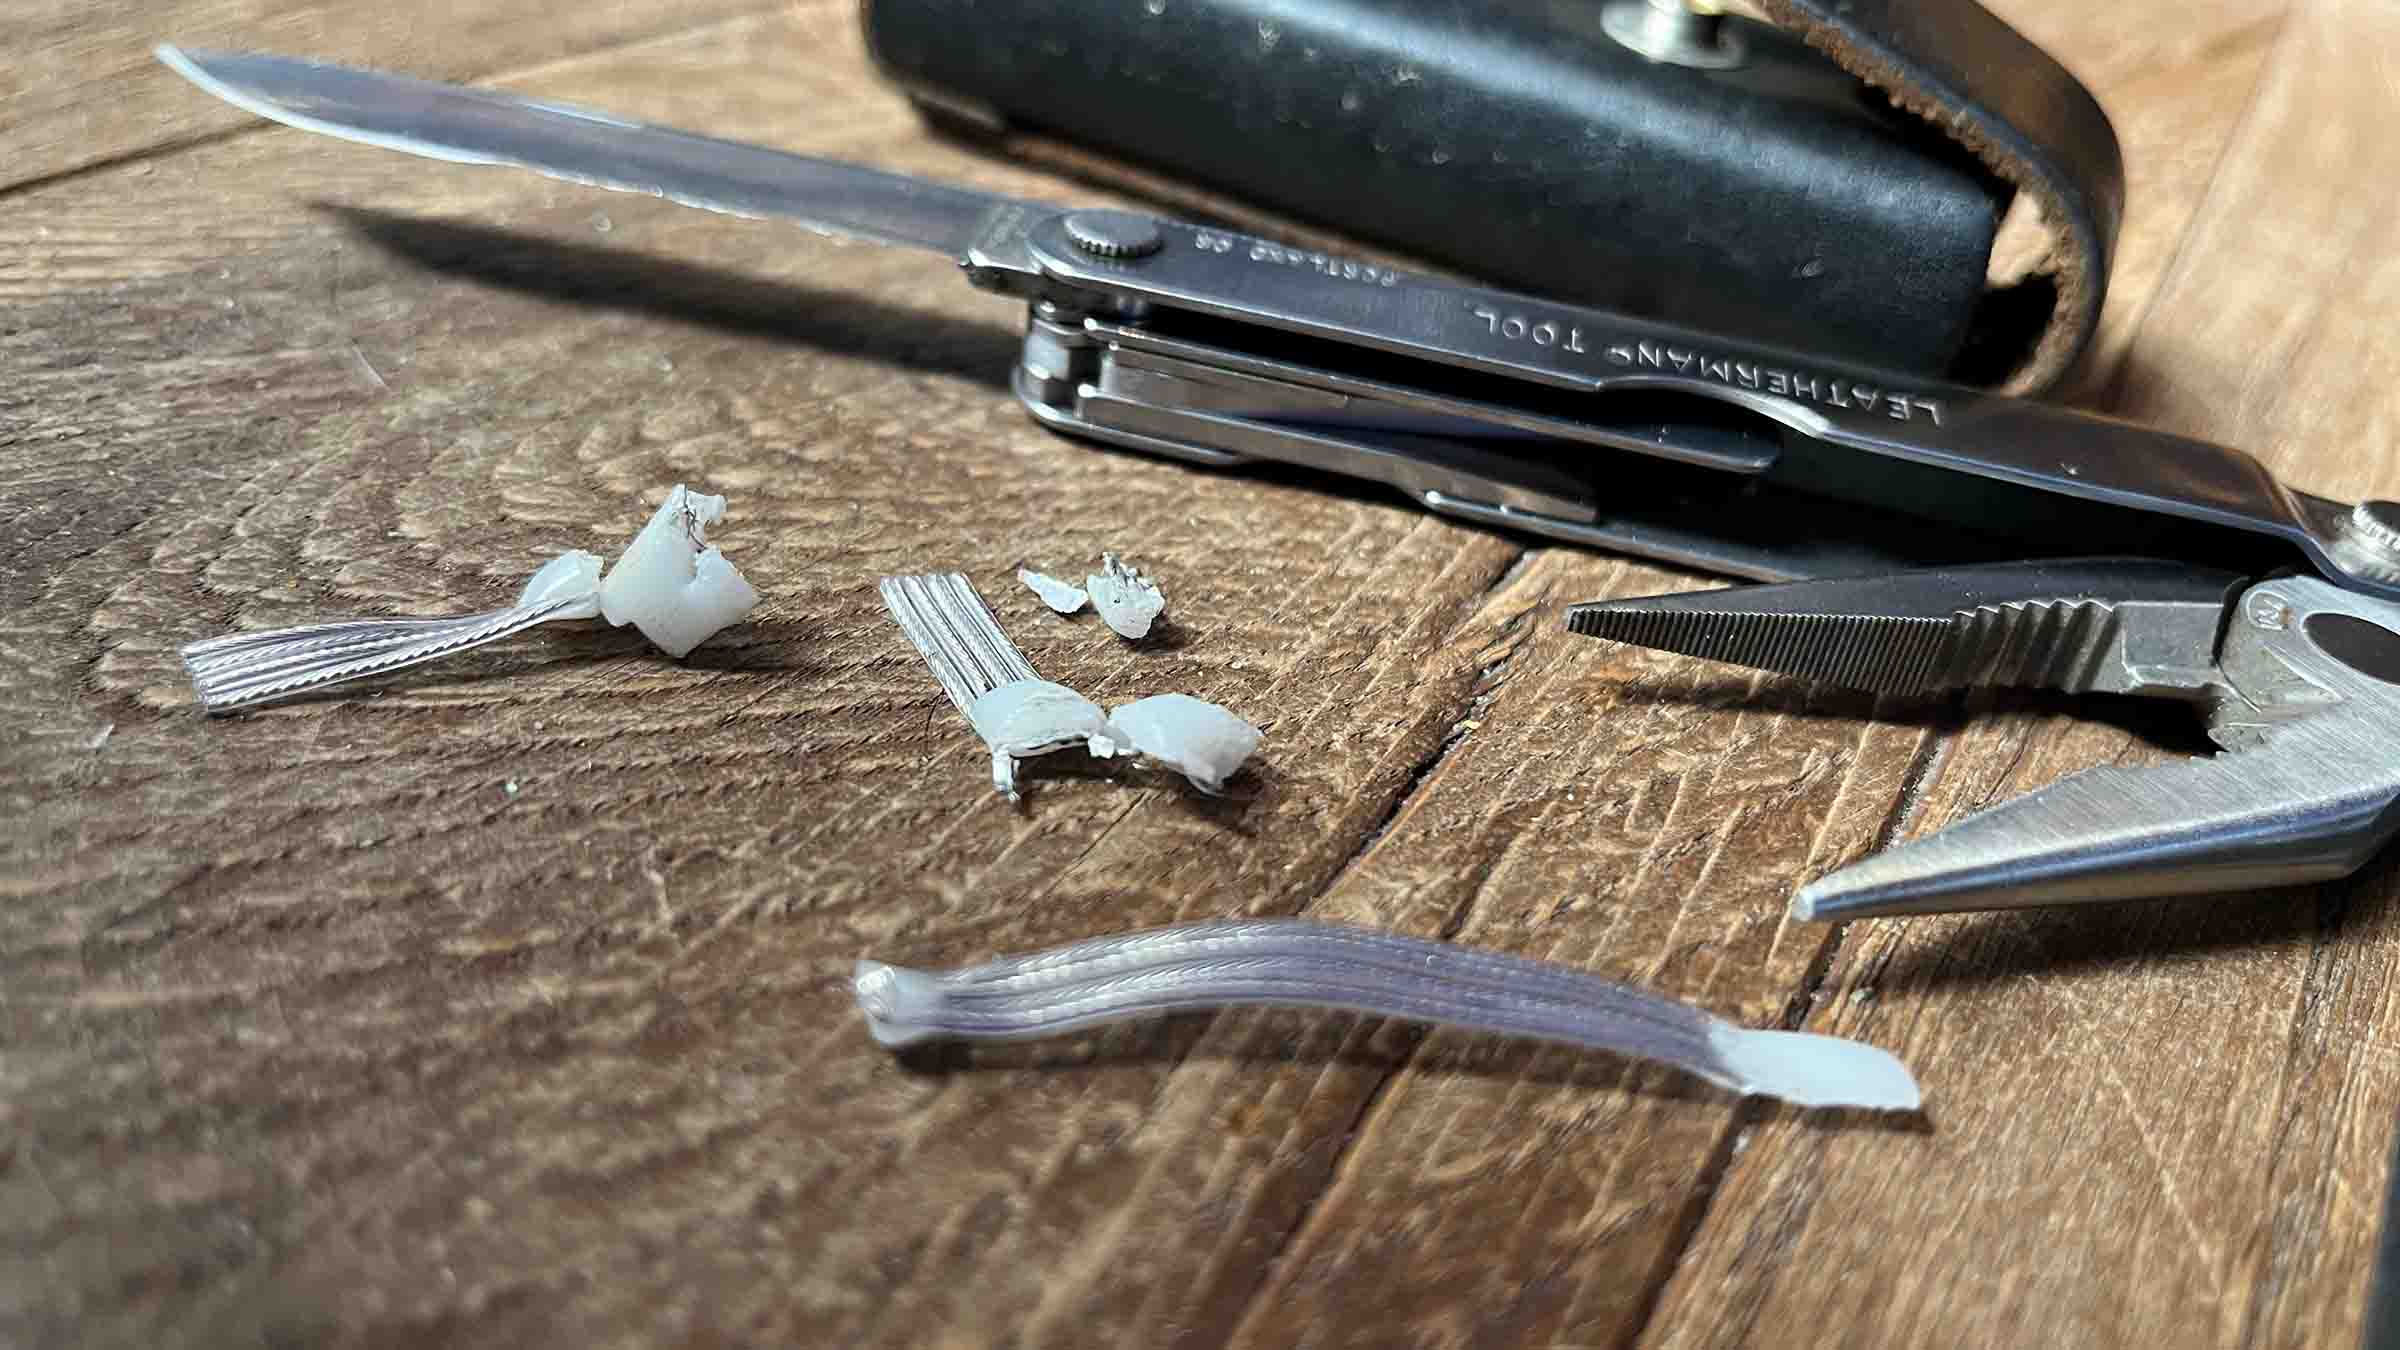
I'm curious what these look like on the inside, so I try to cut them open, but I can't achieve anything but total destruction.
What would i do differently
- test things in the lab before you take em home
Files & resources
Leftovers previous week
- nothing (give yourself a pat on the back)
- fix link to changed xiao qpad repo code structure in previous weeks
Further exploration
- deep dive into MicroPython libraries and considering writing my own for final project