Interface and Application Programming
Week 14 Assignment
Assignment Overview
3D Typewriter — a small web app that sends G-code over USB to Marlin on the plotter I built for Week 12 (Mechanical Design, Machine Design): type text, preview the path, drive the XYZ steppers to write. This page is the project write-up for Week 14 (interface programming).
📋 Assignment Process
Same style as Week 1: each stage below is one step. I went through Marlin → Mega → RAMPS + power → motors → config → web app → demo.
Download Marlin
Official site: marlinfw.org (documentation and download links). Source: github.com/MarlinFirmware/Marlin. Open the project in Arduino IDE and pick the configuration that matches your board (e.g. RAMPS).
Burn firmware to the Arduino Mega / Mega 2560
Board: Arduino Mega or Mega 2560, correct USB port, compile and upload so the ATmega2560 runs Marlin.
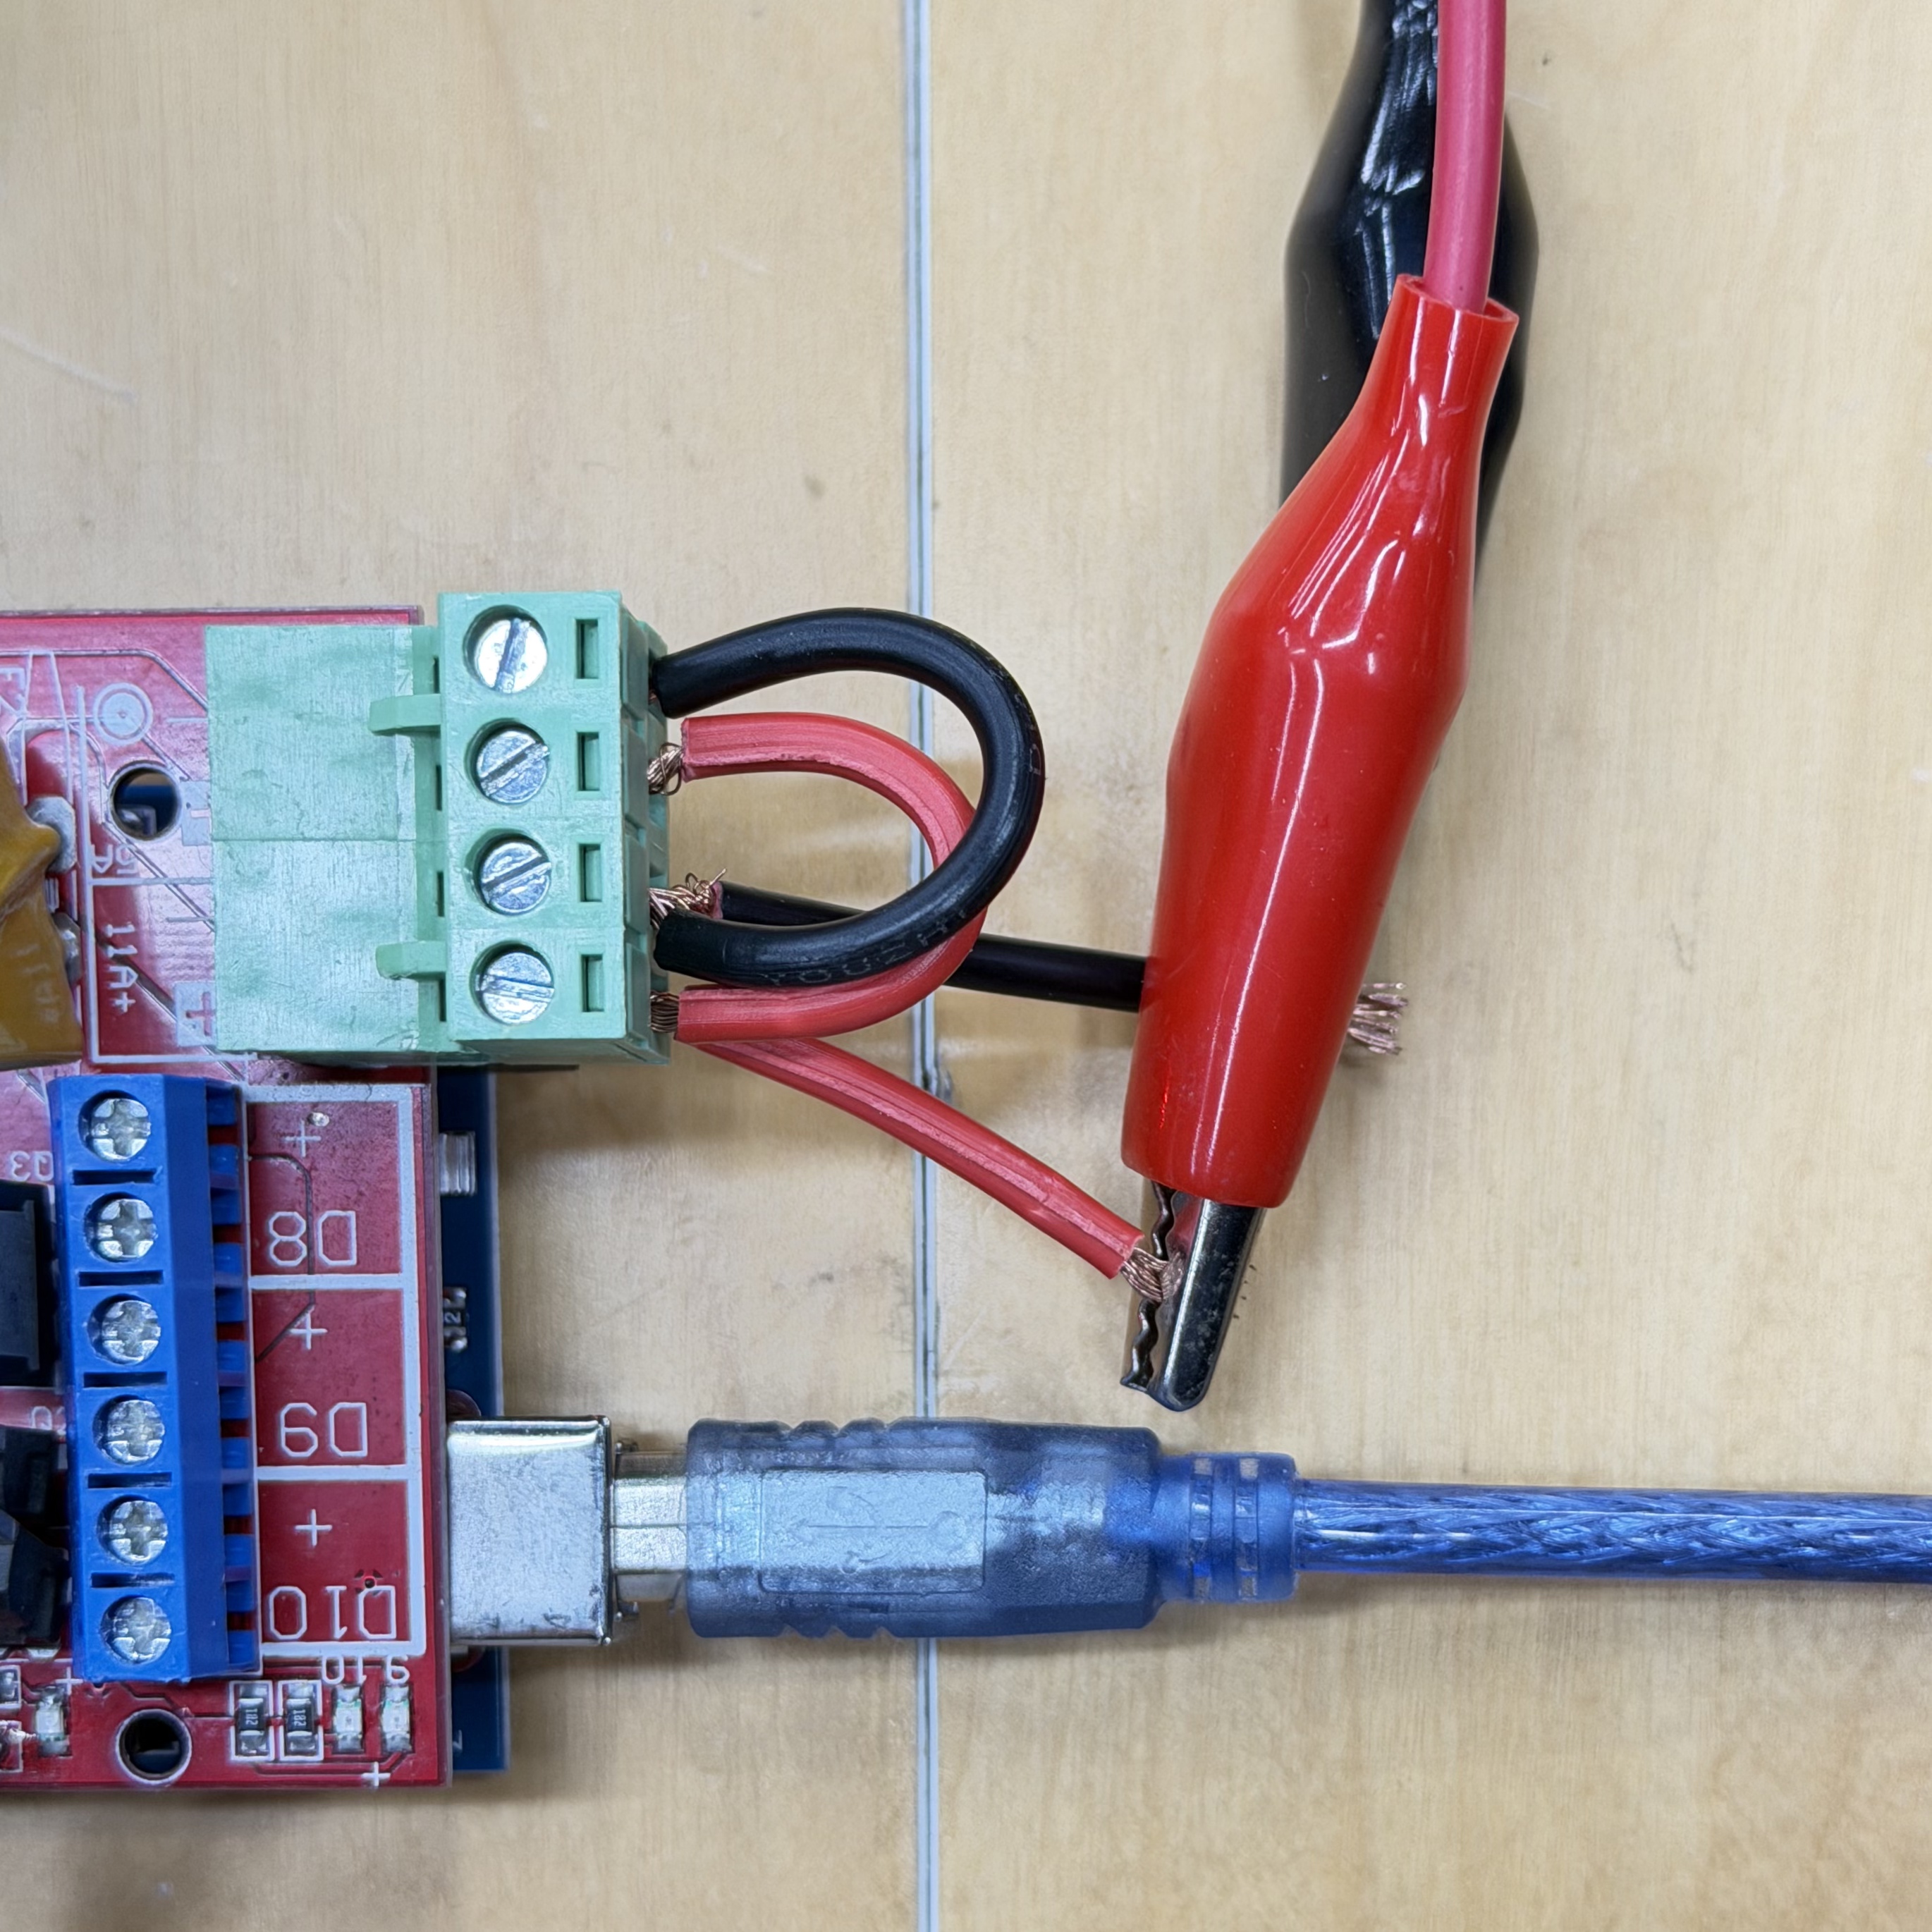
Stack RAMPS and connect 12 V
Plug the RAMPS shield onto the Mega, then connect an external 12 V supply to the RAMPS main power input (polarity and current rating must match your setup).
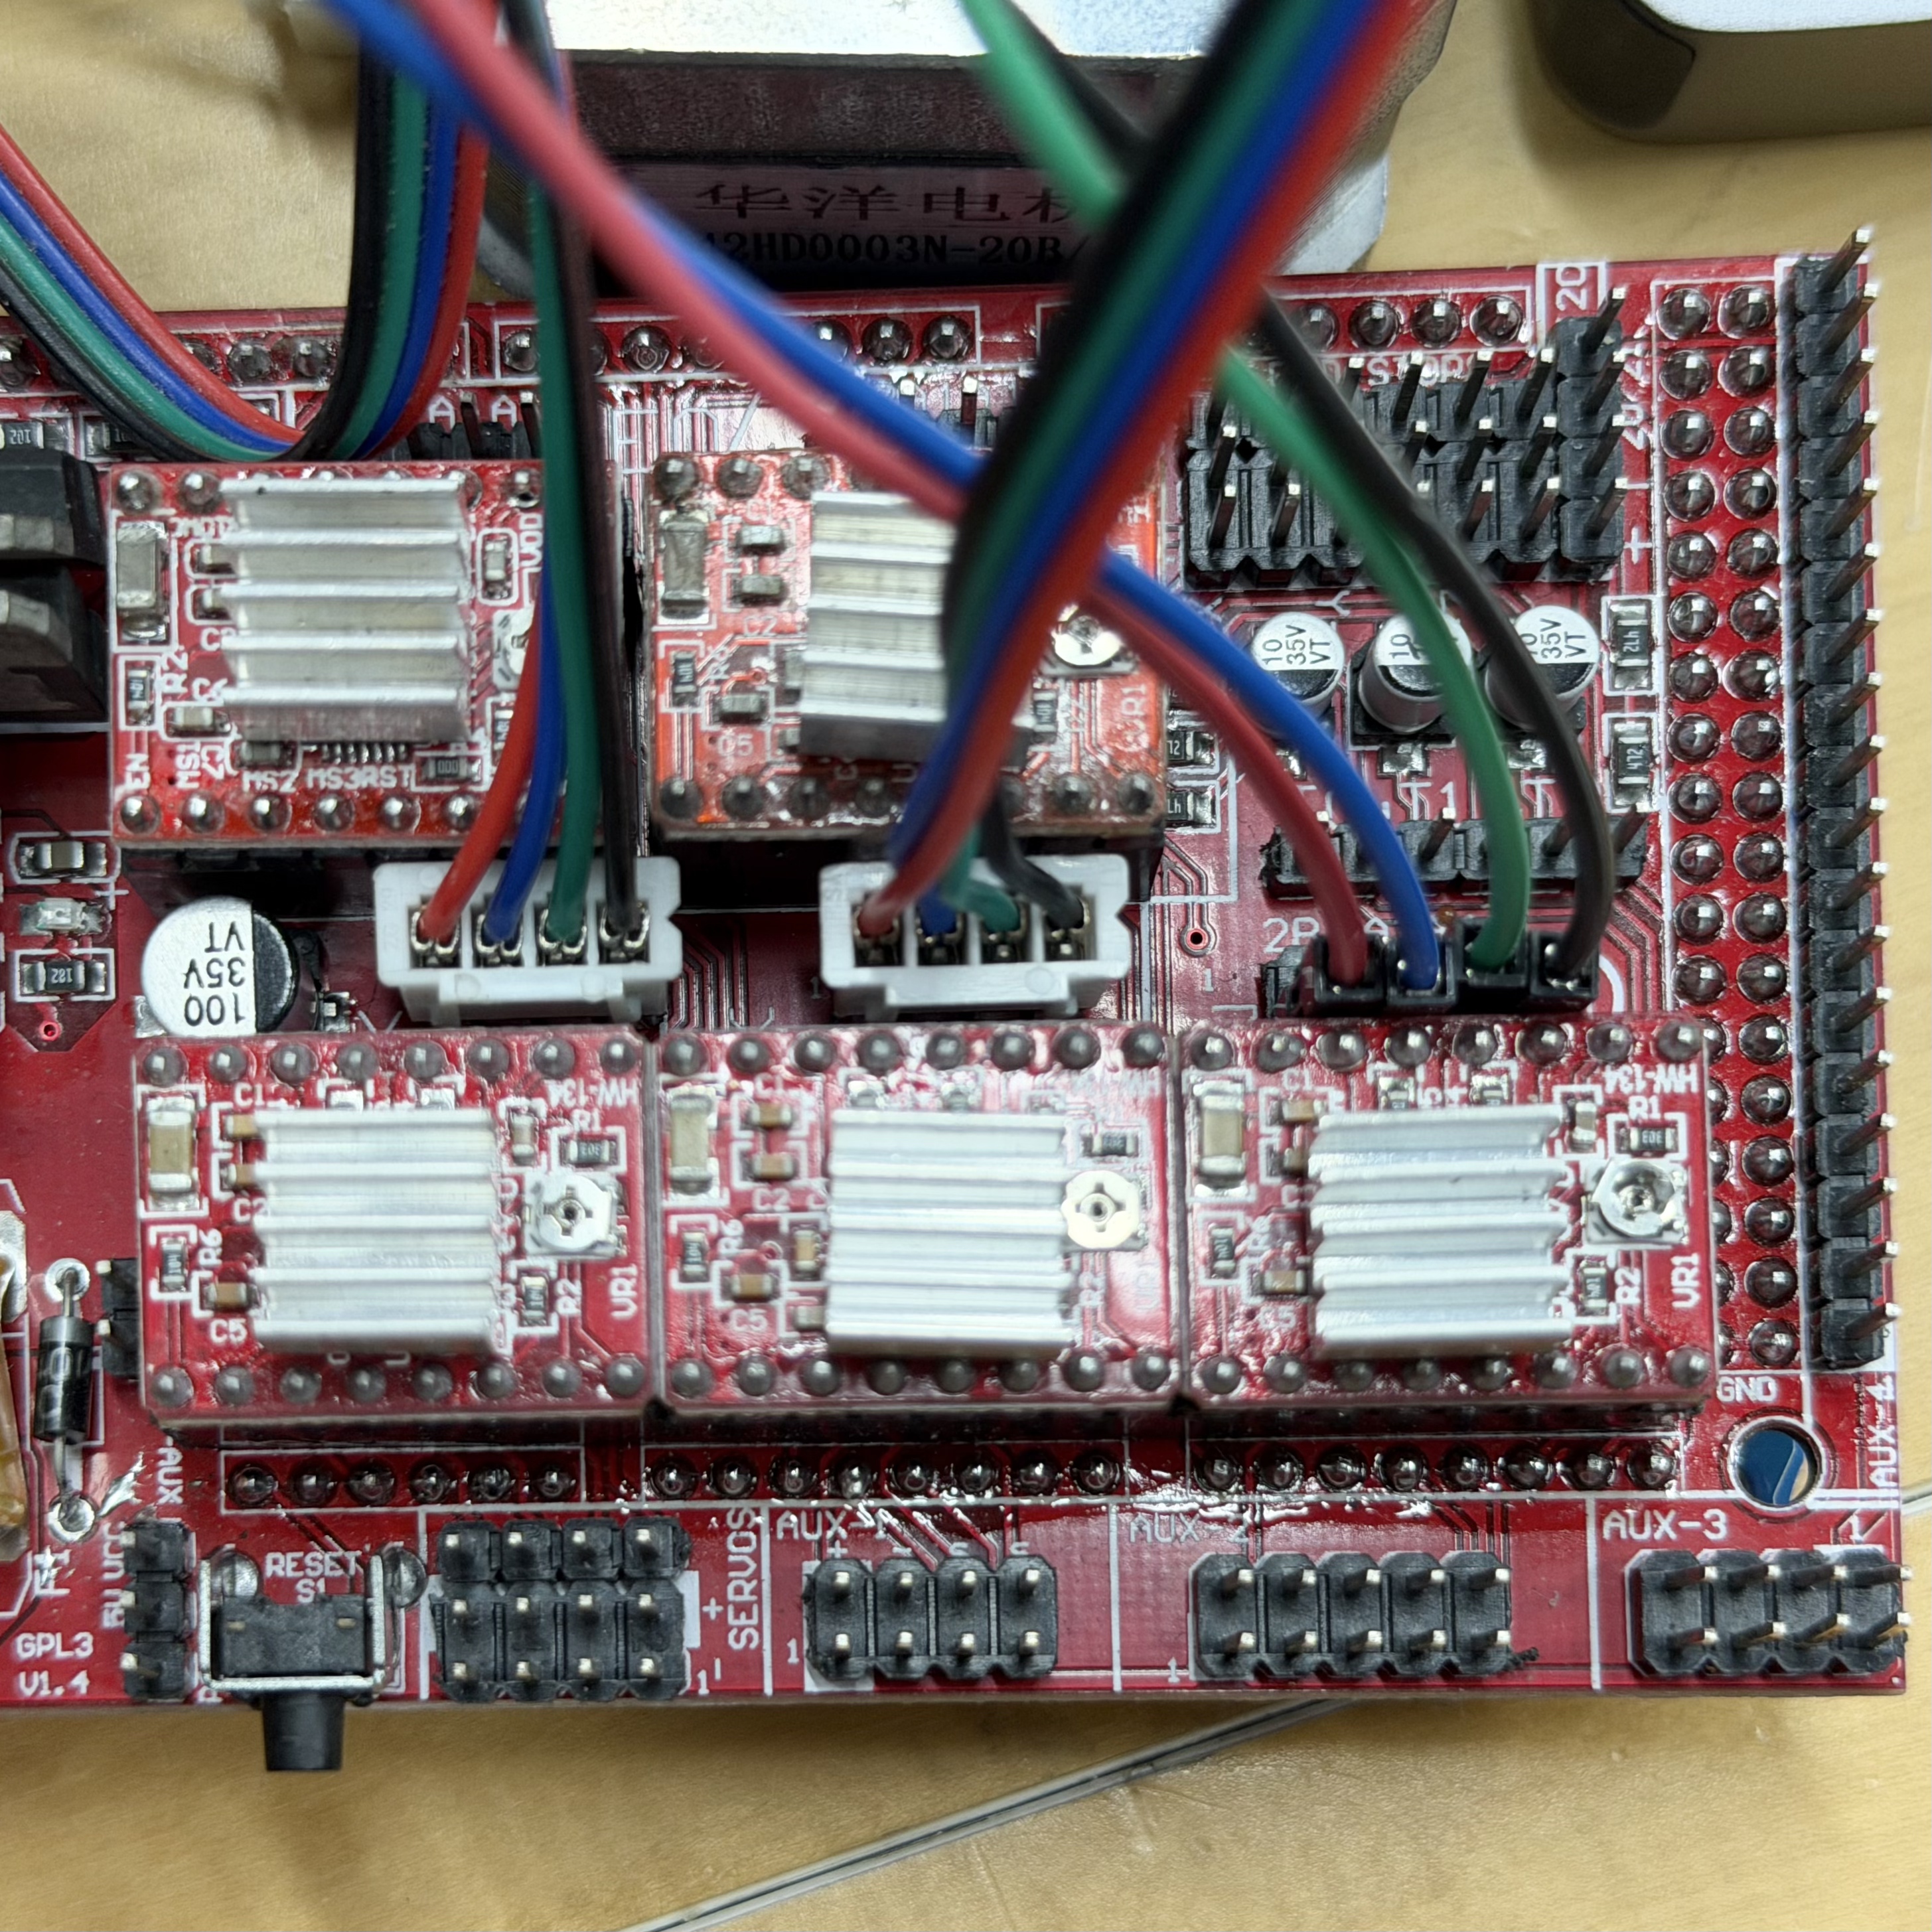
Connect the three stepper motors (X, Y, Z)
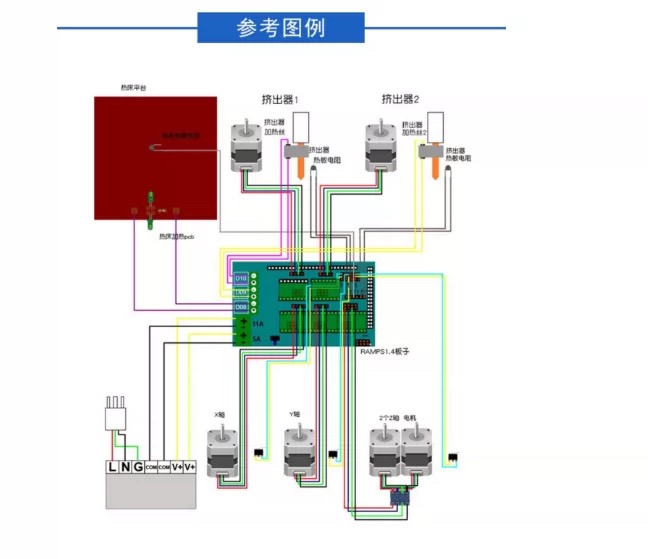
Each axis: 42 mm (NEMA 17) motor to the matching RAMPS driver output (A4988). Reference pinout first, then my wiring.
Reference pinout
My wiring
Edit Configuration.h
Set steps/mm, max feedrate, and max acceleration (see below). Set serial baud to 250000 (BAUDRATE) to match the web app.
Values I used (order X, Y, Z)
#define DEFAULT_AXIS_STEPS_PER_UNIT   { 80, 80, 400, 500 }
#define DEFAULT_MAX_FEEDRATE          { 100, 100, 10, 25 }
#define DEFAULT_MAX_ACCELERATION      { 500, 500, 50, 500 }
Tune A4988, re-flash, bench test
Adjust each A4988 VREF (output current) so motors turn reliably; together with DEFAULT_MAX_FEEDRATE and DEFAULT_MAX_ACCELERATION this fixed skipped steps and vibration. If you change microstepping jumpers, update DEFAULT_AXIS_STEPS_PER_UNIT. After edits, recompile and upload until motion is stable.
Optional bench: MINTEMP off, M211 S0, G92 for workspace zero without endstops; test with Serial Monitor before the browser.
Host computer for the web UI
macOS · Google Chrome · page served over HTTPS or localhost (required for Web Serial).
Software — 3D Typewriter
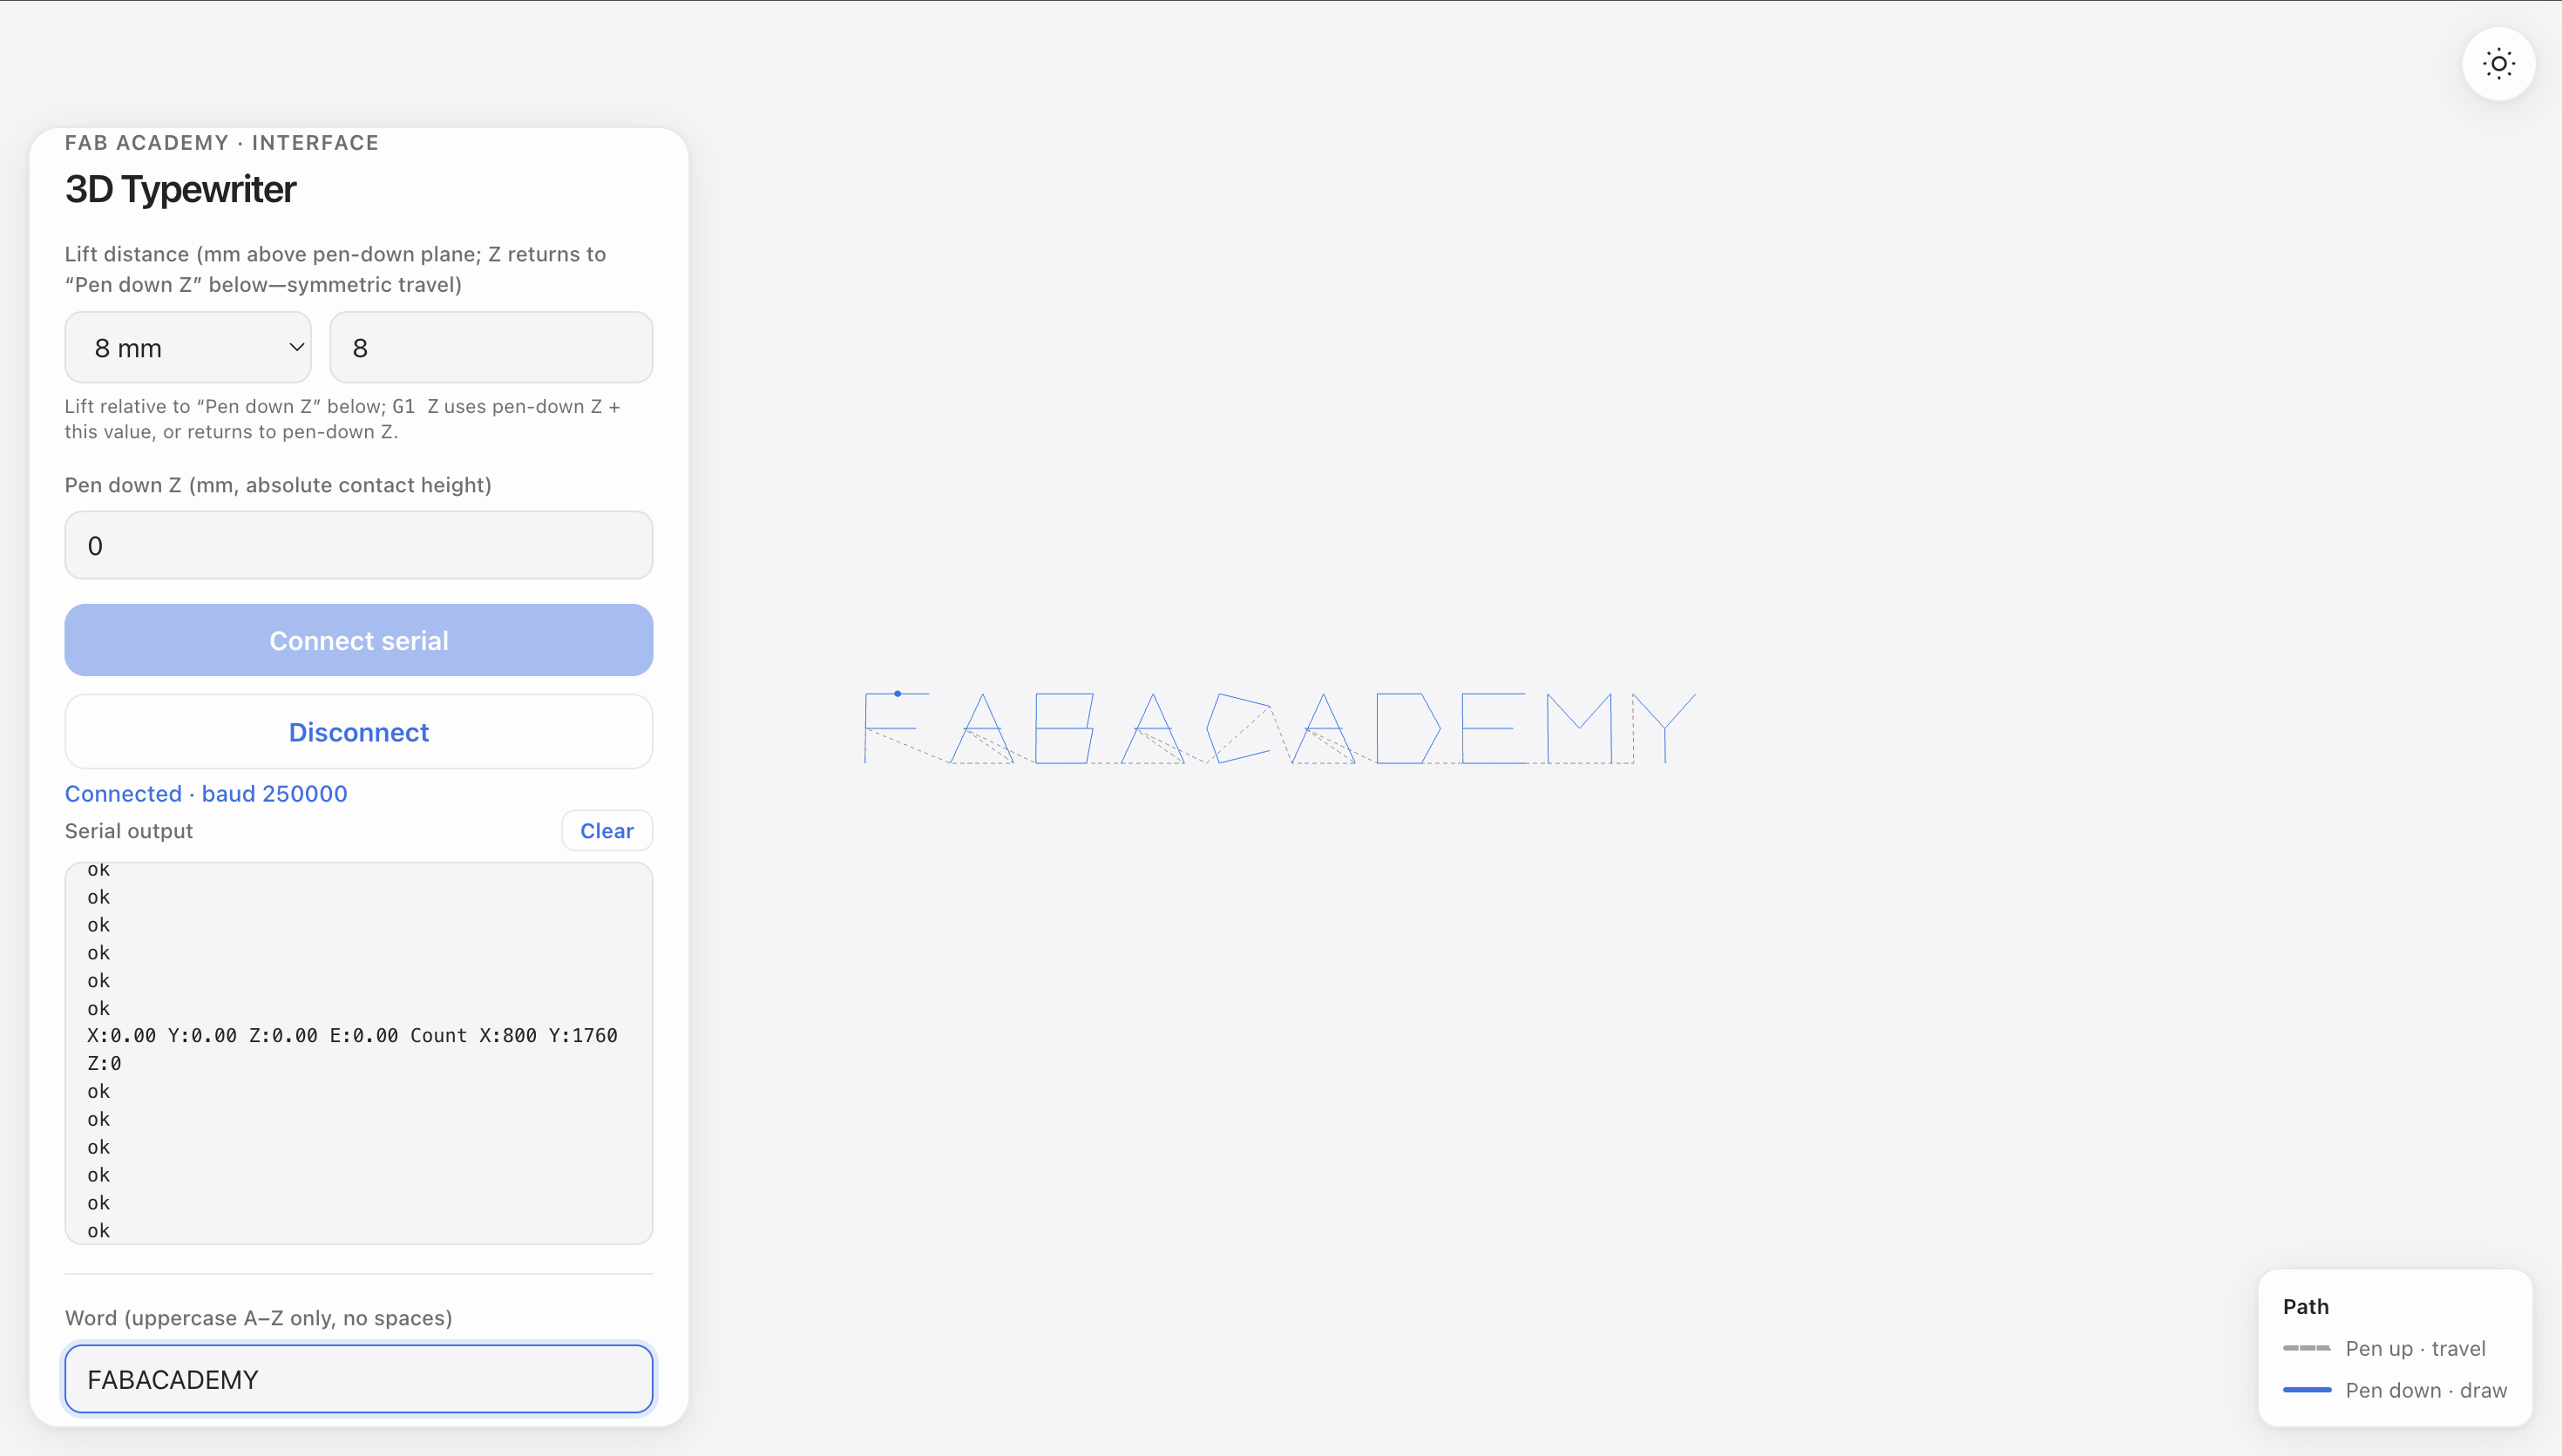
What the app does
3D Typewriter (serial-motor-web): typed text → LETTER_PATHS + Z → G-code streamed line-by-line; in-browser 3D preview of the toolpath (gray travel, blue draw).
Paths and Z logic
Each letter is travel / draw segments in mm; words shift along X. Z only changes at travel ↔ draw (lift = pen-down Z + lift mm, then back).
Browse Web Serial (same baud as firmware)
port = await navigator.serial.requestPort();
await port.open({ baudRate: 250000 });
Busy port: close other serial apps (e.g. Arduino Monitor). Tools: Cursor / Gemini. Later: SVG paths (see canvasline.html).
UI screenshot
Publishing
How to build the site: Week 1 — Principles and Practices
Demo
Video — software ↔ hardware
Demo below: browser / machine interaction while writing.
X / Y drive the pen in the plane; Z is only for pen up (travel) and pen down (draw)—not for drawing strokes in X/Y.