Principles and Practices
Web Development and Setup
📌 Assignment Overview
This week focused on planning and sketching a potential final project and working through a git tutorial.
📋 Assignment Process
This section documents the step-by-step process of completing this week's assignment.
🖥️ Environment Configuration
Operating System: Mac
Environment Setup Software: Node.js
Download: https://nodejs.org/en
Tools Used: Cursor![]() , Gemini
, Gemini![]()
Git configuration (once per machine)
git config --global user.name "your username"
git config --global user.email "your_email@gmail.com"
Download Node.js if needed, open the project folder in Cursor, and run terminal commands from that directory.
GitHub remote setup & Pages — full walkthrough (example: Printer)
This section records the full sequence: create a GitHub repository, bind local files, fix HTTPS token errors, resolve “rejected / fetch first”, and publish on GitHub Pages. Example repo: LeLi1107/Printer — replace with your username and repo name.
Phase 1 — Create repository and bind locally
- On GitHub: New repository → name (e.g.
Printer) → Public → Create. (If you add a README on creation, see Phase 3 — remote will have an extra commit.) - In Cursor’s terminal,
cdinto the folder that contains your site (e.g.index.html). - Initialize Git, stage files, and commit before the first push:
git init
git add .
git commit -m "Initial commit of printer control UI"
Add the remote (HTTPS URL from the repo page):
git remote add origin https://github.com/LeLi1107/Printer.gitIf Git still uses master, rename the branch to main:
git branch -M mainPhase 2 — Token authentication
Error seen: remote: Invalid username or token. Password authentication is not supported.
Cause: GitHub disabled password pushes over HTTPS; use a Personal Access Token (classic) with repo scope.
Token: GitHub → Settings → Developer settings → Personal access tokens → Tokens (classic) → Generate. Copy the ghp_… string once.
“Direct” HTTPS URL (embed username + token; use only on a trusted machine, never commit or screenshot the real token):
git remote set-url origin https://LeLi1107:YOUR_TOKEN_HERE@github.com/LeLi1107/Printer.gitPhase 3 — Push rejected (fetch first)
Error seen: ! [rejected] main -> main (fetch first) — remote has commits (e.g. README) that you do not have locally.
Option A — Merge histories: git pull origin main --allow-unrelated-histories, fix conflicts, then git push -u origin main.
Option B — Overwrite remote with local (only if nothing on GitHub must be kept):
git push -u origin main --forcePhase 4 — GitHub Pages
- Repo → Settings → Pages.
- Build and deployment: Branch =
main, folder =/ (root)(or/docsif the site is underdocs/). - Actions tab: wait until pages build and deployment succeeds (green check).
- Project Pages URL shape: https://leli1107.github.io/Printer/
Note: Pages serves over HTTPS, which satisfies Web Serial’s requirement for secure context (along with localhost).
Stage 4
I used cursor's AI with the following prompt:
I now want to create a FabAcademy 2026 personal website,
style reference apple.com, needs to include Home, Weeklywork,
Finalproject, Aboutme, where Weeklywork has 20 assignments inside,
and needs two modes, dark mode and light mode, help me generate it.
Cursor Generation Interface

Prompt Generation Result
Subsequently used gemini for code troubleshooting, and continued to use cursor for optimization.
After completion, perform version upload
| Steps | Command |
|---|---|
| 1. Record changes | git add . |
| 2. Write commit message | git commit -m "update description" |
| 3. Send to cloud | git push origin main |
🖼️ Image Management
This section covers the process of managing images for the website using PicGo and GitHub.
Step 1: Download PicGo
Download PicGo from: https://github.com/Molunerfinn/PicGo
Install PicGo on your Mac system.
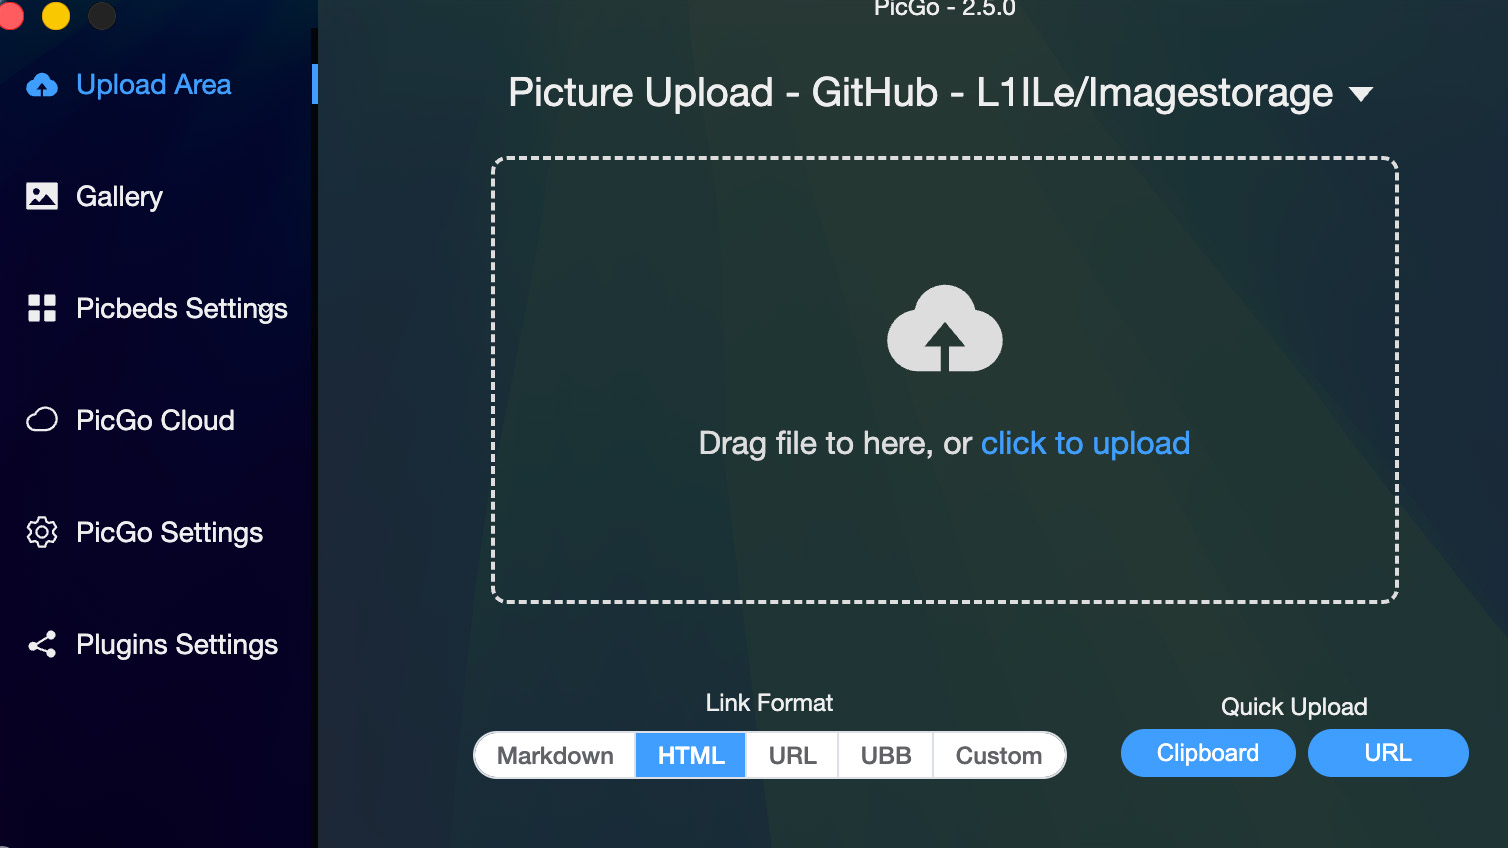
PicGo Application Interface
Step 2: Create GitHub Repository for Image Storage
Go to GitHub and create a new repository named Imagestorage (or any name you prefer).
- Make sure the repository is set to
Publicif you want to access images via public URLs - Initialize with a README file (optional)
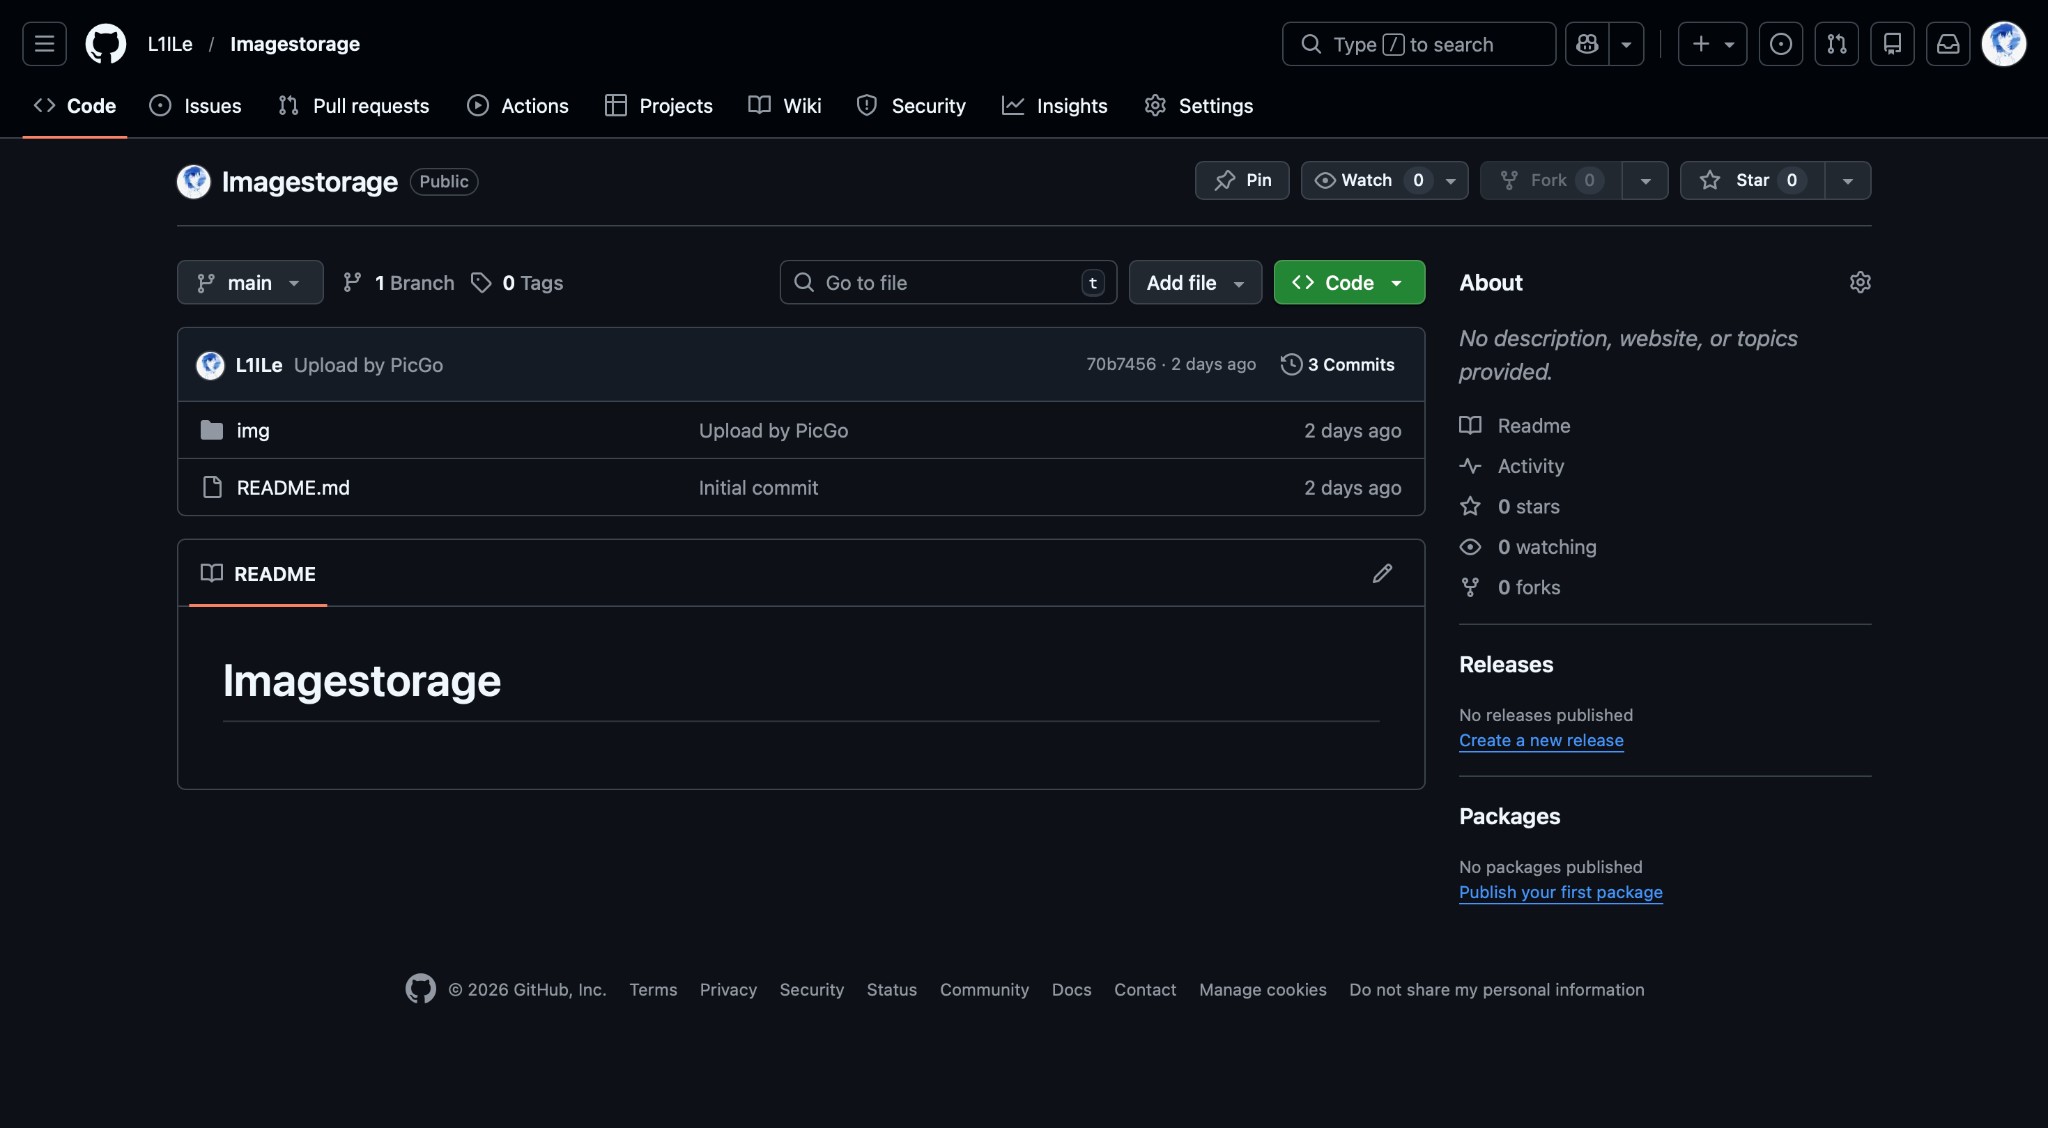
GitHub Imagestorage Repository
Step 3: Generate Personal Access Token
Go to GitHub → Settings → Developer settings → Personal access tokens → Tokens (classic)
- Click "Generate new token (classic)"
- Give it a descriptive name (e.g., "PicGo Image Upload")
- Select the
reposcope/permission - Click "Generate token"
- Important: Copy the token immediately - you won't be able to see it again!
Step 4: Configure PicGo
Open PicGo and configure it with the following settings:
- Go to
PicGo Settings→Picture Bed - Select
GitHubas your picture bed - Fill in the configuration:
- Repository:
your_username/Imagestorage - Branch:
main(ormaster) - Token: Paste your GitHub Personal Access Token
- Storage Path:
img/(optional, for organizing images) - Custom Domain: Leave empty or use GitHub Pages URL if configured
- Repository:
- Click "Confirm" or "Apply" to save settings
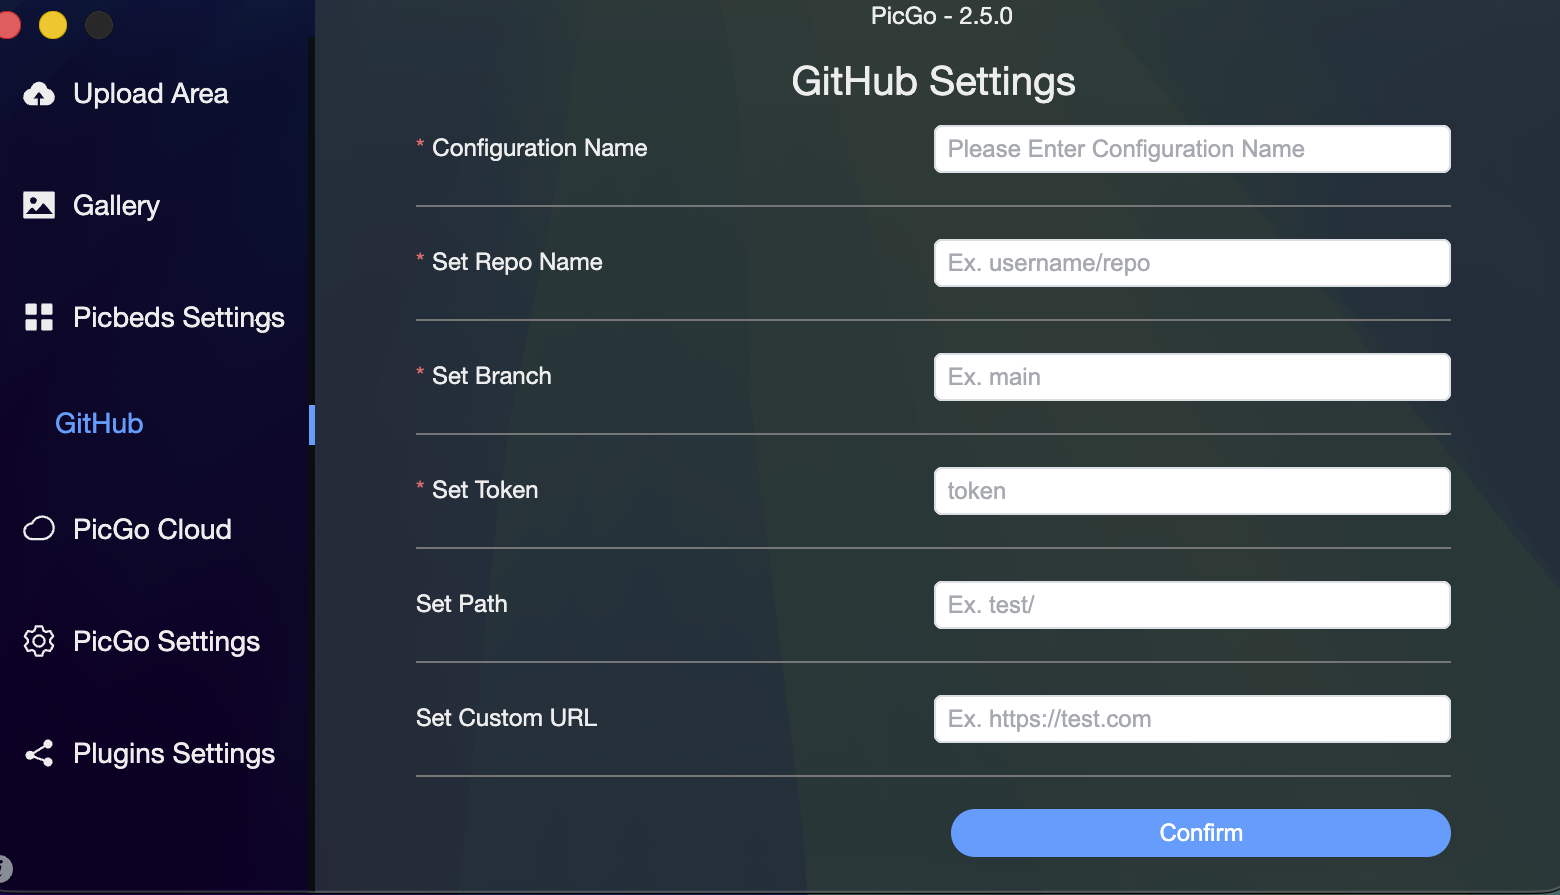
PicGo GitHub Settings Configuration
Step 5: Upload Images and Generate HTML Links
Once configured, you can upload images using PicGo:
- Drag and drop images into PicGo, or click "Upload" to select images
- PicGo will automatically upload images to your GitHub repository
- After upload, PicGo will copy the image URL to your clipboard
- Use the URL in your HTML code:
<img src="IMAGE_URL" alt="description">
Tips
- You can set PicGo to automatically copy URLs after upload in settings
- Use descriptive filenames for better organization
- Consider organizing images in subfolders using the Storage Path setting
- GitHub has a file size limit (usually 100MB per file), so compress large images if needed
🔄 Repository Migration: GitHub → GitLab
This project was initially built on GitHub and has been migrated to the assigned GitLab repository for Fab Academy 2026. Below is the actual troubleshooting process from the migration session.
Background
Website was developed on GitHub (Fab26-TEST). Fab Academy requires GitLab, so I needed to move everything to le-li on gitlab.fabcloud.org, with a public/ folder for GitLab Pages.
Problems Encountered & Solutions
1. "fatal: not a git repository"
Problem: After setup, git add failed. The .git folder existed but .git/config was missing, so Git did not recognize it as a valid repo.
Solution: Removed the broken .git folder, ran git init again, and re-added the remote.
2. "Authentication failed" (401)
Problem: git push returned "HTTP Basic: Access denied". GitLab no longer accepts account passwords for Git.
Solution: Cleared old credentials from macOS Keychain, created a Personal Access Token in GitLab (Settings → Access Tokens) with write_repository scope, and used that as the password when pushing.
3. "No such URL found" – URL parsing error
Problem: Set remote with https://Le Li:TOKEN@gitlab.../le-li.git and got "No such URL found: Li:TOKEN@...". The space in "Le Li" caused the URL to be split incorrectly.
Solution: Encoded the space as %20 and used single quotes: git remote set-url origin 'https://Le%20Li:TOKEN@gitlab.fabcloud.org/.../le-li.git'
4. "Updates were rejected" – remote has commits we don't have
Problem: Push was rejected because the remote already had commits (e.g. from a template or earlier setup).
Solution: Ran git fetch origin main and git merge origin/main --allow-unrelated-histories. Resolved conflicts in .gitlab-ci.yml, README.md, public/index.html, and public/style.css by keeping our versions with git checkout --ours <file>, then committed and pushed.
5. Clone failed – "le-li folder already exists and not empty"
Problem: Could not clone because a local le-li folder already existed.
Solution: Deleted the existing folder with rm -rf le-li, then cloned again. (Ensure no unsaved work before deleting.)
Outcome
Migration completed successfully. The site is hosted on GitLab Pages. After pushing, the remote URL was changed back to the non-Token version and credential.helper osxkeychain was configured so future pushes use saved credentials.
Repository: gitlab.fabcloud.org/academany/fabacademy/2026/labs/unnc/students/le-li