Week17 | Applications & implications, and Project development
Overview
This week has two parts. The first is Applications and Implications, answering structured questions about what the final project does, who it is for, and how it will be evaluated. The second is Project Development which is preparing the final presentation slide and video.
What is a masterpiece?
In FabAcademy, a masterpiece is a final project that demonstrates real mastery of the full range of skills covered during the program: 2D and 3D design, additive and subtractive fabrication, electronics design and production, embedded programming, networking, and system integration. The project must work independently, documents all the process from zero.
What will it do?
The Portable Sleep Monitoring System is a compact device that passively monitors sleep quality through three complementary sensors:
- ICS-43434 MEMS microphone (I2S): detects and logs snoring events by measuring sound energy and frequency in real time on the ESP32-S3. No raw audio is stored.
- ICM-20948 9-axis IMU (I²C): reads the gravity vector to estimate sleep position (back, left side, right side). This lets the system correlate body position with snoring frequency.
- DHT22 (single-wire): measures room temperature and relative humidity throughout the night.
At the end of a session, the user connects to the device's Wi-Fi access point and opens a browser. A lightweight web dashboard shows the full night's timeline: when snoring occurred, what position the user was in, and how temperature and humidity changed. All data is stored locally on the ESP32-S3, no cloud, no subscription, no app required.
The device runs on a LiPo battery for a full night. A small OLED display shows session status, snore event count, and battery level. A single button starts and stops a session.
Who has done what beforehand?
After searching the Fab Academy archive, I did not find prior student project that combines snore detection, sleep position estimation, and room environment monitoring in a single custom-PCB device. Here is some of the related works, commercial and scientific paper:
| Project - Source | What it does | How this project differs |
|---|---|---|
| Withings Sleep Analyzer | Under-mattress HR and snoring detection | Not open hardware, requires mattress mat, and expensive |
| Apple Watch Sleep | Wrist-worn SpO₂ and movement tracking | Closed ecosystem; no room environment monitoring, and expensive |
| SnoreLab app | Phone microphone snore logging | Audio only, no position or environment context |
| Clinical PSG — PubMed | Gold standard 20-channel lab sleep recording | Lab only, requires technician, not portable |
| Airable — Fab Academy 2021 | Wearable CO₂ monitor with custom PCB | No snore detection, no sleep position tracking |
What sources will I use?
Here is the list of the datasheets which I used and will used for my final project:
- 📒 XIAO Seeed ESP32-S3
- 📒 DHT22
- 📒 ICM-20948
- 📒 ICS-43434
- 📒 SSD1306 OLED
And here is the references and libraries in Arduino:
- 2D design & making slide: Inkscape
- 3D design: Fusion 360
- Laser cutter
- Prusa Slicer
- Prusa CORE One L
- Prusa PLA
- Arduino for programming
- I2S library
- SparkFun ICM-20948 Arduino library
- Adafruit DHT sensor library
- Random Nerd Tutorials examples for ESP32 web server
- KiCad for electronic design
- Previous Fab Academy student documentation, Lauri
- DAVINCI RESOLVE 21 for making video for final presentation.
What will I design?
I will design and fabricate the following items from scratch:
3D-printed enclosure (Fusion 360 → Prusa FDM): Two parts snap-fit shell. The enclosure for holding PCB and and the LiPo battery. The top press-fit which lid has a windows for the OLED, microphone, DHT22, and ICM. The OLED and DHT22 inserts inside the lid.
Laser-cut breadboard (Fusion 360 + Inkscape → laser cutter): before start design the PCB in Kicad, first I made a breadboard fit inside the enclosure with polywood that I placed all the components. It was really helpful and made my PCB design easy. I design it with Fusion 360 and prepare in Inkscape and cut it with laser cutter. I used it to mount and organise components on the PCB during development and fit inside the enclosure and its lid.
UV printer (Fusion 360 → Inkscape → laser cutter): printing logos and name on the lid.
Custom PCB (KiCad → PCB mill): I will make a one layer PCB from zero. I do not make any PCB board for charging the battery as the ESP32-S3 has an internal board to charge the battery.
Web dashboard (HTML + CSS + JavaScript): A web dashboard directly from the ESP32-S3. It shows snore status, sleep position, and temperature/humidity. No external hosting is required.
What materials and components will be used?
Bill of Materials
Electronic components
| # | Item | Quantity | Unit cost (€) | Total (€) |
|---|---|---|---|---|
| 1 | XIAO Seeed ESP32-S3 | 1 | 7.49 | 7.49 |
| 2 | ICM-20948 breakout module | 1 | 13.50 | 13.50 |
| 3 | DHT22 temperature and humidity sensor | 1 | 4.50 | 4.50 |
| 4 | ICS-43434 I2S microphone module | 1 | 7.50 | 7.50 |
| 5 | SSD1306 0.96-inch OLED | 1 | 3.00 | 3.00 |
| 6 | 3.7 V, 600 mAh LiPo battery | 1 | 9.00 | 9.00 |
| 7 | FR4 PCB blank, 100 × 80 mm | 1 | 2.00 | 2.00 |
| 8 | PLA filament, approximately 50 g | — | 1.00 | 1.00 |
| Known total | 47.99 |
Other materials
| Material | Use |
|---|---|
| Plywood sheet | Temporary laser-cut component holder and UV-print alignment template |
| UV-curable ink | Text and logos on the enclosure lid |
| Textile band | Holds the device on the body |
| Pin headers and connectors | Removable sensor connections |
| Solder | Electronic assembly |
Most components and fabrication materials were available at Oulu Super FabLab.
Where will they come from?
Almost all components are available at Fab Lab Oulu.
What parts and systems will be made?
I will all the things, listed in the design section.
What processes will be used?
For my final project I will use all the skill that I learned in FabAcademy, except molding and casting:
| Fab Academy | Application |
|---|---|
| Week 2 | Computer-Aided Design |
| Week 3 | Computer-Controlled Cutting |
| Week 4 | Embedded Programming |
| Week 5 | 3D Printing |
| Week 6 | Electronics Design |
| Week 8 | Electronics Production |
| Week 9 | Input Devices |
| Week 10 | Output Devices |
| Week 11 | Networking and Communications |
| Week 14 | Interface and Application Programming |
| Week 15 | System Integration |
What questions need to be answered?
- What sound energy threshold reliably separates snoring from background noise (traffic, partner talking, fan) in a typical bedroom?
- How consistently does the ICM-20948 gravity vector distinguish back-sleeping from side-sleeping when the device is on a nightstand rather than on the body?
- What is the real battery life at the chosen sensing duty cycle — target is at least 8 hours?
- Does room temperature or humidity show a measurable pattern around the times when snoring events are most frequent?
- How quickly does the ESP32-S3 serve the full-night dashboard to a mobile browser over Wi-Fi — target is under 3 seconds?
How will it be evaluated?
The device will be tested against these specific, measurable criteria:
- Snore detection: Compare device log against a simultaneous Snore Lab recording for 3 nights. Target: more than 80% of snore events match within a 10-second window.
- Position classification: Manually annotate 1 hour of video recording and compare against the device's IMU log. Target: more than 85% agreement.
- Battery life: Record continuously until auto-shutdown. Target: at least 8 continuous hours.
- Dashboard performance: Measure load time for a full 8-hour dataset on a mobile browser over WiFi.
- Mechanical durability: Drop test from 1 metre onto a surface with no damage to PCB or OLED.
- Usability: The device should require no more than one button press to start a session and no app installation to view results.
Implications
Personal health. In Oulu, Finland, long dark winters or long summer days may affect on sleep quality. A low-cost, open-source sleep monitor may provide useful database for sleep quality assessment without expensive wearables or clinic appointments.
Privacy. All audio processing happens on the device or stores in SD card. The dashboard never connects to the internet.
Openness. All design files includes KiCad schematic, Fusion 360 enclosure, firmware, and dashboard codes are published under Creative Commons Attribution. Any Fab Lab in the world can reproduce, modify, or build on this project.
Limitations. This is a personal wellness tool, not a medical instrument. It cannot diagnose sleep apnea or any clinical condition. If a user notices concerning patterns, very frequent snoring with many positions changes, the appropriate follow-up is a clinical sleep study.
Project Development
Presentation Slide
The slide is a 1920 × 1080 px image placed in the root directory.
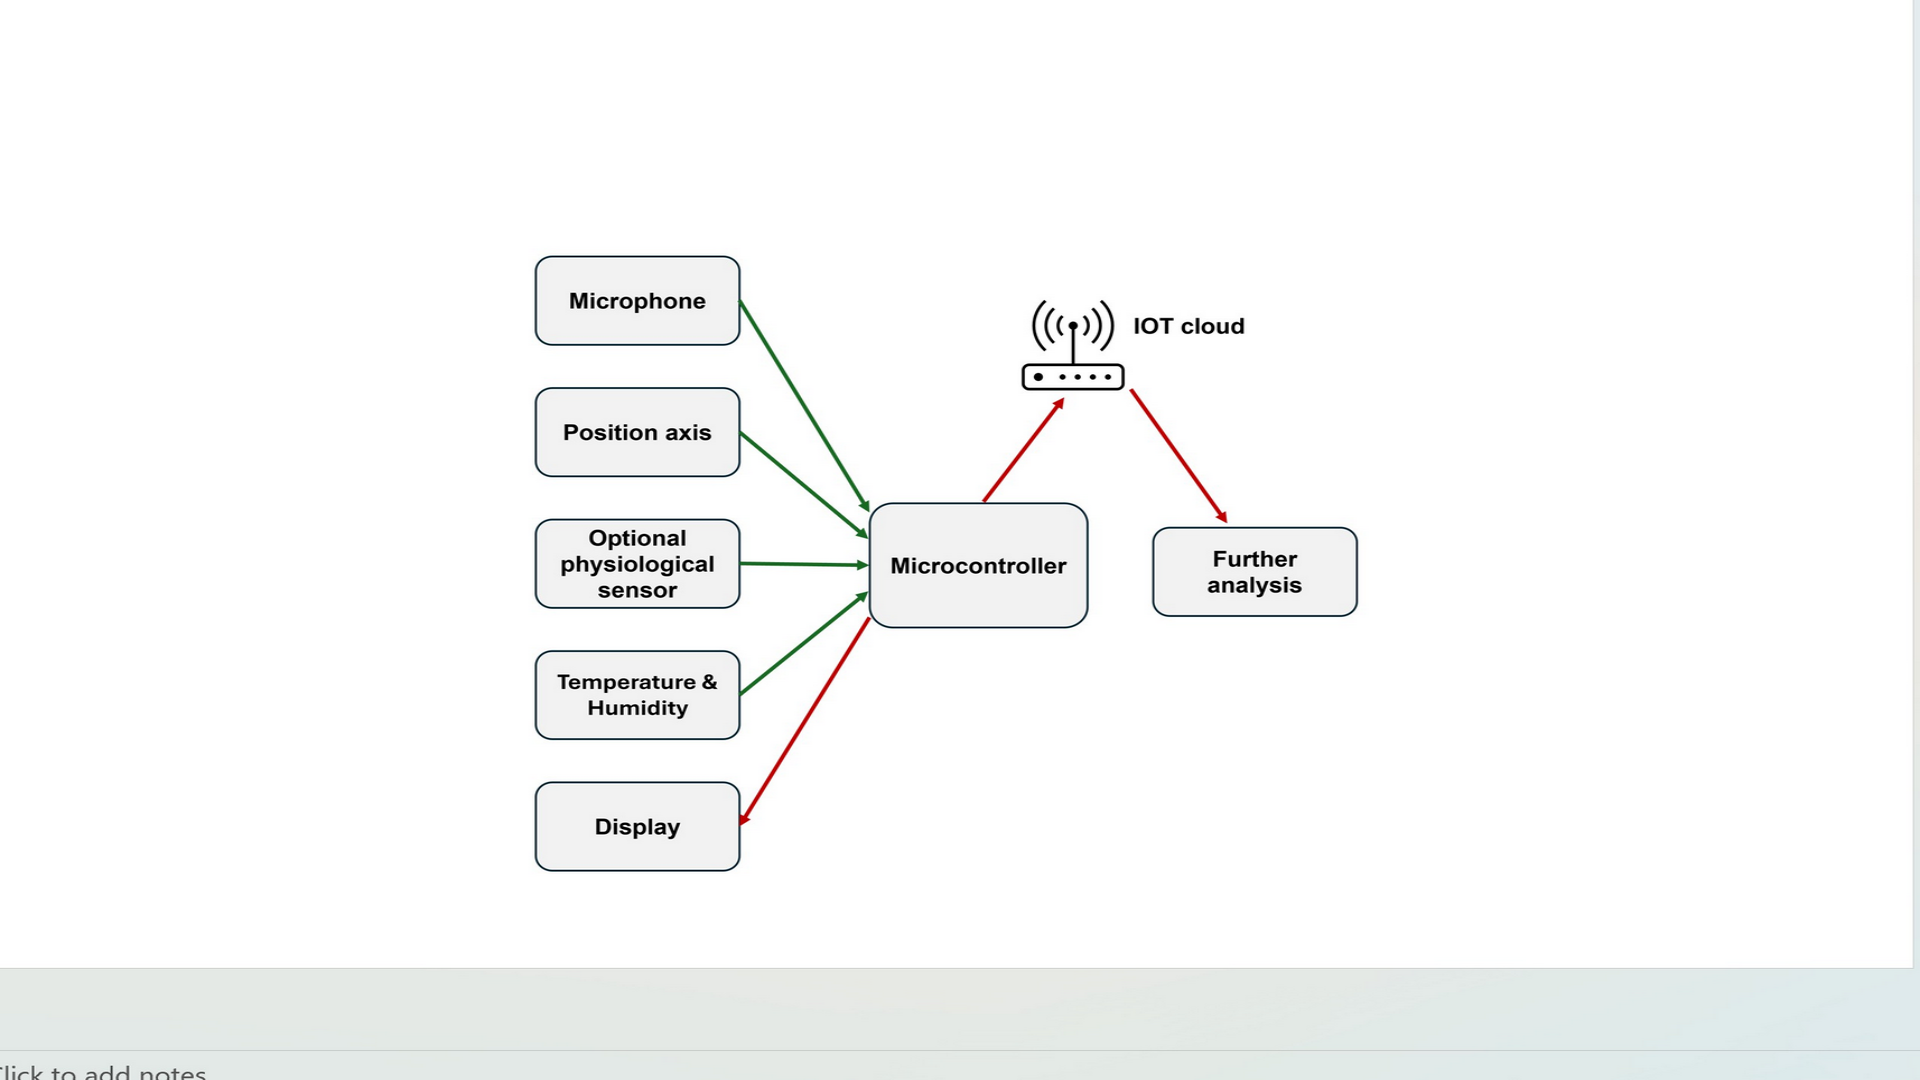
Download: presentation.png
The slide shows the device name, my name, Fab Lab Oulu, a photo or render of the device, and a one-sentence description.
Presentation Video
The video is approximately 1 minute, 1080p, under 25 MB, and placed in the root directory.
Watch: ▶ presentation.mp4
The video shows the fabrication process, the assembled device, and the live web dashboard in operation, and testing the device.
Both files are confirmed in the root directory and linked from the final presentation schedule.
Reflection
This week forced me to think about the project not just as a technical challenge, but as something that needs to be useful, honest about its limitations, and finished on time. Answering the evaluation questions was the most valuable part — it made me realise that a working device without a clear way to measure its performance is not really complete.
Looking at the BOM carefully, I found that I was mixing currencies (€ and $) and listing a machine as a material, which are mistakes that would confuse anyone reading the documentation. Fixing small things like this is part of professional documentation.
The biggest gap I see now is the sections of the final project page that are still empty — the electronic production, input device testing, and system integration write-ups need real content with photos and results before the final evaluation. That is the priority for the coming days.