Week 11 | Networking and communications
Overview
This week I played and did a few test with different setup on Networking and Communications.
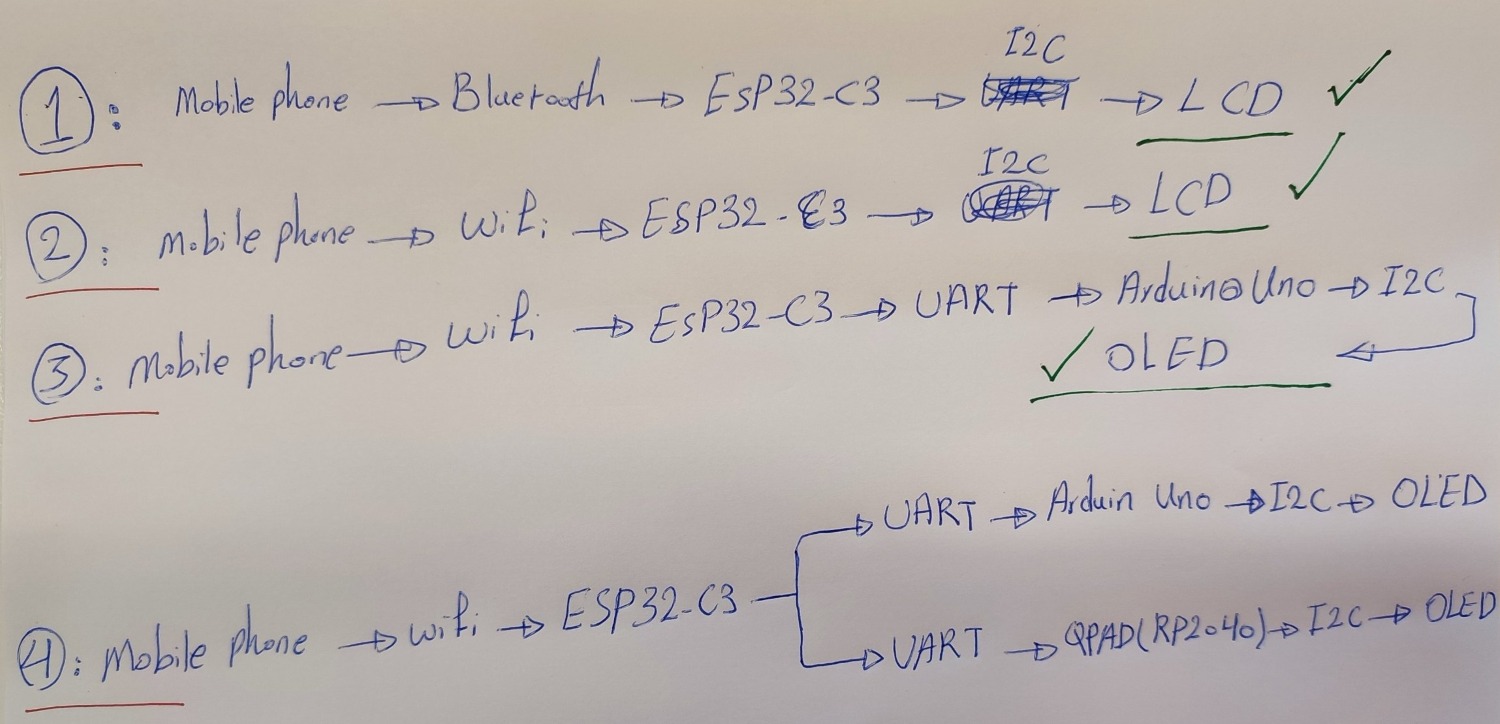
For the individual assignment, I used my custom PCB board with an ESP32-C3 as the main controller. I first controlled an LCD display directly from my phone using both Bluetooth (BLE) and WiFi. In the second experiment, I added an Arduino Uno as a secondary node. The ESP32-C3 received messages from my phone via WiFi and forwarded them through UART serial communication to the Arduino Uno, which then displayed the text on an OLED screen via I2C. The full communication chain was: Phone → WiFi → ESP32-C3 → UART → Arduino Uno → I2C → OLED. This week gave me practical experience with different wireless and wired communication methods and helped me understand how to make multiple devices work together in a small network.
Group Assignment
In the group assignment, using wireless ESP-NOW communication we communicated between three ESP32-C3 boards, one as a sender and two as a receiver.
Individual assignment
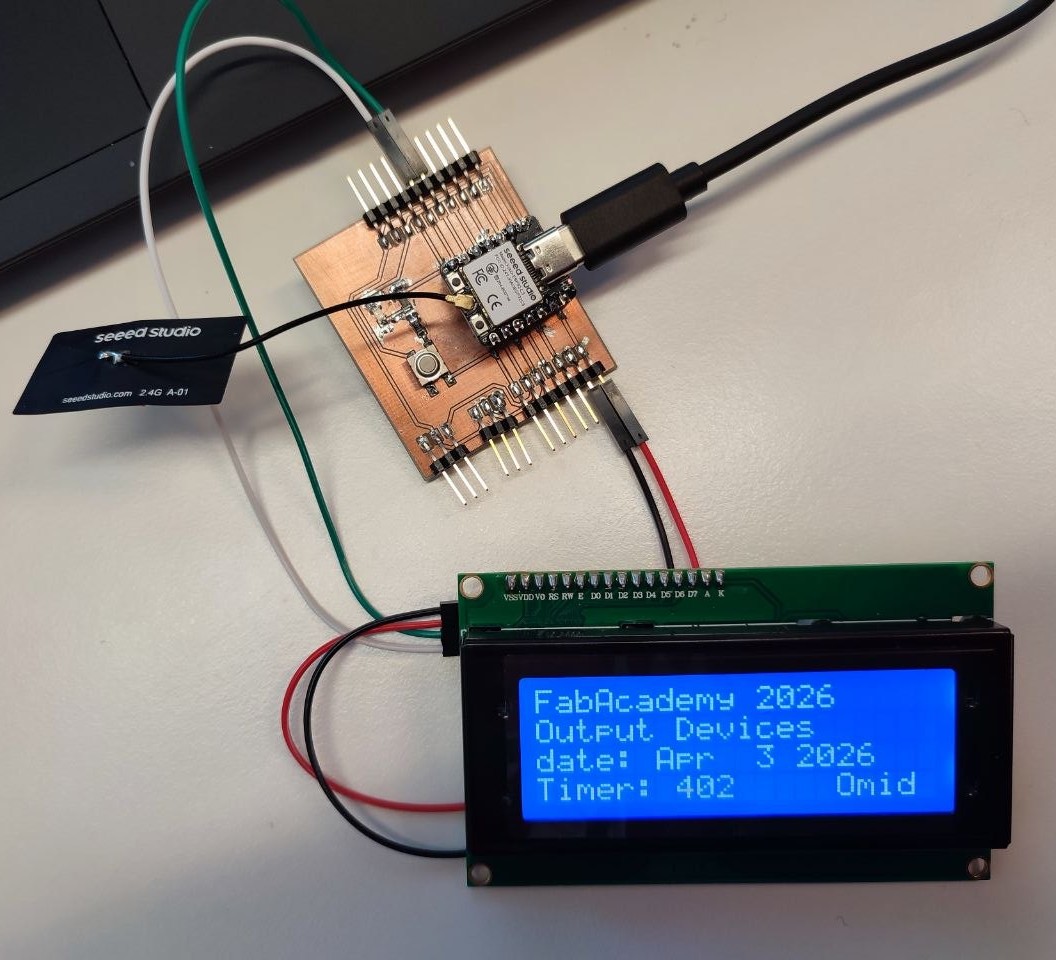
In this part, I used an ESP32-C3 as the main controller. In the first experiment, I connected an LCD to the ESP32-C3 and controlled it from my phone using Bluetooth and Wifi.
In the second test, I added another node (Arduino Uno) to the ESP32-C3. I connected an OLED display to the Arduino Uno and controlled it from my phone using Wifi, with the ESP32-C3 acting as the main node.
Controlled LCD via BLE and Wifi
I started with controlling a LCD with my phone thru Wifi and Bluetooth.
Hardwares and software and Application
- My board that I made during week08.
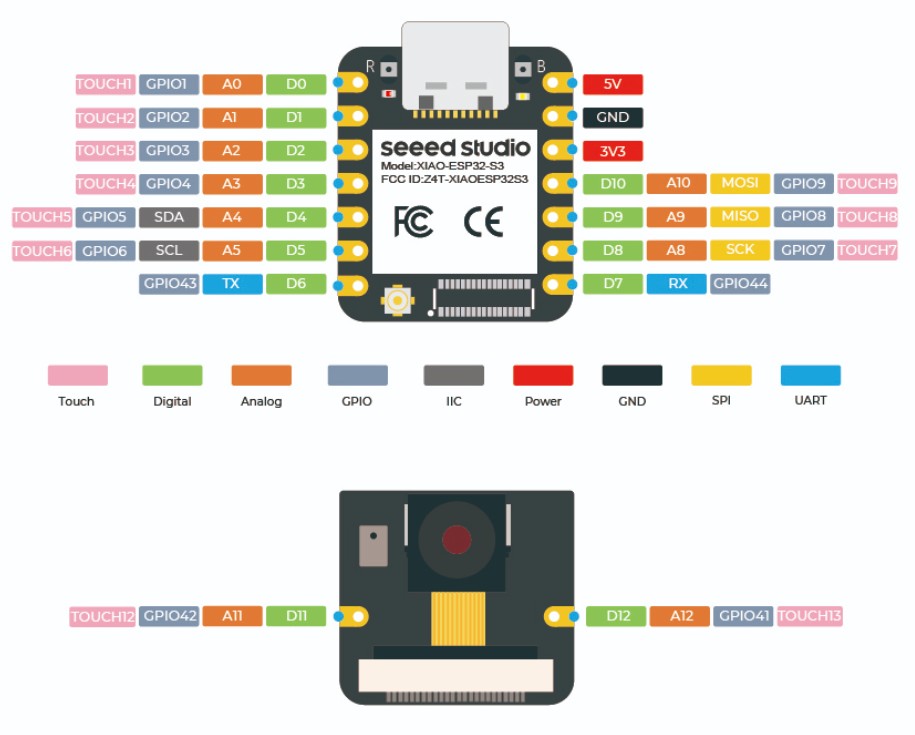
- I changed XIAO RP2040 with ESP32-C3
- USB C cable
- LCD
- Arduino IDE
- BLE Scanner Android App
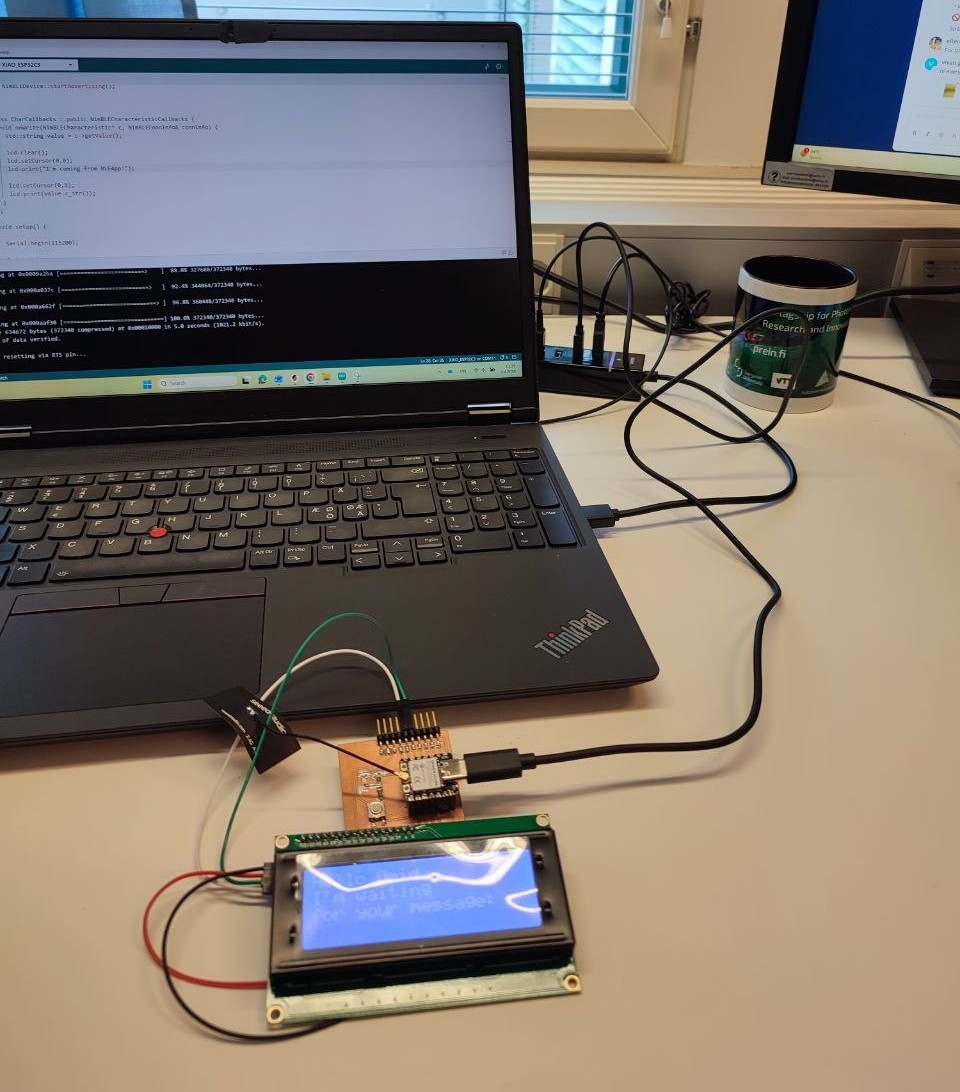
I did wiring same as I did for output device, week10, and connected my board to my laptop with USB c cable.
To use bluetooth connection, I read this great tutorial. I opened the Arduino IDE, started with installing BLE library:

I took the original code.
#include <Wire.h>
#include <LiquidCrystal_I2C.h>
#include <NimBLEDevice.h>
LiquidCrystal_I2C lcd(0x27, 20, 4); //I addressed the LCD and defined the size of it
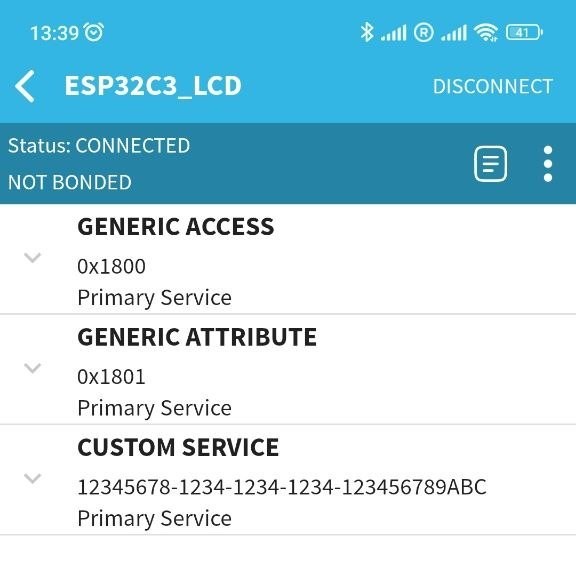
#define DEVICE_NAME "ESP32C3_LCD"
#define SERVICE_UUID "12345678-1234-1234-1234-123456789abc"
#define CHAR_UUID "abcd1234-5678-1234-5678-123456789abc"
class ServerCallbacks : public NimBLEServerCallbacks {
void onConnect(NimBLEServer* server, NimBLEConnInfo& connInfo) {
Serial.println("Client Connected");
}
void onDisconnect(NimBLEServer* server, NimBLEConnInfo& connInfo, int reason) {
Serial.println("Client Disconnected");
NimBLEDevice::startAdvertising();
}
};
class CharCallbacks : public NimBLECharacteristicCallbacks {
void onWrite(NimBLECharacteristic* c, NimBLEConnInfo& connInfo) {
std::string value = c->getValue();
lcd.clear();
lcd.setCursor(0,0);
lcd.print("BLE Msg:");
lcd.setCursor(0,1);
lcd.print(value.c_str());
}
};
void setup() {
Serial.begin(115200);
lcd.init();
lcd.backlight();
lcd.print("Starting BLE");
NimBLEDevice::init(DEVICE_NAME);
NimBLEServer* server = NimBLEDevice::createServer();
server->setCallbacks(new ServerCallbacks());
NimBLEService* service = server->createService(SERVICE_UUID);
NimBLECharacteristic* ch = service->createCharacteristic(
CHAR_UUID,
NIMBLE_PROPERTY::WRITE
);
ch->setCallbacks(new CharCallbacks());
service->start();
NimBLEAdvertising* adv = NimBLEDevice::getAdvertising();
adv->addServiceUUID(SERVICE_UUID);
adv->setName(DEVICE_NAME);
adv->start();
lcd.clear();
lcd.print("BLE Ready");
}
void loop() {
}
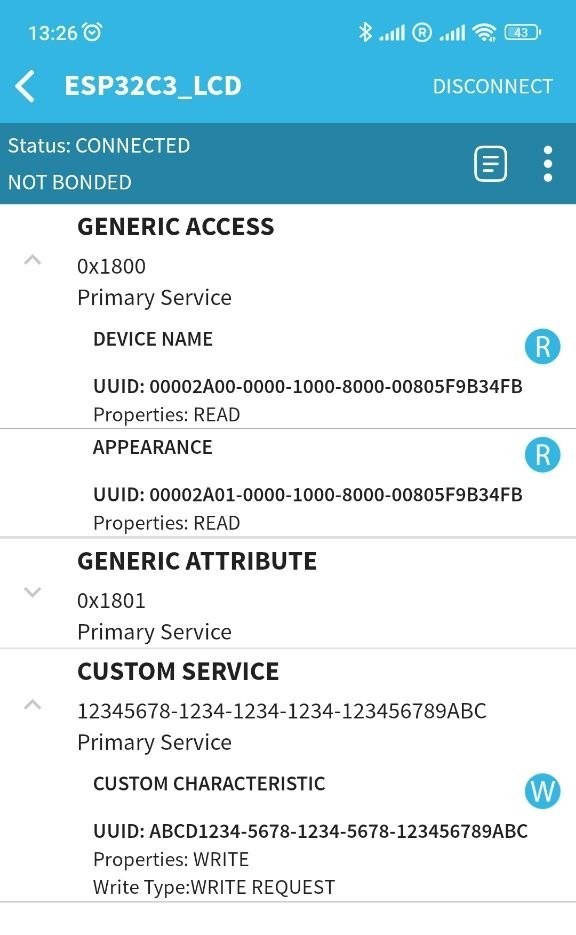
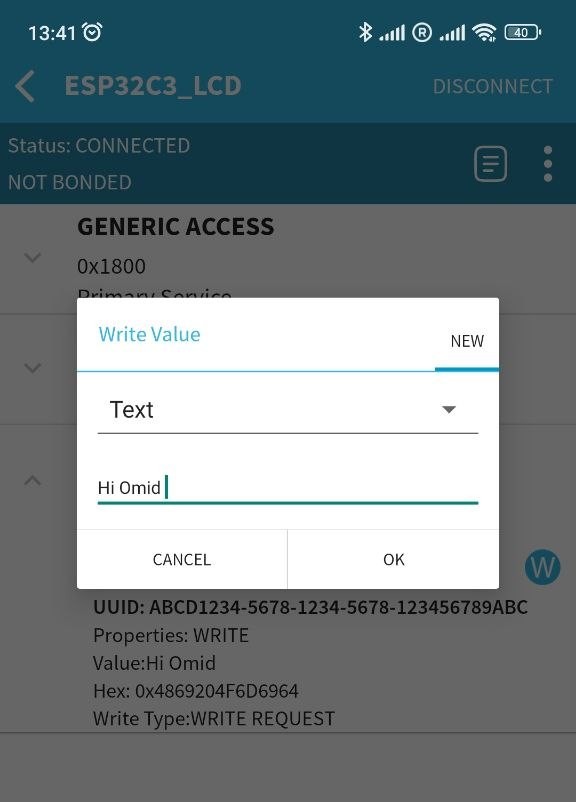
In the write section, can be seen as W icon. I started testing the first text.

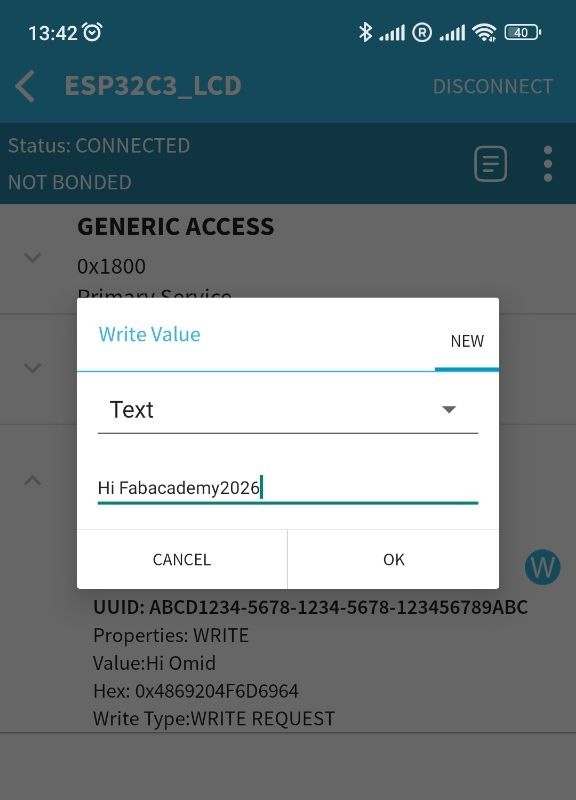
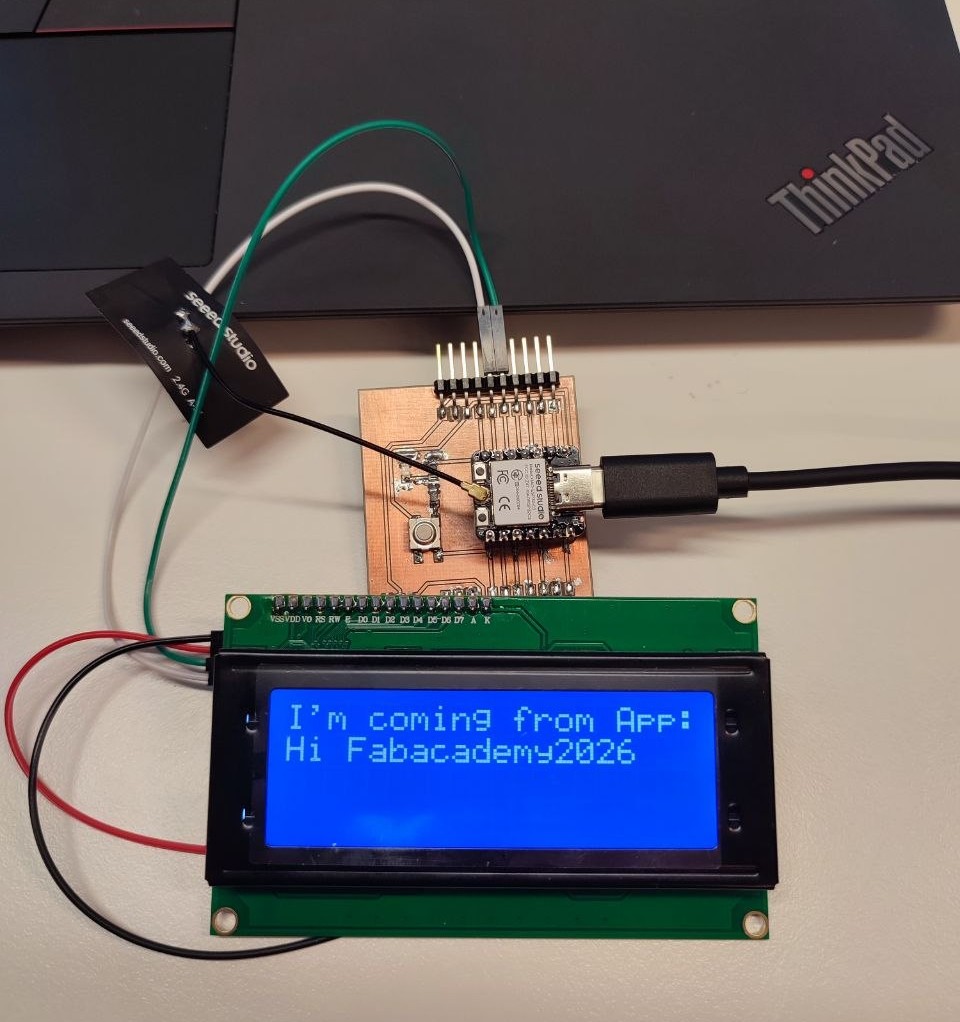
Which it was successful, and I sent another long text.
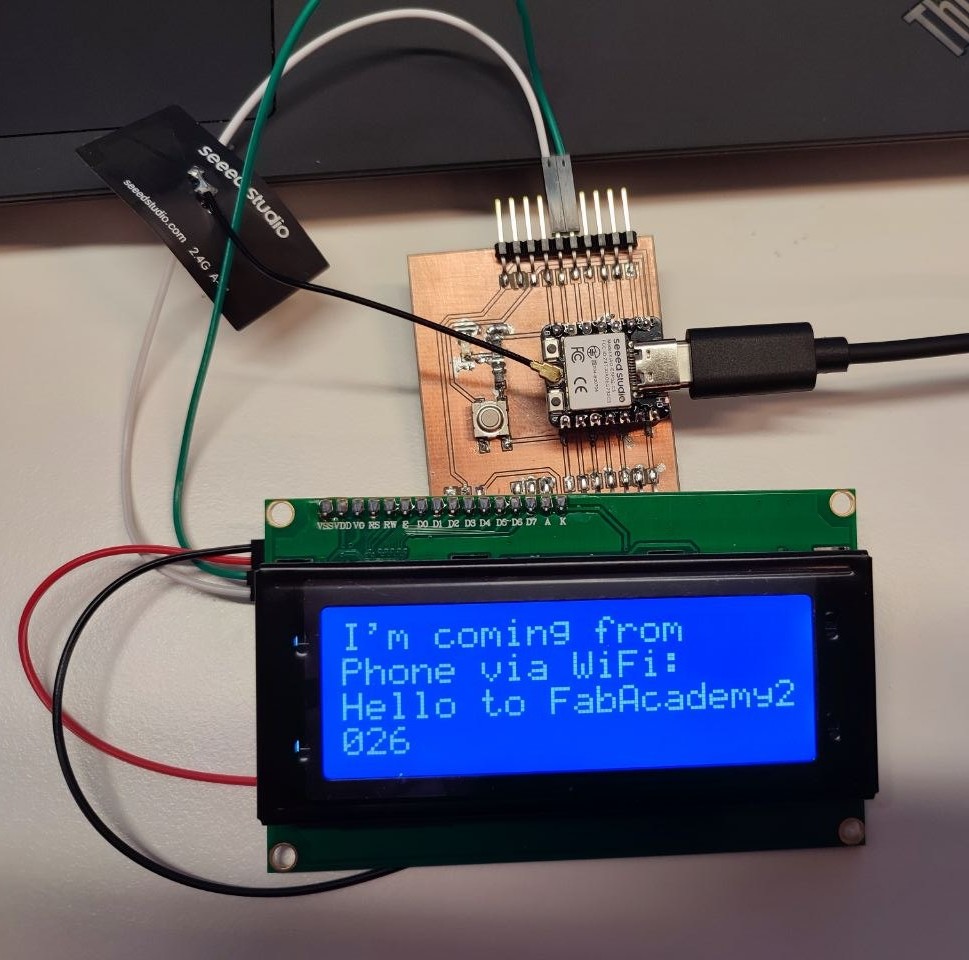
Wifi Test
To use Wifi connection, I followed this tutorial and I downloaded the original code:
Wifi code:
#include <Wire.h>
#include <LiquidCrystal_I2C.h>
#include <WiFi.h>
#include <WebServer.h>

LiquidCrystal_I2C lcd(0x27, 20, 4);
WebServer server(80);

const char* apName = "ESP32C3_LCD";
const char* apPassword = "12345678";   // at least 8 chars

String lastMessage = "Hello Omid";

void showOnLCD(const String& msg) {
  lcd.clear();
  lcd.setCursor(0, 0);
  lcd.print("I'm coming from");
  lcd.setCursor(0, 1);
  lcd.print("Phone via WiFi:");
  lcd.setCursor(0, 2);
  lcd.print(msg.substring(0, 20));

  if (msg.length() > 20) {
    lcd.setCursor(0, 3);
    lcd.print(msg.substring(20, 40));
  }
}

void handleRoot() {
  String page = R"rawliteral(
<!DOCTYPE html>
<html>
<head>
  <meta name="viewport" content="width=device-width, initial-scale=1">
  <title>ESP32 LCD</title>
  <style>
    body { font-family: Arial; margin: 20px; }
    input, button { font-size: 20px; padding: 10px; width: 100%; box-sizing: border-box; }
    button { margin-top: 10px; }
  </style>
</head>
<body>
  <h2>Send text to LCD</h2>
  <form action="/send" method="GET">
    <input type="text" name="msg" placeholder="Type message here">
    <button type="submit">Send</button>
  </form>
</body>
</html>
)rawliteral";

  server.send(200, "text/html", page);
}

void handleSend() {
  if (server.hasArg("msg")) {
    lastMessage = server.arg("msg");
    showOnLCD(lastMessage);

    String response = "<html><body><h2>Message sent</h2><p>";
    response += lastMessage;
    response += "</p><p><a href='/'>Back</a></p></body></html>";

    server.send(200, "text/html", response);
  } else {
    server.send(400, "text/plain", "Missing msg parameter");
  }
}

void setup() {
  Serial.begin(115200);

  lcd.init();
  lcd.backlight();

  lcd.setCursor(0, 0);
  lcd.print("Starting WiFi...");
  lcd.setCursor(0, 1);
  lcd.print("ESP32C3_LCD");

  WiFi.mode(WIFI_AP);
  WiFi.softAP(apName, apPassword);

  IPAddress IP = WiFi.softAPIP();
  Serial.print("AP IP address: ");
  Serial.println(IP);

  lcd.clear();
  lcd.setCursor(0, 0);
  lcd.print("WiFi AP Ready");
  lcd.setCursor(0, 1);
  lcd.print(apName);
  lcd.setCursor(0, 2);
  lcd.print(IP);

  server.on("/", handleRoot);
  server.on("/send", handleSend);
  server.begin();

  showOnLCD(lastMessage);
}

void loop() {
  server.handleClient();
}
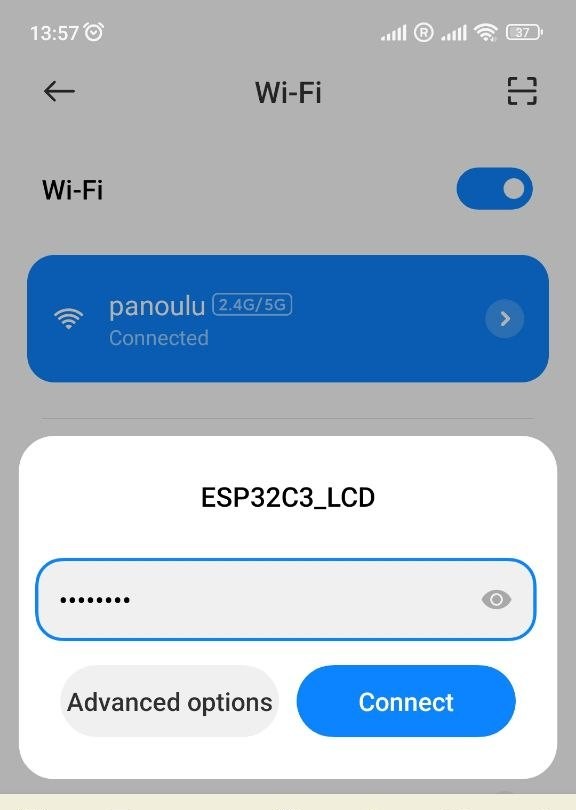
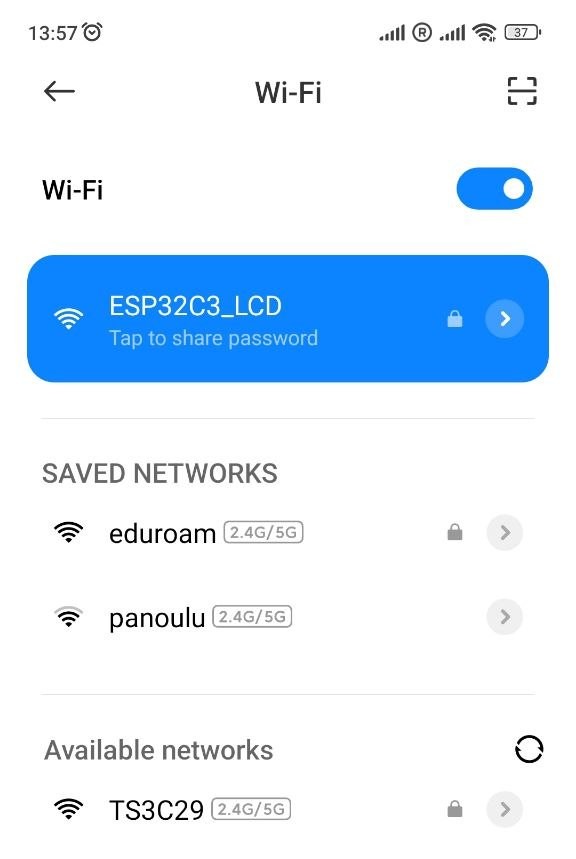
I searched for wifi named ESP32C3_LCD, and after enter the password, I was able to connect.


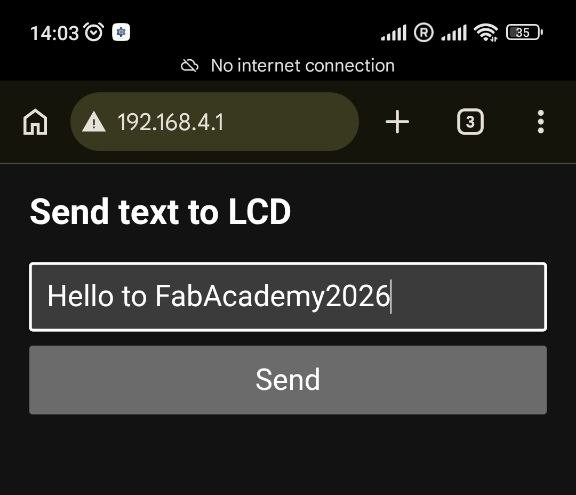
In the browser I went to address of 192.168.4.1, How did I find 192.168.4.1 addresses?
I found the IP address by printing WiFi.softAPIP() in the Serial Monitor. When the ESP32-C3 runs as an Access Point, it defaults to 192.168.4.1.


And I wrote the first message, press Send:
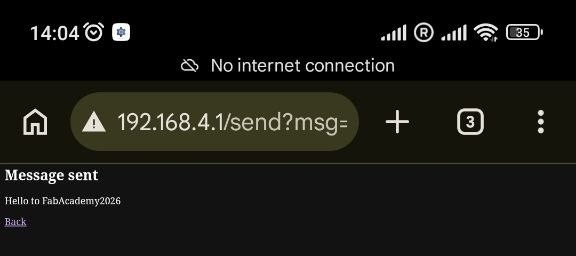
In this two first tests I did not have any issues.
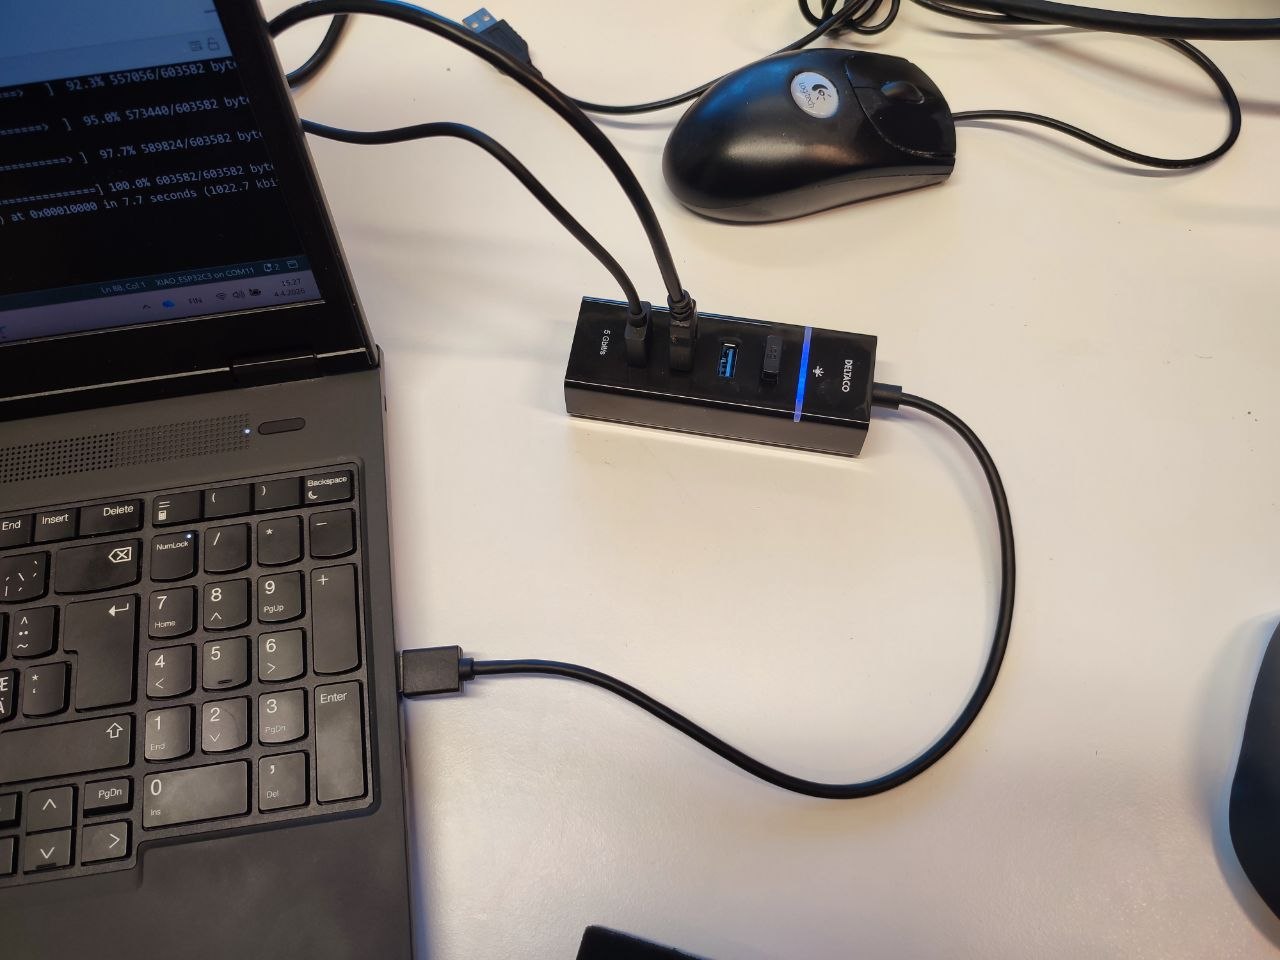
Connected PCB Board (ESP32-C3) to Arduino Uno
In the second setup, my goal was to control an OLED display connected to an Arduino Uno using my phone via Wi-Fi through a PCB board that I made in the output device, week10.
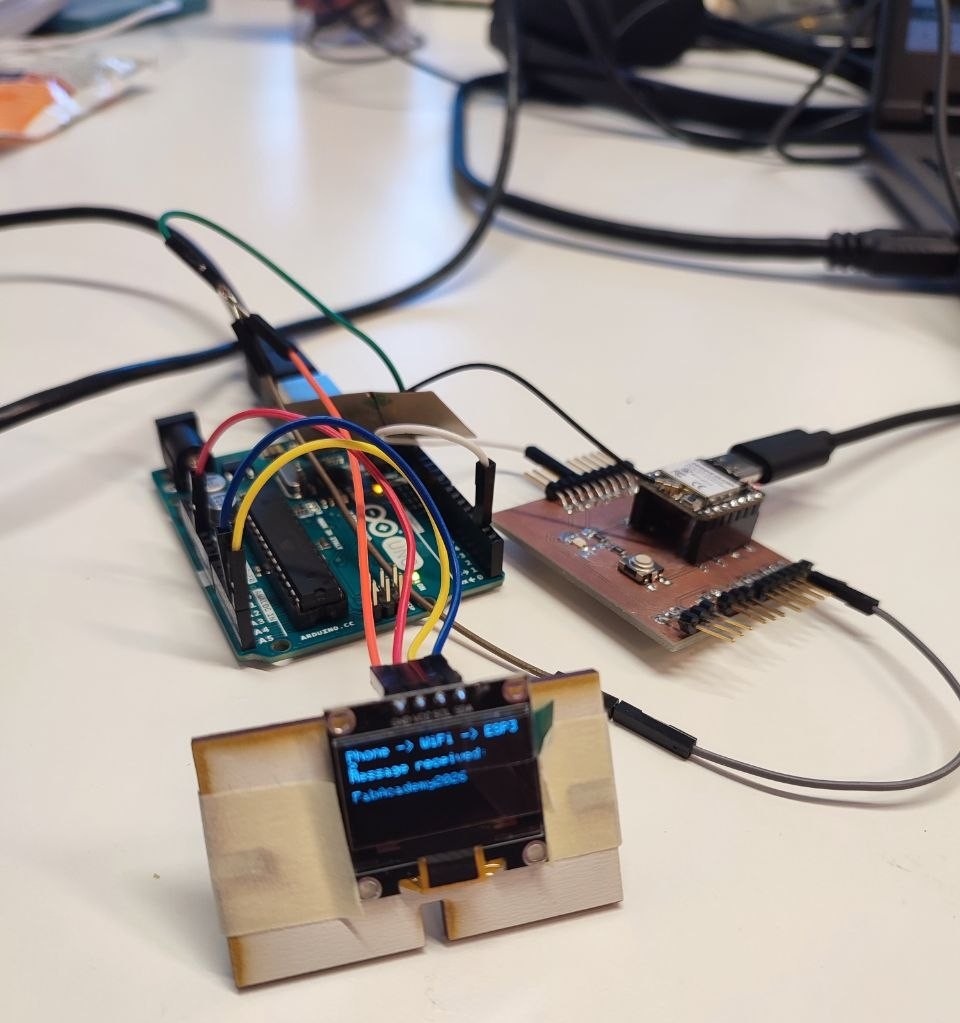
The communication chain I made:
Phone → WiFi → ESP32-C3 → UART Serial → Arduino Uno → I2C → OLED Display.
In this setup, the ESP32-C3 acts as a Wi-Fi access point and receives messages from the phone. The ESP32-C3 then forwards the message through UART serial communication to the Arduino Uno. Finally, the Arduino processes the received message and displays it on the OLED screen using the I²C interface.
Wiring
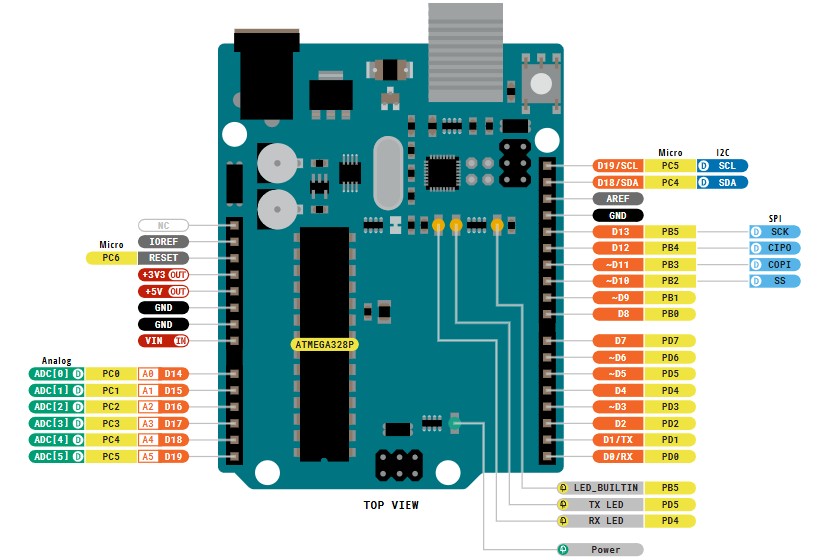
GND (ESP32-C3) --> GND(Arduino) TX (pin D6 in ESP32-C3) --> RX (pin 2 in Arduino)
OLED connected to Uno
GND --> GND VCC --> VCC SDA --> SDA SCL --> SCL
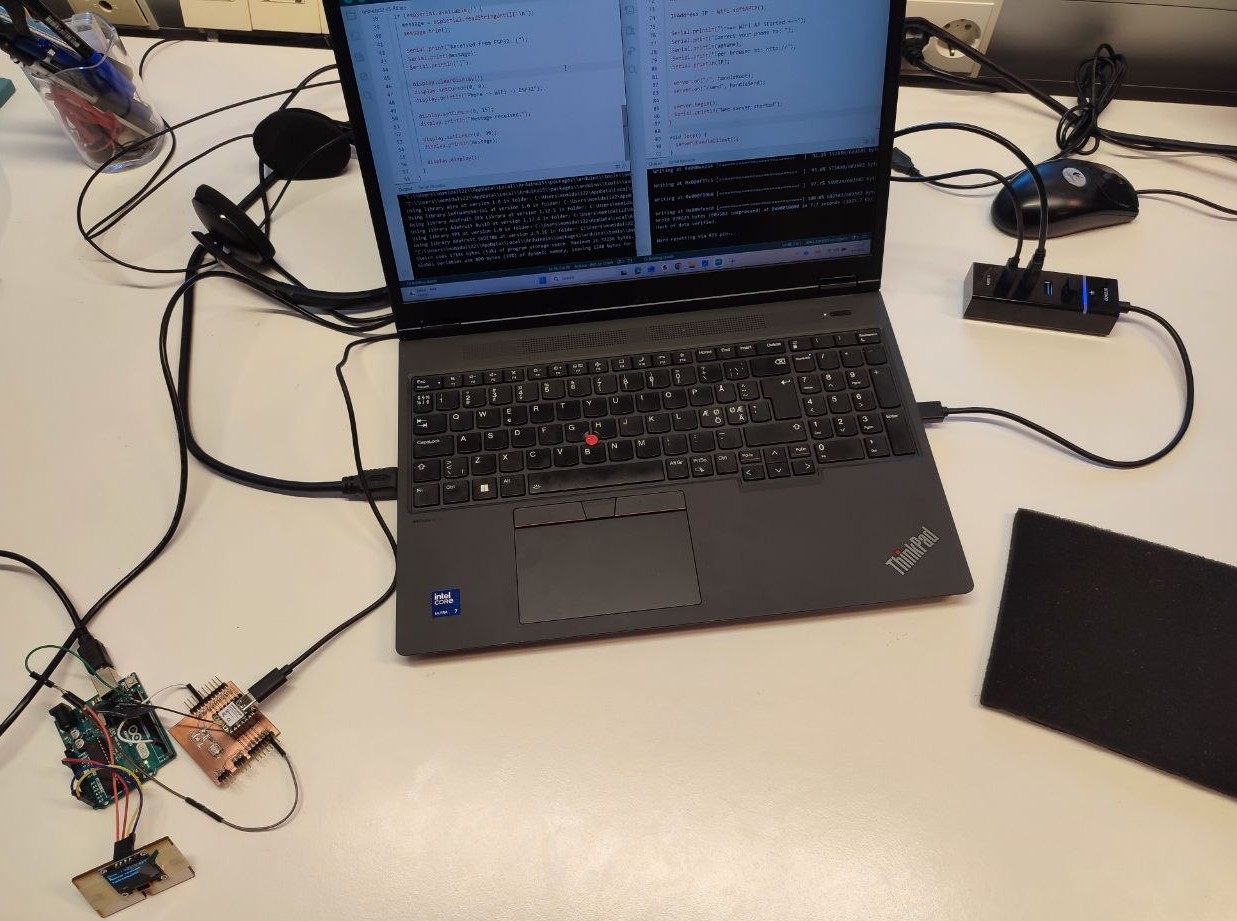
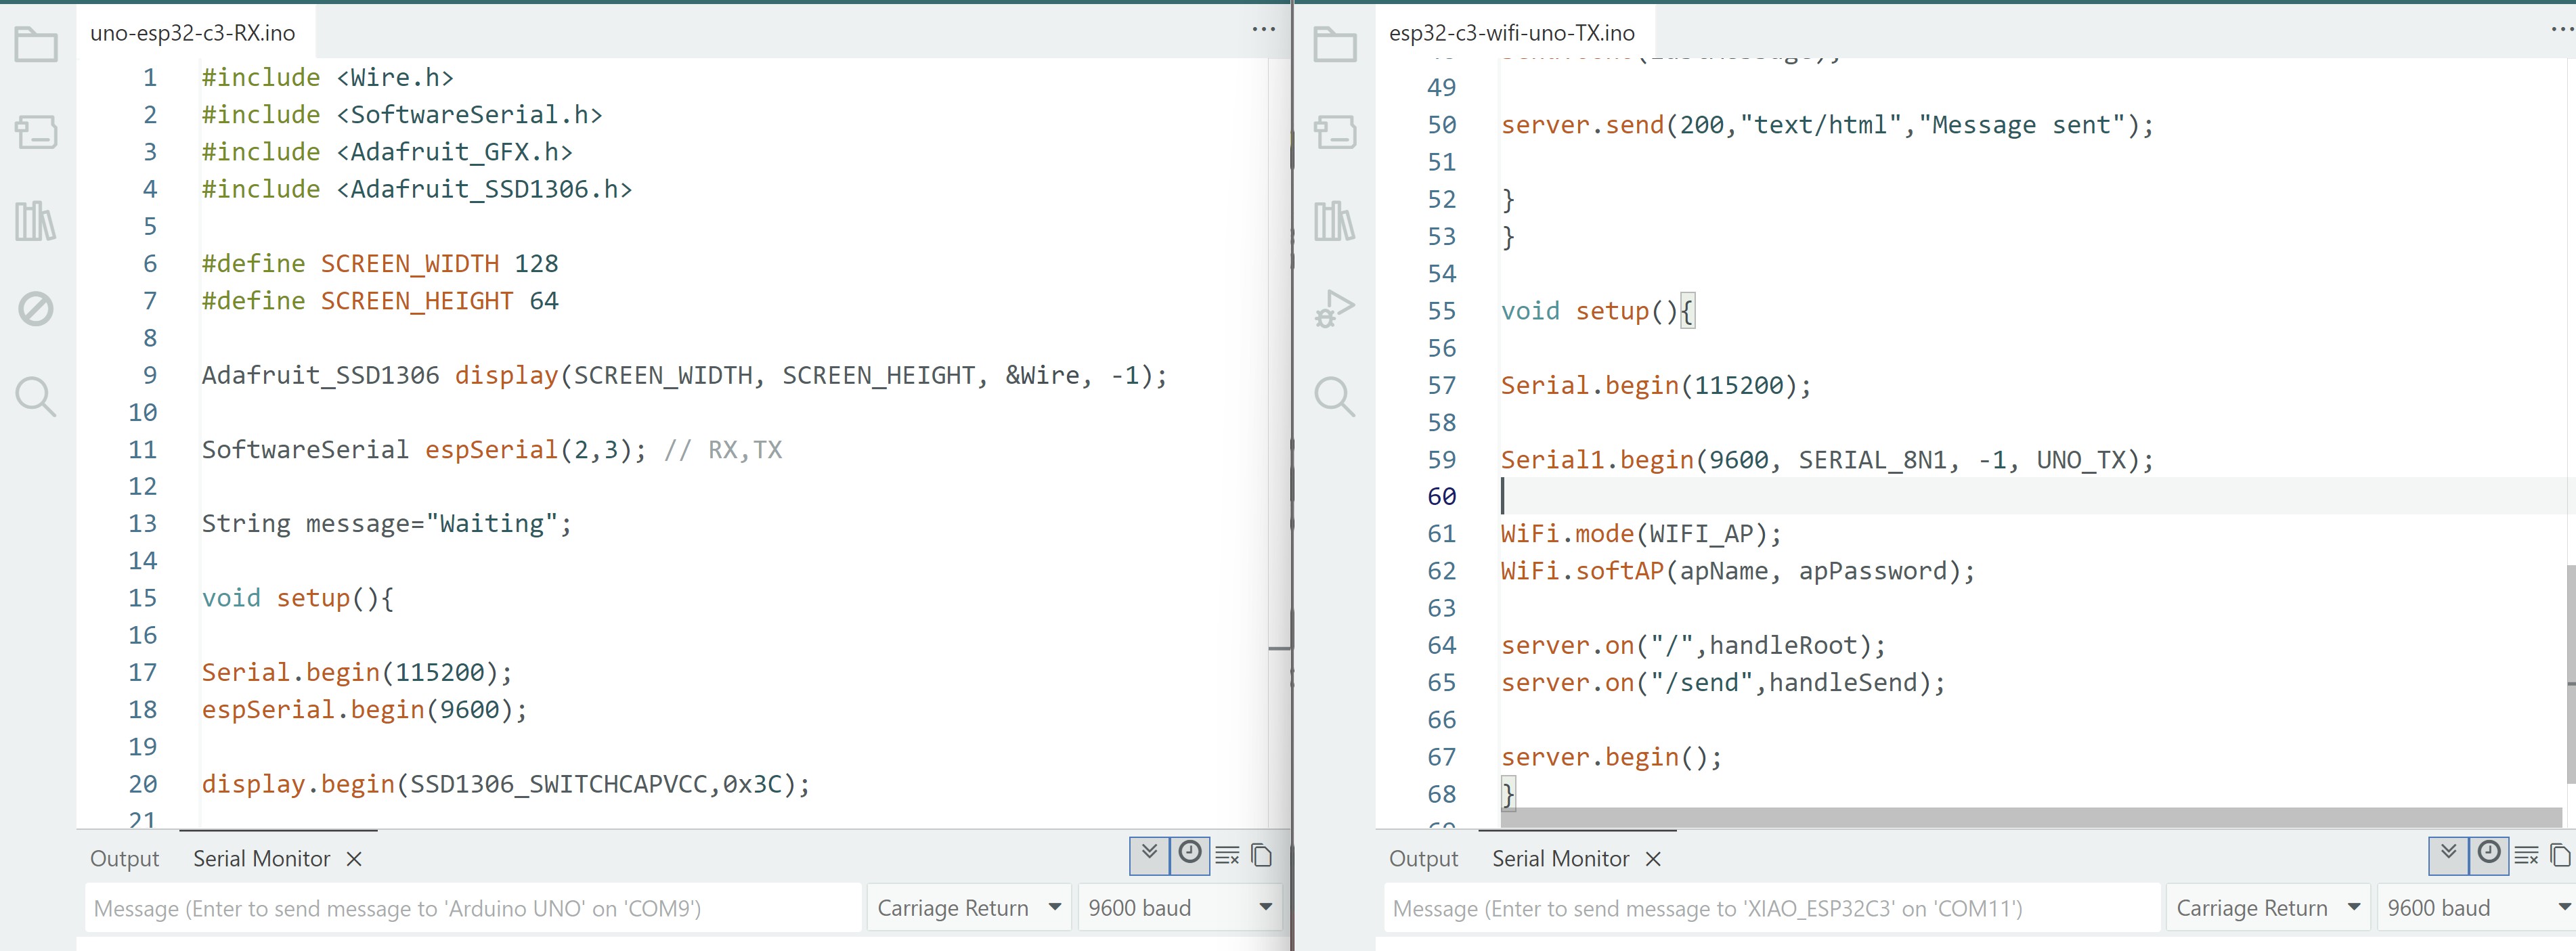
Programming
For programming I used Arduino IDE. Both microcontroller needed its own code. For The coding I asked Chatgpt:
ChatGpt prompt:
I want to use esp32-c3 and send a message to arduino uno r3 and display it on oled. one more thing I want to send the message from my phone via wifi to ESP32 and... modify this code:
(I paste the code that I used for the first setup)
ESP32-C3
#include <WiFi.h>
#include <WebServer.h>
WebServer server(80);
const char* apName = "ESP32_Uno";
const char* apPassword = "12345678";
// Hardware UART1 on default pins: TX = D6 (GPIO21), RX = D7 (GPIO20)
#define ESP_TX_PIN D6 // Connect this to Arduino Uno pin 2
#define ESP_RX_PIN D7 // Connect this to Arduino Uno pin 3 (optional for now)
String lastMessage = "";
void sendToUno(String msg) {
Serial.print("Sending to Arduino: ");
Serial.println(msg);
Serial1.println(msg); // Send with newline
}
void handleRoot() {
String page = R"rawliteral(
<!DOCTYPE html>
<html>
<head>
<meta name="viewport" content="width=device-width, initial-scale=1">
<title>ESP32 Message Sender</title>
<style>
body{font-family:Arial;margin:30px;}
input,button{font-size:20px;padding:10px;width:100%;}
button{margin-top:10px;}
</style>
</head>
<body>
<h2>Send message to Arduino OLED</h2>
<form action="/send">
<input type="text" name="msg" placeholder="Type message here">
<button type="submit">Send Message</button>
</form>
</body>
</html>
)rawliteral";
server.send(200, "text/html", page);
}
void handleSend() {
if (server.hasArg("msg")) {
lastMessage = server.arg("msg");
sendToUno(lastMessage);
String response = "<html><body>";
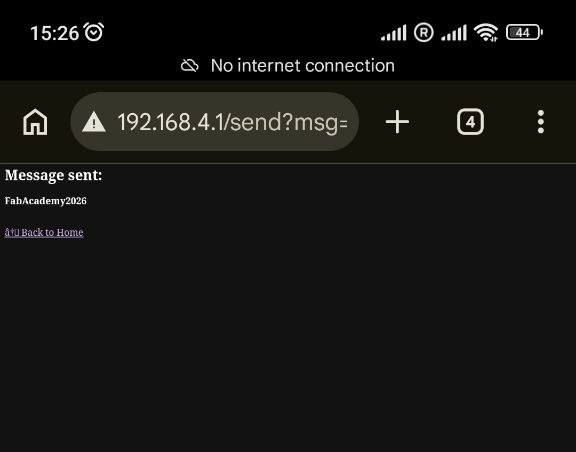
response += "<h2>Message sent:</h2>";
response += "<p><strong>" + lastMessage + "</strong></p>";
response += "<br><a href='/'>← Back to Home</a>";
response += "</body></html>";
server.send(200, "text/html", response);
} else {
server.send(400, "text/plain", "No message received");
}
}
void setup() {
Serial.begin(115200); // USB Serial Monitor (debug)
// Correct initialization for Xiao ESP32-C3
Serial1.begin(9600, SERIAL_8N1, ESP_RX_PIN, ESP_TX_PIN);
WiFi.mode(WIFI_AP);
WiFi.softAP(apName, apPassword);
IPAddress IP = WiFi.softAPIP();
Serial.println("\n=== WiFi AP Started ===");
Serial.print("Connect your phone to: ");
Serial.println(apName);
Serial.print("Open browser at: http://");
Serial.println(IP);
server.on("/", handleRoot);
server.on("/send", handleSend);
server.begin();
Serial.println("Web server started");
}
void loop() {
server.handleClient();
}
Arduino Uno
#include <Wire.h>
#include <SoftwareSerial.h>
#include <Adafruit_GFX.h>
#include <Adafruit_SSD1306.h>

#define SCREEN_WIDTH 128
#define SCREEN_HEIGHT 64

Adafruit_SSD1306 display(SCREEN_WIDTH, SCREEN_HEIGHT, &Wire, -1);

SoftwareSerial espSerial(2, 3); // RX (pin 2), TX (pin 3)

String message = "Waiting...";

void setup() {
  Serial.begin(115200);
  espSerial.begin(9600);

  if (!display.begin(SSD1306_SWITCHCAPVCC, 0x3C)) {
    Serial.println("OLED failed");
    while (true);
  }

  display.clearDisplay();
  display.setTextSize(1);
  display.setTextColor(SSD1306_WHITE);

  display.setCursor(0, 0);
  display.println("System Ready");
  display.setCursor(0, 20);
  display.println("Waiting for message");
  display.display();

  Serial.println("Uno ready - waiting for ESP32...");
}

void loop() {
  if (espSerial.available()) {
    message = espSerial.readStringUntil('\n');
    message.trim();

    Serial.print("Received from ESP32: [");
    Serial.print(message);
    Serial.println("]");

    display.clearDisplay();
    display.setCursor(0, 0);
    display.println("Phone -> WiFi -> ESP32");

    display.setCursor(0, 15);
    display.println("Message received:");

    display.setCursor(0, 30);
    display.println(message);

    display.display();
  }
}
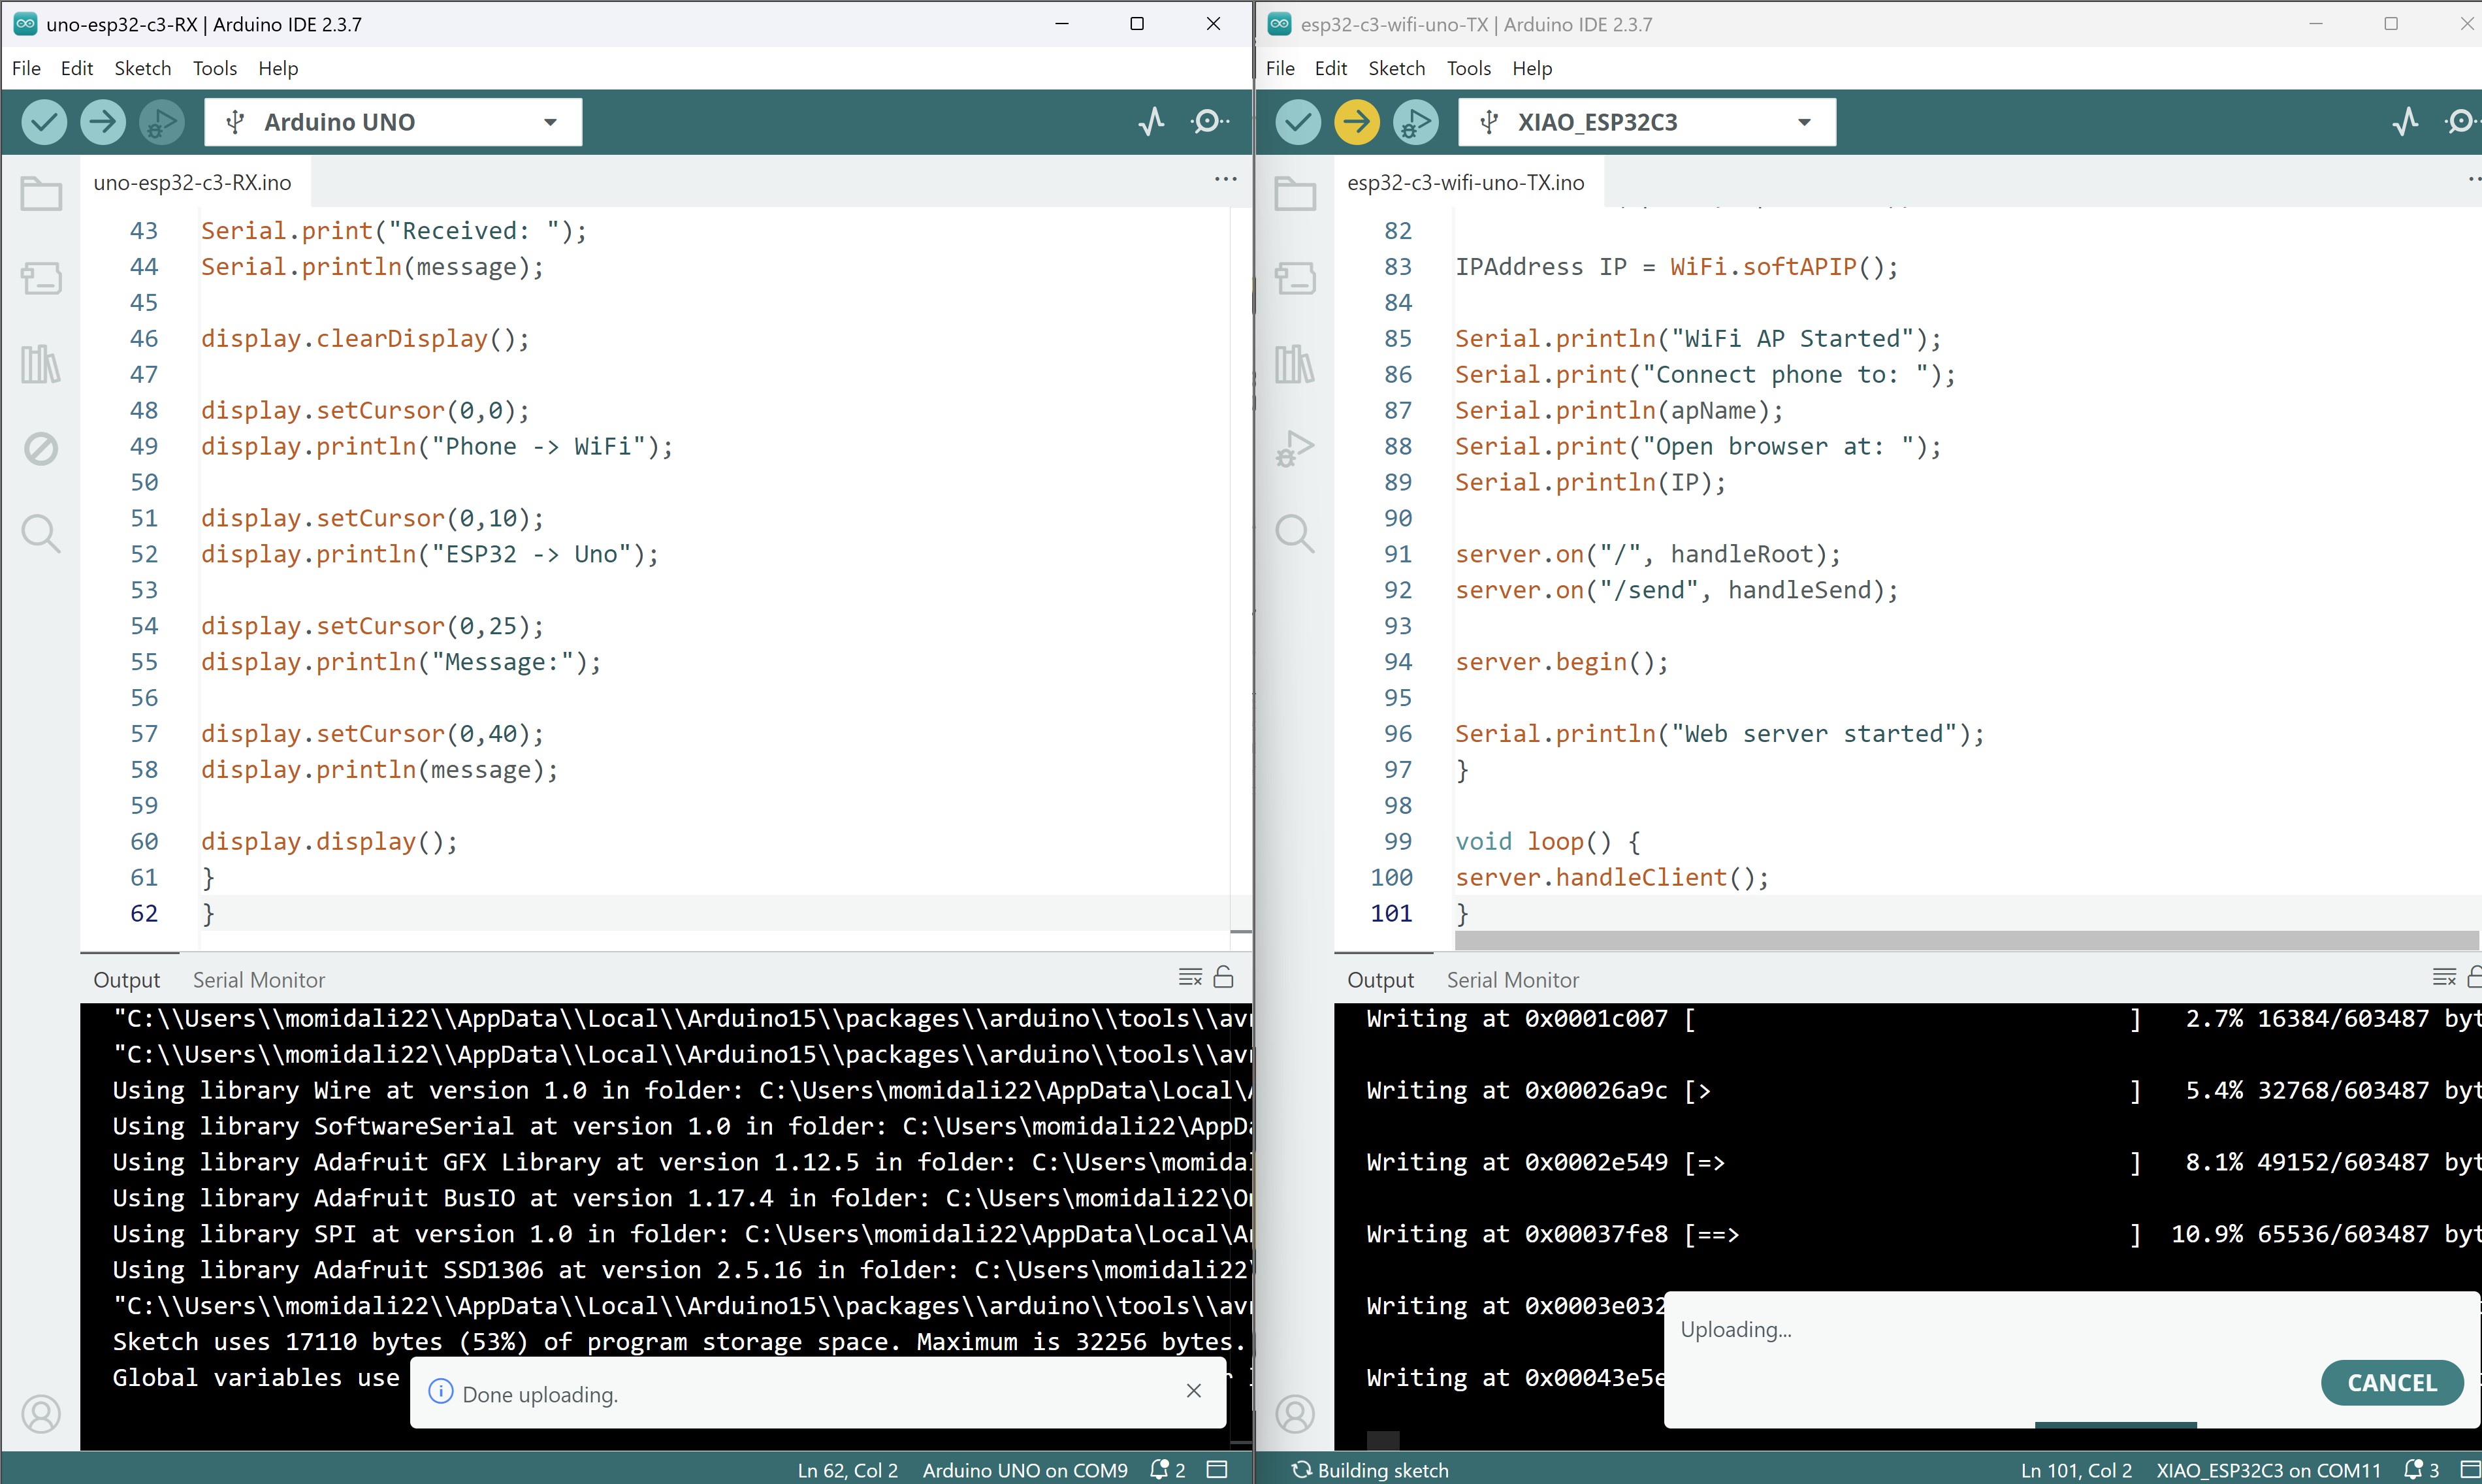
I got this error:

The issue was that the UART serial connection was still connected before programming the microcontroller. It must be disconnected before uploading the code. After successfully programming the board, I reconnected the UART serial port and everything worked correctly.
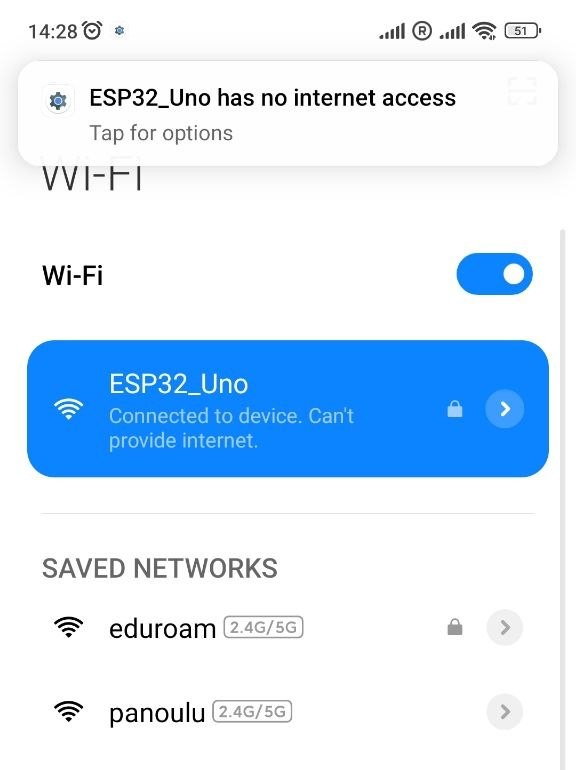
Then I connected to the ESP32-Uno WiFi:
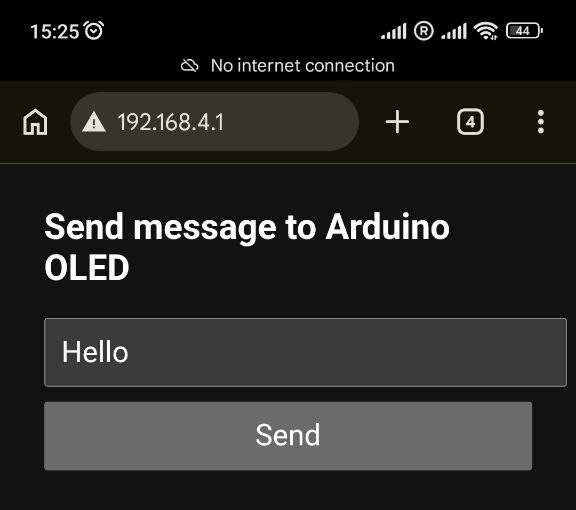
And opened the address 192.168.4.1 in the browser:
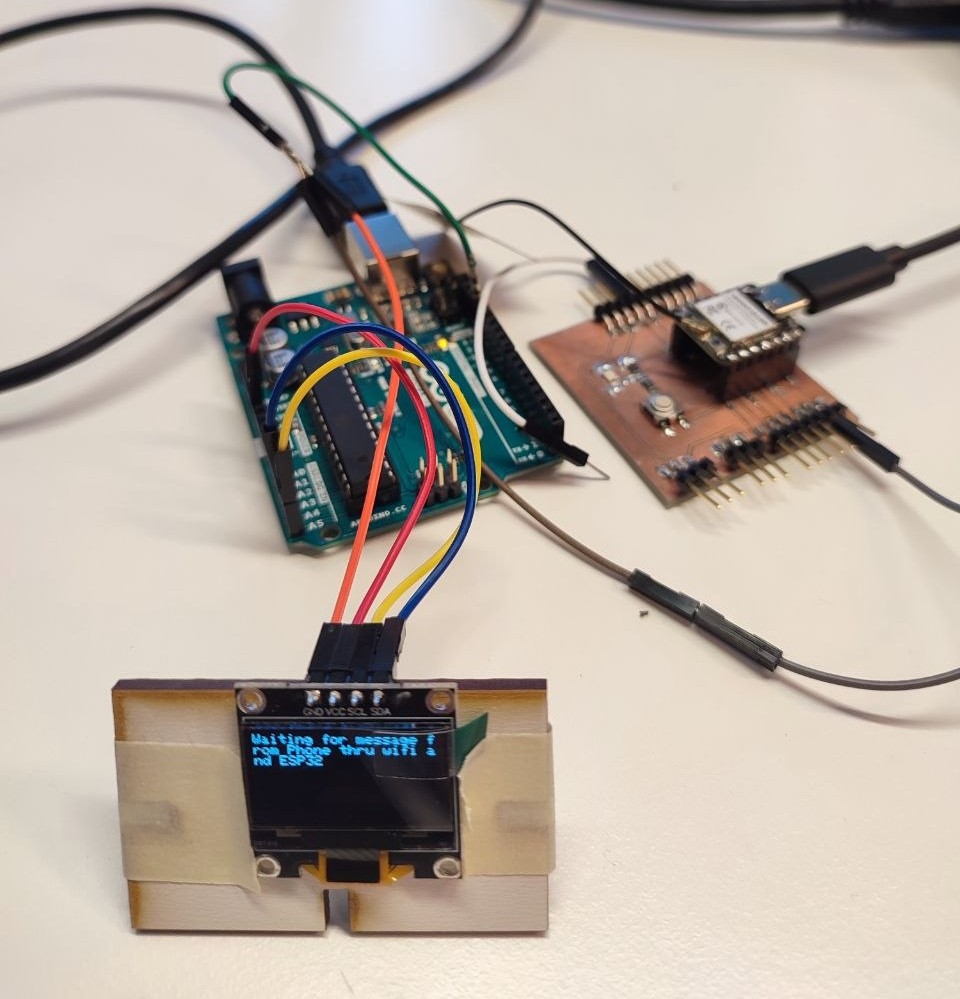
The display was ready to receive a message:
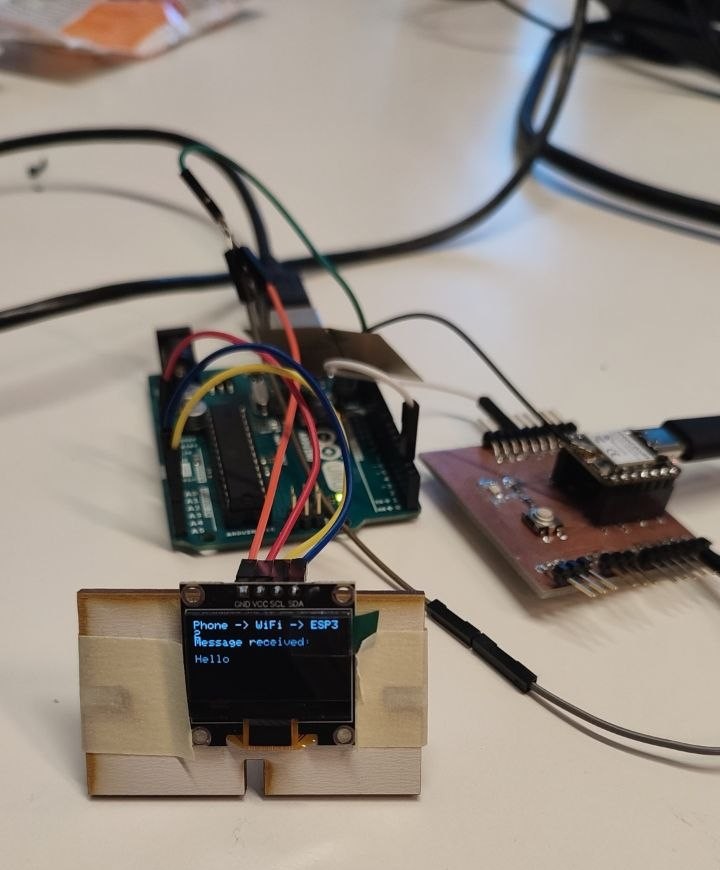
Here is the message received from my phone:
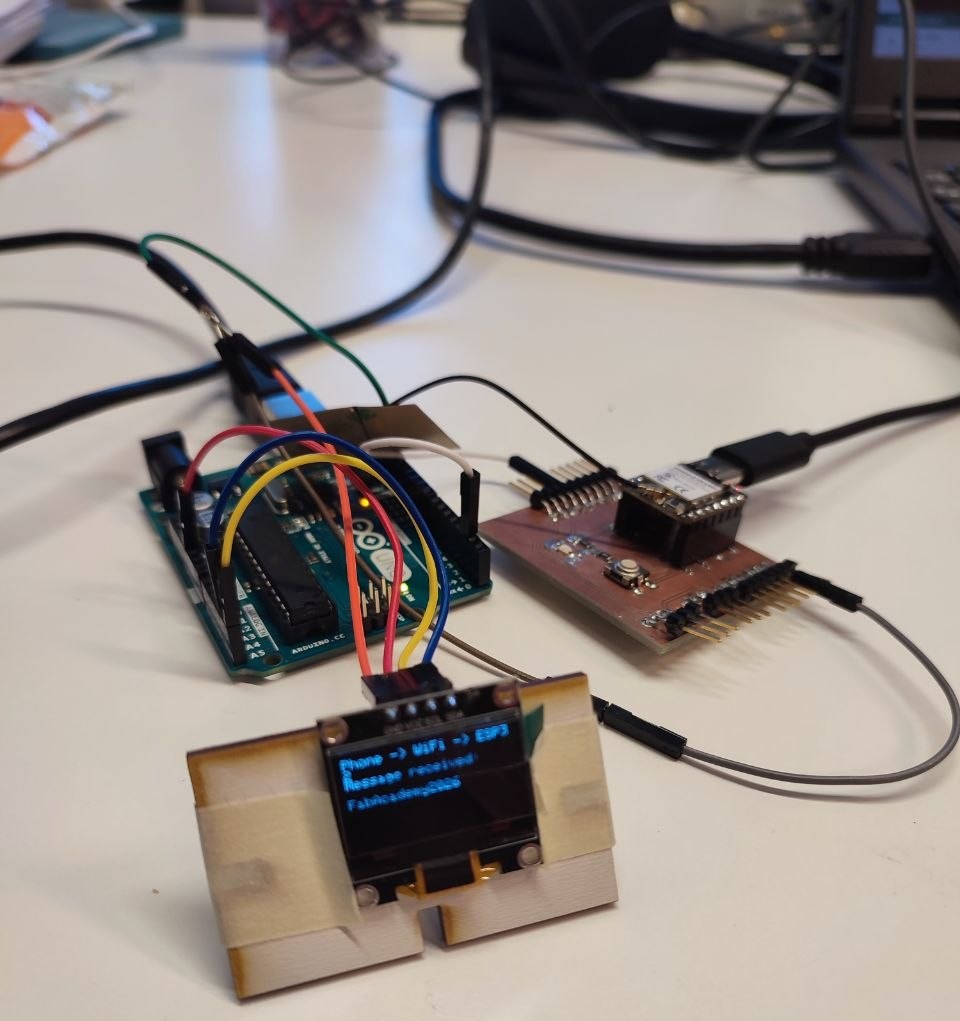
I then sent another message while standing about 10 meters away from the setup:
Reflection
This week was very interesting to me. I really enjoyed setting up both Bluetooth and WiFi connections from my phone to control a display and seeing my texts appear instantly on the LCD felt rewarding. Working with the ESP32-C3 as a WiFi access point and web server was straightforward thanks to the tutorials, but combining it with serial communication to the Arduino Uno added a new layer of complexity. I faced a common but important issue during programming: the UART pins were still connected, which prevented the upload. Remembering to disconnect the serial lines before flashing the code was a useful lesson. In this week I learned how to: Set up BLE communication using the NimBLE library. Create a simple web interface with the ESP32 acting as an access point. Use UART (Serial1 on the XIAO ESP32-C3) to send data between to another microcontrollers. Integrate an OLED display on the Arduino side with the Adafruit library.
Overall, I gained more confidence in using wireless protocols (BLE and WiFi) and in building small multinode systems. The experience of controlling a distant display while standing 10 meters away through WiFi was especially satisfying. I still want to explore more advanced networking topics like ESP-NOW in my own projects and improve the user interface of the web page in the future. This week strengthened my understanding of how data flows between devices in different communication layers.