Week 16
Wildcard
Week Outline
- Wednesday: Global Class for Wildcard Week.
- Thursday: Local Classes on Robotic Light Painting, Metal Joining, Soft Robotics, and Digital Embroidery
- Wednesday: Global review.
Global Class
This week's global class was divided in two parts. During the first part, Neil ran us through a list of examples of digital processes that we can learn about during this week. During the second part, Neil gave us an introduction to composites.
Local Classes
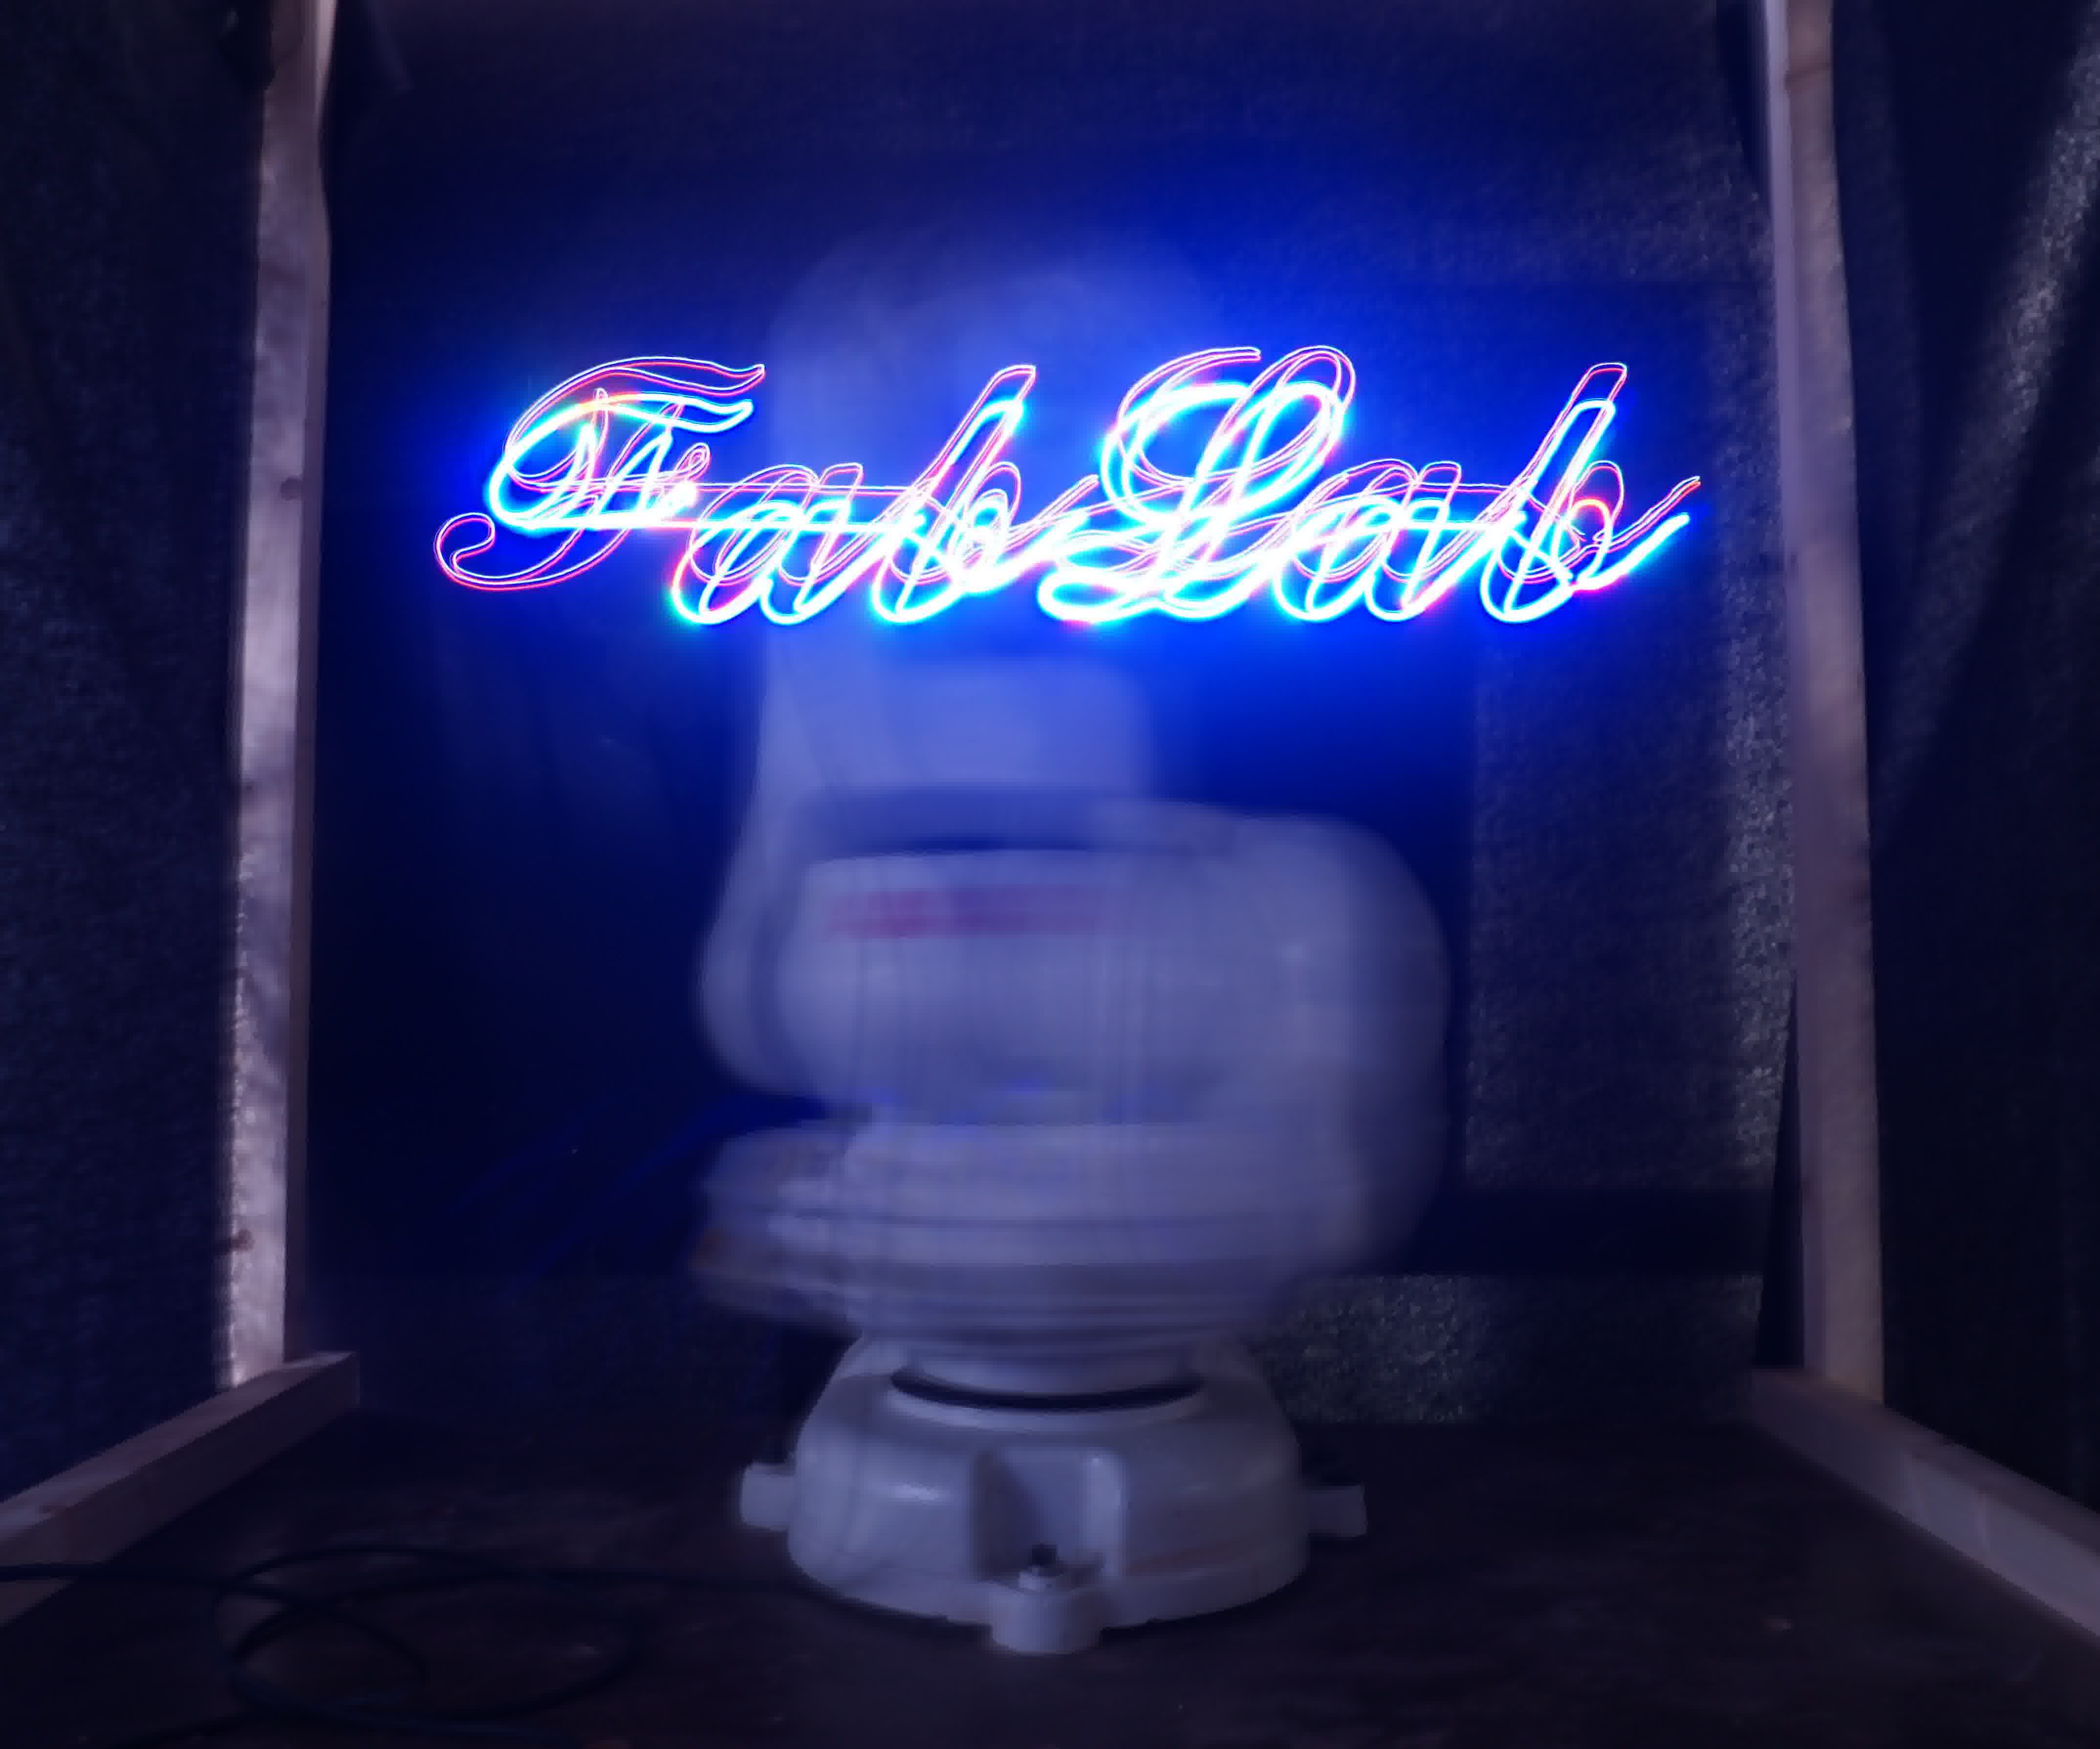
Robotic Light Painting
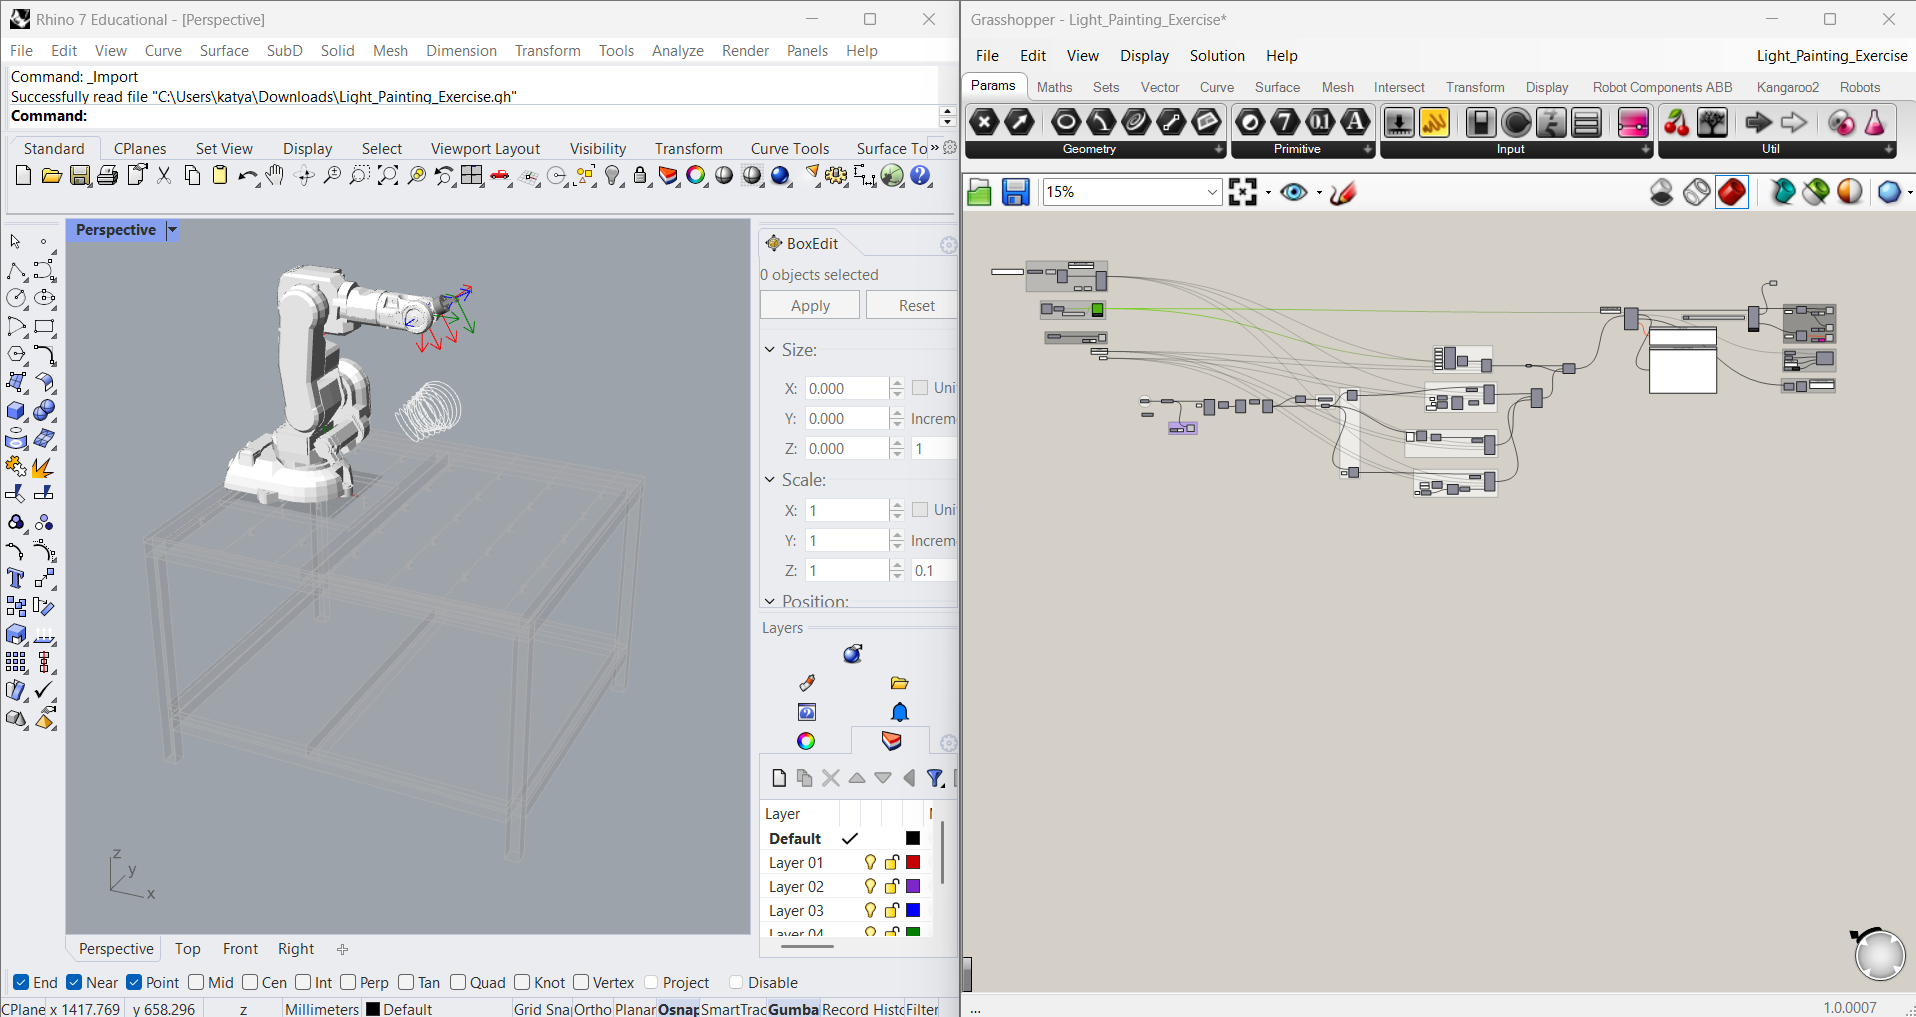
Riaz, the head of robotics here at IAAC, started the class by learning about the different types of industrial robots. The robots we have at the lab are mostly 6-axis robots so he explained the basic kinematic principles, how kinematics solvers work through inverse kinematics, and the concept of singularities and the different types there are.
Then, using this example file, he ran us through the process of using a grasshopper script to control the robot. He explained the process of defining the tool, calculating and calibrating the DCP, determining the curves for the light painting by exploding them into points and then turninng them into planes, creating the joint and linear motions, and generating the toolpaths.
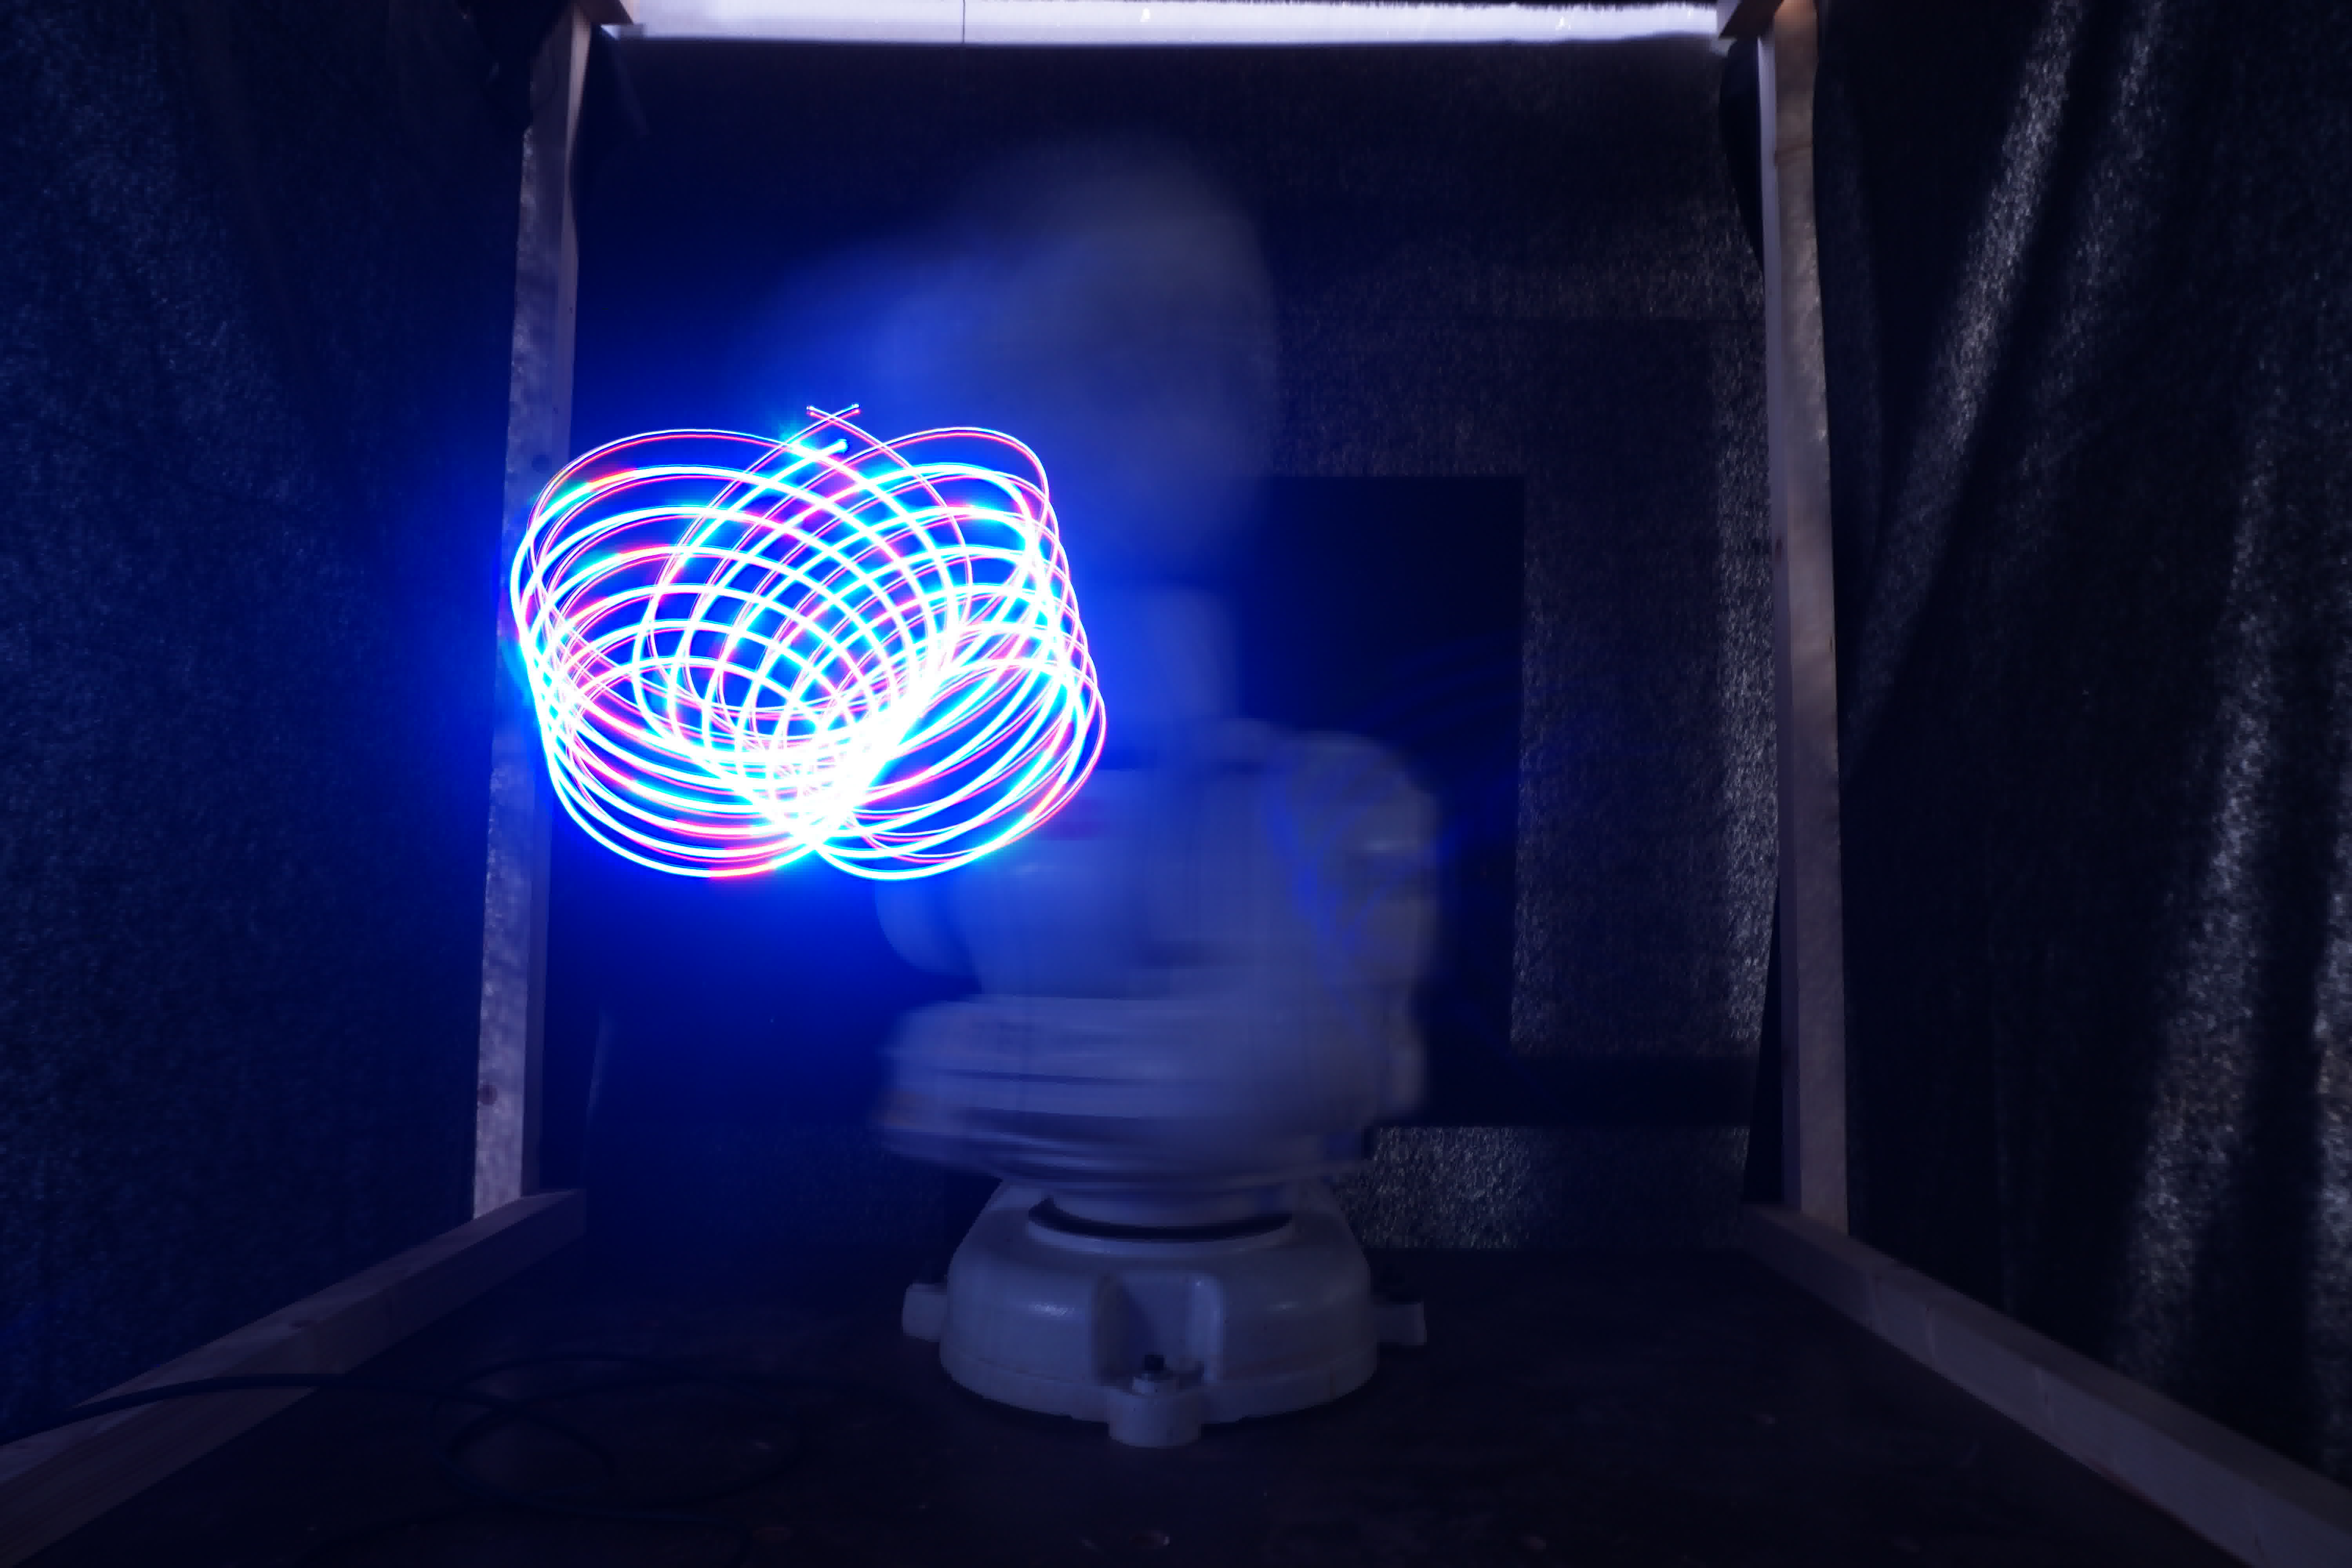
Finally, he took us to the robotics area and let us play with some 6-axis robots. After that, we loaded his example file into the robot to create this light painting:
Metal Joining
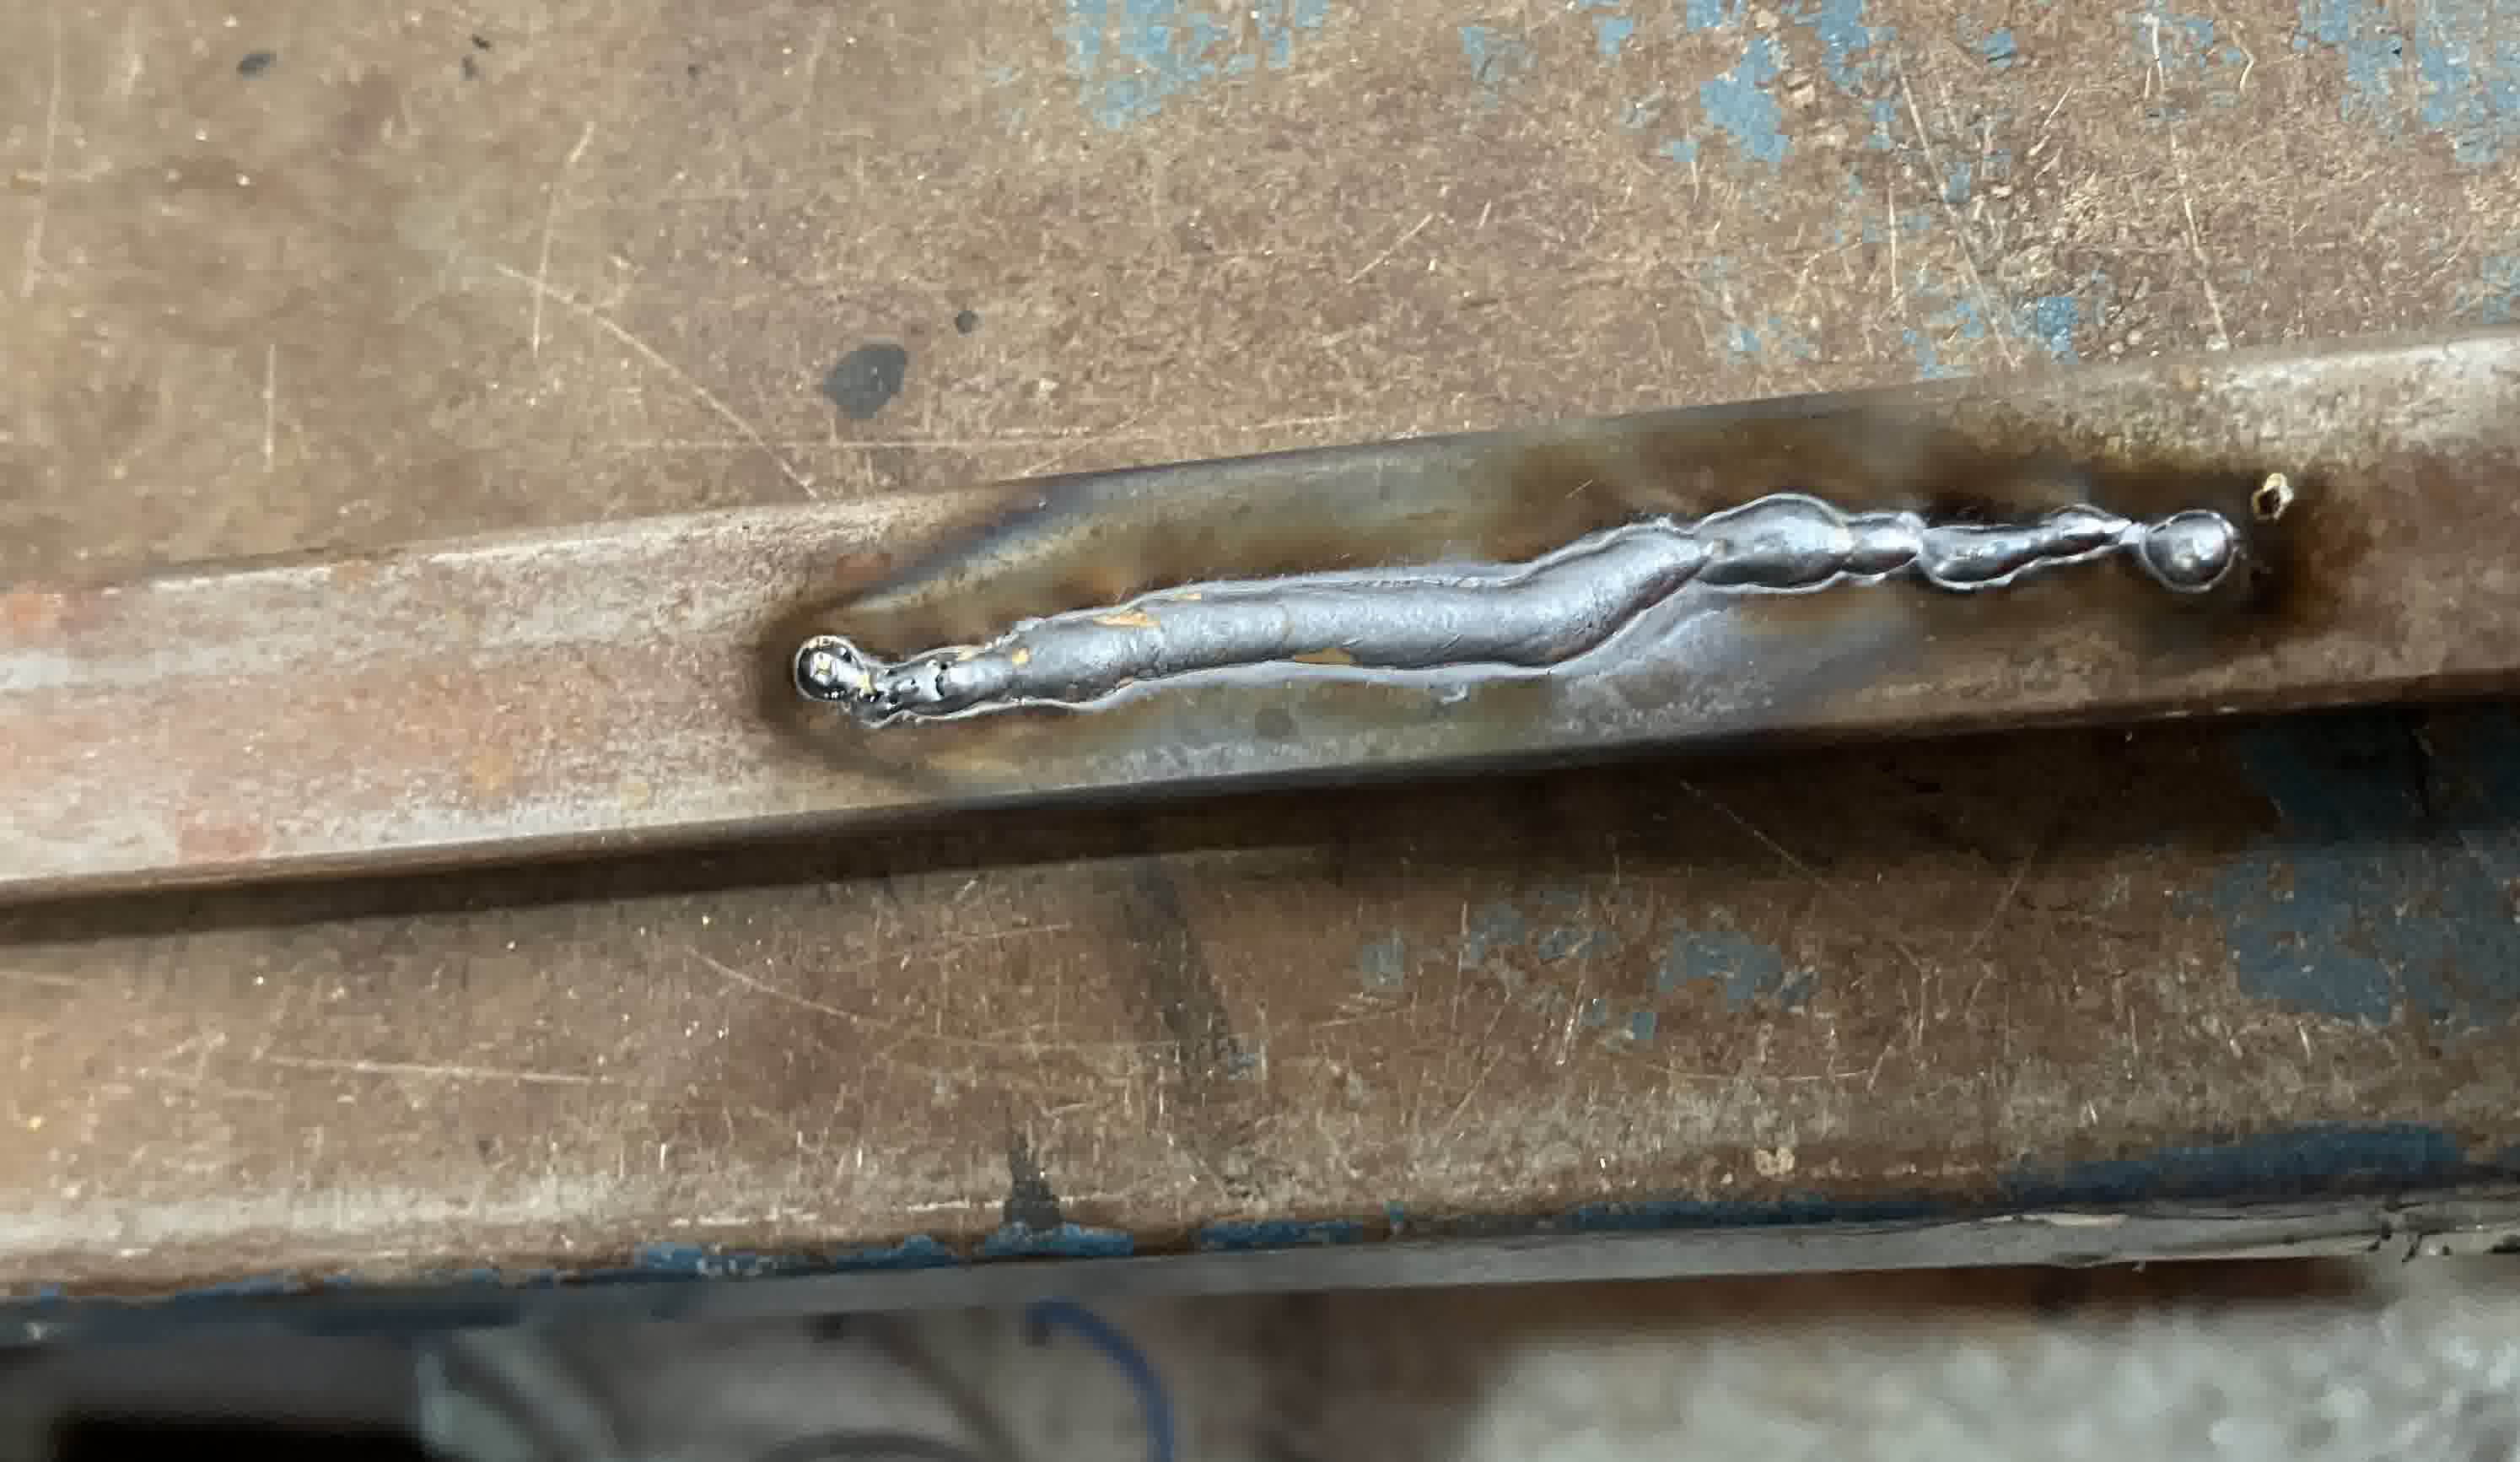
Dani started the class discussing the difference between soldering, brazing, and welding. He explained the theoretical concepts behind each one and then introduced us to electrode stick welding, TIG welding, MIG welding, friction stir welding, and spot welding.
After the theoretical part of class, we moved on to the practical. So first Dani explained how to set up the work area and then he did a demonstration.
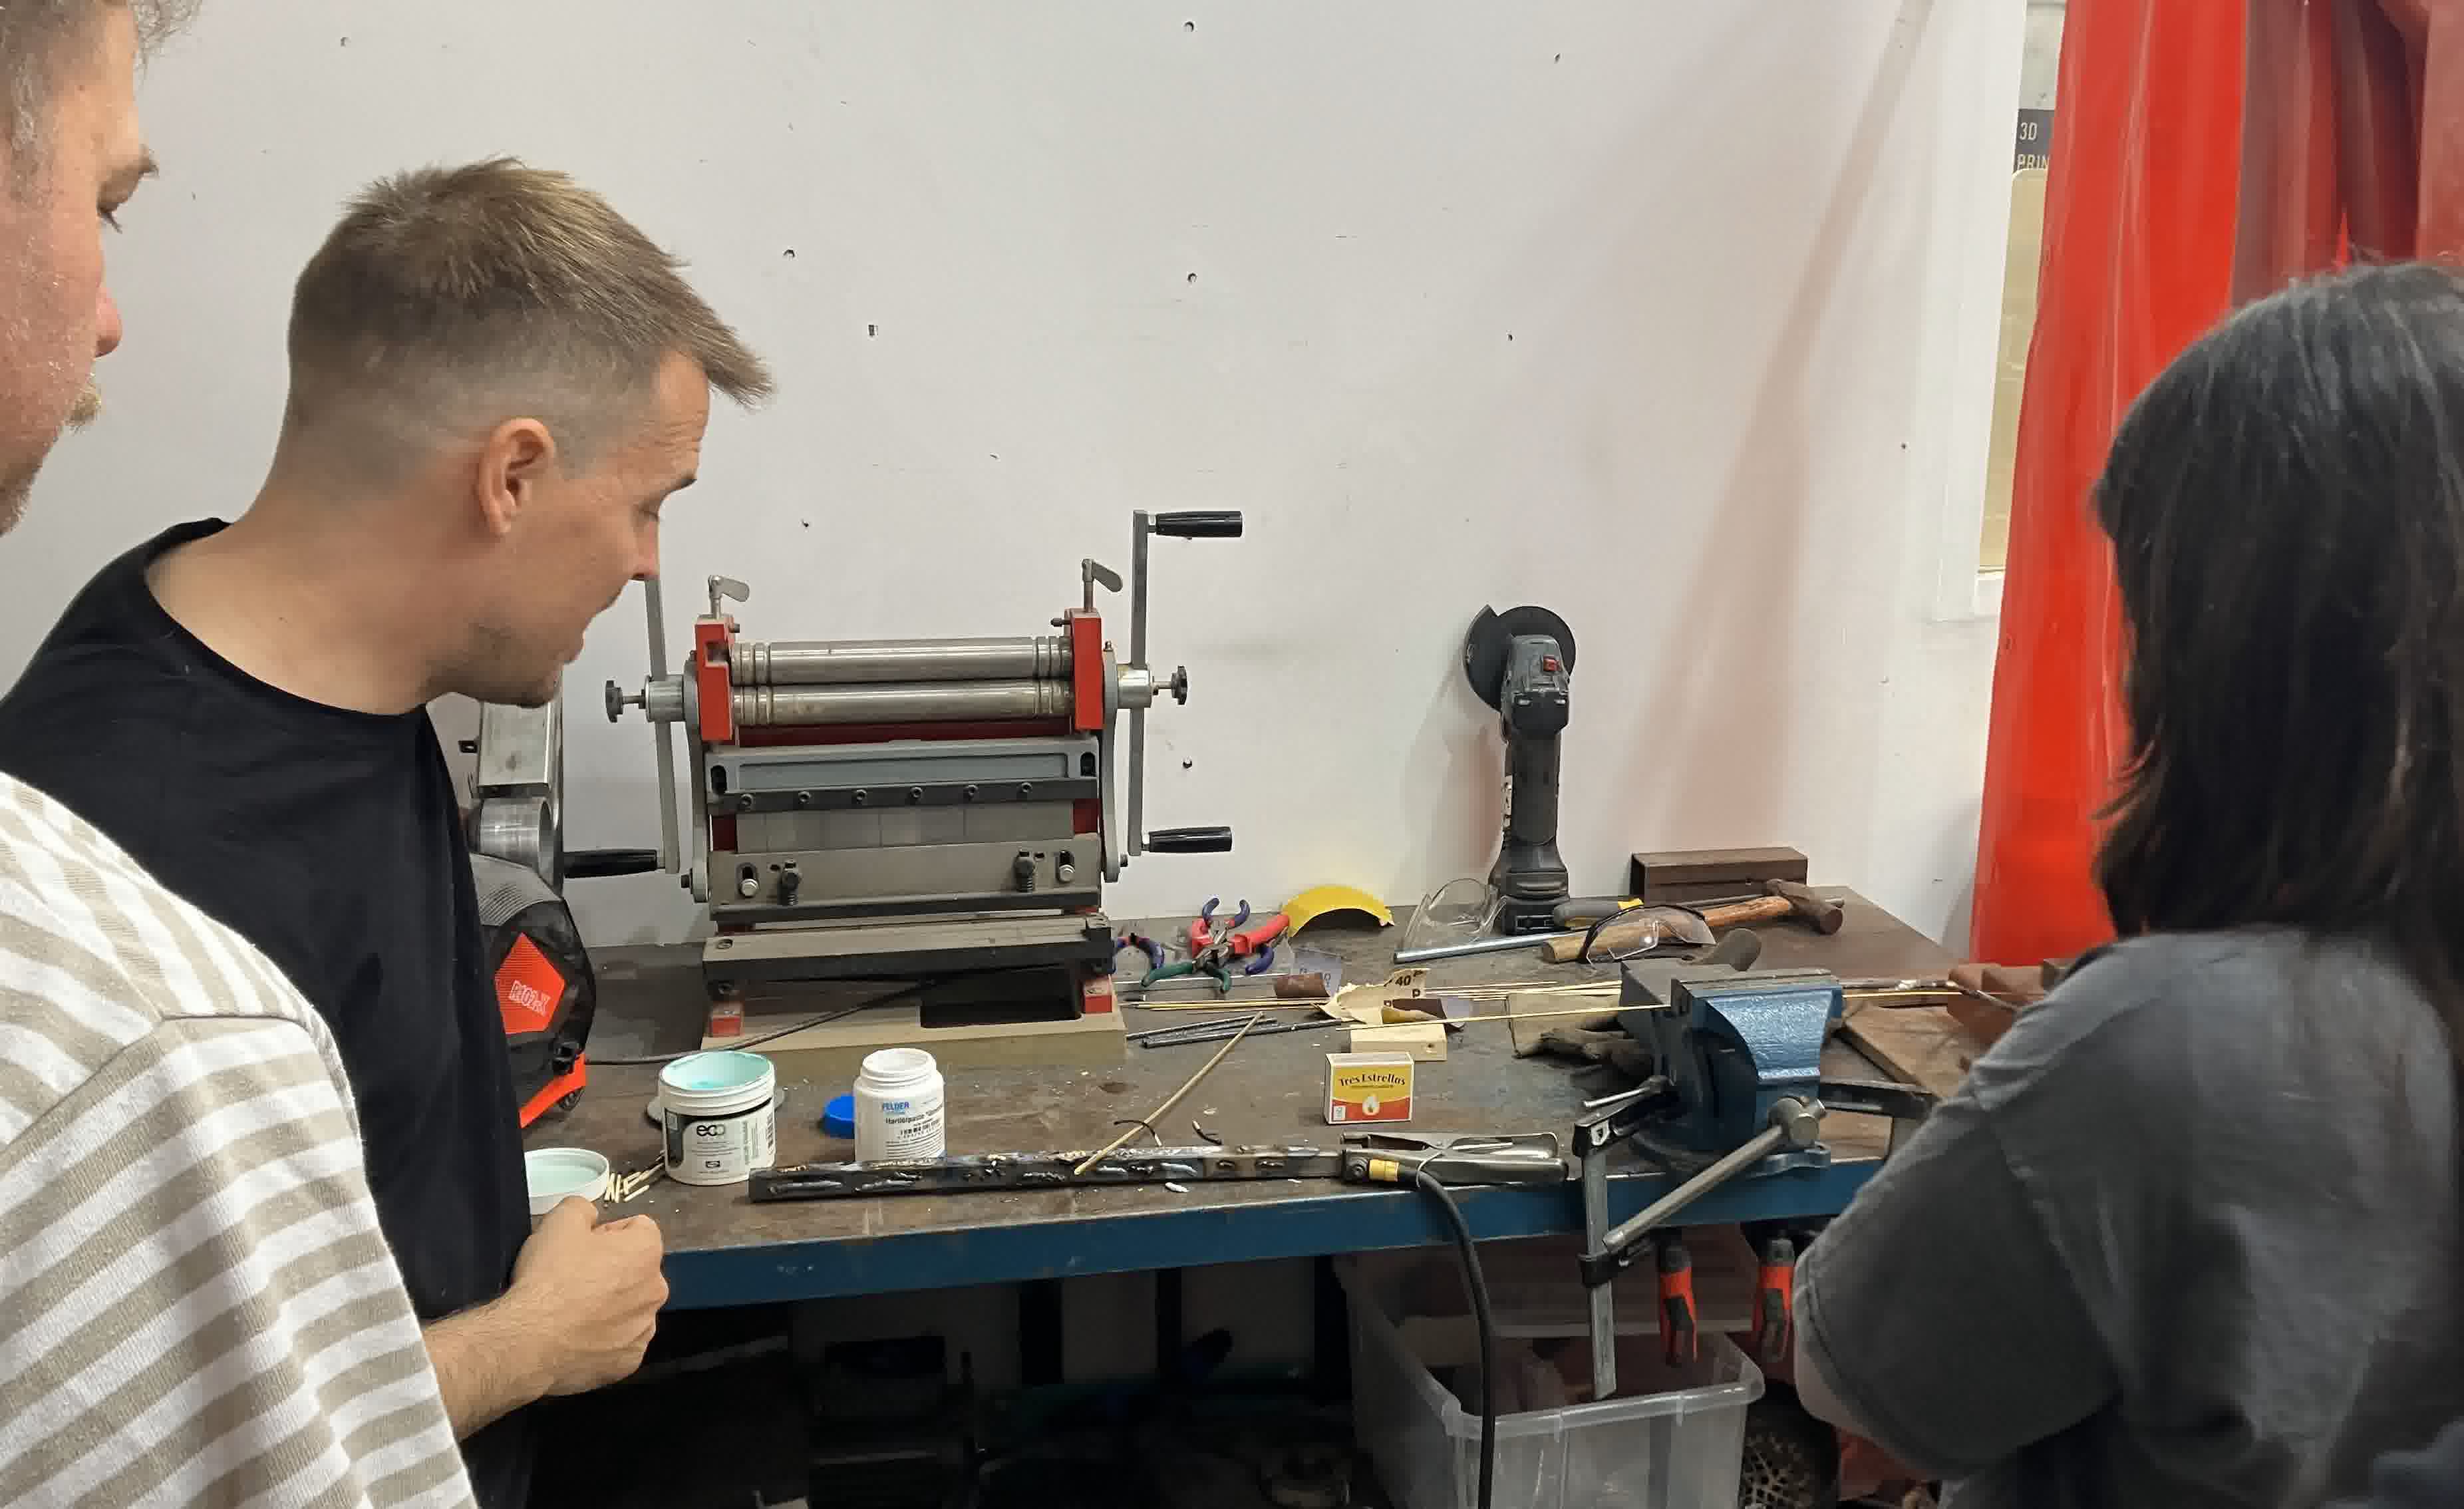
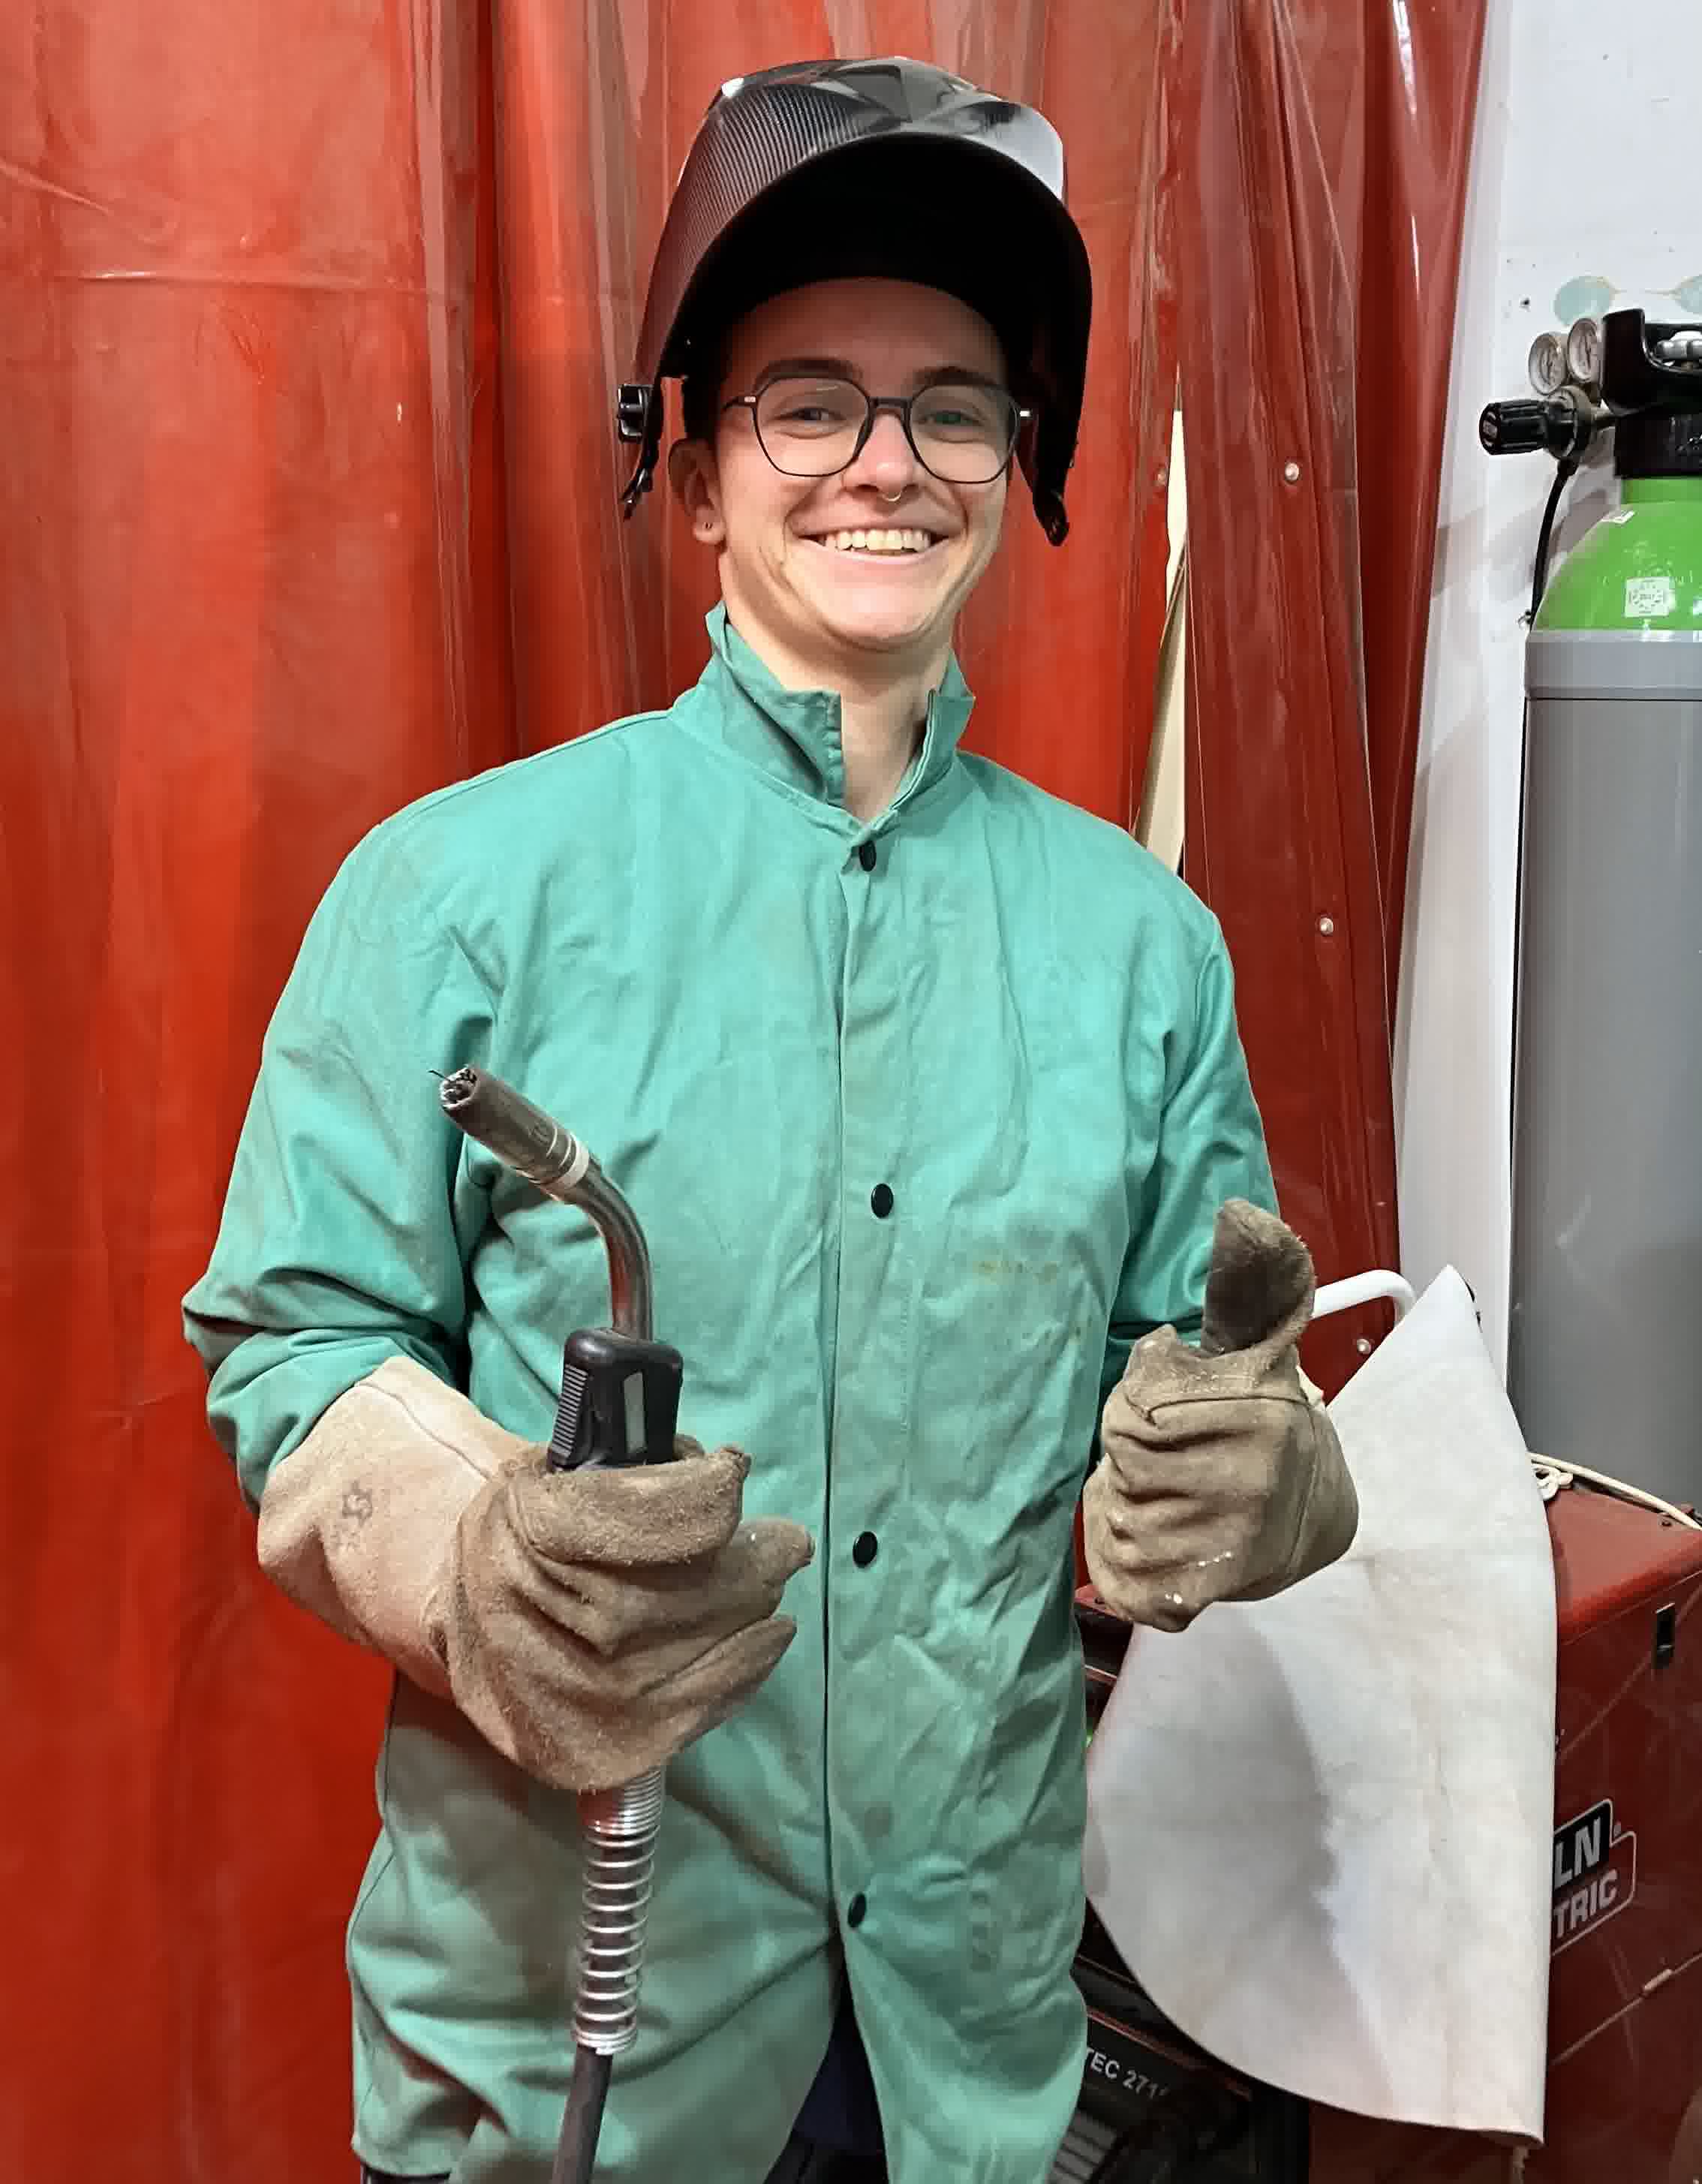
Then he guided us each as we tried it out ourselves:
Soft Robotics
This class was led by, Nicolo, a former MDEF student. First, he introduced us to the concept of using biomaterials in soft robotics. Then, he showed us multiple examples and then talked a little bit about his own experience with the topic. Then we did an exercise in biomimicry strategies in soft robotics. So he guided us through the process of transposing a 3D model into a 2D design, making the biomaterial (we used glicerine, gelatine, and water), lasercutting our 2D design on cooking paper, putting the cut design between two layers of biomaterial, and then putting a tube into the layers to blow air in and out (mimicking breathing).
Digital Embroidery
Adai started the class by showing us all the different parameters with which we can play:
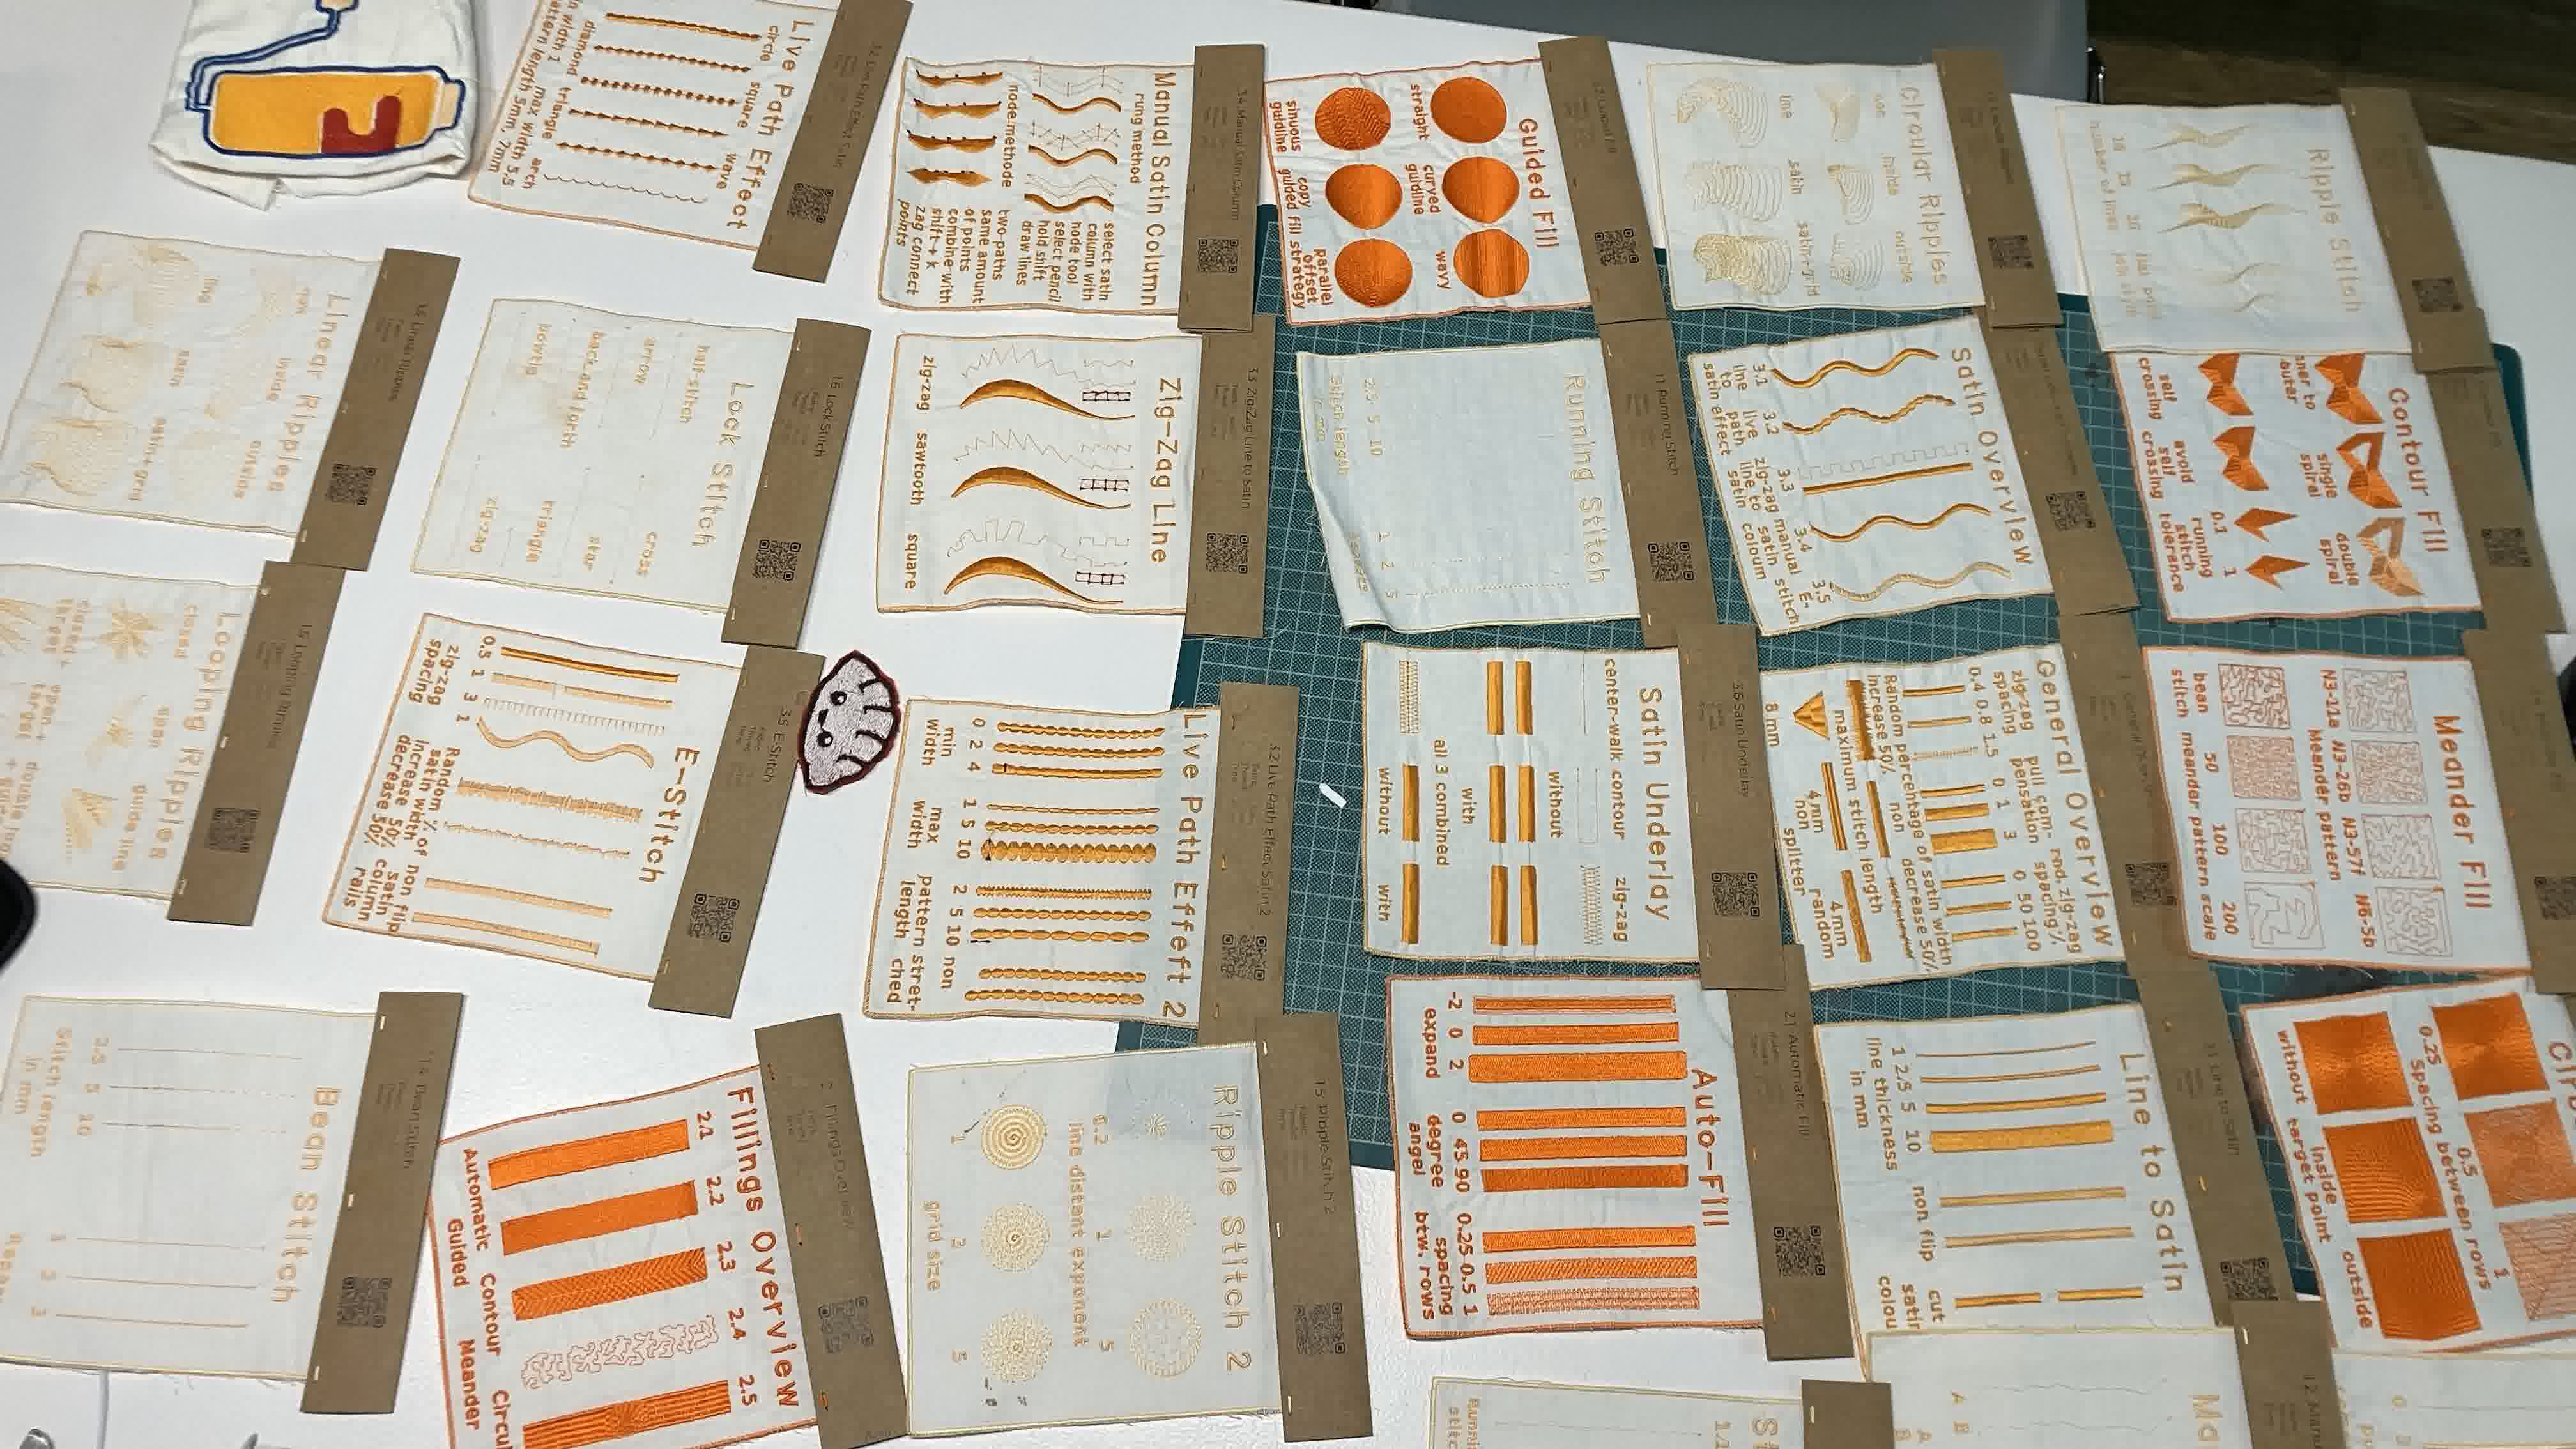
They are all based on Julia Gase's documentation, which is what guided our class. Adai referenced this documentation when explaining to us the workflow for using the Ink/Stitch extension on Inkscape to create toolpath files for a digital embroidery machine.
Assignment
Design and produce something with a digital process (incorporating computer-aided design and manufacturing) not covered in another assignment, documenting the requirements that your assignment meets, and including everything necessary to reproduce it. Possibilities include (but are not limited to) machines, welding, molding and casting, folding, robotics, electronics, embedded programming, food, materials, biotechnology, textiles, and composites.
Robotic Light Painting
For this week's assignment I started messing around with the robotic light painting. I created this file on Grasshopper in Rhino. Then, I followed Riaz's instructions to create this toolpath file. You can see the simulation of the toolpath below:
And this is how the final product looked:
Digital Embroidery
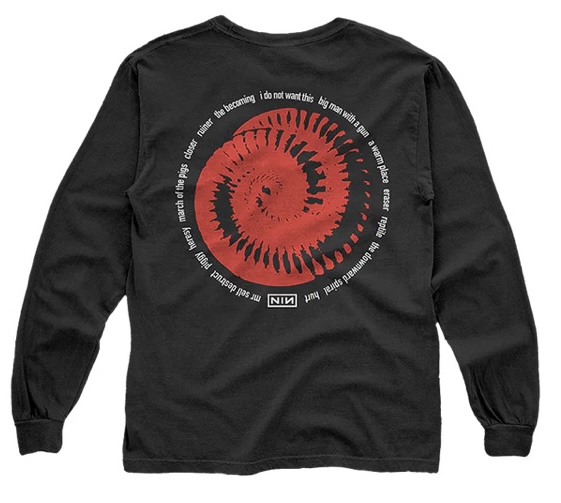
For our four and a half year anniversary, my partner and I are going to a Nine Inch Nails concert. We were looking at their soon to be released merch and we both really liked this shirt:
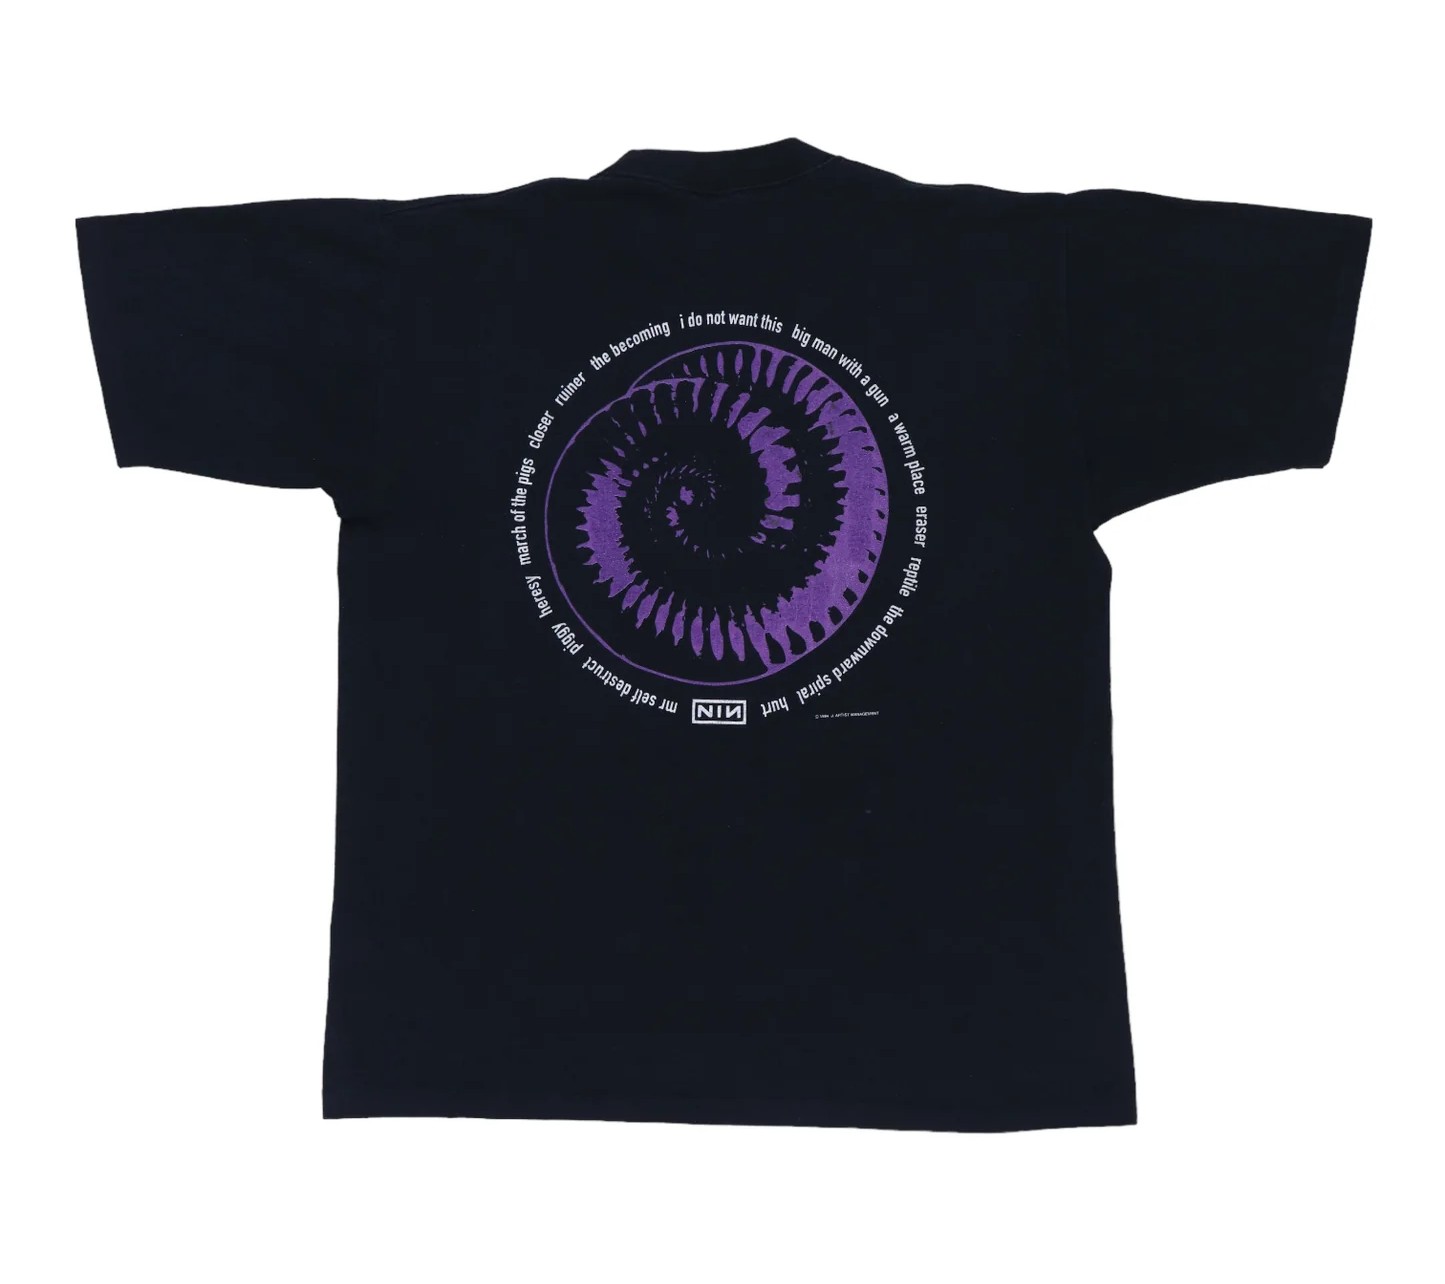
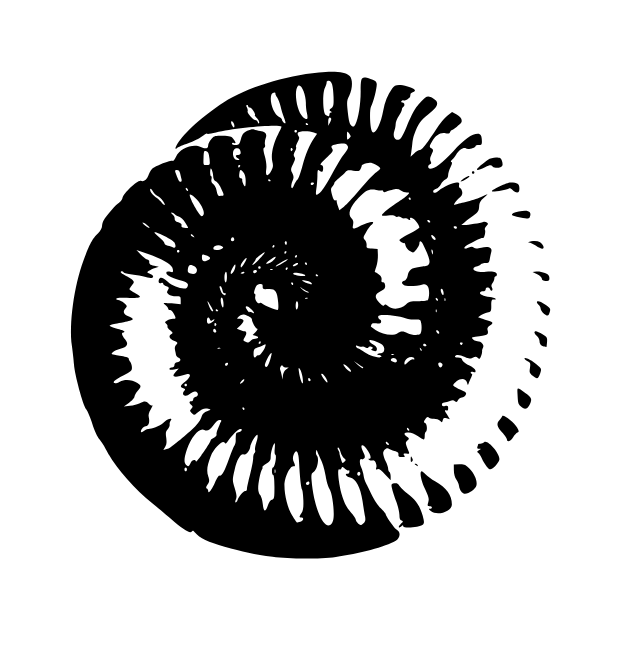
So since the new shirt is pretty expensive, I thought it would be cool to do my own version of it to gift to my partner to use at the concert. Before embroidering a shirt though, I decided to do some tests on scraps of fabric. So first I found the downward spiral logo online:
I created this file on Inkscape. I selected a circular fill method, a 0.25mm spacing between rows, a 2.1mm running stitch length, a 0.1mm running stitch tolerance, and 1 repeat. This gave me this file as a toolpath for the embroidery machine. You can see the simulation of the toolpath below:
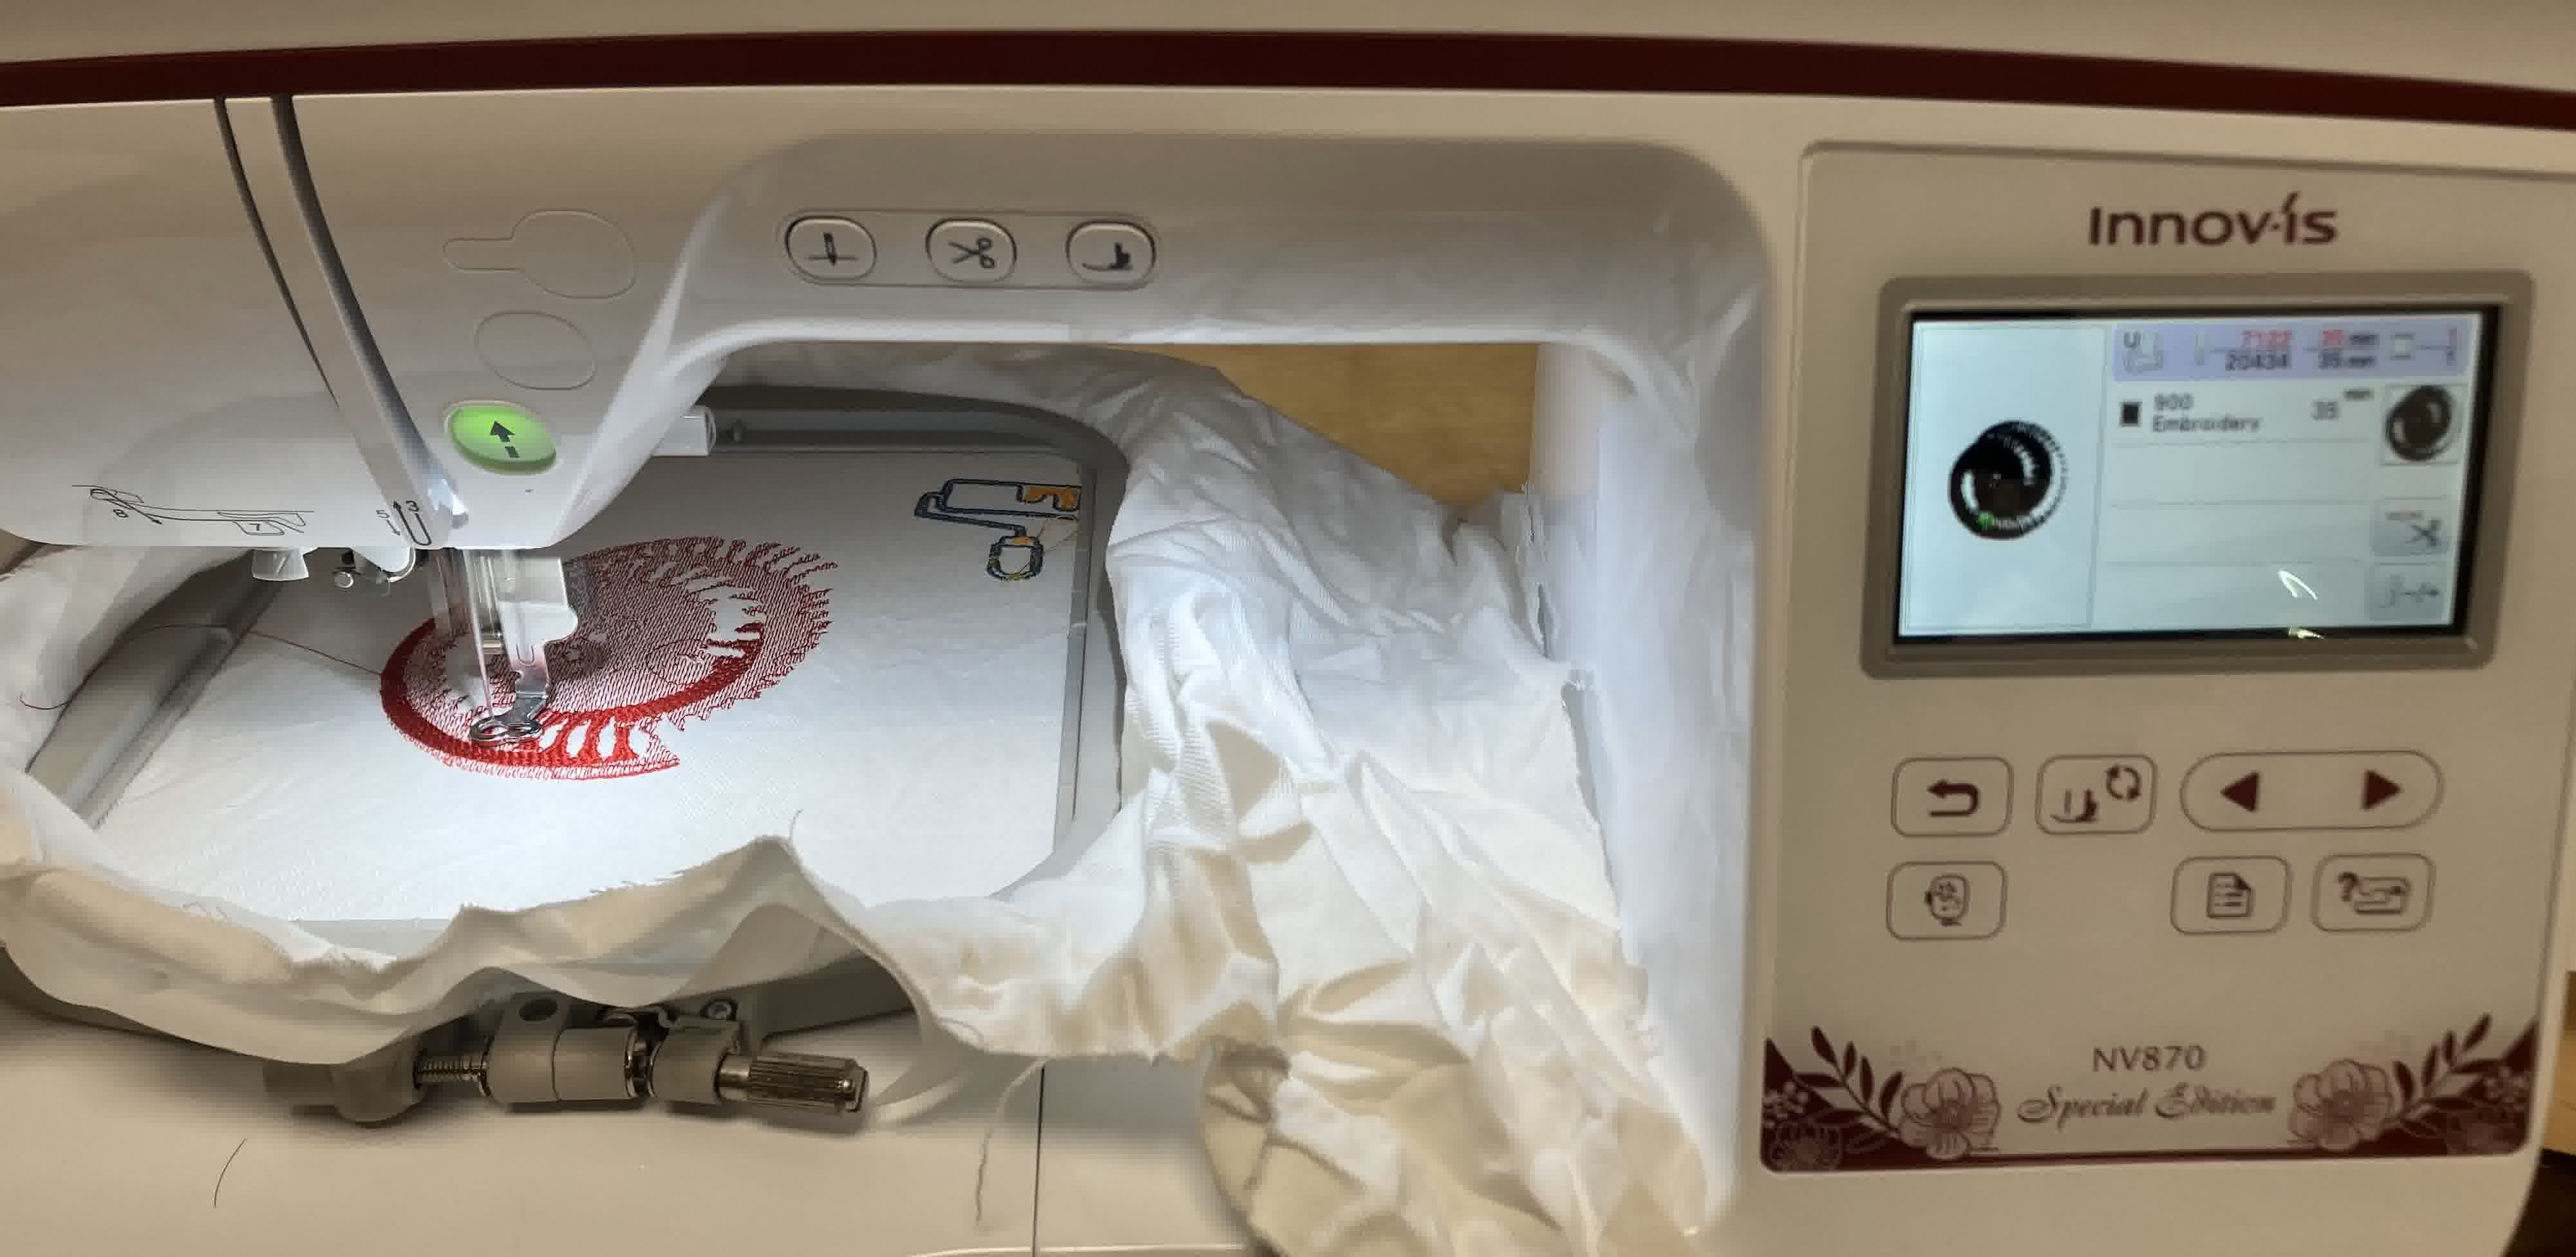
And this is how the final product looked:
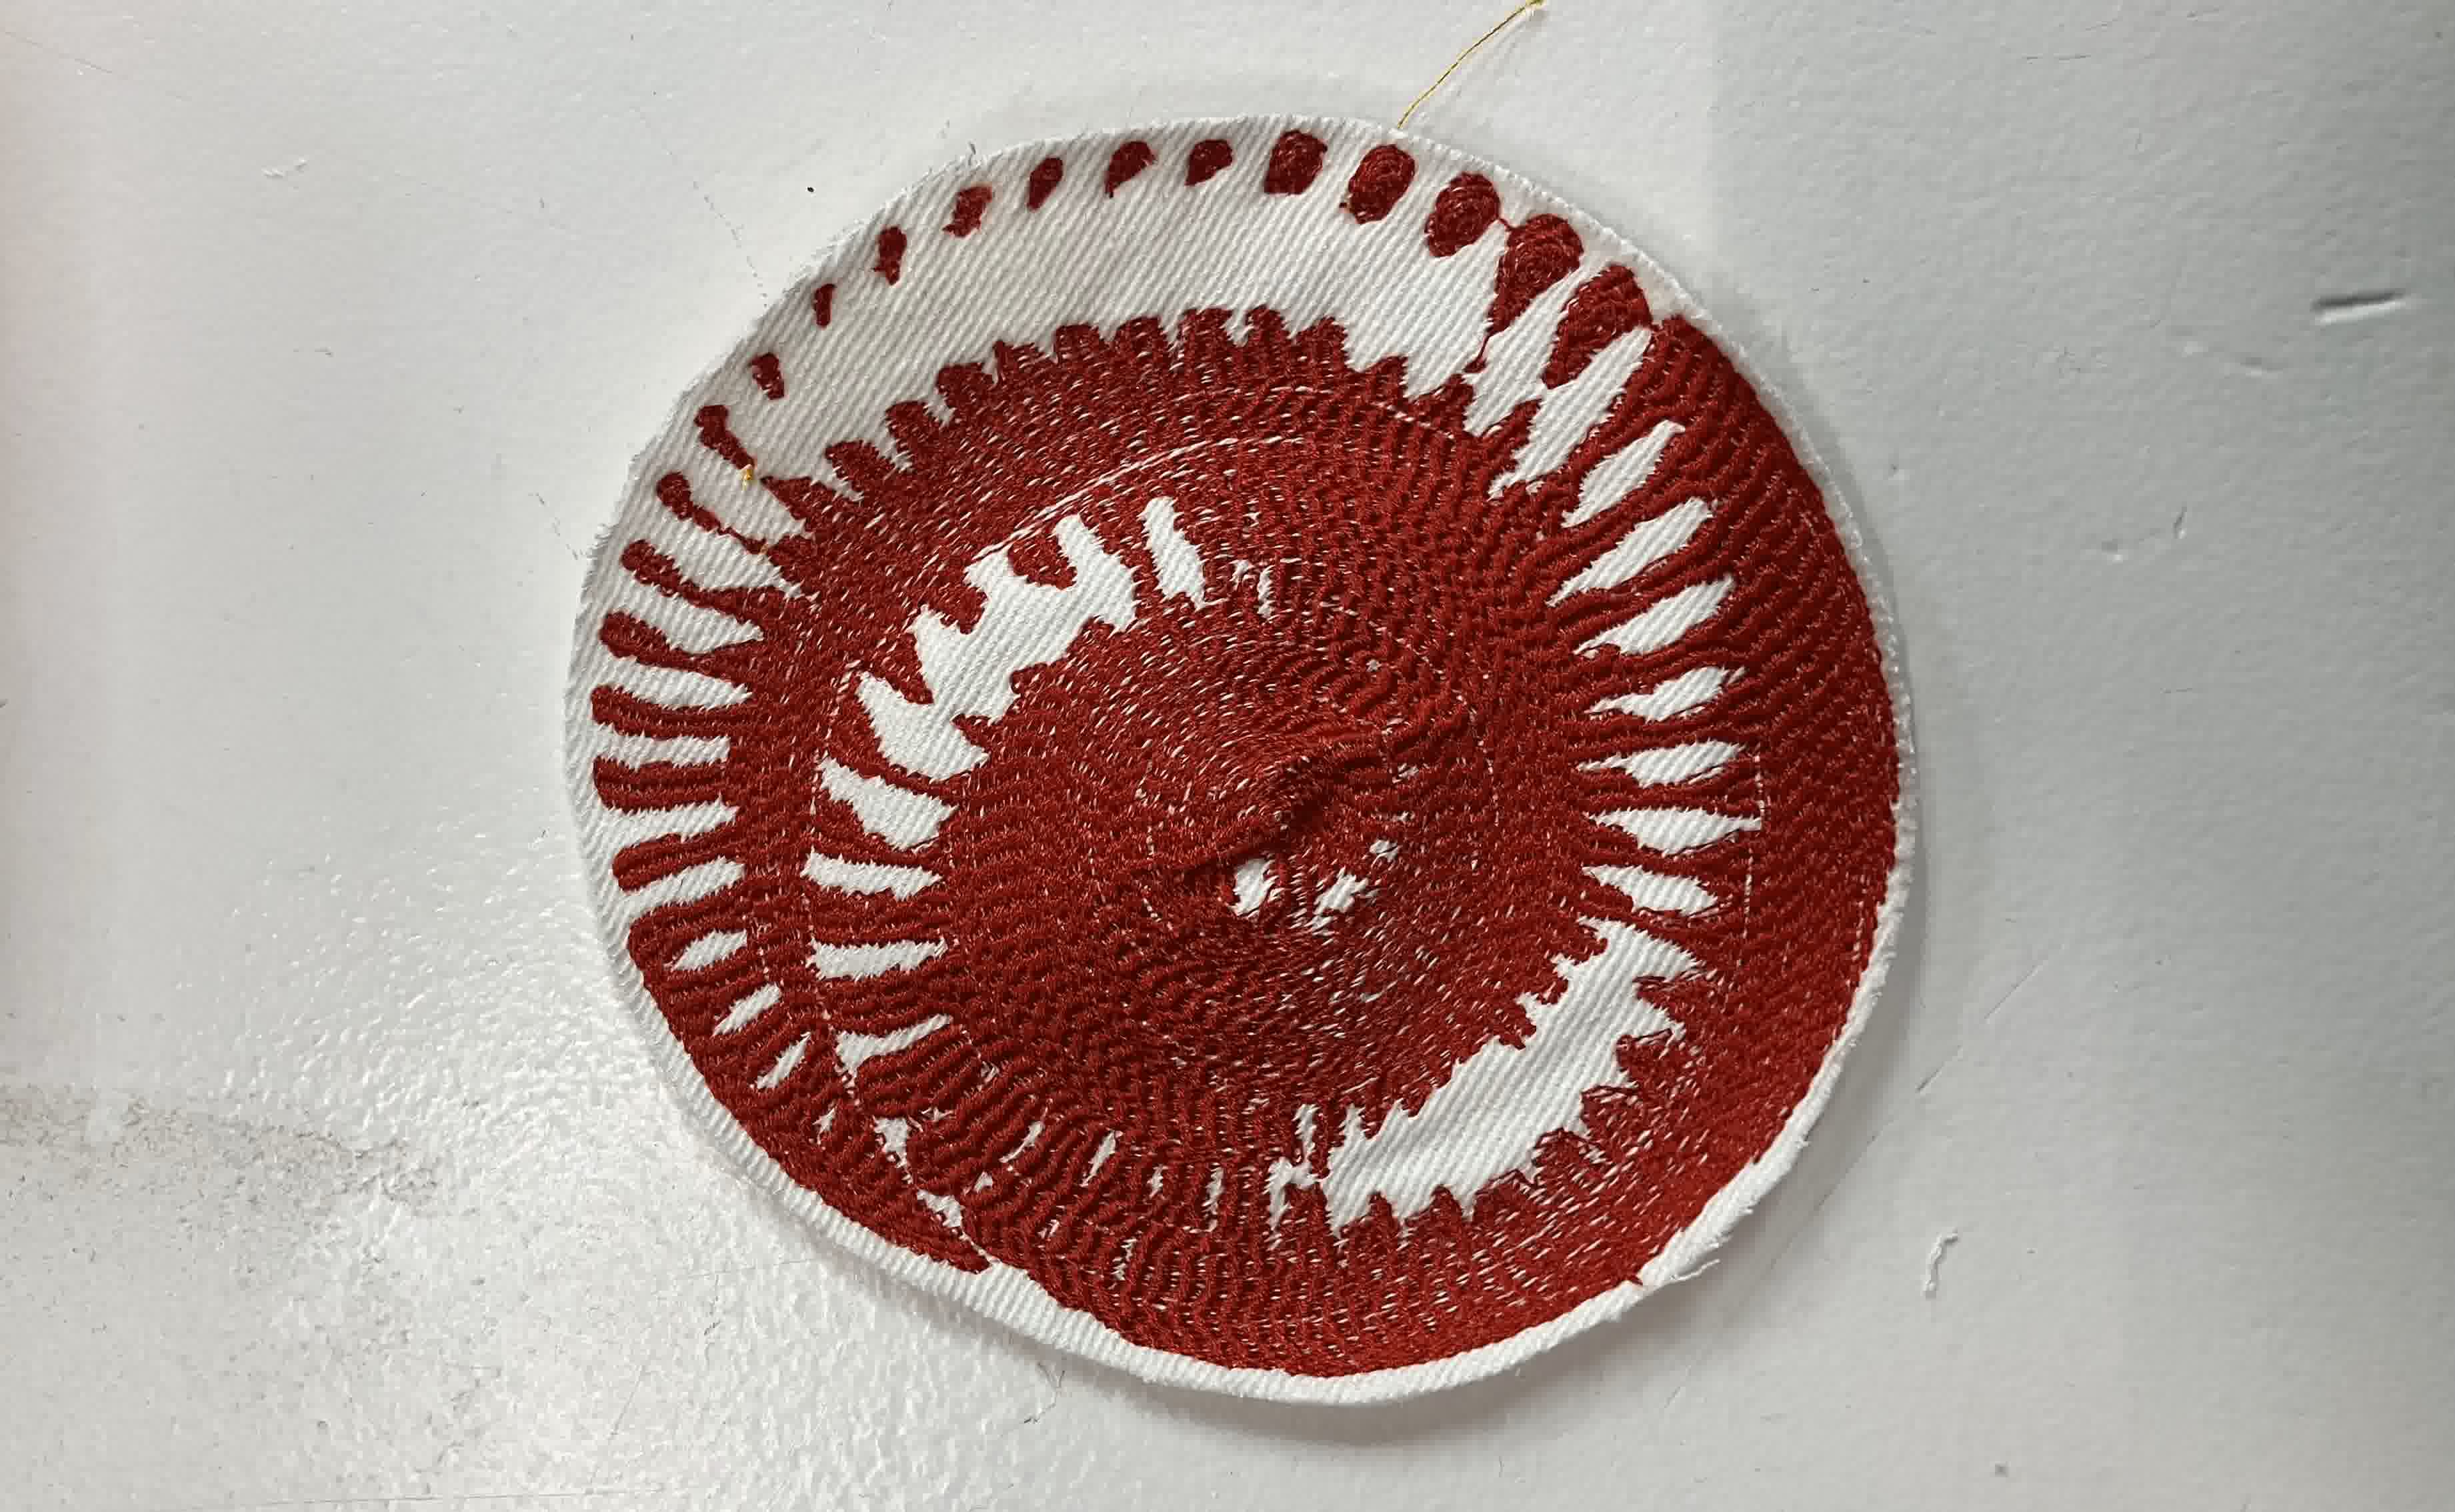
I didn't love how the fabric popped up in the center or how there were some gaps, so I decided to change the parameters. I selected a auto-fill method, a 2.1mm running stitch length, a 0.1mm running stitch tolerance, and for the rows to be staggered 4 times before repeating. It was already pretty late and the previous stitch had taken half an hour, so I also reduced the size by half. Based on this, I created this file on Inkscape. Which gave me this file as a toolpath for the embroidery machine. You can see the simulation of the toolpath below:

And this is how the final product looked:
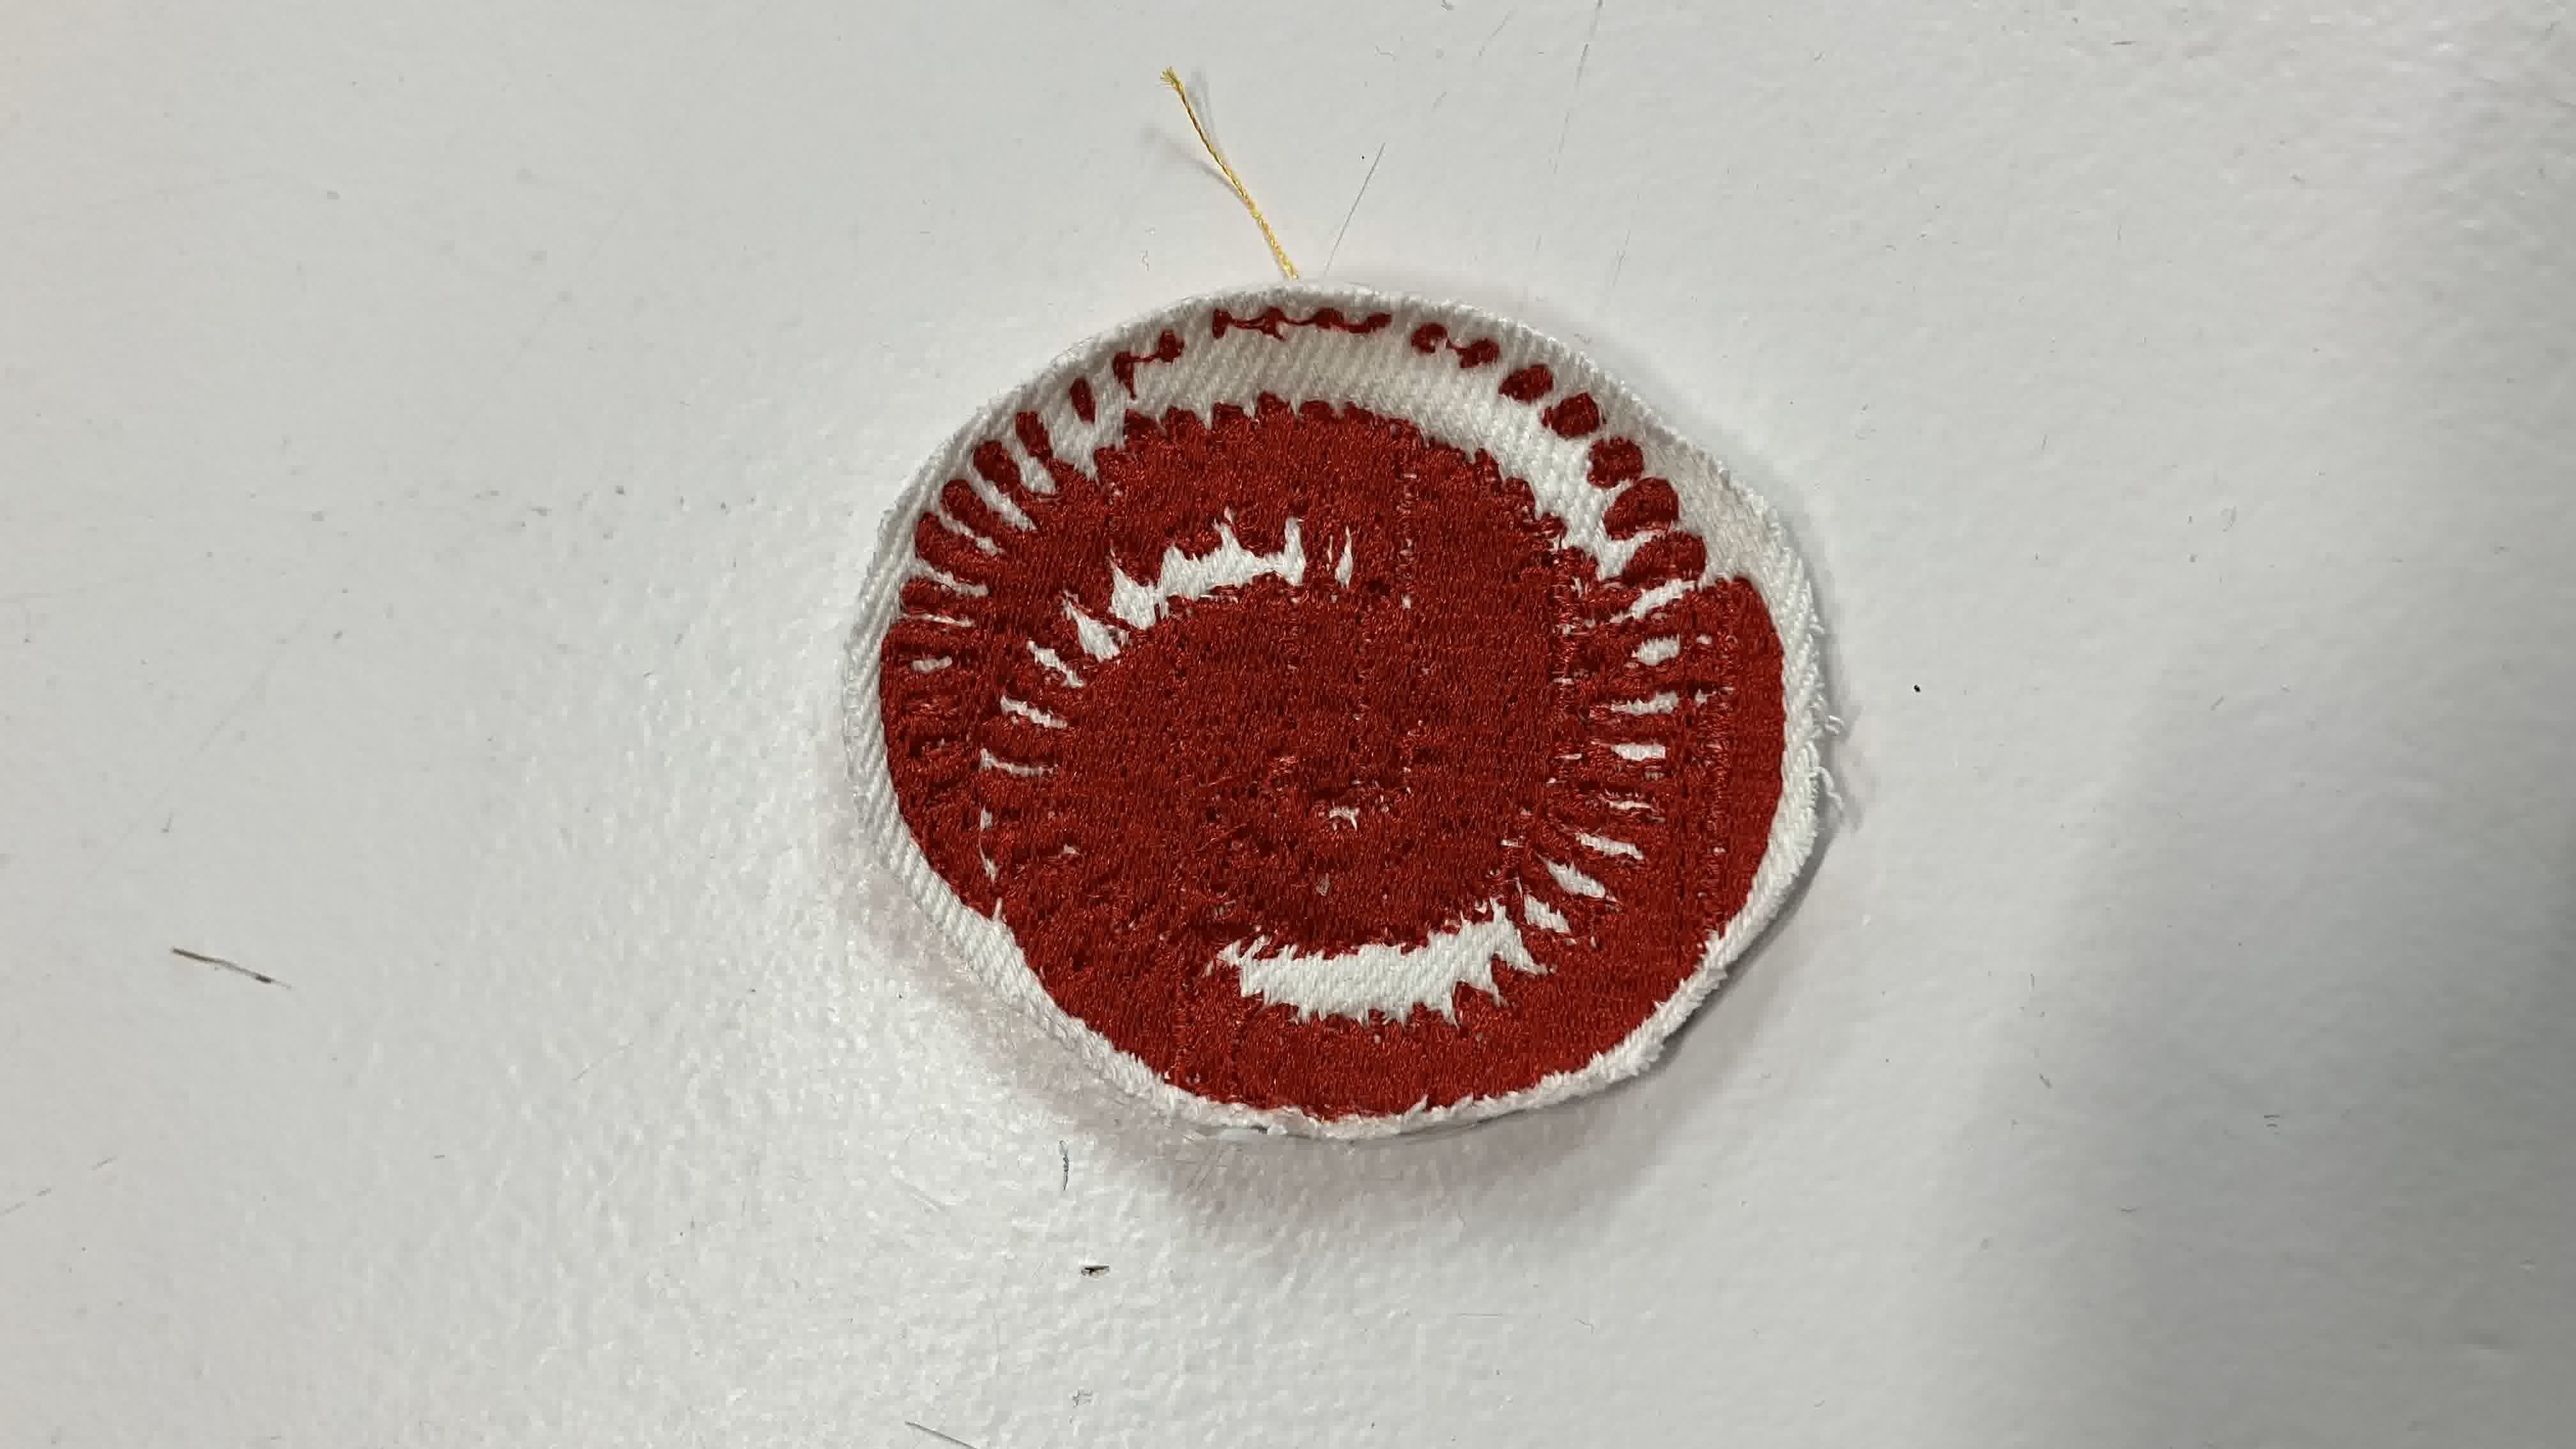
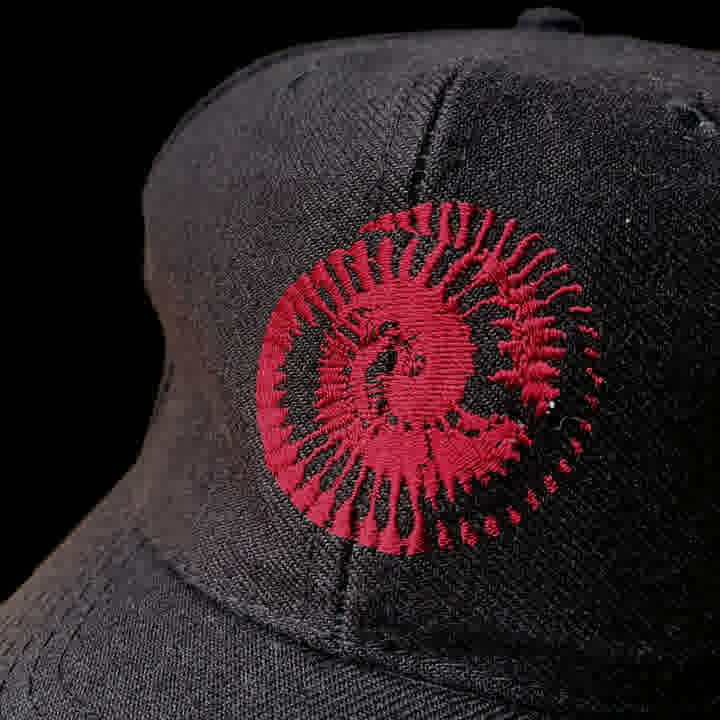
I didn't love the final finishing, but I thought it was better than the first one. At first I thought a contributing issue might've been the smaller size of the embroider causing it to loose details. However, I stumbled across this hat from the 1994 tour:
So I decided to keep experimenting with parameters and sizes before embroidering a tshirt.