Week 7
Computer Controlled Machining
Week Outline
- Wednesday: Global Class on Computer Controlled Machining.
- Thursday: Local Classes on CNC theory, Rhino CAM, and CNC Practice.
- Friday: I designed my music stand with integrated saxophone stand on Fusion.
- Monday: Recitation on Sustainable Materials, Quantum, and Optics.
- Wednesday: Global Review. I caught up with my documentation.
Global Class
For this week's global class, Neil started with some inspiration and showed us the most impressive projects that have been done for this week. Then, he showed us different machines, materials, vendors, and job shops. Then, he explained different types of toolings and compared some of them. He also talked about speeds and feeds for them. Then he explained different types of fixturing and structure techniques. He also explained different toolpaths and how they work. He talked about the different softwares and file formats that can be used. He finished the class with a very in-depth and focused discussion on safety, and told us basically every type of accident that could happen and how to avoid them.
Local Classes
CNC Theory
Dani started the theory class by explaining the basic anatomy of CNC machining and discussing the different types of CNC machining. Then he went more in depth into the parts of the machines we will be using (3-axis CNC mills) and the components needed in the space around (especially for safety purposes). Then he discussed the different materials that can be used for CNCing, and their particular properties and benefits.
Then he walked us through the workflow of designing for machining. He discussed what limitations we have and what we need to account for in our designs. Then he discussed the process of nesting and showed us different softwares that can be used for it. He then talked about the approaches to building volumes. He then talked about joinery and developed on some strategies. Then he explained the toolpath concept and g-code control softwares.
Then, Dani explained the most common terms used in CNC. After that, Josep compared drill bits and end mills. Then, they showed us different endmills and discussed their characteristics and uses. They explained the concepts of bit anatomy, flute counts and applications, chip loads, feed rates, spindle speeds. Then, they explained how to calculate speeds and feeds with the chip load formula, with the tool manufacturer's datasheet, and with a calculator tool.
Then, Dani introduced the concepts of climb and conventional milling and compared both of them. He discussed different strategies for setting up the material on the machine.
The class finished with a discussion on possible mistakes that can happen, how to avoid them, and what safety precuations to follow.
Rhino CAM + CNC Practice
Josep had prepared some models in order to run us through the workflow of preparing a file for cutting on Rhino CAM.He explained the overall workflow from importing the file all the way to exporting the CAM that the machine reads, and the different parameters to take into account for different applications. In the end, we got this CAM ready file for our Feeds and Speeds test and this CAM ready file for our Fit test.
After showing us how to prepare the files for different types of pieces we might want to cut with different techniques, Josep took us back to the wood workshop and ran us through the process of setting up and preparing the files and the machine. He then cut both test files with us, running us through the steps.
Assignments
1. Complete your lab's safety training as a group.
After our Rhino CAM local class and before our CNC practice local class, Josep ran us through the lab's safety training. He showed us the different machines, the dust extractors, and the safety measures for each machine. He also talked about correct practices and what to do in case of emergency.
2. Test runout, alignment, fixturing, speeds, feeds, materials and toolpaths for your machine as a group.
The documentation of the work we did can be found here.
3. Make (design+mill+assemble) something big.
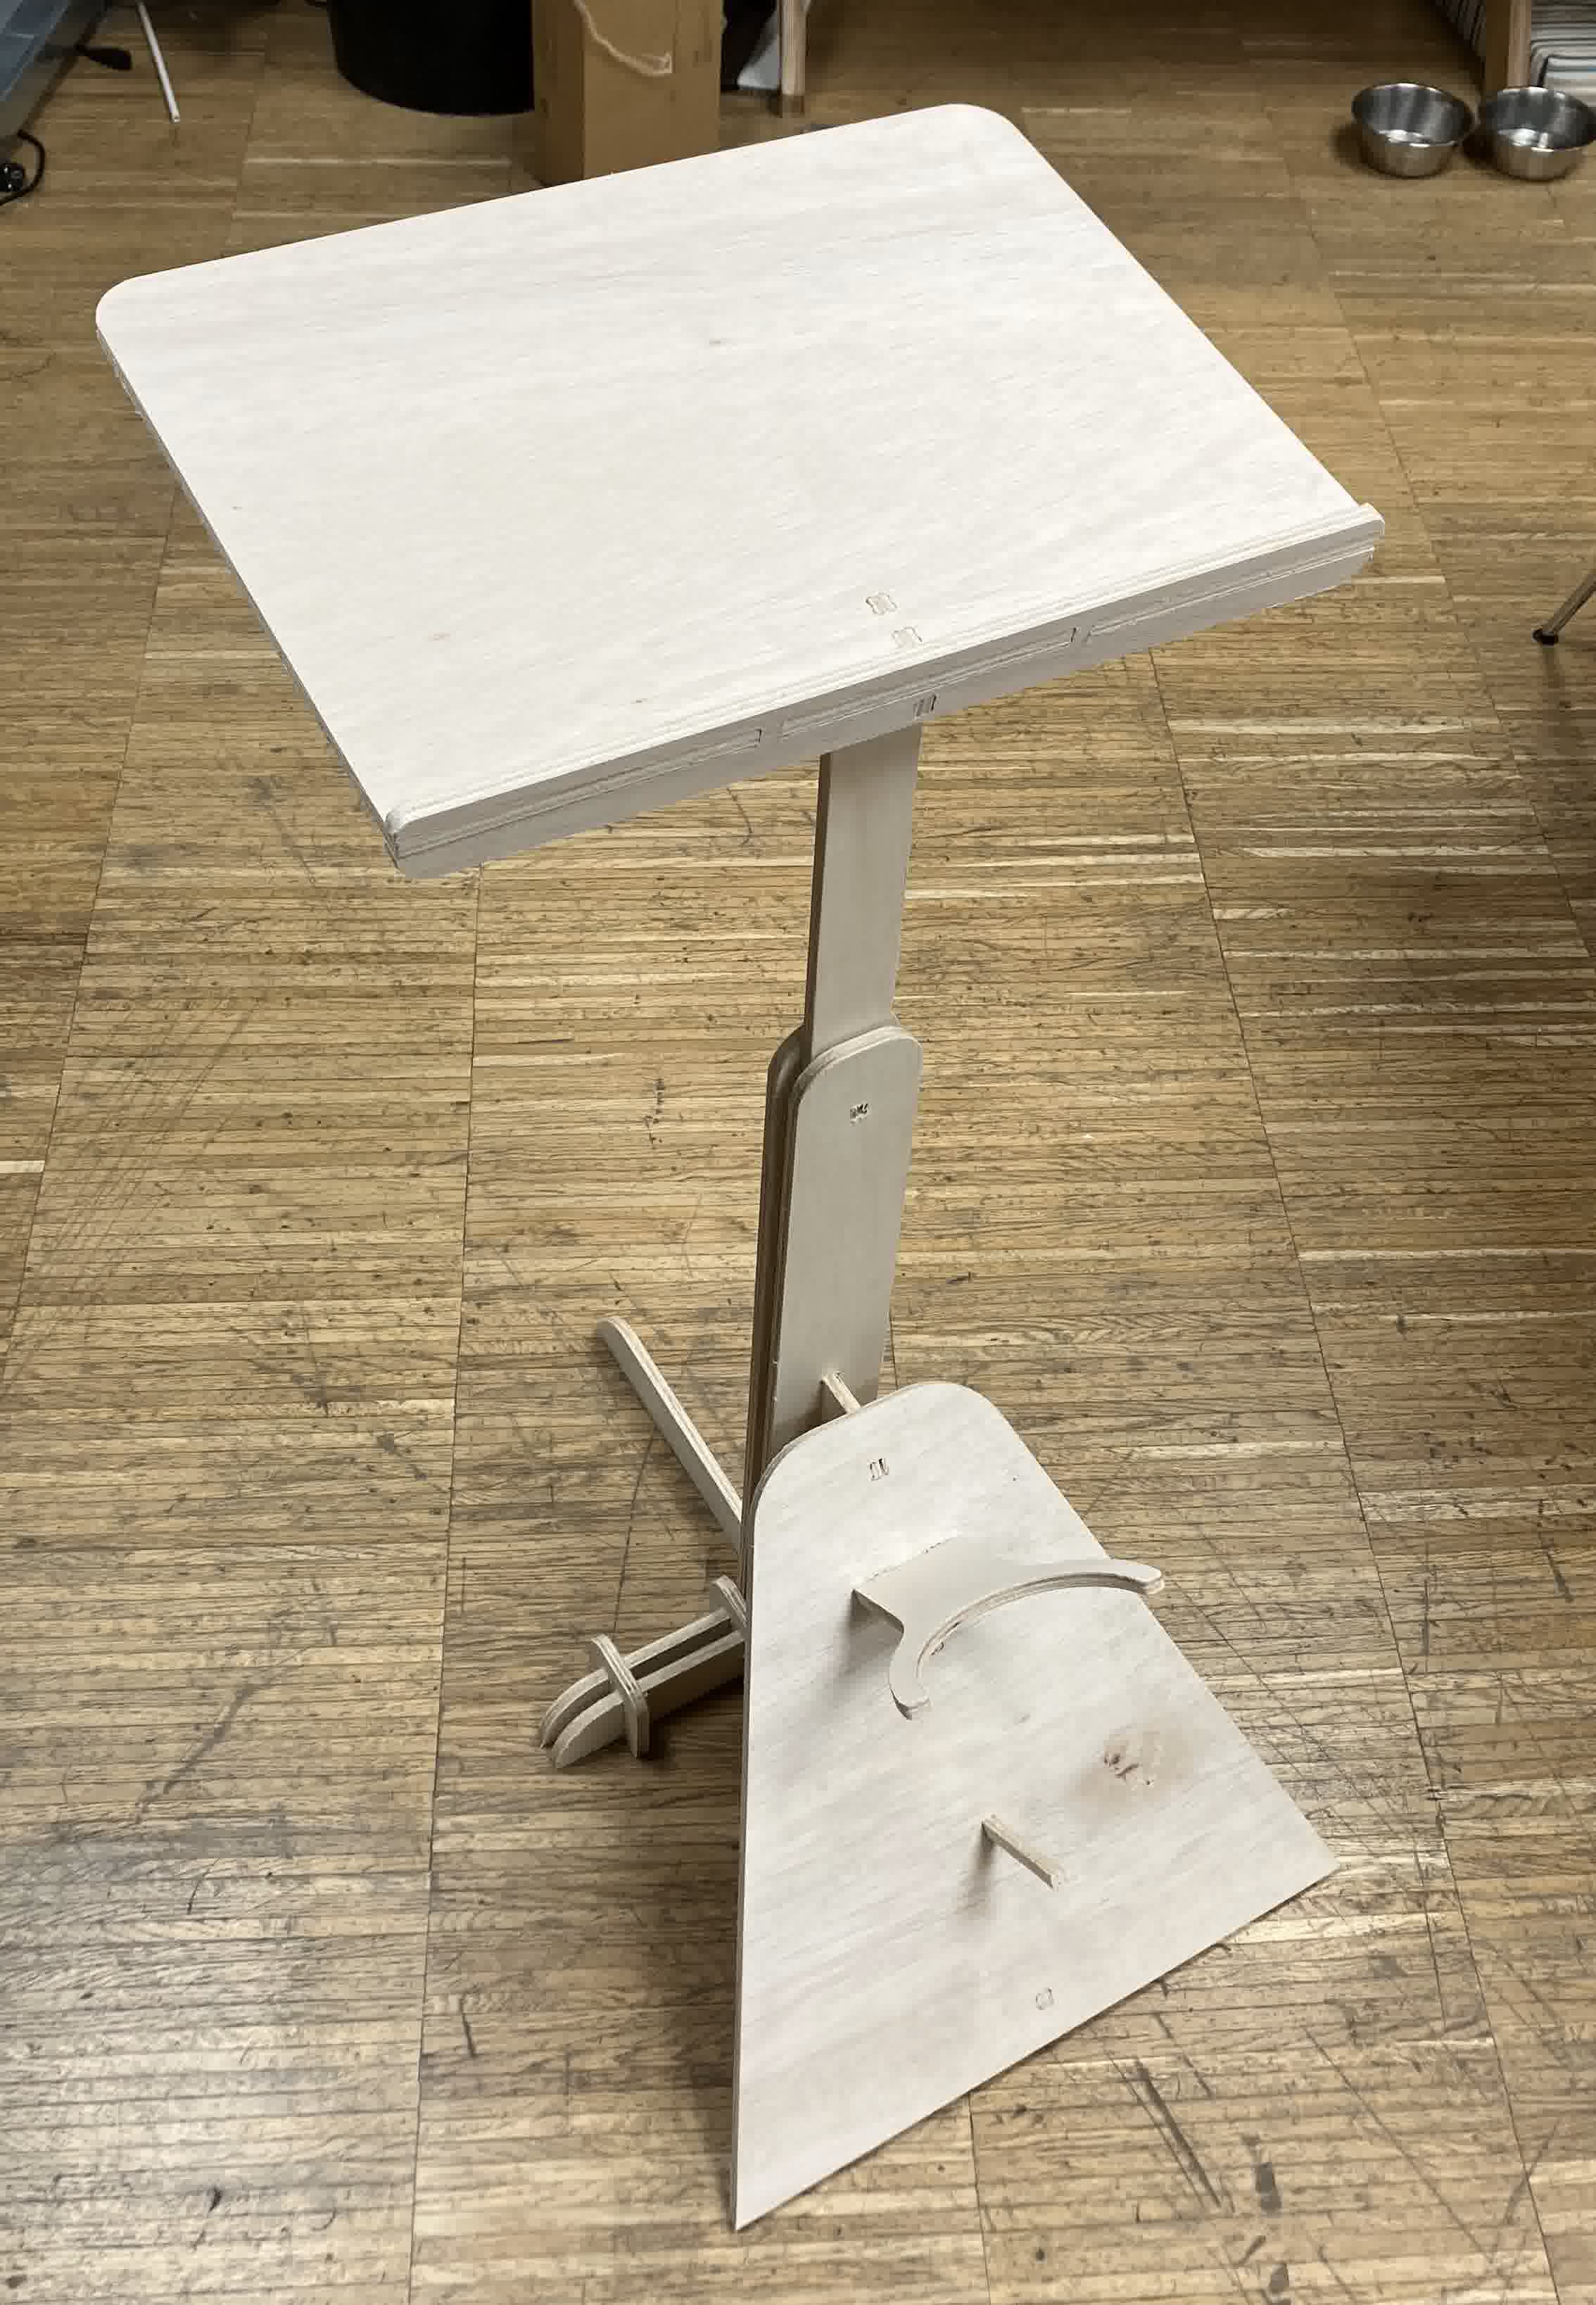
Music Stand with Integrated Saxophone Stand
I have a small apartment and the belief that I already own too much stuff, so coming up with something big that I wanted to build was a bit hard. I knew we were being provided with plywood, so I originally thought about doing a piece of furniture. However, I came up with the idea of doing a stand I could use for my final project, so I decided to do a music stand that will both hold music sheets and my saxophone while I'm not playing it. Basically, I was combining two pieces into one:
Designing in Fusion
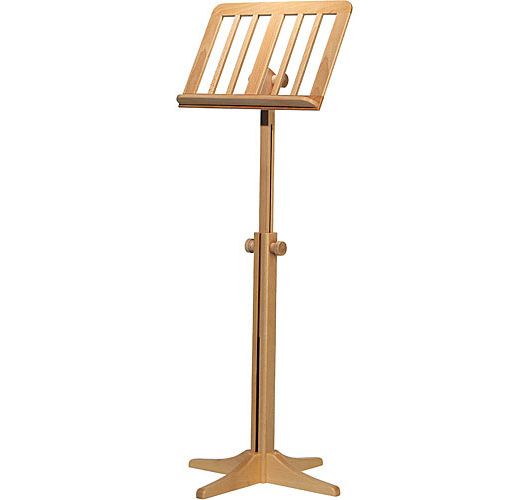
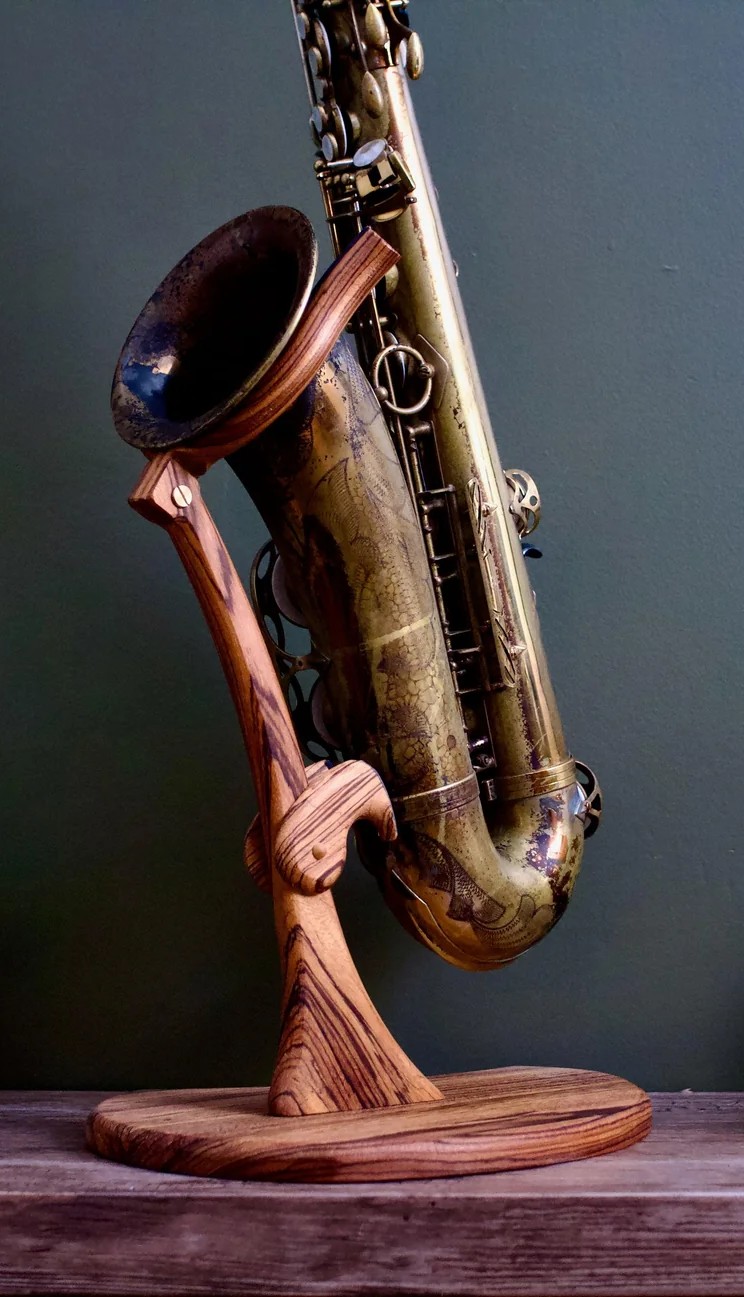
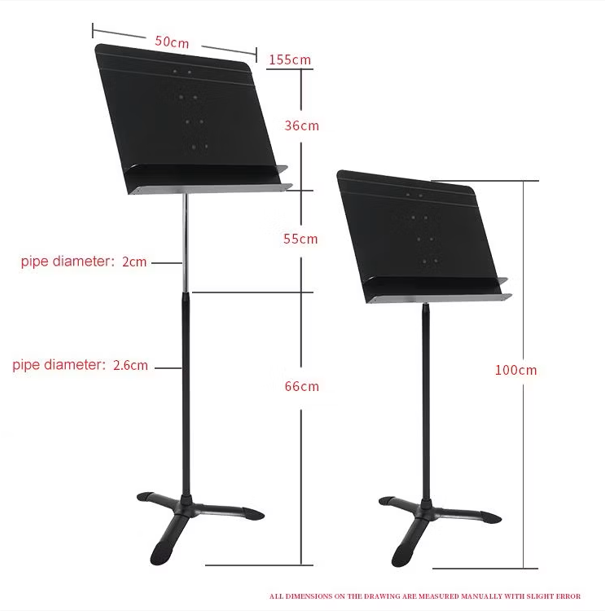
In order to start designing my piece, I needed to understand what dimensions it would have. I used the following image as a base reference:
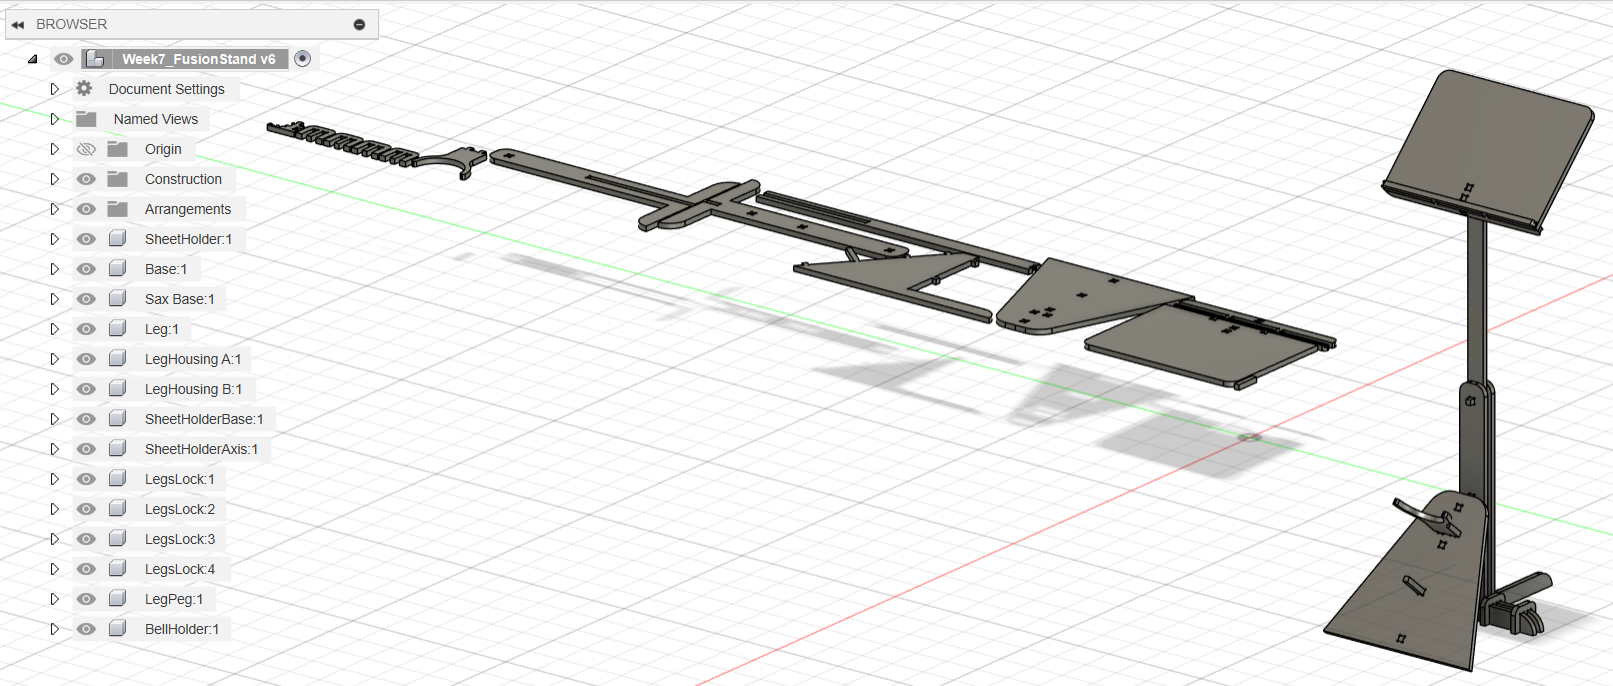
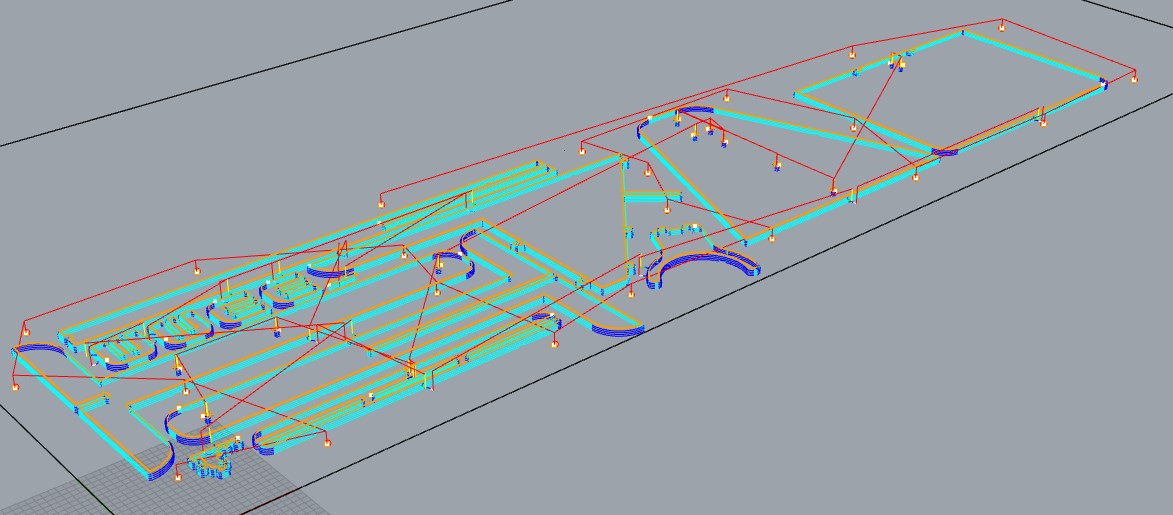
Then, I started designing the pieces as isolated components and aligning them in order to know where I needed to make joints and additional supports. This led to me designing the structure in place. Afterwards, I created an arrangement of all the pieces next to the structure in order to create a drawing from it to turn into a 2D design that can be used to CNC.
The full file with the structure and arrangement can be found here. The dxf of the arrangement can be found here. The pdf of the arrangement can be found .
Prepping on Rhino CAM
After exporting the 2D drawing of the arrangement of pieces from Fusion, I imported it into Rhino 7 on my computer to prepare the file for the CAM software on Rhino 6 in our lab's computer. So I added points for where I was going to put the screws, and divided the inner and outer cuts into separate layers. Then I exported that file into our lab's computer and got to work with Rhino CAM. Here I created two separate toolpaths, one for engraving the dots for the screws and one for cutting the pieces.
The Rhino 7 file can be found here. The Rhino 6 with CAM file can be found here. The CAM file for the screws can be found here. The CAM file for the rest of the assembly can be found here.
Prepping + Cutting Material
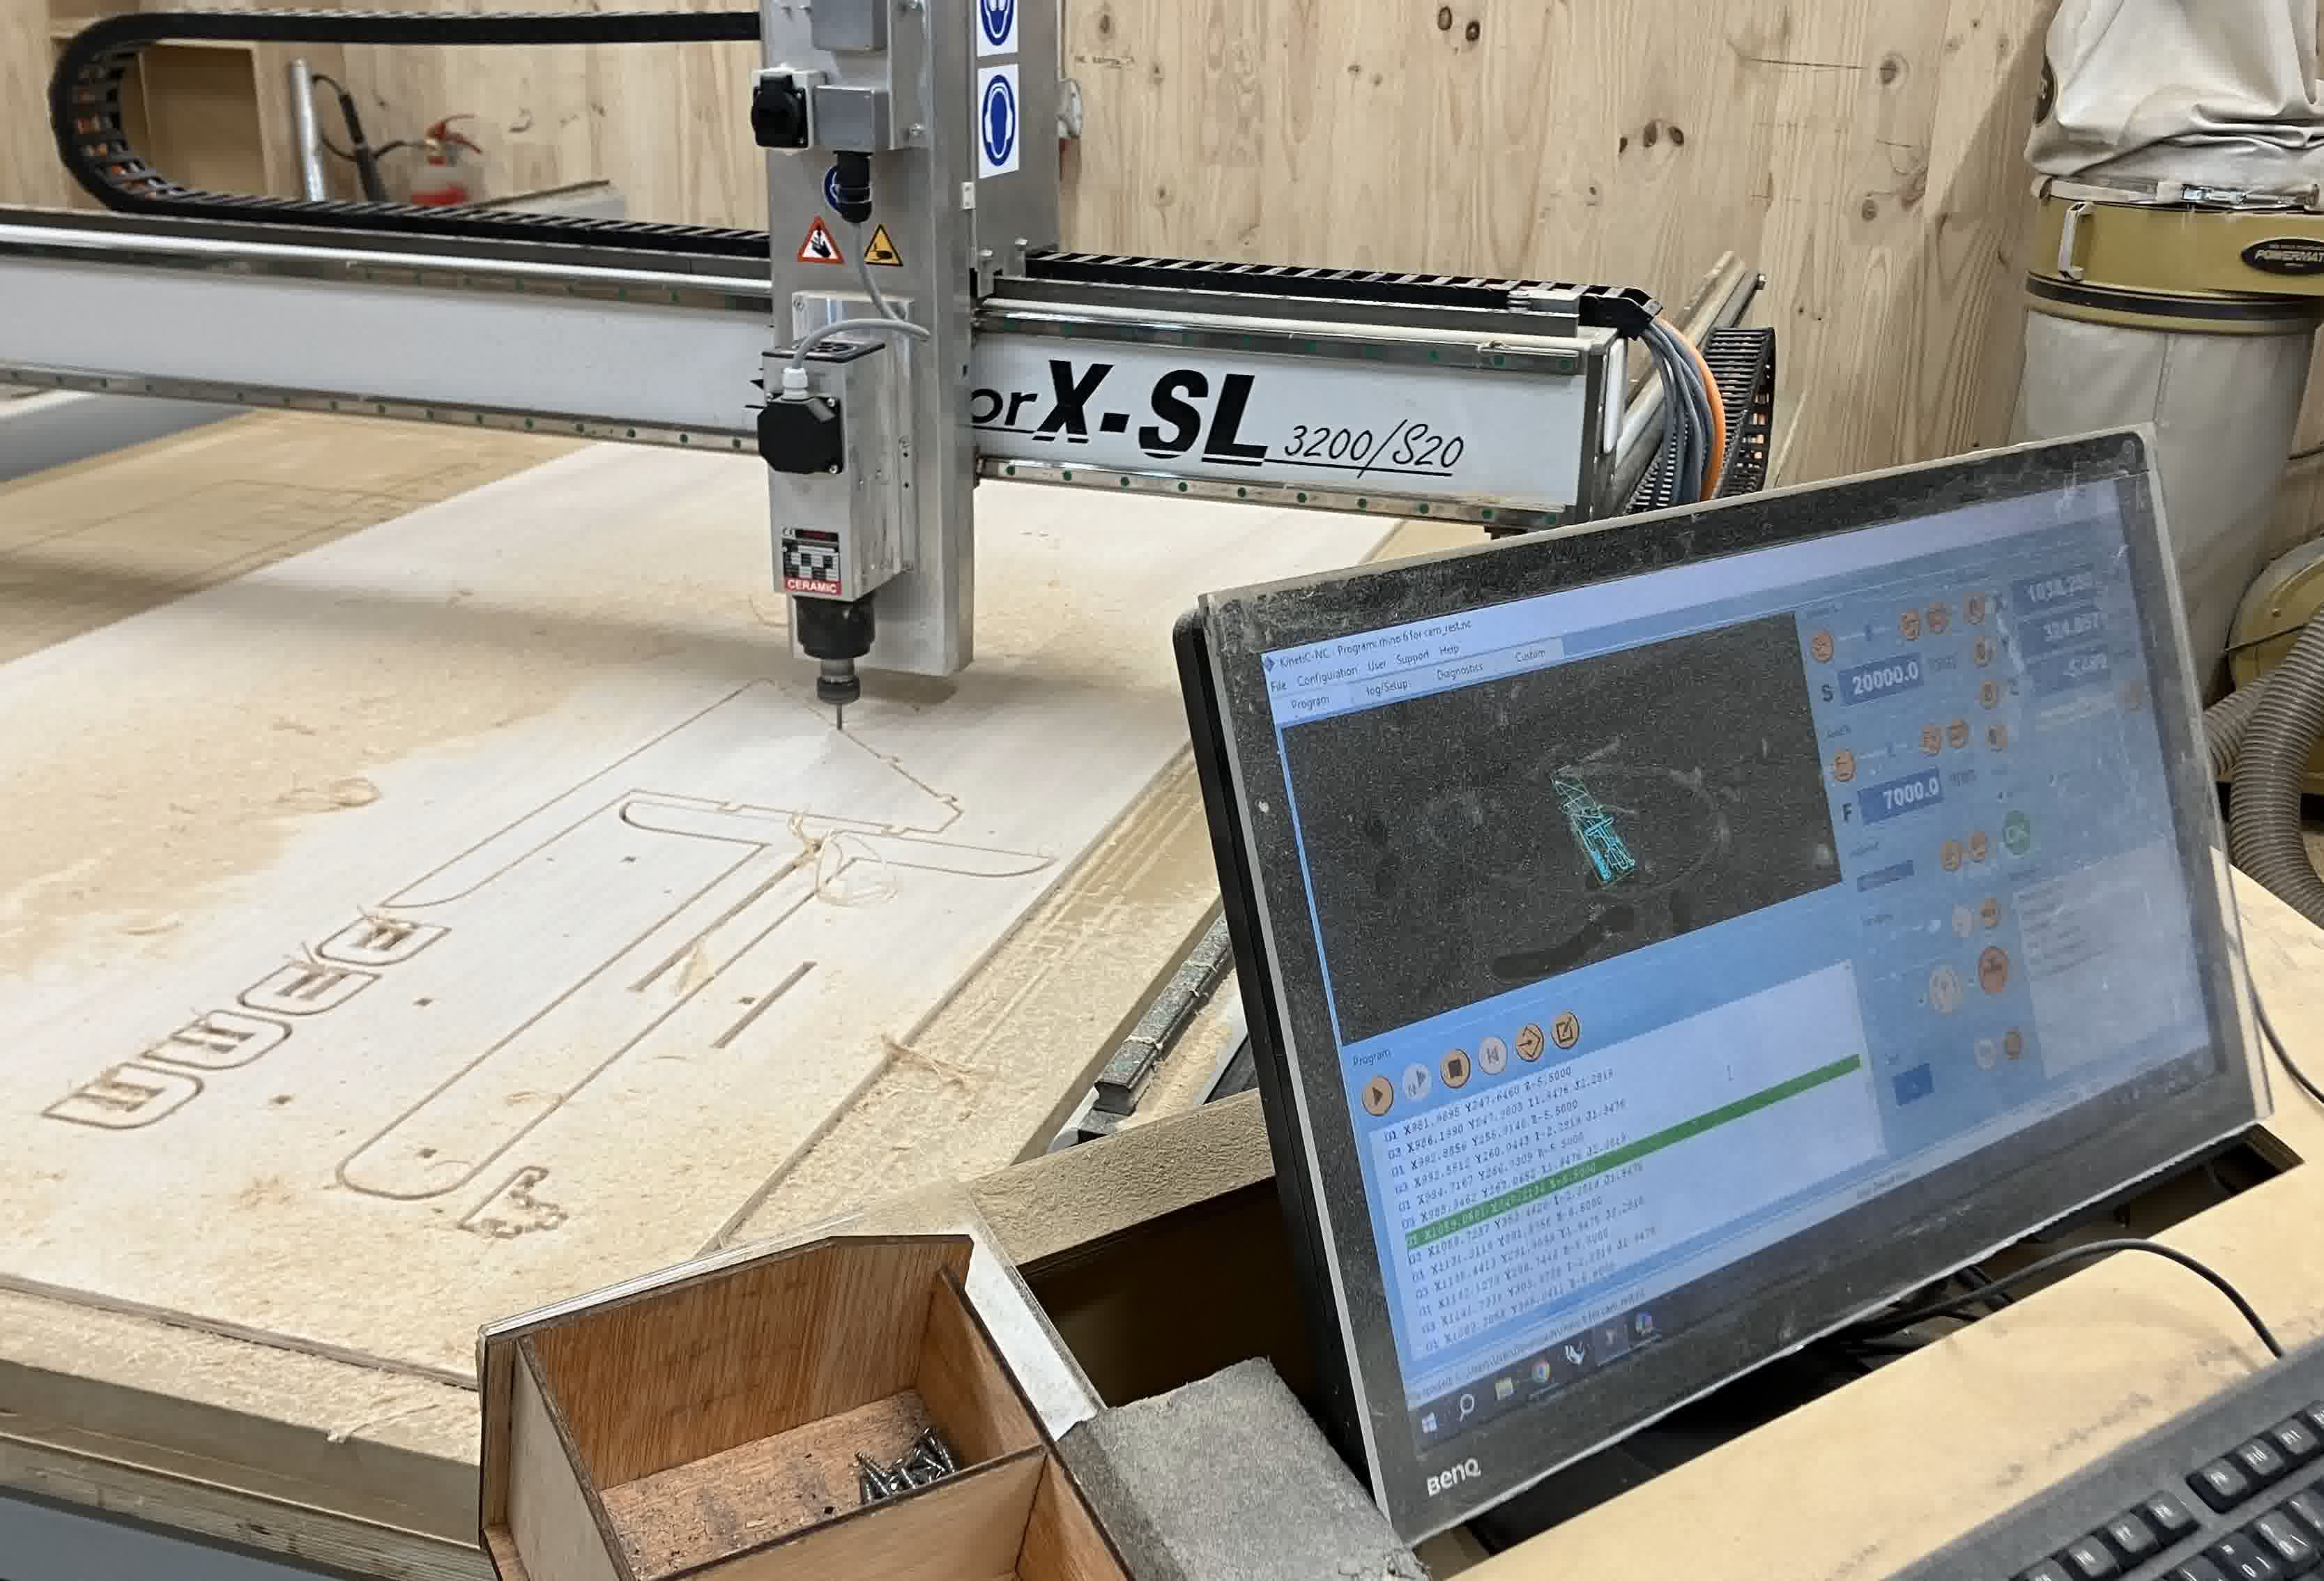
I prepared the machine the way Josep and Dani taught us. Then I layed the material on the machine and loaded the file for the screw markings on the computer and got that going. After that I screwed the screws into the material where the engravings were done. Then I loaded the cutting files on the computer and got that going.

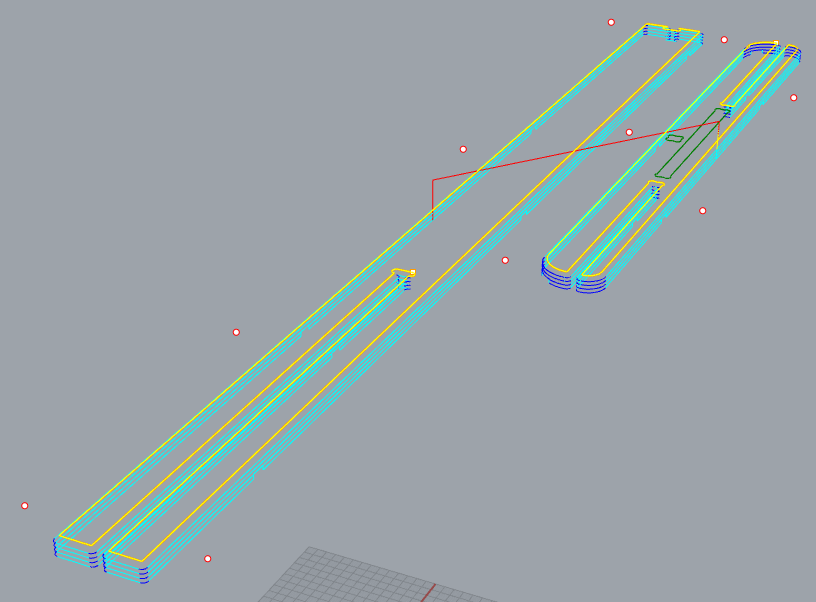
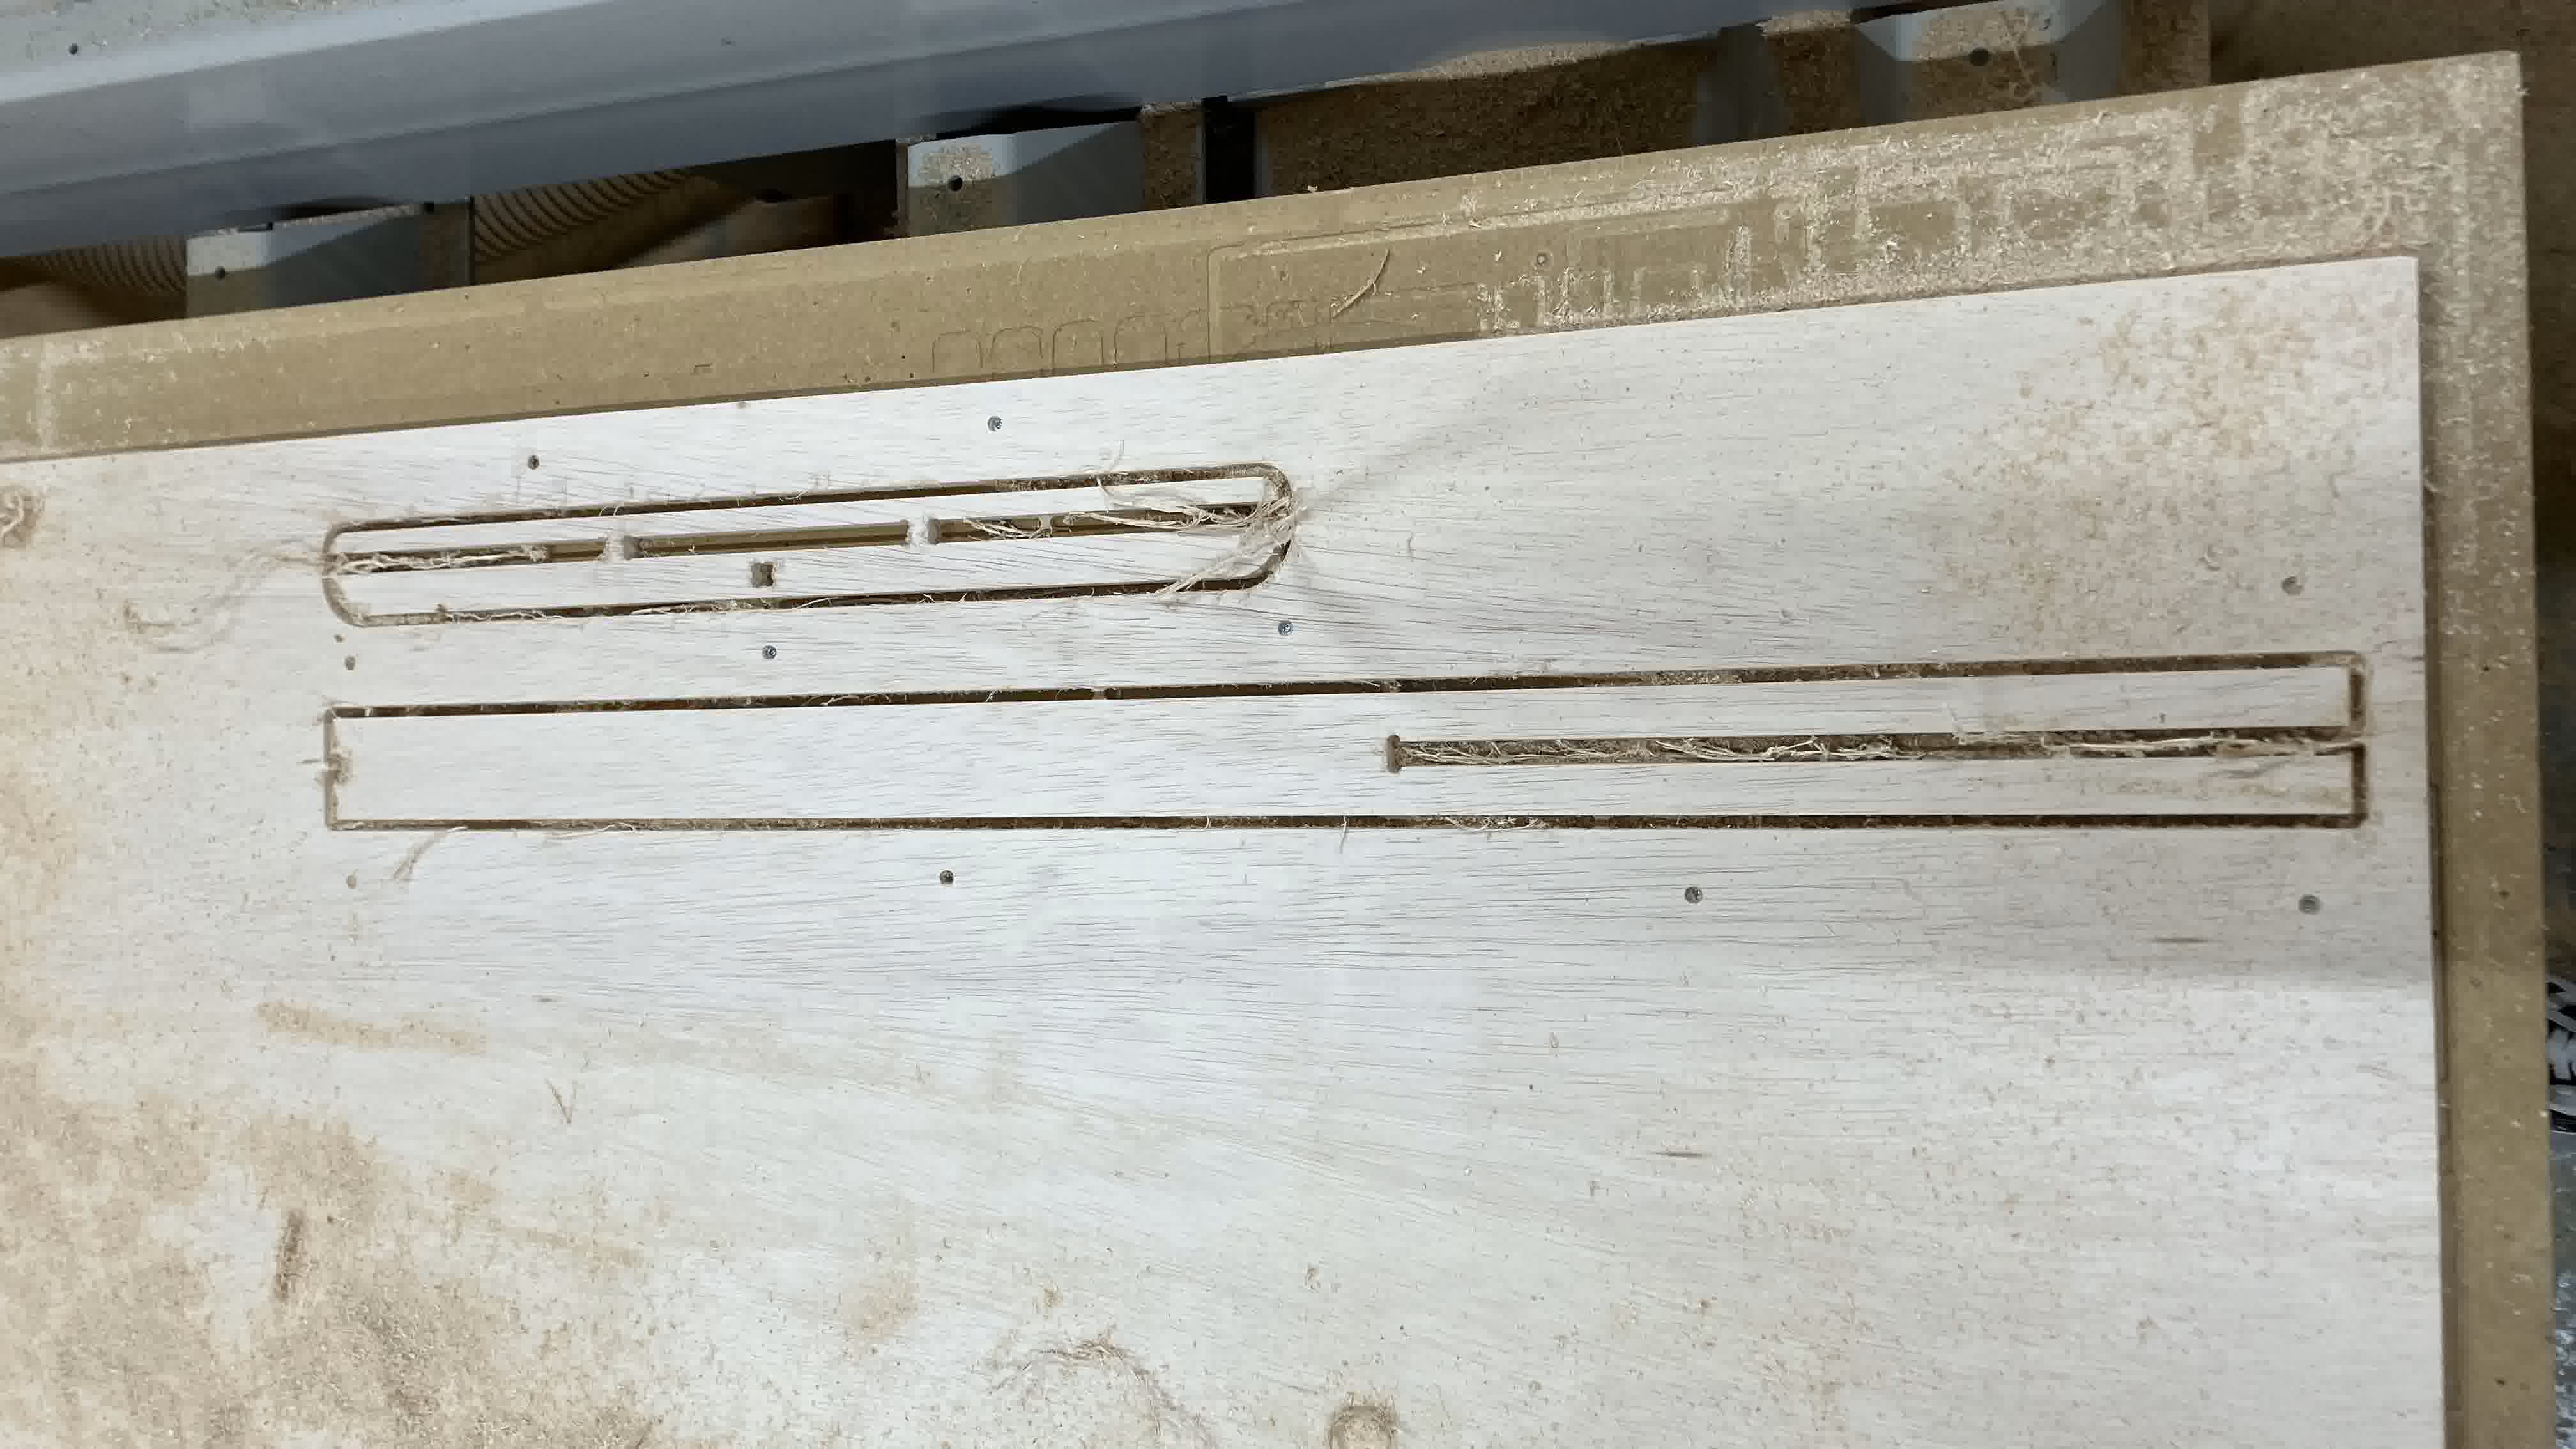
Unfortunately, as you can see above, two of th elonger pieces I had came loose during the cut (not enough bridges) and were ruined.
Re-Prepping on Fusion and Rhino CAM
I had to go back to Fusion and create a 2D drawing of the two parts that were ruined. Then I repeated the previous process I did for the whole structure, except this time I added more bridges.
The dxf of the pieces can be found here. The pdf of the pieces can be found . The Rhino file can be found here. The Rhino 6 with CAM file can be found here. The CAM file for the screws can be found here. The CAM file for the rest of the assembly can be found here.
Re-Cutting Failed Parts
I repeated the previous process I did for the whole structure and luckily this time the pieces came out properly.
Sanding and Assembling Piece
Once I had all the pieces cut (properly), I grabbed a 240 grain and an 80 grain piece of paper and got to work. So in the end the structure ended up looking like this: