Week 11
Networking and communications
Group assignment
- send a message between two projects
Client-side configuration by Pepe
WiFi client configuration based on ESP32-C3 for servo control depending on the measured weight
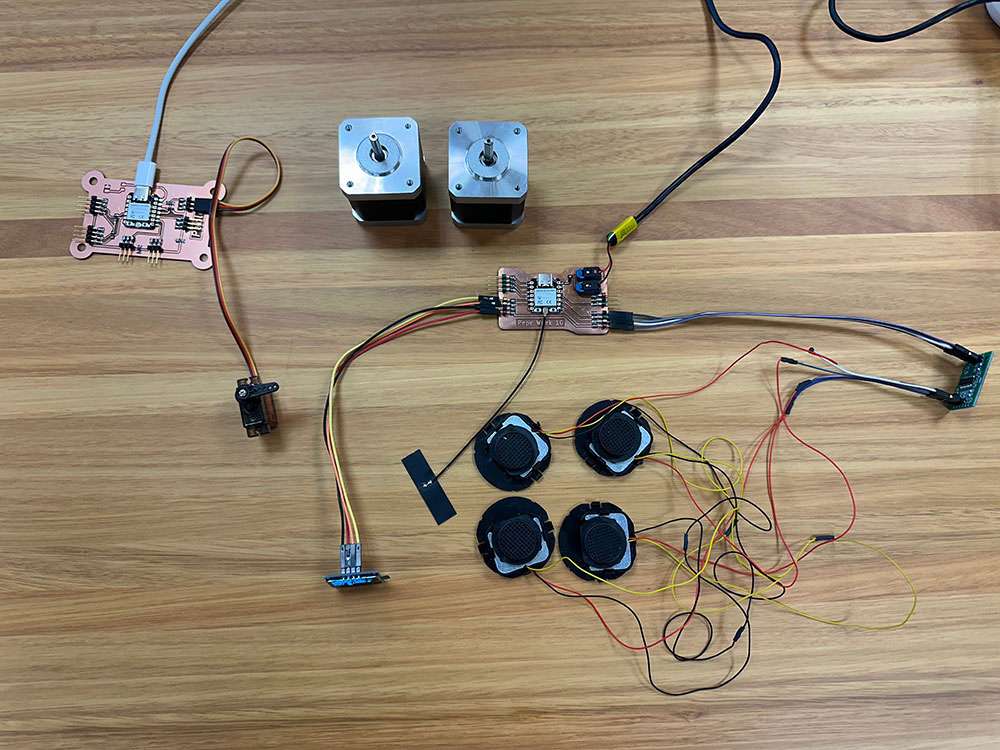
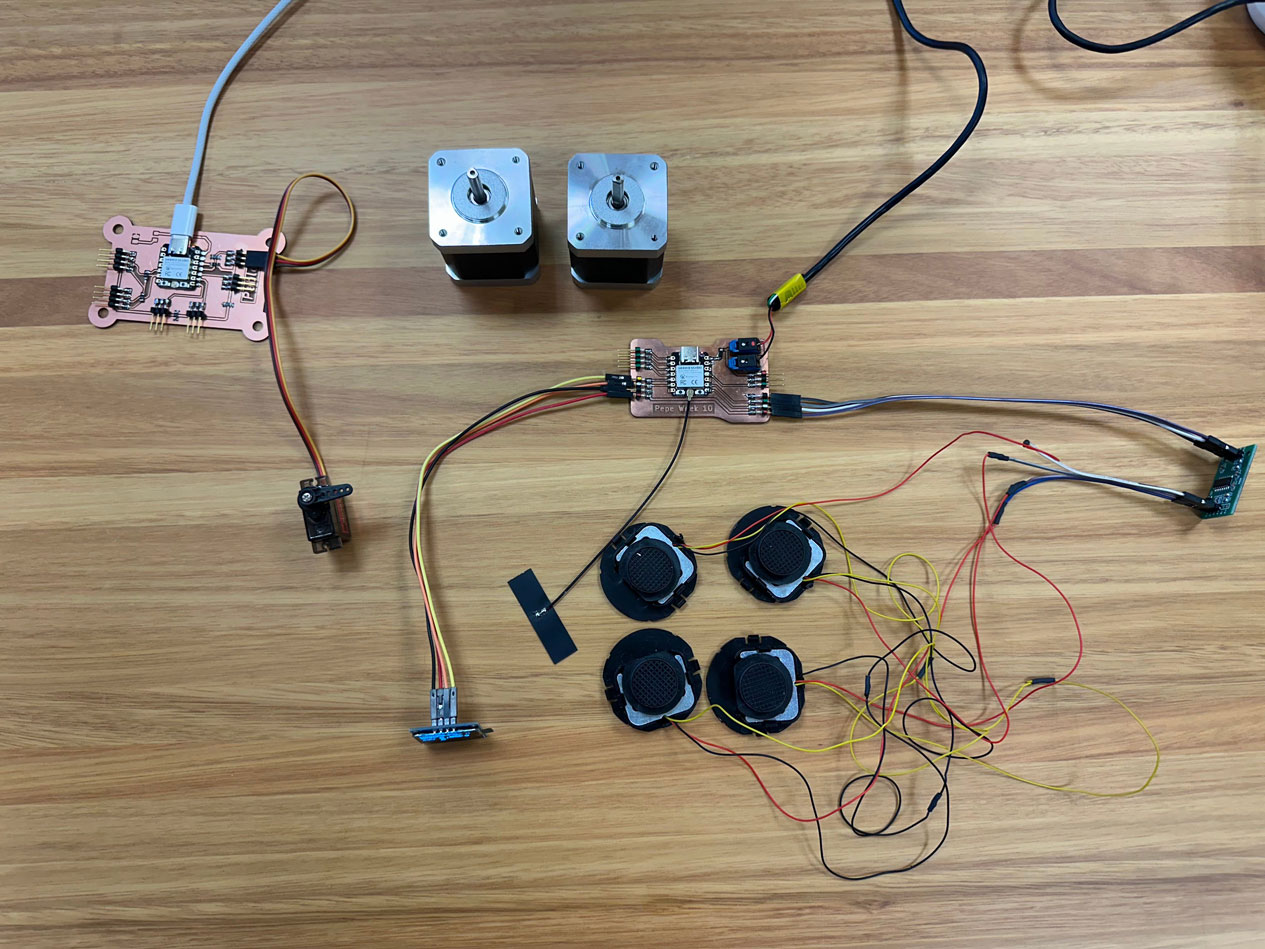
Throughout the development of this group assignment, we set out to implement a system that, based on the weight detected by a load cell connected to an ESP32-C3, would control the rotation of a servo motor built by Pablo, through a web server configured by Francisco. Pepe was in charge of developing the client-side system.
During the process, we tackled several technical challenges and progressively refined the implementation until the system worked as intended. Below are the main steps and key decisions we took:
- Connection to the access point
- We began by connecting the client to the servo_wifi access point provided by Francisco's server.
- At first, we incorrectly sent HTTP requests using URL parameters such as ?angle=90. We later realized Francisco’s server expected fixed routes (/0, /90, /180). We corrected the client accordingly and it worked without further issues.
- Reading from the load cell
- In this part, Pepe contributed his experience from working with load cells in previous weeks.
- We used the HX711 interface connected to pins D7 (CLK) and D8 (DOUT).
- We implemented functions for automatic and manual taring (triggered by pressing T or t), and a scaling function (triggered by S or s) that saves the scale factor in non-volatile memory (Preferences).
- We also fixed a problem in the serial input reading that caused the system to skip the user input when entering the calibration weight.
- Servo control logic
- Pablo contributed his deeper understanding of servo operation.
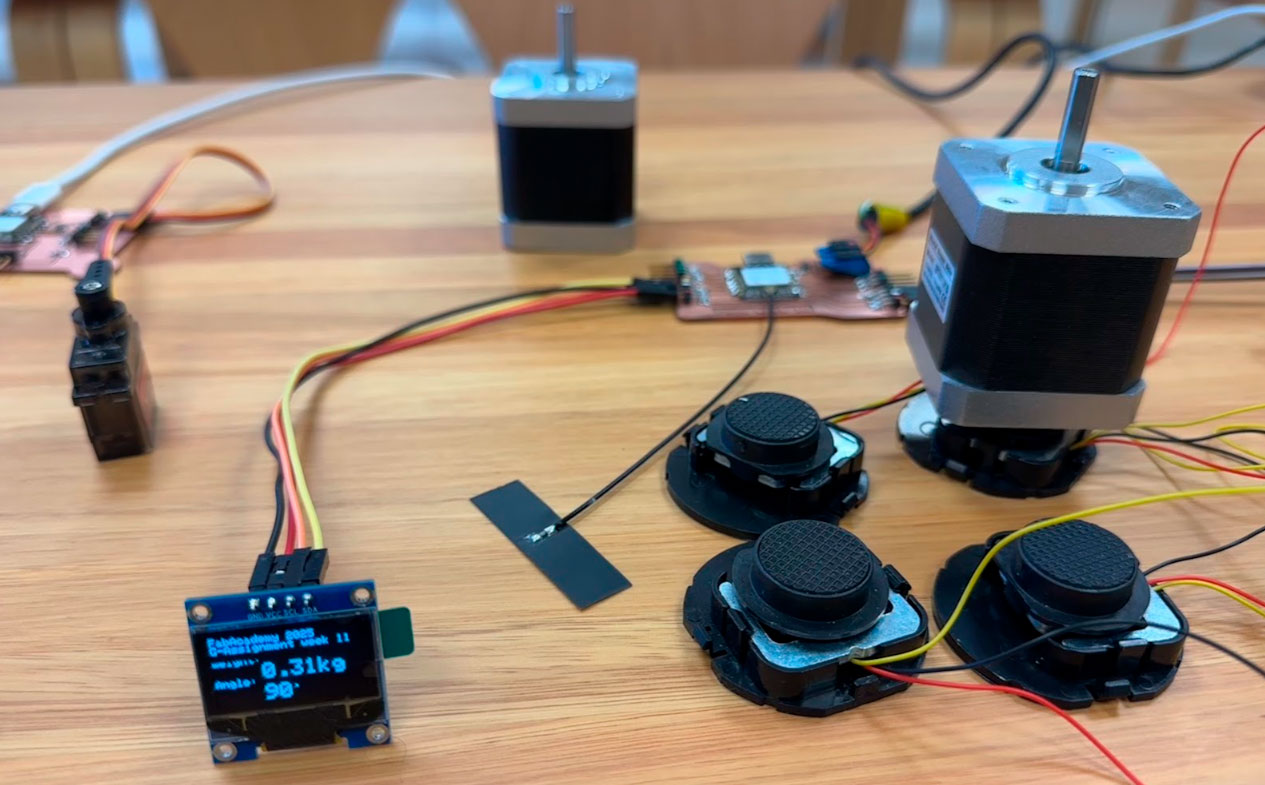
- We defined three discrete angle positions: 0, 90, and 180 degrees, in coordination with Francisco’s server setup.
- We established that the servo would only change position if the weight variation exceeded 0.1 kg compared to the last significant reading.
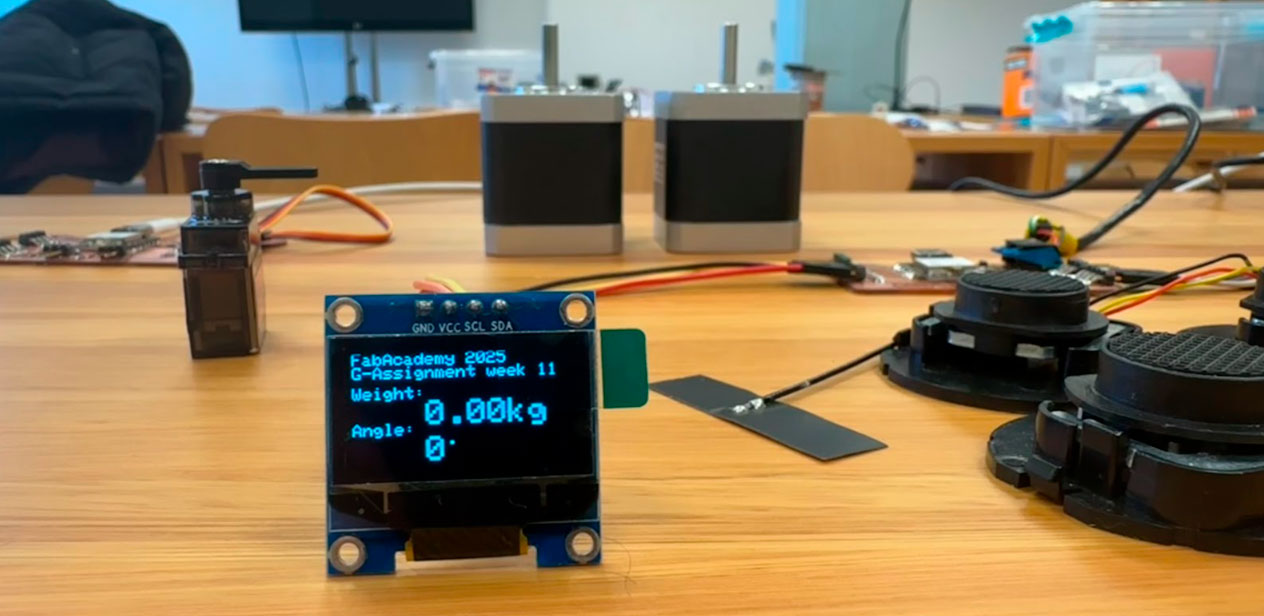
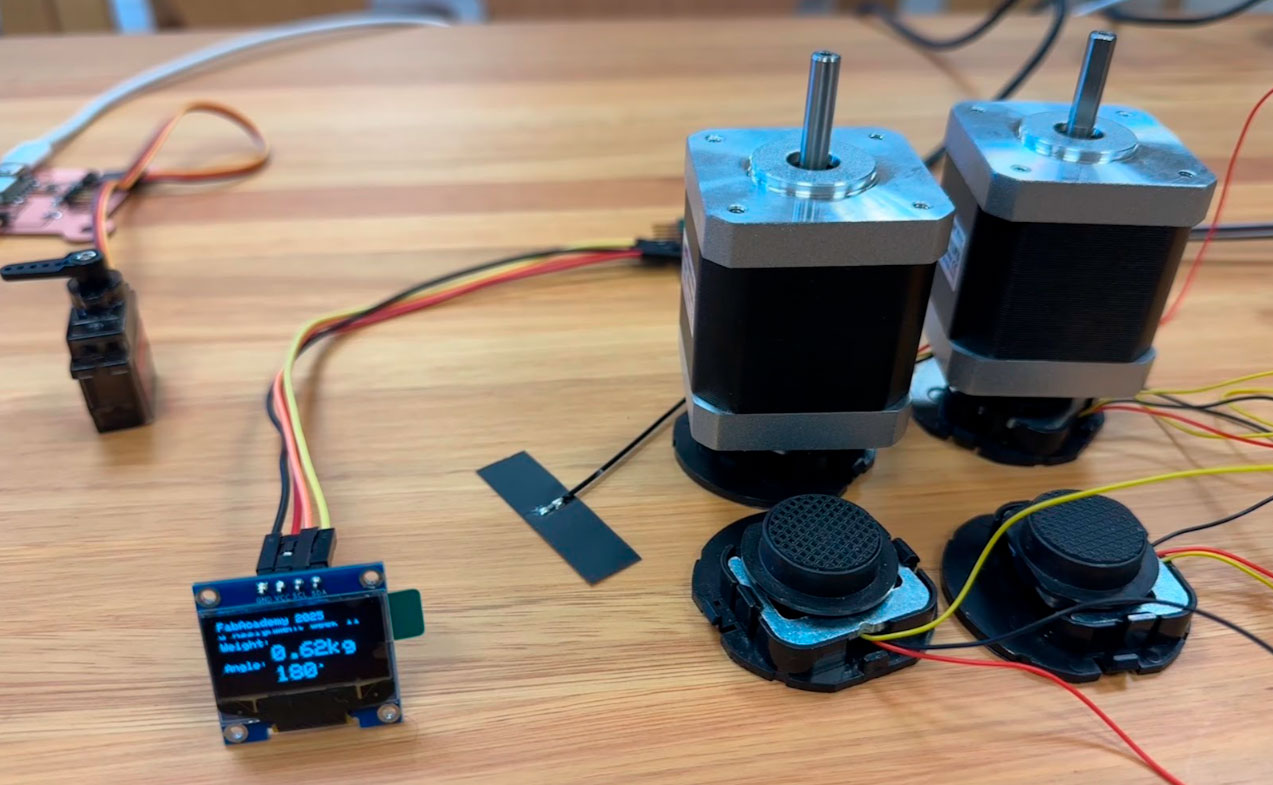
- OLED display visualization
- Together, we refined the layout of the text shown on the OLED screen.
- We added a 128x64 OLED screen to display the system status.
- In the first version, the text was too large and overlapped the headings.
- We redesigned the display to:
- Show “FabAcademy 2025” and, on the line below, “G-Assignment Week 11” permanently at the top.
- Display the weight in large text right below.
- Display the angle on a separate line, preceded by the word “Angle:”.
- We identified that the degree symbol (\xB0) was not rendered correctly. We resolved this by using display.write(248) to ensure correct display.
- Measurement filtering and stability
- We added logic to avoid showing negative values.
- We defined that any weight below 0.05 kg would be displayed as 0.00 kg.
- We set the system to update measurements every 2 seconds using millis() to improve general stability and avoid rapid oscillation.
This collaborative development allowed us to successfully integrate sensor reading, WiFi communication, servo actuation, real-time display, and persistent memory storage.
AccesPoint and server-side configuration by Pablo and Francisco
In this assignment, we created an HTTP server running on the ESP32 that serves a simple webpage.
The webpage allows users to control a servo motor by clicking buttons to move it to three different positions: 0°, 90°, and 180°. Here's a breakdown of how it works:
- Wi-Fi Access Point: The ESP32 is set up as an access point (AP) with the SSID "servo_wifi" and password "12345678". Now any device that connects to this Wi-Fi network can interact with the ESP32 through a browser.
- HTML Page with Buttons:
The server responds with an HTML page that contains three buttons:- "Move to 0°"
- "Move to 90°"
- "Move to 180°"
These buttons are links that send HTTP GET requests to the ESP32 server. Each button corresponds to a different angle for the servo (0°, 90°, or 180°). - Servo Control:
The ESP32 is connected to a servo motor, and when the server receives a GET request with /0, /90, or /180, the servo is moved to the corresponding angle. For example:- A GET request to http://192.168.4.1/0 moves the servo to 0°.
- A GET request to http://192.168.4.1/90 moves the servo to 90°.
- A GET request to http://192.168.4.1/180 moves the servo to 180°.
- Interaction:
To interact with the system:- Connect to the Wi-Fi network "servo_wifi" using the password "12345678".
- Open a web browser and navigate to http://192.168.4.1.
- The webpage with the three buttons will appear.
- Clicking each button sends a request to move the servo to the respective angle.
How It Works Technically:
- The ESP32 sets up a Wi-Fi access point.
- The server listens on port 80 for incoming requests.
- When a client (your browser) connects to the ESP32's IP address (e.g., 192.168.4.1), it receives the HTML page with the buttons.
- When the user clicks a button, the browser sends a GET request to the ESP32, which interprets it to control the servo's angle.
- The servo motor moves to the requested position (0°, 90°, or 180°) depending on the GET request.
This system allows you to control the position of a servo motor via a simple web interface or any client, making it easy to interact with the hardware using a browser or other component