7. Embedded programming
Hero Shot
Group Assignment
Here is a group assignment link
The group is also embedded below.
- Browse through the data sheet for your microcontroller compare the performance and development workflows for other architectures.
Below is the data sheet comparison I made and chose to make use of to select the microcontroller.

Individual Assignment:
This week we were assigned to;
- Write a program for a microcontroller development board that you made, to interact (with local input&/or output devices) and communicate (with remote wired or wireless devices).
Extra cerdit: use different languages &/or development environments.
Extra credit: connect external componets to the board.
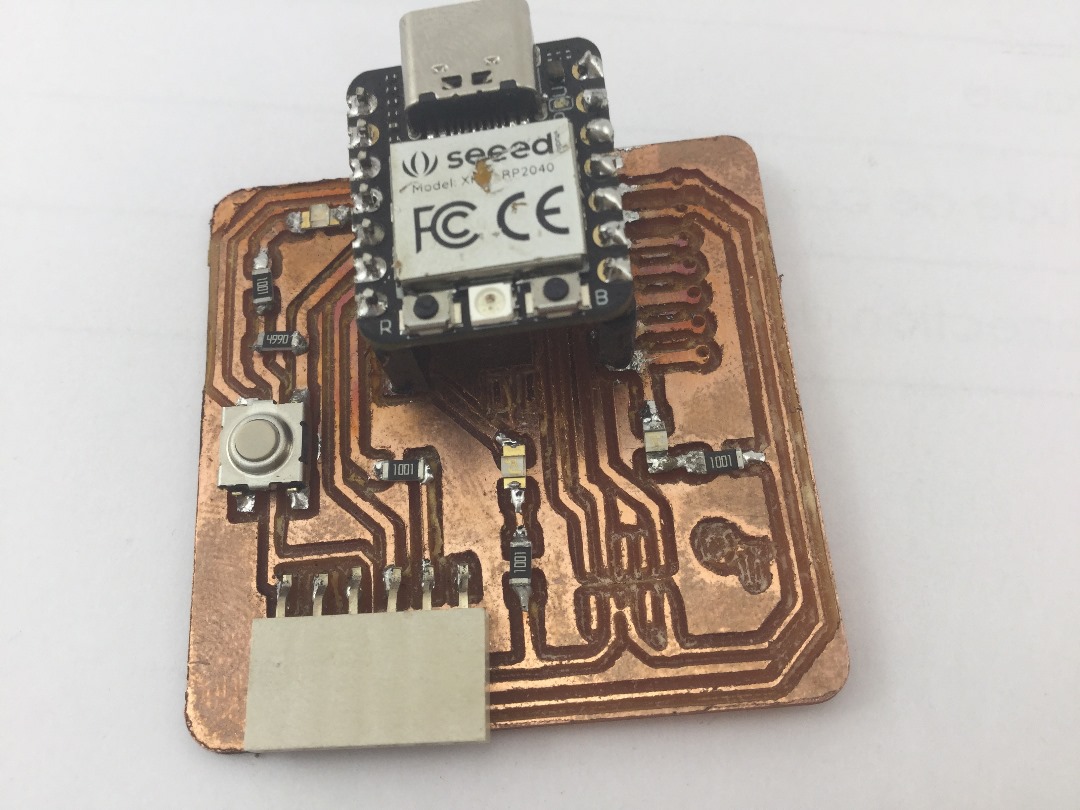
So, as per requirement, I am entitled to write a program for the Microcontroller board which I designed during the electronics production week. The board is well known as Quentorres.
Below is the Quentorres board that I designed.
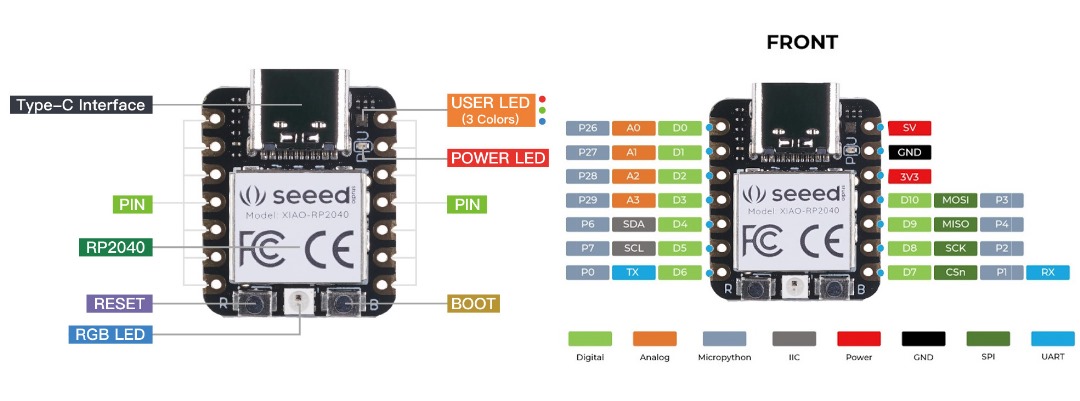
Pin-out
Below is the pin-out of XIAO RP2040 Chip.
Specification Parameter
Description
CPU
- Dual-core ARM Cortex M0+ processor, flexible clock running up to 133 MHz
Storage
- 264KB of SRAM, and 2MB of onboard Flash memory
I/O PINs
- 11 digital pins, 4 analog pins, 11 PWM Pins
Interface
- 1 I2C interface, 1 UART interface, 1 SPI interface, 1 SWD Bonding pad interface
Power supply & Downloading interface
- USB Type-C interface
LEDs:
- 1 user LED, 1 power LED, two LEDs for serial port downloading, 1 RGB LED
Button
- 1 RESET button, 1 BOOT button
Power Pads
- For the battery power supply
Software compatibility
- Support Micropython / Arduino / CircuitPython
Cover
- Projection cover for protecting the circuit
Dimensions
- 21x17.5 mm
Attention
- All the I/O pins are 3.3V, please do not input more than 3.3V, otherwise, the CPU may be damaged.
Programming
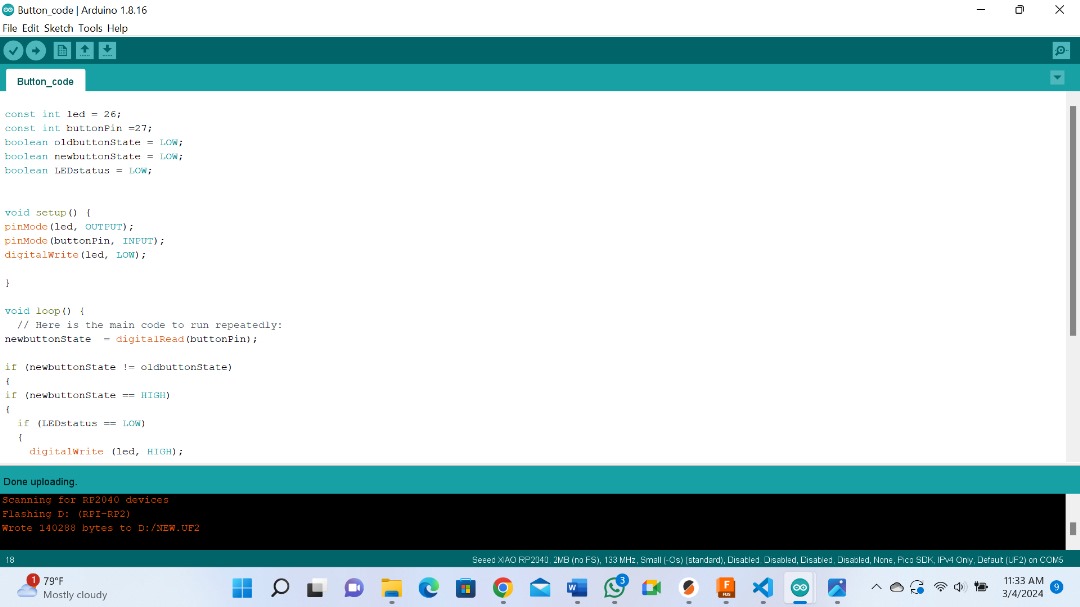
So, in my program to interact with the microcontroller development board, I have used the button as my local input device and the LED as an output device.
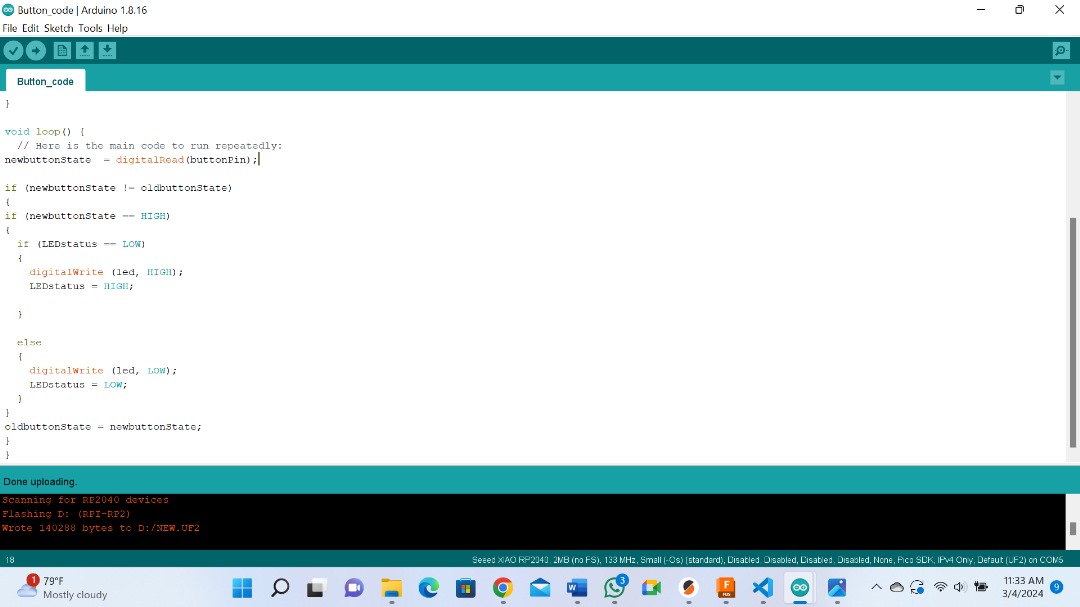
Below is the program in detail.
Pressing the Button.
Below is a shot video of the outcome.
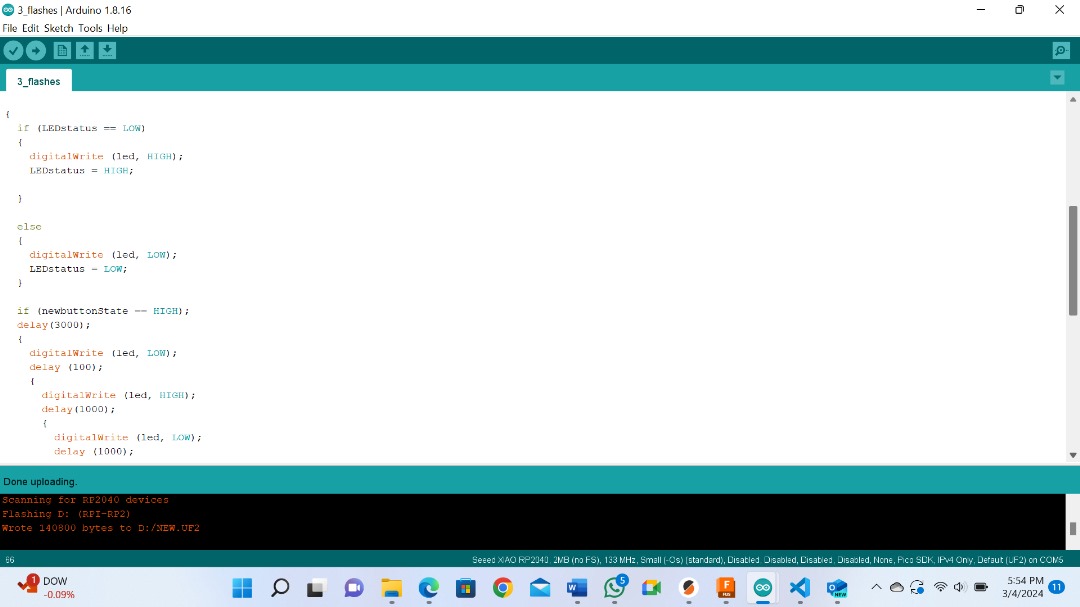
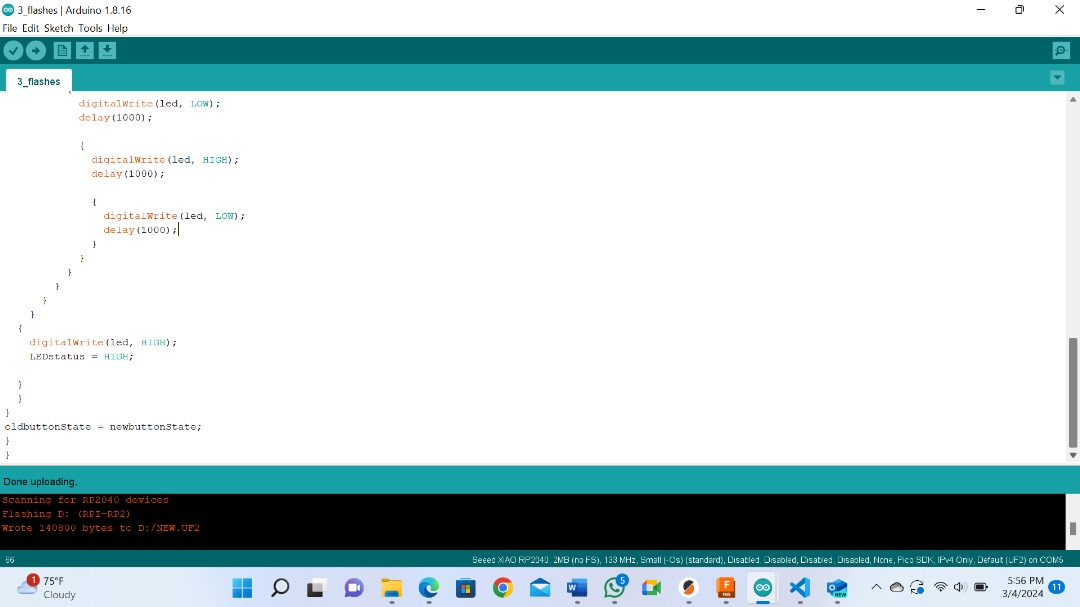
Here I tried to do some changes on the program. This time I let the LED Blink three times after I pressed ON the button.
After pressing the button, the LED will delay three Seconds before it switches off, and then it will switch itself ON-OFF three times, at a delay time of one Second. And finally, stay ON state.
Below is a program in detail.

Video showing how it works.
Files
What went Well/what went wrong
This week was another blessing. Almost everything went smoothly. Even though I am very new to this program but by going through different sites, I managed to write a program by myself. And this was what I admired so much when I see other people able to write code. Now I am so happy to have acquired this new skill.