5. 3D Scanning and printing
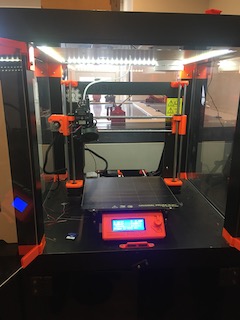
At De Waag we have several 3D printers, which all function more or less in the same way. Demonstration model was a Prusa Original Prusa i3 MK3. These are the specs:
*Build Volume 25×21×21 cm
Layer height 0.05 - 0.35 mm
Nozzle 0.4mm default, wide range of other diameters/nozzles supported
Filament diameter 1.75 mm Supported materials Wide range of thermoplastics, including PLA, PETG, ASA, ABS, PC (Polycarbonate), CPE, PVA/BVOH, PVB, HIPS, PP (Polypropylene), Flex, nGen, Nylon, Carbon filled, Woodfill and other filled materials.
Max travel speed 200+ mm/s
Max nozzle temperature 300 °C
Max heatbed temperature 120 °C
Printer dimensions (without spool) 7 kg, 50×55×40 cm; (X×Y×Z)
Power consumption PLA settings: 80W / ABS settings: 120W*
The Prusa is an open source Czech 3D printer, advertised as the most sold worldwide, and comes as a self-assembly kit. I chose to work with it because it was the one used in the demo, and also because it seemed to need the least amount of tweaking. One of the other machines, the Creality Ender 3 printer, had a faulty fan and issues with the levelling (see Bens’ page ) - so I’m happy I picked this one.
Here are some general principles to 3D printing in general.
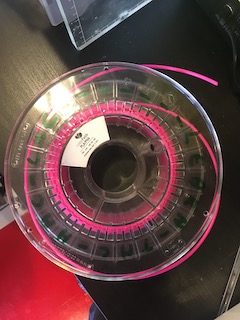
- The printer uses filament, which comes in many different types. Our instructor used PLA, which is cornbased, and supposedly one of the more environment friendly types.
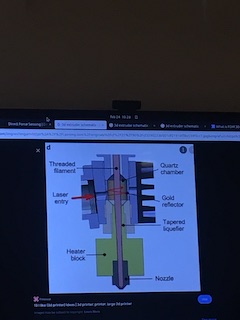
- You feed the filament into the machine, where it gets heated in the hotblock to the point that is is soft enough to mold. There is, in fact, a ‘window’ for the material - too hot is not good, not hot enough also no good. In order to maintain this window the machine cools with heatsink and two fans, one at the top and one at the printingbed - which, in it’s turn, is heated as well.
-
The nozzle where the softened filament comes out has to be in the right position.
-
The speed of the machine is one of the variables.
-
Over-or underextrusion are results of either pushing too much filament or too little, in both cases also relative to the chosen speed.
 * The first layer has to stick to the bed - this way you can see if the parameters are right. Dirty (nonsticky) bed: clean it with glasscleaner.
settings…
the benchy.
Realisation
For a few weeks now, I had been scratching my head as to why all these machines need so much explanation, sometimes describing very different paths. A simple (or even very extended) manual should be enough, no? After asking questions on that, I came to the realisation that in this course, and in prototyping in general, it is not about finding out how the machine works (meaning: the machine prescribing you a specific set of gestures in order to get what you want from it), but about understanding the principles of the machine and by tweaking it you make it do what you want it to do. This may seem like the same thing when you look at the endresults, but for me there is a fundamental difference - it is about being in control. Blatantly obvious for some maybe, but to me this question is crucial, and lies at the heart of why I wanted to take part in this Academy. I am glad I encountered it here, entering a new paradigm.
28-02-22
Holidayweek, so time to catch up.
Yesterday I designed objects in Blender.
It took me a while to see which kinds of items could not be produced subtractively - I mean, it all depends on your tools and the size of your hands in the end. There’s this early 16th century prayernut by Adam Dircksz at the Rijksmuseum…
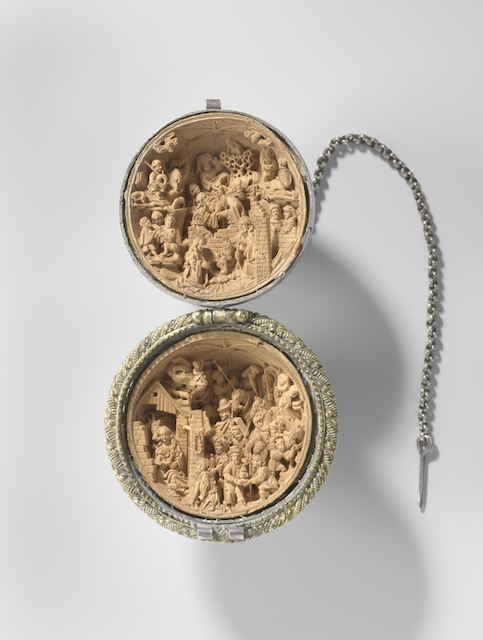
picture courtesy of Rijksmuseum.
But I thought it was good to start with ‘something with deep holes in it’ as a concept.
That went nowhere, too little of an idea. Then I took on the plan of ‘something complicated’..
Also not very inspiring.
Finally,
courtesy this gentleman.
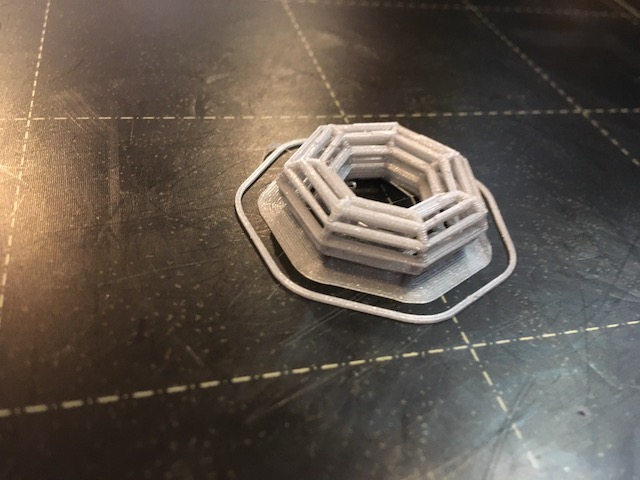
I ended up with a mini brutalist building.

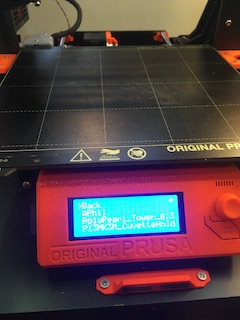
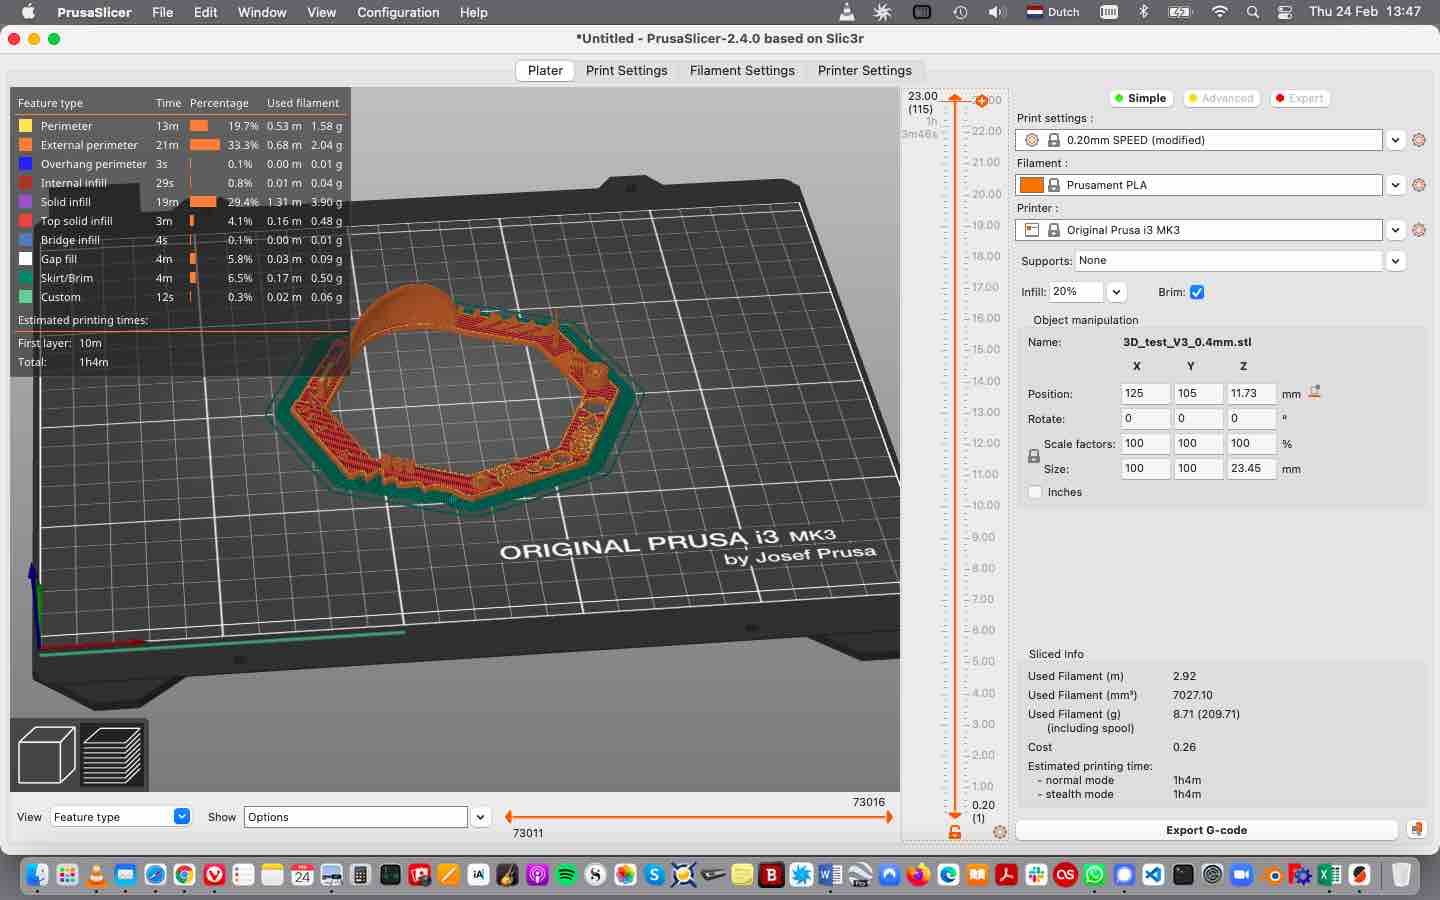
I exported the design to an stl, and opened it in the Prusa slicer
A slicer, by the way, being software that allows you make a ‘toolpath’ so to speak for the model you’d want to print. In it you set the parameters for the plater, the print, the filament and the printer, determining speed and size and detail of your output. Greater detail takes more time, different filaments require different temperatures or infill e.g., etc.You can do a visual check on the process. Once you got things right, you export it to Gcode.
 With this size and settings it would take way too long…
 …so I shrunk the model, and ended up with a more humane wait.
The actual settings I used:
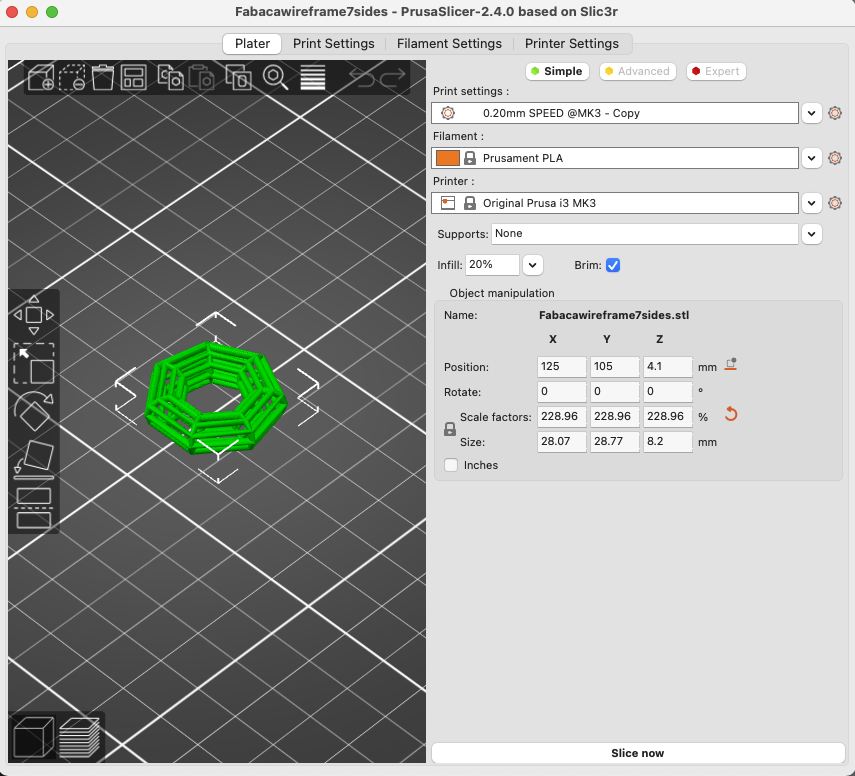
I generated the Gcode, put it on an SDcard, and fed the Prusa.
I used gold pla, and things were fine initially. Nice first layer, nice beginning. But at some point the thread started to clog, and eventually destroyed the object.
 I tried it a few times more, but for reasons unknown to me it just wouldn’t go as planned- my whole piece was dragged around the bed. I had a hunch about the gold material, and wanted to replace it with something else. Then unloading the filament proved to be impossible, no matter how often I tried. I had to ask Henk for help, and even he couldn’t move the gold stuff. “Never in my life seen it so stuck”.
As he went for his tools, I decided to start the other job I had waiting, which was soldering my final board, the SWD.
In the meantime Henk fixed the issue, by heating the hotblock to a high enough temperature. That was a relief.
I removed the golden pla, and switched the machine off. Back to the board from the previous week - which I finished (see there).
I tried it a few times more, but for reasons unknown to me it just wouldn’t go as planned- my whole piece was dragged around the bed. I had a hunch about the gold material, and wanted to replace it with something else. Then unloading the filament proved to be impossible, no matter how often I tried. I had to ask Henk for help, and even he couldn’t move the gold stuff. “Never in my life seen it so stuck”.
As he went for his tools, I decided to start the other job I had waiting, which was soldering my final board, the SWD.
In the meantime Henk fixed the issue, by heating the hotblock to a high enough temperature. That was a relief.
I removed the golden pla, and switched the machine off. Back to the board from the previous week - which I finished (see there).
Error
In hindsight, the reason for the gold PLA to behave this way (settings for the silver were not really any different) most likely had to do with how it was stored: I took it out of a box without a plastic sealing, so the filament must’ve been too moisty.
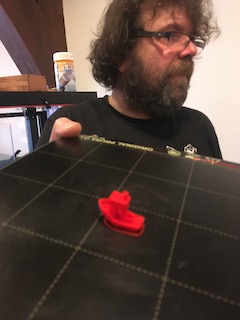
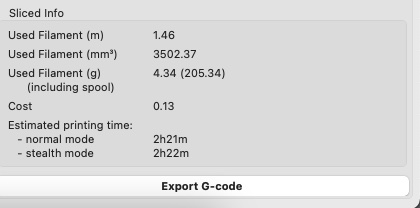
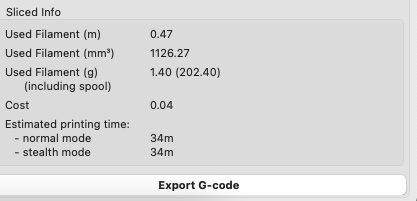
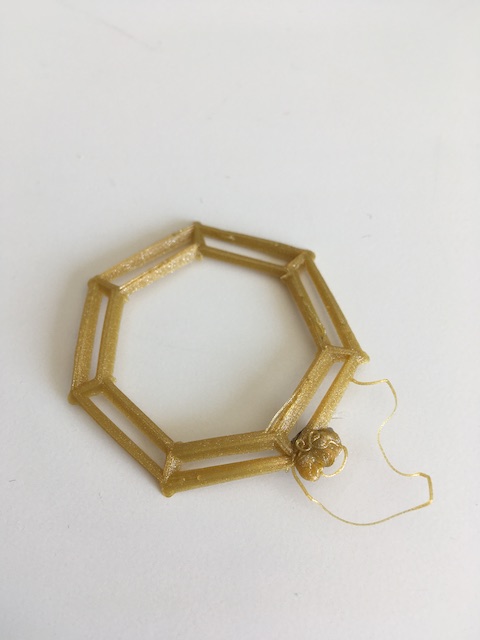
By then, I was ready to start printing again, and this time with the silver filament. I also shrunk the design again as I described above, to a little over two cm this time, so the printing time went down considerably. Of course i could have changed other variables as well,like the mm/speed ratio or the infill (determining the density of the design, with 100 being solid and 0 being empty). I did not need supports in my design (supports being the external structure holding the piece up, to be cut away after the print is finished) Integral to the success this time was als adding a brim (the layer underneath), so the object stuck to the bed better, and a skirt (the circumference-line) which allows the extruder to ‘get ready’ for the job, and serves as a final check for coming problems with sticking to the bed or levelling.
I think it came out well, I like my design.
Groupassignment
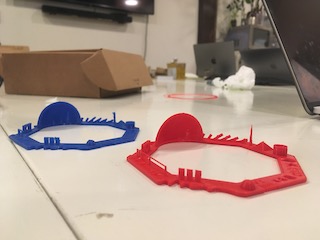
I did this assignment with Joany and Paola.
We downloaded a testfile like we saw in the various documentations from previous years, sliced in the Prusa slicer
 , and generated the Gcode again.
We used the common red PLA, and basically repeated the steps Henk demonstrated. Paola writes about it here, Joany will continue next year.
, and generated the Gcode again.
We used the common red PLA, and basically repeated the steps Henk demonstrated. Paola writes about it here, Joany will continue next year.
Nothing out of the ordinary happened, the final result had all the detail needed,
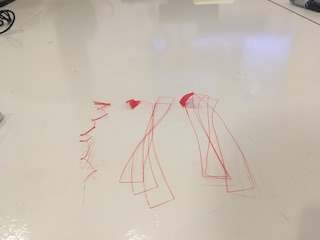
 and in comparison with another print with a different filament that was left behind by another student earlier, our test was fine - you can see for example the top of the ‘gate’ at the bottom left is missing in the blue print.
 I learned that there are two sides to a process where there are so many varaibles to control - 1 is much can go wrong, 2 is: you can control and tweak things to your liking. Consistency is key here, as everywhere in the Lab.
3D Scanning
Before entering the programme I thought 3D scanning would be a major component of all the things I’d be doing. I’d been researching different techniques from the perspective of my interest in history (it is huge in that field) Sketchfab, Google Scholar secretly hoping to have a go at something like Sacro Monte di Varallo but in retrospect (writing this in june) I notice I not even really documented it, let alone use the process.
So here we go.
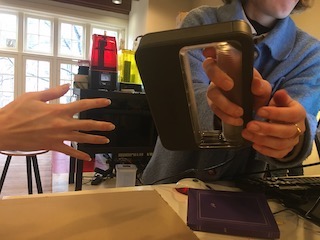
At the Waag we have an oldie, the Sense scanner. You need a very steady hand and patience for it, and completing a full scan proved to be very hard. Objects shouldn’t be moving, or too fine, or too small, or attached to their surroundings, etc.
Henk did a a scan of me, and together with Paola & Joany we had several attempts at finishing a good clean scan -of anything, basically. The results were underwhelming, probably the reason why I never returned to this.
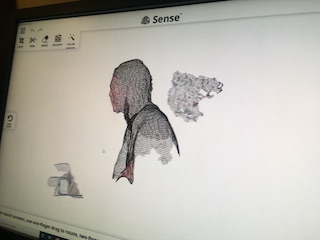
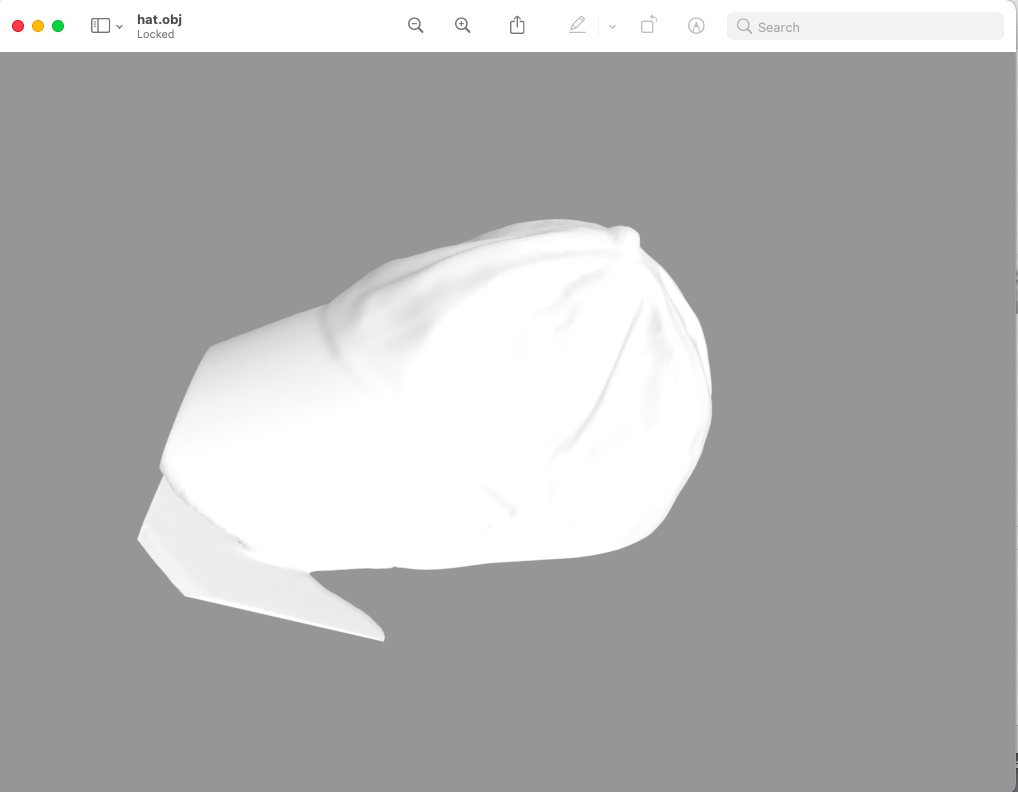
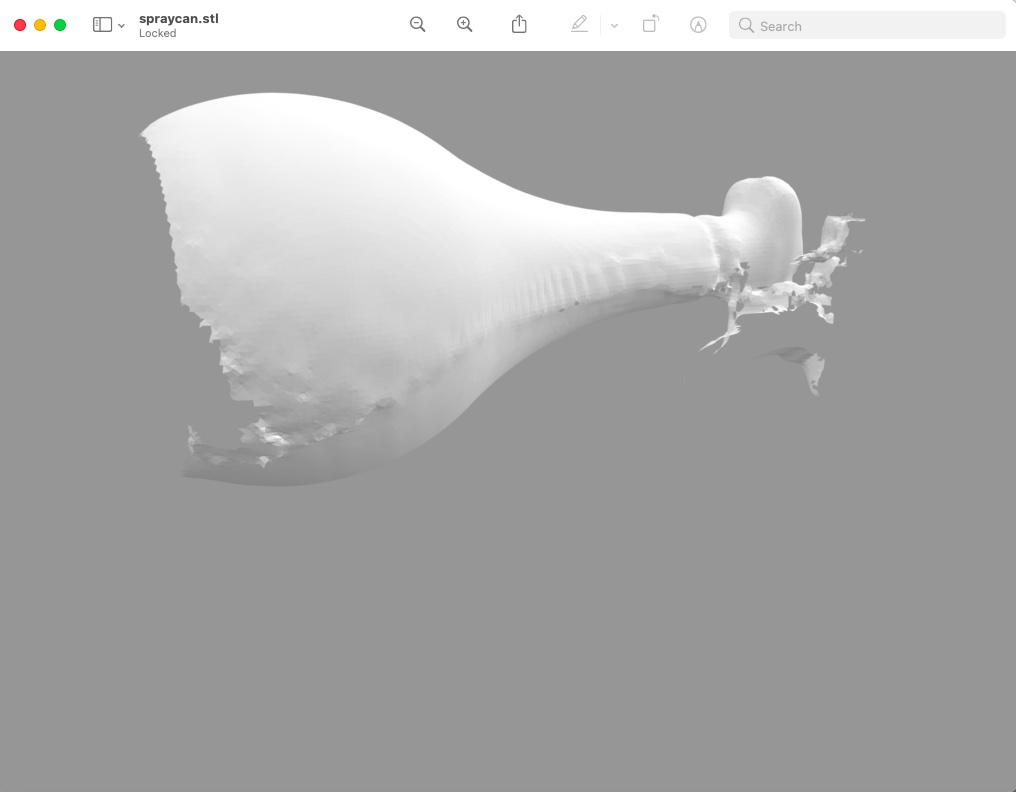 I attempted to scan Jonathan’s hat, but it proved to be hard to scan an oject without scanning the physical context as well. I ended up with messy scans; so messy, that I did not have a file good enough to print.
 Later, Michelle gave us the tip to use a phone-app like Qlone, quite a bit easier in use.
I tried it out, and she was right. Did not make any prints with it though, and by june the files I had on my phone are no longer there - is it because I did not have a premium version?
Later, Michelle gave us the tip to use a phone-app like Qlone, quite a bit easier in use.
I tried it out, and she was right. Did not make any prints with it though, and by june the files I had on my phone are no longer there - is it because I did not have a premium version?
edit june
Tutor Henk commented that I’d not written in enough detail on how to operate the 3D printer. I agree: my notes should suffice to have me effortlessly prepare and execute my designs, paying respect to safety, cleanliness and efficiency. Unfortunately my notes most often are not like that; they lack detail or focus, and I constantly needed to piece together how to do things by comparing and borrowing information my peers or predecessors published. So I will do the same below and cheat a bit. The thing I write above, about being in control is an important factor underlying his comment I guess - copying what others wrote or did, even if it is the offical manual which leaves nothing to be desired- does not yet make the machine work for you - you’ll still be working for the machine. The level of control that I felt comfortable with I reached only later, and not on every machine. The Modela PCB miller: yes. The lasercutter: yes. This 3Dprinter: not yet. My schedule was prohibitive. I am attracted to the printer though, and want to work with it in the future. I like the look, the concept, the scale. Not entirely the output - the less plastic the better.