Week 5. 3D Printing & Scanning
Before the Start
Introduction 🖊
This week relates to 3d Printing and Scanning. A huge and creative world is going to start. Excited about it!
Nowadays is possible to 3d print a full range of objects of all dimensions, shapes, and materials. From live organs to concrete buildings constructions! 3D multi-material printers already exist as well!
Scanning as a technique is less attractive rather than 3d printing, but it can be sometimes handy. For instance, in re-building projects where parts of an object or construction are missing, it is possible to scan them, instantly have a 3d model, and edit it to 3D re-design the missing parts.
I don’t feel as attracted to this technique as I do for 3D printing, but I would really like to have the opportunity to understand better its functionality.
Fab Assignments 📚
-
Group assignment:
- Test the design rules for your 3D printer(s)
- Document your work and explain what are the limits of your printer(s) (in a group or individually)
- Document your work to the group work page and reflect on your individual page what you learned
-
Individual assignment:
- Design and 3D print an object (small, few cm3, limited by printer time) that could not be easily made subtractively
- 3D scan an object, try to prepare it for printing (and optionally print it)
My Goals 🎯
- What I think I already know:
- I already have some basic experience in both fields because of my background as a designer. But I never used it in an advanced/professional way.
- What I want to learn:
- I would like to challenge myself and learn new ways to work with both techniques. Especially I’m very attracted to the shaping possibilities which 3D printing gives.
- Think about how to apply these techniques on my final project.
- Print an Organic shape.
- Print a Pattern that I can use to texturize my bioplastics.
- Print on fabrics.
Project Management
| Task | Time | Day |
|---|---|---|
| Research | 4h | 23, February |
| Test the design rules for your 3D printer(s) - Group Assigment | 6h | 24, February |
| Design for 3D Printing | 5h | 24 / 25 February |
| 5D Printing | 3h | 25 February |
| Bio-material testing | 3h | 25, February |
| 3D Scanning | 2h | 28, February |
| Documentation | 8h | 27 / 28, February |
Files 📂
| Name | Description | Link |
|---|---|---|
| File 0 | 3D Model, Fusion 360 - Bowl 1 | Link |
| File 1 | 3D Model, Fusion 360 - Bowl 2 | Link |
| File 2 | 3D Model, Fusion 360 - Texture | Link |
| File 3 | 3D Model, Scan - Matrioska | Link |
| File 4 | 3D Model, Scan - Buda | Link |
Research
Attached are some websites which I investigated before the starting of the week. Here I found handy info about both techniques, related projects, and references for my individual assignment and future personal projects:
Niel’s references:
- DefeXtiles video
- DefeXtiles blog
- Filament Properties Table
- Emergin Objects
- Prusa 3D Printers
- 3D Printing Curriculum
- Smooth - On - 3D Printing Coating
- Ender Pro
- Creality Ender 3 V2
- Filament Extruder
- Colored Filaments, Protopasta
- Automated Printing, Mosaic
- Hangprinter
- 3D printed laser scanning
- Photogrammetry 2 – 3D scanning with photocamera
3D Designs:
- Recycle Cardboard into Anything with 3D Printing
- WikiFactories
- ShapeWays
- Eric Klarenbeek
- DIY Inkjet Printer
- UAU Project
New 3d printers:
Instagram references:
Previous Students work:
Results 🖖
Group Assigment
Individual Assignment
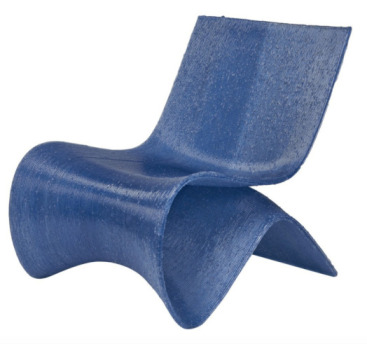
Organic vase
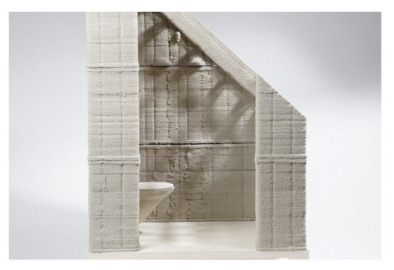
Tesselation surface
Matrioska
Group Assignment Process 🏊♀️ 🏊🏾 🏊🏽♀️
I did my group assignment together with Sander and Joany.
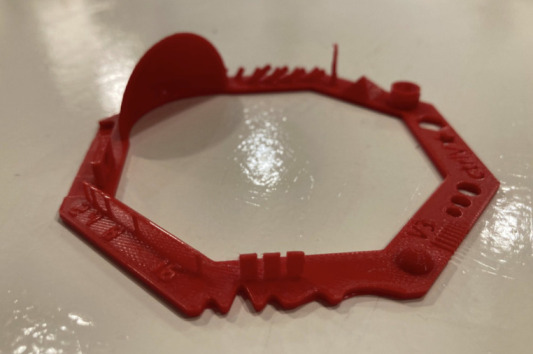
The purpose of the group assignment is to test the design rules of our 3D printer machines. At the Waag we have 3 different printing machines:
- Creality Ender-3
- Original Prusa i3 MK3
- Ultimaker 2
In our group, we learned how to Characterize the Prusa 3D Printer.
3D Printing Machine Basics
The 3D printers are one of the machines with most parameters to play with at the Fablab. Henk introduced us the basic ones, and explained the problems we could have using the machines in a wrong way.
Structure
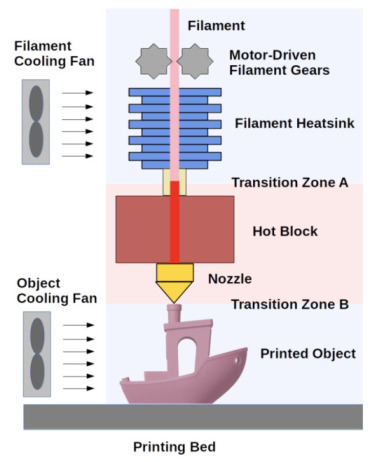
The 3D printing mechanism works as a vertical extruder, where 5 parts play an inportant role:
| Part | Function |
|---|---|
| Motor-Driven Filament Gears | It is the part where the filament is introduced to the extruder mechanism through motor-driven gears |
| Filament Heatsink | Here the filament is cooled down with a small fan because it is too close to the hot block. This is needed to ensure that the filament doesn’t melt and flow up |
| Hot Block | Here is where the filament is heated up (temperature differs depending on the material and speed, for PLA normally between 200º - 215º) in order to melt it and flow it out the nozzle, ready to 3d print |
| Nozzle | It is the part through which the material goes out. The standard diameter of the nozzle is 0.4 mm, but it can be changed depending on the final product needs. In the area below the nozzle, there is a second little fan, needed to cool down the material and be able to print multiple layers on top of each other. |
| Printing Bed | This is where the design is 3d printed. The bed also needs to be warm (around 60º - depending on the material) in order to ensure that the object sticks to it and doesn’t move during the printing process. |
I case of wanting more info about the 3D printers machines, I researched this website.
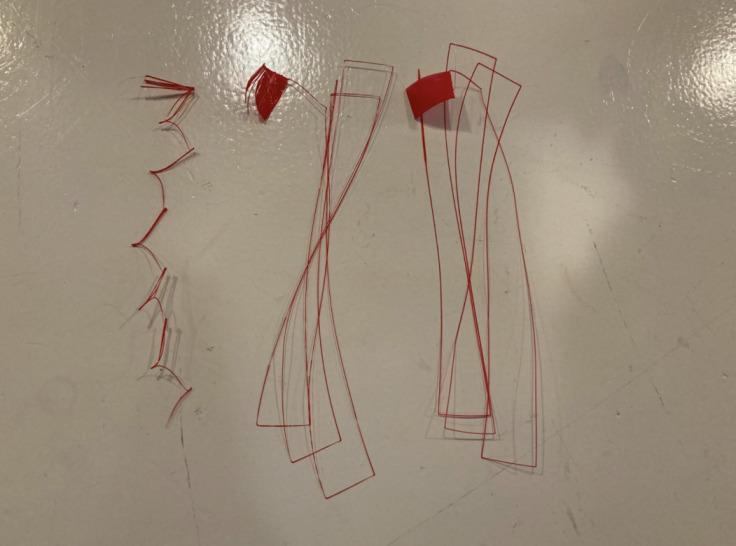
Filament Vs. Nozzle
Our local instructor Henk explained to us different situations which we should avoid. Those are influenced by the amount of filament filled and the extrusion speed programmed:
-
Over extrusion: this happens when we use too much speed for pushing the filament through the nozzle, in comparison with the movement speed of the nozzle itself. This results in designs where condensed blocks of material are visible in some parts of it.
-
Under Extrusion: this happens when the filament pushed through the nozzle is too short in comparison with the fast movement of the nozzle. This results in a design where there are layers with missing material weak areas.
Here you can find a handy link where is explained How to fix the most common 3D printing errors like the ones explained before.
Z-axes
Another parameter that plays an important role for the 3d printing is the height of the Nozzle bottom part (the Z-axes).
In fact, is very important to be sure that the height of the Z-axes is correctly set up before the printing. There are 3 main situations where we can find ourselves:
- The Nozzle is too high: the filament will not stick properly to the bed and there will be layers with more material density rather than others.
- The Nozzle is perfectly located: the material is distributed uniformly within the layer.
- The Nozzle is too low: the material is almost invisible in some parts of the layer.
Attached are some photos of the filament leftovers when setting up the PRUSA’s bed temperature and Z-axes distance. We can see that the is correctly settep up when the print looks like the one on the right.
Materials
Materials give the temperature parameters of the nozzle and bed. Those parameters change depending on the material, speed and final result wanted.
Here you can find a handy link where Filament Properties Table are on explain. You can check there the parameters you will need to set up the extruder vs. bed temperatures of your 3d printing machine.
The most extended material in use for 3d printing machines is PLA. It is because of its material performance (High Strength and Stiffness), sustainable features, and price. Attached the standard paramenters to set up your machine with PLA.
| Parameter | Number |
|---|---|
| Extruder Temperature | 190º - 220º |
| Bed Temperature | 40º - 60º |
Even if PLA is the favorite material used by the 3D printing comunity, there are a lot of other material which we can use. At the Waag we have filaments made of cork, wood, and carbon based.
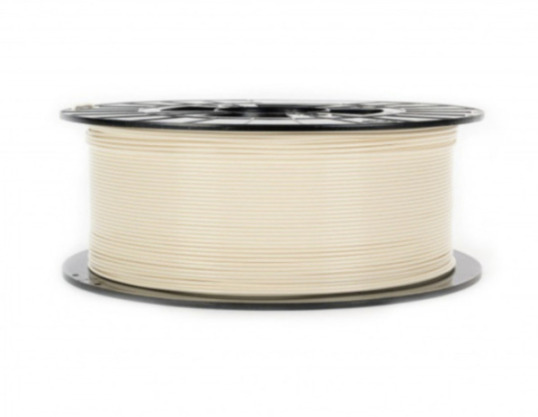
Even if those materials look nice and could be more eco-friendly, they also are not as handy to work with as PLA or other plastic filaments, due to the diameter’s irregularity.
As my final project directly relates to 3d printing machines, I did researched about other projects with 3D bio-printing results. There is a range of innovative possibilities such as:
Vanplestik - 3D printing recycled plastics
The New Raw - 3D printing recycled plastics
Jet Clay - 3D printing clay

Omlab - 3D printing waste water
Slicing Software
PRUSA slicer Vs. Cura
When using a 3D printer, We need to previously “slice” our files before being able to send them to the machine.
There are different software which can be used in order to do that. At the Waag, our local mentor Henk showed us how to use the slicer from PRUSA. You can download it here.
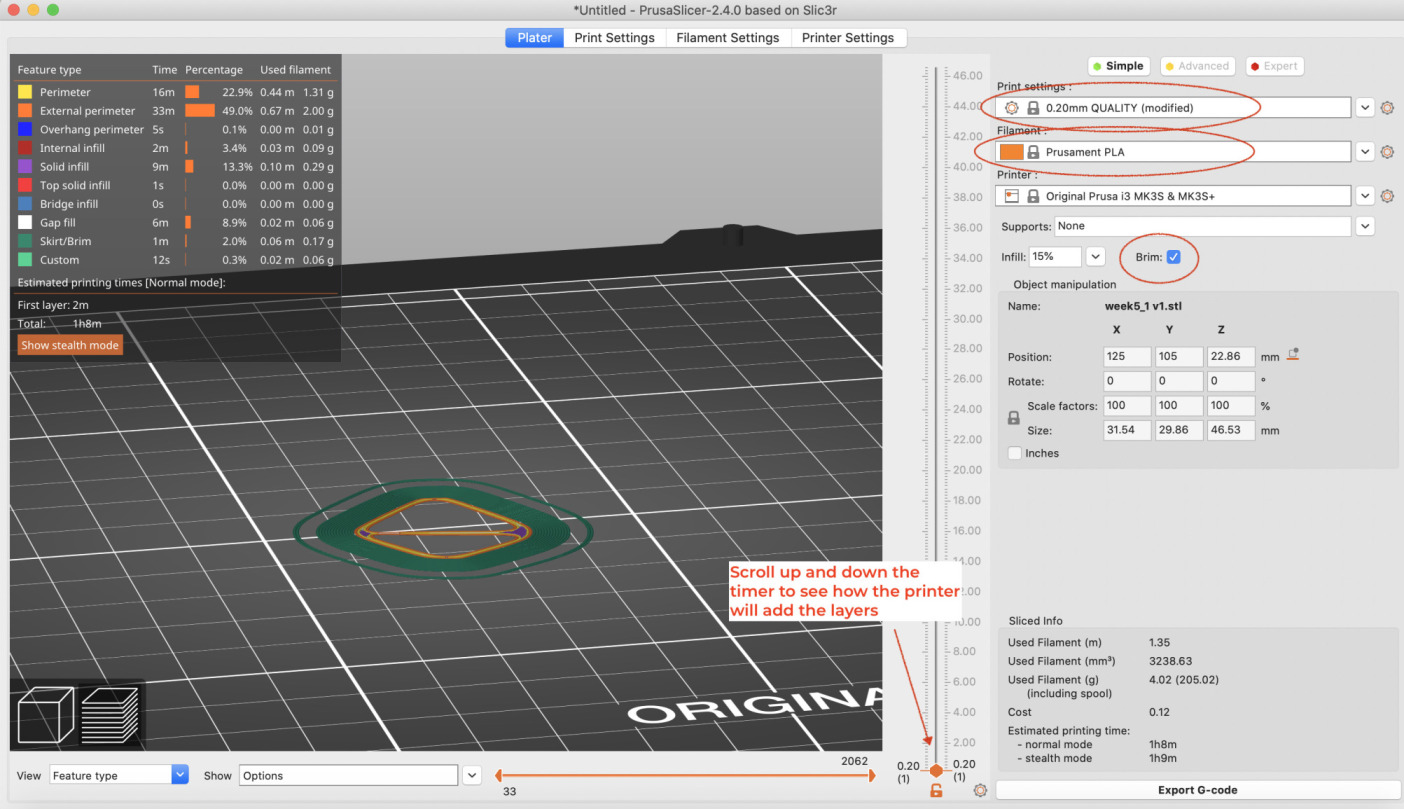
Another famous slicer driver is the one from Ultimaker called CURA. I already had experience using this one, so was nice to get to know a new software.
Why we need to use a Slicer software?
The importance of this software resides in being able to previously set up the parameters which will be used by the machine when printing your designs.
Slicer parameters
Thanks to the Slicer driver, you will be able to select the filament material and nozzle speed parameters - basic level - but there are many more other features that can be customized to suit your final result needs.
Also, the slicer software has a very handy option, which allows you to see how the 3D machine will print each layer, permitting you to previously check if there could be any problem when printing your designs.
When designing tall designs, it will be handy to add a “Brim” to ensure that the piece will be correctly stay attached to the bed. When the design is too complex, you will also find it handy to add “structures” to your design,(normal density of 20%), in this way all the parts of your design will have a bottom surface to build on top of them.
Tip 1: Even if you set up previously with the Slicer software your designs, you can also change the parameters while printing. This can be handy when you want to lower for example the speed in the first layers and speed it up later.
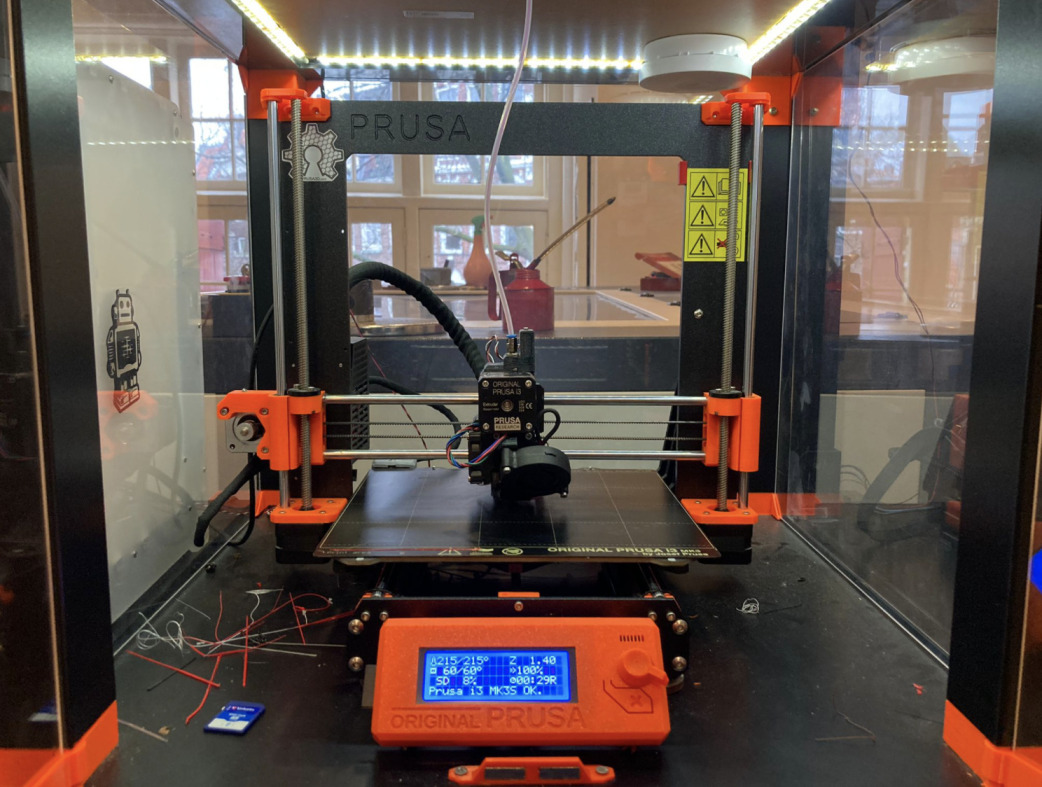
Setting up the 3D Printing Machine
During the group assignment, we set up the PRUSA 3d printer. In order to do that, we needed to follow these steps:
-
Turn on the Machine. Press the ON/OFF button located on the back part of the machine.
-
Calibrate the machine. This point just has to be done from time to time, especially when we notice that the machine is not working properly.
Some machines have an option to make this step automatically - like the PRUSA - other ones need to be calibrated manually - like the Ender.
-
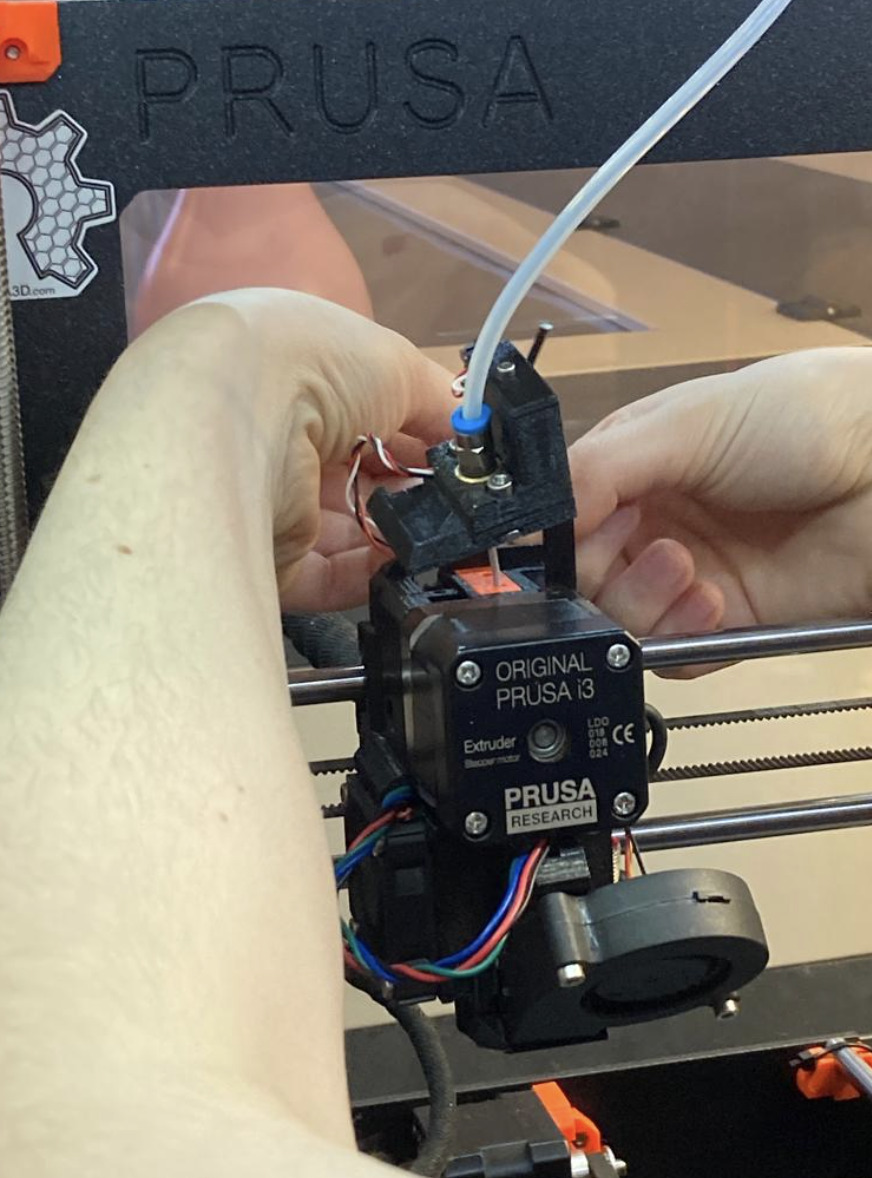
Choose the filament material you want to use. Cut off the end of the wire at an angle of 45° in order to easily push it within the filament tube.
-
Load the filament.
In order to do that, firstly locate it on the rolling filament bed placed on top of the machine’s outer box.
Then, select the option “load filament” to heat up the nozzle temperature. In this way, the filament will be ready to use.
-
Prepare your design file and slice it with the PRUSA slicer.
-
Load your file. The machine will heat up both the nozzle and the machine temperature with the required parameters before starting to print.
In the case of the PRUSA 3d printer, the machine will auto-calibrate before the start.
- Wait for your print to be done!
During the process, is always important to double-check at the beginning that the first layers are working properly, and come back time to time to the machine, to be able to fix mistakes in time! Sometimes you could run out of filament, your design could stick out the bed if you don’t use a brim, or some parts could break if missing a proper structure to handle them!
Tip 1: When setting up your 3d printing machine, be sure that the bed is clean. Sometimes the design will stick out the bed if is dirty. We had this problem when using for the first time our 3D PRUSA printer with our local instructor Henk.
3D Scanning Machine Basics
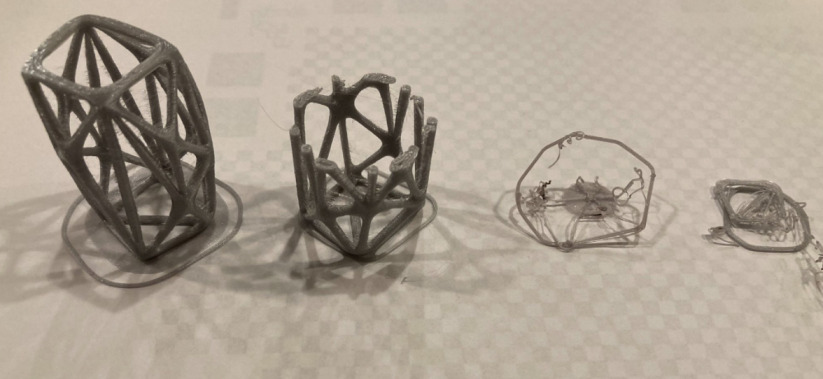
At the Waag we have a 3D Systems Sense Scanner. This machine permits you to scan three different kinds of “volumes” depending on their size: objects, head, or body.
There is not much to explain about the machine, the only thing you need to do to set it up is to plug the Sense Scanner into the computer’s USB and open the Sense software.
When we were introduced to 3D Scanning, we learned that it is possible to scan objects at home using your own phone. An app dedicated to it is called Qlone.
During the week, I wanted to both test the Sense scanning machine and the app to make a proper comparison between the both of them.
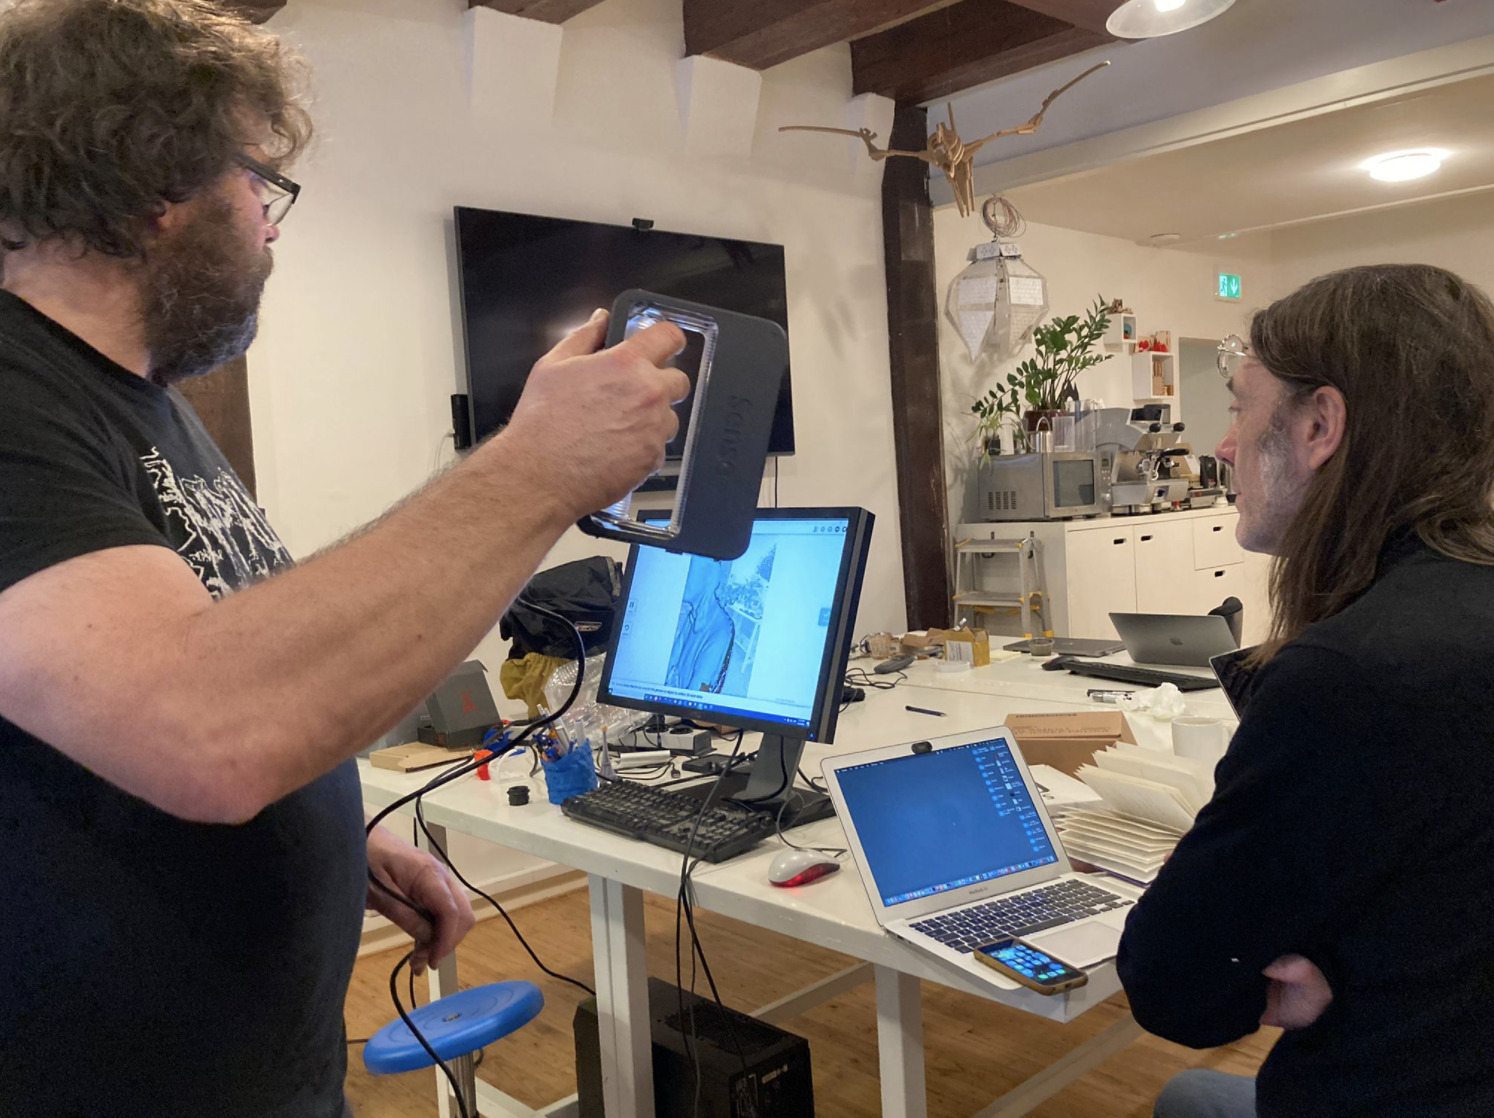
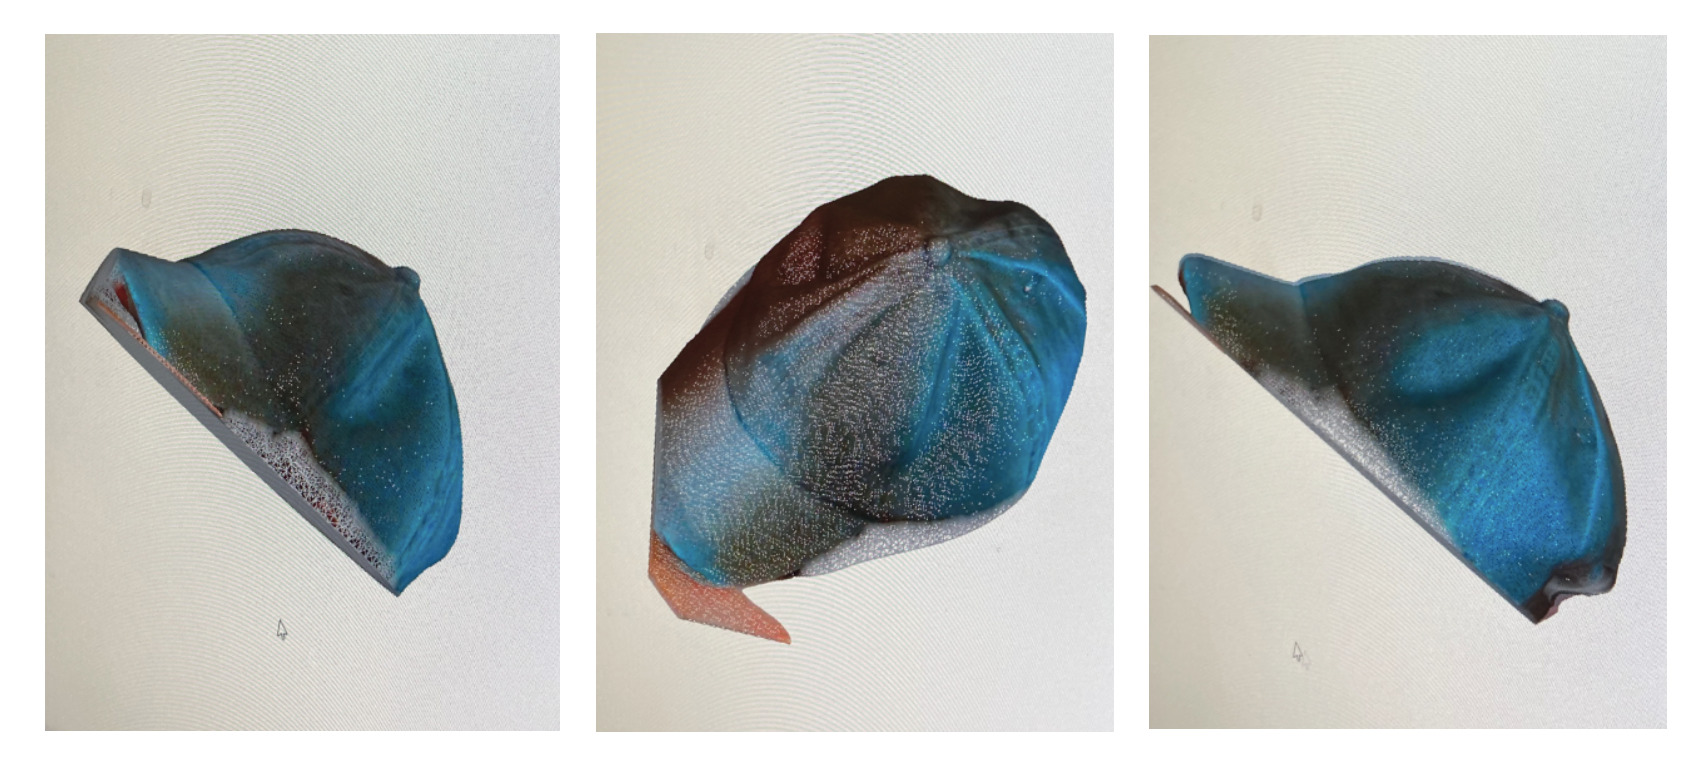
During the group assignment time, I did the first try with the Sense machine, 3D Scanning Jonathan’s hat, but it didn’t work out perfectly.
Individual Assignment Process 🏊♀️
3D Printing
Organic Shape - PLA, PRUSA
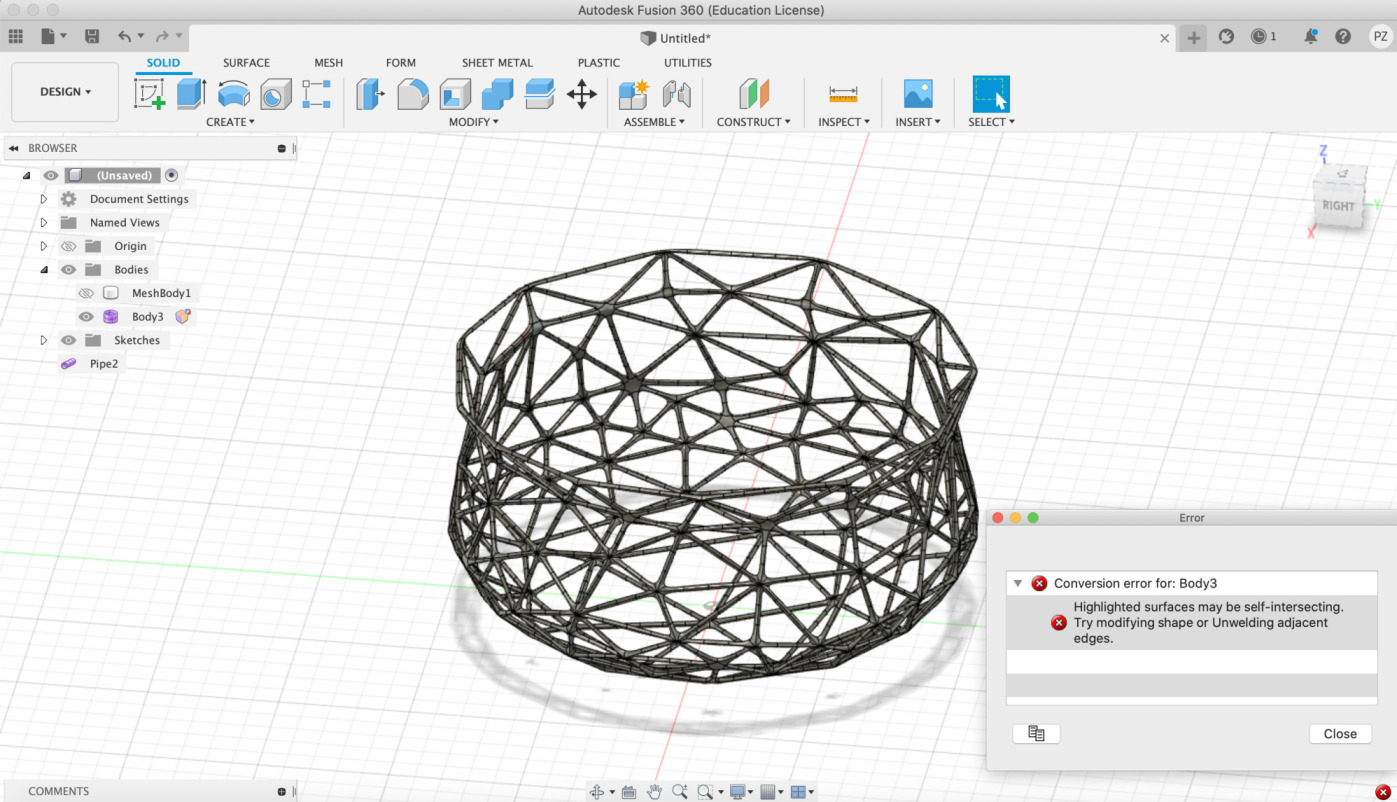
For my individual assignment, I wanted to learn how to make an organic shape with Fusion 360º. I followed this tutorial to make the design.
Firstly I designed an organic vase, but since the shape was very small and fragile, I decided to re-shape it to be able to make a few first tries.
Organic vase - 1
Organic vase - 2
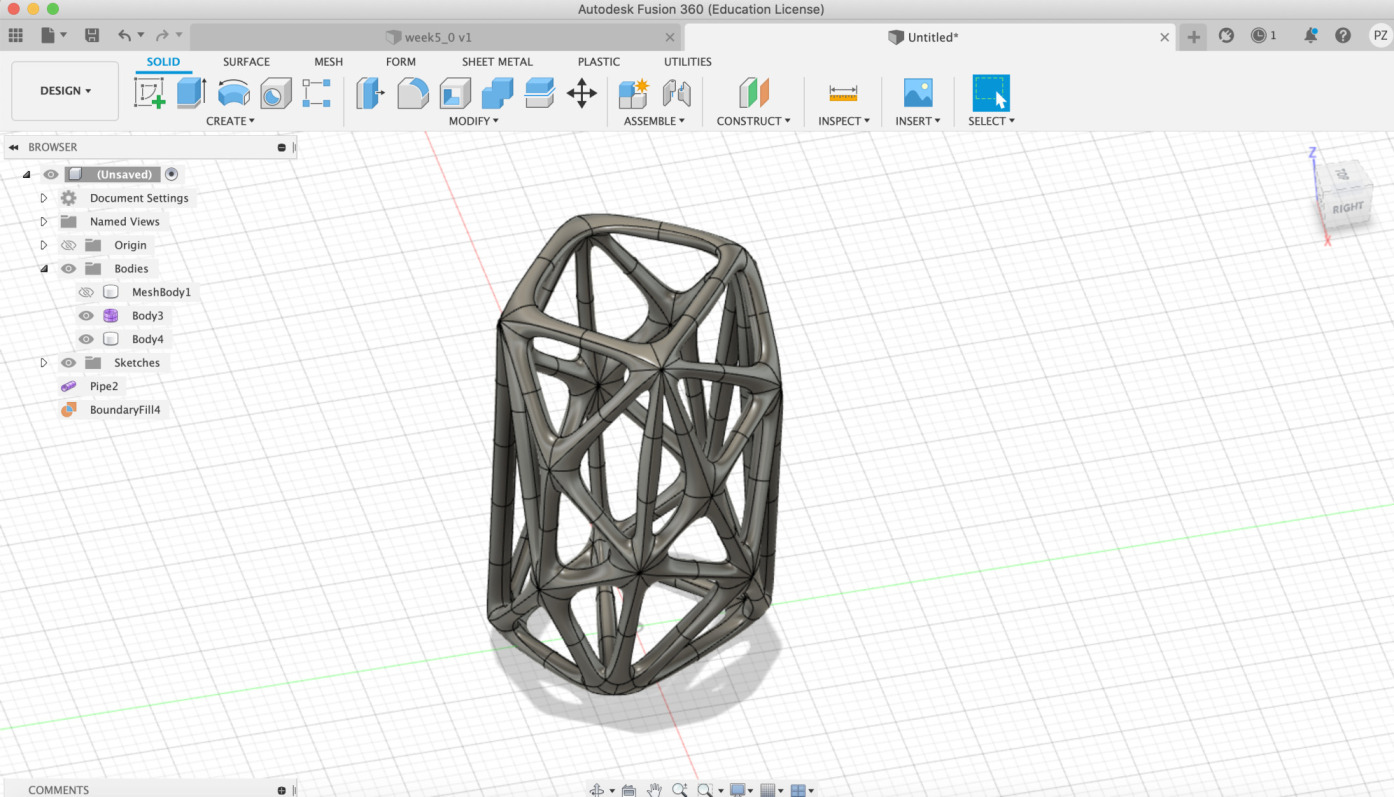
I did not have complications when developing the 3D design, but when setting up the 3D printer I did have a few mistakes from which I learned a lot.
My first mistake was making the pips diameter of my design too small, and also the design itself.
Tip 1: When using pipes, don’t make too small your design. It will break and not stick properly, in fact, this is the first problem that I had when printing my design.
Secondly, I did a new and bigger design. I tried to print it, but the speed was too high so the object stuck out from the 3D printer.
Tip 2: Don’t use a high speed when doing an organic and small design. If you are not very sure if your design will work, you can manually modify the speed on the nozzle for the first layer, check that everything is okay, and speed up the process.
The second local instructor, Michelle, advised me to cut the botton part of my design, in order to ensure that the first layer was completely flat. Doing that and using a slower speed, the 3D printer started to print my sculpture properly, but then I had a new mistake …
Tip 3: Always have a flat first layer in your design. This tip sounds very obvious, but when designing organic shapes, sometimes pipes make the bottom surface not being flat and make it difficult the print it. In order to fix the problem, Michelle - the local support teacher - showed me how to cut the design from the slicer driver to make it work! and it did!
My last mistake was not adding a Brim to my design. Since it was just a few cm heigh, I wrongly tough it will not need a brim, so at a certain point the design stuck out the bed and I had to stop the printing and start it again.
Tip 4: When your design is bigger than a few cm, always add a brim.

Finally, I got my design done! Using the right pipes size, speed, and flat bottom surface, my sculpture worked out!
But then I had a new complication … When I finished my printing, I had to unload the filament. I selected the option to do that with the PRUSA 3D printer, but when the machine asked me to take out the filament I did not do it correctly so the material got stuck in the heatsink part.
Again, Michelle showed me how to take out the parts of the machine, take out the filament, and assemble again the screws.
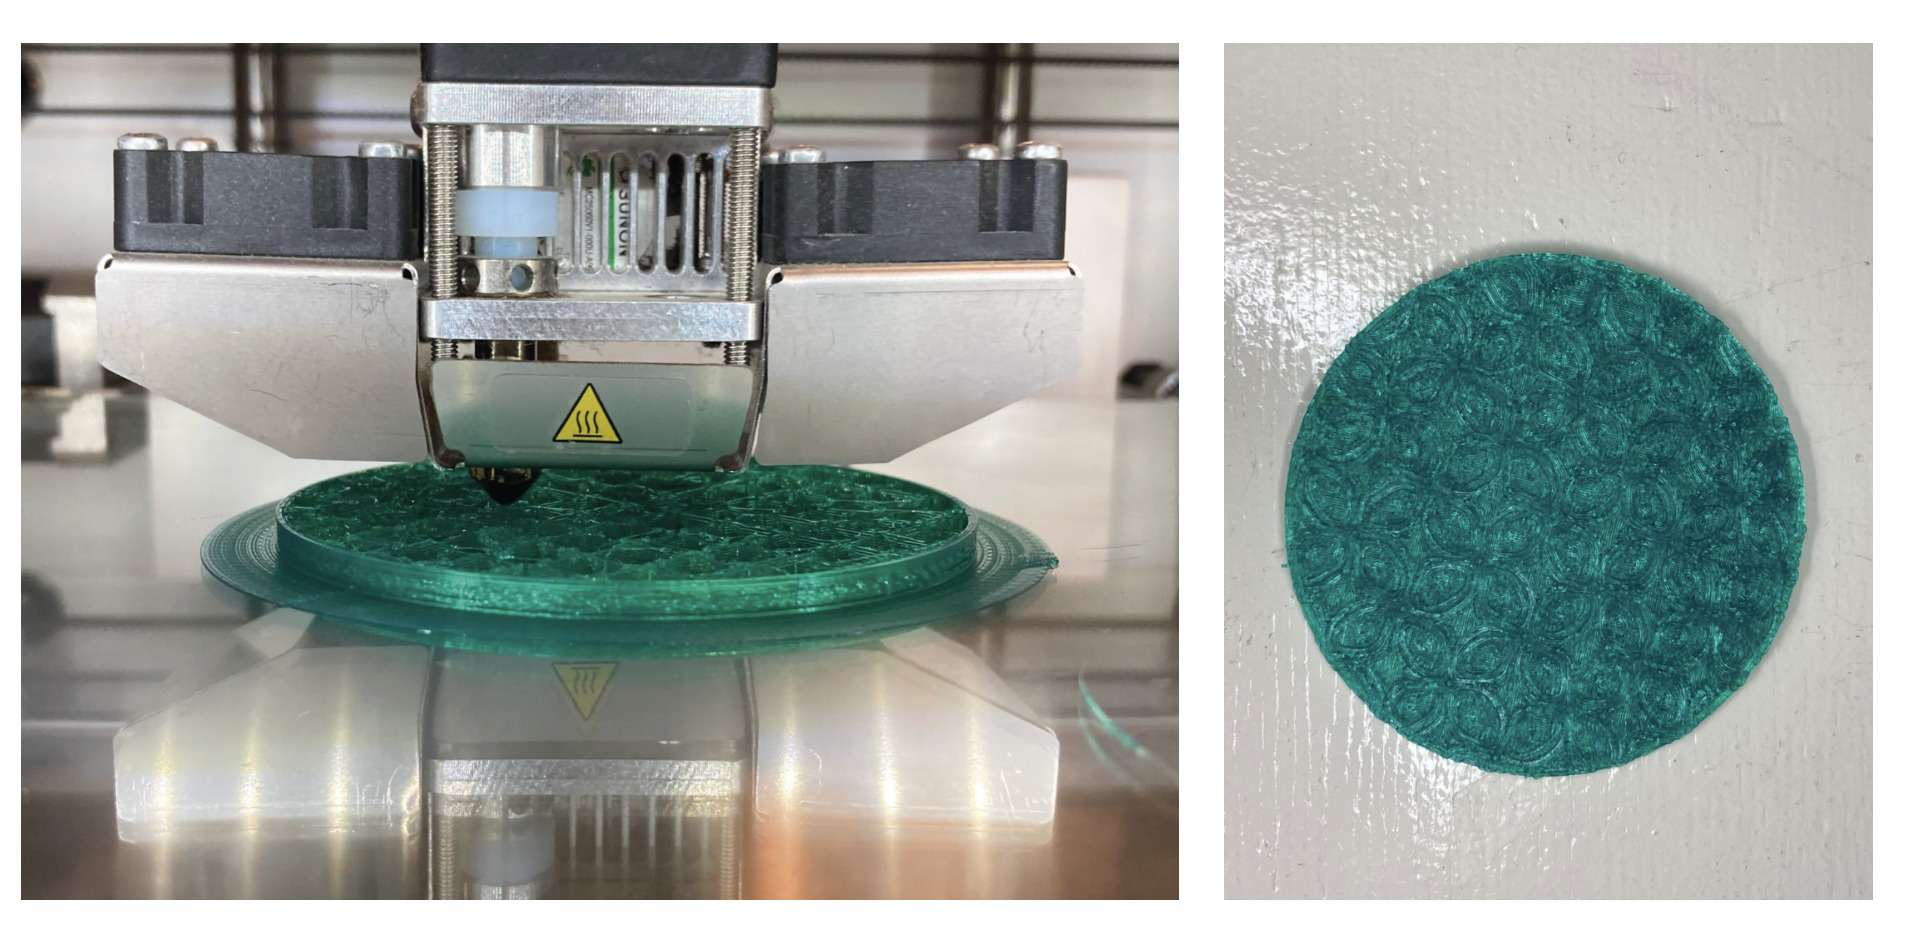
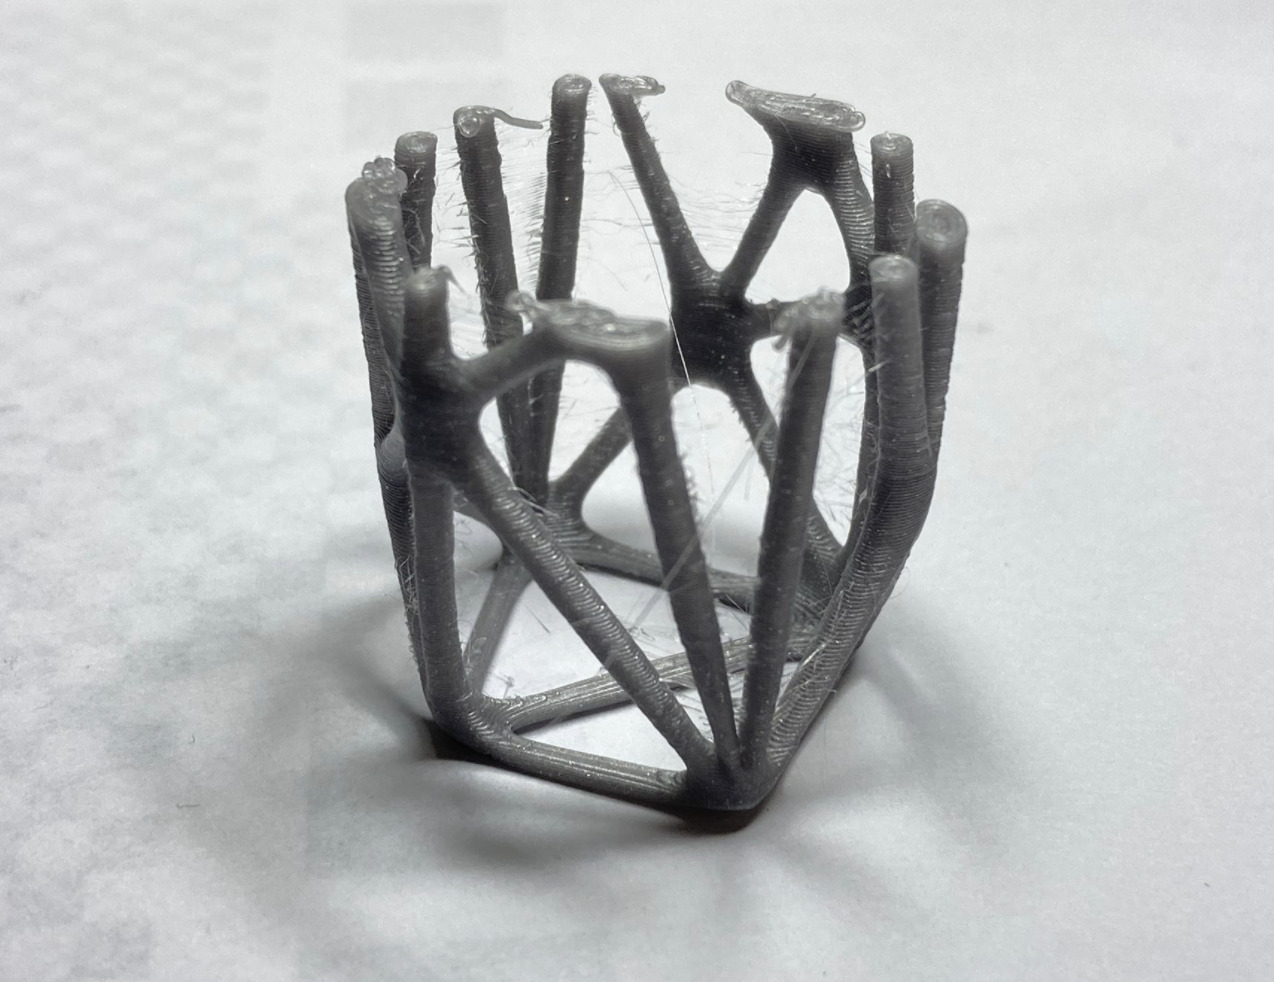
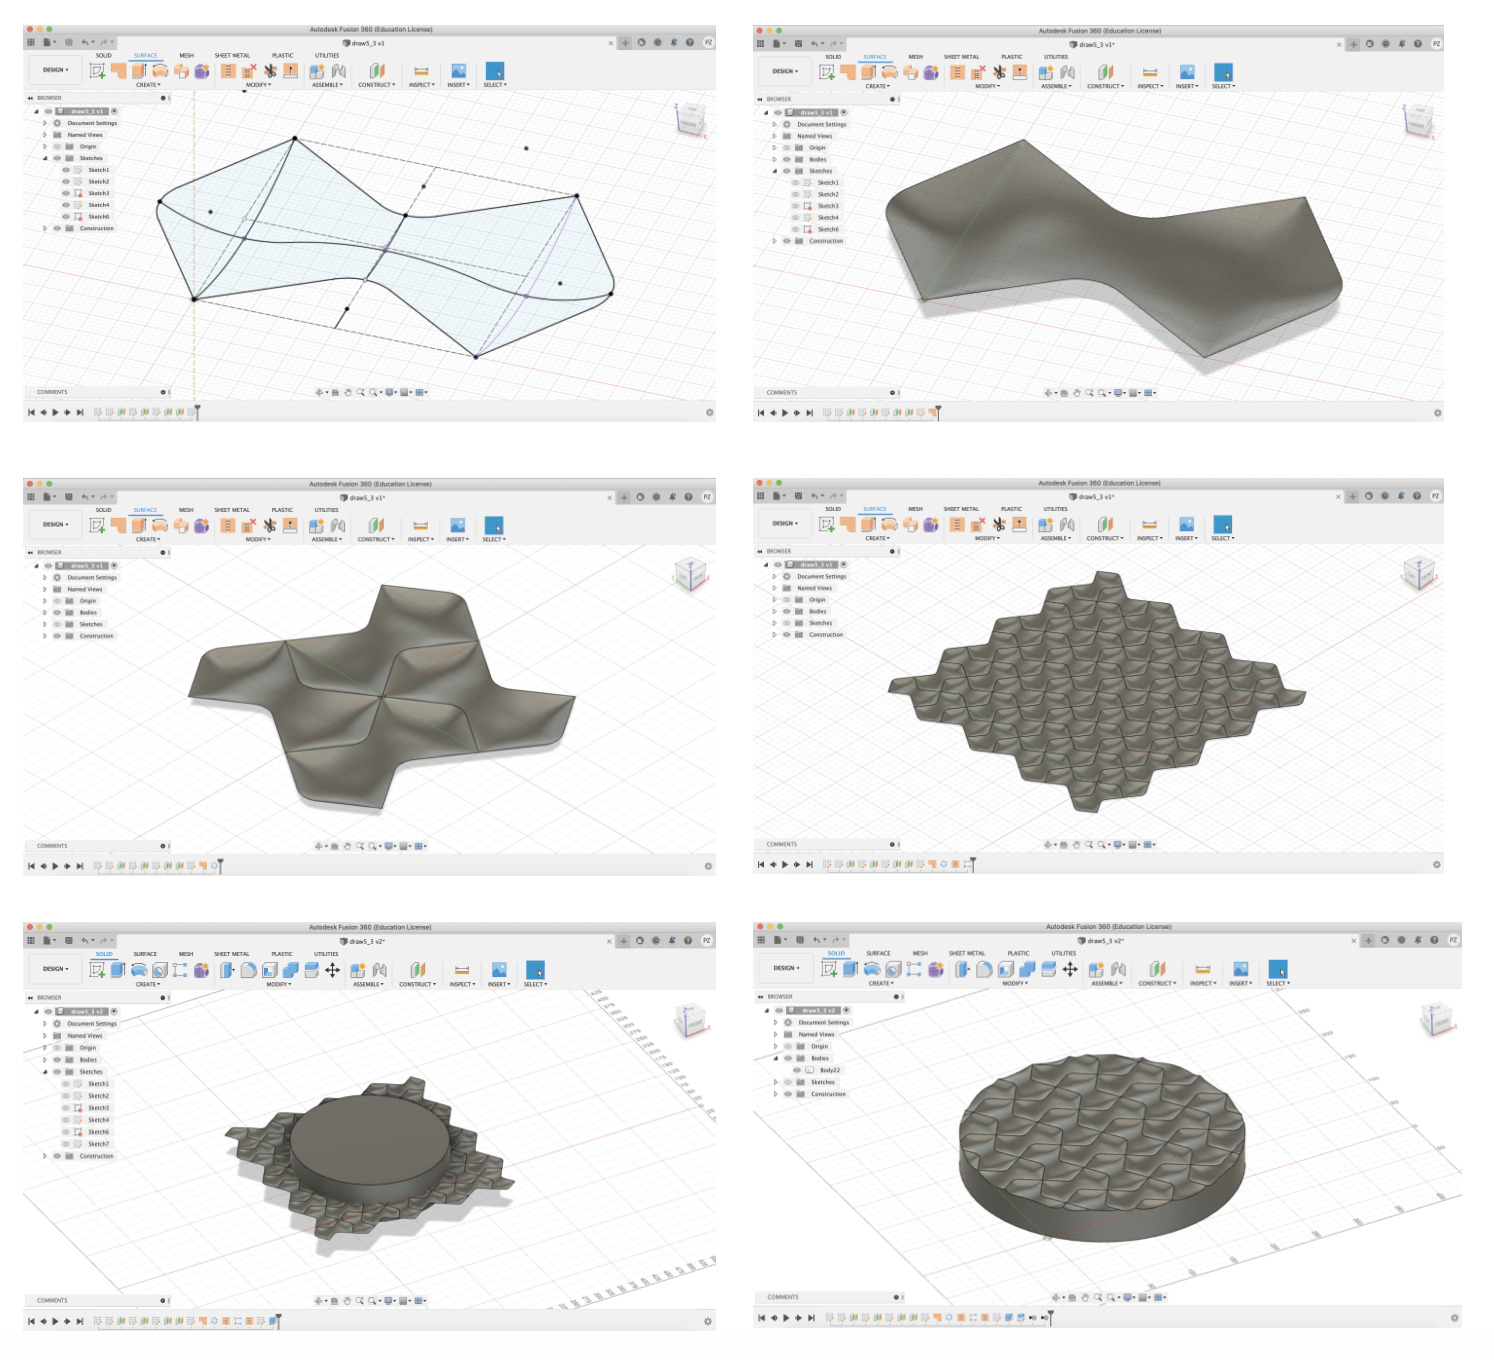
Funky Tesselation - PLA, Ultimaker
As I’m researching bioplastics for my final project, I wanted to learn how to make tessellation surfaces with 3d printing, in order to use the surface as a mold with the bio-plastics.
In order to 3D design it, I followed this tutorial.
I did not have neither complications following it, attached some photos of the process.
To print, I used the Ultimaker 2+. During my experience with this machine, I also had a two main problems which I explain below:
- Load the filament.
When loading filament in the machine, you firstly need to select the option “remove filament” before being able to load a new one. This makes sense, till you don0t have any previous material loaded which you want to unload - which was my case - and you still need to make the full process before you can start using the machine …
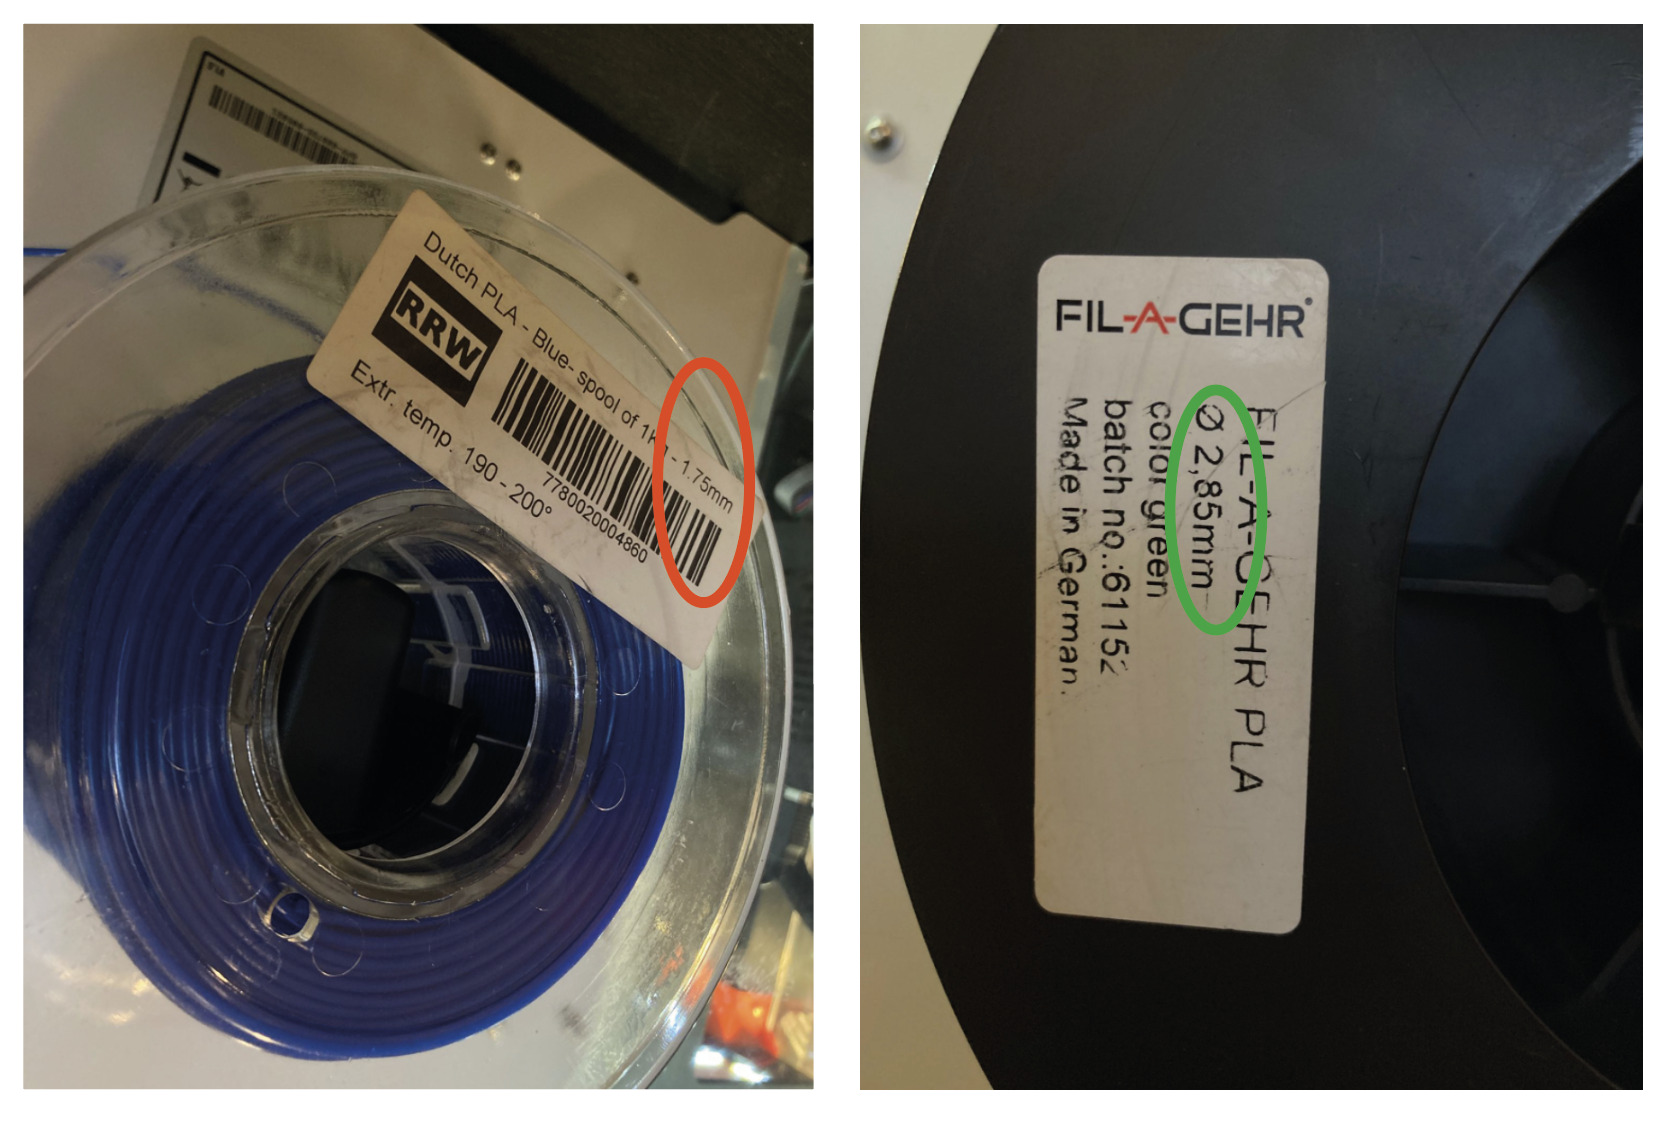
My mistake was choosing the wrong filament which is not compatible with the Ultimaker 3D printer. I did not know that in the ultimaker machines the filament’s diameter required is 2.85 mm and for the PRUSA or Ender is 1.75 mm.
- Load the file.
When I loaded my design, I had problems because I was using the slicer from PRUSA and not the one from Ultimaker, CURA. Due I had to download it and learn how to use it. There are much more other paramenters to play with CURA rather than with the PRUSA slicer.
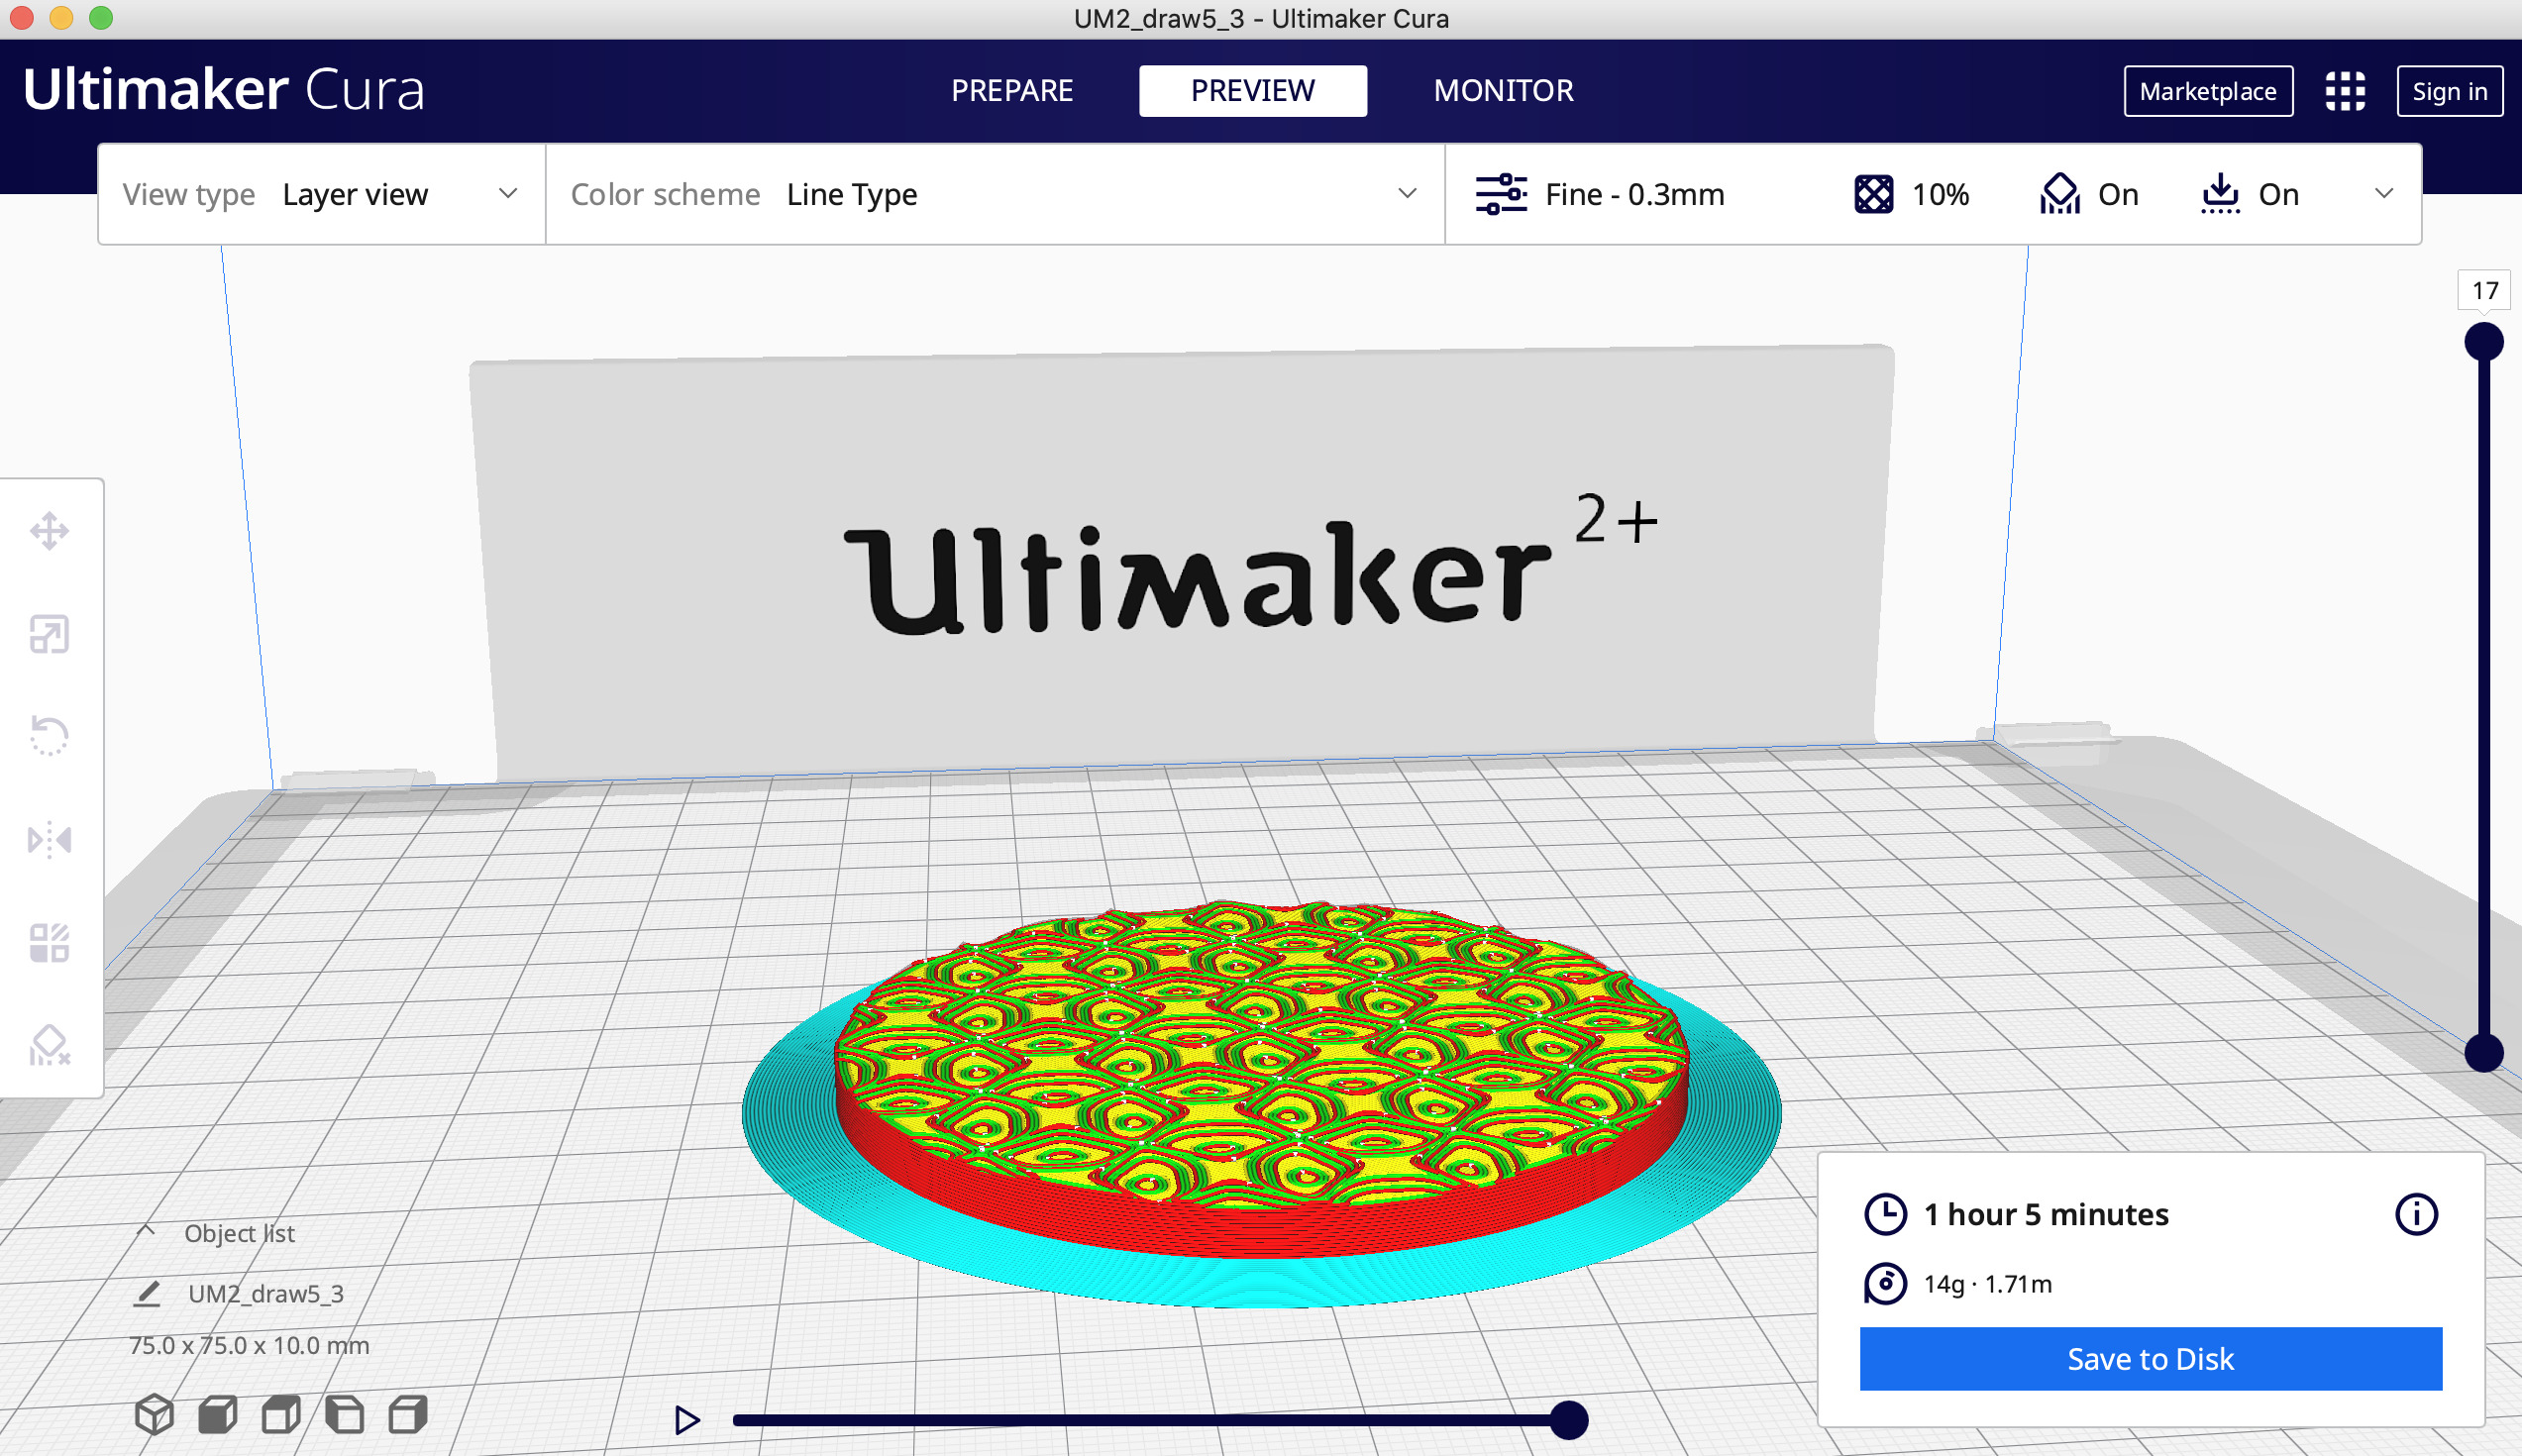
- 3D printing.
During the process of printing, I did not have problems with the machine. If I have to consider my experience using both printers, I enjoyed more the setting up of the PRUSA, rather than the Ultimaker.
3D Scanning
Since I did not have a good experience with my first tries using 3D Scanning. I had a few ideas of objects I wanted to try to find good use of the machine.
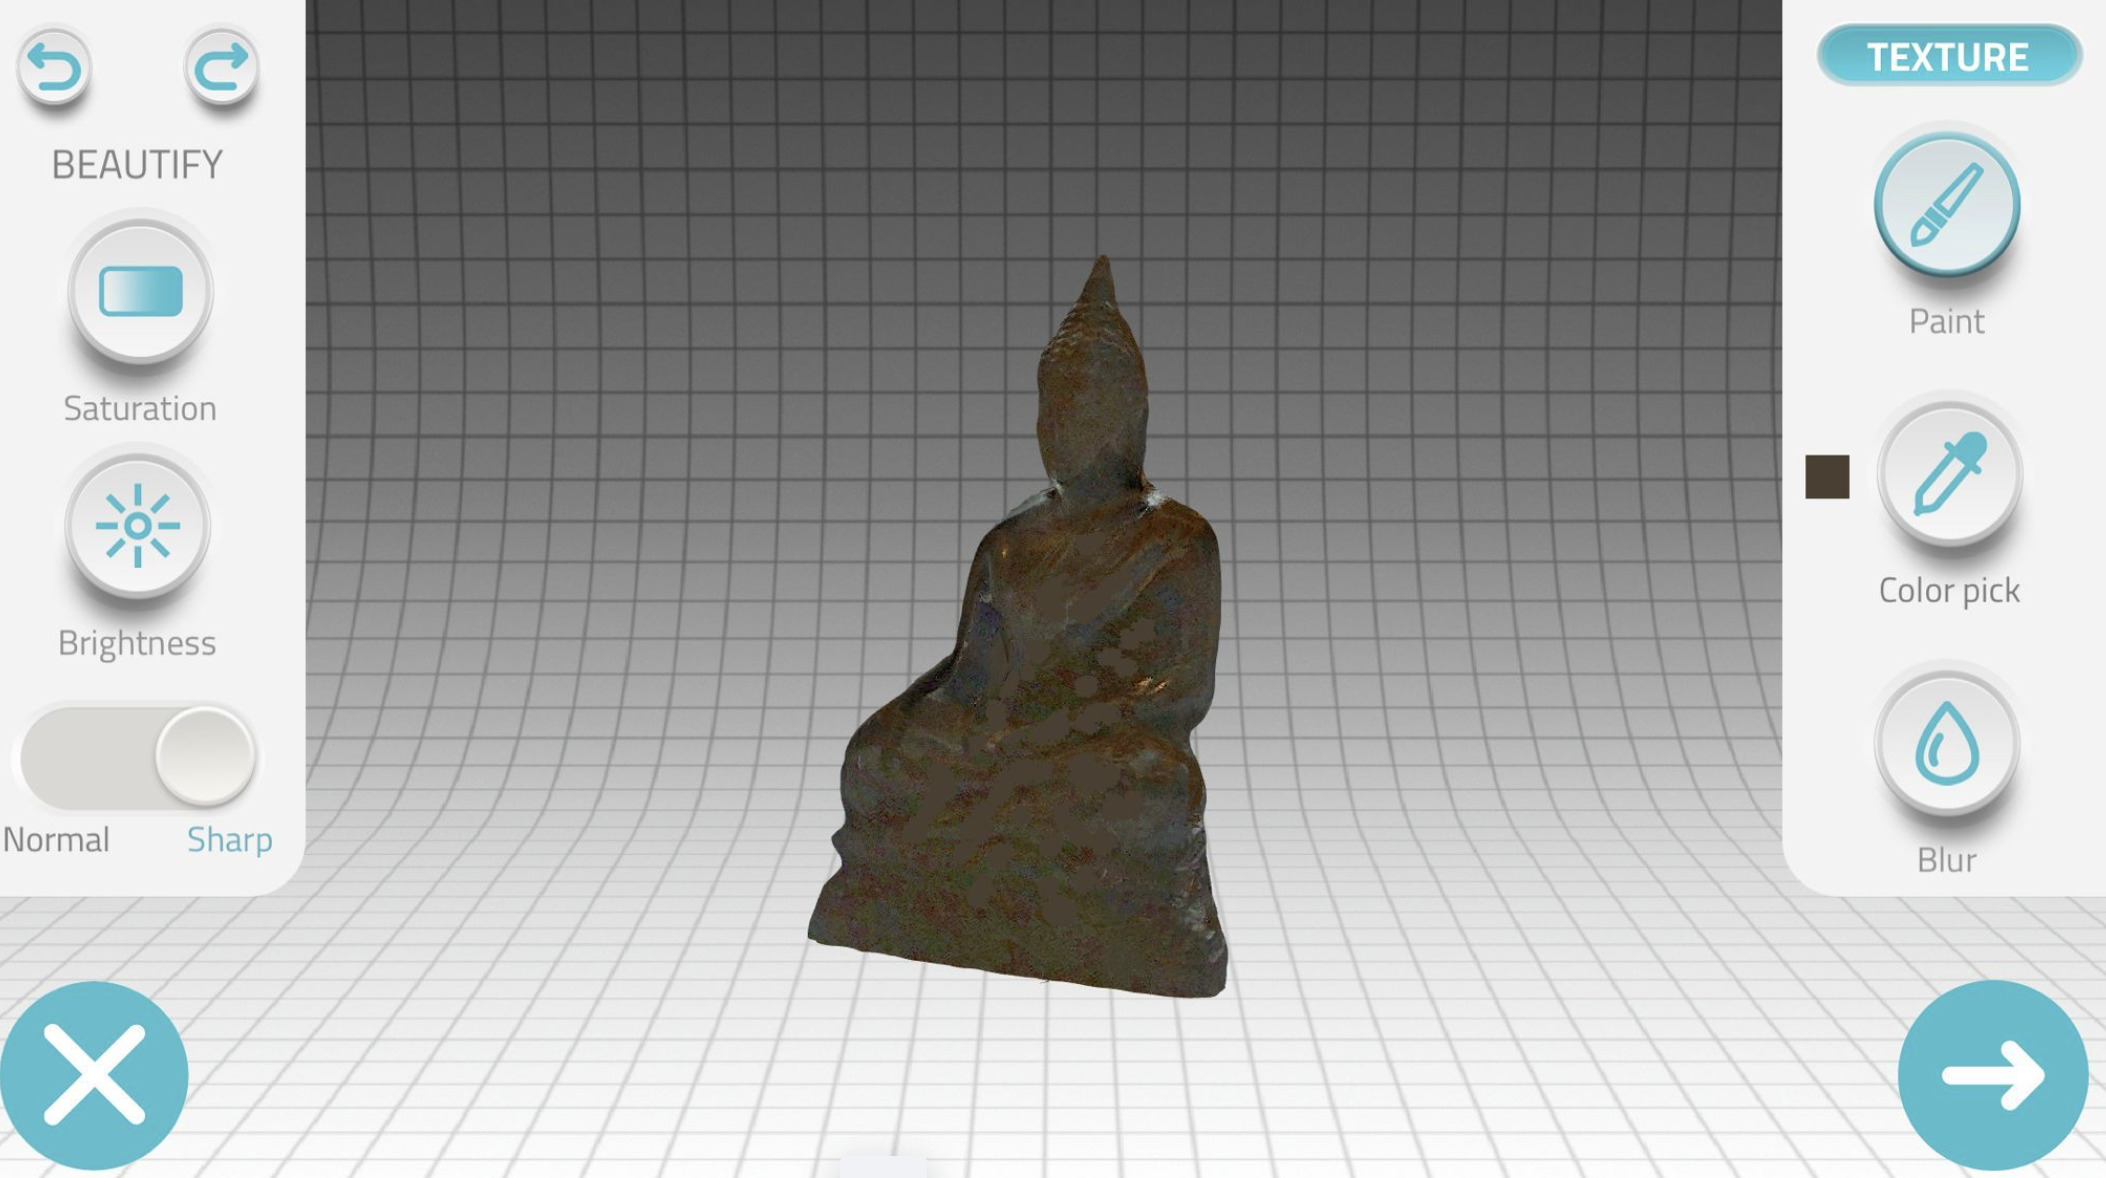
Buda
In order to compare the quality of both the Sense and the Qlone softwares, I tried to Scan a little Buda stata which I had at home. This is the result:
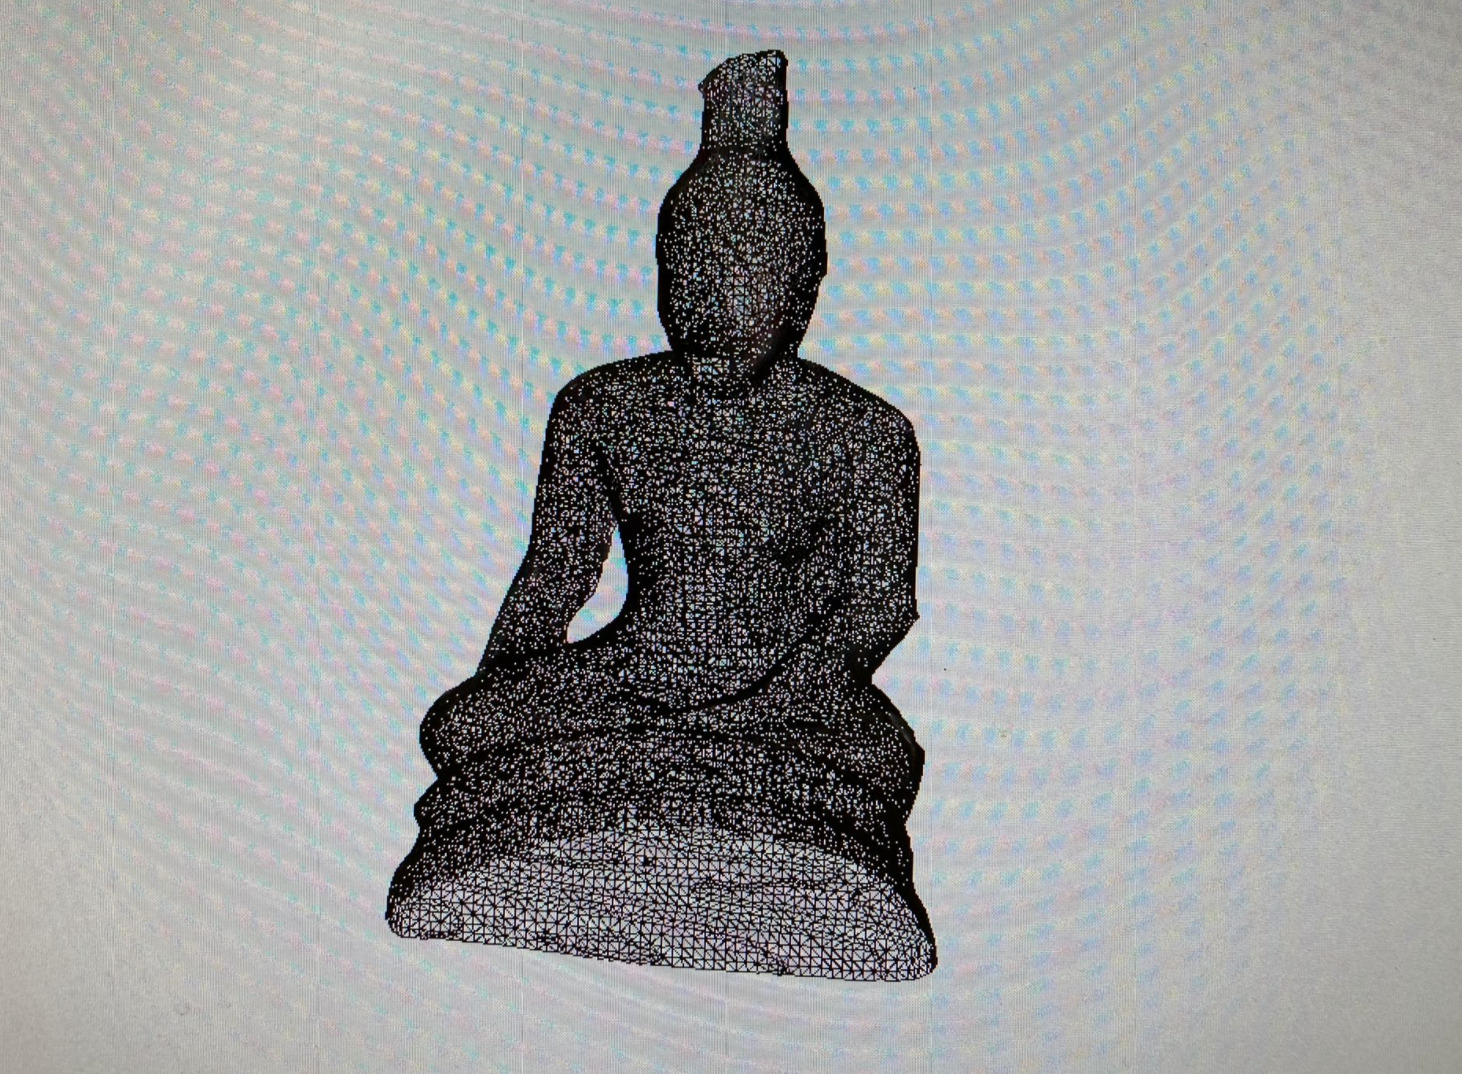
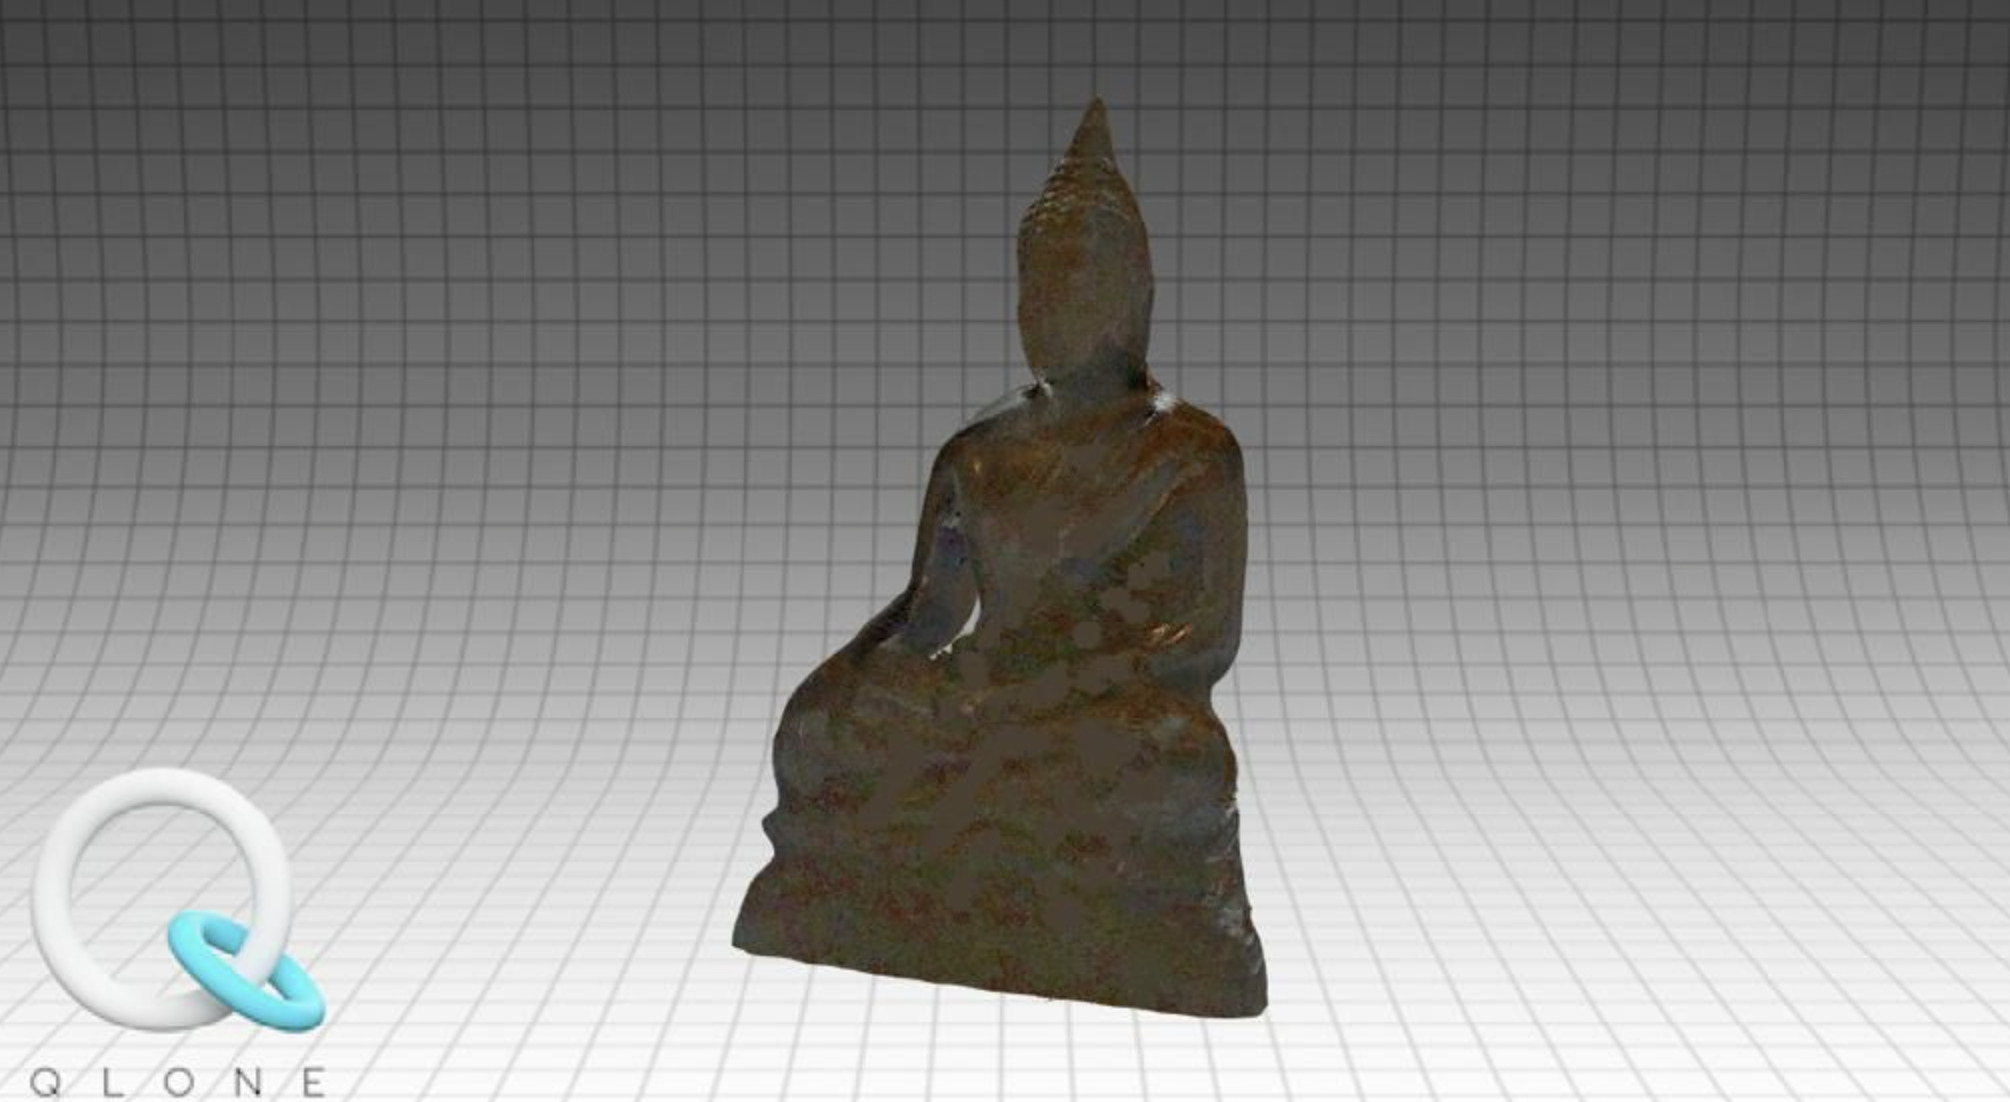
Experiencing both techniques, I would recommend using better the Sense machine to scan small objects, since I took a really long time with the Qlone app to scan the piece - about 20 minutes - and just 5 minutes to scan it with Sense, obtaining very similar results in terms of details quality.
The only good thing about Qlone, is that it has further options to make a post edition of your file. In fact, you can play with light, colors, textures, and re-shape it if wanted.
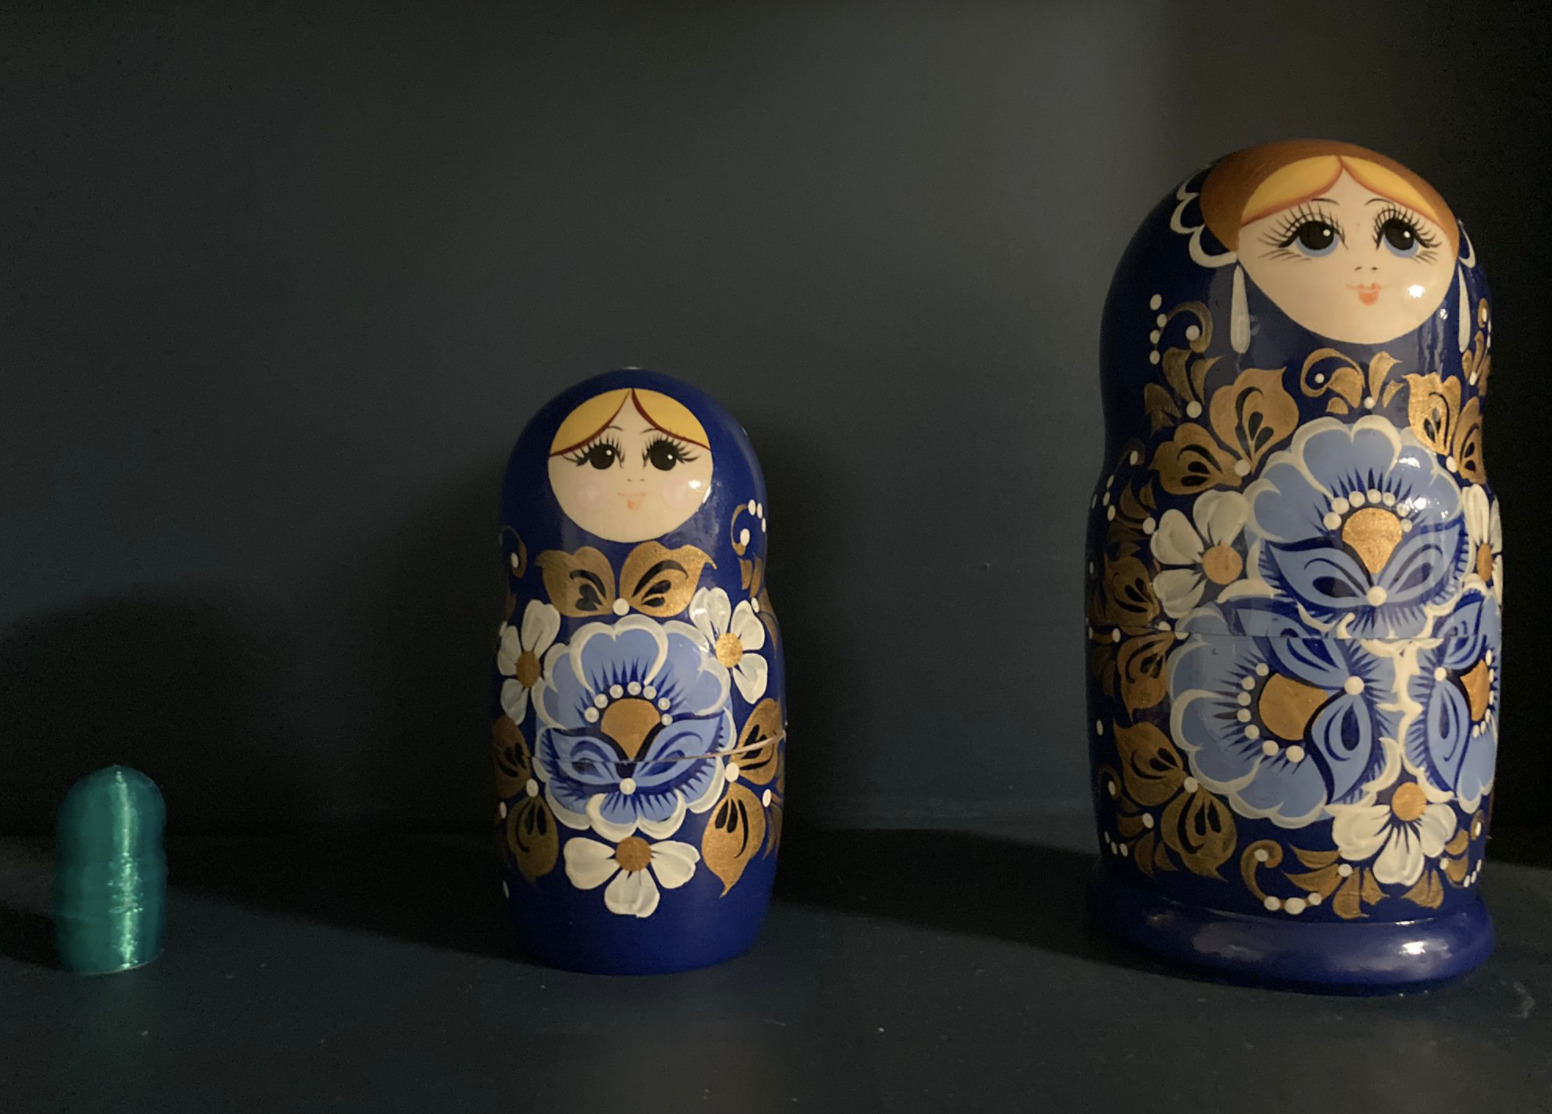
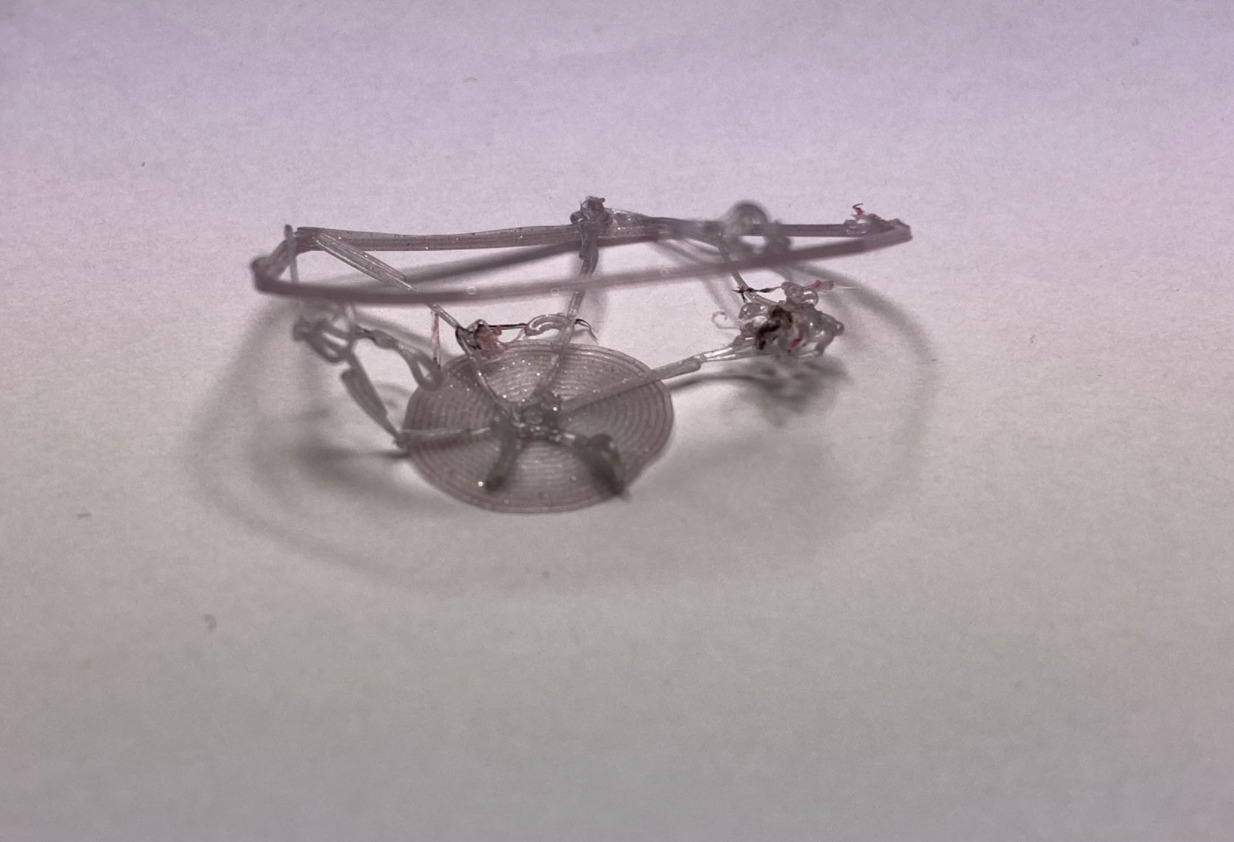
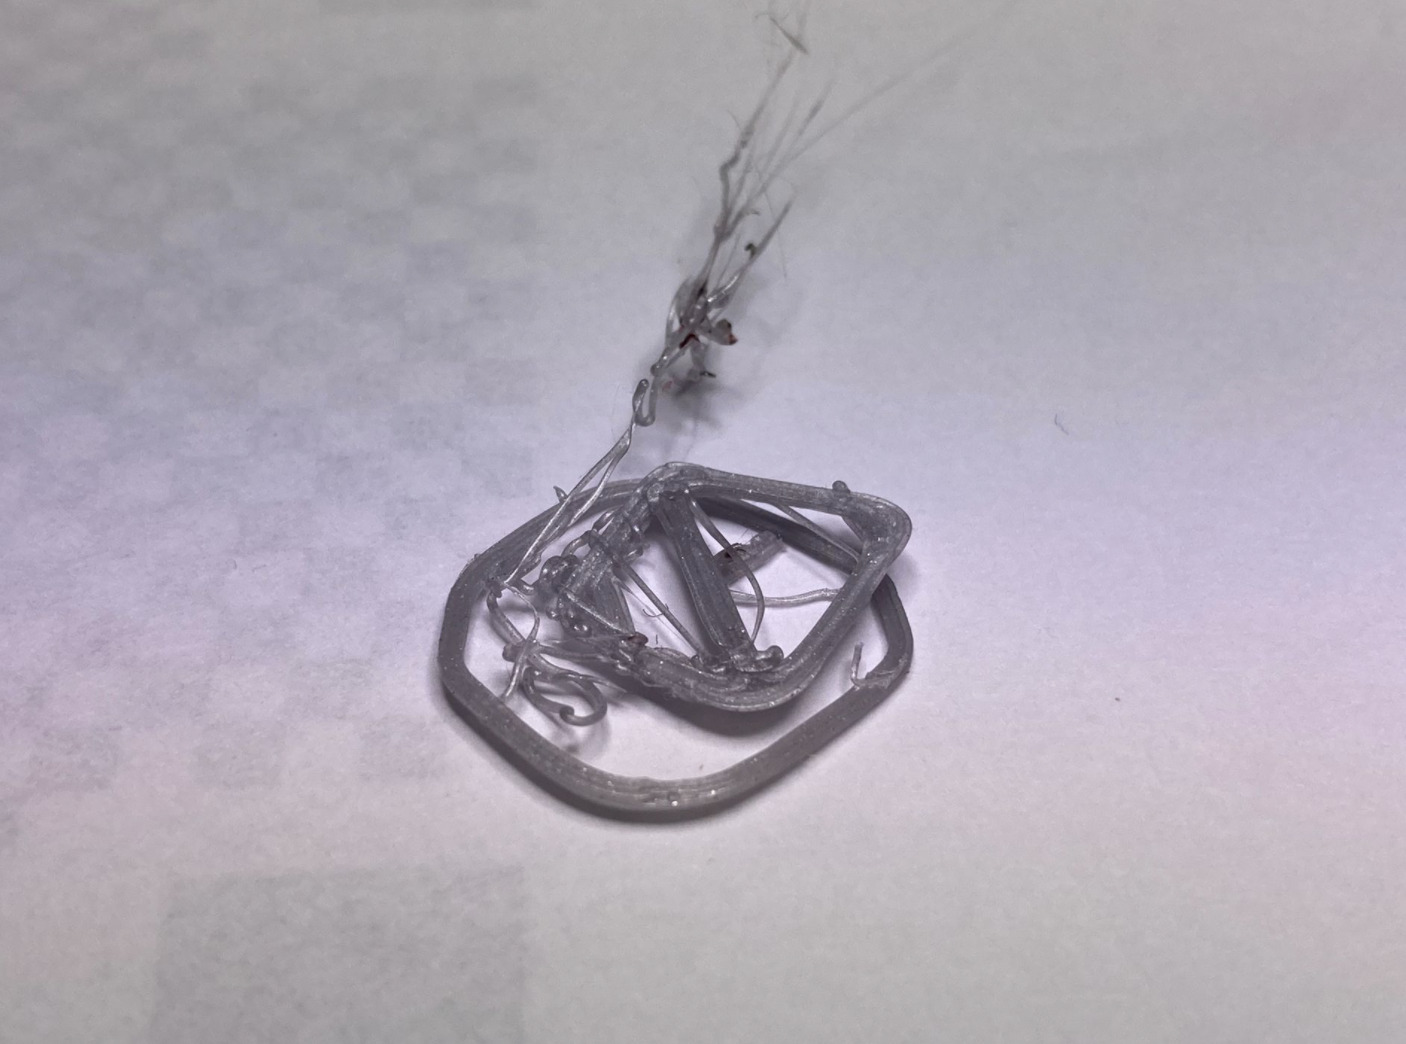
Matrioska
When choosing something which I could 3D Scan and Print, I wanted to choose an object where a piece was missing or needed to be reconstructed.
I found a Matrioska. These pieces normally always have missing parts - and especially the tiny ones - so I opened mine and discovered that actually the Matrioska was missing much more pieces rather than expected.
I decided then to scan it and make a print of the last tiny missing piece. Attached the results:
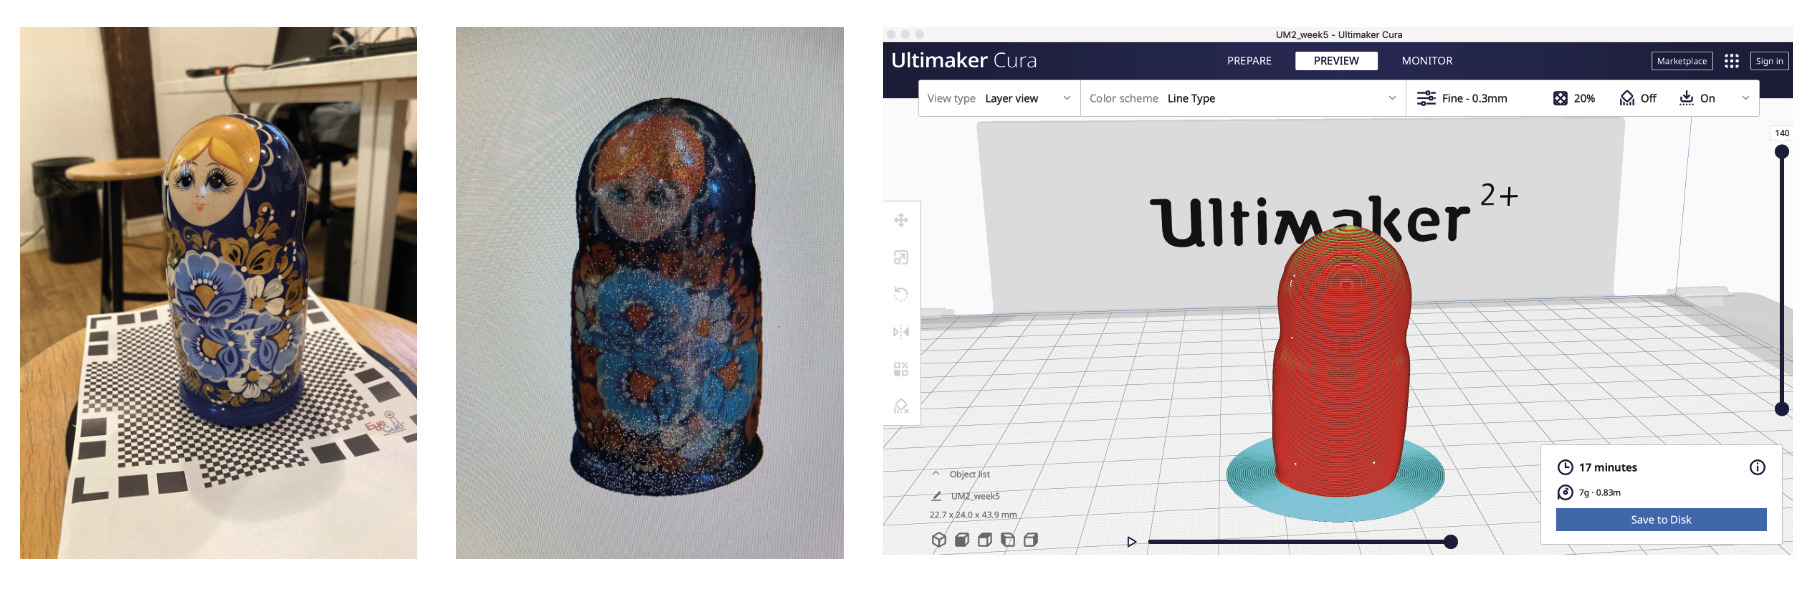
When printing it, I did not have problems either when setting up the Ultimaker 2+ machine or with the design slicing. But When the object was finally done, I tried to stick it out from the crystal bed and I broke into two parts.
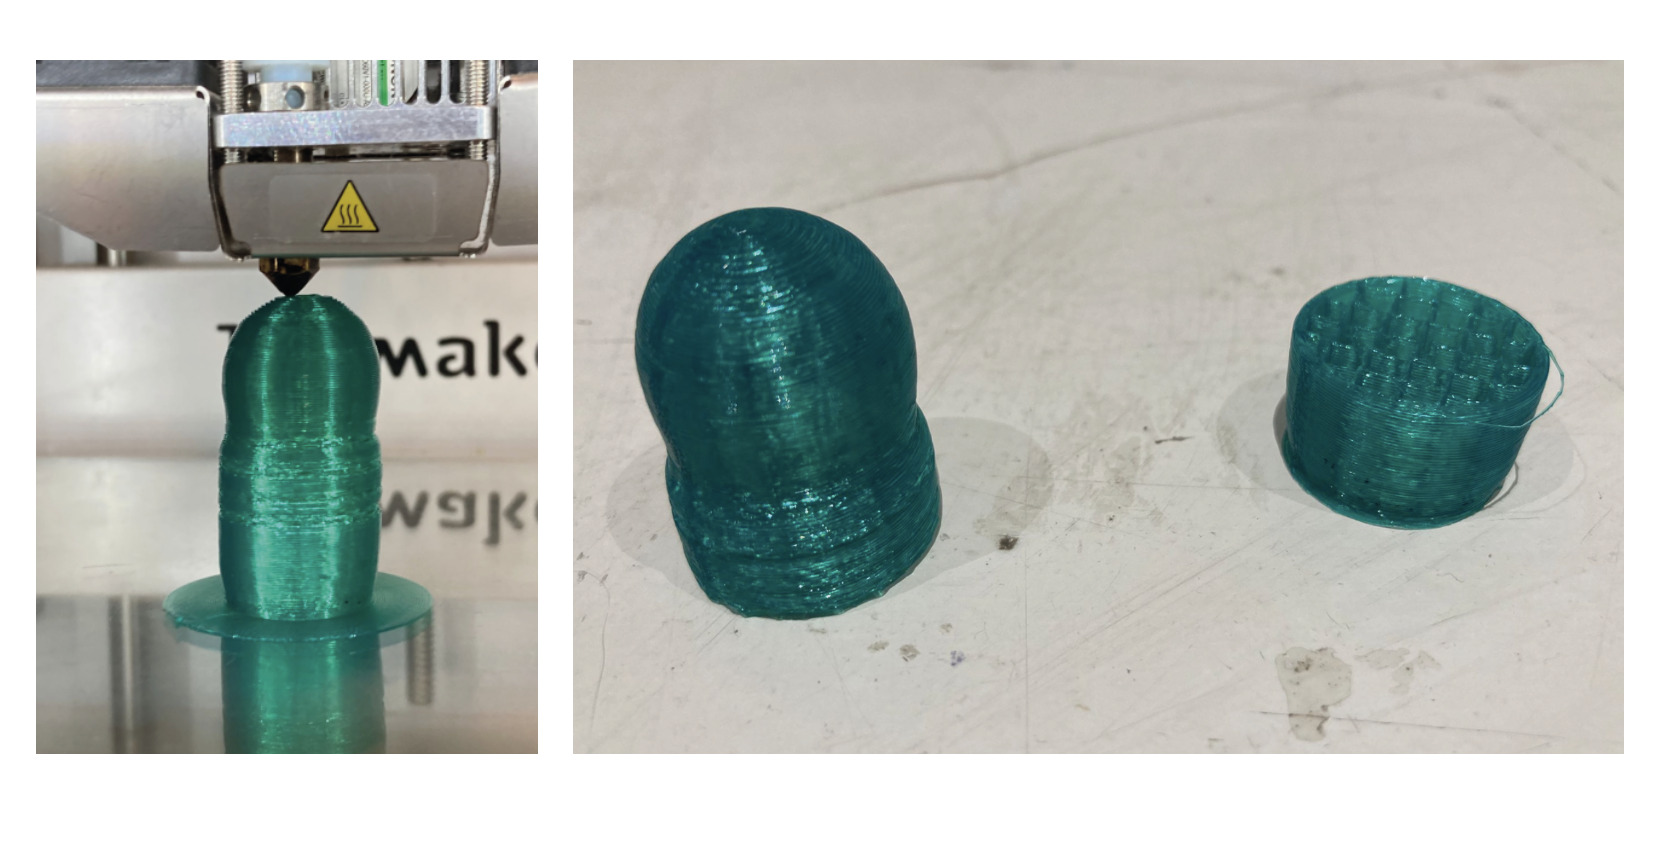
This happened because the 3D Matrioska Scanning was not uniform in all its parts, so there were fragile sections of the piece which were not printed properly.
Retrospective 🤔
3D Printing
Due to my experience with two of the machines that we had in the Fablab, the PRUSA one seems to be a better option to work with since it’s more intuitive, gives fewer problems when setting it up, and has a big community of people with whom share your experience, problems, and innovations.
I already had in mind buying a 3D printer for a while, and I think I will go for the PRUSA one.
During this week, I also discovered that my original final project idea of making a desktop machine to extrude bio-filament may not be the most optimal option. In fact, when the filament’s diameter is not uniform, the printer’s nozzle normally blocks and the 3D printers don’t work properly.
Since my purpose is to be able to 3D print bio-materials at home, and thanks to the knowledge I acquired during this past week. I think a good idea could be to build an OPEN SOURCE upgrade of my PRUSA printer to a 3D BIO-printer.
3D Scanning
I had a kind of love and hate feeling for this technique. I think the idea behind it is very handy for some projects, even for artistic purposes would be such an interesting technique to try out!
But when operating with it, it takes a long time to make a propper scan of an object, and not all shapes and materials are possible to be scanned both by the Sense or the Qlone app.
Out of this week’s experience, I consider that 3D Scanning should have an improvement in the technique to reach its purpose in an efficient way.