15. Interface and application programming
TODO
- individual assignment:
write an application that interfaces a user with an input &/or output device that you made
- group assignment:
compare as many tool options as possible
This week I used Arduino + Web Serial + p5js to do the assignment.
Idea
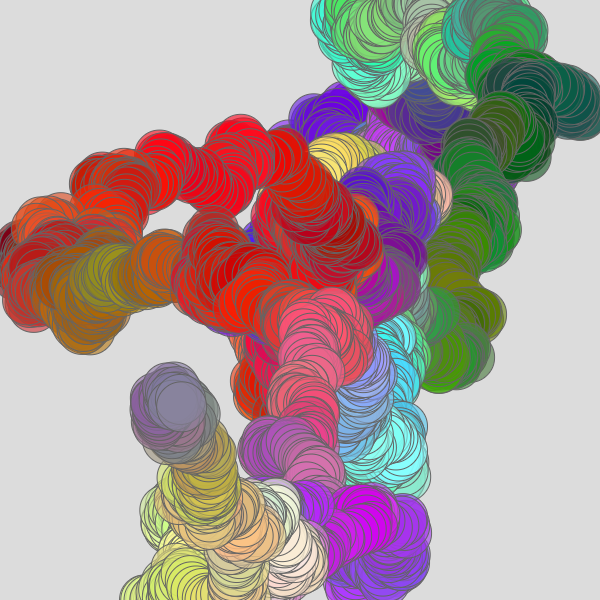
This week I want to connect the dance robot with an web interface. The web page will record all movement runs a small servo robot.
The movment will be like this following picture. It was written by p5js.
Web Serial
The Web Serial API provides a way for websites to read from and write to serial devices.
Using Web Serial enable us to combine Arduino with a creative, fast-changing context: the Web. Web Serial is used by the web browser, it means we can have access to all kinds of different web APIs like p5js, ml5js, paper.js, three.js, matter.js, and more!
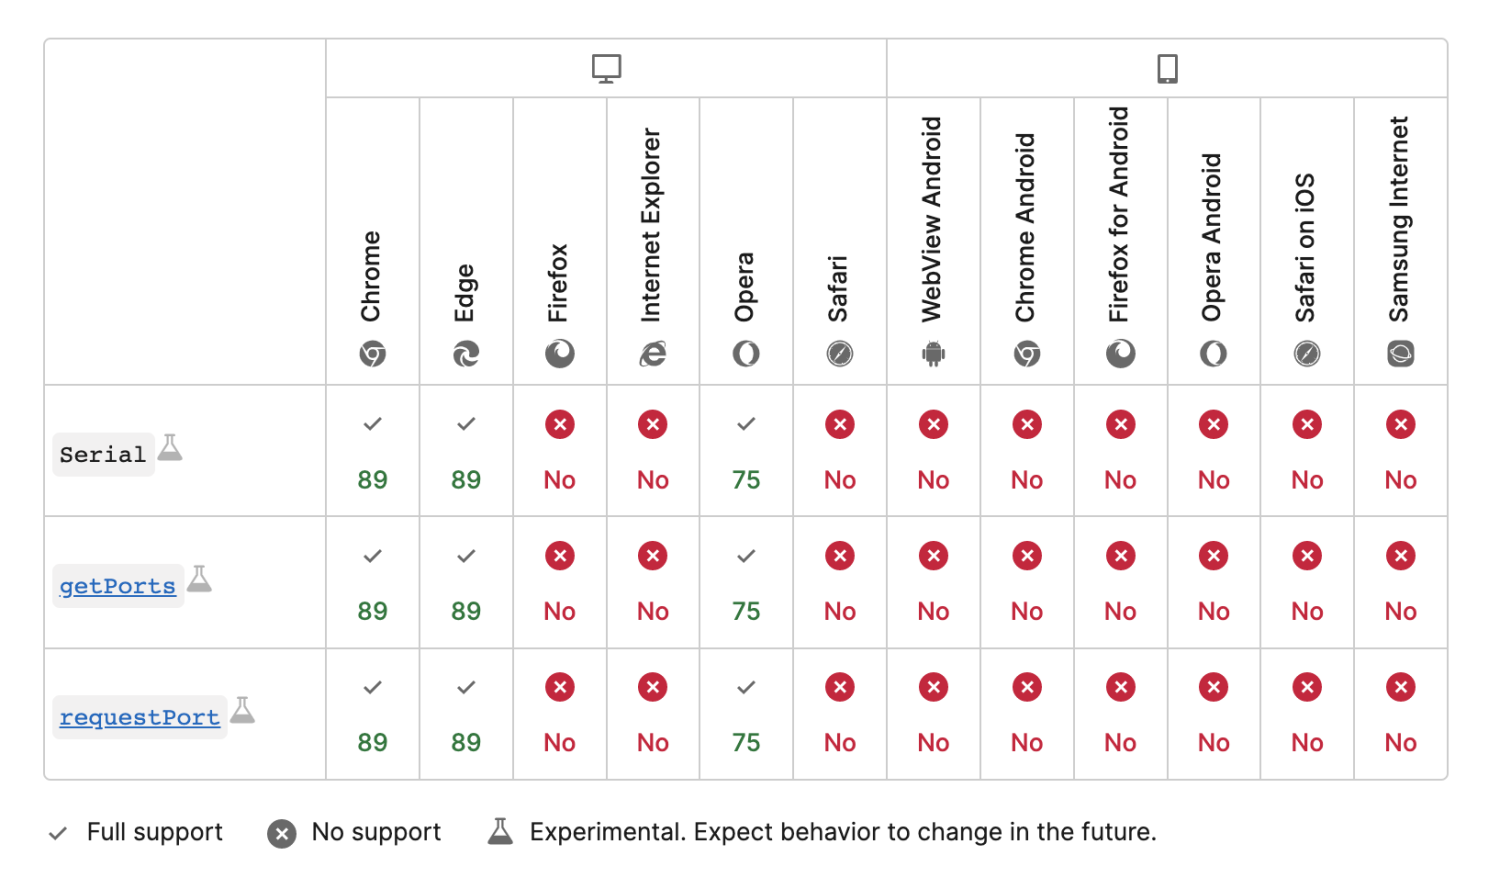
One thing to note is that Web Serial is still a Draft specification. So in many browsers are not supported. Check this page to see if your browser supports. I use chrome, so no problem for me. (2022-05-10)
Learn the example of web serial API here.
p5.js
In 2008, John Resig (the creator of jQuery) ported Processing to JavaScript, which allowed creators to use Processing without a Java plugin (Wikipedia). While an early success—and adopted by teaching programs such as Khan Academy—the port may have come out just a bit early in HTML+JavaScript history. In 2013, Lauren McCarthy (media artist + professor at UCLA) created p5.js, which is now the officially supported JavaScript-based library for Processing and renders natively to the Canvas element. Similar to the original Processing mission, p5.js is:
a JavaScript library for creative coding, with a focus on making coding accessible and inclusive for artists, designers, educators, beginners, and anyone else! p5.js is free and open-source because we believe software, and the tools to learn it, should be accessible to everyone.
To write p5js code, it is super easy to use the online editor p5js.org or p5js.net. It is an open source platform and you can share your online code with others.
The offical start page of p5js : https://p5js.org/get-started/ Some other reference:
- Johannes Preis’ Introduction to p5.js, an excellent introduction to p5.js, the coding editor, basic graphic rendering, and interactivity.
- The plethora of official p5.js examples
- The Coding Train’s Programming with p5.js by Daniel Shiffman who probably produces the best, most interesting, fun, and accessible creative coding videos.
Arduino
With the Arduino code from the Output device week, make some changes:
- Set baud rate to 115200;
- Add Serial print code.
#include <Servo.h>
Servo myservo; // deinfe Servo Object
int pos = 0;
byte x = 0;
void setup() {
pinMode(0, INPUT);
myservo.attach(5);
Serial.begin(115200); //set baud rate to 115200
}
void loop() {
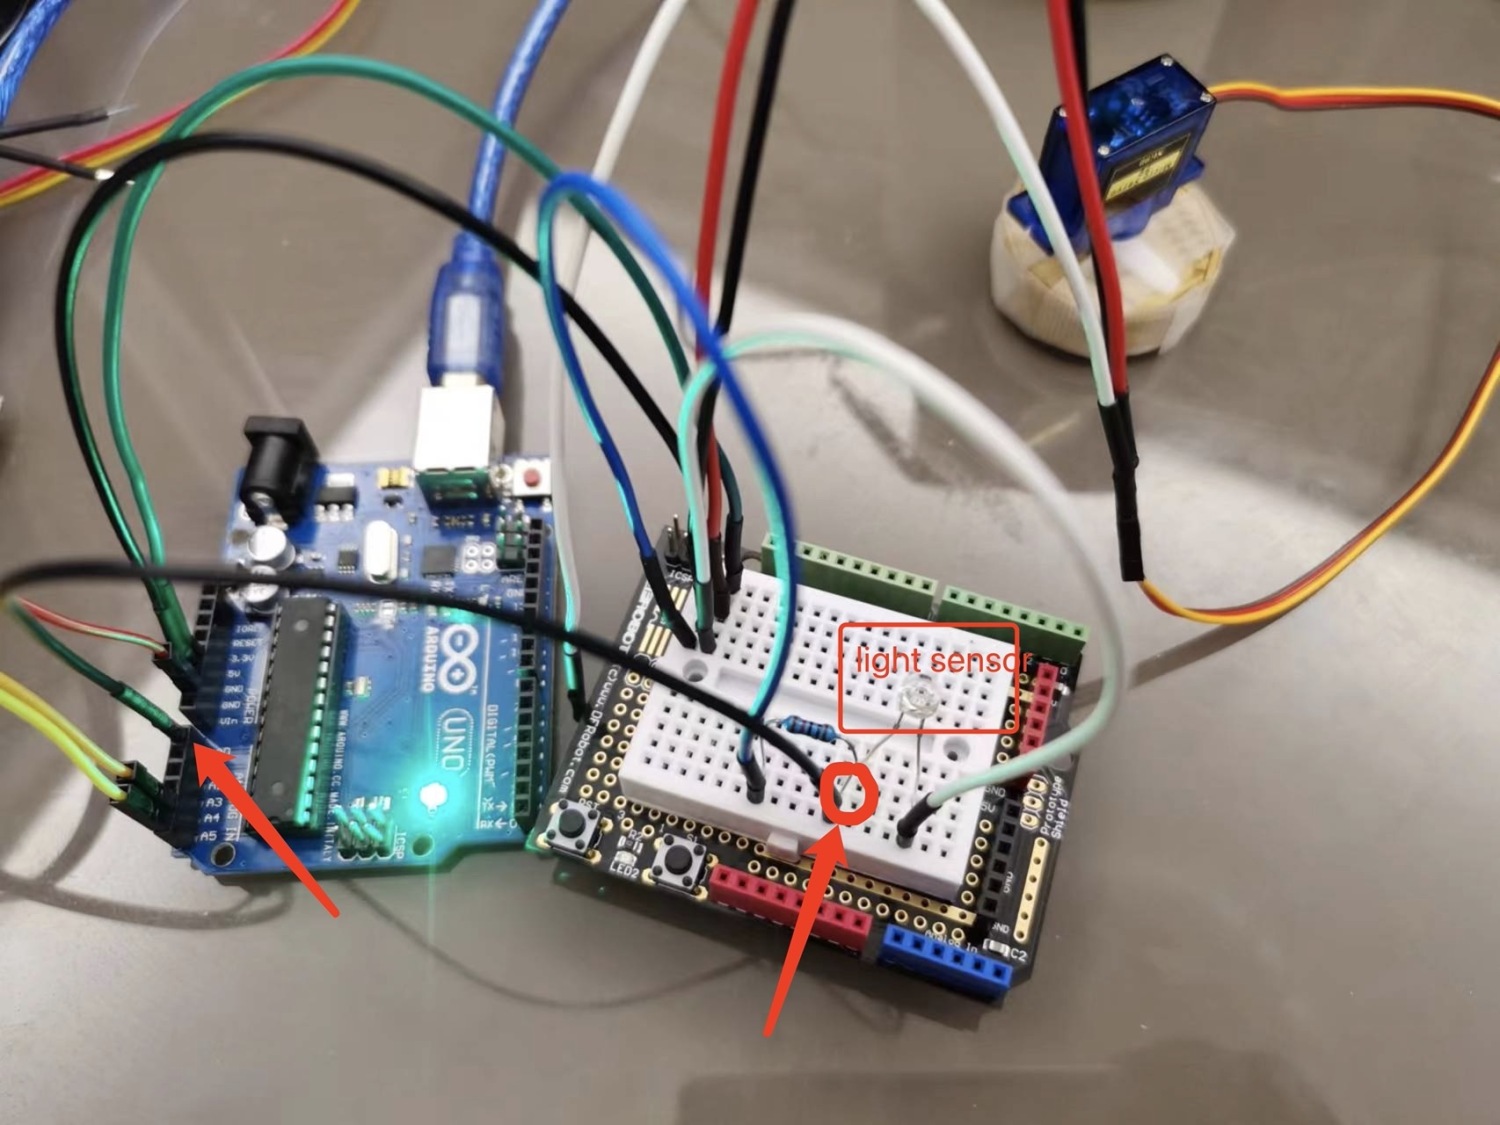
int value = analogRead(0); //Read value from light sensor
value = map(value, 0, 1023, 0, 255);
Serial.println(value);
int pos_ = map(value, 0, 255, 0, 180);
int delay_ = map(value,0,255,20,0);
for (pos = 0; pos <= pos_; pos ++) {
// in steps of 1 degree
myservo.write(pos);
delay(delay_);
}
for (pos = pos_; pos >= 0; pos --) {
myservo.write(pos);
delay(delay_);
}
}
The serial would printout the analog value from light sensor.
Interface Programming
Create Project
Create an empty project in p5js editor, the editor will automticaly create index.html, css\style.css, and sketch.js files.
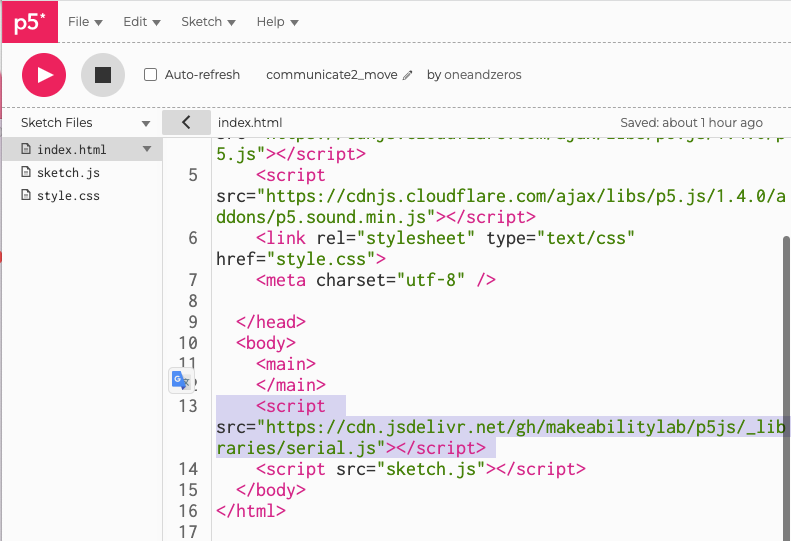
Add the serial.js to index.html, make sure you add in serial.js to the
or : <script src="https://cdn.jsdelivr.net/gh/makeabilitylab/p5js/_libraries/serial.js"></script>
After this, run the program, it will be like this:

Use web serial
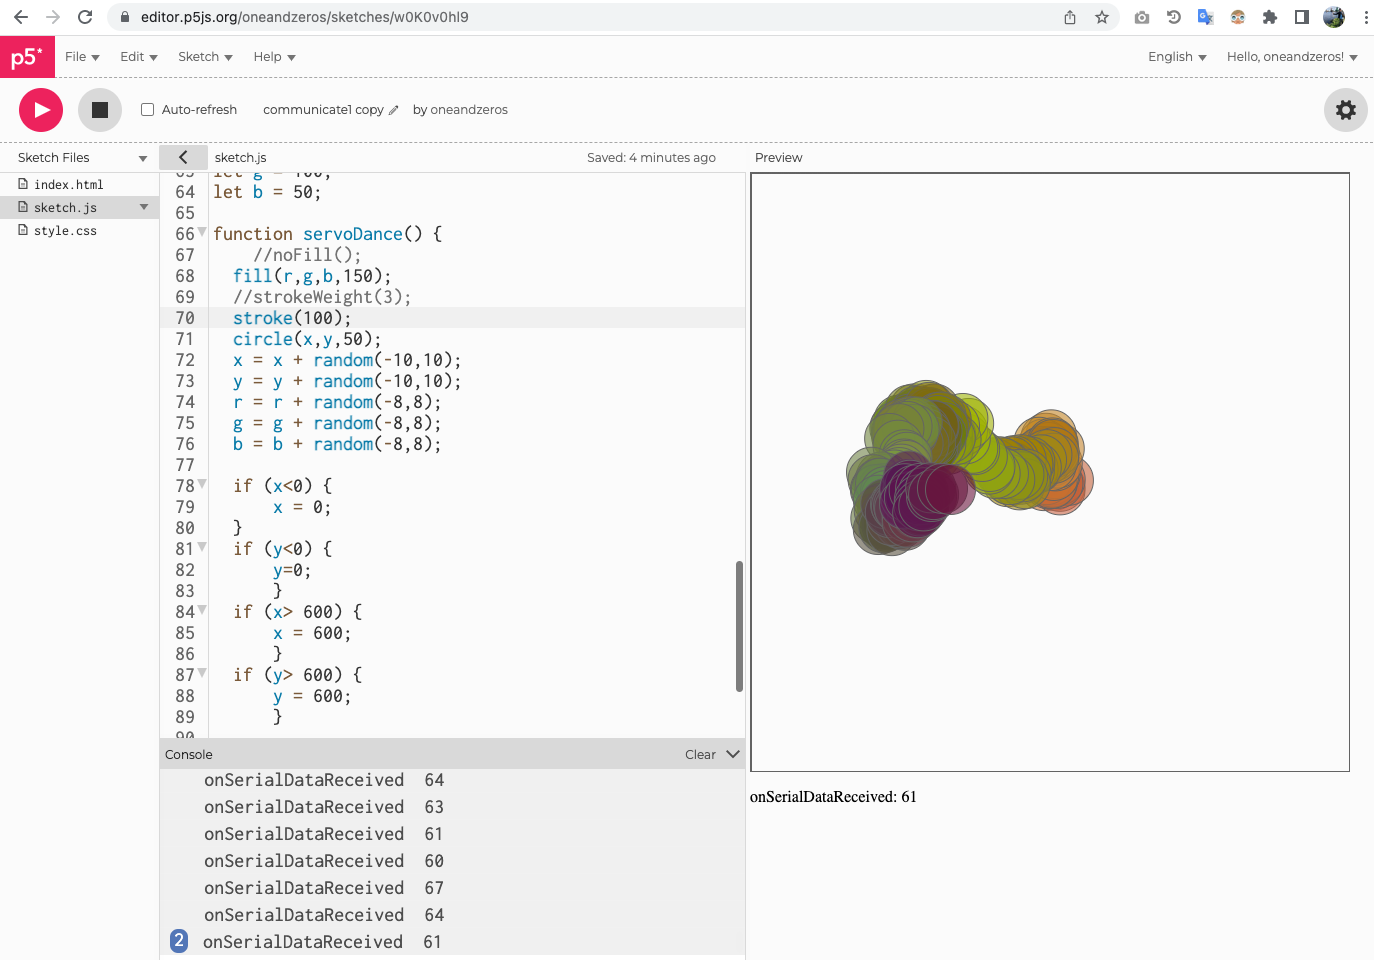
https://editor.p5js.org/oneandzeros/sketches/w0K0v0hl9
let serialOptions = { baudRate: 115200 };
let shapeFraction = 0; // tracks the new shape fraction off serial
let serial; // the Serial object
let pHtmlMsg; // used for displaying messages via html (optional)

function setup() {
  createCanvas(600, 600);

  // Setup Web Serial using serial.js
  serial = new Serial();
  serial.on(SerialEvents.CONNECTION_OPENED, onSerialConnectionOpened);
  serial.on(SerialEvents.CONNECTION_CLOSED, onSerialConnectionClosed);
  serial.on(SerialEvents.DATA_RECEIVED, onSerialDataReceived);
  serial.on(SerialEvents.ERROR_OCCURRED, onSerialErrorOccurred);

  // If we have previously approved ports, attempt to connect with them
  serial.autoConnectAndOpenPreviouslyApprovedPort(serialOptions);

  // Add in a lil <p> element to provide messages. This is optional
  pHtmlMsg = createP(
    "Click anywhere on this page to open the serial connection dialog"
  );
}

function draw() {
  noFill();
  rect(1,1,599,599);
}

function onSerialErrorOccurred(eventSender, error) {
  console.log("onSerialErrorOccurred", error);
  pHtmlMsg.html(error);
}

function onSerialConnectionOpened(eventSender) {
  console.log("onSerialConnectionOpened");
  pHtmlMsg.html("Serial connection opened successfully");
}

function onSerialConnectionClosed(eventSender) {
  console.log("onSerialConnectionClosed");
  pHtmlMsg.html("onSerialConnectionClosed");
}

function onSerialDataReceived(eventSender, newData) {
  console.log("onSerialDataReceived", newData);
  pHtmlMsg.html("onSerialDataReceived: " + newData);
}

function mouseClicked() {
  if (!serial.isOpen()) {
    serial.connectAndOpen(null, serialOptions);
  }
}
Run the program, the browser will pop-up to ask you which serial port to use. Select the arduino port.

Record movements
// dance part

let x = 300;
let y = 300;
let r = 200;
let g = 100;
let b = 50;

function servoDance(newData) {
  //noFill();
  fill(r,g,b,150);
  //strokeWeight(3);
  stroke(100);
  let d = 50;
  circle(x,y,d);
  let range = map(newData,0,255,0,d/2);

  x = x + random(-range,range);
  y = y + random(-range,range);
  r = r + random(-range,range);
  g = g + random(-range,range);
  b = b + random(-range,range);

  if (x<0) {
    x = 0;
  }
  if (y<0) {
    y=0;
  }
  if (x> 600) {
    x = 600;
  }
  if (y> 600) {
    y = 600;
  }

  r = r>255? 255:r;
  g = g>255? 255:g;
  b = b>255? 255:b;

  r = r<0? 0:r;
  g = g<0? 0:g;
  b = b<0? 0:b;
}
The movements and color will change when the motor moves. I map the light senor value [0,255] to [0,radius], use this value as the random source of each movement.