4. Computer controlled cutting|Week 3
This week which was dedicated to computer controlled cutting we used machines such as a vinyl cutter or a laser cutter.
Assignment
Group assignment: Characterize your lasercutter’s focus, power, speed, rate, kerf, joint clearance and types.
Individual assignment: Cut something on the vinylcutter. Design, lasercut, and document a parametric construction kit. accounting for the lasercutter kerf, which can be assembled in multiple ways, and for extra credit include elements that aren’t flat.
Vinyl cutter
At TechWorks we have the Roland vinyl cutter. The software that works with this type of machine is CutStudio.
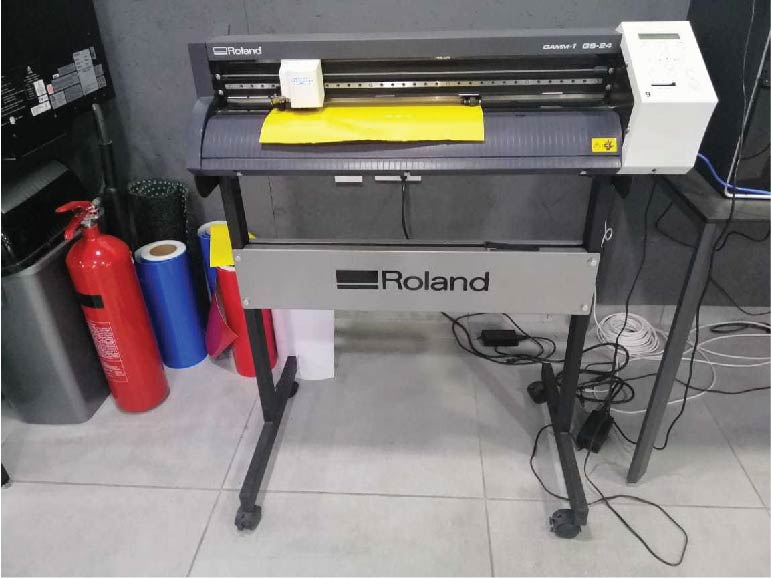 Vinyl machine, Roland CAMM-1 GS-24
Machine Parts& Operating-Vinyl cutter :
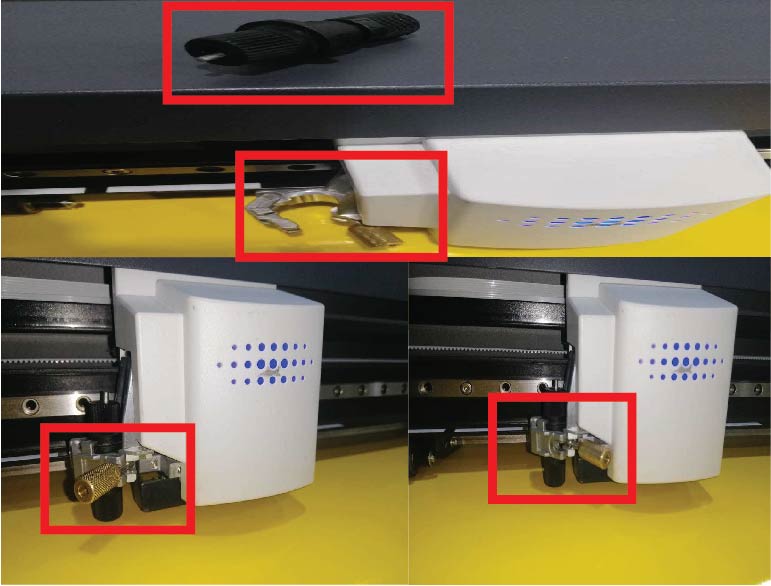
1.Cutting blade: The cutting blade should be sharp to have a quality cut. You can push the blade from the back end of blade holder to check the blade condition.
Make sure that the circular edge in the blade holder is in its right place and held by the metal part as shown in the images Below. The image in the lift shows a wrong placement of the blade. Tight the holder screw to hold the blade holder firmly.
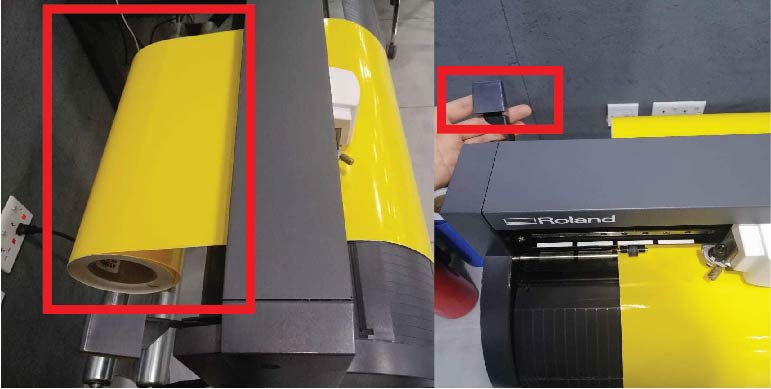
2.Placing the Vinyl Roll: The vinyl roll is placed on the bars in the back side of the machine.
Step 1: We manually inserted the vinyl under the machine rollers.
Step 2: To define the cutting width, rollers should be moved in front of white bars on the machine.
Step 3: Move the holding lever or handle to close position to hold roll in position.
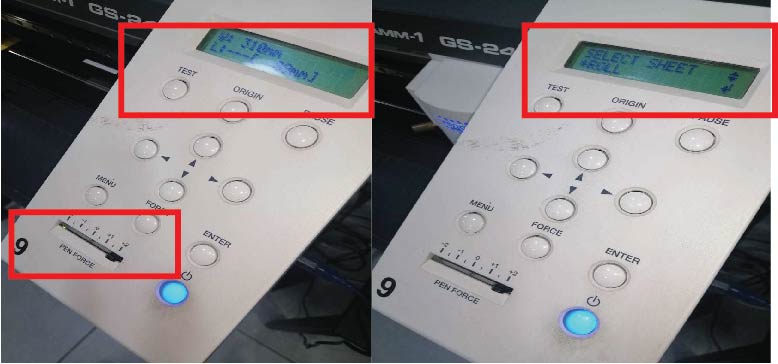
3.Preparing for cutting:4 Step 1: Turn the machine ON Step 2: Now the carriage is at origin. You can also setup the origin manually by a long press on “Origin” button. Step 3: Select the sheet, ours was “Roll”. Note: The machine will calculate working width using rollers positions. Using the arrows on control board, you can move sheet manually. Recommended: The pen force should be tested to make sure that the blade will cut the sticker part of vinyl but not the back paper. To do this press on “Test” Note: in this assignment a pen force of +2 was the correct setting.
Vinyl Character cut: I used this site to download the pictures in SVG format, then edited them on Inkscape.
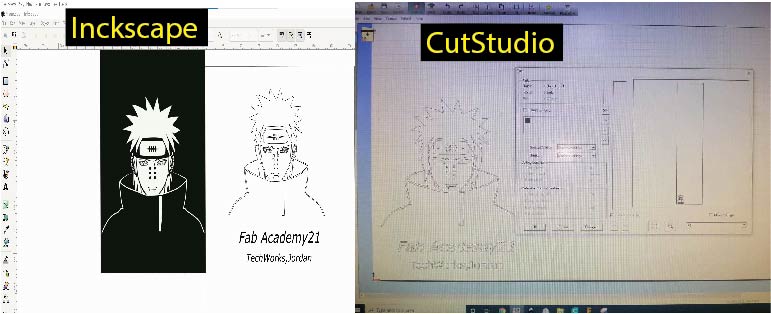 Then I loaded the file into Cutstudio, then adjusted the height and width with the aspect ratio of the file, then I printed with the machine settings.
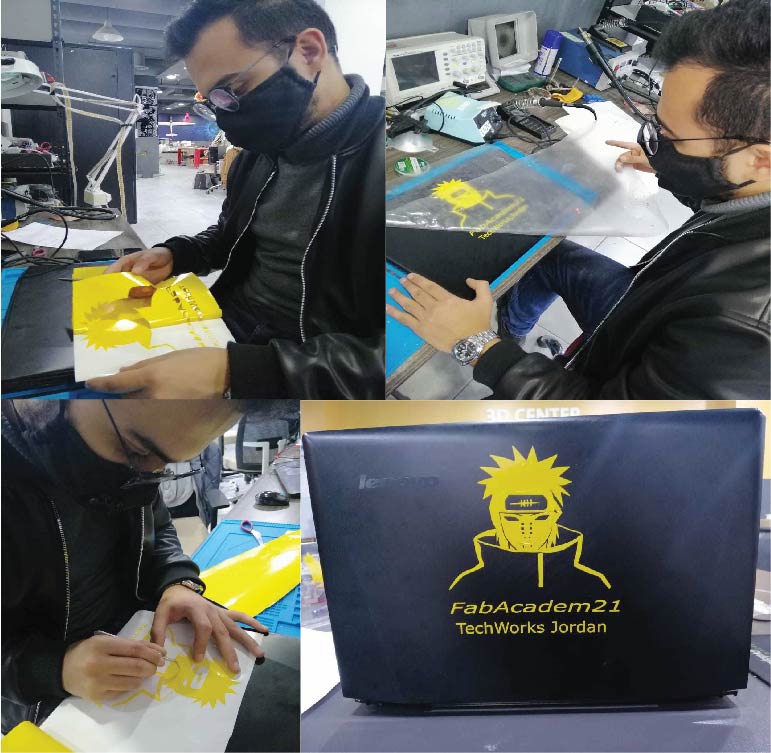
The output cut on yellow vinyl:
I out a paper to stick it on the back of my laptop, I applied pressure to make the design stick well to the tape. Then peal it out, as shown the below images.
Hero shoot !
CNC LASER Cutter :
Machine: trotec speedy 400.
This part of the group assignment was about the trotec speedy 400 Laser engraving machine.
Before using any machine in general you should read the data sheet before operating.
Safety Instructions: Safety cautions must be considered while working on Laser cutting machines. Please understand and apply all caution signs before start working. Safety rules and warnings: - Protect eyes and skin by wearing the proper safety glasses. - Risk of fire. - Don’t operate the machine unless the exhaust system is on. - Don’t leave the machine unattended. - While operational always keep the lid closed. - In case of fire, head to the nearest emergency exit.
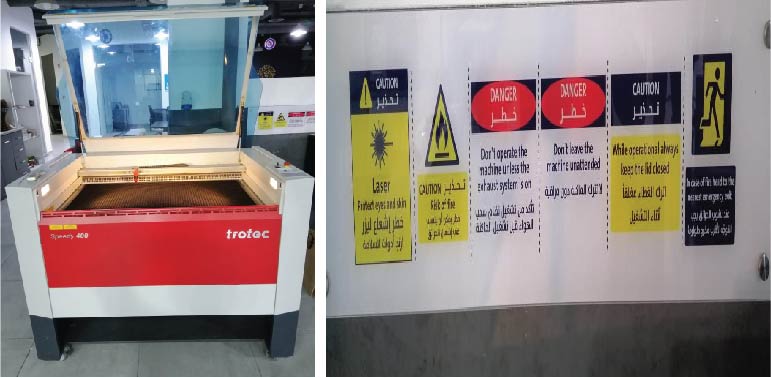 Machine used: trotec. Speedy Laser Engravers; Speedy 400.
Data sheet: Speedy 400.
Laser Software: Jobcontrol.
Machine operation - Running:
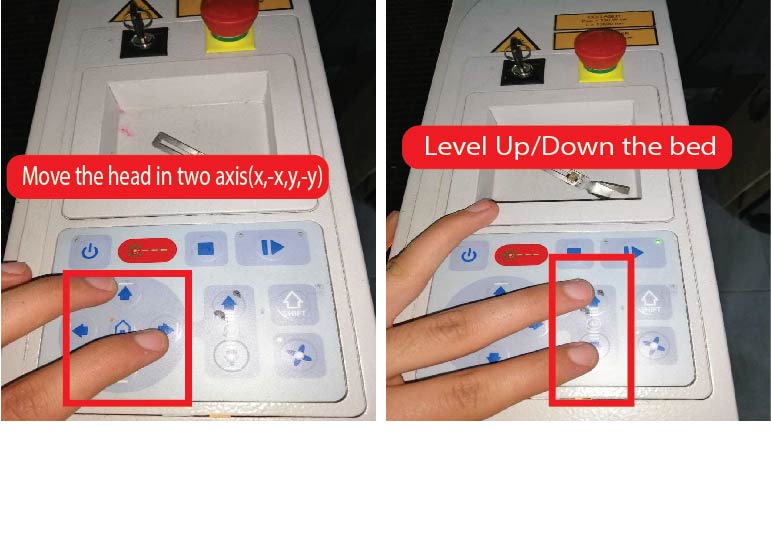
When turning on the machine, it will start calibrate to its zero offsets, we press the two buttons UP and DOWN simultaneously for two seconds, the Laser head will move to the top right corner to calibrate X axis and Y axis.
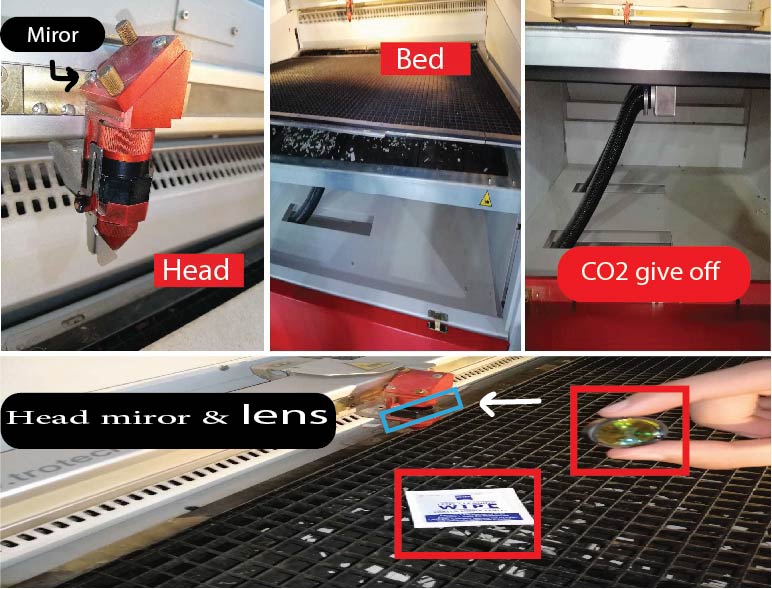
Checking Head Mirror and Lens:
The head mirror and lens should be checked and cleaned periodically. Unscrew the head lens holder and remove the lens. If necessary, clean with the special cleaning wipes and avoid touching with fingers. When you finish put head mirror and lens back to their places.
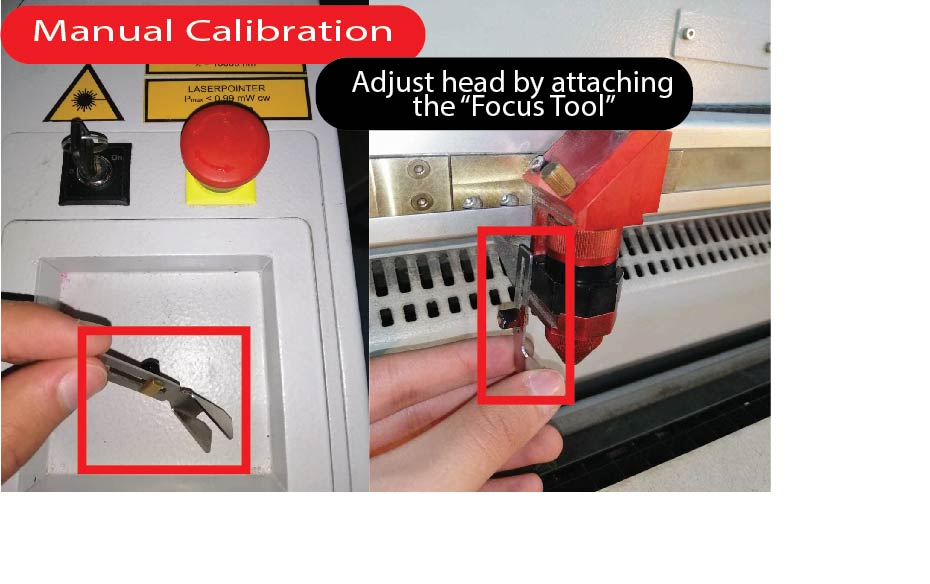
ADJUST THE LASER HEAD:
After putting the piece that we want to cut, we adjust the head height by attaching the Focus Tool to the laser head in the working area, then press down until the Focus Tool hit the surface or barely detached from the laser head.
2D DESIGN AND CUTTING:
laser Software: Jobcontrol
2D software: Inckscape
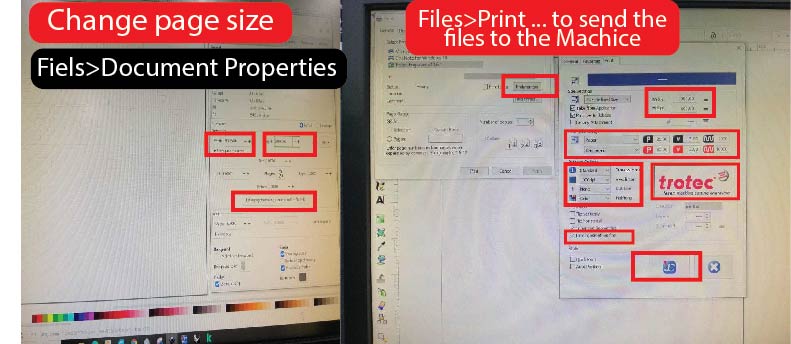
Sending Job to Laser Machine Software:
Using “Print” command and selecting “trotec speedy 400”, job is ready to send to Laser machine software. Open “Printer Preferences” to check on different settings. Select the right “Material Settings”, This will load the color/power/speed settings from the loop up table. The option “Inner geometries first” will make the machine to work from inside out. To save the settings in machine software we clicked on “JC”. Click on “Print”.
By selecting the wanted test cut, we select the print like a normal printer, but when we click on properties, it will prompt a window to the machine’s program Jobcontrol.
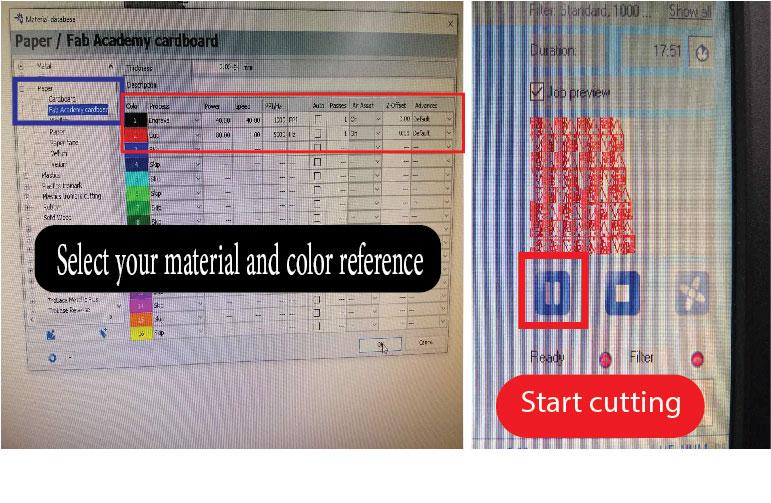
I select from the material settings for example:
Paper
Carboard
and the process options keep it standard, then hit the Jobcontrol’s logo to export it to Jobcontrol software. Then we move the kerf test cut to snap to laser’s head location, which gets updated in the program.
I used the default settings to cut the board, and the setting was for the machine:
Engrave: Power: 40%, Speed: 40%, and frequency: 500
Cut: Power: 60%, Speed: 01%, and frequency: 5000
And the following was manually inputted to the program, where Black for engraving and it was similar to the cutting setting but with more speed, and Red color for Cutting.
Starting Cutting: Click on “Connect” to connect to the machine. Drag you job from the list to the right and drop in working area Note: click on the “eye” to view our job from the upper commands Finally, move your job, and when we are ready click on “Start”.
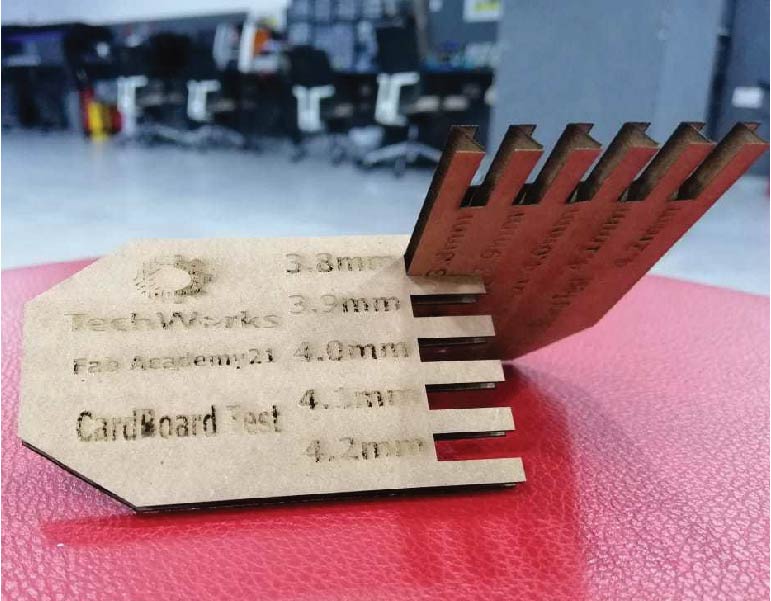
Group Assigment:
Results: we completed a “press fit” guide for CardBoard material. For 4.0 mm cardboard, I found that 3.8 mm cut gives a good hold. From this test we concluded the “kerf” value for 4.0 mm cardboard is 0.1 mm
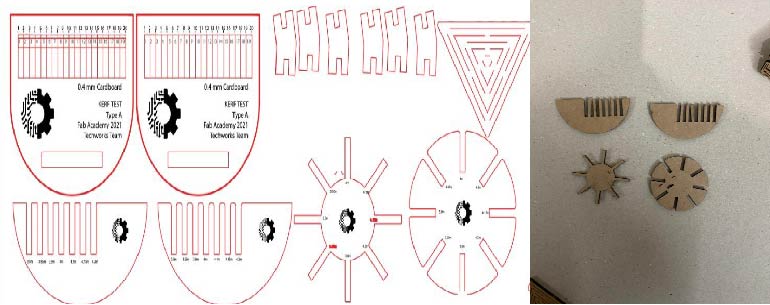
We also made a “kerf test for Cardboard” with this pararmeters: Power :100 Velocity: 10
And This sittings didn’t work in good wat, then I changed it to
Power:100
Velocity:5
Finally, It worked. 3.8 mm cut gives a good hold.
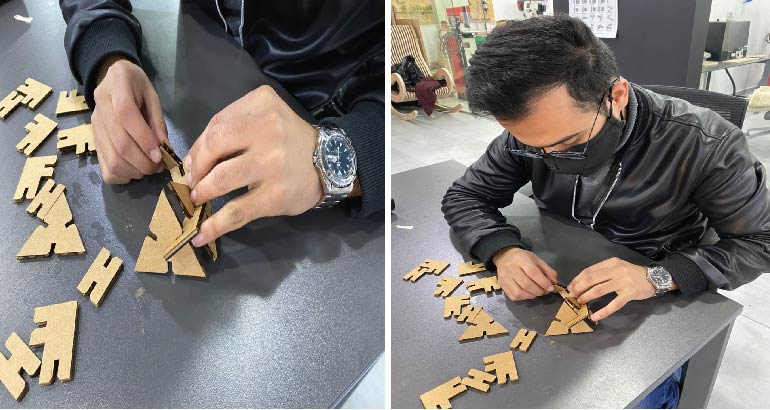
Parametric construction kit:
This week I used SolidWorks to make the kit. I worked on building a construction kit for making many things like characters and cubes it can be modulated. I used SolidWorks to build system components. The design of each block is parametric. Block parameters were defined in “Global Variables” in SolidWorks.
First I made a triangle with three sides, and I made a Triangle with width of 70mm and 62.57mm length.
I made chamfer to all the edges of the gaps in the models, then I exported it as DXF.
 NoteL that when I change the height of the triangle the other changed as well.
Joints:
I also made a joint (H& Symbol) parameters: H symbol > 25.40mm width, 38.10mm height. L symbol > 50mmmm width, 38.03mm height.

Files to download:
At the end of the cutting of my kit :
While assembly and trying to create a spectacular stuff :)
Hero Shoot:
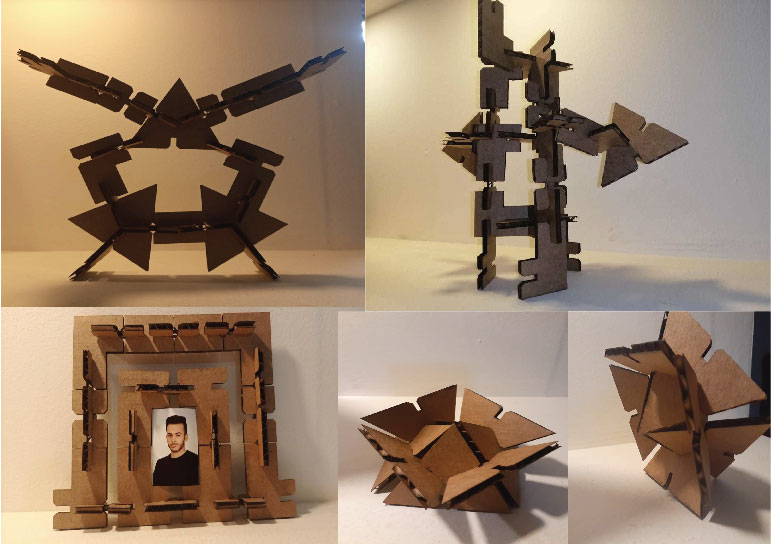
Finally, these were one of the shapes that you can do it with this Kit, hope you like it.