2.Project management|Week 1
What did I learn this week?
| To do lists | Y/N |
|---|---|
| Overview of version control | ✓ |
| Overview of Git | ✓ |
| Initialise a new repository | ✓ |
| Add remote and push/pull | ✓ |
| SSH Key | ✓ |
| Git commit messages | ✓ |
| Branching | ✓ |
| Making a website using markdown language | ✓ |
| Additional things I learned | Y/N |
|---|---|
| HTMIL | ✓ |
| CSS | ✓ |
Overview:
This is the first time I have designed a website using “Markdown”. I had a lot of problems, but with patience and perseverance I’ve been able to get through it.

What is Git?
Git is the most commonly used version control system. Git tracks the changes you make to files, so you have a record of what has been done, and you can revert to specific versions should you ever need to. Git also makes collaboration easier, allowing changes by multiple people to all be merged into one source.
Git book help me a lot to understand it.
So lets start create our first website
Step one:
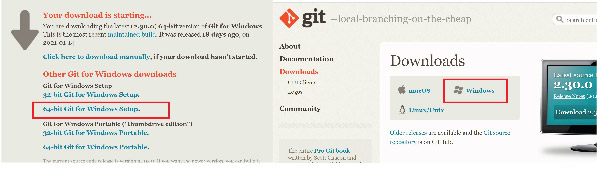
I have downloaded Git from for Windows 64-bit.
Here I started installing the program in my PC . C:\
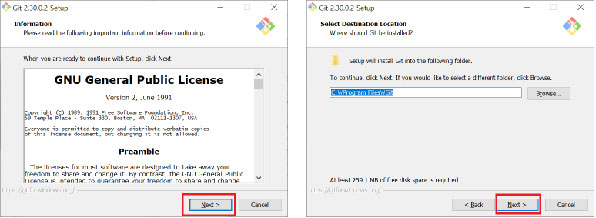
Then I have chosen to install using the recommended option so third-party software.
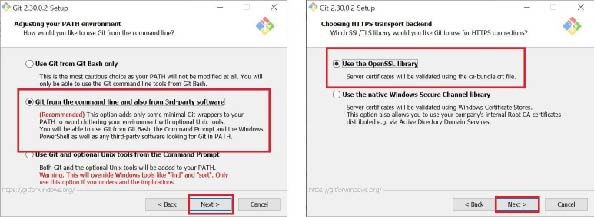
third-party meaning: For example, you may download an app that helps you schedule workouts with friends. This app may request access to your Google Calendar and Contacts to suggest times and friends for you to meet up with
Step 2:
I opened Git bash window and did this fellow steps.
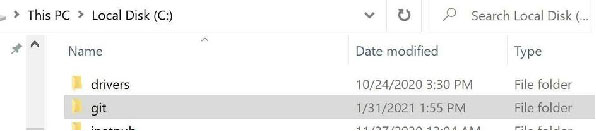
- First: I created a directory C:\git to save my repository . This tutorial was useful
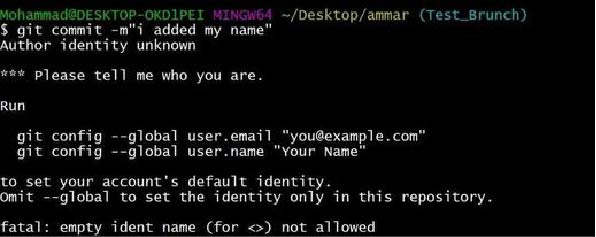
- Then I configured my username and email on Git Bash by using:
Configure email:
git config --global user.email "my email"
Configure username:git config --global user.name "my user name".
`

Step 3:
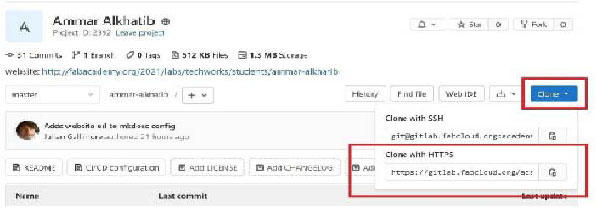
CLONE MY REPOSITORY:
- First go to gitlab and login, to get the URL code.
- Then press on "clone", and choose Clone with HTTPS.
Use this tutorial if you have any problem
- In Git command I used
cd gitto work inside the directory created. - In Git command I used
git clonecopied URL** to clone my repository with the name as used in the cloud, which is"ammar-alkhatib".
git cd
git cd /c/
- Using
cd ammar-alkhatib, now I am working inside the cloned directory “ammar-alkhatib”.

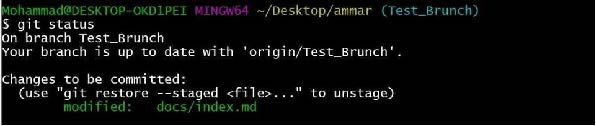
Note: By typing git status it will give me the information about adding or changing or deleting files/folders as shown in the image.
git status
To upload the files, we type:
git add . ///adds a change in the working directory to the staging area. It must be done every time we make changes to the file.
Then use git commit to commit (save) the staged files: To record the changes. Git add with git commit are used to track project versions.
git commit -m"your comment"
- Use command
git status\\ to help what do next git status.
- Finally use command git push \\ to upload the change: Push the changes in our local repository to the remote one which is Gitlab in our case.
Step 4:
Atoms

I downloaded Atom which is a markdown editor from its official to start adding my documentation.

the image above shonw ATOM from the inside while I was working.
What is Markdown?
-
Markdown is a lightweight markup language that you can use to add formatting elements to plaintext text documents.
-
In an application like Microsoft Word, you click buttons to format words and phrases, and the changes are visible immediately. Markdown isn’t like that. When you create a Markdown-formatted file, you add Markdown syntax to the text to indicate which words and phrases should look different.
Why I Use Markdown?
-
Markdown can be used for everything. People use it to create websites, documents, notes, books, presentations, email messages, and technical documentation.
-
Markdown is platform independent. You can create Markdown-formatted text on any device running any operating system.
-
Markdown is everywhere. Websites like Reddit and GitHub support Markdown.
I have learnt about markdown using Atom by this website with some tutorials that I took from it in order to use it on my website.
-
Here I listed the important syntax sheet that will help you in the progress :
Markdown Sheet
Element Markdown Syntax Heading # H1 ## H2 ### H3 … ###### H6 Bold bold text Italic italicized text Blockquote > blockquote Code codeHorizontal Rule — Link [title] (https://www.example.com) Image ![alt text ] (image.jpg)
For more syntax read the following tutorial on this wsbsite
Step 5 [Conclusion]:
Uploading local directory into remote repository Using:
-
git
add .: for add changes into staging area. -
commit -m"your comment": saved changes into local directory with a comment for future reference. repository. git status: for checked the status of local directory and staging area. Everything looks good.git push: for uploaded local directory into cloud or remote

Useful links/References: