16. Wildcard week
Goal of the week:
- Design and produce something with a digital fabrication process (incorporating computer-aided design and manufacturing) not covered in another assignment, documenting the requirements that your assignment meets, and including everything necessary to reproduce it.
This week I focused on biomaterials: ‘bio-based’, biodegradable and compostable compounds. It all started with the idea of creating a material that was similar to animal skin in terms of physical characteristics, but which was cruelty-free, had a low environmental impact and was rooted in the Tuscan territory and more specifically in the agricultural sector. The idea was to identify a waste material that was readily available and redirect it towards a new life cycle, carrying forward the concept of sustainability, recycling and circular economy. I therefore concentrated on using grape pomace (waste from wine production), experimenting with different biopolymers and additives as a first step.
TOOLS AND INGREDIENTS
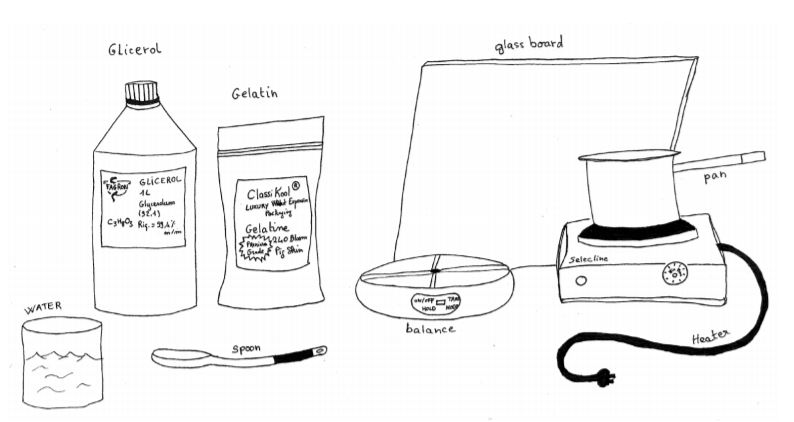
Creating a biomaterial is very similar to cooking. It is a creative act that involves following a defined recipe, modifying part of it or inventing new ones. The basic tools to start with are:
- a saucepan
- a spoon
- scales
- a thermometer
- a cooker
- an aluminium, plastic or glass mold.
The idea behind the creation of bioplastics is very simple and assumes that the basic elements are:
BIOPOLYMER + PLASTICISER + SOLVENT + ADDITIVES + DYE
Biopolymers include:
-
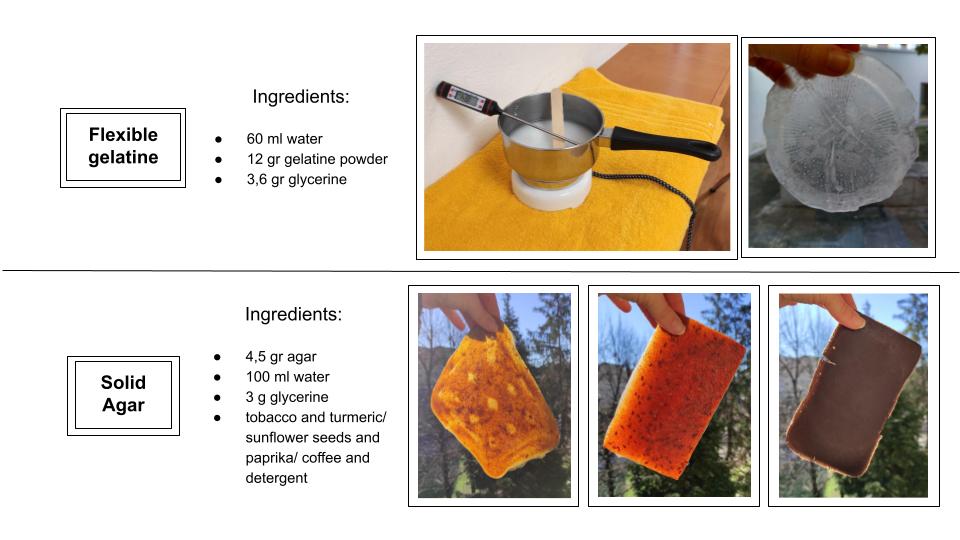
AGAR Polysaccharide used as a natural gelling agent and obtained from red algae. It melts at temperatures between 85°C and 90°C. It is normally used in cooking, especially for the preparation of vegetarian and vegan dishes. A flexible but non-elastic material can be made from it. It loses a lot of water during the drying process, so its thickness and size are greatly reduced, which makes it possible to create very thin biomaterials.
-
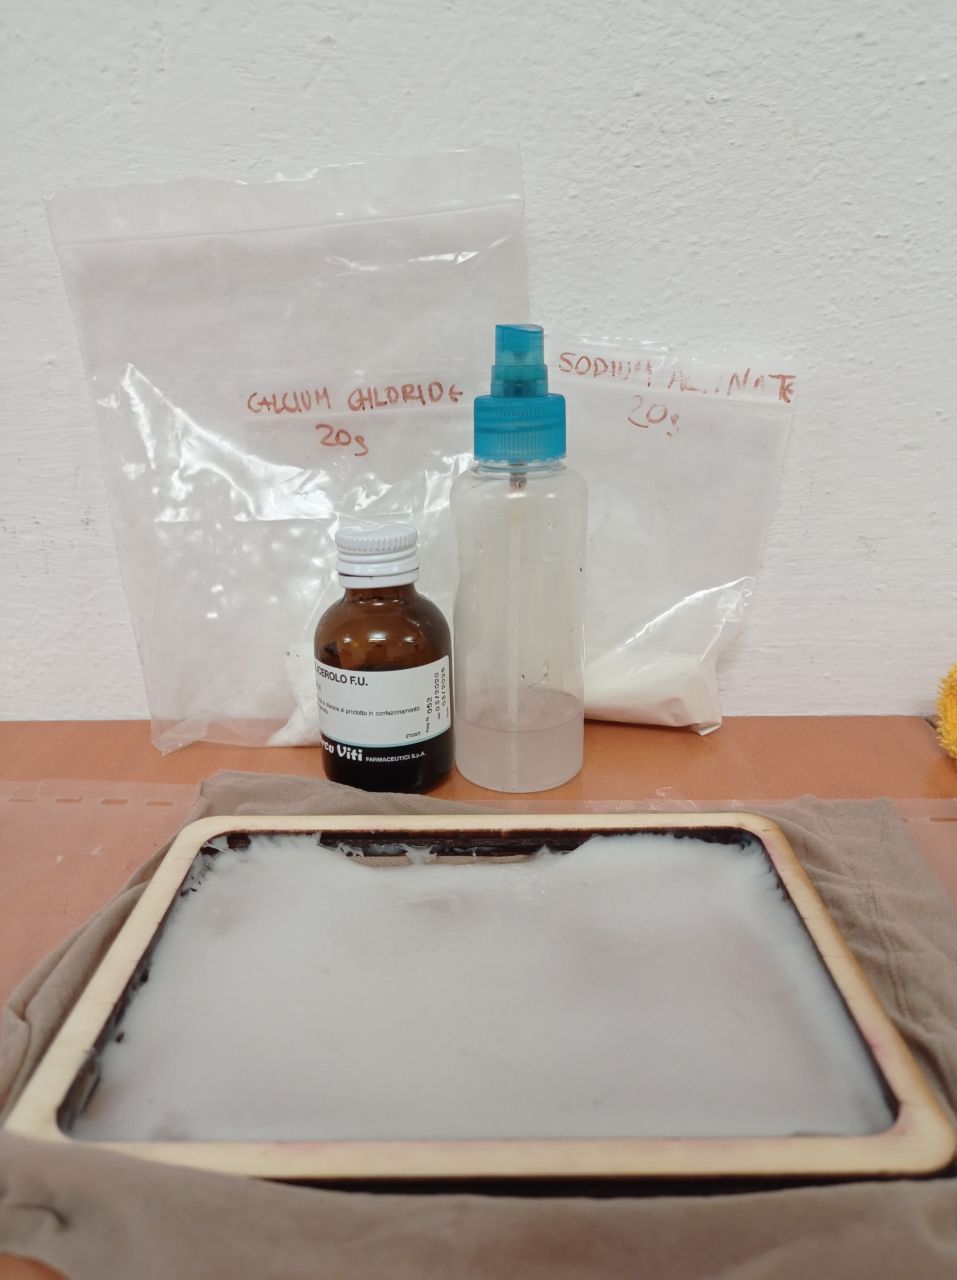
ALGINATE A polysaccharide found in the cell walls of brown algae. Its colour ranges from white to brownish-yellow. It is sold in filamentous, granular or powder form. It is used as a thickener and stabiliser in the food, pharmaceutical and cosmetics industries. It is resistant to high temperatures (up to 150°). In the creation of bioplastics, alginate is always accompanied by a mixture of calcium chloride which acts as a hardening agent.
-
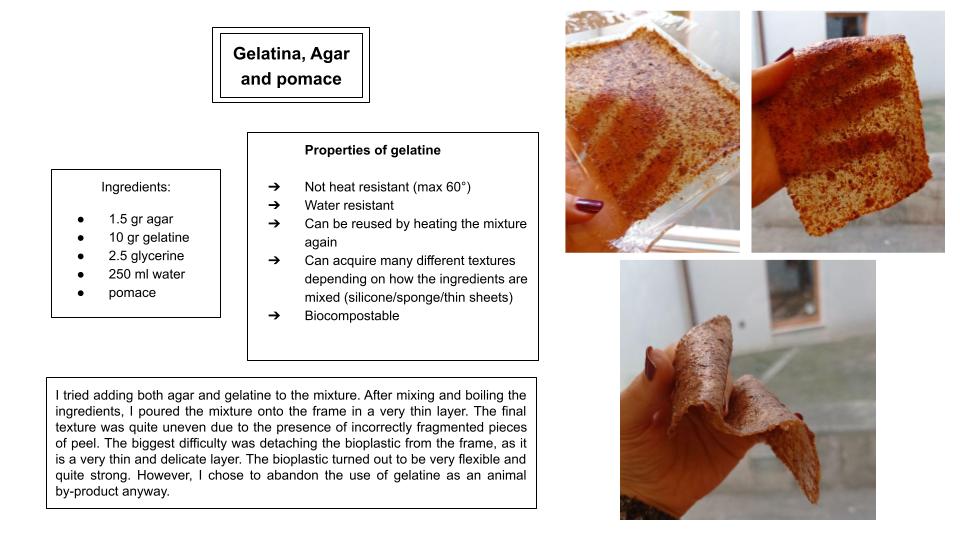
GELATINE This is obtained by extraction in hot aqueous solution from animal connective tissues by hydrolysis. It is not resistant to high temperatures, in fact it melts at 60°. This makes it easy to reuse and recycle the material.
-
STARCH It is obtained from the maize kernel by a wet milling process and takes the form of a very fine white powder.
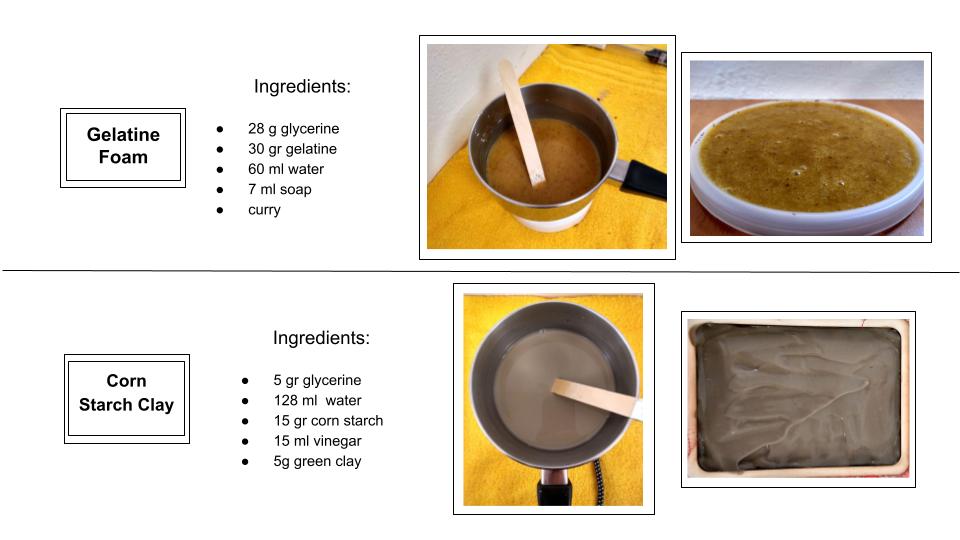
GLYCERINE, an organic compound found in lipid substances, phospholipids and glycolipids, is used as a plasticiser. It has the appearance of a thick, viscous, clear, odourless liquid. The amount of glycerine is crucial in determining the properties of the material to be created. Adding more glycerine makes the material more flexible, reducing the amount makes the material more rigid. The solvent used is mainly water, preferably distilled water.
NATURAL INKS OR PIGMENTS are used as colouring agents.
ADDITIVES can give the compound different characteristics, for example: using eggshells, chalk, oils helps to prevent the material from shrinking; natural fibres and debris help to strengthen it; natural soaps and emulsifiers give it softness and sponginess.
RECIPES
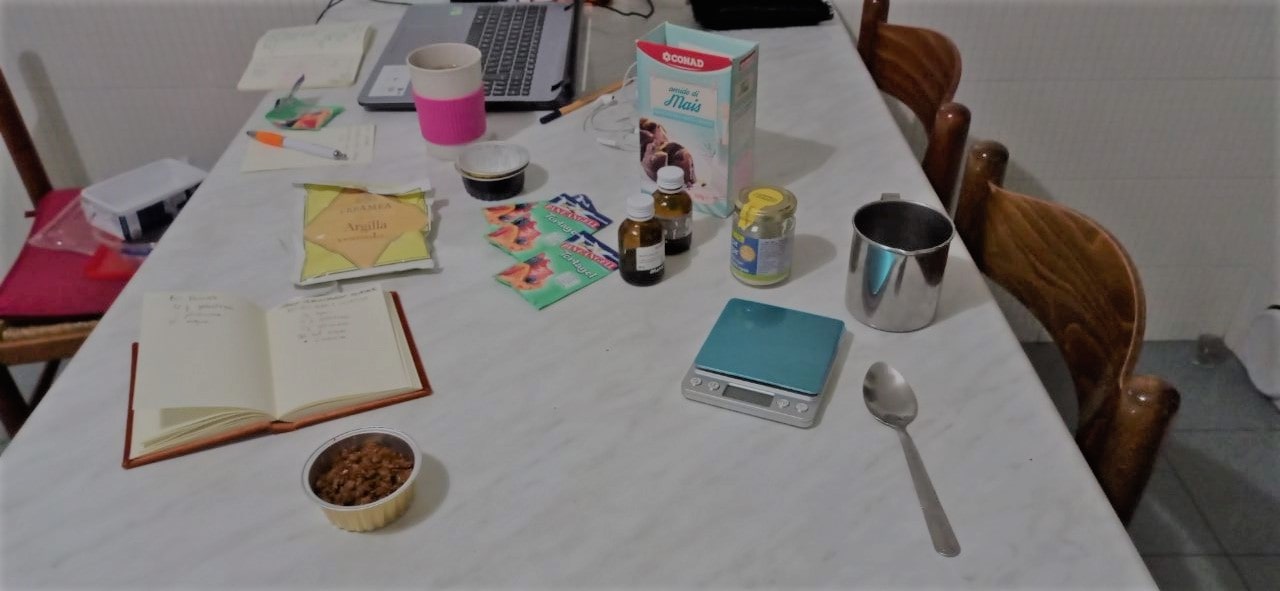
The recipes used were mainly taken from the Bioplastic Cookbook and from Materiom, an open source platform for sharing recipes on biomaterials. I made a number of changes, especially in relation to the type of additives, to understand how the mixture responds to the different elements.
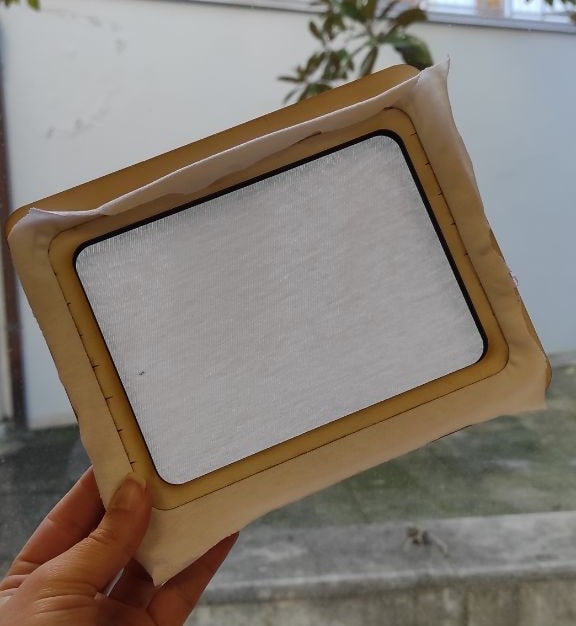
The ideal is to mix the powder components first and then add the liquids. The addition of vinegar (possibly before glycerol) acts as an antibacterial and prevents some components from decomposing or rotting. If organic components are added, it is best to boil them first and then allow them to dry out in order to remove all the bacterial components. The addition of coconut oil, ginger oil or any other vegetable oil acts as a protection for the bio-leather material and to moisten the food waste in order to make the mixture more homogeneous. Adding glycerine along with the oil is essential because if you add only glycerine the material will be flexible but not strong, if you add only oil it will be stiff but brittle. Adding both, on the other hand, produces a flexible and strong material. Bioplastics behave like glue and stick to wood. For this reason, in order to spread them out to create a homogeneous surface, it is best to pour them into a non-porous container, so it is advisable to use glass or plastic, possibly acrylic. If you want to create very thin sheets of bioplastic, it is advisable to pour the mixture into a wooden frame and let it dry for a few days, then remove it from the frame and let the air dry process complete. Therefore, as a first step I created small wooden frames with a laser cutter.
EXPERIMENTS
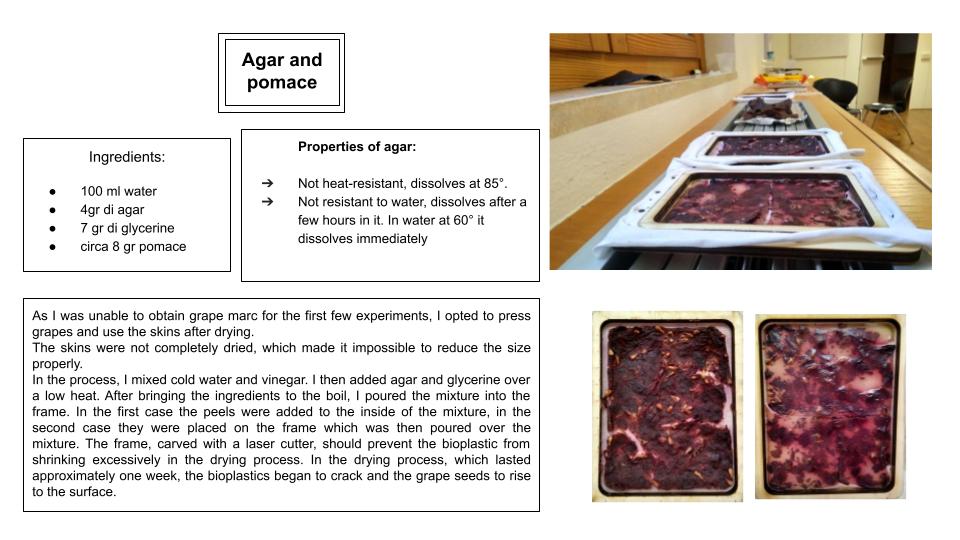
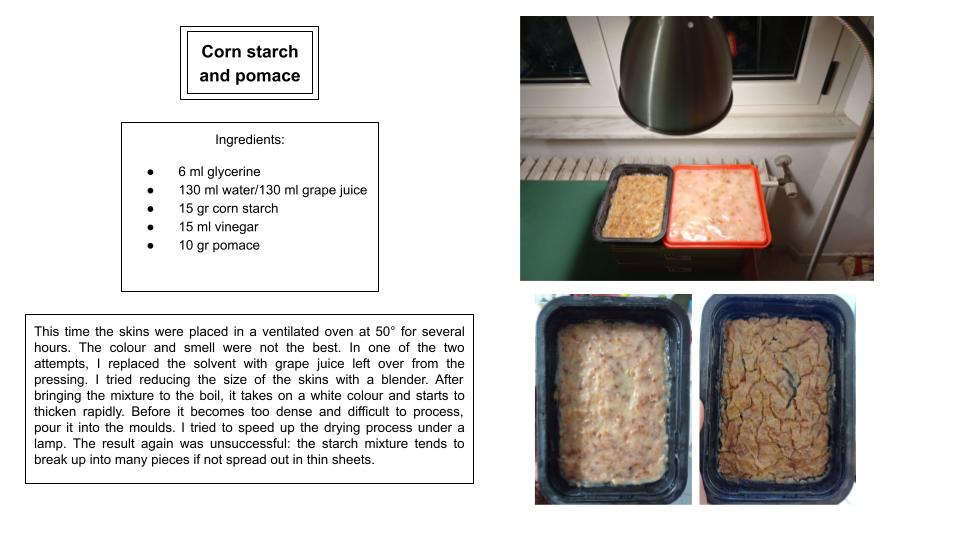
After several unsuccessful experiments, I realized that the use of alginate was probably the right option to focus my work on a single biopolymer and come up with a recipe that would meet my needs. I therefore focused my attention on this and on the possible alternatives to experiment with, varying both the amount of glycerine (which makes the compound more or less flexible) and the amount of pomace.
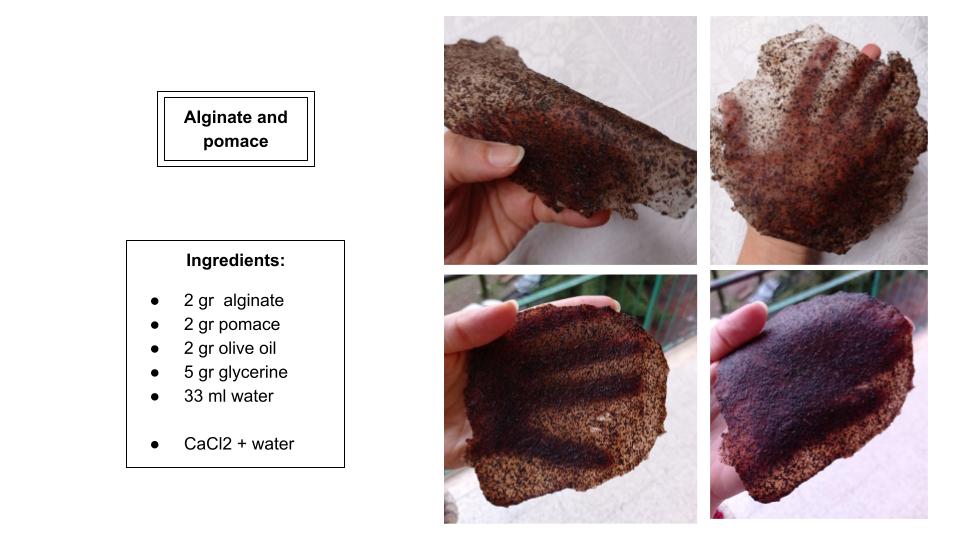
Noting that the last composition of ingredients had resulted in a workable, albeit thin, biomaterial, I chose to focus on the last recipe and try to get a larger, thicker layer that I could work with to create an object.
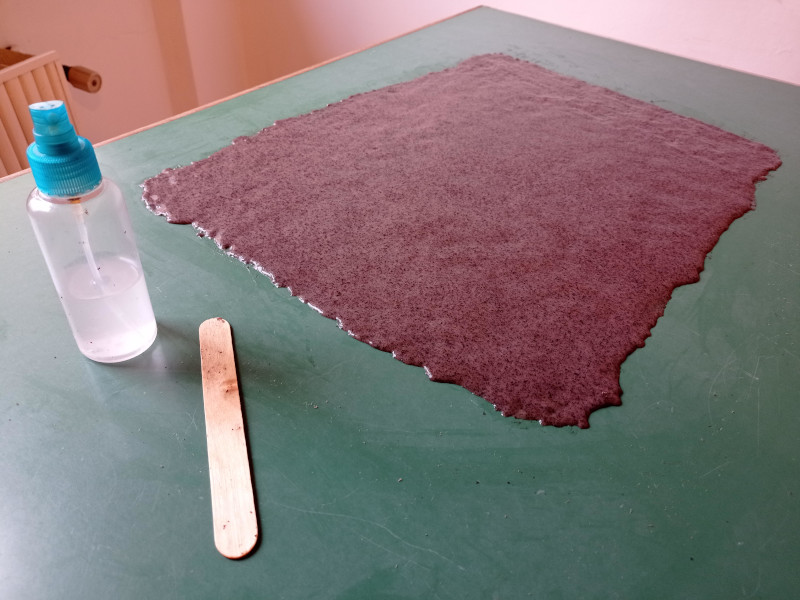
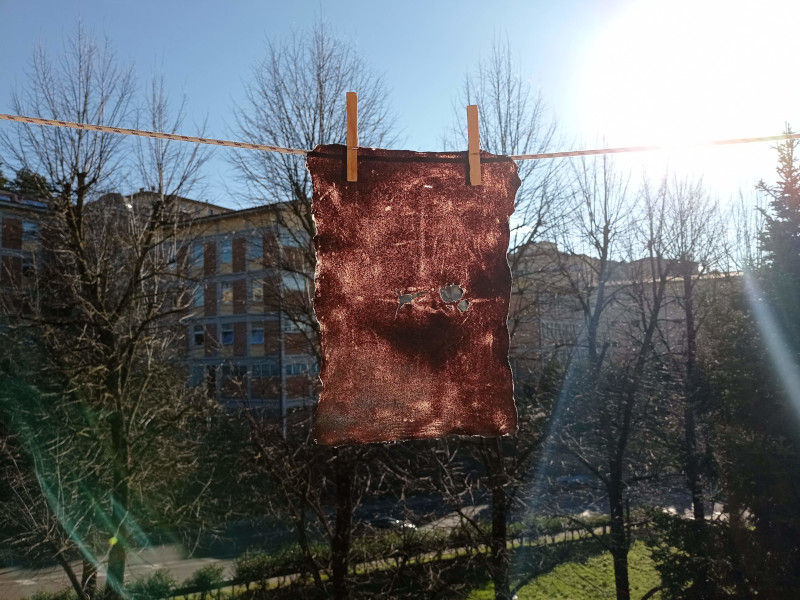
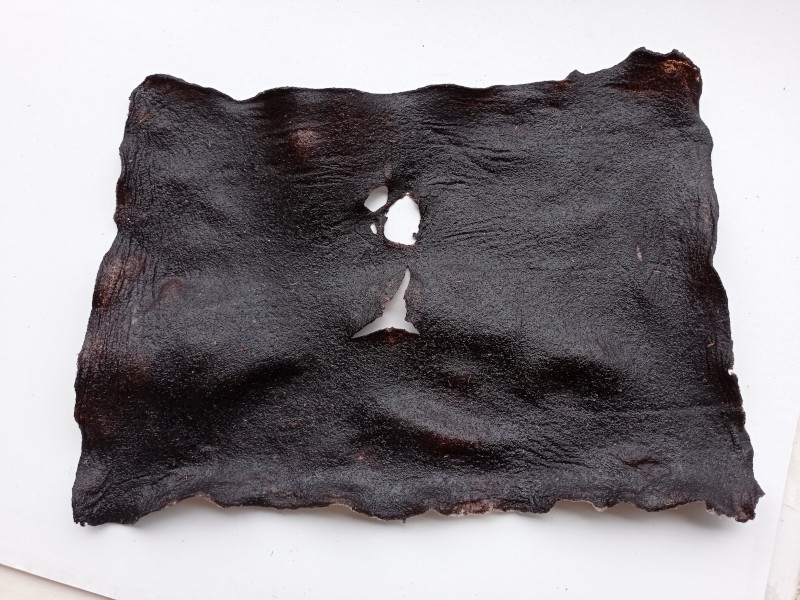
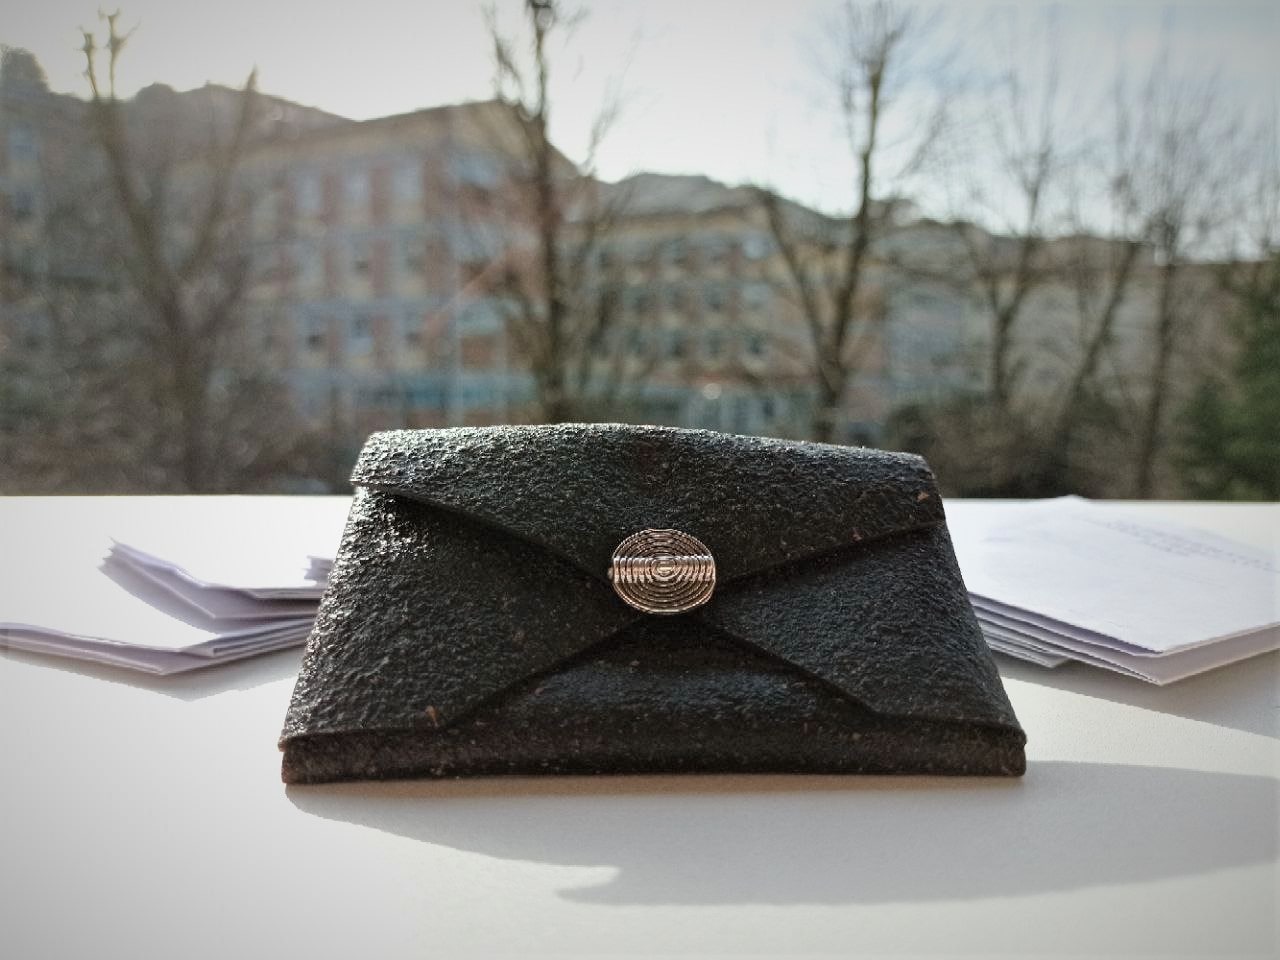
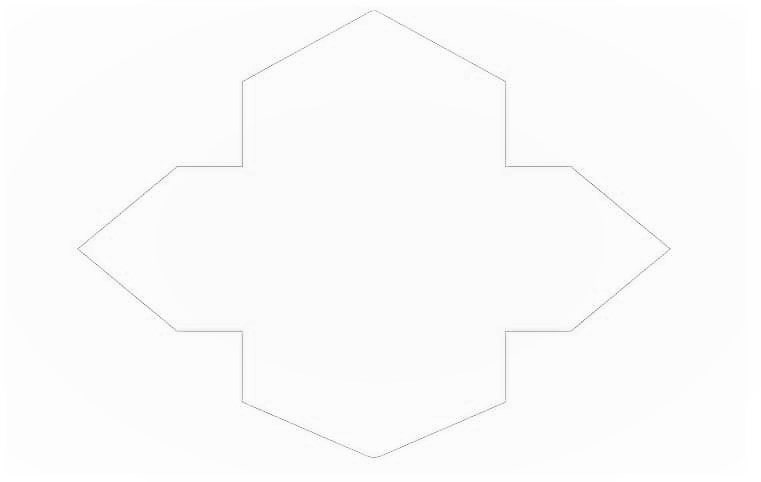
The drying process was very slow and as there was a hole in the center it was not possible to create very large patterns. I therefore opted for a card holder on which I sewed a button. After creating the design in Illustrator, it was sent to the laser cutter which cut the bioplastic. I made several attempts before I found the right machine settings to cut the material perfectly. In the end I was able to combine speed and power to achieve a satisfactory cut.
The model I create on Illustrator was a really simple paper holder:
The final result was the following one: